Snowflake Connector
Gainsight NXT
| IMPORTANT: Gainsight is upgrading Connectors 2.0 with Horizon Experience. This article applies to tenants which have been upgraded to the Horizon Experience for Connectors 2.0. If you are using Connectors 2.0 with the previous version, you can find the documentation here. |
This article explains admins how to create a Snowflake connection and jobs.
Note: This document provides general guidance on creating a Connection and setting up jobs. The business use case of each job is different and needs a unique configuration. For more information on creating any Job, refer to the Configuration of Connectors in the Additional Resource section at the end of this article.
Overview
Snowflake is an analytic data warehouse provided as Software-as-a-Service (SaaS). It enables corporate users to store and analyze data using cloud-based hardware and software.
After a Snowflake connection is established from Gainsight, Admins can:
- Create data fetch jobs in the Connectors 2.0 page to sync data from selected Snowflake’s Views and Tables into destination tables in Gainsight.
- You can use Snowflake as a data source in Adoption Explorer and Data Designer.
- For more information about how to create datasets, refer to the Create Datasets in Data Designer article in the Additional Resources section at the end of this article.
- For more information about Adoption Explorer, refer to the Configure Projects in Adoption Explorer article in the Additional Resources section at the end of this article.
Business Use Case: With the Snowflake connection, sync business data into Gainsight from your organization’s Snowflake instance. You can build reports on this data and then combine this data with other customer information to create datasets in Data Designer.
Note: The Variant datatype is currently not supported in the connectors job.
Create a Connection
Admins can create more than one Snowflake connection to different schema/warehouses.
To sync data from Snowflake's Tables or Views to Gainsight, you must create a Snowflake connection. The Snowflake connection can also be used as a source in Data Designer or Adoption Explorer.
To create a Snowflake connection and enable bulk data fetching, the following permissions are required for the user authenticating the connection:
- Read access to Snowflake data
- Default Warehouse permission
- Create Stage Permission (required by Snowflake for users making bulk data fetches)
Note:
- If your Snowflake Instance requires whitelisting of IPs, then please raise a support ticket to obtain the most up-to-date list of IP addresses. Ensure that Gainsight IPs are whitelisted, before creating a connection.
- Gainsight adheres to any Access Controls defined in Snowflake, and limits the data we can access from your Snowflake instance.
To create a Snowflake connection:
- Navigate to the Administration > Integrations > Connectors 2.0 > Connections tab.
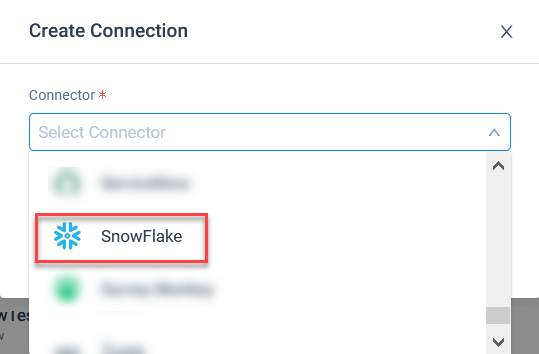
- Click Create Connection. Create Connection page is displayed.

- In the Connector dropdown, select Snowflake.
- Enter the name of the connection.
- Select Basic or OAuth, and enter the credentials for the following:
- Database Host
- Schema Name
- Database Name
- Warehouse
- Username
- Client ID
- Client Secret
Note: While entering the Database Host, make sure https:// is not prefixed.
- Click Authorize
Note: Your database administrator should be able to provide all the above information except the name of the connection.

After a connection is established, you can create a job to pull Snowflake’s Views and Tables data into Gainsight.
Generate ClientID and Client Secret
In order to connect to the Snowflake instance via OAuth, a SECURITY_INTEGRATION must be created in the Snowflake instance.
The following query is a sample query used for creating a SECURITY_INTEGRATION entry in the snowflake.
Note: To create the Security_Integration, Gainsight recommends to reach out to Snowflake admin.
CREATE SECURITY INTEGRATION "Gainsight"
TYPE = OAUTH
OAUTH_CLIENT = CUSTOM
OAUTH_CLIENT_TYPE = 'PUBLIC'
OAUTH_REDIRECT_URI = 'https://dev-apigateway.develgs.com:8080/api/accounts/oauth2callback'
ENABLED = TRUE
OAUTH_ISSUE_REFRESH_TOKENS = TRUE
  OAUTH_REFRESH_TOKEN_VALIDITY = 7776000
Use the REDIRECT URLs below for the OAUTH:
-
US1 Callback URL: https://app.gainsight.com/api/accounts/oauth2callback
-
US2 Callback URL: https://app.us2.gainsightcloud.com/api/accounts/oauth2callback
-
EU Callback URL: https://eu-app.gainsight.com/api/accounts/oauth2callback
Once created, a ClientId and ClientSecret will be assigned against this entry, which can be viewed by executing the following query in the Snowflake instance.
select SYSTEM$SHOW_OAUTH_CLIENT_SECRETS('Gainsight')
Context Menu
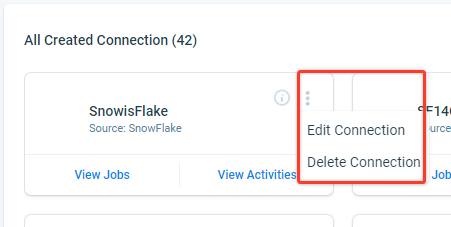
The context menu consists of the following options:
- Edit Connection: Snowflake connection details can be modified by this option.
- Delete Connection: Deletes the Snowflake connection, if the associated Job Chains and data jobs are deleted.
Create a Connector Job
You can create a Connector Job to fetch data from Snowflake’s Views and Tables into Gainsight.
Notes:
- Admins can pull up to 5 GB of data (soft limit) in a single job run from Snowflake to Gainsight.
- Connectors 2.0 supports hourly sync for Snowflake jobs.
To create a job:
- Navigate to the Administration > Integrations > Connectors 2.0 > Jobs page.
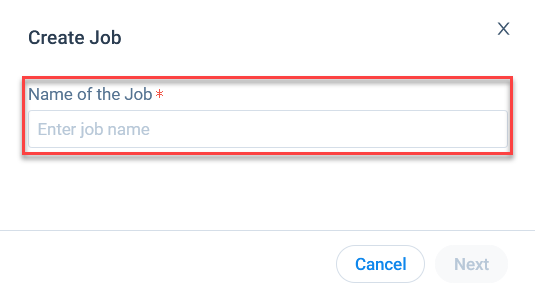
- Click Create Job. Create Job dialog appears.

- Enter a unique Job name.
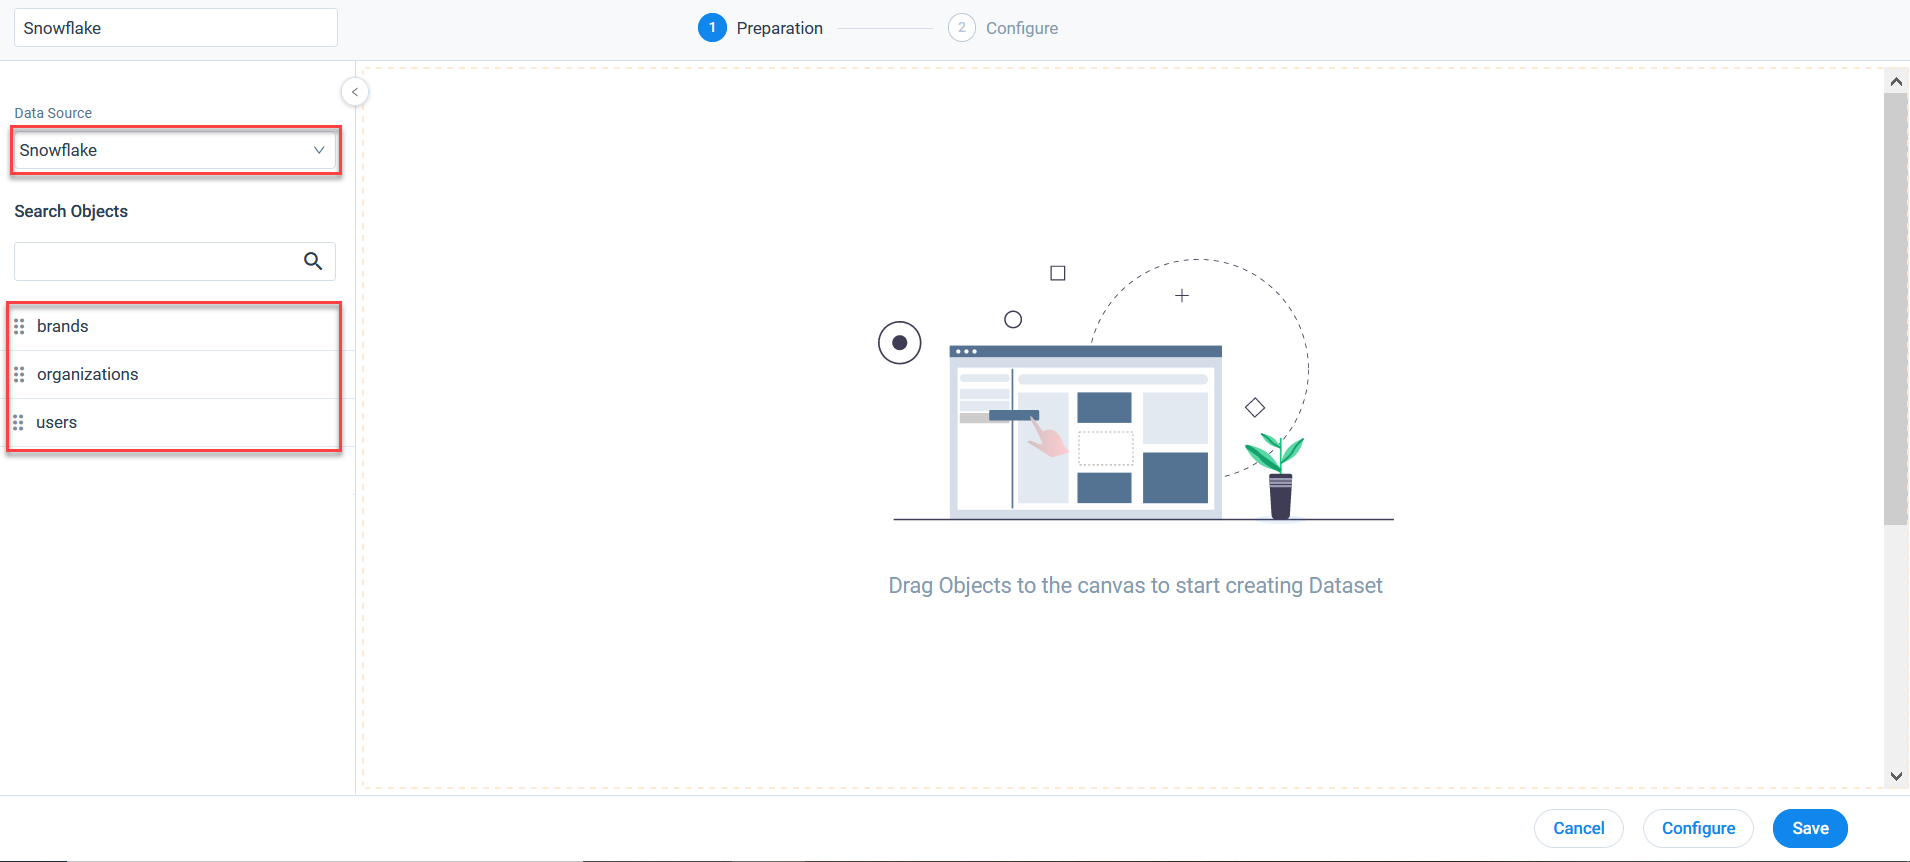
- Click Next. Job Preparation page appears.
- From the Data Source dropdown list, after selecting the required external system, all the objects under the selected Data Source appear.
- Drag and drop the required object from the objects list to the Canvas screen. The Dataset Configuration page appears.
Fields
In the Fields tab, admins can add fields from the source object.
To add fields to the source object:
- From the Reference for primary key dropdown, select the reference type for the primary key to identify unique records.
- In the Reference for last modified date dropdown, select the required date field which will identify the modified records since the last run.
Example 1: Gainsight imports data from external application applications using a date field. This date field is reference for last modified date of a record.The following conditions describe how data is transferred from Snowflake to Gainsight during each job run:
- Initial Import: The first import occurred at 01:00 PM on December 21, 2021. Because the dates marked in these records are less than or equal to the same date, all two records were pulled.
Record Id Name Modified At 1 John 21/12/2021 2 Jane 21/12/2021
- Second Import: The second import occurred at 02:00 PM on December 21, 2021. Because the date of the records was less than or equal to the date being synced for, all three were pulled. This also includes record id 3, which was added between 01:00 PM and 02:00 PM.
Record Id Name Modified At 1 John Doe 21/12/2021 2 Jane 21/12/2021 3 Arnold 21/12/2021 - Third import: The third import ran at 02:00 PM on December 22, 2021 and pulled only one record with the date December 22, 2021 and the other two records are ignored, despite the fact that record id 3 was modified but it arrived late in the data warehouse.
Record Id Name Modified At 1 John Doe 21/12/2021 2 Jane Doe 22/12/2021 3 Arnold S 22/12/2021
That is why, the modified date ( select at reference of last modified date in connectors job ) of the record should be marked at the time, when it was updated in the data warehouse, not at the source.
Example 2: Gainsight imports data from third party applications using a datetime field. The following conditions describe how data is transferred from Snowflake to Gainsight during each job run.
- Initial import: The initial import took place at 01:00 PM on December 21, 2021 and pulled all the records because the datetime marked in the records is less than or equal to the time at which the job ran.
Record Id Name Modified At 1 John 21/12/2021 09:30AM 2 Jane 21/12/2021 10:30AM - Second Import: The second import ran at 01:00 PM on December 22, 2021 and pulled only Record Id 3, because it synced the records from 21/12/2021 01:00 PM to 22/12/2021 01:00 PM. Record Id 1 is ignored because it the Modified field says it was modified before 1PM on 21/12/2021, and had date time marked before the run.
Record Id Name Modified At 1 John Doe 21/12/2021 12:30PM 2 Arnold 22/12/2021 12:30AM
That is why, the modified date ( select at reference of last modified date in connectors job ) of the record should be marked at the time, when it was updatd in the data warehouse, not at the source.
All the fields from the select source View/Table are displayed. You can use the Search textbox to locate any particular field in the selected fields.
- (Optional) In the Display Name field, modify the field label as per your preference.
- (Optional) To delete a field from the source object, click X
- Click Save.
Filters
In the source object, you can apply multiple filters on the selected fields to sync the required data.
To apply filters on the selected fields:
- Navigate to the Filters tab.
- Click Add Filter.
- Select the field to apply a filter.
- Choose the Operator and then input the data in the Value text box.
- (Optional) Click + icon to add more filters.
- (Optional) Click x icon to delete any specific field.
Note: In the Advanced Logic text box, apply logic on the filters by adding operators (AND or OR) between them, such as (A OR B) AND C. - Click Save.
Summary
In the Summary tab, all the added fields and filters are displayed which are added in the Dataset.
Merge
You can merge two or more source objects or datasets together and create an output dataset to load data in Gainsight. For example, merge Tickets and User objects to pull the details of users who created the tickets and number of tickets created by each user. For more information on Merge, refer to the Jobs List Page article in the Additional Resources at the end of this article.
Transform
In the Preparation step of a connector job, admins can Transform data and add Case Fields to get more meaningful insights from the customer data.
Business use case: The Transform function provides the capability to create or modify new case fields. The new case fields can be used to modify the external field as per the consumption requirement in Gainsight’s data model. Case fields can be defined to populate different values for different case conditions. For example, External picklist values such as New, Open, and Closed can be modified to Active and Inactive to match Gainsight’s picklist values.
For more information on how to transform an object, refer to the Jobs List Page article in the Additional Resources at the end of this article.
Add Destination
When the final output dataset is ready, add a destination to the output dataset. This enables data sync from the source to the target Gainsight object. For more information on how to add destination, refer to the Jobs List Page article in the Additional Resources at the end of this article.
Direct Mappings
You must map fields from the output dataset to the target object in the field mappings. Data sync happens from the source fields of the external system to the target fields of Gainsight, based on the configured field mappings. For more information on Direct Mapping, refer to the Jobs List Page in the Additional Resources section at the end of this article.
Derived Mapping
You can use derived mappings to populate values into a field through lookup into another field of the same or another object.
Note: To use Derived Mappings, your Target Object must have at least one field of data type GSID.
In this stage, you can create lookup mapping in a data sync job. You can create a lookup to the same object, or another standard object, and match up to six columns. Once the required matching is performed, Gainsight IDs (GSIDs) are fetched from the lookup object into the GSID data type fields. For more information on the derived mappings, refer to the Jobs List Page article in the Additional Resources at the end of this article.
Job Chain
The Job Chain feature helps simplify the process of scheduling a group of related Jobs that you need to run in a particular sequence. This sequence is based on the scheduled time of the Job Chain. For example, if Job A and B are in a sequence, ‘Job B‘ automatically starts as soon as ‘Job A’ completes, and there is no need to schedule a job separately.
Note: If a Job is added in a Job Chain, then the individual job schedule is ignored and the Job Chain’s schedule is considered and the jobs are run as per the sequence of the jobs in the Job Chain.
For more information on the Derived Mappings, refer to the Job Chain page in the Additional Resources section at the end of this article.
Configure Job or Job Chain
You can configure the schedule of a data job or Job chain as required. For more information, refer to the Configure Job or Job Chain Schedule in the Additional Resources section at the end of this article.
When you create a Job Chain by adding multiple Jobs in a sequence, then add a schedule to the Job Chain, the schedule of the individual jobs is not honored.
Note: You can schedule a Snowflake job with a minimum of an hourly sync capability.
Job Activities
View the Execution and Update activities of all the data jobs in the Activity page. You can download the logs of the job execution from this page to help troubleshooting the configuration issues. For more information, refer to the Activity Page in the Additional Resources section at the end of this article.
Frequently Asked Questions
Please refer to the Snowflake Connector FAQs article.
Additional Resources
For more information about Connectors, refer to the following articles:
- Create Datasets in Data Designer
- Configure Projects in Adoption Explorer
- Configuration of Connectors
- Data Platform and Connectors
- Connectors List Page
- Jobs List Page
- Job Chain Page
- Configuration of Job or Job Chain Schedule
- Activity Page