Preparation of Connector Jobs
Gainsight NXT
| IMPORTANT: Gainsight is upgrading Connectors 2.0 with Horizon Experience. This article applies to tenants which have been upgraded to the Horizon Experience for Connectors 2.0. If you are using Connectors 2.0 with the previous version, you can find the documentation here. |
This article explains to admins how to create a data job to sync data from an external application to Gainsight.
Overview
After creating a connection with the external application, admins can create custom jobs to sync data from the external application to Gainsight. Gainsight offers Out Of the Box (OOB) Jobs for a few Connectors which is needed for initial setup to sync data from the other source objects into Gainsight.
To access the Jobs page, navigate to Administration > Integrations > Connectors 2.0 > Jobs.
_2023-03-02_at_11.29.14_AM.jpg?revision=1)
In the Jobs list page, you can see that single or multiple jobs are associated with a connection. You can find a specific Job either by using the Search text box or by using Connections text box to search Jobs by Connection Name. The Jobs page provides the following details of each job:
|
Column |
Description |
|
Job name |
This shows the name of the Job. |
|
Connection name |
The Connection name created in Connections Page. |
|
Source |
The System from which data is being fetched. |
|
Destination |
Refers to the target Gainsight object. |
|
Last Run Status |
Indicates the status of the executed Jobs as Success, Partial Success, or Failed in the last run. |
|
Last Run On |
Indicates timestamp and the date on which the Job was last run. |
|
Schedule Type |
Indicates the schedule type of Data Sync Jobs as Scheduled Execution or On Demand. For more information on Schedule Type, refer to the Configure Jobarticle in the Additional Resources at the end of this article. |
Context Menu Options
From the Context menu of a Connection, select one of the following options to perform the respective actions:
- Edit Job: Use this option to edit a job. For more information, refer to the Jobs List page article in the Additional Resources section at the end of this article.
- Delete Job: Use this option to delete the selected Job.
- Run Job: Use this option to execute the job with one of the data sync options:
- Data modified since last Sync Date and Time
- Data modified within a specified Time and Date
- All Data
For more information on Run Job options, refer to the Configure Job or Job Chain article in the Additional Resources section at the end of this article.

Create a Connector Job
In the data jobs, you can select a data source and create a dataset, merge two different datasets to create an output dataset, transform dataset, and then sync final data to Gainsight through Add to Destination. The following functionalities are available while creating a data job:
To create a job:
- Navigate to Administration > Integrations > Connectors 2.0 > Jobs. You can see the existing Jobs of all the Connections.
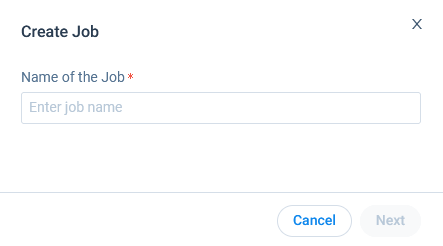
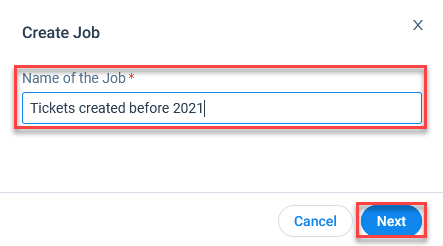
- Click Create Job. Create Job popup window is displayed.

- In the Name of the Job field, enter a unique name.
- Click Next. Preparation step is displayed.
-
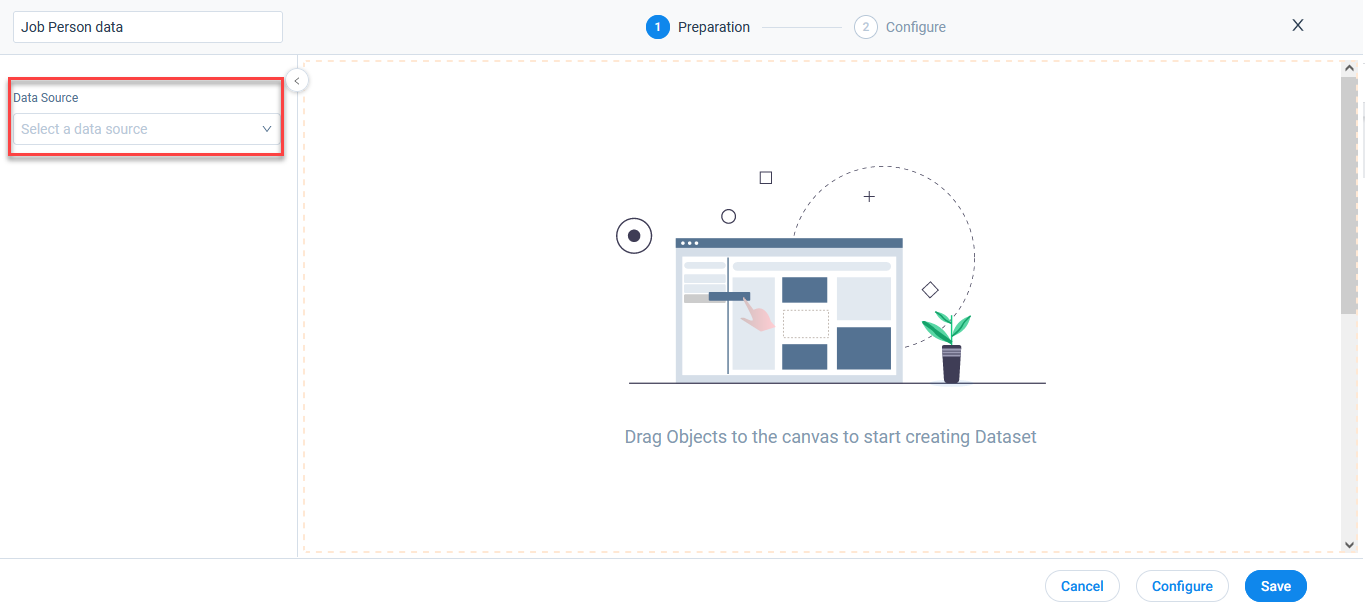
From the Data Source dropdown, select the connection. All the objects under the selected data source are displayed.
Add Source object
To add source object:
- Drag and drop the required object from the Objects list to the Preparation step. Object details page is displayed, where you can select Fields, add Filters, and view Summary.
Fields
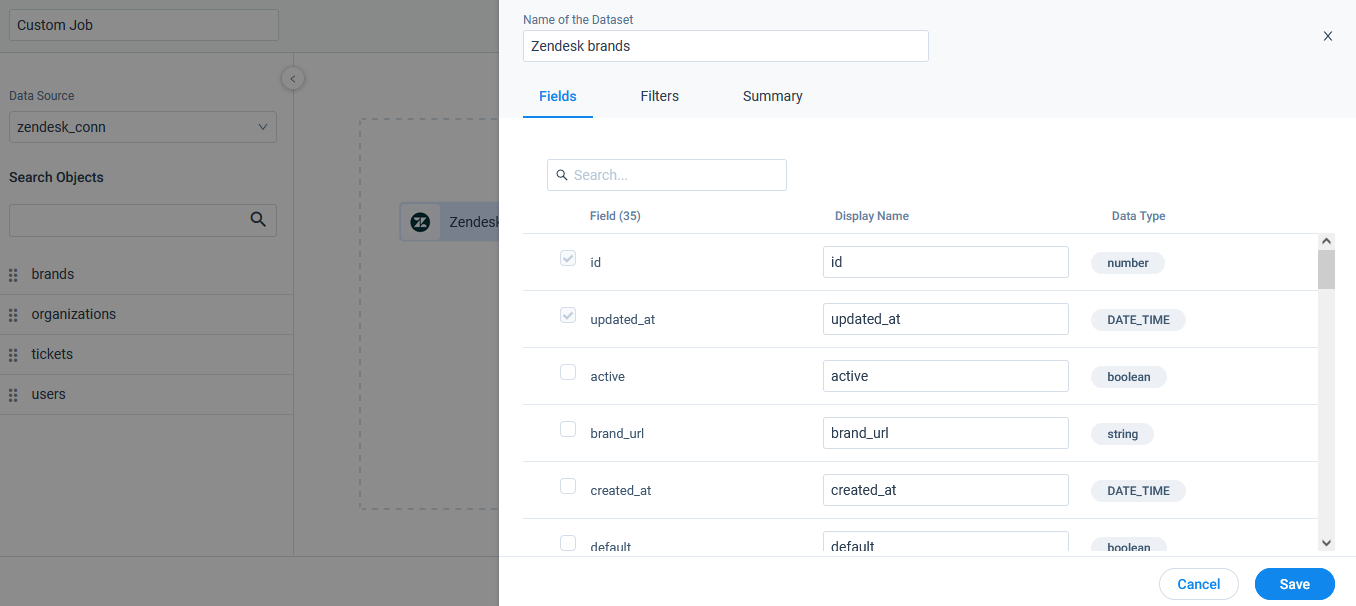
In the Fields tab, you can select the source fields from which you want to sync data into Gainsight.
To select fields:
- (Optional) In the Name of the Dataset, you can modify the name of the source object.
- (Optional) In the Reference for primary key field, select a primary field for reference.
- (Optional) In the Reference for last modified date field, select a field which can be used as a reference for last modified date of a record.
- Select the required fields to be added in the source object.
- (Optional) In the Display Name field, you can modify the field name.
- Click the Filters tab.
Filters
In the Filters tab, you can add filters to sync data from the source object as per your requirement. For example, you can add filters to sync data after a particular date.
To add filters:
- Click Add Filter.
- From the Field, select the field you want to filter on.
- From the Operator field, select the operator.
- From the Value field, select the appropriate value.
Notes:
- To Add more filters, click + icon.
- To Delete a filter, click x icon.
- To add advance filters such as (A OR B) AND C, type in your desired expression in the Advanced Logic text box.
- Click the Summary tab.
Summary
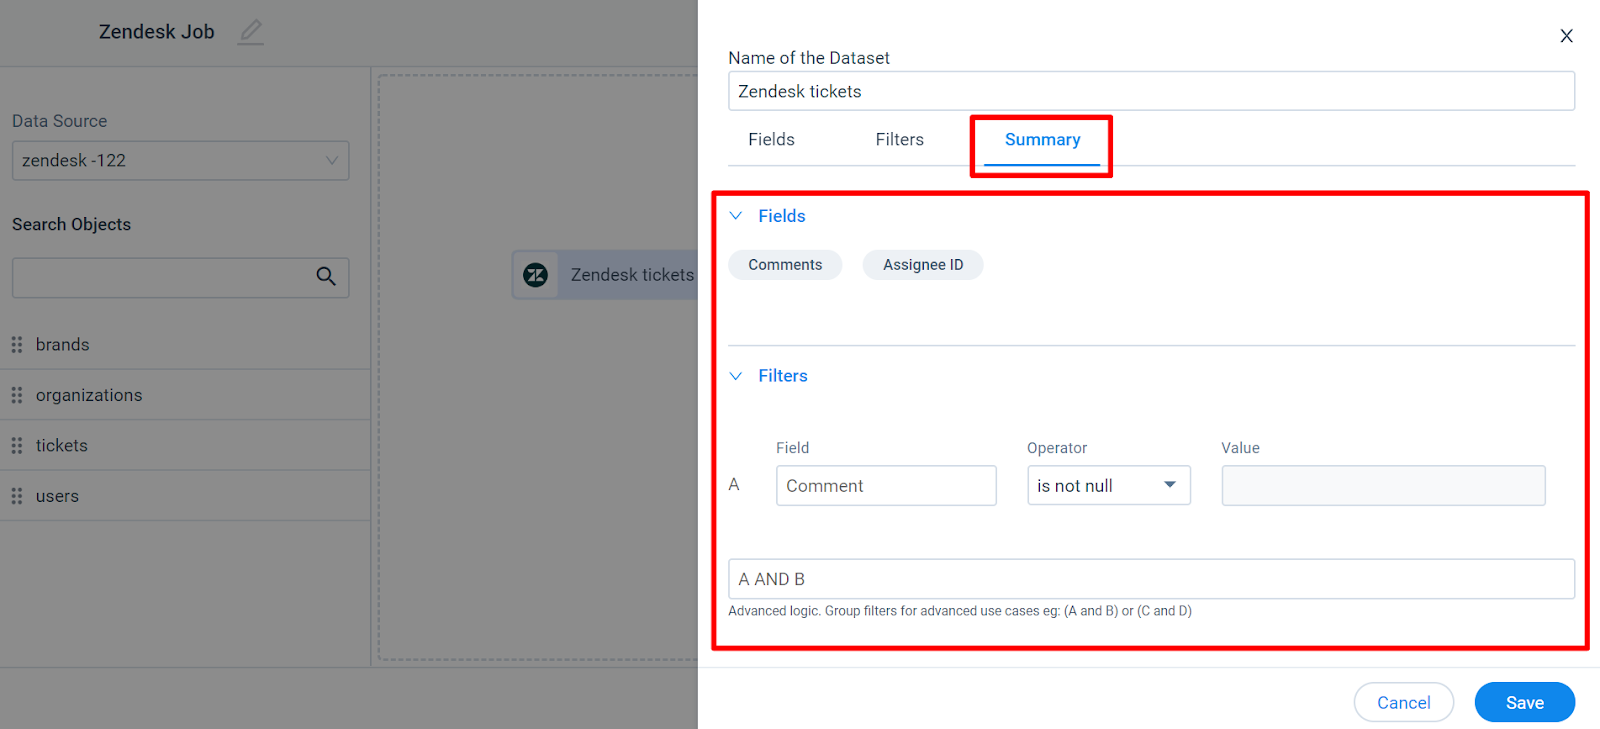
In the Summary tab, you can view a list of all selected fields and added filters in the source object.
IMPORTANT:
- Once the source object is prepared, you can Add Destination to the source object or you can configure (Transform or Merge) the source object. For more information on how to add destinations, refer to the Add to Destination section.
Preview Data
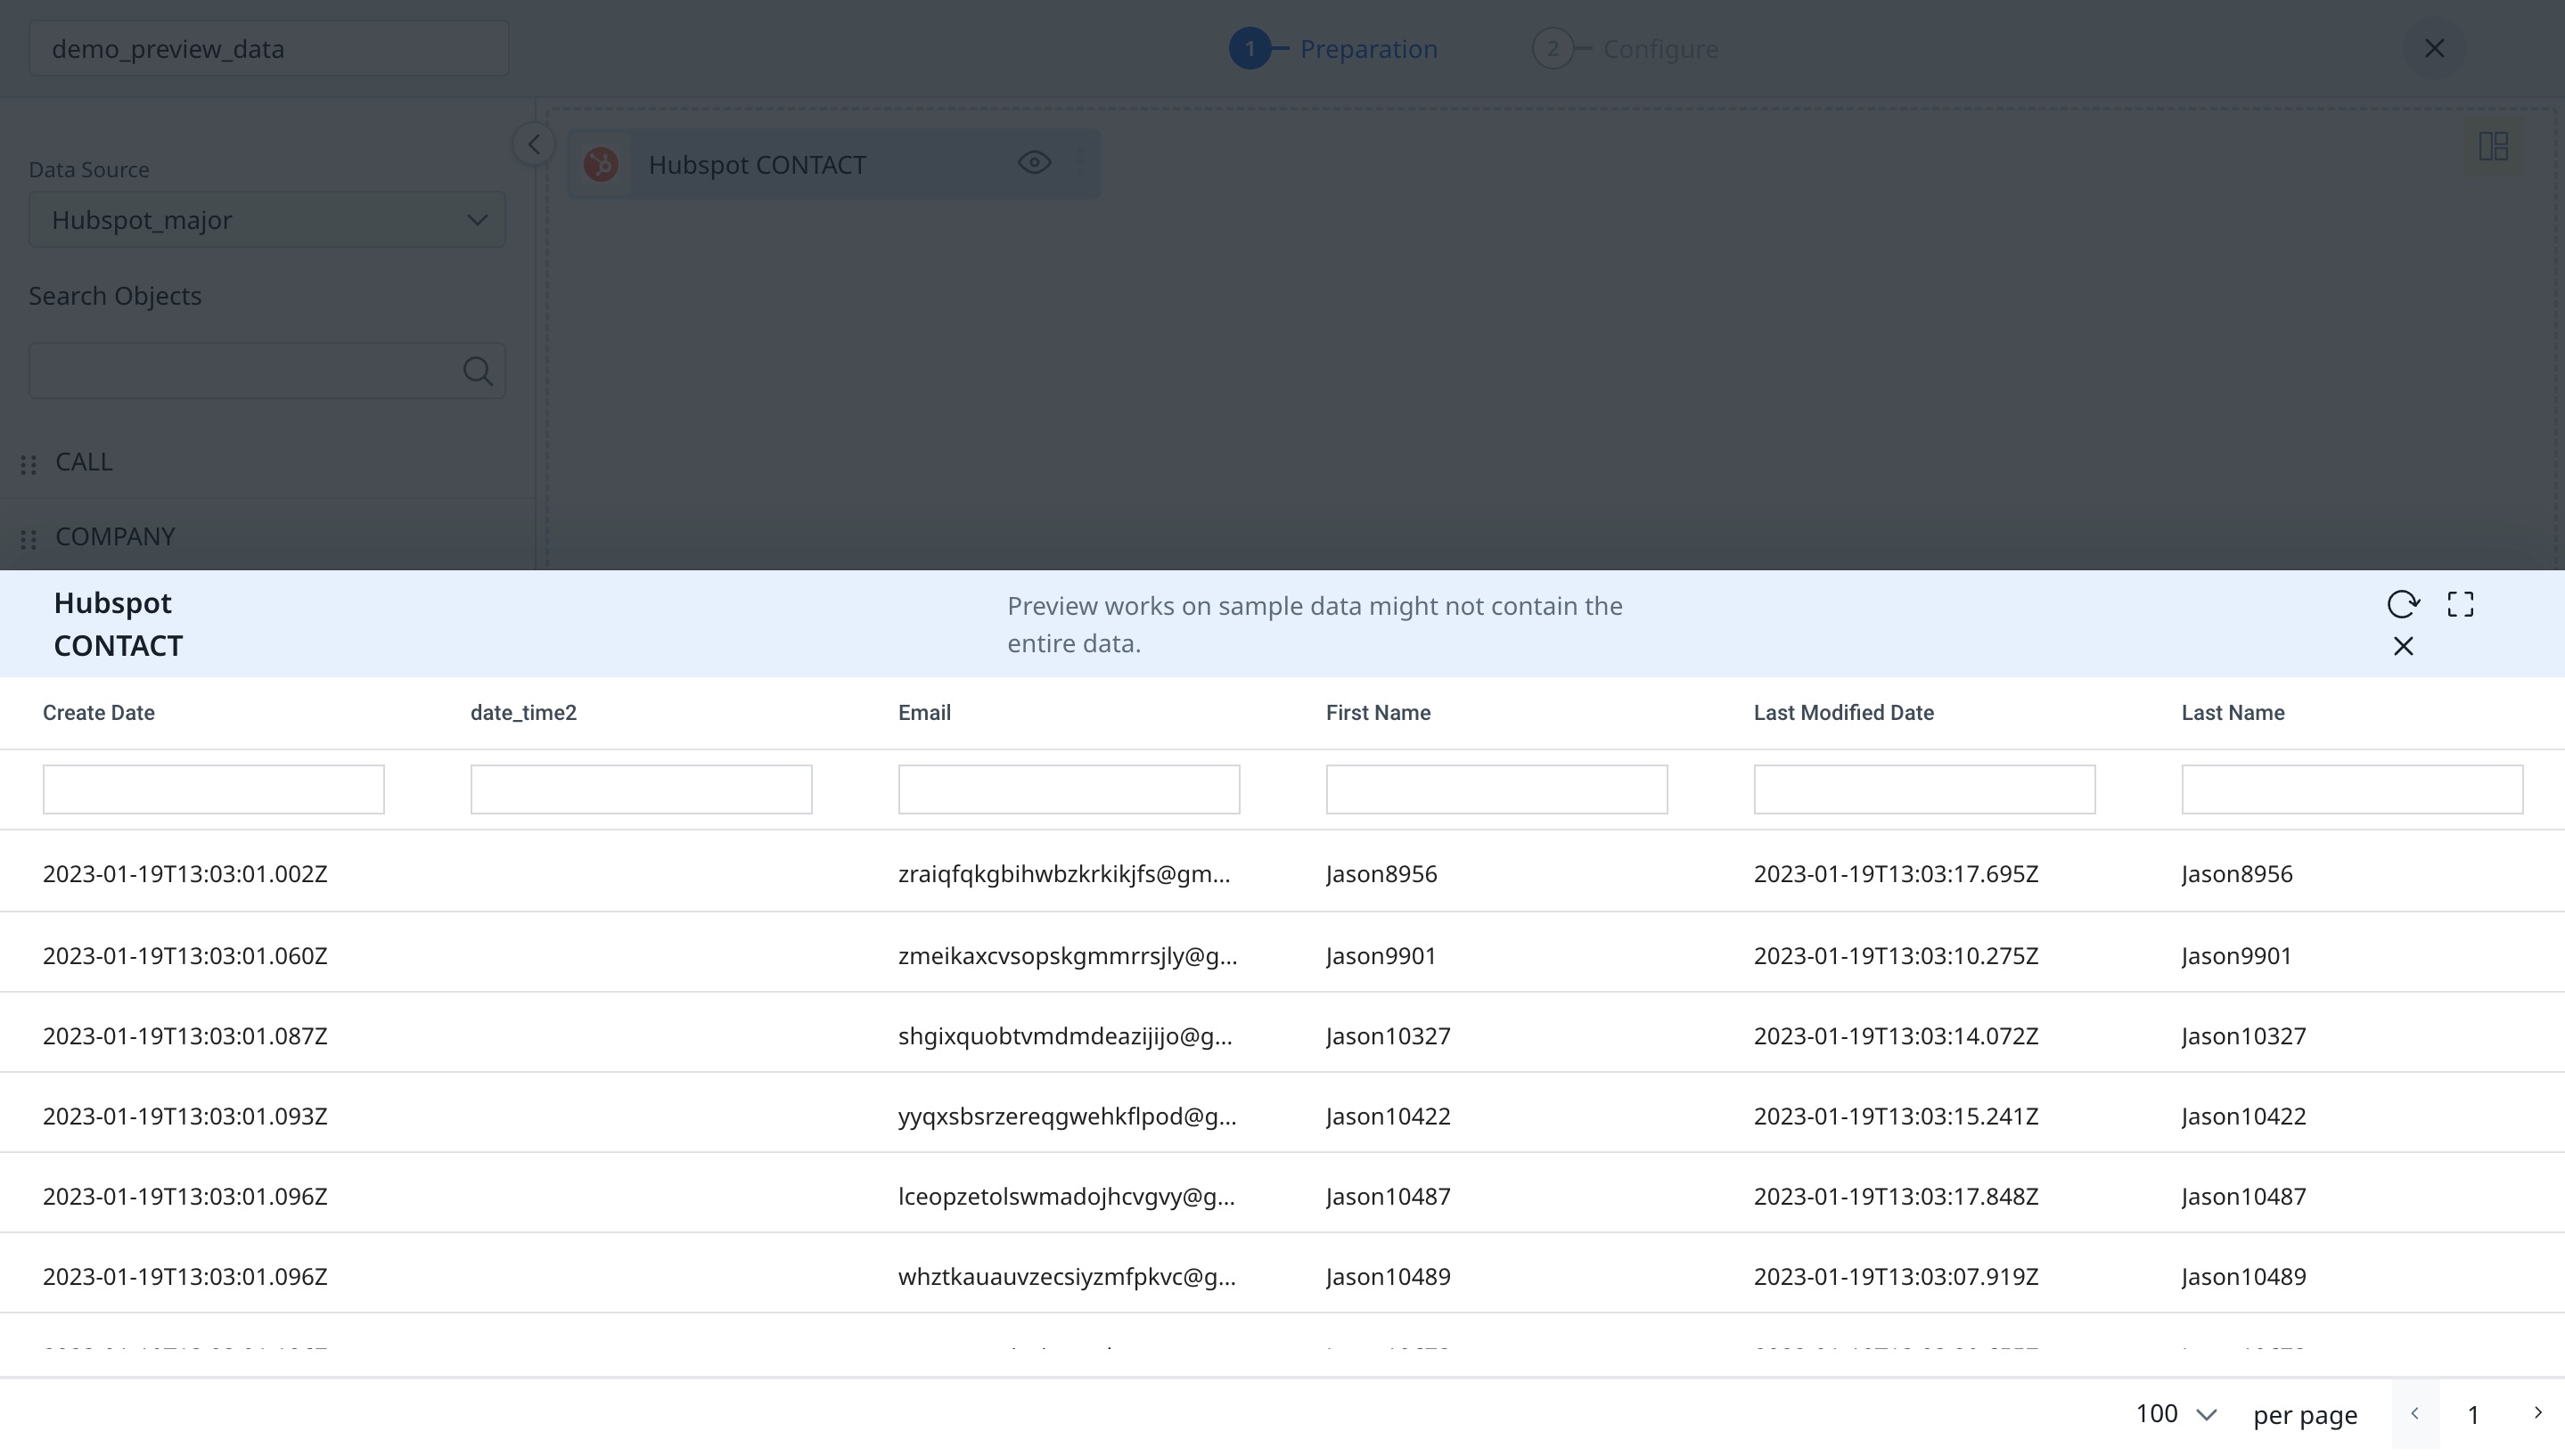
The data preview feature helps to view sample data for an object during job creation. This helps implementation teams get a better understanding of the extracted data, and thus accelerates the integration setup for admins.
IMPORTANT: Tenants with BigQuery Connector need to re-authorize the connection to use the Data Preview feature.
To view the sample data of an object:
- Navigate to Administration > Integrations > Connectors 2.0 > Jobs.
- From the three-vertical dots menu icon, select Edit. The Preparation step page appears.
- Click the Eye icon on the source object. The preview of the data present in the source system for the object appears.
To modify the fields included in the data preview for the objects:
- From the source object, click the three-vertical dots menu icon.
- Select Edit. The Fields slide-out panel appears.
- In the Select Fields list, select the fields you want to preview.
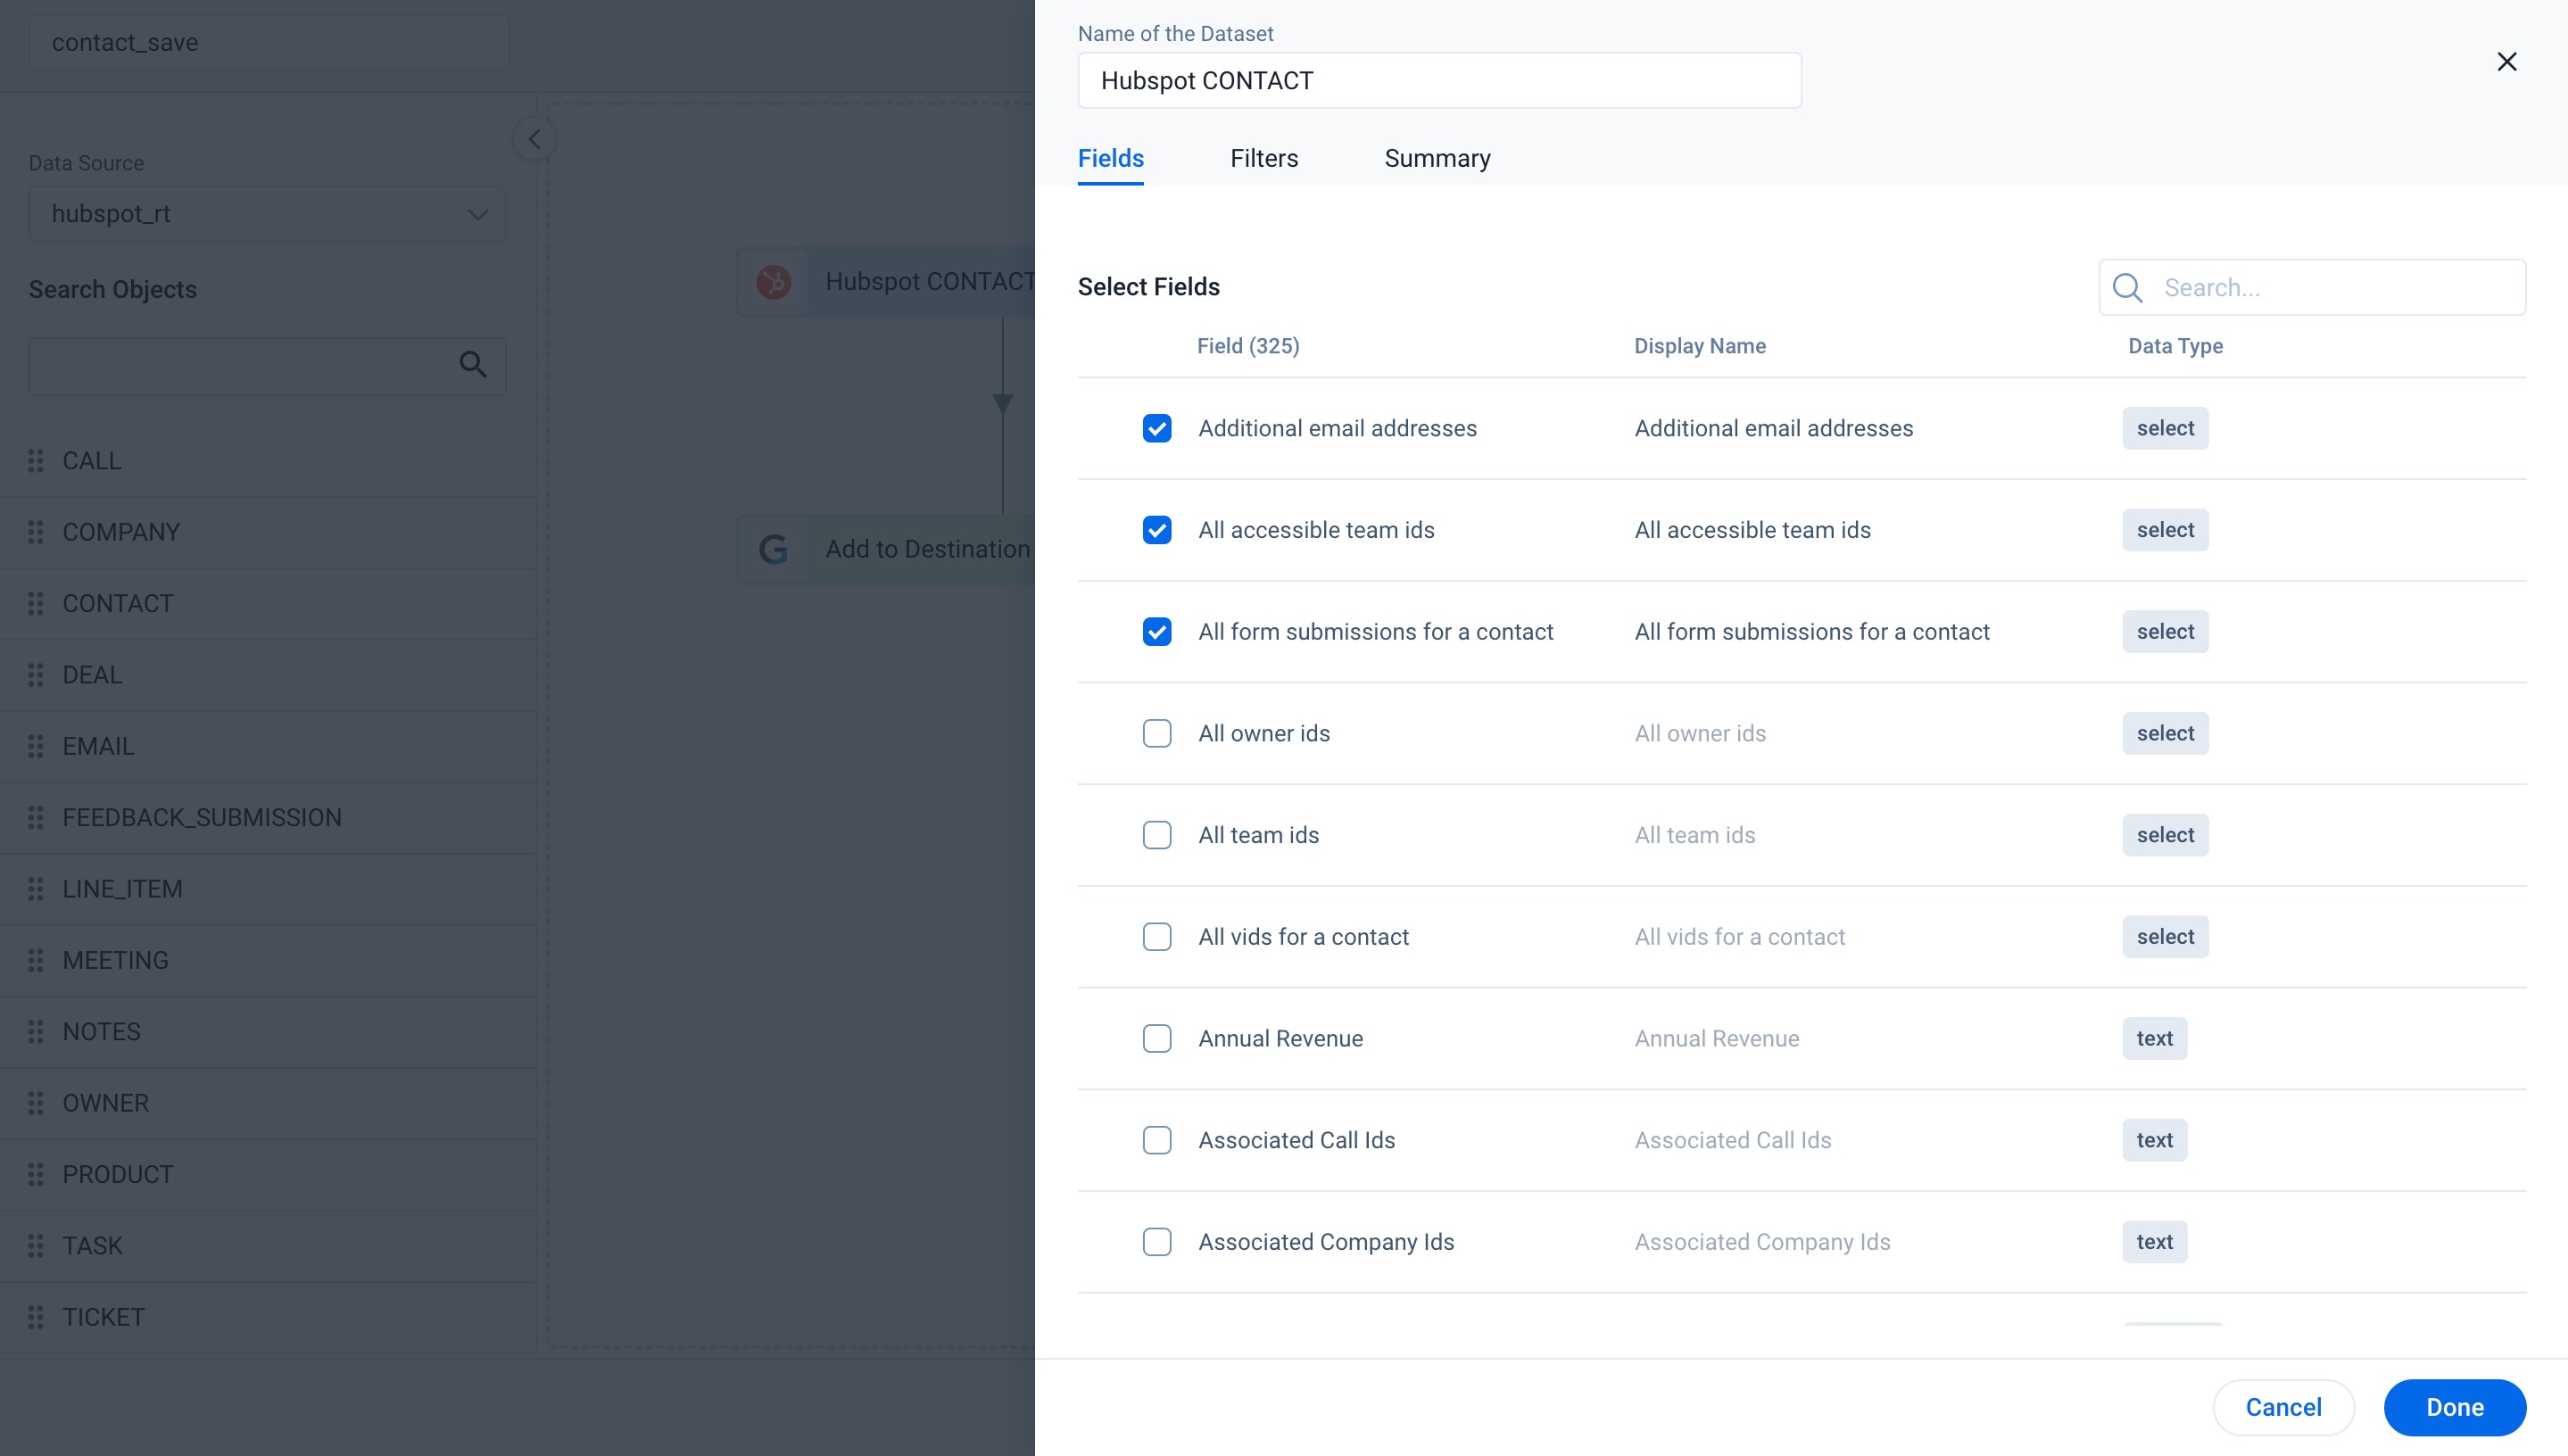
- Click Done.
- Click the Eye icon on the source object. The preview data for selected fields is modified.
Note: The Gainsight PX Connector does not support the preview data feature.
Transform
In the Preparation step, admins can transform data and add Case fields to get more meaningful insights from the customer data.
Example Business use case: The Transform function provides the capability to create or modify new case fields. The new case fields can be used to modify the external field as per the consumption requirement in Gainsight’s data model. Case fields can be defined to populate different values for different case conditions.
For example, External picklist values such as New, Open, and Closed can be modified to Active and Inactive to match Gainsight’s picklist values.
Note: Transform function is only available for Zendesk, Freshdesk, ServiceNow, Jira, Zuora, Zoho and Pipedrive.
To transform a object:
- Navigate to Administration > Connectors 2.0 > Jobs tab.
- Click Create Job.

- In the Name of the Job field, enter a name.
- Click Next.
- In the Data Source dropdown, select a source.
- Drag and drop the required object to the Preparation screen.
- From the context menu of the dataset, click Transform.
- Click Add Case Field.
- In the Label field, enter the name for the case field.
- From the Data Type field, select the data type as Boolean, Number, or String.
- Click Case 1 to expand the view.
- Click Add Filter to add a condition as per your requirement.
- In the THEN field, select the field and the value to display the resultant data when the set conditions are met.
- (Optional) Click +CASE to add another case field by following steps 3 to 7.
- From the DEFAULT field, select a value when none of the conditions match.
- Click Add.
- Click Save.
Merge
You can merge two datasets together and create an output dataset. You can merge two datasets or multiple datasets and create one final dataset.
Business Use Case: For instance, if you want to know the details of the tickets and users who create support tickets in Zendesk. To achieve this use case, you can merge datasets created on Zendesk Tickets and Zendesk Users objects into one output Dataset and import data into Gainsight Standard or Custom objects (Target object).
To merge two Datasets, select Merge from the options of the dataset that you want to merge with the required dataset.
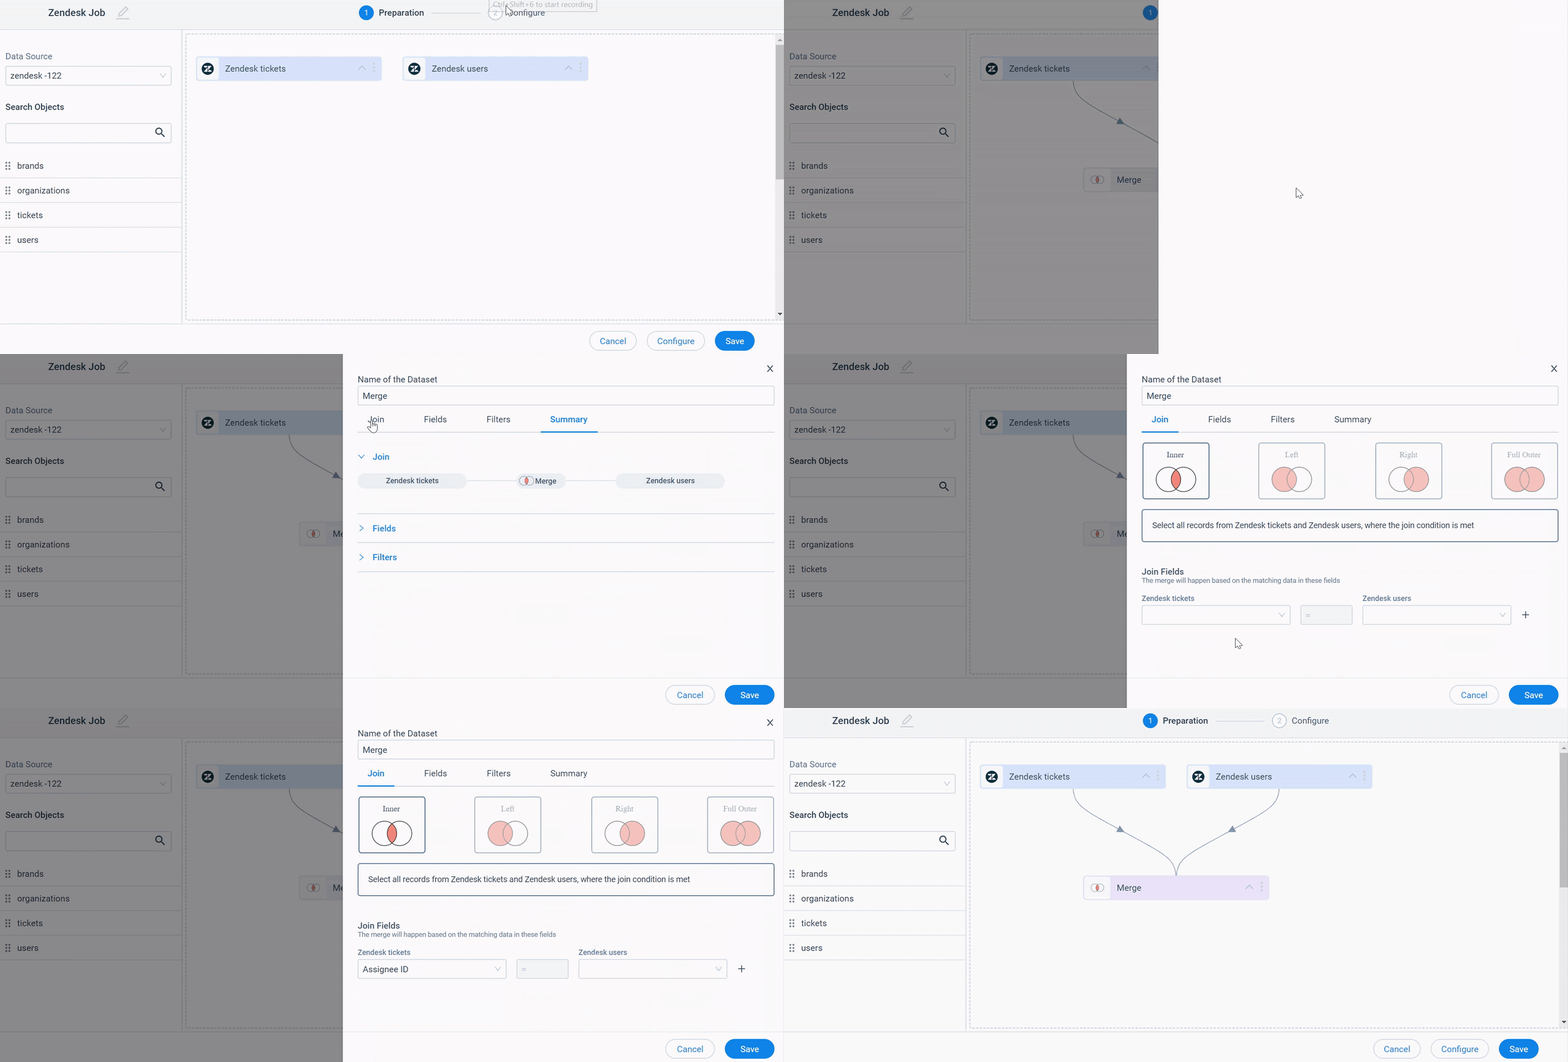
Once you merge the datasets, a new window with the dataset name ‘Merge’ appears, where you can see Join, Fields, Filters, and Summary tabs.
Join
Basic JOIN clauses are used to combine rows from two or more tables, based on a common field between them. There are four types of Joins supported in Gainsight: Inner Join, Left Join, Right Join, and Outer Join. Each join type, when used with a Merge task in the Connectors, produces a slightly different data set. For more information, refer to the Join Types article.
- Inner Join: It retains common records from both datasets.
- Left Join: It retains all the records from the left dataset.
- Right Join: It retains all the records from the right dataset.
- Full Outer Join: It retains all records from both the datasets.
To join two Datasets:
- Navigate to the Join tab.
- Select the required Join type.
- Select a field from each dataset to set the criteria. For example, the User ID in the first dataset is Assignee ID, and User ID in the second dataset is ID while merging datasets created on the objects, Zendesk Tickets and Zendesk Users.
- Click + to add multiple record matching criteria. This helps filter the records based on your business requirements.
- Click Save.
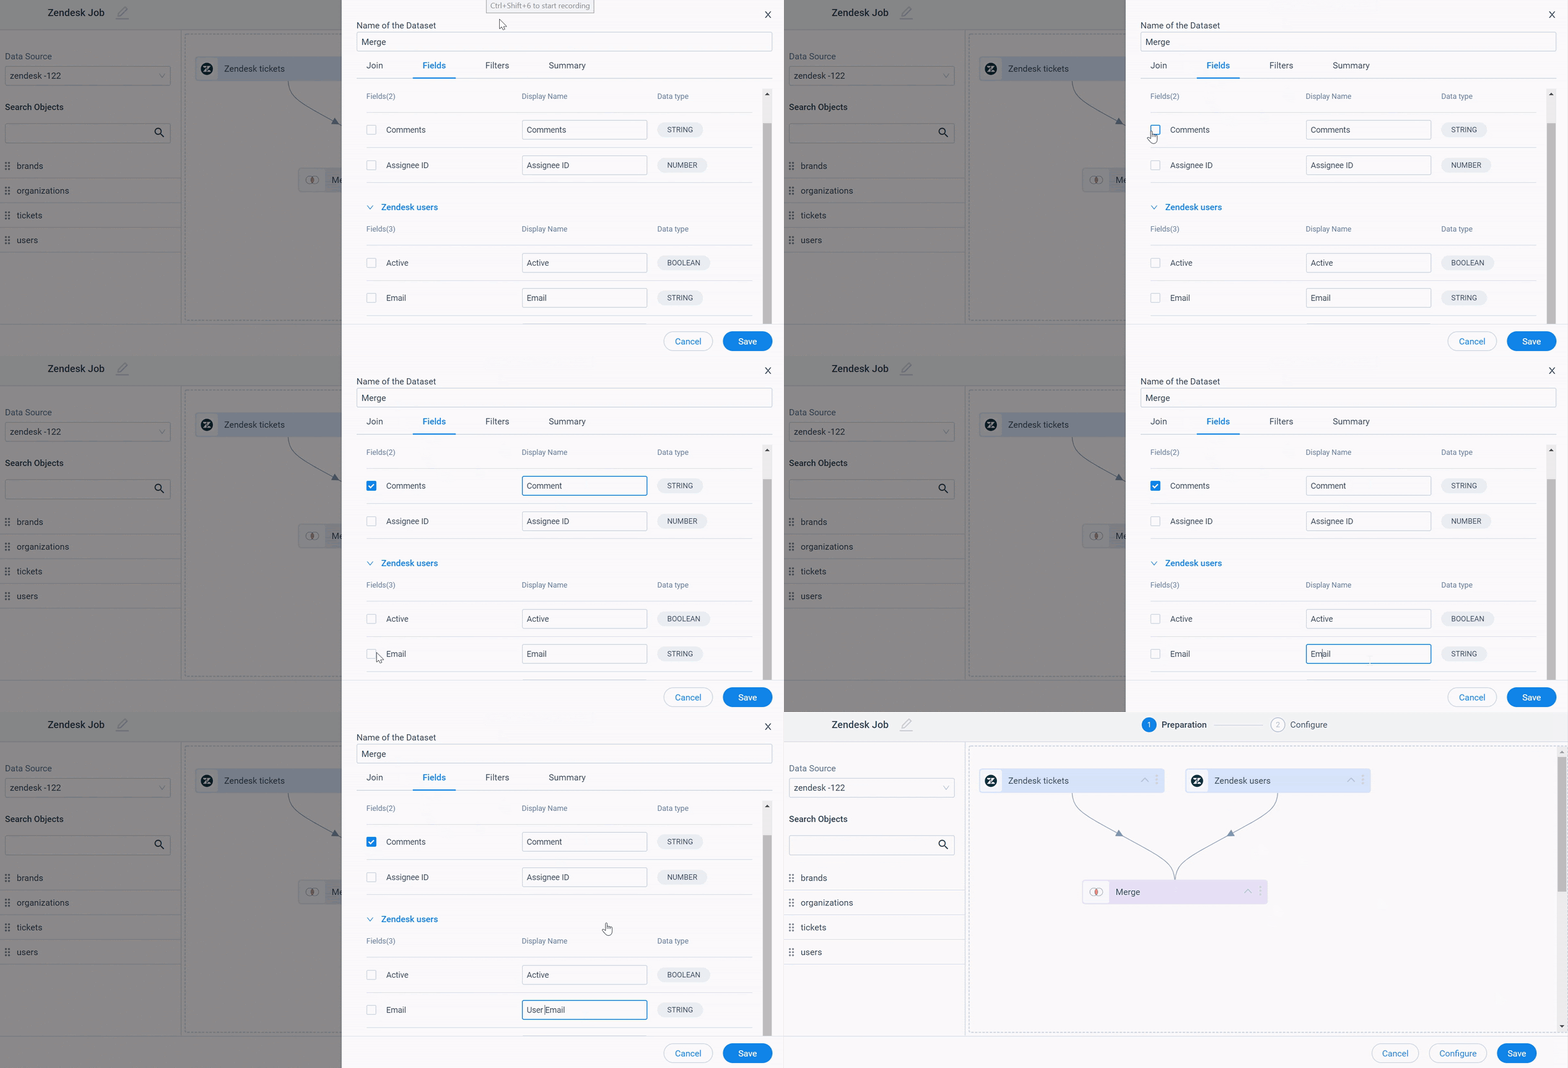
Fields
In the Fields tab:
- Select/Deselect the individual fields that are added from the source datasets and add them to the merged output dataset.
- (Optional) In the Display Name field, you can modify the display name.
- Click Save.
Filters
Filters in Merge work as filters in Prepare Dataset. For more details, refer to the Filters section.
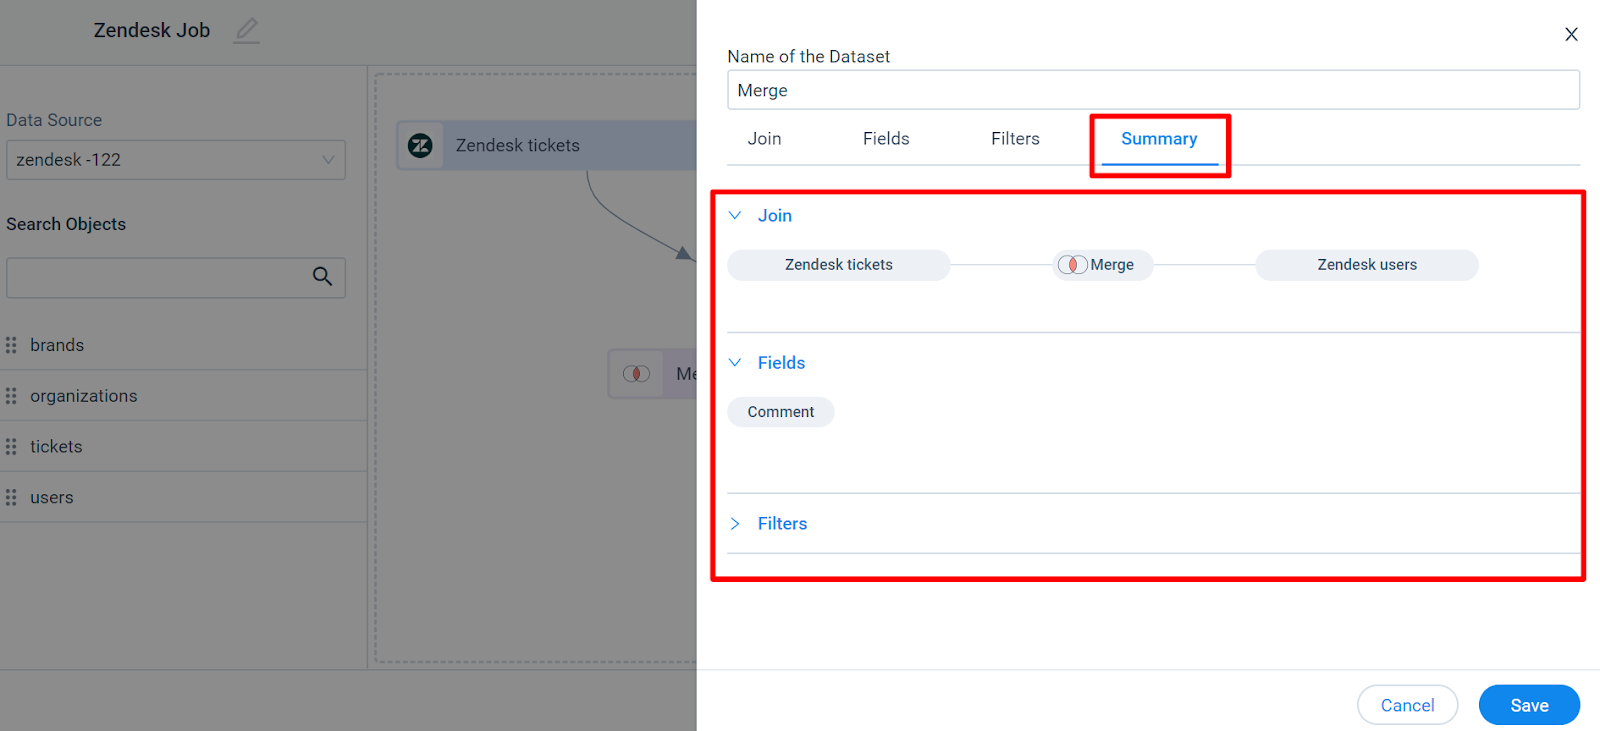
Summary
In the Summary tab, you can view Join details, a list of all Fields, and Filters in the Dataset.
You can now proceed to the configuration step. For more information on how to configure a dataset, refer to the Configuration of Job or Job Chain Schedule article in the Additional Resources section at the end of this article.
Note: If you want to delete a dataset permanently from a data job, click Delete from the options of the dataset.
Add to Destination
Once the final output dataset is prepared, a destination can be added to the output dataset to sync data from the source to the target Gainsight object. In Add to Destination, you can select the target object from Gainsight and map the source fields from external system objects to their corresponding target fields in Gainsight.
Note:
- You can select any of the source objects added to the Preparation screen including merge or add destination. The source object cannot be changed once you proceed to the field mappings.
- You can select a target Gainsight object from the list of standard opportunity objects: GS Opportunity, GS Opportunity Stage, GS Opportunity Line Item, GS Pricebook, GS Pricebook Entry, Record Type, and Product.
To Add To Destination the output dataset:
- Click the three vertical dots menu of the final output dataset.
- Select Add Destination, a slide-out panel appears.
- From the Gainsight Object dropdown, select the target Gainsight object. After you select the target object, you can configure the Direct and Derived Mappings between the source and target fields.
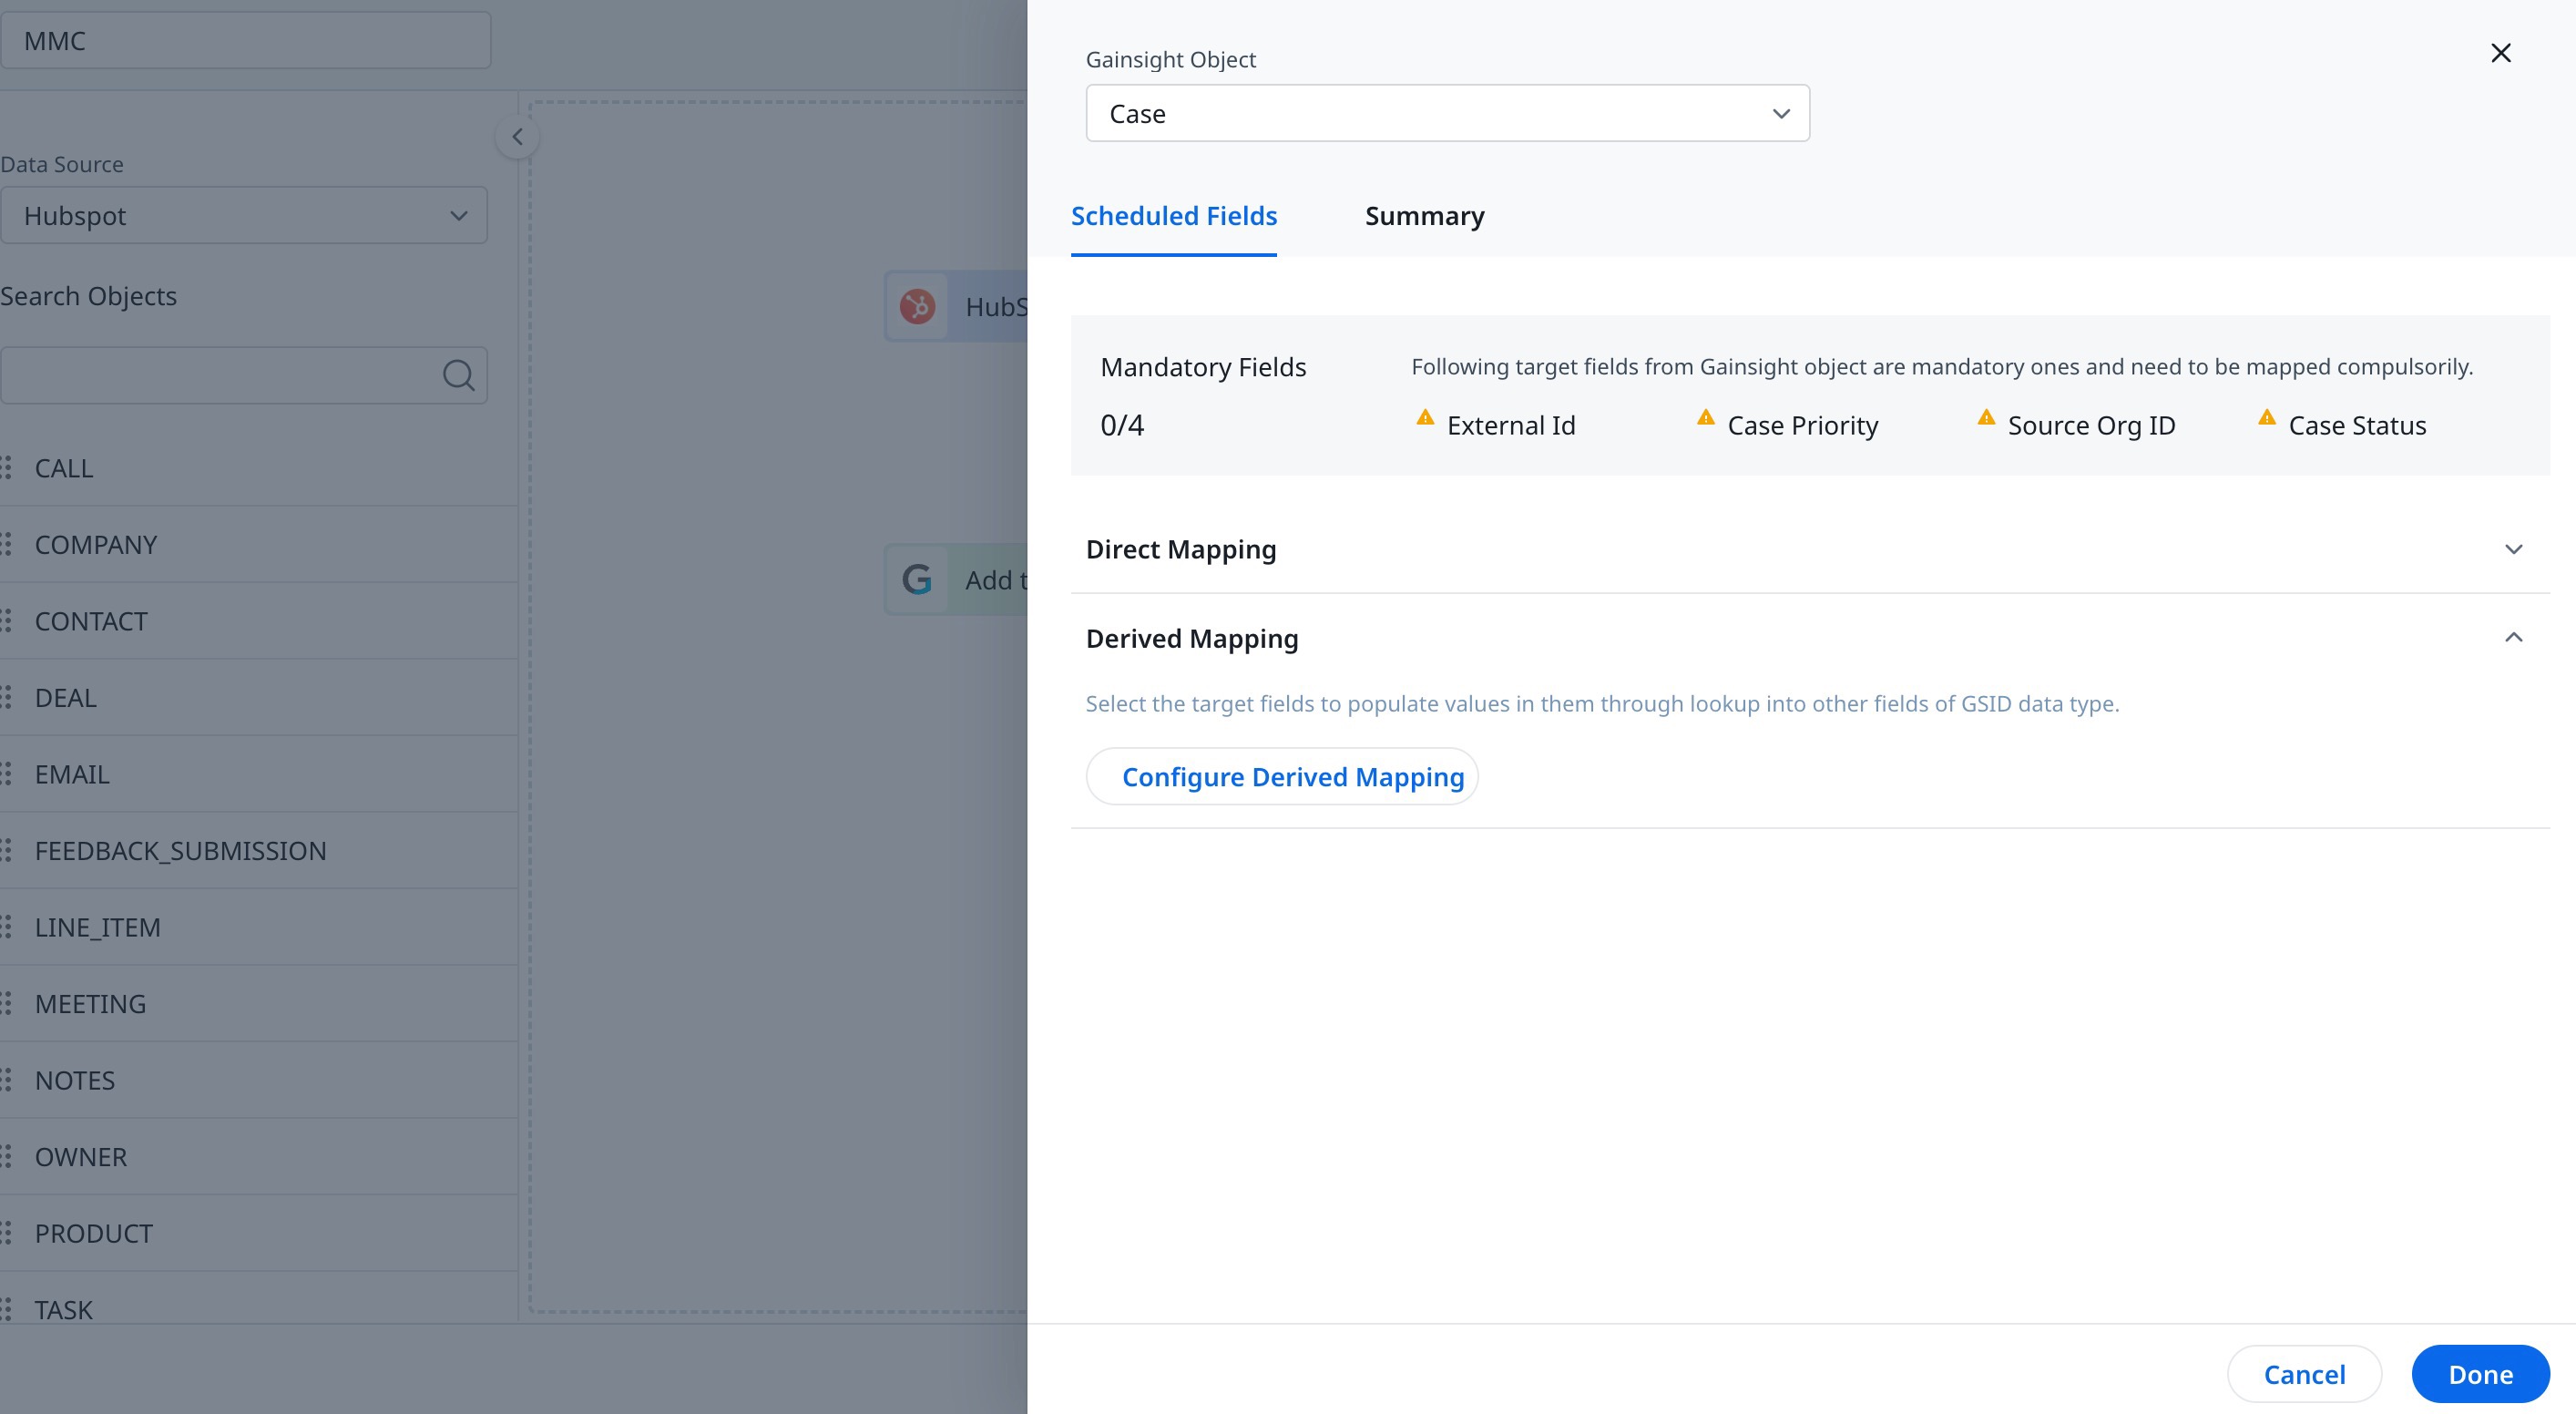
Scheduled Fields
This section contains the following sub sections:
Direct Mapping
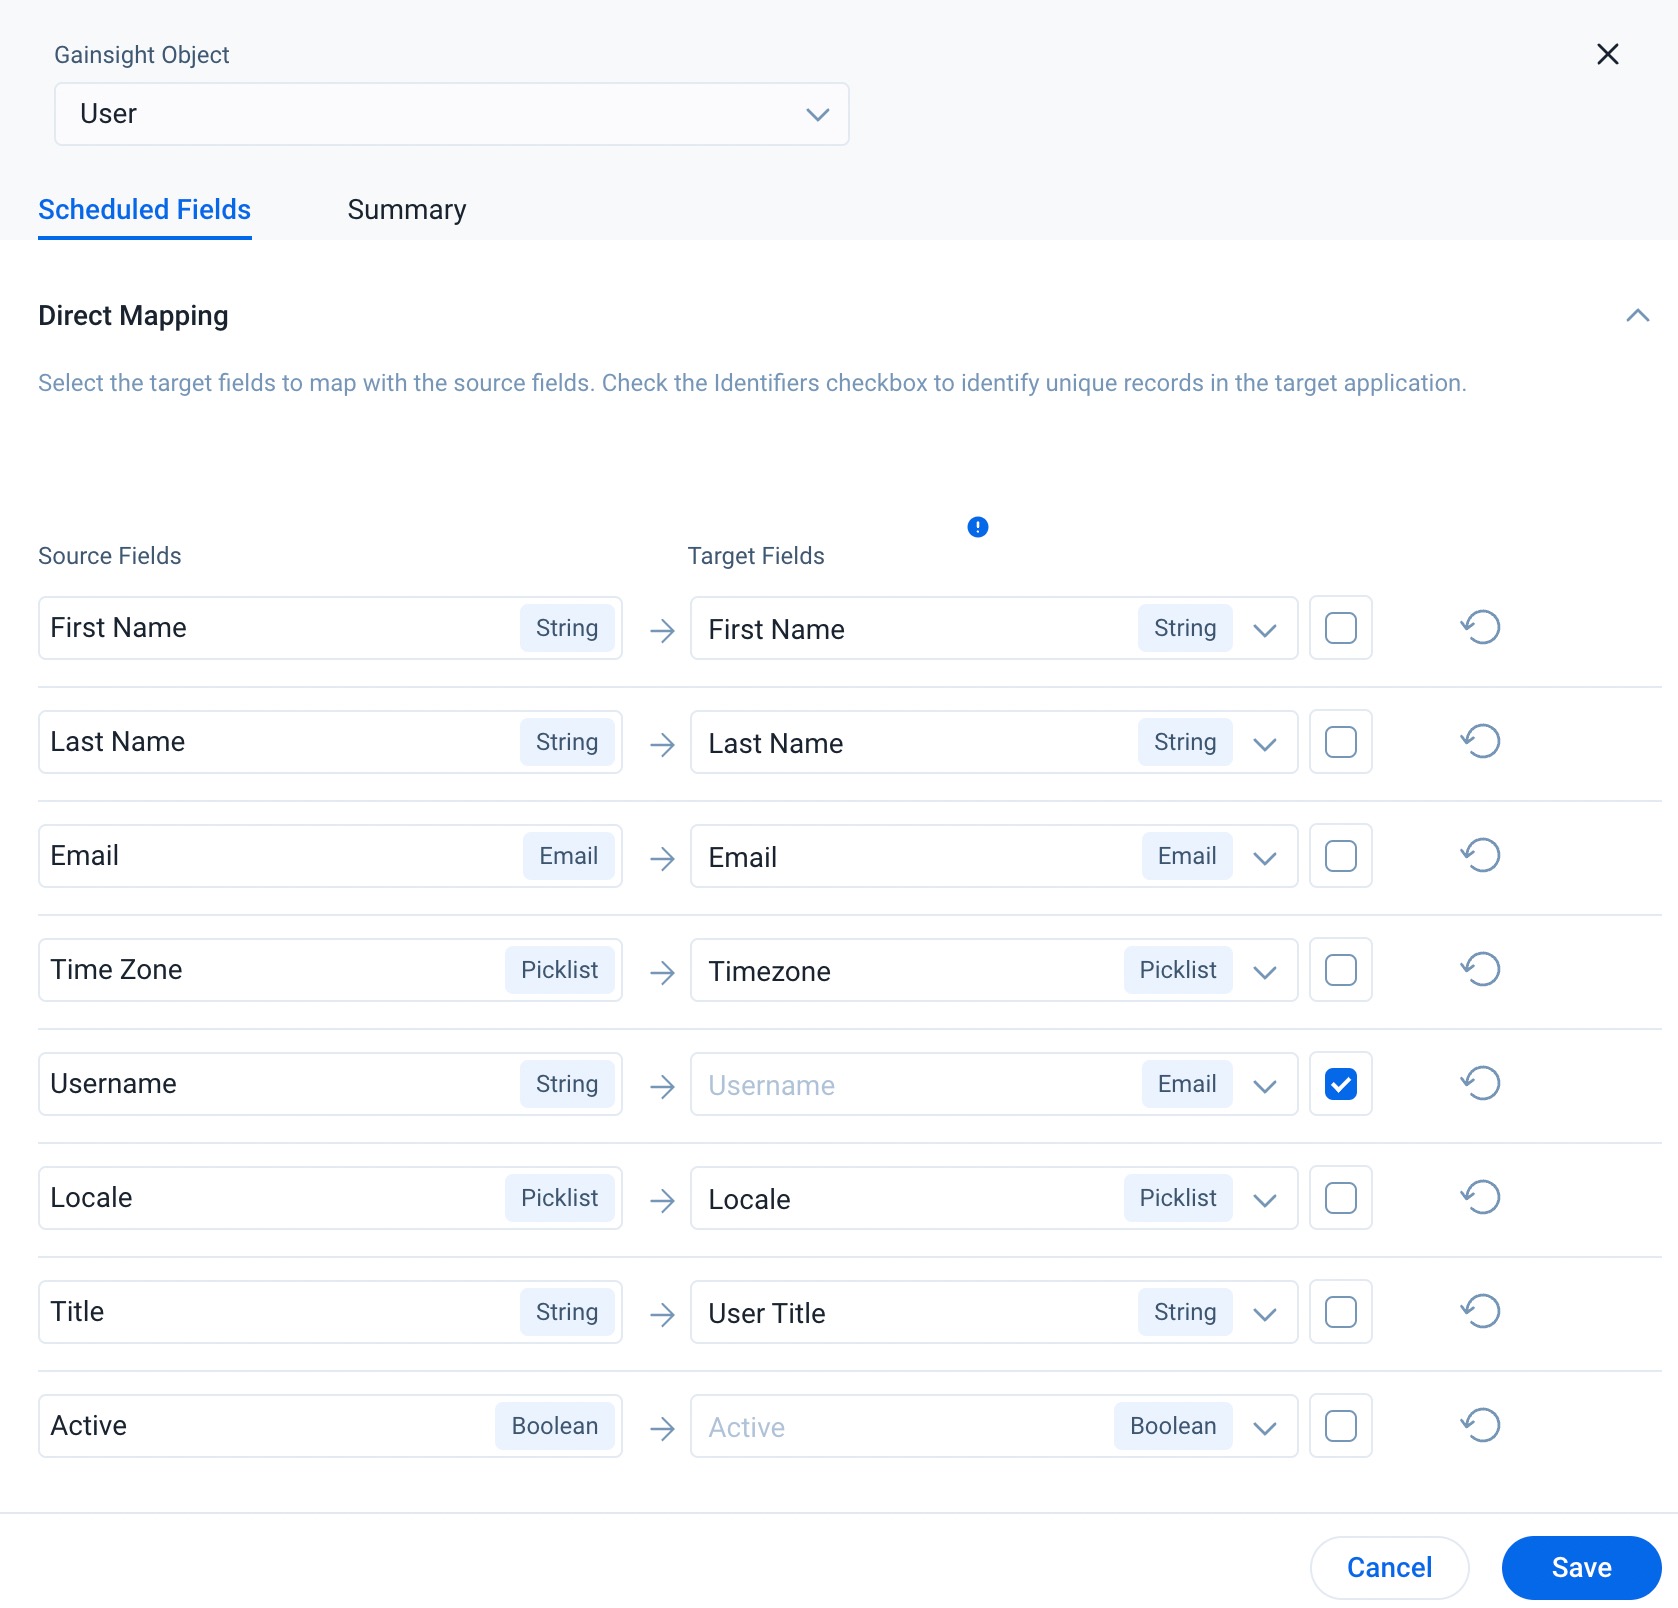
In Direct Mapping, you can map fields from the output dataset to the target object in the field mappings. Data sync happens from the source fields of the external system to the target fields of Gainsight, based on the configured field mappings. You can see all the selected source fields from the dataset in the Source Field column.
To add direct mapping between the fields:
- In the Target Field column, select the fields to which data should be synced.
- Select the Include in identifiers check box for at least one of the fields. It helps to identify a unique record from Source to Gainsight while updating data into the remaining mapped fields. Any Source field which has unique values can be used as an Identifier (Example: Zendesk Ticket ID to External ID in Gainsight).
- You can now proceed to the Derived Mapping section.
Derived Mapping
This is optional and you must configure the Derived Mappings only if you want to populate values into the target fields of data type GSID. GSID values are populated from the same or another object through lookup.
In this Derived Mapping stage, create Lookup mapping in a data sync job. You can have a lookup to the same object or another standard object and match up to six columns. Once the required matching is performed, fetch Gainsight IDs (GSIDs) from the lookup object into GSID data type fields. For more information on the Derived Mappings, refer to the Data Import Lookup article in the Additional Resources section at the end of this article.
IMPORTANT: To use derived mappings, the target object must have at least one field of data type GSID.
-
Click Derived Mapping to expand.
-
Click the Configured Derived Mapping button.
-
Click the Add Mapping button to add a Derived Mapping field.
-
From the Salesforce Field (Source Field) dropdown menu, select the source.
-
From the Data Flow dropdown menu, select the direction in which the data should be fetched.
-
From the Gainsight Field (Target Field ) dropdown menu, select the value.
Note: Only fields with GSID data type are displayed in the Gainsight Field dropdown. Define Lookup gets enabled with a cross icon (which states Configuration Pending). -
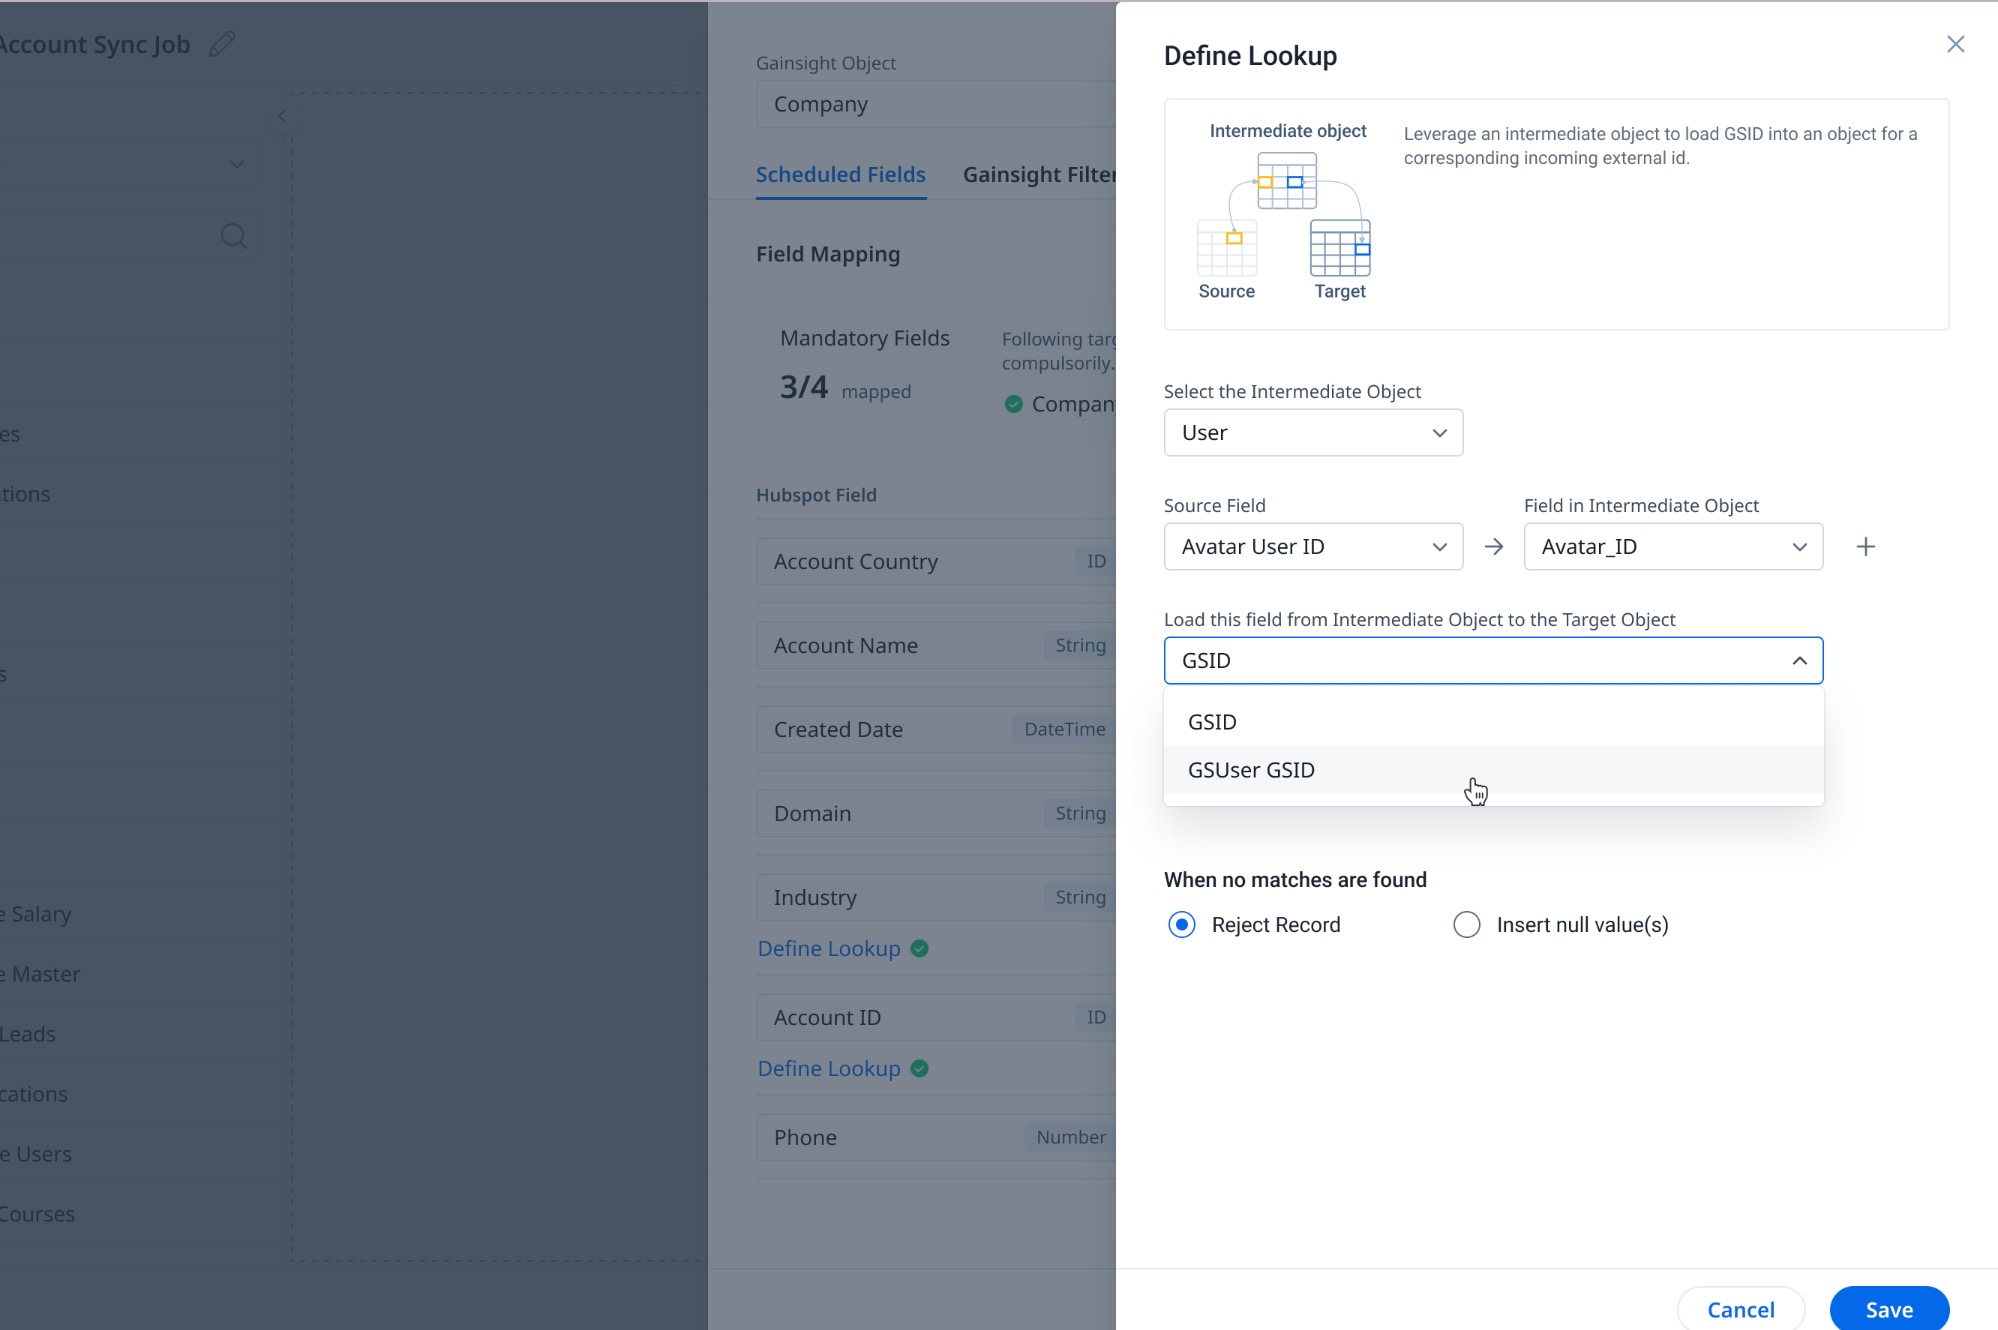
Click the Define Lookup button. The Define Lookup slide-out panel appears.
-
In the Define Lookup page, select the following details.
-
From the Select the intermediate object dropdown, select an intermediate object for the lookup.
-
From the Field in Intermediate Object dropdown menu, select the object to be mapped.
-
From the Load the field to the Target Object from the Intermediate Object dropdown, select the field to be added to the target object.
- Click here for more information on the above Fields
-
Field Description Select the intermediate object It is the object to which the intermediate field belongs. Gainsight looks up to this object to populate the target field with GSID, subject to matching criteria. Field in Intermediate Object The value in this field of the intermediate object should match with the value in the source field. It becomes the matching criteria. Load the field to the Target Object from the Intermediate Object It is the GSID type field whose value is inserted in the lookup field of the target object.
-
From the When Multiple Matches Occur dropdown menu, select a value.
Note: The selected value determines what action must be performed when multiple records are found for the matching criteria. The following are options in the When Multiple Matches Occur dropdown menu:-
Use any one match: One of the two records is selected.
-
Mark record with an error: The record is not synced and is marked as an error.
-
-
From the When no matches are found dropdown menu, select a value.
Note: The selected value determines the action to be performed when no matching records are found. The following are options in the When no matches are found dropdown menu:-
Insert Null Value(s): Null value is inserted in the GSID field of the target object.
-
Reject Record: The specific record is not considered and is rejected.
-
-
-
Click Done. The Define Lookup appears with a green tick icon (which states Configuration Completed).
- (Optional) Click the Add icon to add another matching criteria.
Note: You can select any GSID type field from the intermediate object and transfer it to the corresponding Gainsight field based on matching criteria.
Manage Match Criteria
In the Add to Destination, selecting a Gainsight Object (such as Company Person, Relationship Person, or Person) requires mapping of mandatory fields. These fields, essential for the mapping process, vary based on the Match Criteria you select in the Manage Match Criteria settings.
Note: For Company Person out-of-the-box jobs, the Match Criteria or Resolution key will be set as an identifier.
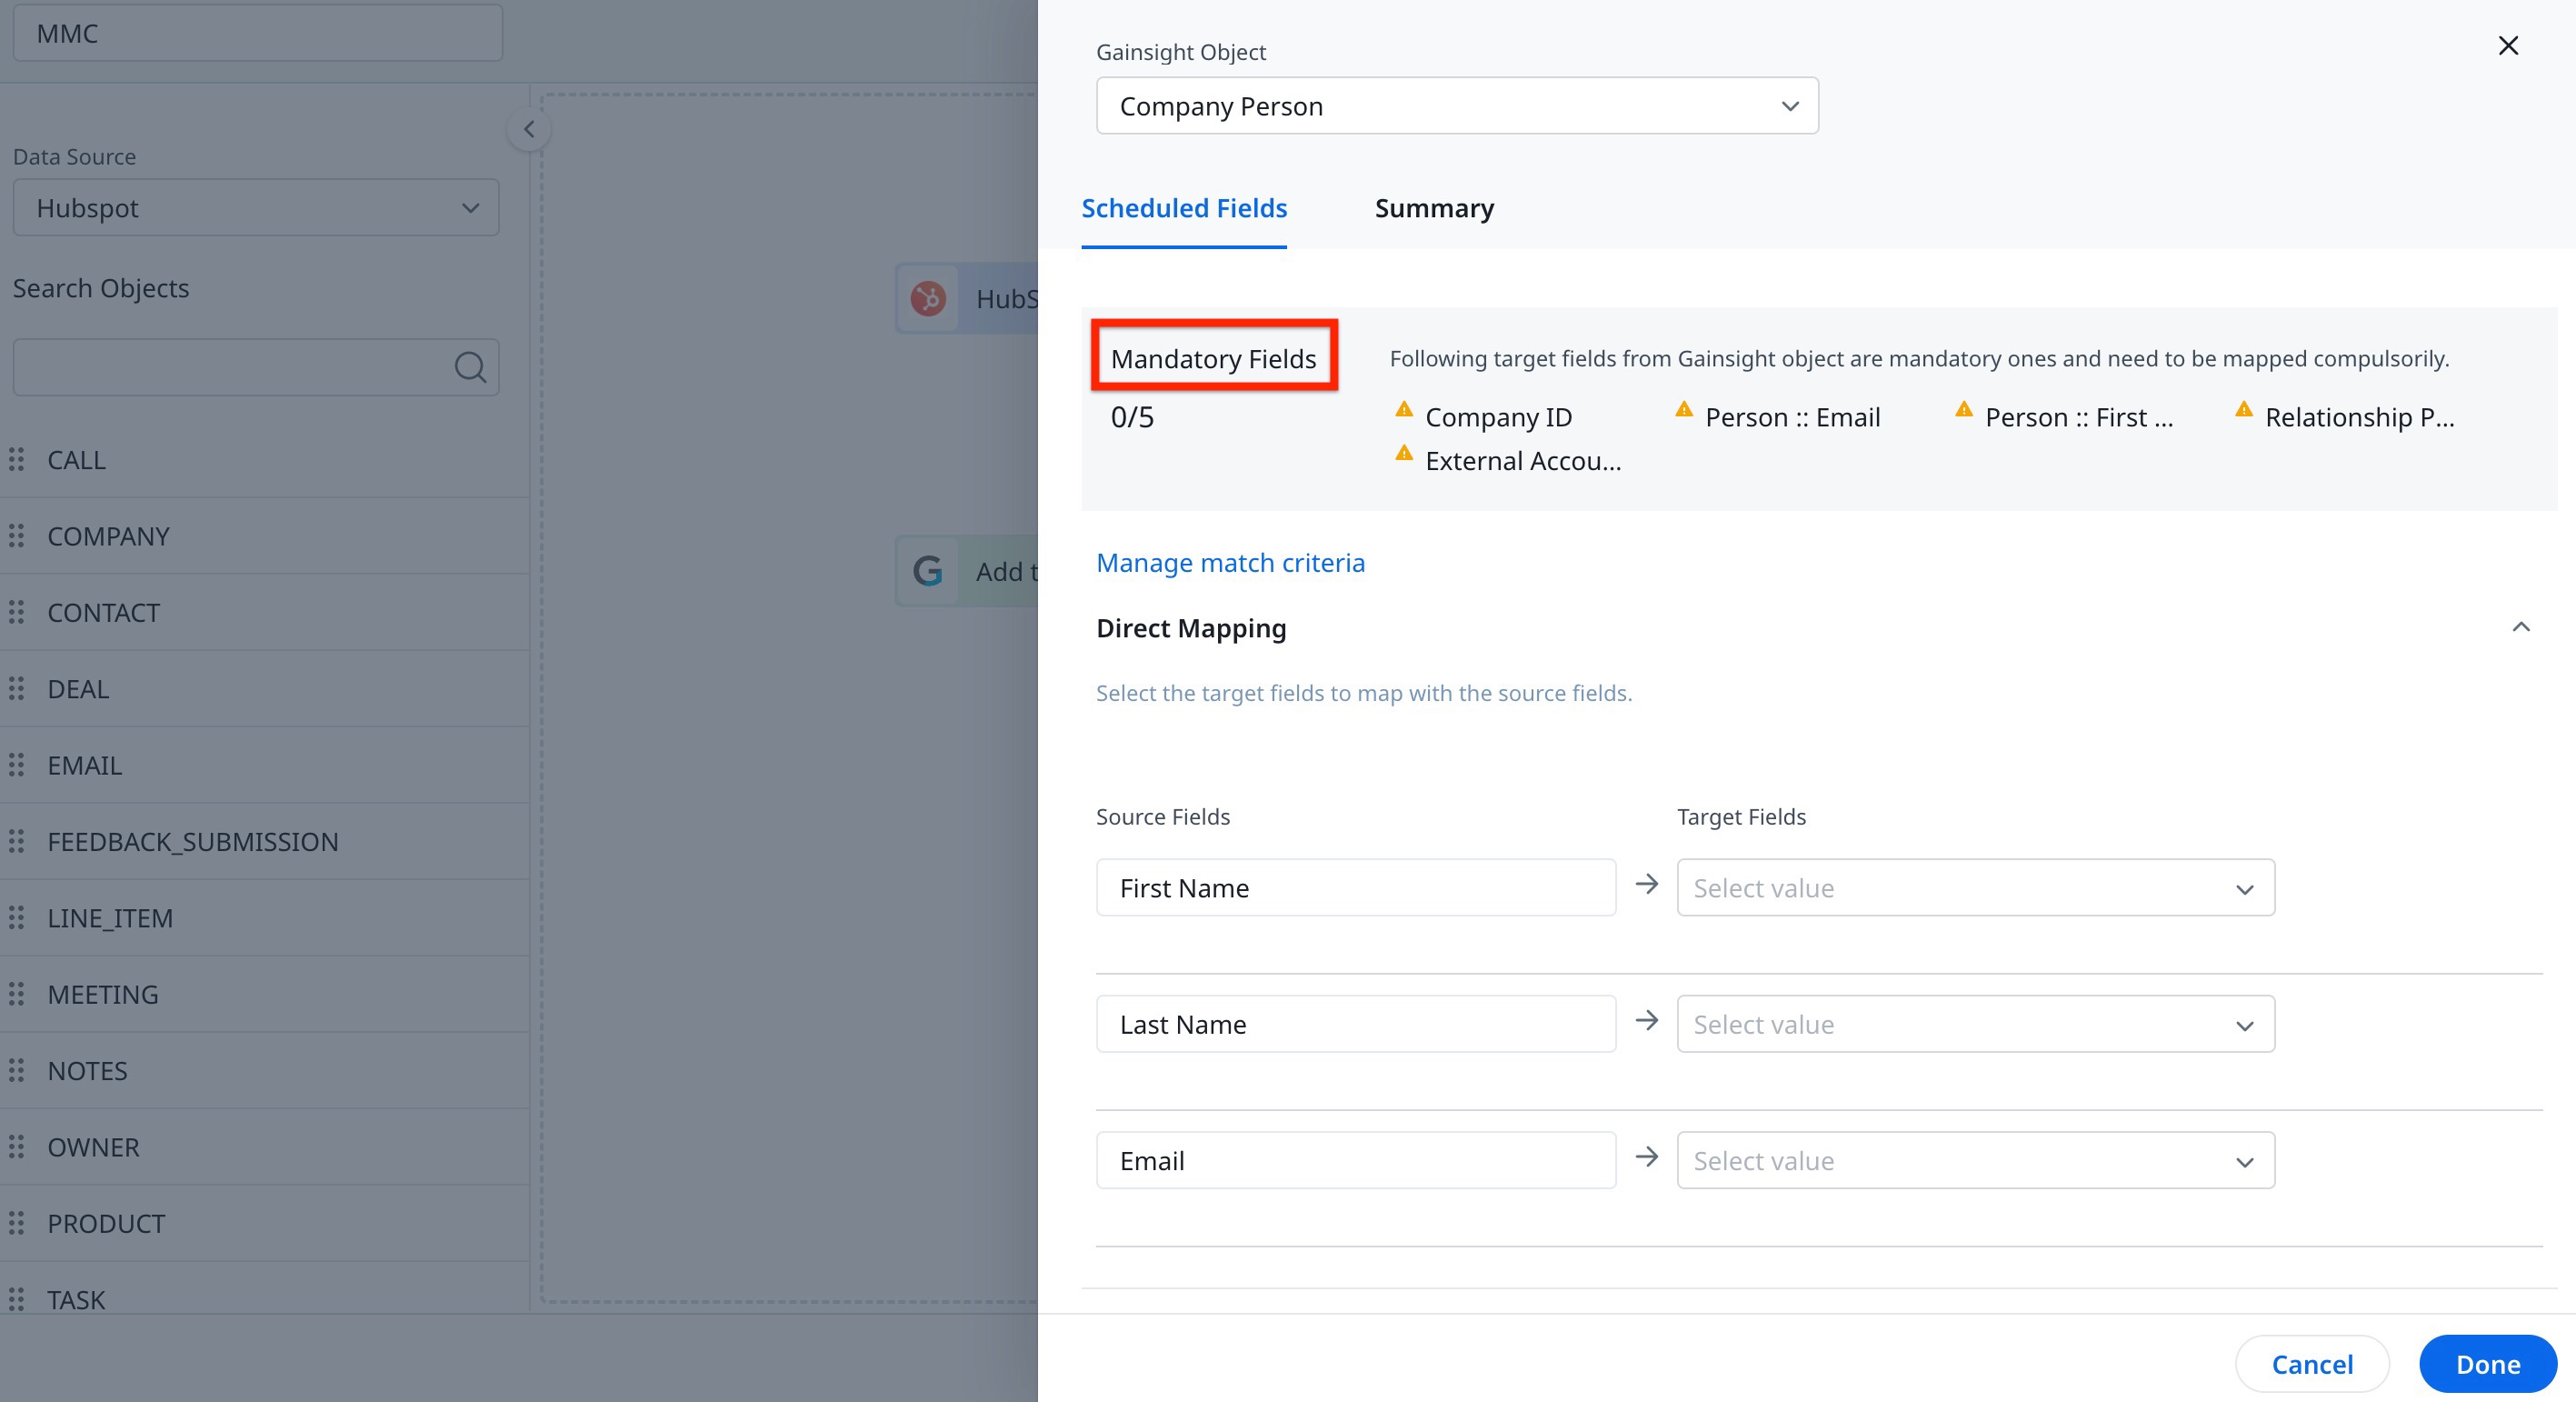
IMPORTANT: Ensure the required Source Fields are added to map to Target Fields based on the Manage Match Criteria.
Match Criteria play a key role in ensuring data accuracy by preventing duplicate person records during data import via various methods like the Rules Engine, Connectors, People Admin, or the People section.
For more information on how admins can define the Match Criteria, refer to the People Management article.
You can manage match criteria to select the fields to match records when importing person data. To manage match criteria:
- Click Manage Match Criteria. The Manage Match Criteria dialog appears.
- Re-arrange the Match Criteria based on their likelihood to identify the record uniquely.
- Select or deselect the criteria to define the fields that will identify the records.
- Click Save.
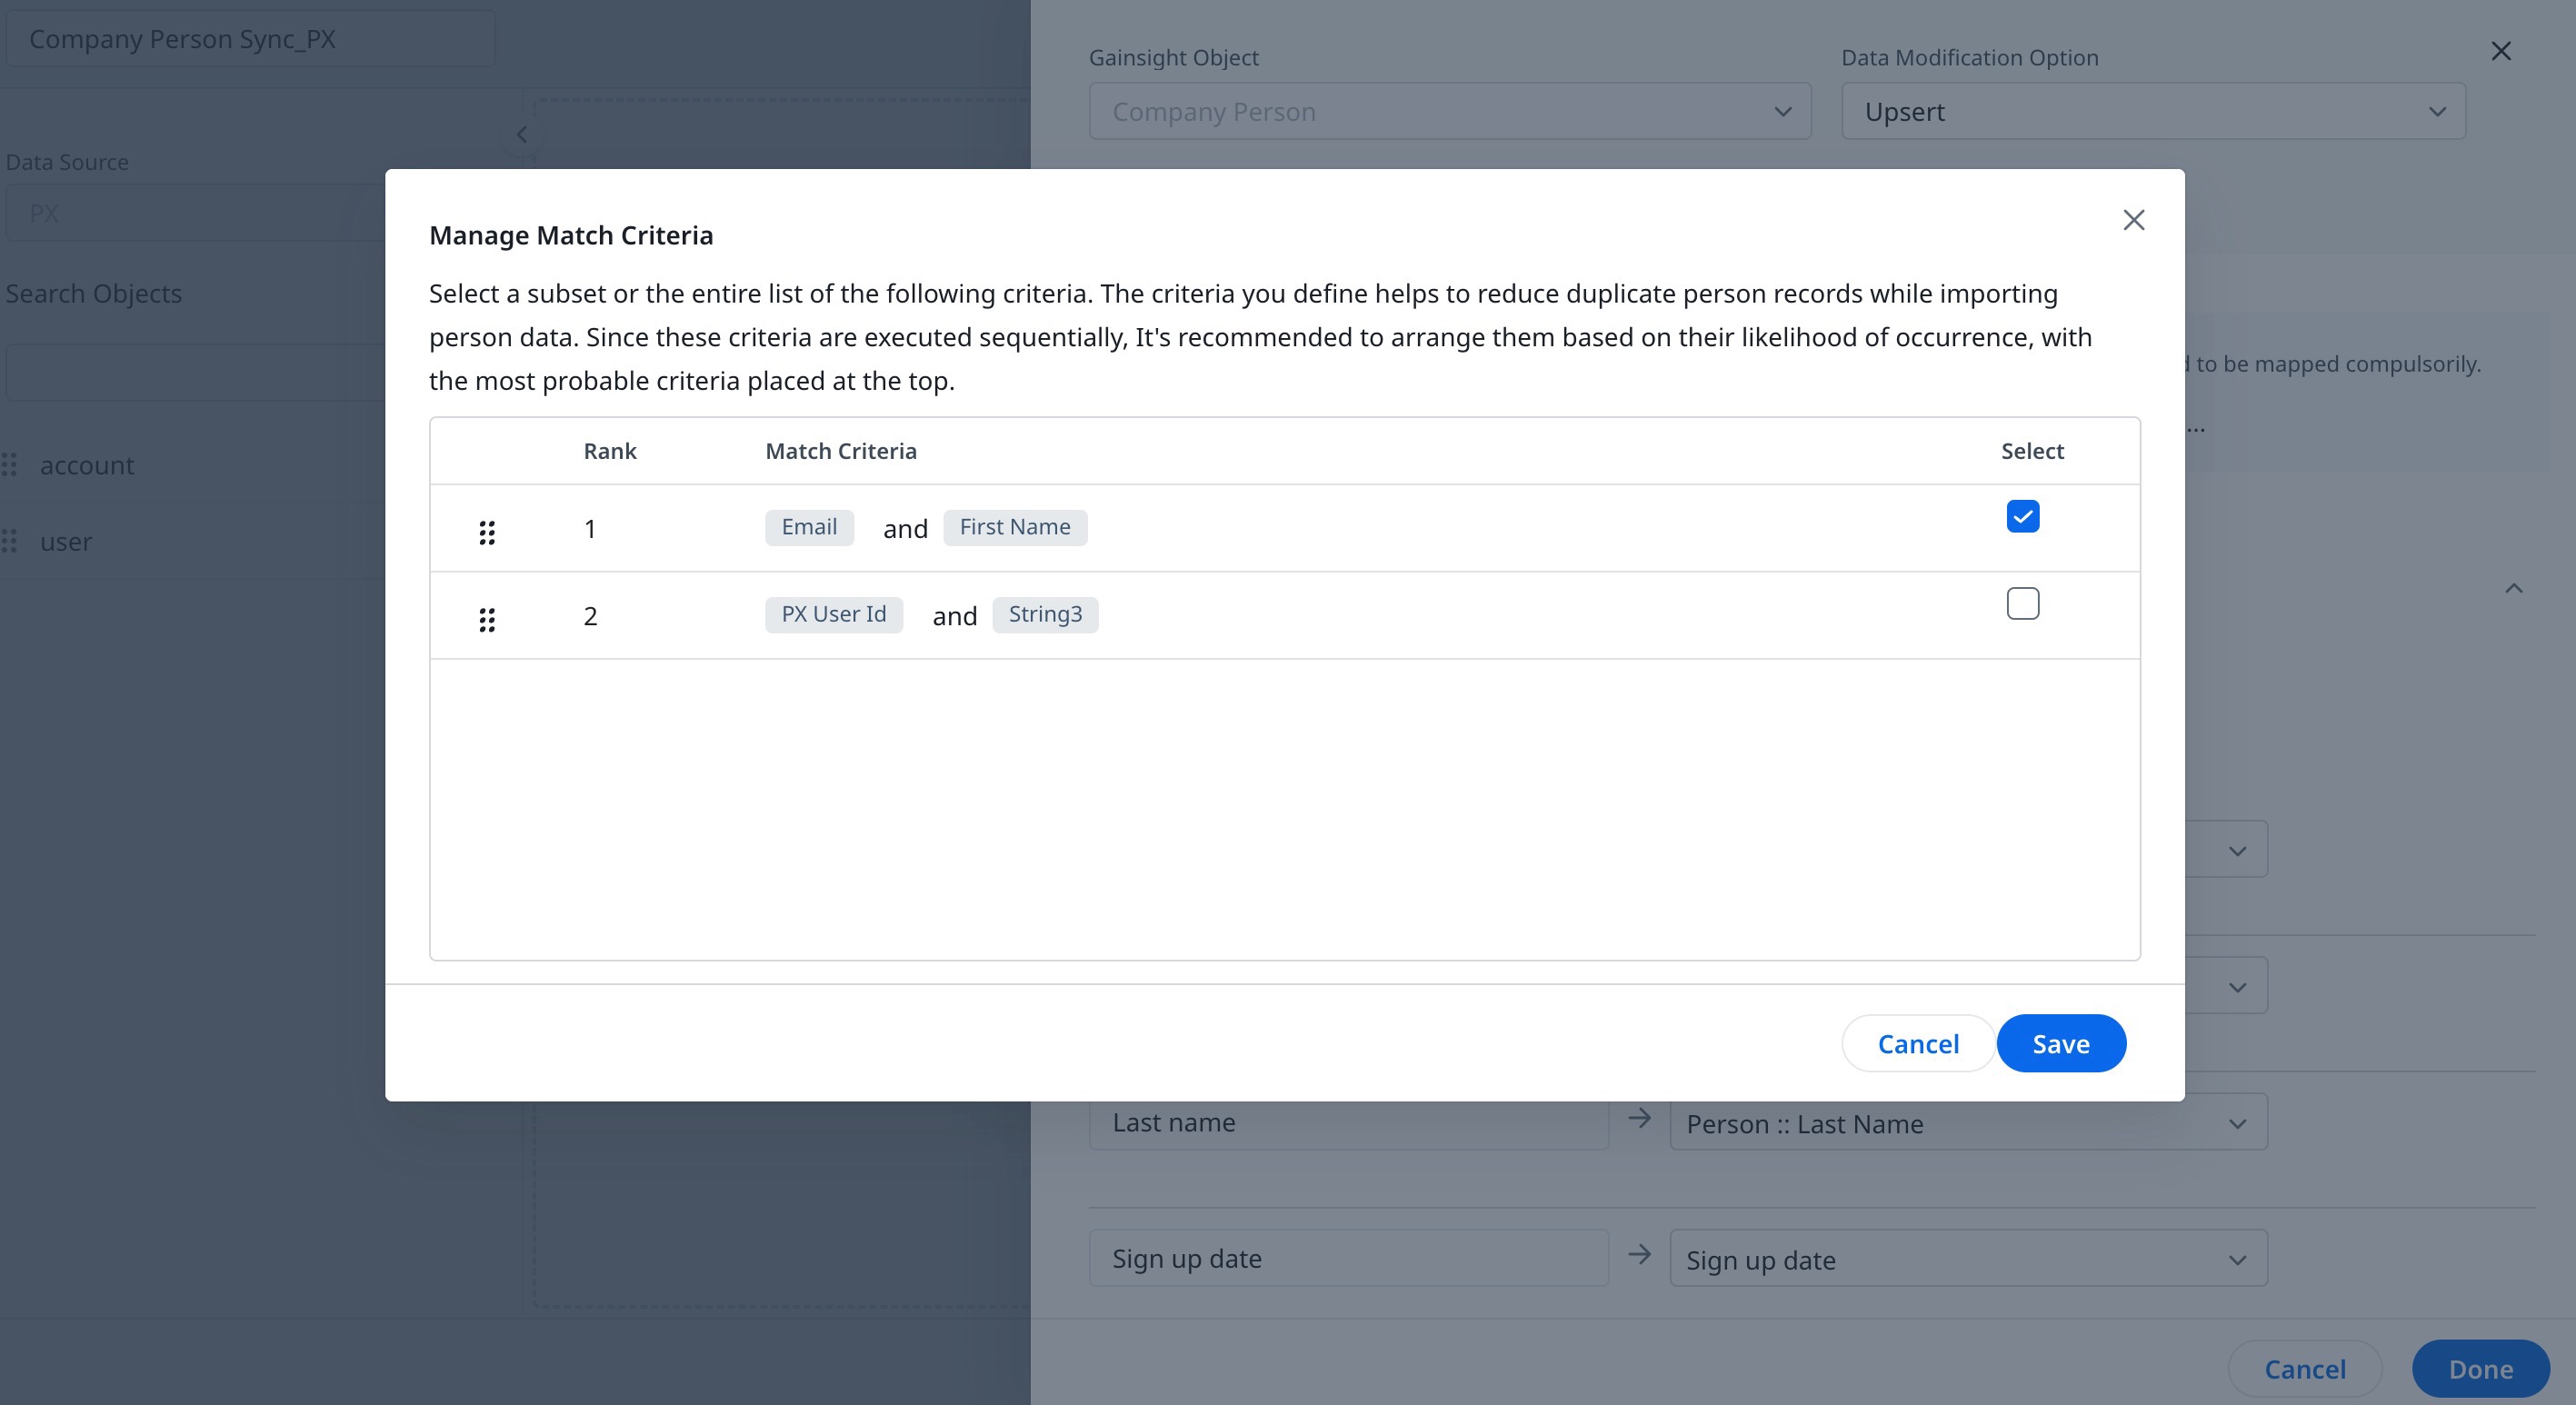
Note: A limit of three criteria, with up to three fields each, can be selected.
Proceed with Direct or Derived Mapping to complete the process.
Delete Option
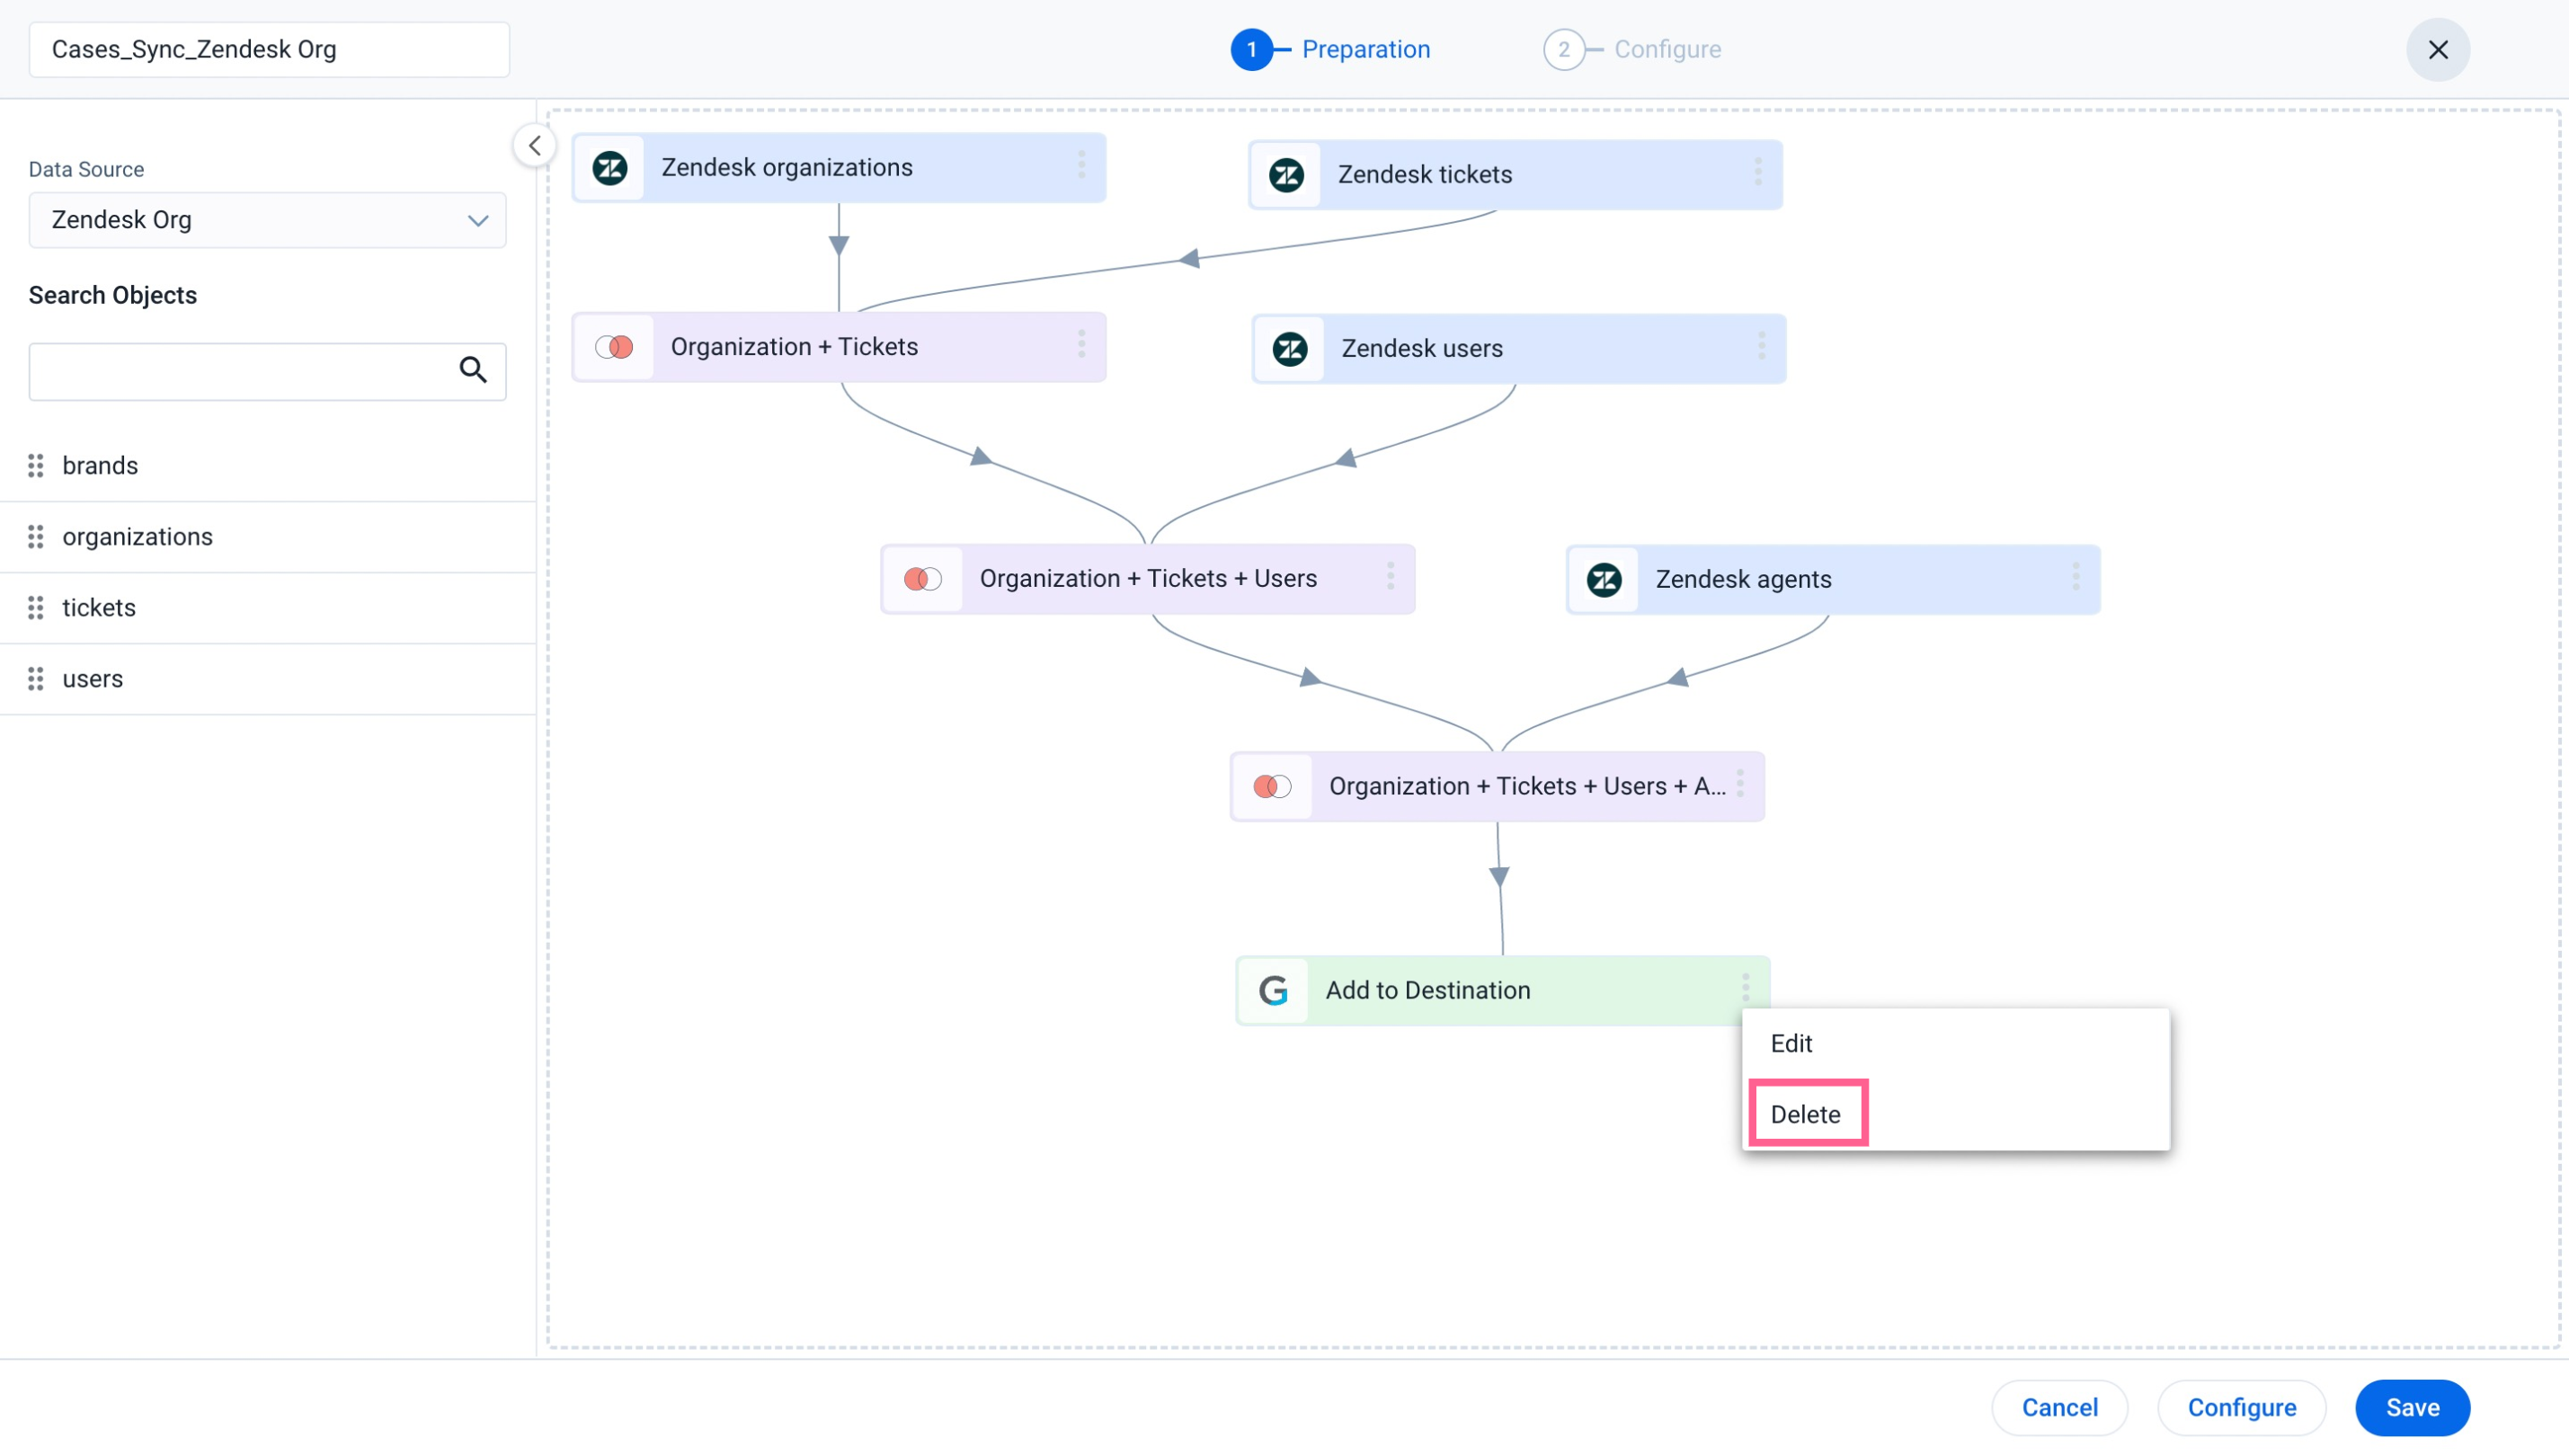
The delete option in the Add to Destination task can delete destination tasks and allow admins to modify existing jobs by adding/removing Merge or Transform functions. As a result, modifying a complex or bulky schema that contains multiple objects, merges, and transformations becomes easy without creating a new job.
To delete a task:
- Navigate to Administration > Integrations > Connectors 2.0 > Jobs. The Jobs List page appears.
- Click the three-vertical dots icon of the respective job.
- Click Edit. The Preparation step appears.
- From the Add to Destination task, click the three-vertical dots.
- Select Delete. A confirmation dialog box appears.
- Click Confirm. The Add to Destination task is deleted.
Notes:
- To configure/schedule a job, adding a Add to Destination task is mandatory, failing which an error message appears on the screen.
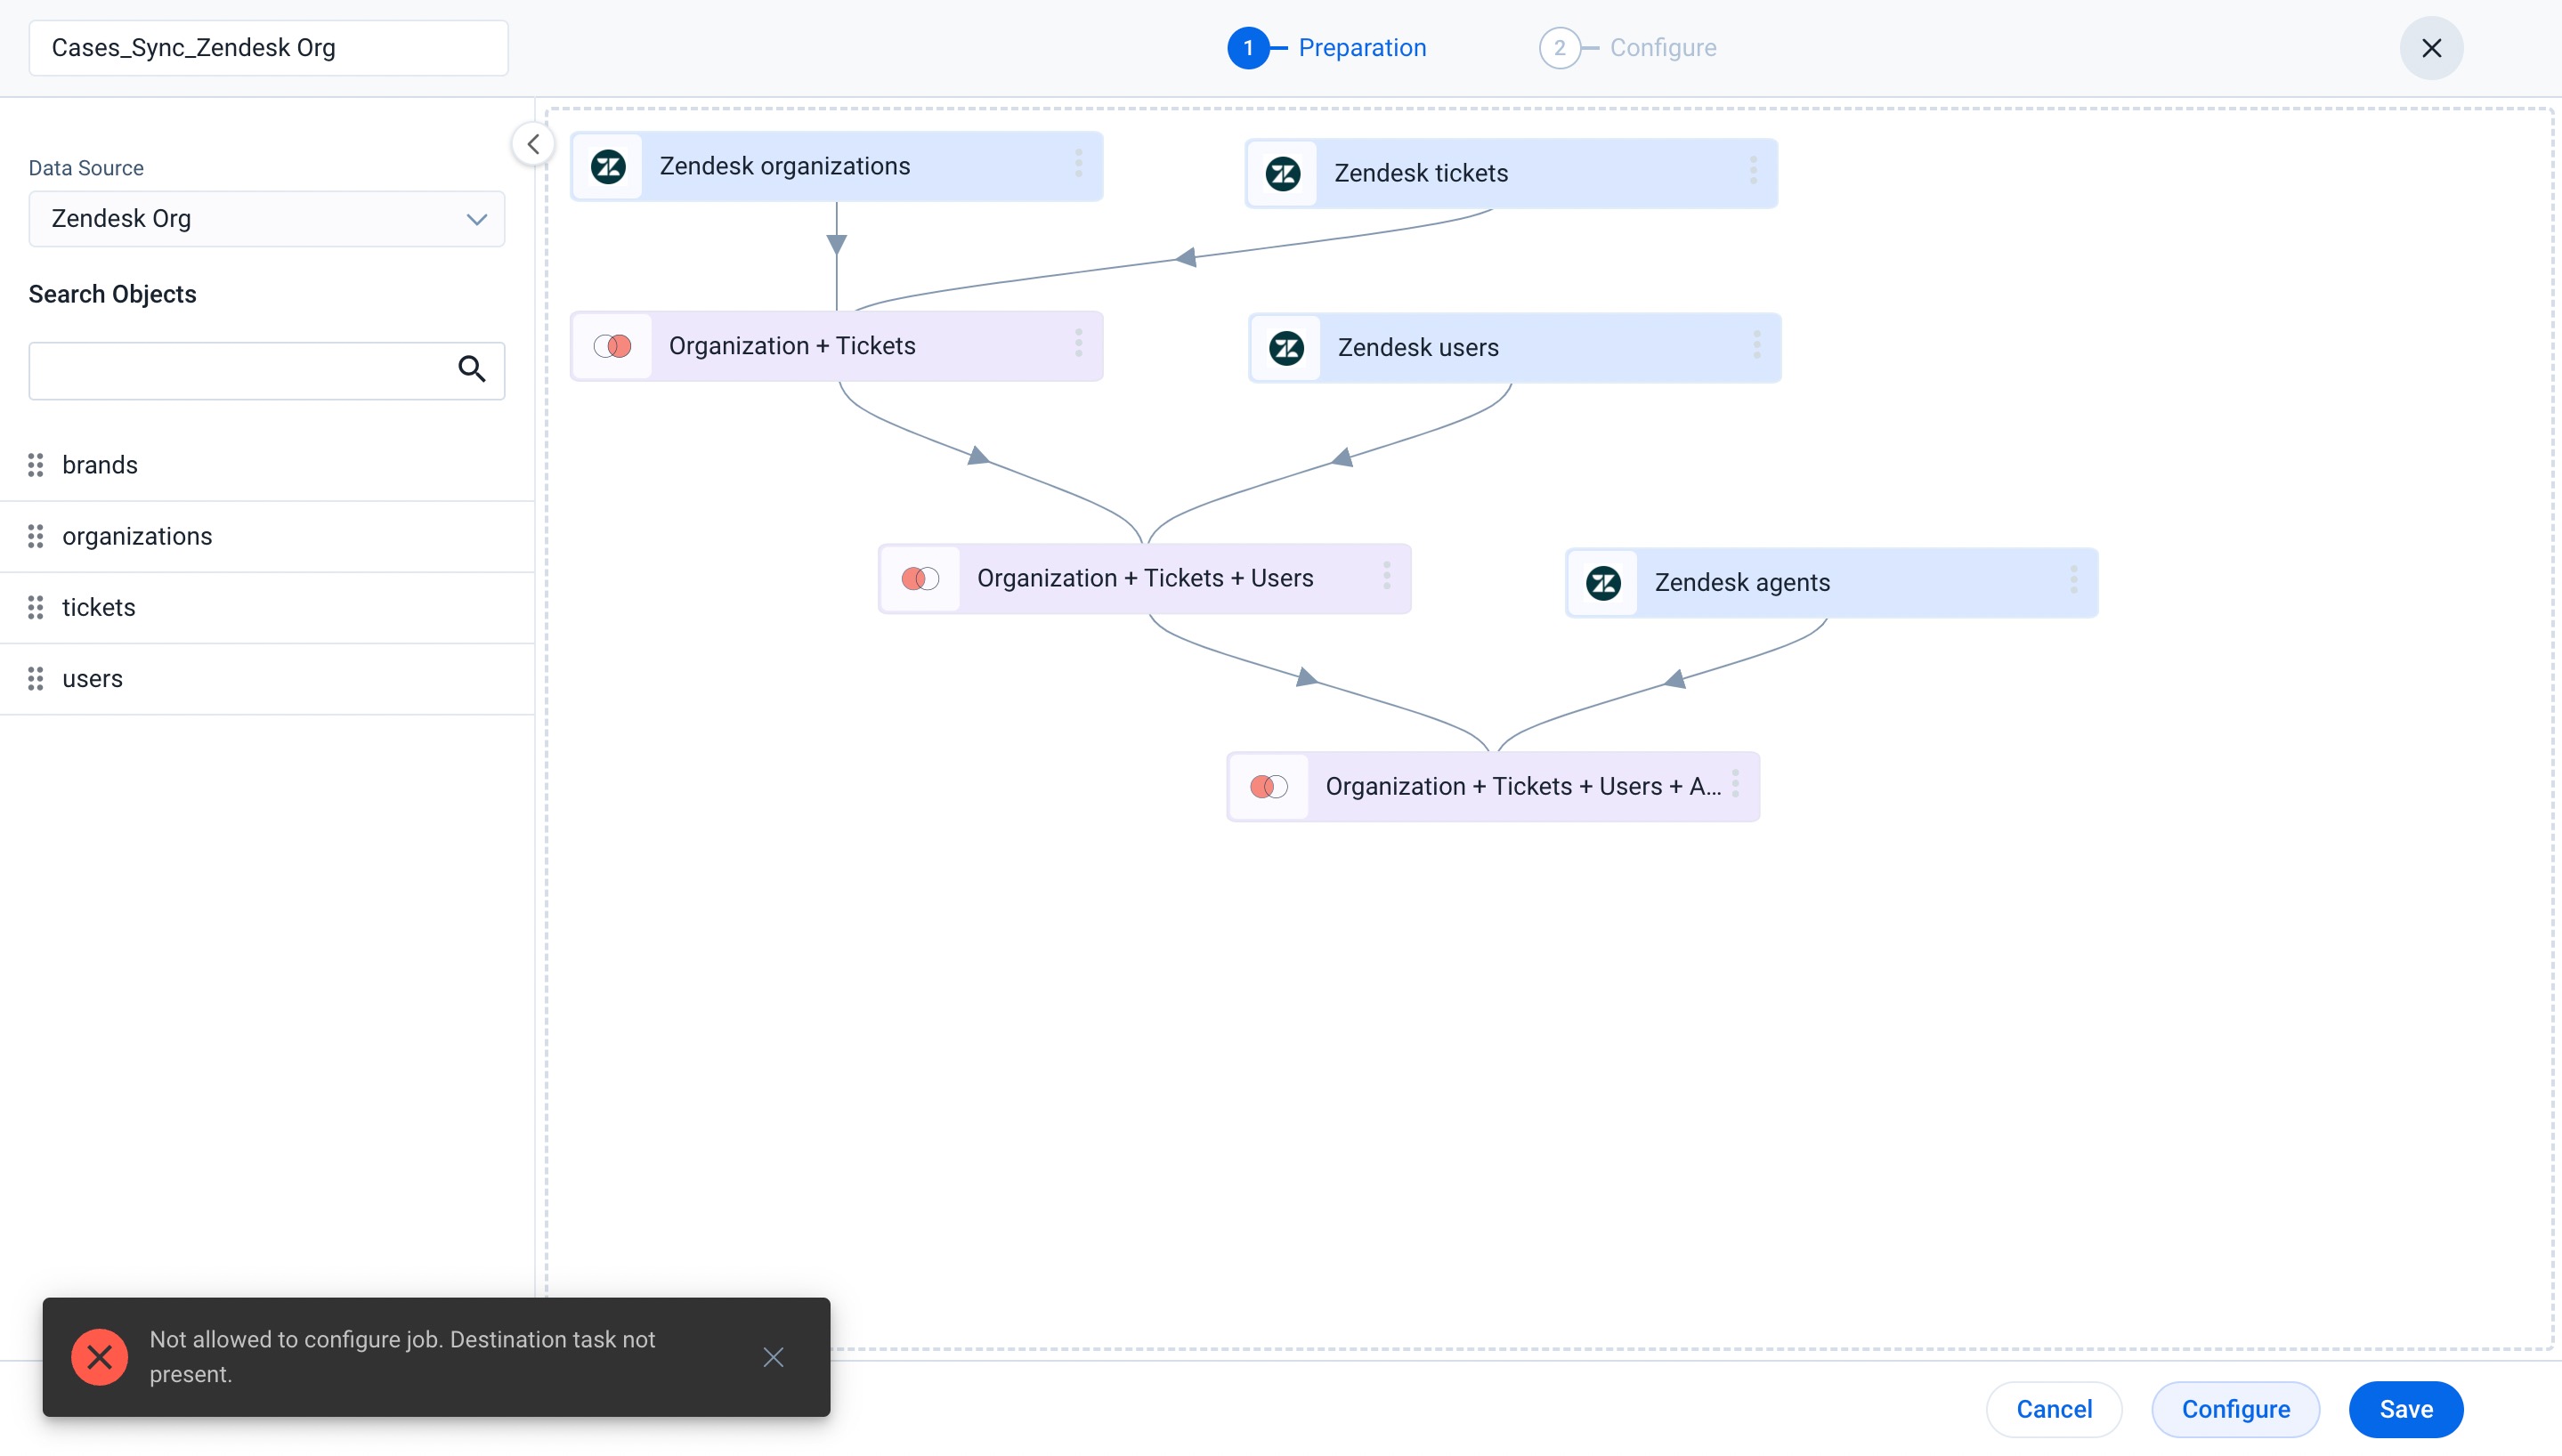
- If you try to save the job without adding the Add to Destination task, the job gets saved. But during the job execution that is triggered by schedule or Job chain, the job may fail.
- Without the Add to Destination task, you cannot perform the Manual Job Run function.
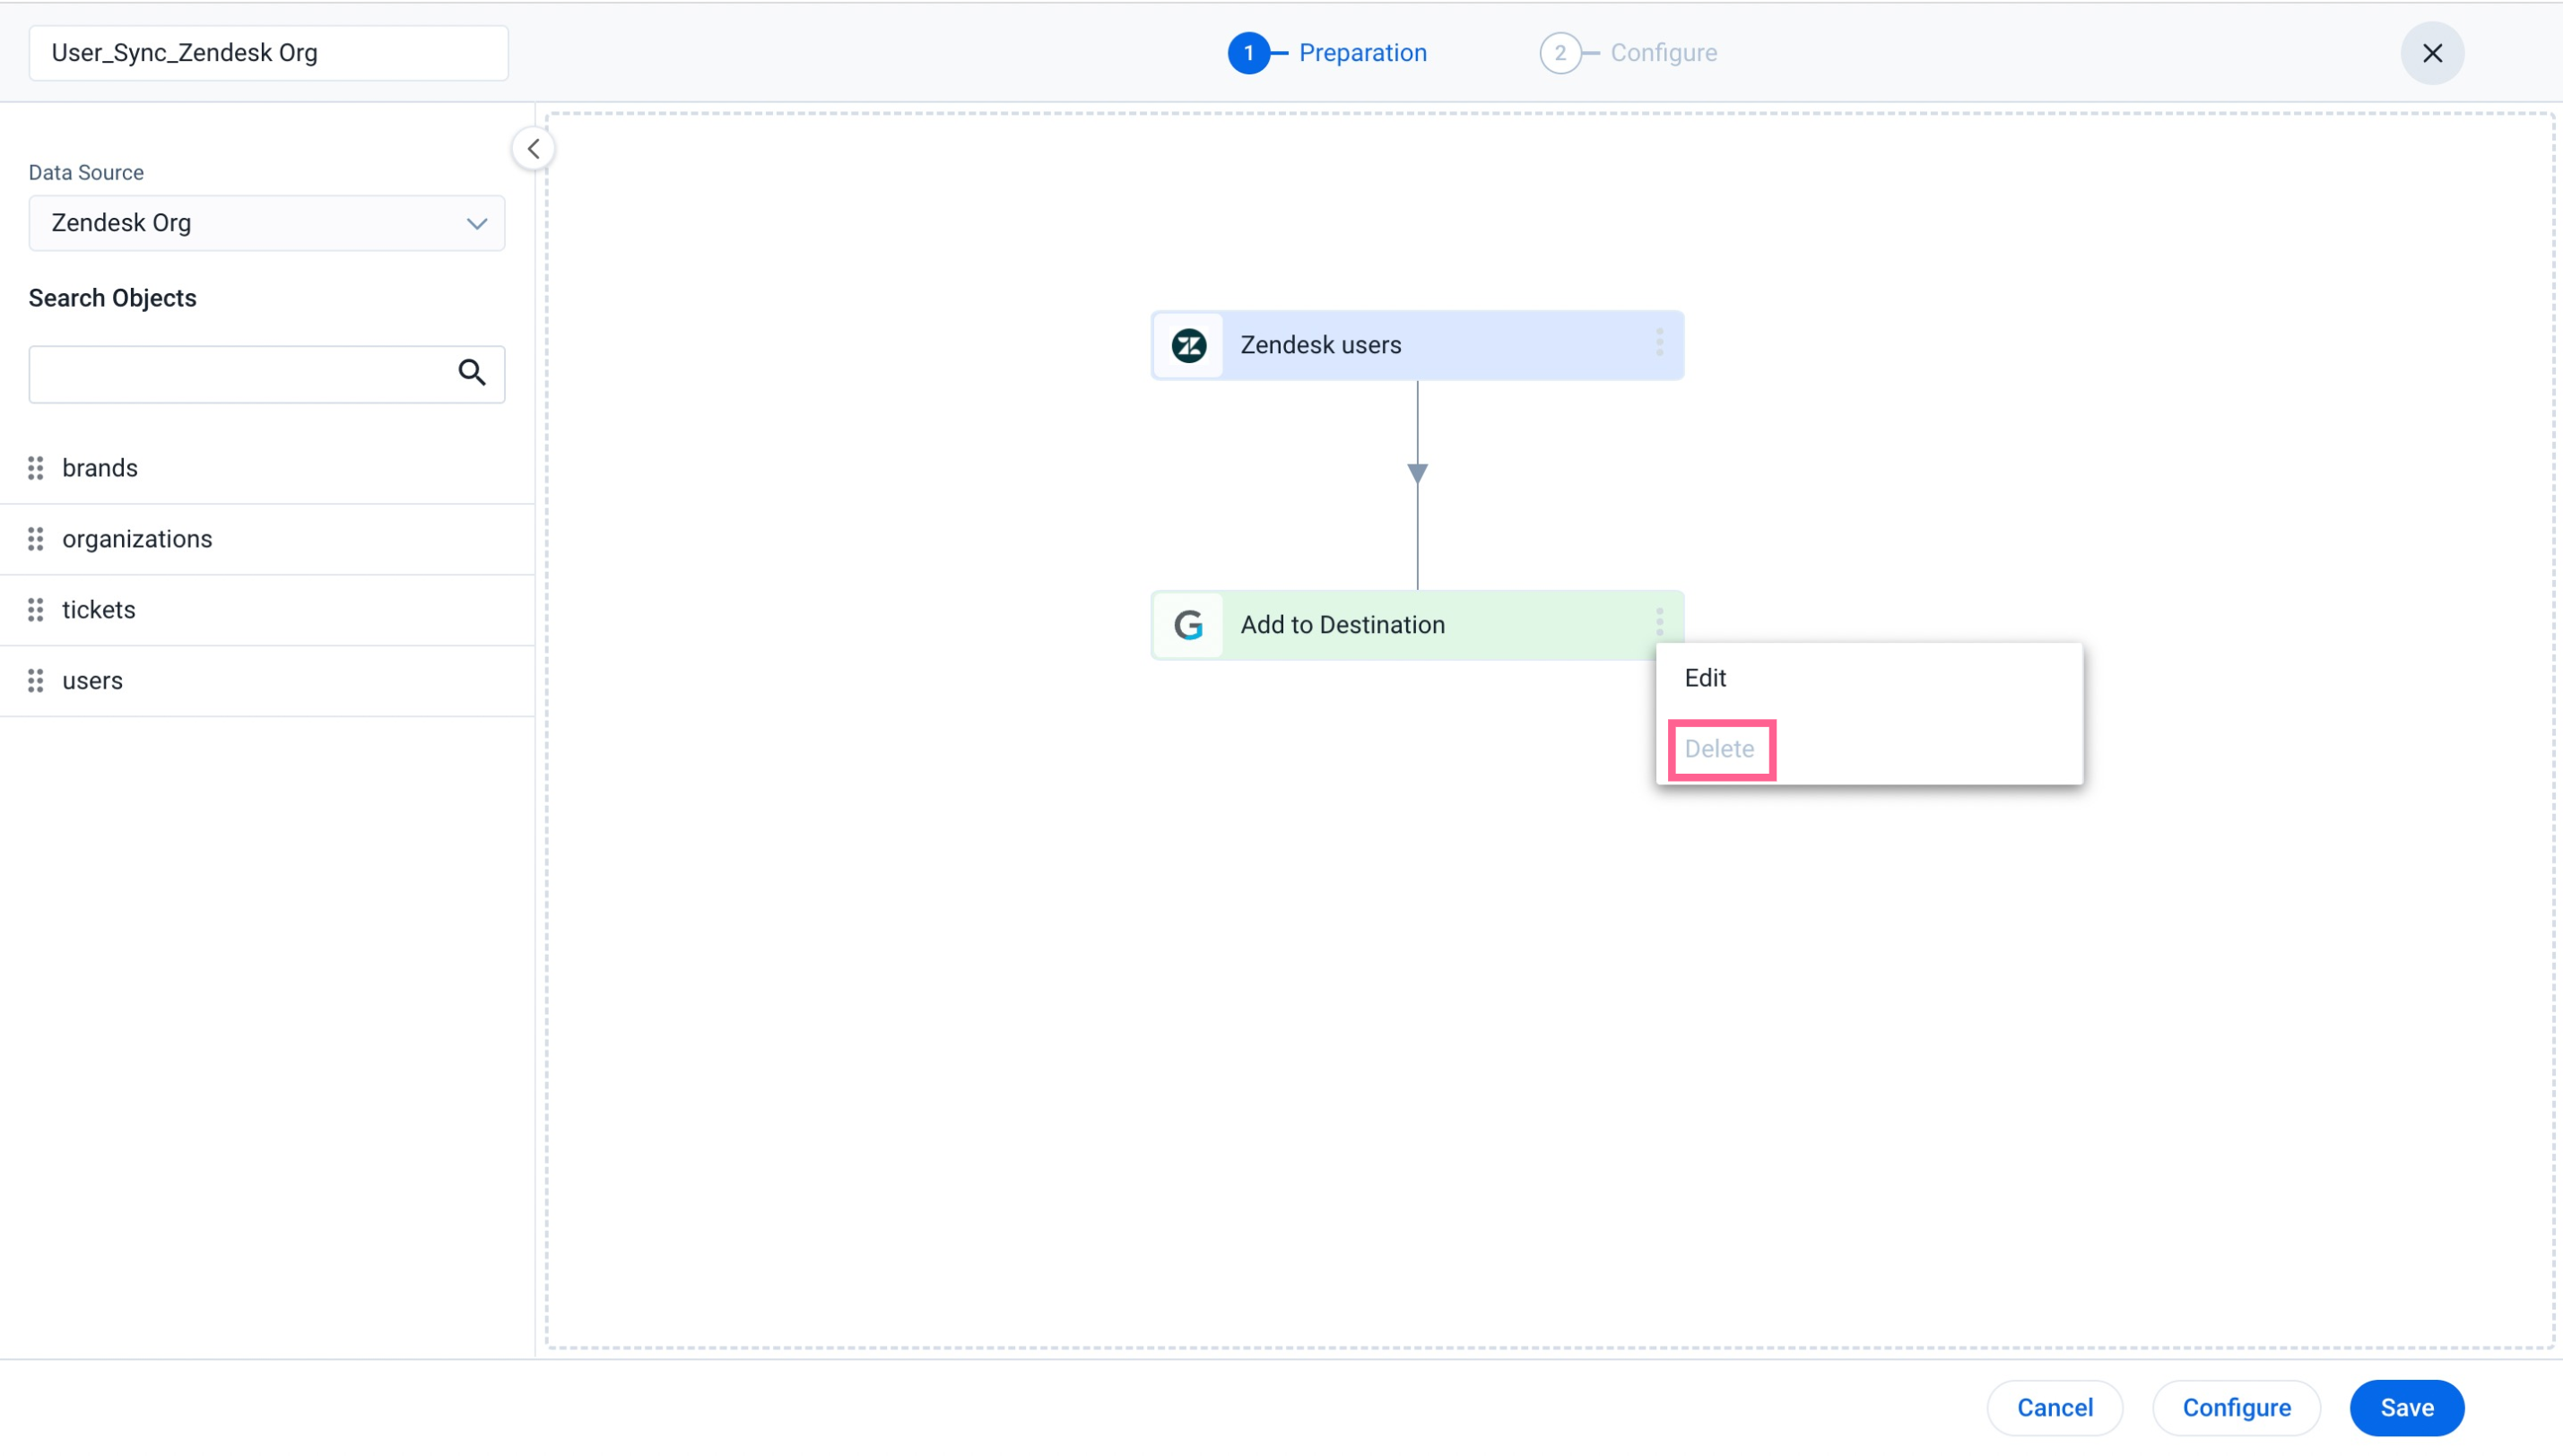
- There are a few standard jobs, such as User, Currency, Company Teams, and Image, in which the delete option is disabled. If the admin deletes the Add to Destination task, the object will not be available in the Gainsight Object list while creating any custom job.
Summary
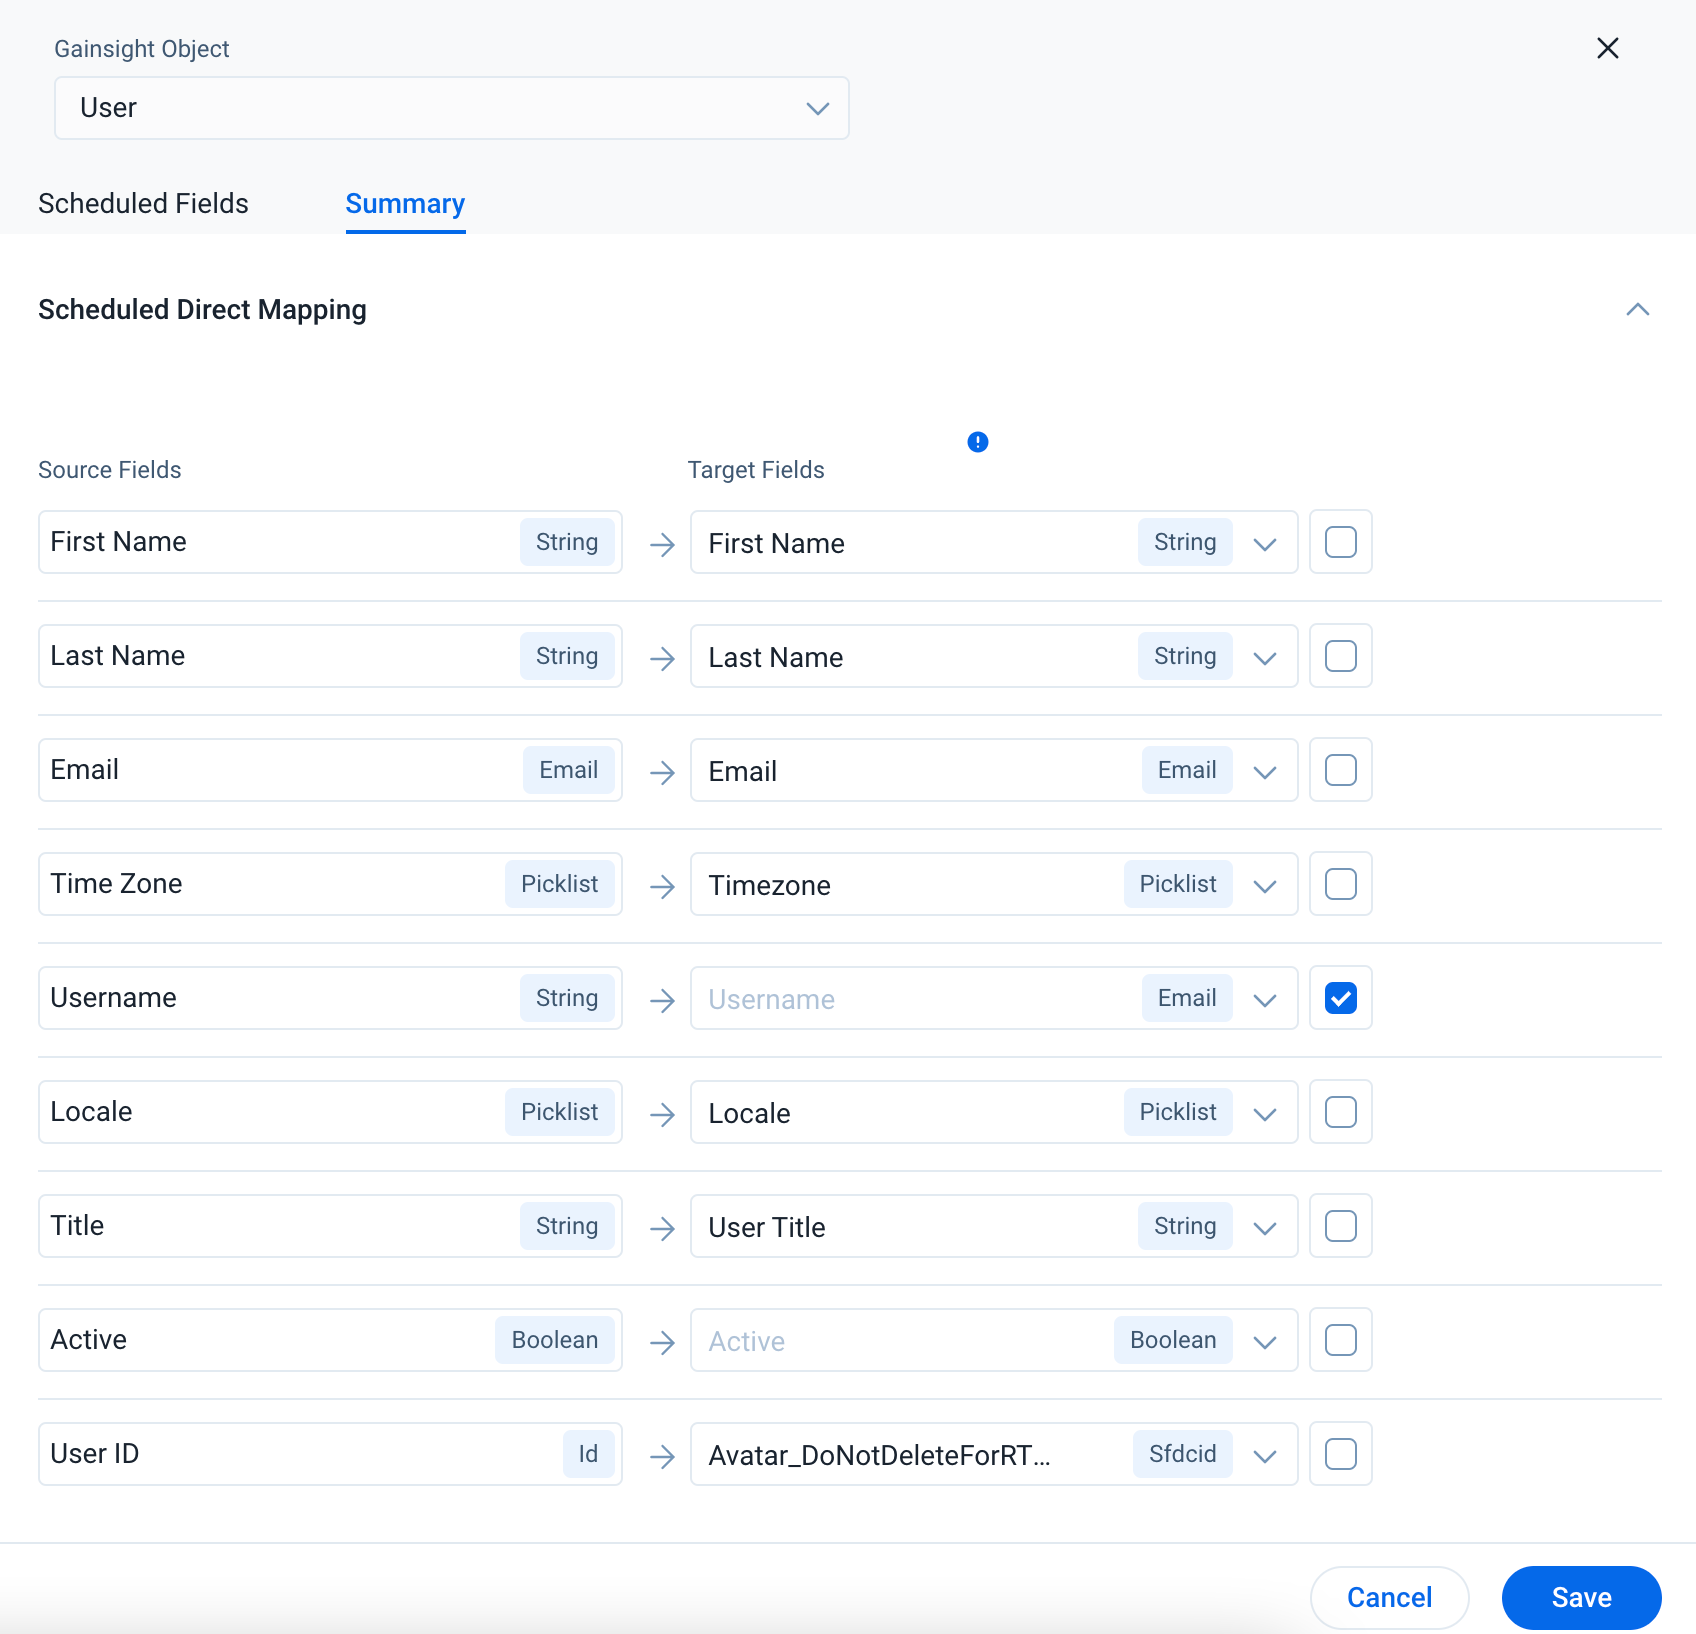
In the Summary tab, the details of Direct and Derived Mappings are available in Dataset.
Once you complete the preparation of the dataset, navigate to the Configure step to schedule the job execution. For more information on how to Configure the Job, refer to the Configuration of Job or Job Chain Schedule article in the Additional Resources section at the end of this article.