Archived Using Call to Action (CTA) and Task Detail Views
Cockpit [old version] documents will be archived soon...Documents related to the old Cockpit feature will be archived soon and will no longer be available as all the customers now have Cockpit Horizon Experience in their orgs. Learn about the improved version of Cockpit on Horizon Experience through documents which can be accessed from here.
Gainsight NXT
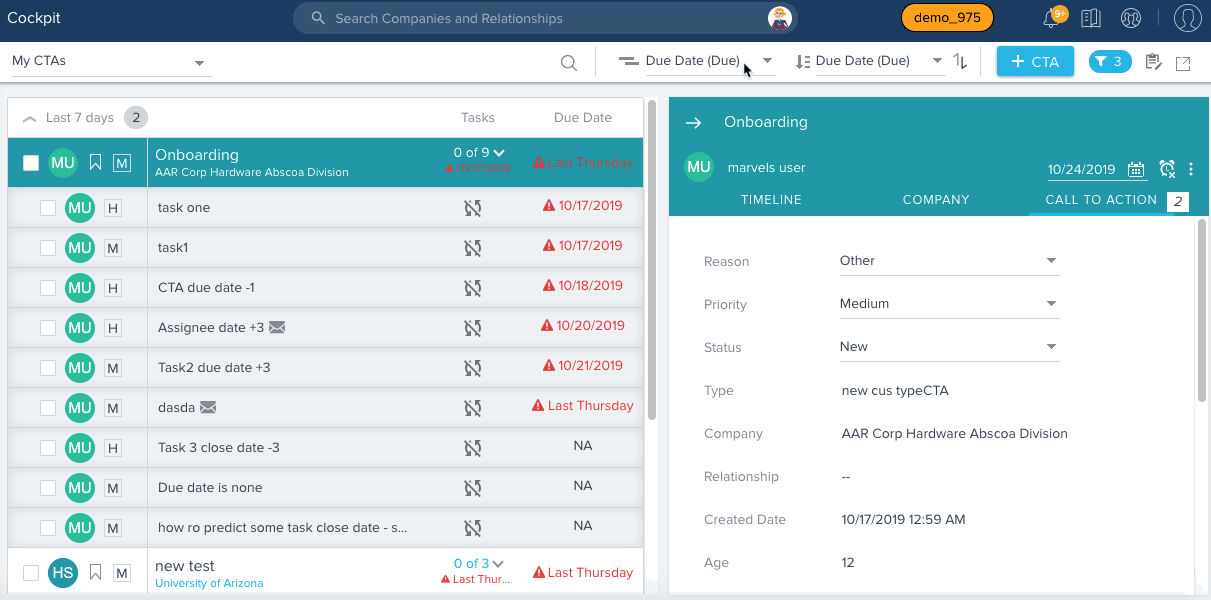
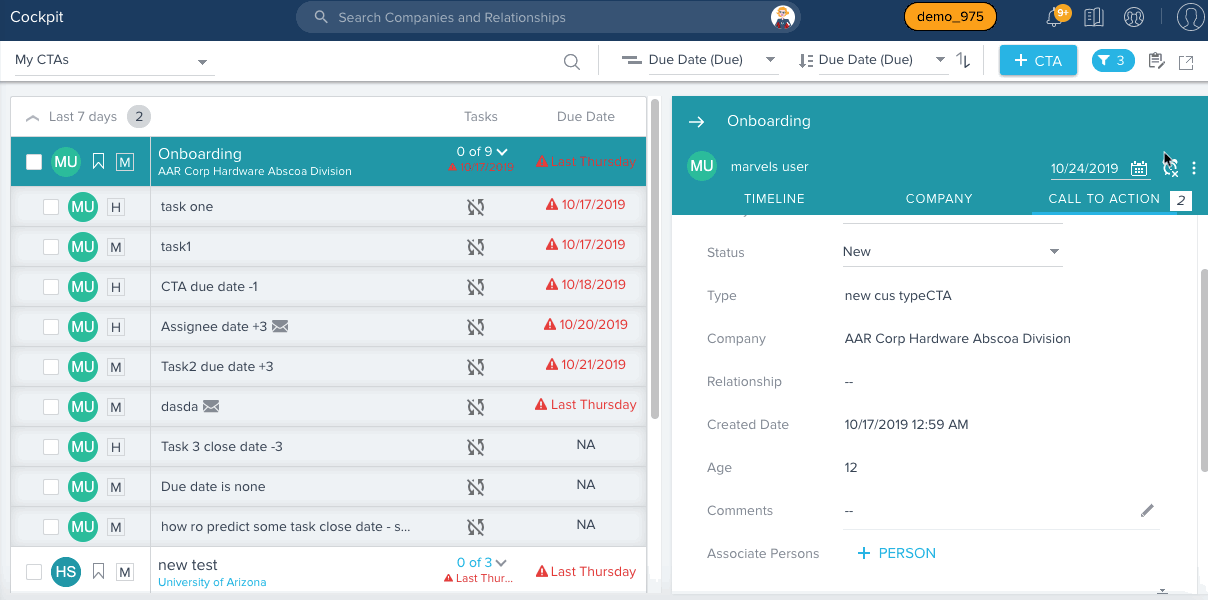
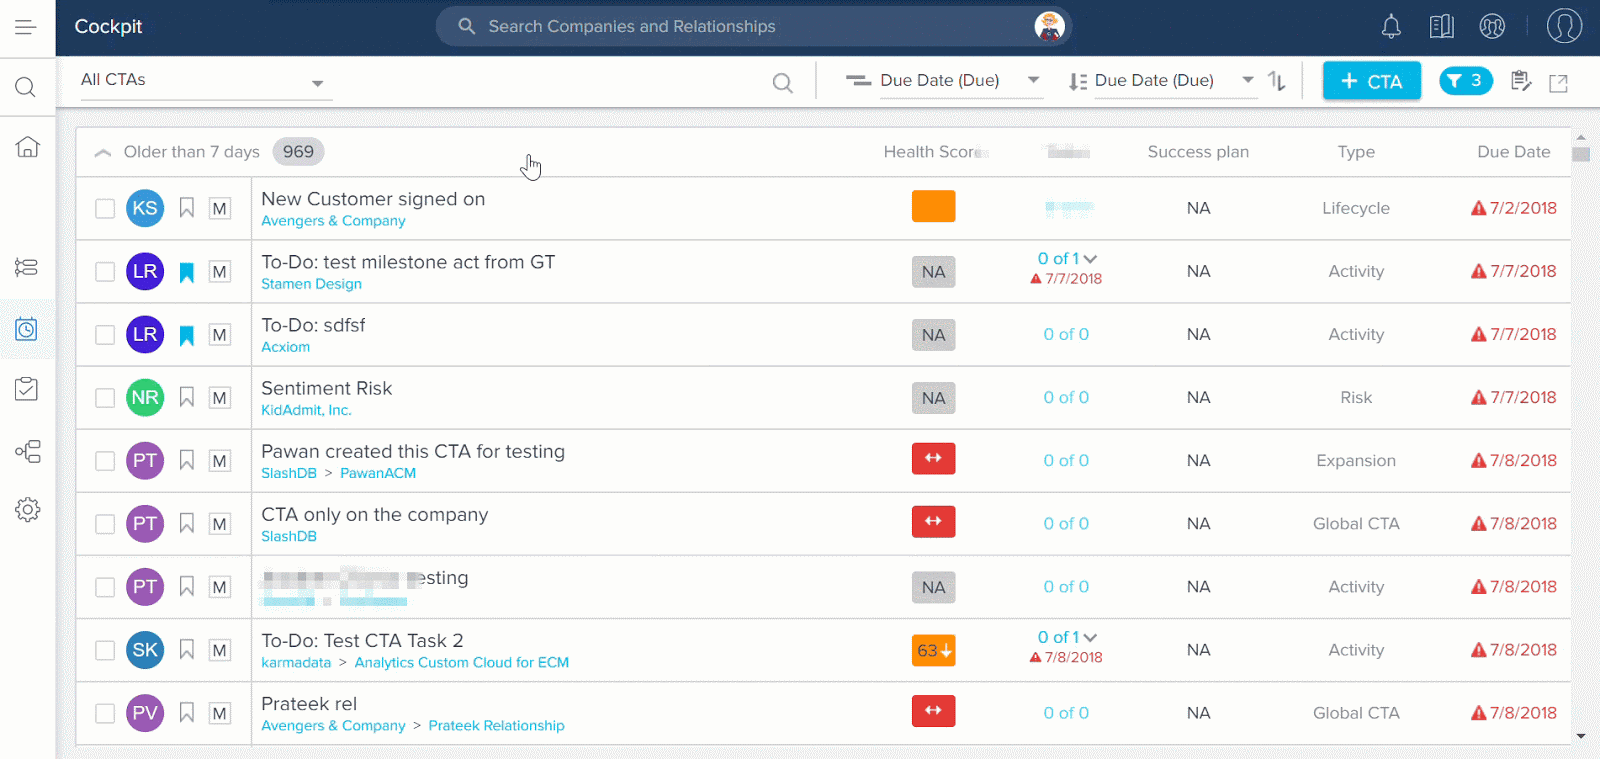
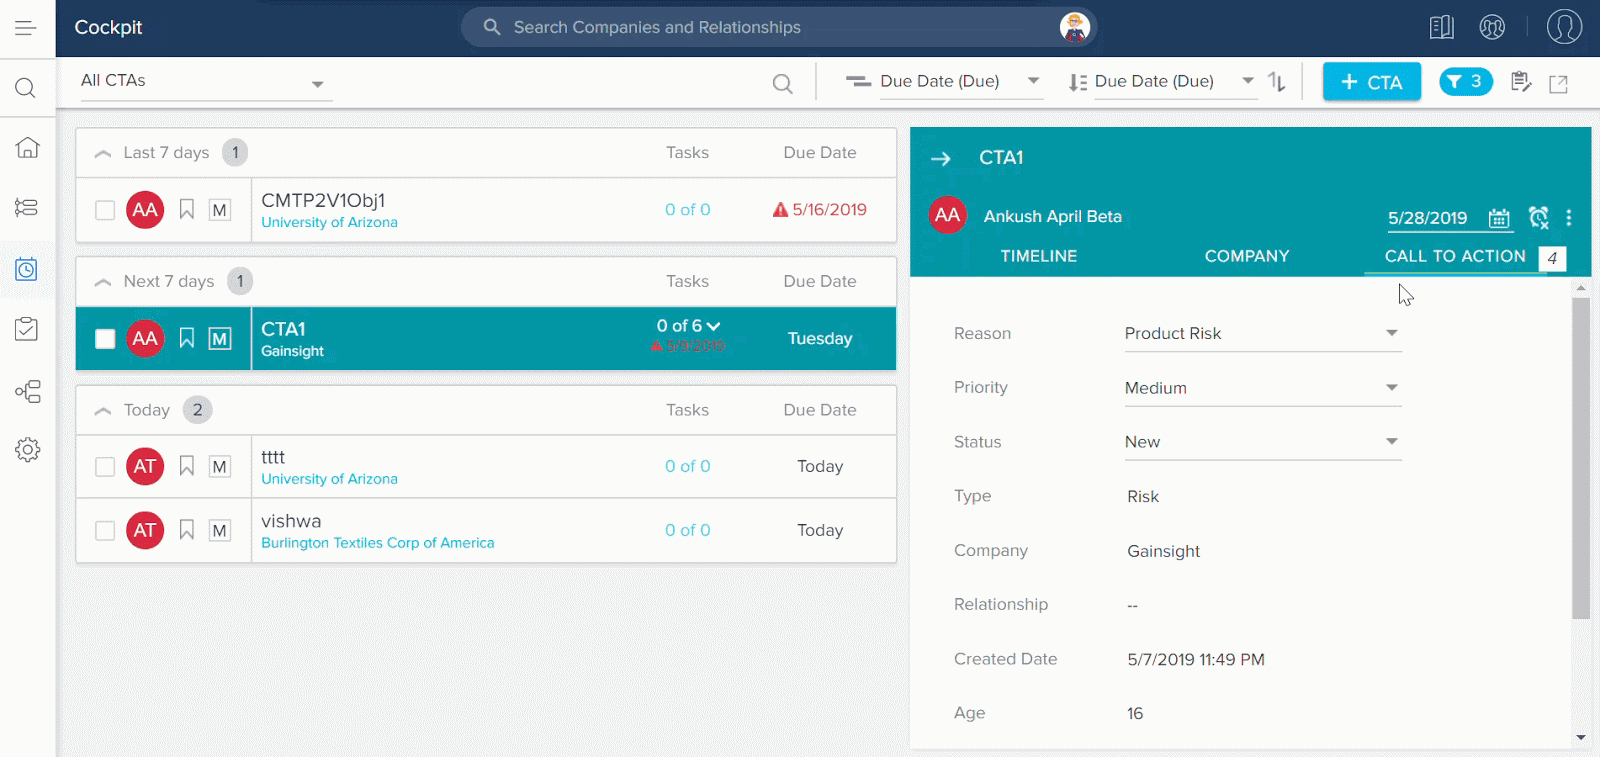
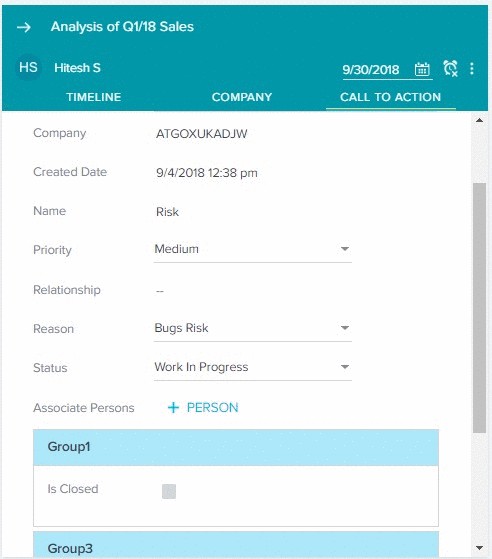
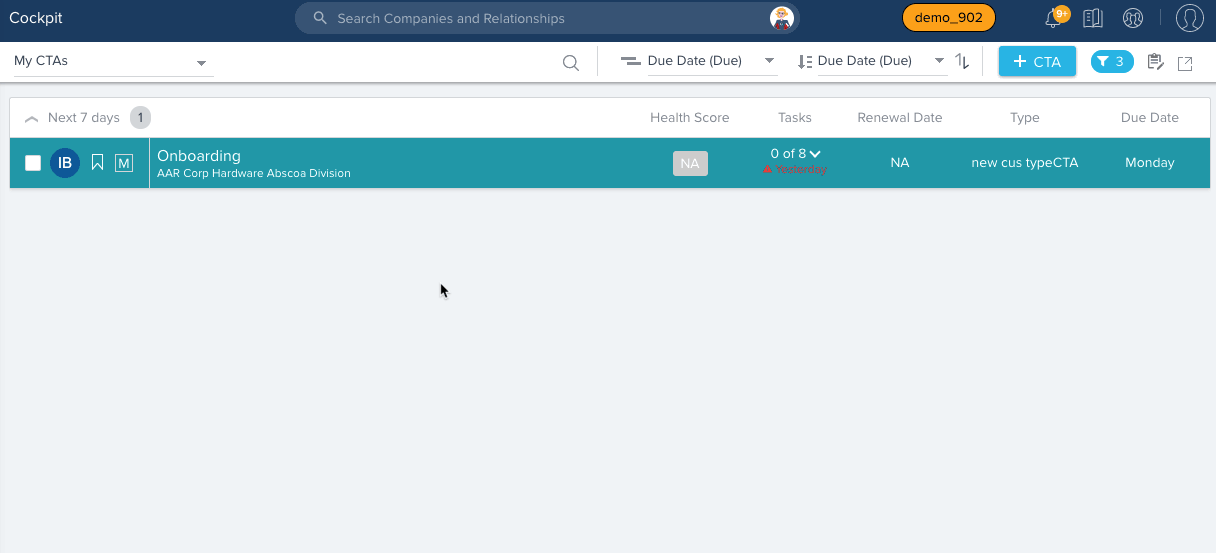
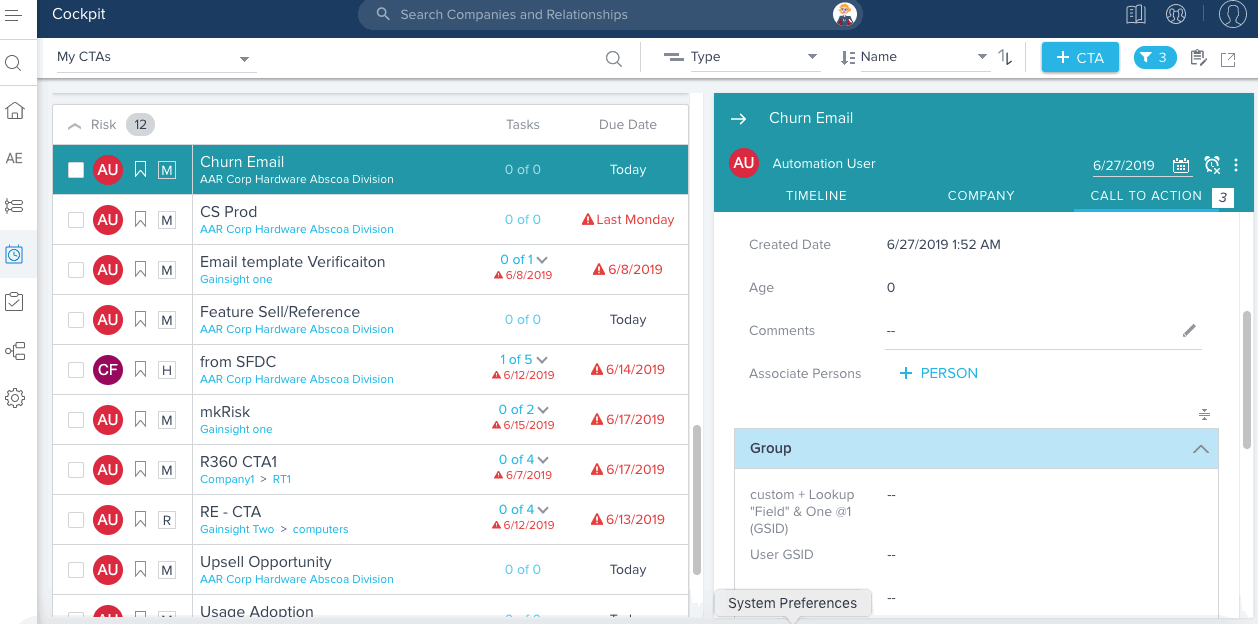
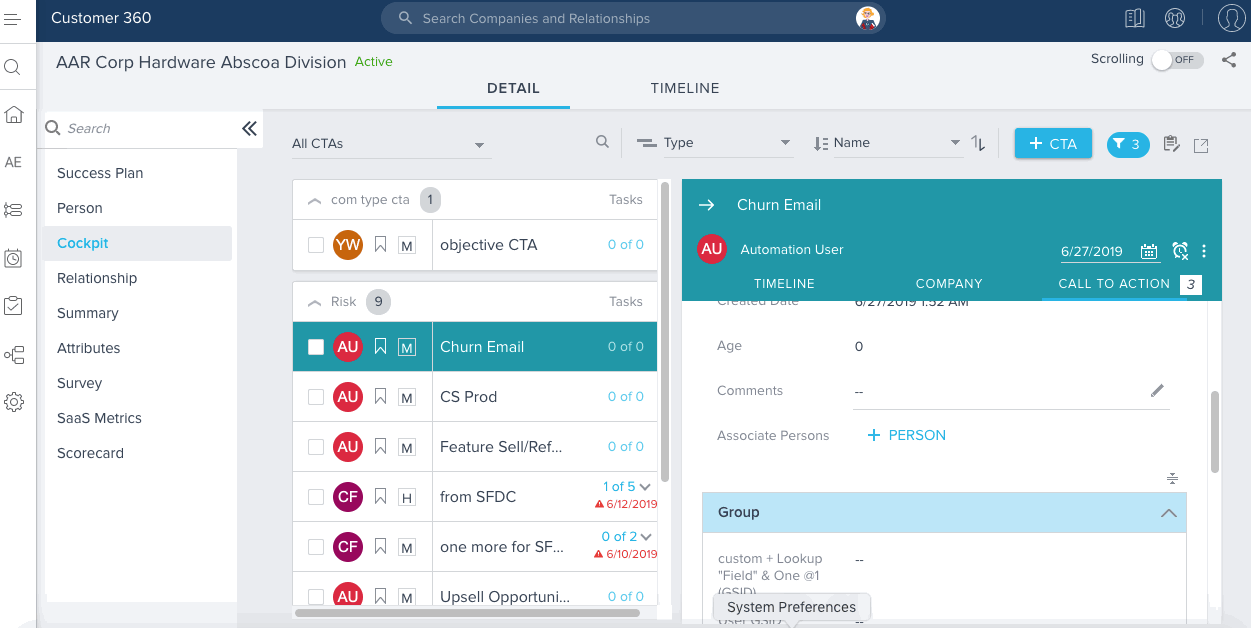
Cockpit List View is displayed in the Cockpit page and C360/R360 > Cockpit section. You can click the name of a CTA to access its details in the CTA detail view. Similarly, if you click the name of a task, the task details are displayed. The CTA and task detail views are where CSMs can update status, add comments, re-assign ownership, adjust the due date, and more. Additionally, various attributes are visible, and potentially editable in these views, depending on how your Admin configured the detail views. For information on how to configure these views, refer to Configure CTA Detail View Layouts.
CTA Detail View
If you click a CTA's name, you will see the expanded view which includes more information about the customer. From here you can:
- Change the CTA Assignee
- Edit the Due Date
- Snooze the CTA. For more information, refer to How to Use the Snooze Option below.
- Add Associate Persons. For more information, refer to Associate Persons below.
- You can Add Task, Apply/Replace Playbook or Delete CTA from the CTA detail view. For detailed information, refer to How to Add a Task and Apply a Playbook from CTA Detail View below.
- Log a Timeline activity for the particular company or relationship, and tied to the specific CTA and create tasks for this activity. For more information, refer to Timeline feature in CTA Detail View below.
- Change CTA Reason
- Change CTA Priority
- Change CTA Status
- You can create or link to an transactional object having lookup to Company object (for Company CTAs) or associated to the Relationship Type (for Relationships CTAs)
- See information in the read-only fields that are added from admin configuration
- Click the arrow on the top left to collapse the Expanded View
Add a Linked Object in CTA Detail View
Linked Objects allow CSMs to create and update records directly from Cockpit. The Gainsight MDA objects which have at least one field with a look up to the company will be available in the Linked Objects section to link to CTAs.
For more information on how to configure linked objects, refer Configure CTA Linked Objects.
To create a record in linked object:
- Navigate to CTA detail view > Linked Object (subtab).
- Click + CREATE NEW.
- Enter the required details in each of the fields displayed.
- Click Save. A new record is created.

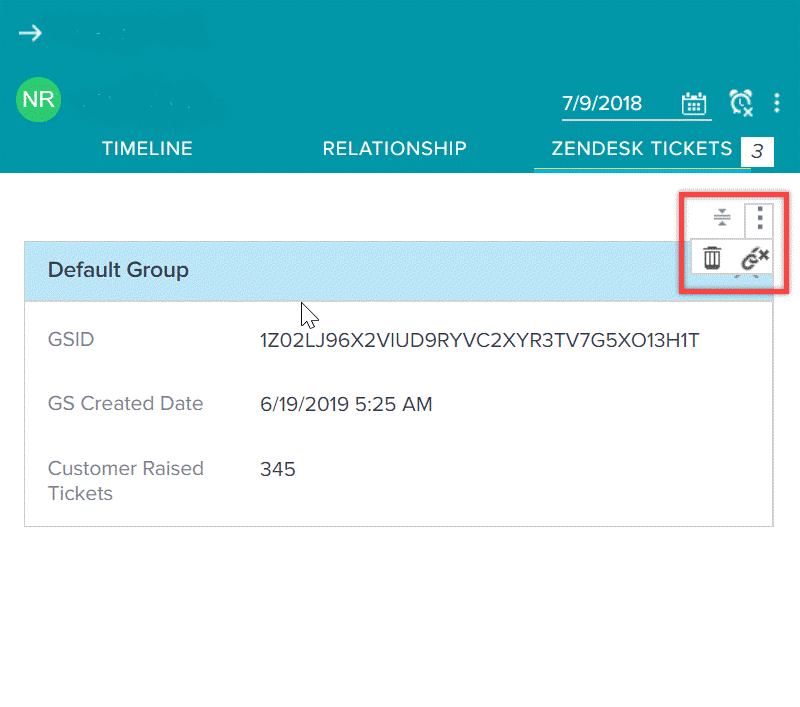
Use Case - Create Records using Linked Objects
Based on the Admin layout configuration, CSM can enter data for the fields and create a new record in Zendesk Tickets object, or edit existing records of Zendesk Tickets object. In this case, CSM can only modify the Customer Raised Tickets field, since this is the only editable field that was added to the Default Group section above. GSID and GS Created Date fields are auto generated fields which cannot be edited. The created record associates with the company to which the CTA belongs.
Linked object example:
To link CTA to an existing record or create new records in the linked object for the current CTA:
- Navigate to the Cockpit list view page.
- Open the detail view of a Risk Type CTA.
- Click the number icon and select Zendesk Tickets.
- Click + CREATE NEW to create a new record in the Zendesk Tickets Object with GSID to link the current CTA (or) click LINK TO AN EXISTING to update an existing record to store the current CTA information. CSMs can search for the values of those fields, which have been added in the Search section by Admin. The resultant values are filtered based on the Filters applied by Admin.
- Enter a value in the Customer Raised Tickets field.
Note: The Customer Raised Tickets field is located on the Zendesk tickets Object and tells the number of tickets raised by specific customers.

- (Optional) To de-link the record, click the ellipsis menu and select De-Link. This option removes the record from CTA detail view. However, the record still exists in the linked object.
- (Optional) To delete a record, click the ellipsis menu and select Delete. This option will remove the record from CTA detail view and the linked object.
Add a Linked Object in CTA Detail View
Gainsight NXT in Salesforce CRMContent in this section supports Gainsight NXT accessing through Salesforce Login. To learn more about Gainsight NXT in Salesforce, click here.
- Click here to expand for more information on how to add a Linked Object in CTA Detail View
-
Linked Objects allow CSMs to see relevant information from Salesforce records, and also update these records directly from Cockpit. The SFDC objects which have at least one field with a look up to the account will be available in the Linked Objects section to link to CTAs.
Prerequisite: You must have Salesforce permission to link and create records from CTA, else you see an error message upon saving. To enable write permissions, navigate to Setup > Profiles > edit your profile > [enable modify all data]. If you find any discrepancies, contact your Salesforce Admin.
For more information on how admins can configure linked objects, refer Configure CTA Linked Objects.
Note: If a CSM tries to create a record on the Salesforce Linked Object, by logging into the Gainsight NXT directly, the UI displays “Login from salesforce to view the data” error message. To create records, CSMs must login to Gainsight NXT via Salesforce.
To create a record using SFDC linked object, logged-in from Salesforce:
- Navigate to CTA detail view > Linked Object (subtab).
- Click + CREATE NEW.
- Select the required details in each of the fields displayed.
- Click Save. A new record is created.
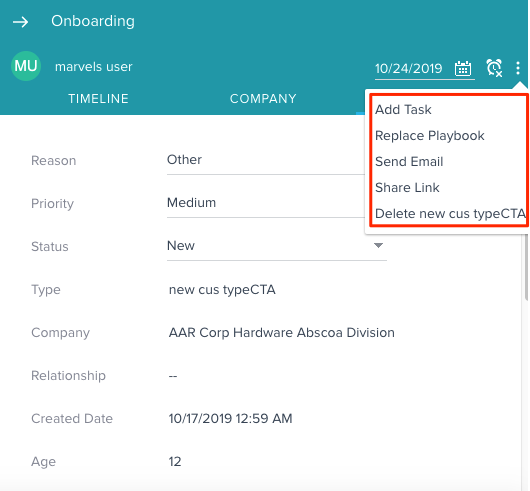
How to Add a Task and Apply a Playbook from CTA Detail View
Click the Options icon in the CTA detail view to:
- Add Task
- Apply Playbook (If not applied already)
- Delete CTA (CTA type is shown in the UI).
- Replace Playbook. If a Playbook was already applied, you will see an option to Replace Playbook, to remove the old and apply a new one.
.png?revision=1)
How to Use the Snooze Option
The main reason you would want to snooze a CTA instead of closing it is to make sure Rules Engine is not firing similar CTAs. For example, say you have configured a rule that triggers CTAs when there are less than 5 logins per week. Then you find out that the customer is on vacation for a month. In this scenario, you could snooze the CTA instead of closing it, and in effect avoid getting another CTA in the next 3 weeks when you know the usage is going to be low.
To snooze a CTA, click the clock icon in the CTA detail view.
- Select a date for the CTA snooze to end, and select a reason for snoozing. Click SNOOZE. The Snooze is in effect through the selected date. The Snooze date is based on the individual user's timezone setting.
Note: CTAs get un-snoozed automatically post the end of snooze period, and reappears in the Cockpit List View.
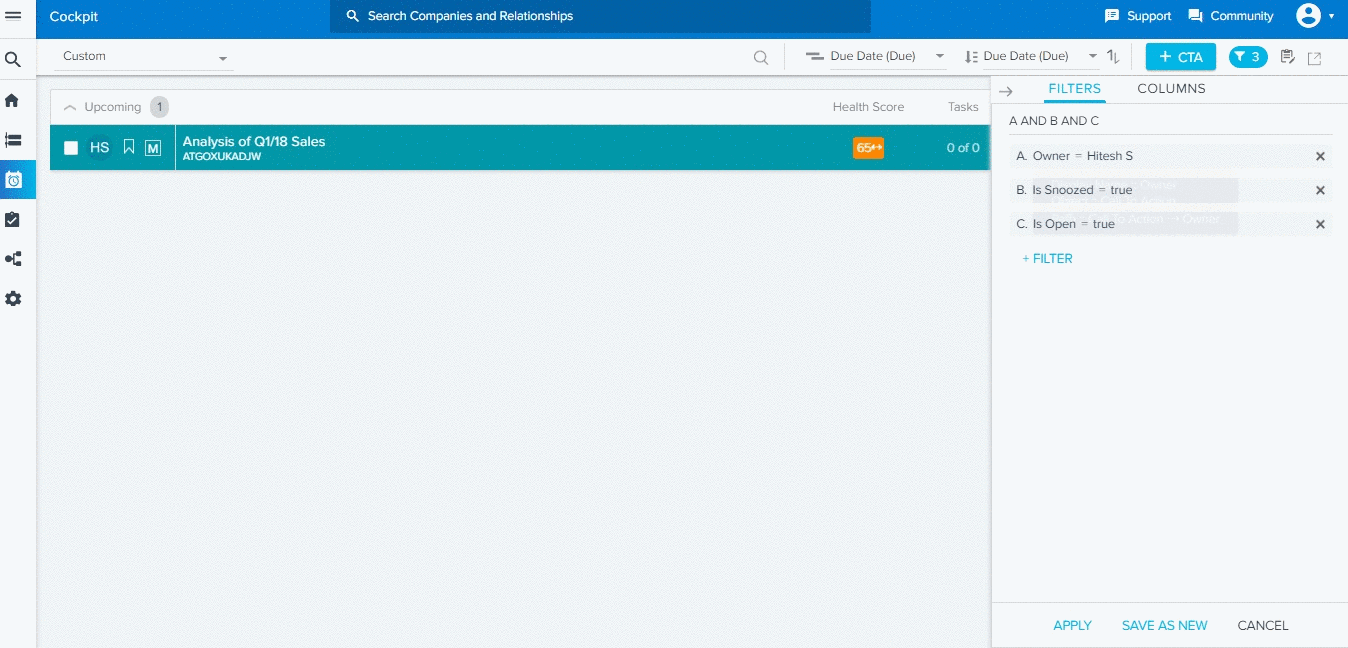
- To view snoozed CTAs in the Cockpit List View, you must select the filter icon in the upper right corner, and select "Is Snoozed " filter as true. Snoozed CTAs also display in C360/R360 > Cockpit.
- To update either Snooze Date or Snooze Reason, click the clock icon again and change the details as required. Click Update.
- To un-snooze a CTA manually, click the clock icon and click Un-Snooze then the CTA will reappear in the Cockpit List View. Users can now track the previous snooze date in the same dialog.
Note: The snooze option and snooze reasons are configured by your Admin. For more information on how to configure the snooze option, refer to Configure Cockpit: CTA Types, Reasons, Priority, etc and Federated Customer Management.
Associate Persons
This allows you to associate persons that are available within the Company or Relationship of a CTA or task.
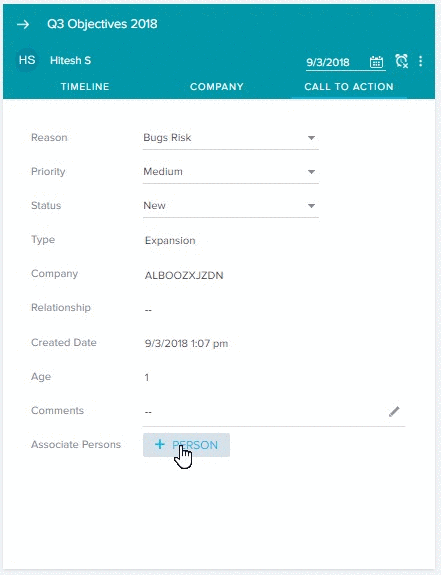
To add persons:
- Click + PERSON.
- Perform search as required. You can now view the results as configured.
For more information about how to add new persons, refer to Configure Cockpit List View, General Settings, and Reporting Categories.
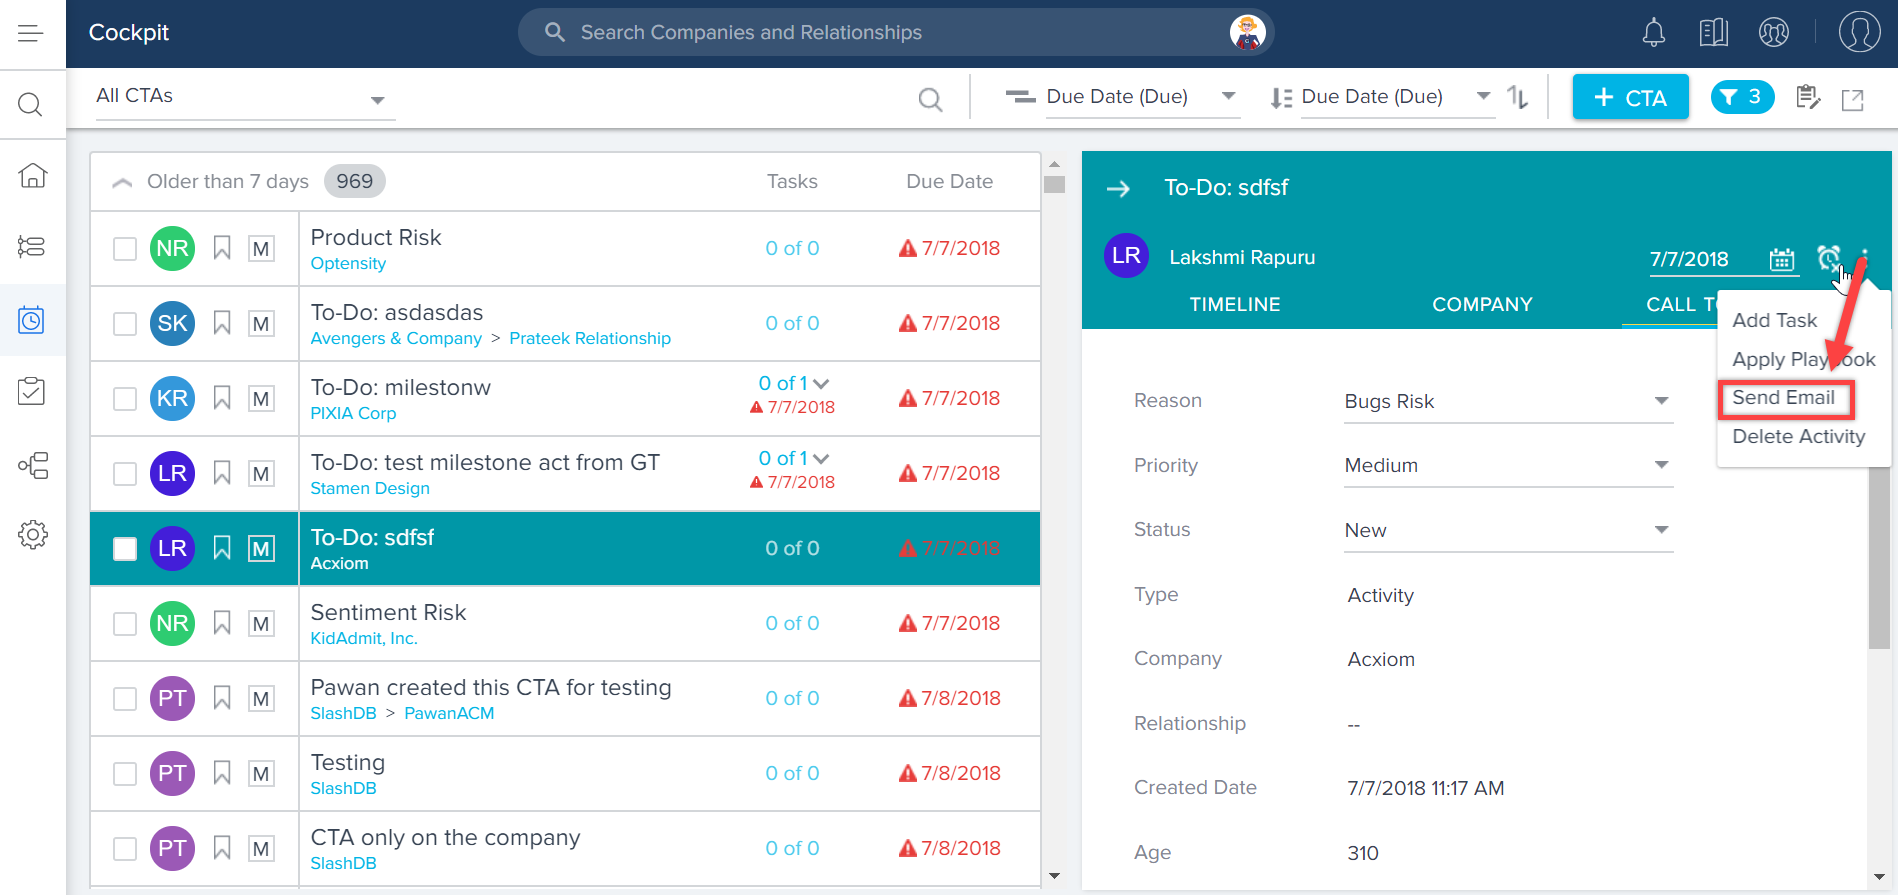
How to use Send Email option
This feature allows CSMs to send emails using any email template from Cockpit (within a CTA), without applying a playbook. To allows CSMs to send Ad-Hoc emails from Cockpit, admins must first configure an email template, and then CSMs can select the email template to associate with the email task.
- For information on how to configure email task, refer Configure Emails to Send From Cockpit.
- For information on how CSMs can send emails from Cockpit, refer to Send Emails from Cockpit (aka, Email Assist and Send Email option).
How to use Share Link option
Using Share Link option, CSMs can now share a CTA as a link with any Gainsight User, based on their business requirements.
Use Case: For instance, as a CSM you may want to share a CTA with your CSM Manager and want to review the CTA - Due Date. This option allows you to share a CTA as a link with your CSM Manager.
To use this option:
- Click the three dots on the upper right corner of the CTA Detail View.
- Click Share Link.
- Click COPY. The link is copied to the clipboard and can be shared with any Gainsight User.
The following image shows how a shared CTA appears, when a Gainsight User clicks on the link.
How to Use Expand/Collapse Sections/Groups
In the CTA Detail View, CSMs can see multiple Groups that contain fields for viewing and/or updating, as configured by the admins. CSMs can now expand and collapse all the fields in a single group or all Groups, based on their business requirements.
Use Case: For instance, assume that you have multiple Groups like: Support, Marketing, Sales and Finance in a CTA Detail View, and you may want only the Support Group to remain expanded. Using this enhancement, you can now achieve this by collapsing all the other groups in the detail view, to avoid unnecessary scrolling.
To Expand/Collapse Sections/Groups:
-
Navigate to Cockpit list view page.
-
Open the CTA Detail View of any CTA that has multiple Groups in it.
-
Click the
(Expand) and
(Collapse) buttons to expand and collapse a single group. If required, you can also expand and collapse all the groups using
(Expand all groups) and
(Collapse all groups buttons) respectively.
Note: This functionality is also applicable to 360 > Cockpit/Success Plans.
Timeline feature in CTA Detail View
You can access Timeline Activity from the CTA detail view to log an activity (for the particular company or relationship, and tied to the specific CTA). The Timeline functionality in the CTA detail view is the same as in C360/R360 > Timeline. You can create tasks for an activity in the Timeline tab and these tasks are added to the same CTA. You can create a task for an activity from the Activity Timeline page and you can see these tasks and their respective CTAs in the Cockpit list view page. For more information on this, refer to Use Timeline to log Activities.
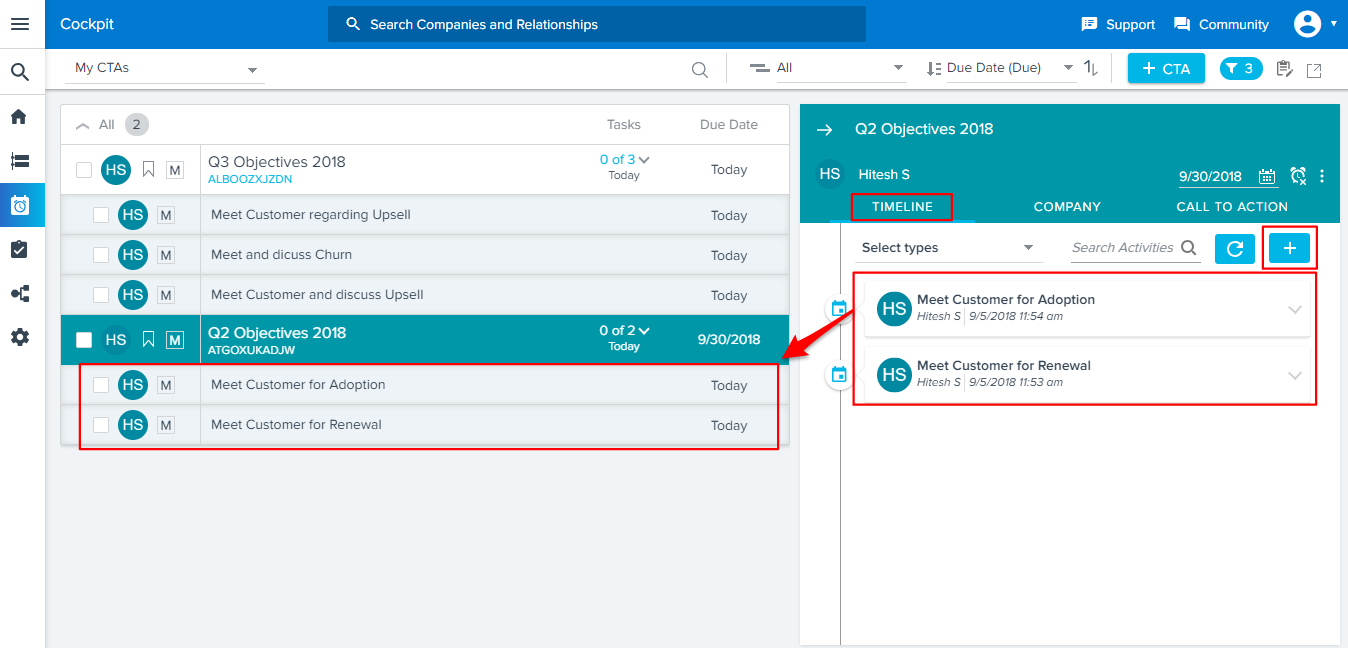
To log an activity from the CTA detail view:
- Navigate to CTA detail view > Timeline tab. All the activities tied to the CTA appear here.
- Click + to log an Update, Call, Meeting, and Email or click any Activity in the Activity dialog to update.
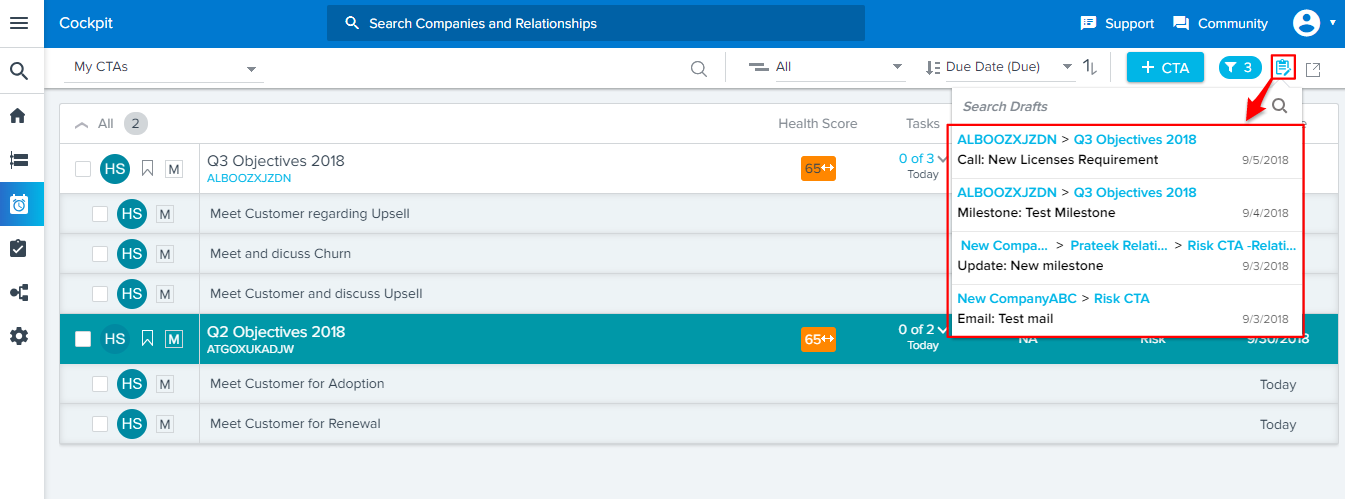
- Click Activity Drafts icon in the top right of the Cockpit view. This option shows all the activity drafts which were started but not logged in CTA detail view > Timeline. Users can open an activity draft, edit, and log into CTA detail view > Timeline from here.
Notes: Tasks created from Cockpit > CTA detail view > Timeline or C360/R360 > Timeline can be edited or deleted from Cockpit only, and they can be read only from C360/R360 > Timeline.
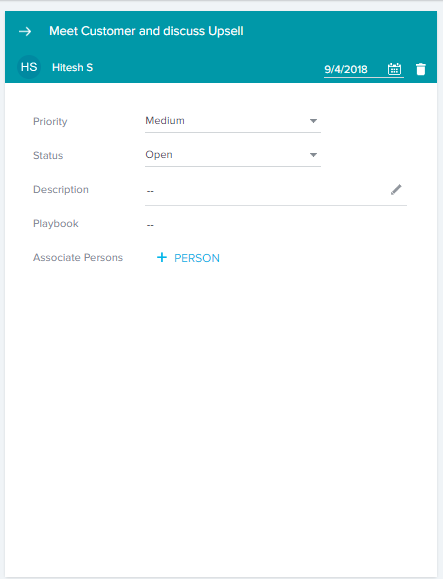
Task Detail View
If you click on a task, you will be able to:
- Change Task Due Date
- Change Task Priority
- Change Task Status
- Add Associate Persons
If the task was part of a Playbook, you can see the Playbook Name and the Playbook Completion %.