
Configure General Settings and Reporting Categories
This article helps admins configure General settings and Reporting Categories for Cockpit.
Overview
The General tab in Cockpit Configuration allows you to manage how Calls to Action (CTAs) function across Company and Relationship records.
Use this section to configure CTA behavior, Timeline visibility, Email Assist tracking, Success Plan visibility in Cockpit, and Reporting Categories for CTA Types, Reasons, and Priorities.
To access these settings:
- Navigate to Administration > Cockpit. The Cockpit Configuration page appears.
- Select the General tab.

General Settings
The General tab allows you to configure:
CTA Settings
The following settings control how Calls to Action (CTAs) behave and appear in Cockpit:
| Setting | Description |
|---|---|
 |
CTA Column Layout: Defines how fields appear on the CTA detail view. Select 2 Column Layout or 4 Column Layout from the dropdown list. |
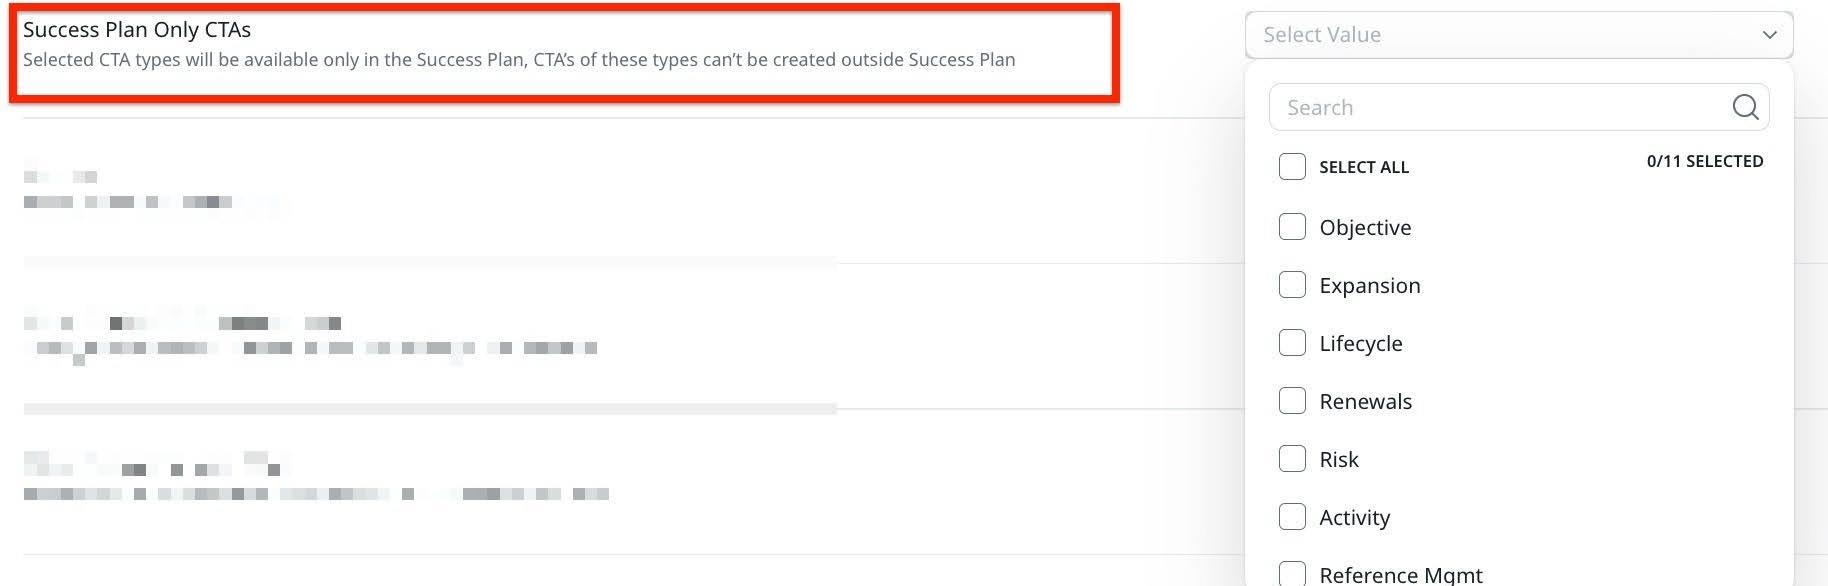 |
Success Plan Only CTAs: Restricts selected CTA Types to Success Plans. Selected CTA Types are available only within Success Plans. |
 |
Snooze: When turned on, users can snooze CTAs. When turned off, the Snooze option is not available to users. |
 |
Show CTAs in C360/R360 cockpit: Displays CTAs associated with Success Plans in C360 or R360 Cockpit. When turned on, active CTAs associated with a Success Plan appear in C360 or R360 Cockpit. When turned off, CTAs associated with Success Plans do not appear in C360 or R360 Cockpit. |
 |
Allow Persons to own CTAs: Controls whether external users (Persons) can own CTAs in a Shared Success Plan. When turned on, external users (Persons) can be assigned as CTA owners. When turned off, only internal users can own CTAs. Note: This applies only to CTAs inside Success Plans. |
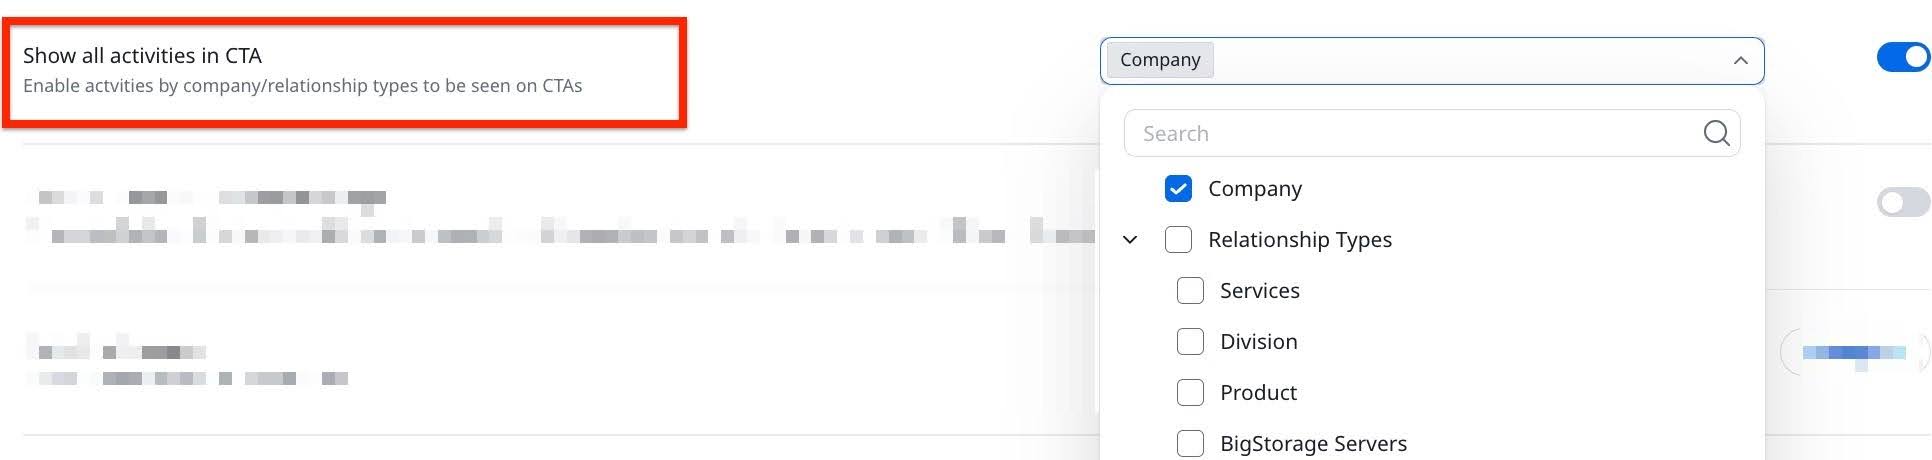 |
Show all activities in CTA: Enables visibility of Timeline activities from the selected Company or Relationship entity types within a CTA. When turned on, select one or more entity types from the dropdown list. Activities from those entities appear in the CTA detail view. When turned off, only activities of that particular entity are displayed. |
 |
Show All Fields on CTA Creation Page: Controls whether all CTA fields are displayed during CTA creation. When turned on, all fields appear upfront on the CTA creation page. When turned off, additional fields remain under Add more details. |
 |
Associate Persons: Enables the Associate Persons field in CTAs. Click Configure to set up the Associate Persons field. For more information on how to configure this setting, refer to the Configure Associate Persons section of this article. |
 |
Defaults for Timeline: Sets the default CTA Type and attributes for CTAs created through Timeline. Click Setup the defaults to configure the default CTA settings. For more information on how to configure this setting, refer to the Defaults for Timeline section in this article. |
Associate Persons Configuration
Use Associate Persons configuration to control how Person records appear when users associate Persons to a CTA.
To access Associate Persons Configuration:
- Navigate to Administration > Cockpit. The Cockpit Configuration page appears.
- Select the General tab.
- In the Associate Persons section, click Configure. The Associate Persons Configuration slide-out panel appears.

Use the Associate Persons Configuration slide-out panel to enable Associate Persons for specific Company or Relationship Types.
- In the Company & Relationship Type list, select one or more entity types. Each entity type has its own configuration. You can select multiple entity types to configure them at once.
- From the Search Field Configuration dropdown list, select the required configuration. The available configurations depend on the selected entity type.
- Turn on the Enable toggle. Users can now associate Persons in CTAs for the selected entity types.
- Click Save.

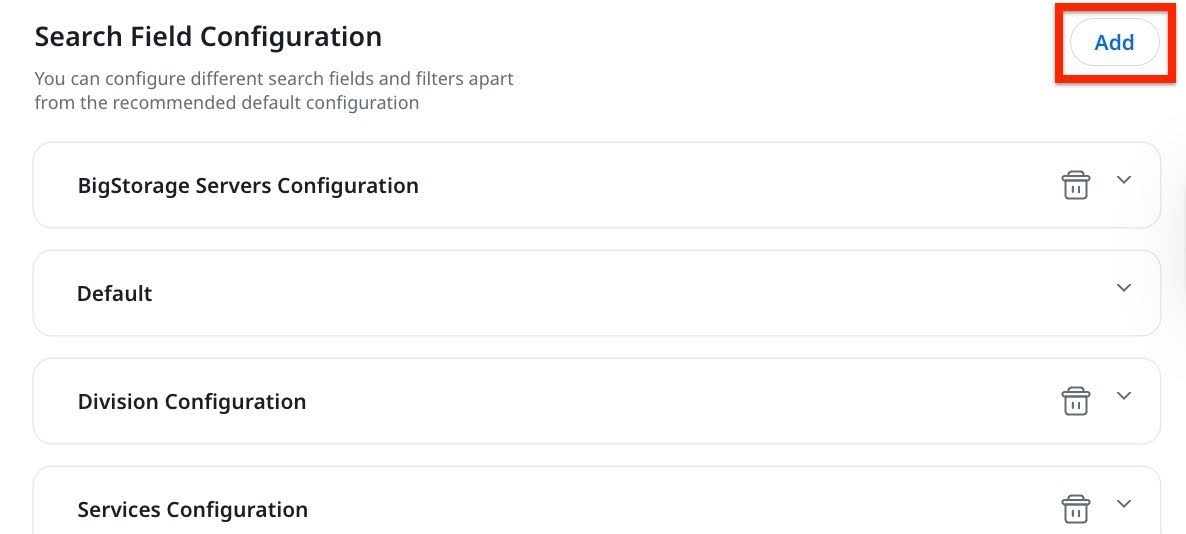
Search Field Configuration
Use Search Field Configuration to define how Person records are searched and filtered when associating Persons to a CTA.
You can create multiple configurations and assign them to different Company or Relationship Types.
To create and configure Search Field Configuration:
- In the Search Field Configuration section, click Add.
- Enter a name for the configuration.
- Select either Company Person or Relationship Person.
- Under Search Fields, click Add Column and select the required Person fields.

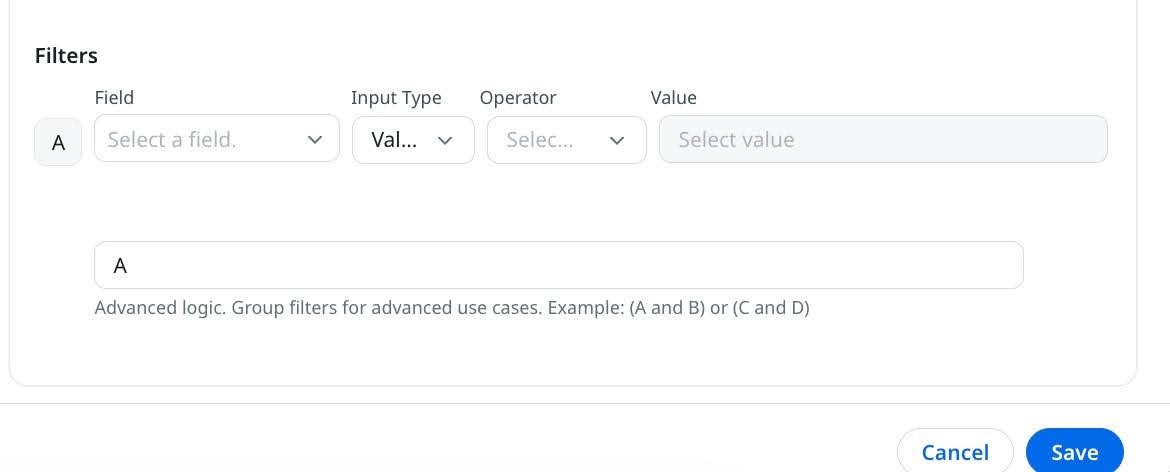
- (Optional) Under Filters, click Add Filter and configure the required:
- Field
- Input Type
- Operator
- Value
- Click Save.
The configuration is added to the list and becomes available in the Search Field Configuration dropdown for the applicable entity type.
Defaults for Timeline
Use this setting to define default values for CTAs created from Timeline.
When configured, the selected CTA Type and attributes are automatically applied when users create CTAs from Timeline.
To configure default values for CTAs created through Timeline:
- Navigate to Administration > Cockpit. The Cockpit Configuration page appears.
- Select the General tab.
- In the Defaults for Timeline section, click Setup the defaults. The Setup Timeline Defaults Value slide-out panel appears.
- From the Default CTA Type for timeline dropdown list, select the required CTA Type.
- From the Default Reason dropdown list, select the default reason.
- From the Default Status dropdown list, select the default status.
- From the Default Priority dropdown list, select the default priority.
- Click Save.
The selected values are applied automatically when CTAs are created from Timeline.
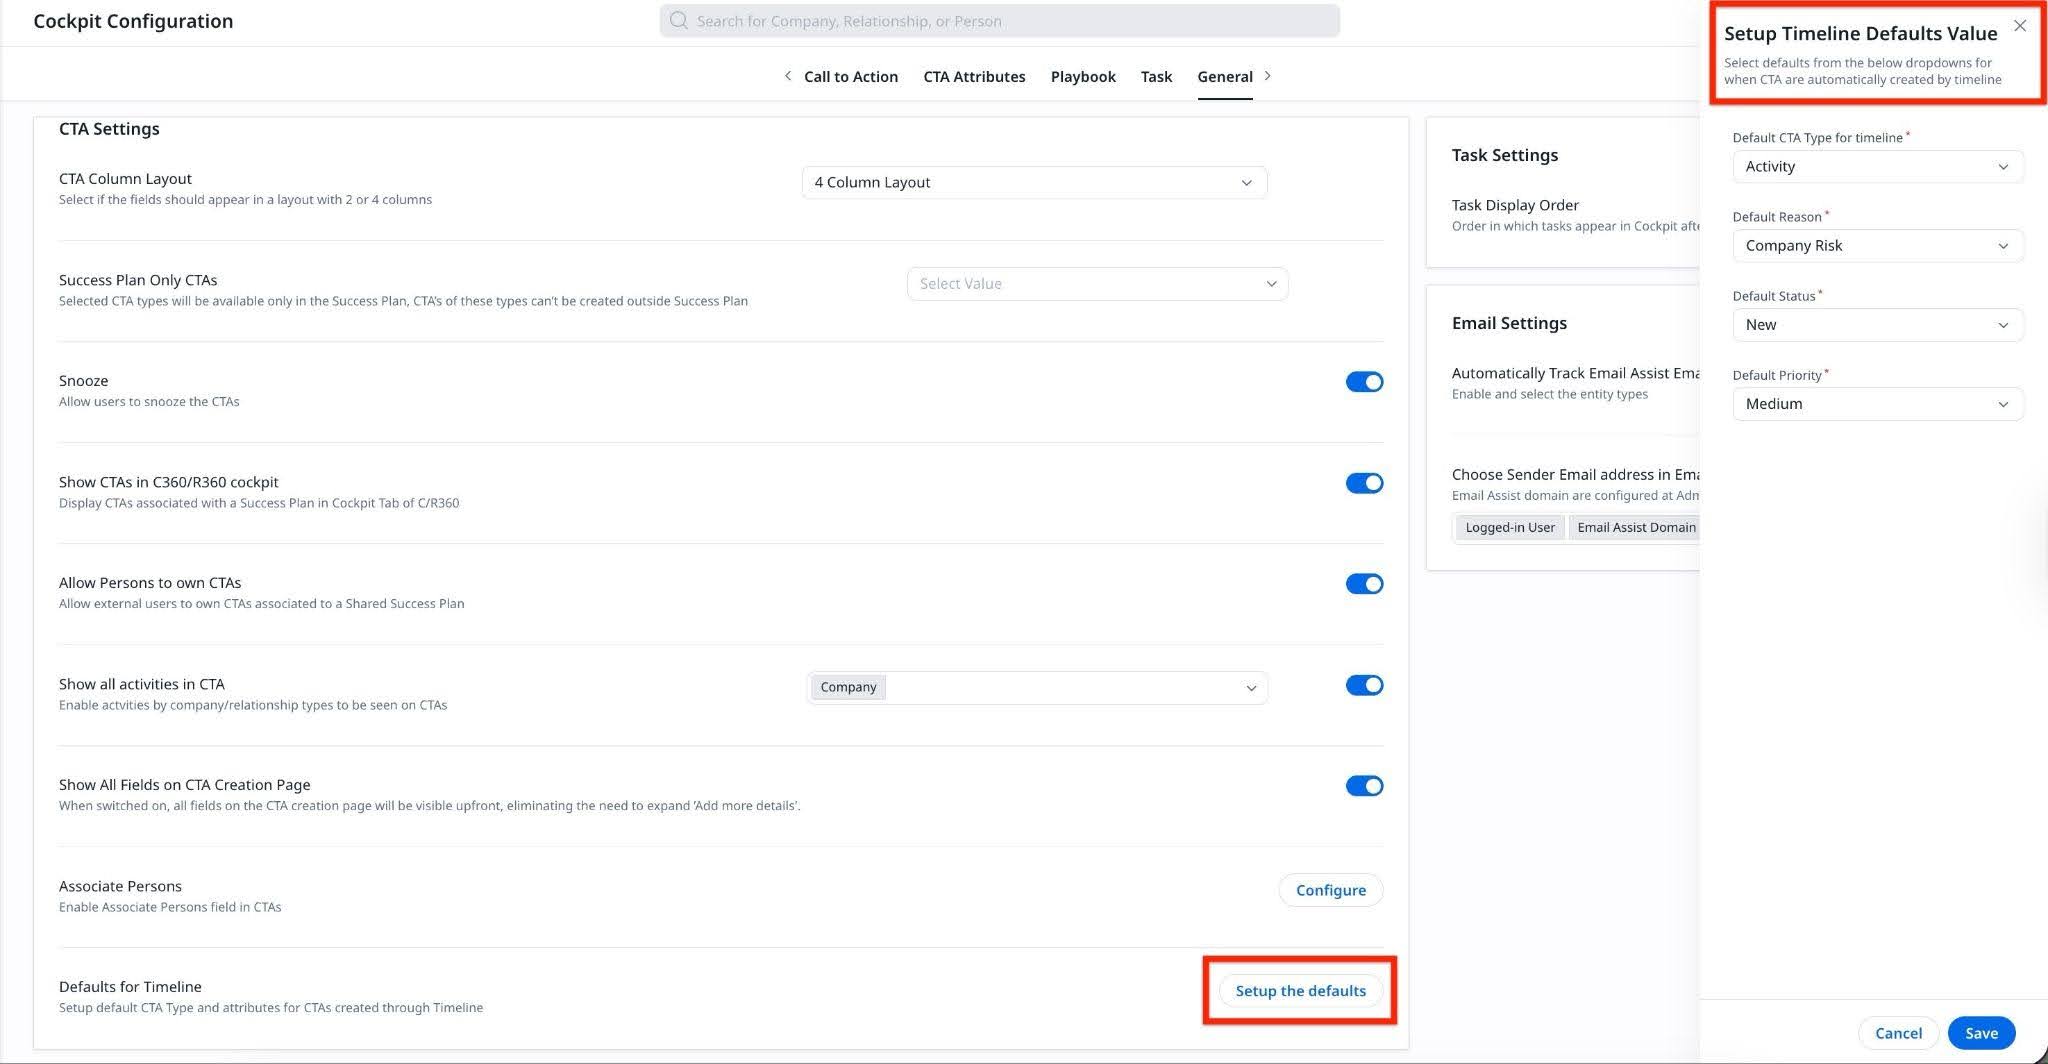
These defaults apply only to CTAs created through Timeline. They do not affect CTAs created manually from Cockpit.
If Timeline defaults are not configured at the Success Plan type level, the Cockpit Timeline defaults are applied.
Task Settings
Use Task Settings to control how tasks are displayed in Cockpit after a Playbook is applied.
| Setting | Description |
|---|---|
 |
Task Display Order: Defines the order in which tasks appear in Cockpit after a Playbook is applied. Select the required option (for example, Due Date) from the dropdown list. |
Email Settings
Use Email Settings to control how Email Assist behaves in Cockpit.
| Setting | Description |
|---|---|
 |
Automatically Track Email Assist Emails in Timeline: When turned on, emails sent through Email Assist are logged as activities in Timeline and appear in the CTA detail view. When turned off, emails sent through Email Assist are not logged in the Timeline. |
 |
Choose Sender Email address in Email Assist: Defines the email addresses available when sending emails from Email Assist. Users can send emails using the Logged-in User or configured Email Assist domains. |
Reporting Categories
Use Reporting Categories to organize and classify CTA Types, Reasons, and Priorities for reporting purposes. Each CTA element has default reporting categories configured in the Global tab. Admins can add new categories, edit existing ones, or delete defaults.
If a reporting category is mapped to a CTA element that is in active use in Cockpit, it cannot be deleted.
To configure Reporting Categories for CTA Types:
- Navigate to Administration > Cockpit. The Cockpit Configuration page appears.
- Select the Call to Action tab.
- In the Reporting Category column, click the dropdown arrow next to the Reporting Category name. A dropdown list appears.
- In the dropdown list:
- Click the edit icon to update the Reporting Category name.
- Click the delete icon to remove the Reporting Category.

- To add a new category, click Create CTA Type. For more information on adding a Reporting Category, refer to the Add a Reporting Category section.
Add a Reporting Category
You can create a new Reporting Category directly when creating or editing a CTA Type.
To create or add a Reporting Category:
- Navigate to Administration > Cockpit. The Cockpit Configuration page appears.
- Select the Call to Action tab.
- Click Create CTA Type, or click the three-dots horizontal menu at the end of an existing CTA Type row and select Edit. The Create CTA Type dialog box or the Edit CTA Type dialog box appears.
- In the Reporting Category field, type the name of the new category.

- Click Add. The new category is created and selected in the Reporting Category field.