Basic Operations in Gainsight Data Management
Gainsight NXT
This article explains to admins how to perform basic operations in the Data Management page.
Overview
The Gainsight Data Platform offers a mechanism through which Data that is collected and stored in various data stores in any organization can be managed in the Matrix Data model and transform this data to drive business metrics through tools offered by the Platform. Using Data Management, Admins can create and manage Gainsight Objects directly from the Data Management page.
IMPORTANT: Before proceeding ahead, Gainsight recommends you to go through the Gainsight Objects article for information on types of Gainsight Objects provided as part of its Data Management.
Create a Gainsight Object
Admins can create a custom object to store information in Gainsight as per their requirements.
To create an object:
- In the global navigation pane, type Data Management Horizon in the search field.
- Click Data Management (Beta) in the search results.
- Click Create Object. The Create Object page is displayed.
- In the Object Informations step, enter the information in the fields explained in the following table:
| Fields | Description |
| Object Display Name | A unique name for the object. |
| Object Name | It is auto-generated with a suffix of __gc (), based on the name entered in the above field. |
| Description | A brief description of the object being created. |
| Object Type |
|
- Click Next. The Fields section is displayed.
Add Fields in Object
The Fields section displays the list of Standard and System fields that are provided Out Of The Box (OOB).
| Field Name | Data Type | Object Type |
| Currency ISO Code Note: This field is only enabled when multi-currency support is enabled in you org. |
String | Standard |
| GS Created By | GS ID | System |
| GS Created Date | Date Time | System |
| GSID | GS ID | System |
| GS Modified By | GS ID | System |
| GS Modified Date | Date Time | System |
Notes:
- The above Field Names cannot be Edited or Deleted.
- Click Expand All to view detailed information of all Fields created.
- Click Collapse All to view only the Field Names along with Data Types and Field Types.
In the Fields section, you can add the fields by the following two methods:
- Upload CSV file to create fields in object
- Drag fields to add them in object
Upload CSV file to Create Fields in Object
Admins can upload a CSV file containing the field details from the local system, while creating a new object.
Note: The Upload CSV file option is not available when you edit an object.
To add fields through CSV file:
- Drag and drop the CSV file from the local system (or) click Browse to the location and select the CSV file. The Fields will be automatically uploaded in the canvas as shown below.
Note: The CSV file size should be less than or equal to 1 MB.
- Change the field display name and field name as required. You can select a different data type, if the automatic matching is incorrect.
- (Optional) You can assign default values to the Target Object fields.
- Click Save.
Note: Click Delete icon beside the fields to remove the field.
Drag and Drop Fields to Add Them in Object
Admins can drag and drop fields to add them in the object.
To add fields through drag and drop method:
- Drag and drop the required data type from the Object pane to the Fields pane.
- Enter the details in the following Fields section:
- Field Display Name: The display name of the Field that you want to create.
- Field Name: An auto-generated field name based on the Field Display Name with a system defined suffix of _gc.
- Default Value: The default value that you would like to insert in the object field. This is a dynamic field whose data type changes automatically, based on the Data type selected above. This field is not displayed when you select the GS ID Data type.
- Decimal Places: This field is displayed only when you select either Currency, Number, or Percentage Data type. Assign the number of decimal places on the values in the field. By default, the assigned decimal place is 0. Range is 0 to 9.
- Description: The description of the field being created.
- Dropdown: (This field is displayed only when you select either Dropdown list or Multi select dropdown list as the Data type.) You must select a Category for the Dropdown list. For more information on Dropdown lists, refer to the Dropdown List article.
- Max Length: (This field is visible only when you select the Rich Text Area Data type) You should specify the maximum number of words supported by this field.
- (Optional) Click Show Advanced Options.
- Mark it as a mandatory field: By setting this constraint, the field is not allowed to ingest a null value record while importing data.
- Hide in Reporting: If you select this checkbox, the field will be hidden in the Reporting functionality.
- Mapping: (This field is displayed only when you select either GSID, Date, DateTime, Email, or String data type). You can map the current field only to standard fields from Gainsight Objects, enabling certain values with hyperlinking and enhancing search capabilities. However, hyperlinks are generated specifically for Company and Relationship names within applicable 360 objects. For example, if you map a field to the Gainsight Company Name and the data in that field is hyperlinked, redirecting to C360 based on the field mapped to Gainsight Company ID. When end users click the hyperlink. In that case, it navigates to the C360 page for that company. It’s important to note that while Person also has a 360, it does not include hyperlinking in production.
The following are the standard fields that you can map with a custom field: Company ID, Company Name, Relationship ID, Relationship Name, Relationship Type ID, Relationship Type Name, User Email, User ID, User Name, Person Email, Person Name, Person ID, and Company Person ID. -
Lookup: (This field is displayed only when you select either Email, String or GS ID data type.) Import GSID of a record from one object to another, while ingesting data through any channel. For more information on the lookups, refer to the Data Import Lookup article.
Note:- Lookup between Low Volume Custom Object and High Volume object is not supported. However, you can create Lookup to standard objects
- You cannot apply lookup from any standard or system field.
- You can apply lookup from any custom field of data type String, GSID, and email.
- Self Lookup is only allowed for GSID dataType fields in Standard Object.
-
On Delete: This allows you to reset the records of this field, when the corresponding lookup record is deleted. This field has three options:
- Delete: When the lookup record is deleted, the corresponding record in the current object is deleted.
- Set Null: When the lookup record is deleted, the corresponding value in the current field is Set to Null.
- None: When the lookup record is deleted, no action will be taken in the current object.
- Create Formula: With Create Formula Fields, you can instantly create a formula field on CTA, Task and Success Plan objects, based on your business requirements.
- To use a formula function in a custom field, you must ensure that the Data type of the custom field is the same as the return type of the formula function. For example, the Date Diff function returns output in Number format.
- When creating a formula field, ensure clarity in the use of operators to avoid ambiguity:
- Use MOD for modulus operations.
- Use % to represent percentages.
-
- To use this function, your custom field must have data type as either Number, Percentage, or Currency. Substring function returns output in String format. You cannot use it if your custom field’s data type is currency or Date. For more information on Create Formula, refer to the Advanced Operations in Data Management article in the Additional Resources section at the end of this article.
Note: Click the Delete icon beside the fields to remove the field.
- Click Save.
Settings
In the Settings tab, admins can configure the following:
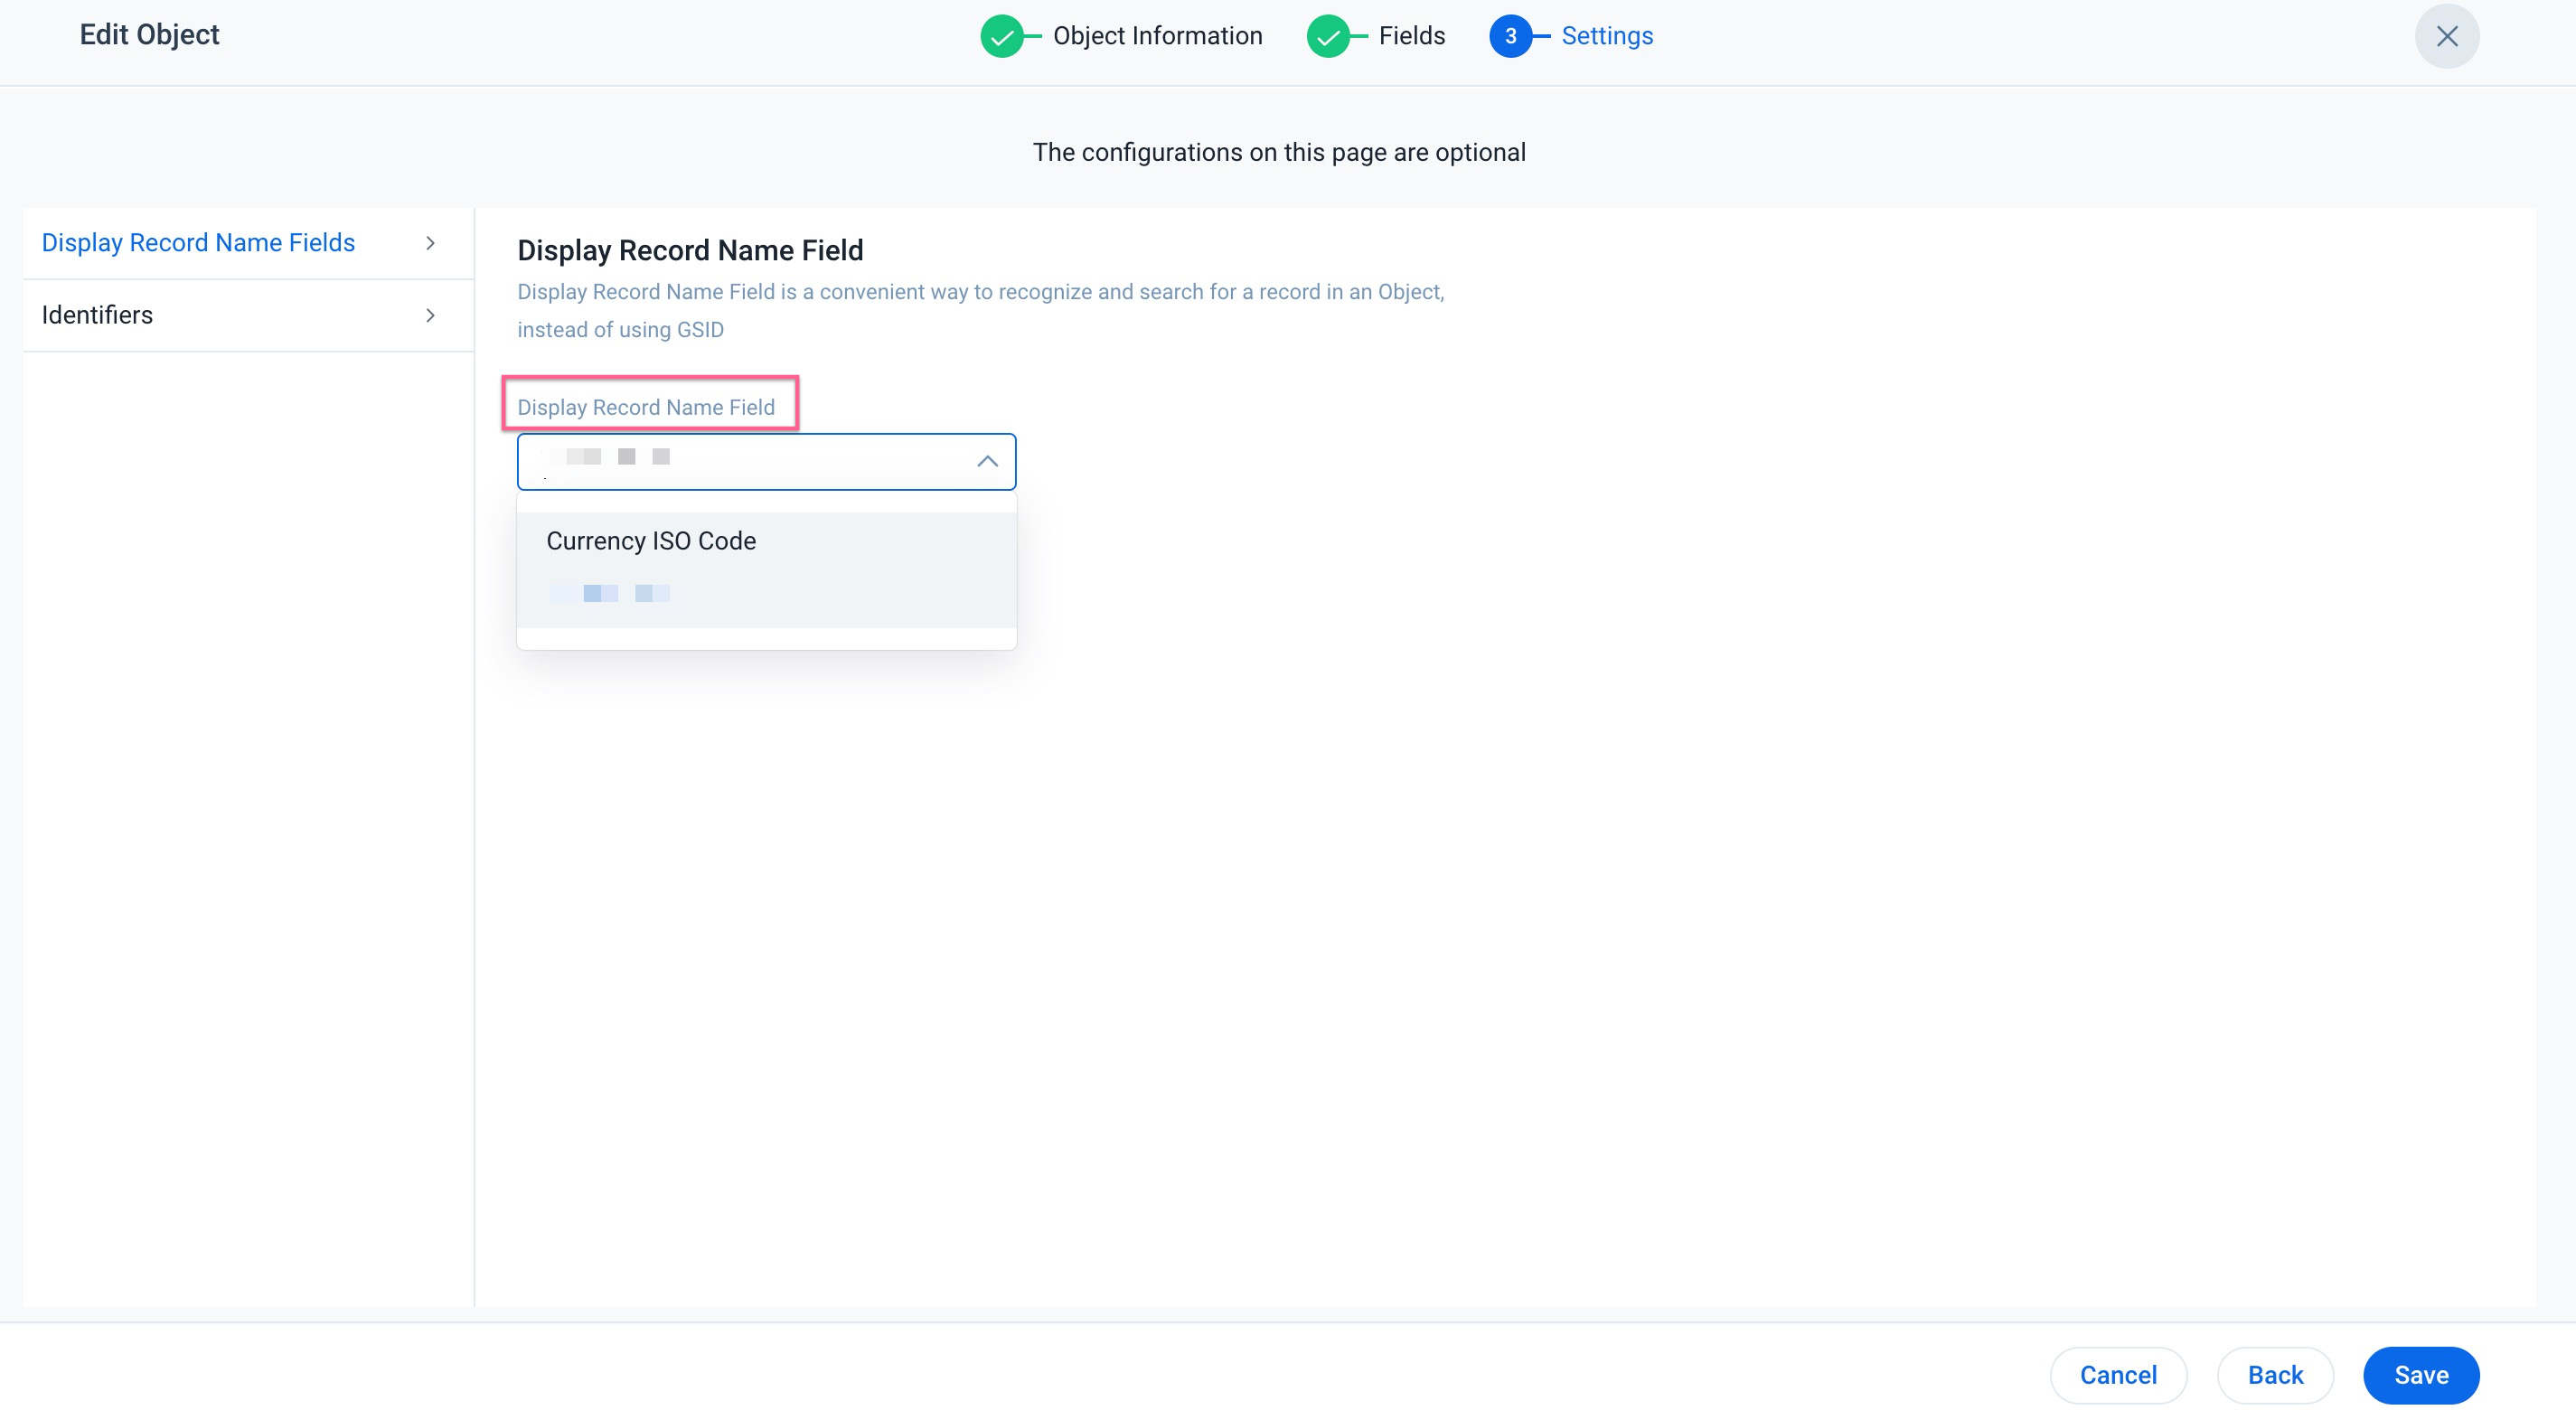
Display Record Name Fields
Display Record Name, helps users to configure and use a recognizable name field to identify the data instead of GSIDs. This simplifies the admin’s experience of viewing, searching, and editing data.
For example:
- When you create Reports, a more readable name can be added to the Show me fields instead of GSID.
- Display the name of the "Created By" user instead of the GSID of the user record.
To assign display record name fields:
- Navigate to Settings tab. The Display Record Name Fields section appears.
- From the Display Record Name Field dropdown, select the name to be assigned.
- Click Save.
IMPORTANT: The Display Record Name Field is:
- Pre-defined for the System and Standard objects.
- Applicable to Low-volume Custom objects.
- Applicable for Email and String data types.
- Not applicable to Who ID and fields with self-lookup properties.
The following table shows the predefined Name field and Searchable field for System and Standard Objects.
| Object | Named Field | Searchable Field |
|---|---|---|
| Anonymous Person | Name | Name |
| Company | Name | Name |
| Person | Name | Name, Email |
| User | Name | Name, Email, SFDC UserName |
| Relationship | Name | Name |
| Relationship Type | Name | Name |
| Cases | NA | Assignee ID, Case Priority, Case Status, Case Subject, Case Type, External Id, External System Id |
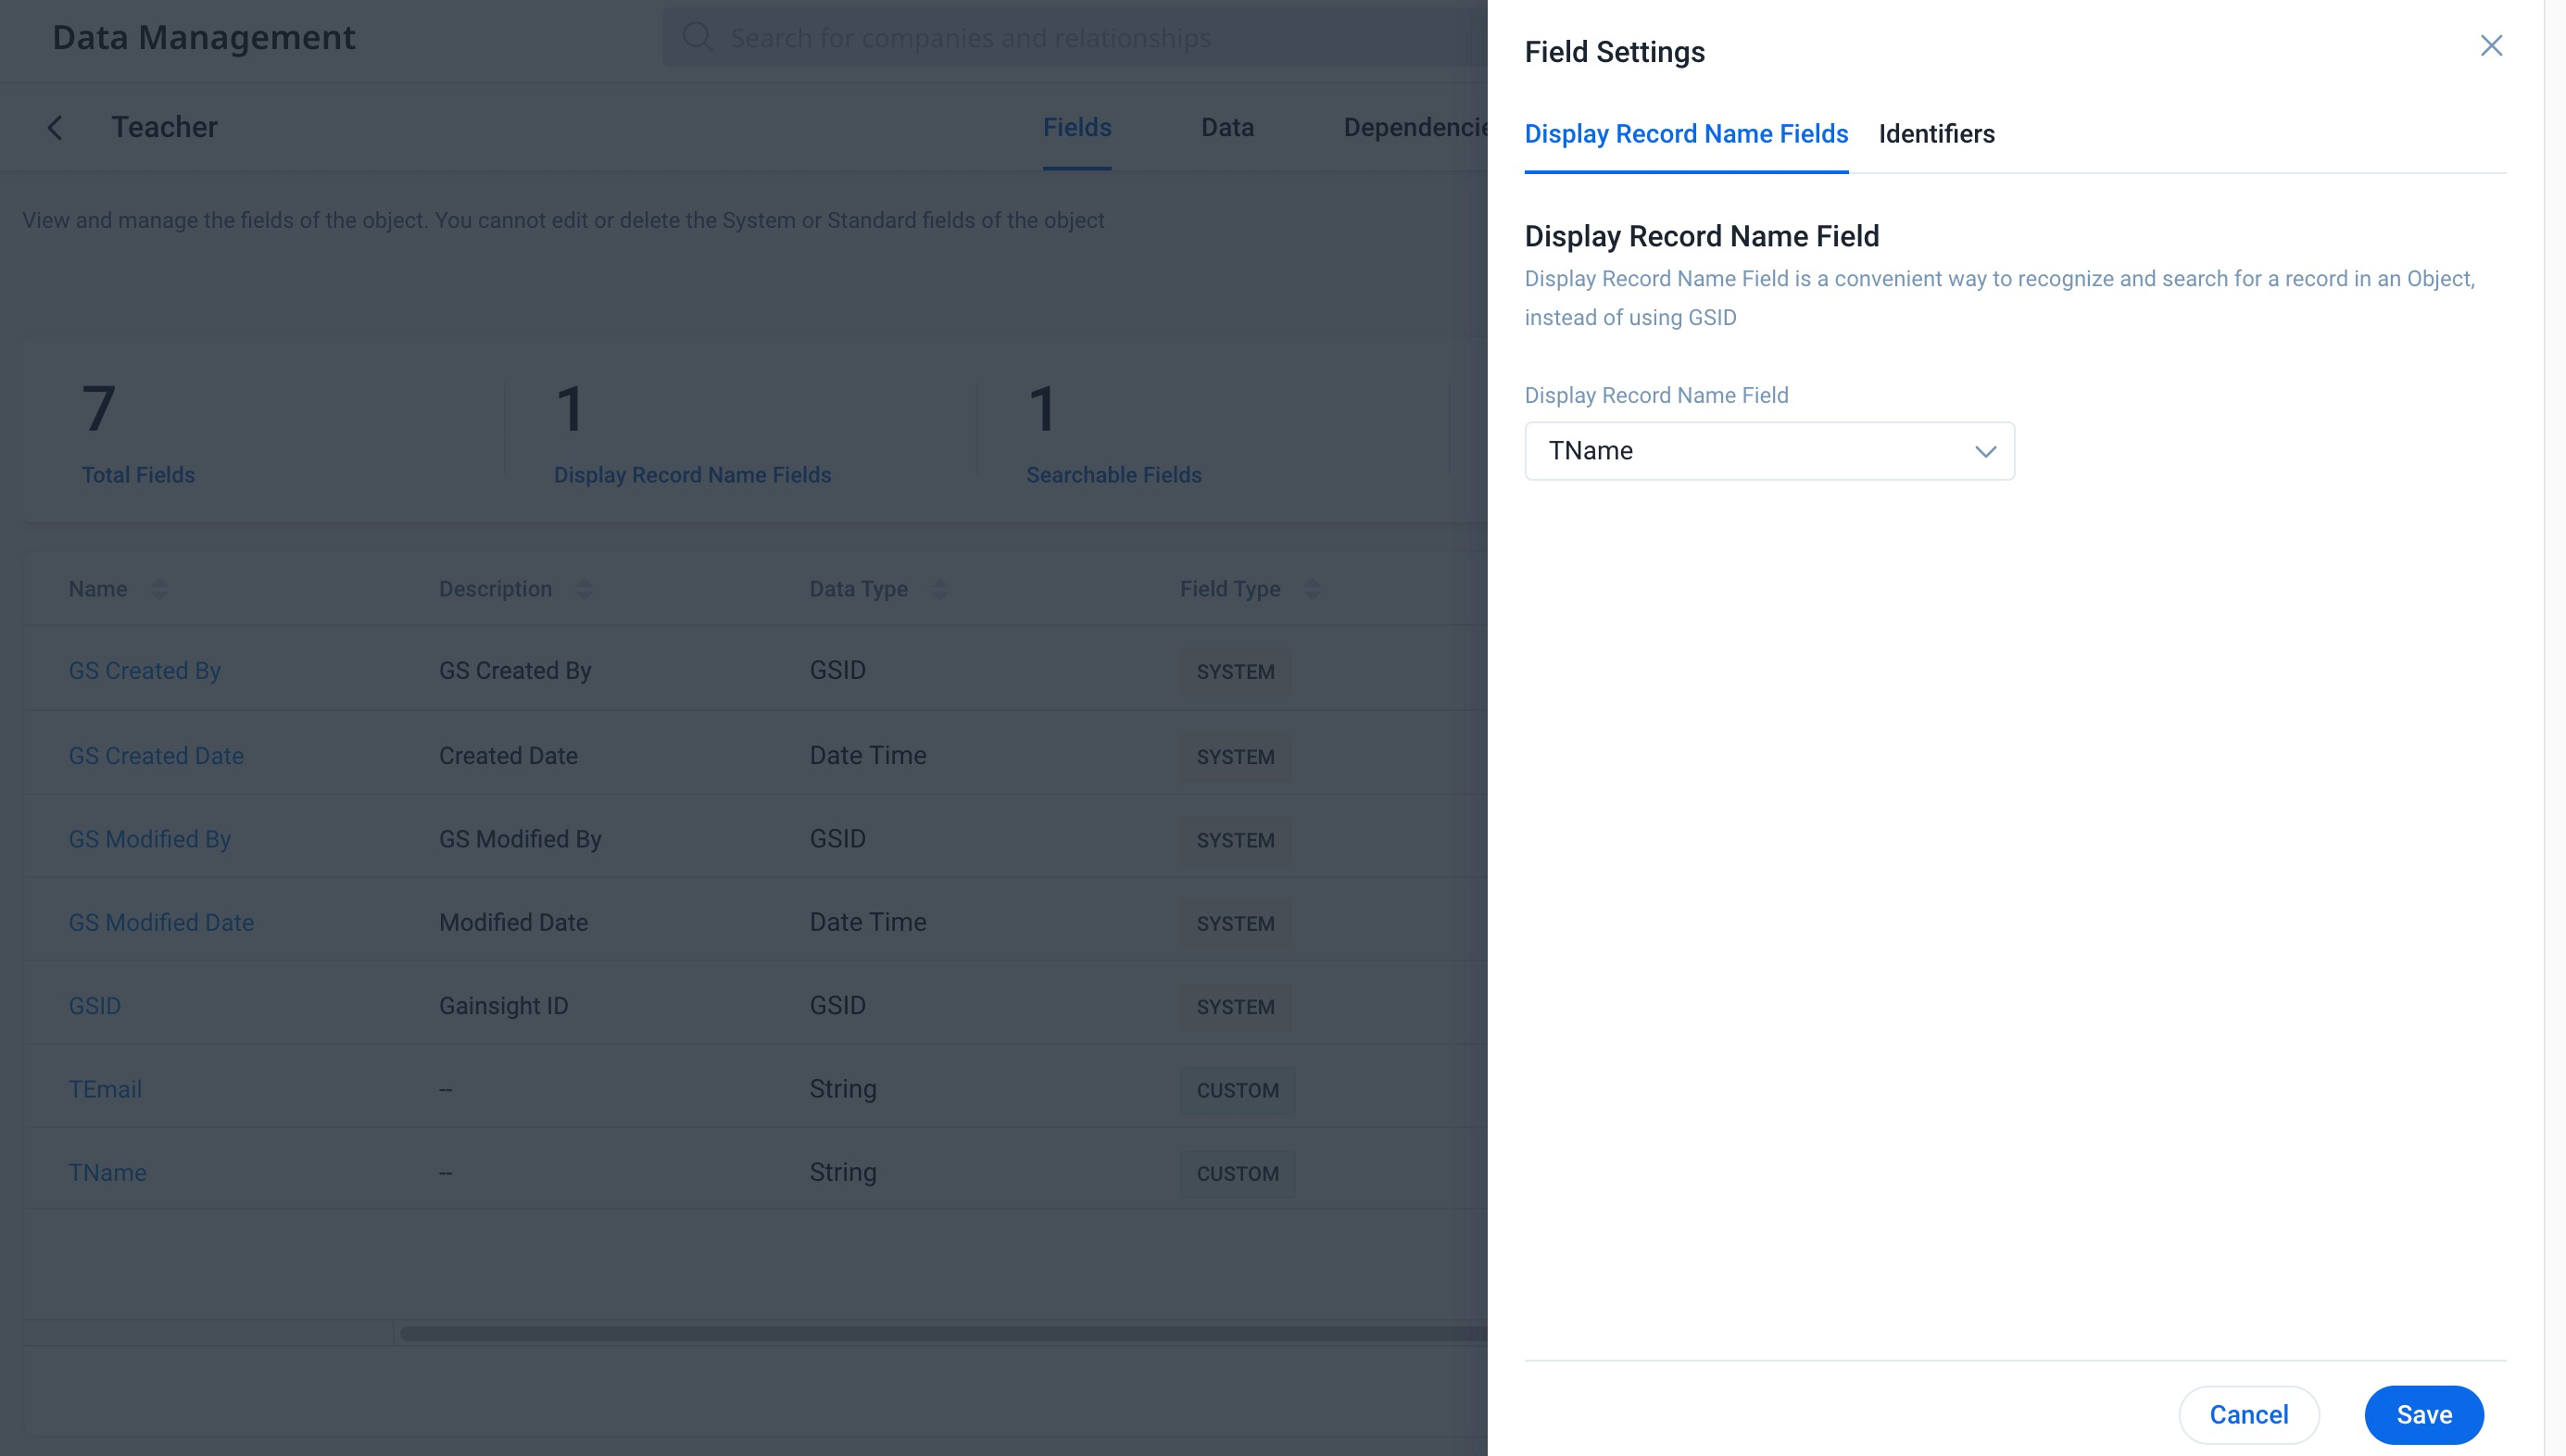
Edit Display Record Name Field
Admins can edit the Display Record Field from the Fields tab.
To edit the display record name field:
- Navigate to Fields tab in the object.
- Click the Settings icon. The Field Settings slide-out panel appears.
- From the Display Record Name Field dropdown, select the name.
- Click Save.
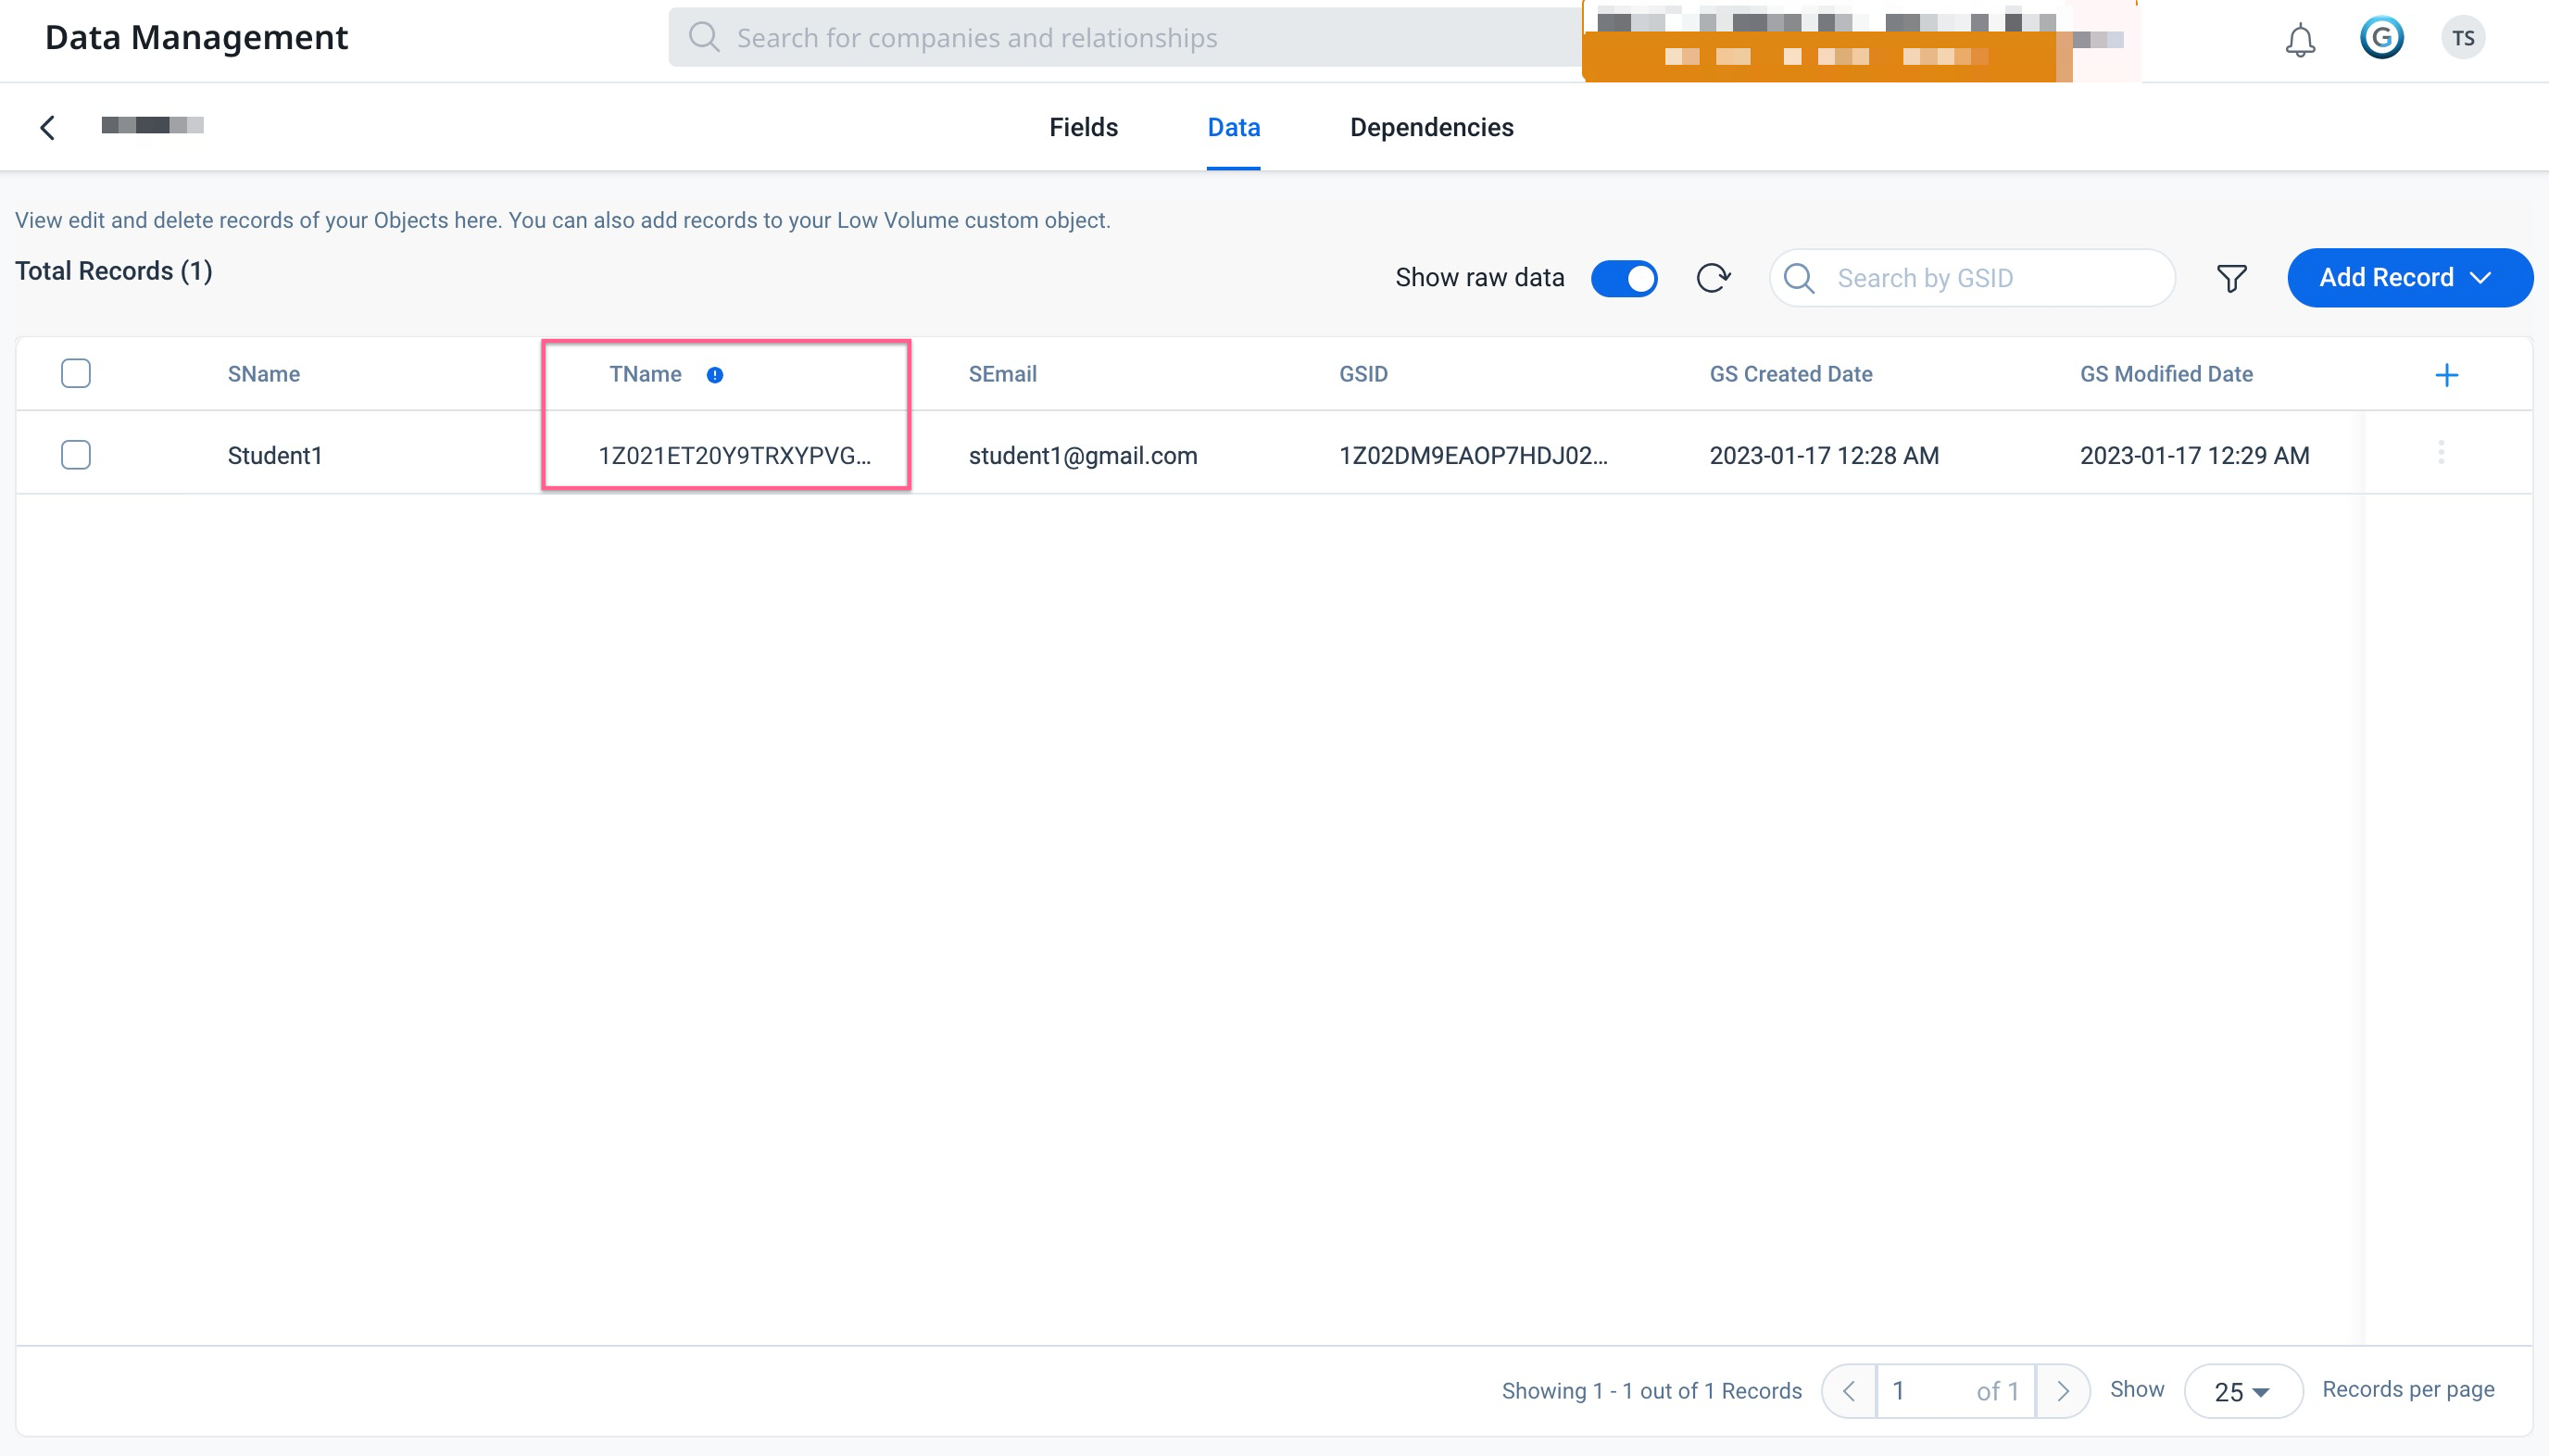
View Display Record Name Field
Once the Display Record Name field is assigned, admins can view the assigned name in the Data tab.
To view the display record name field, navigate to the Data page. The list of fields in the object is displayed. The below image shows the raw data for each of these fields.
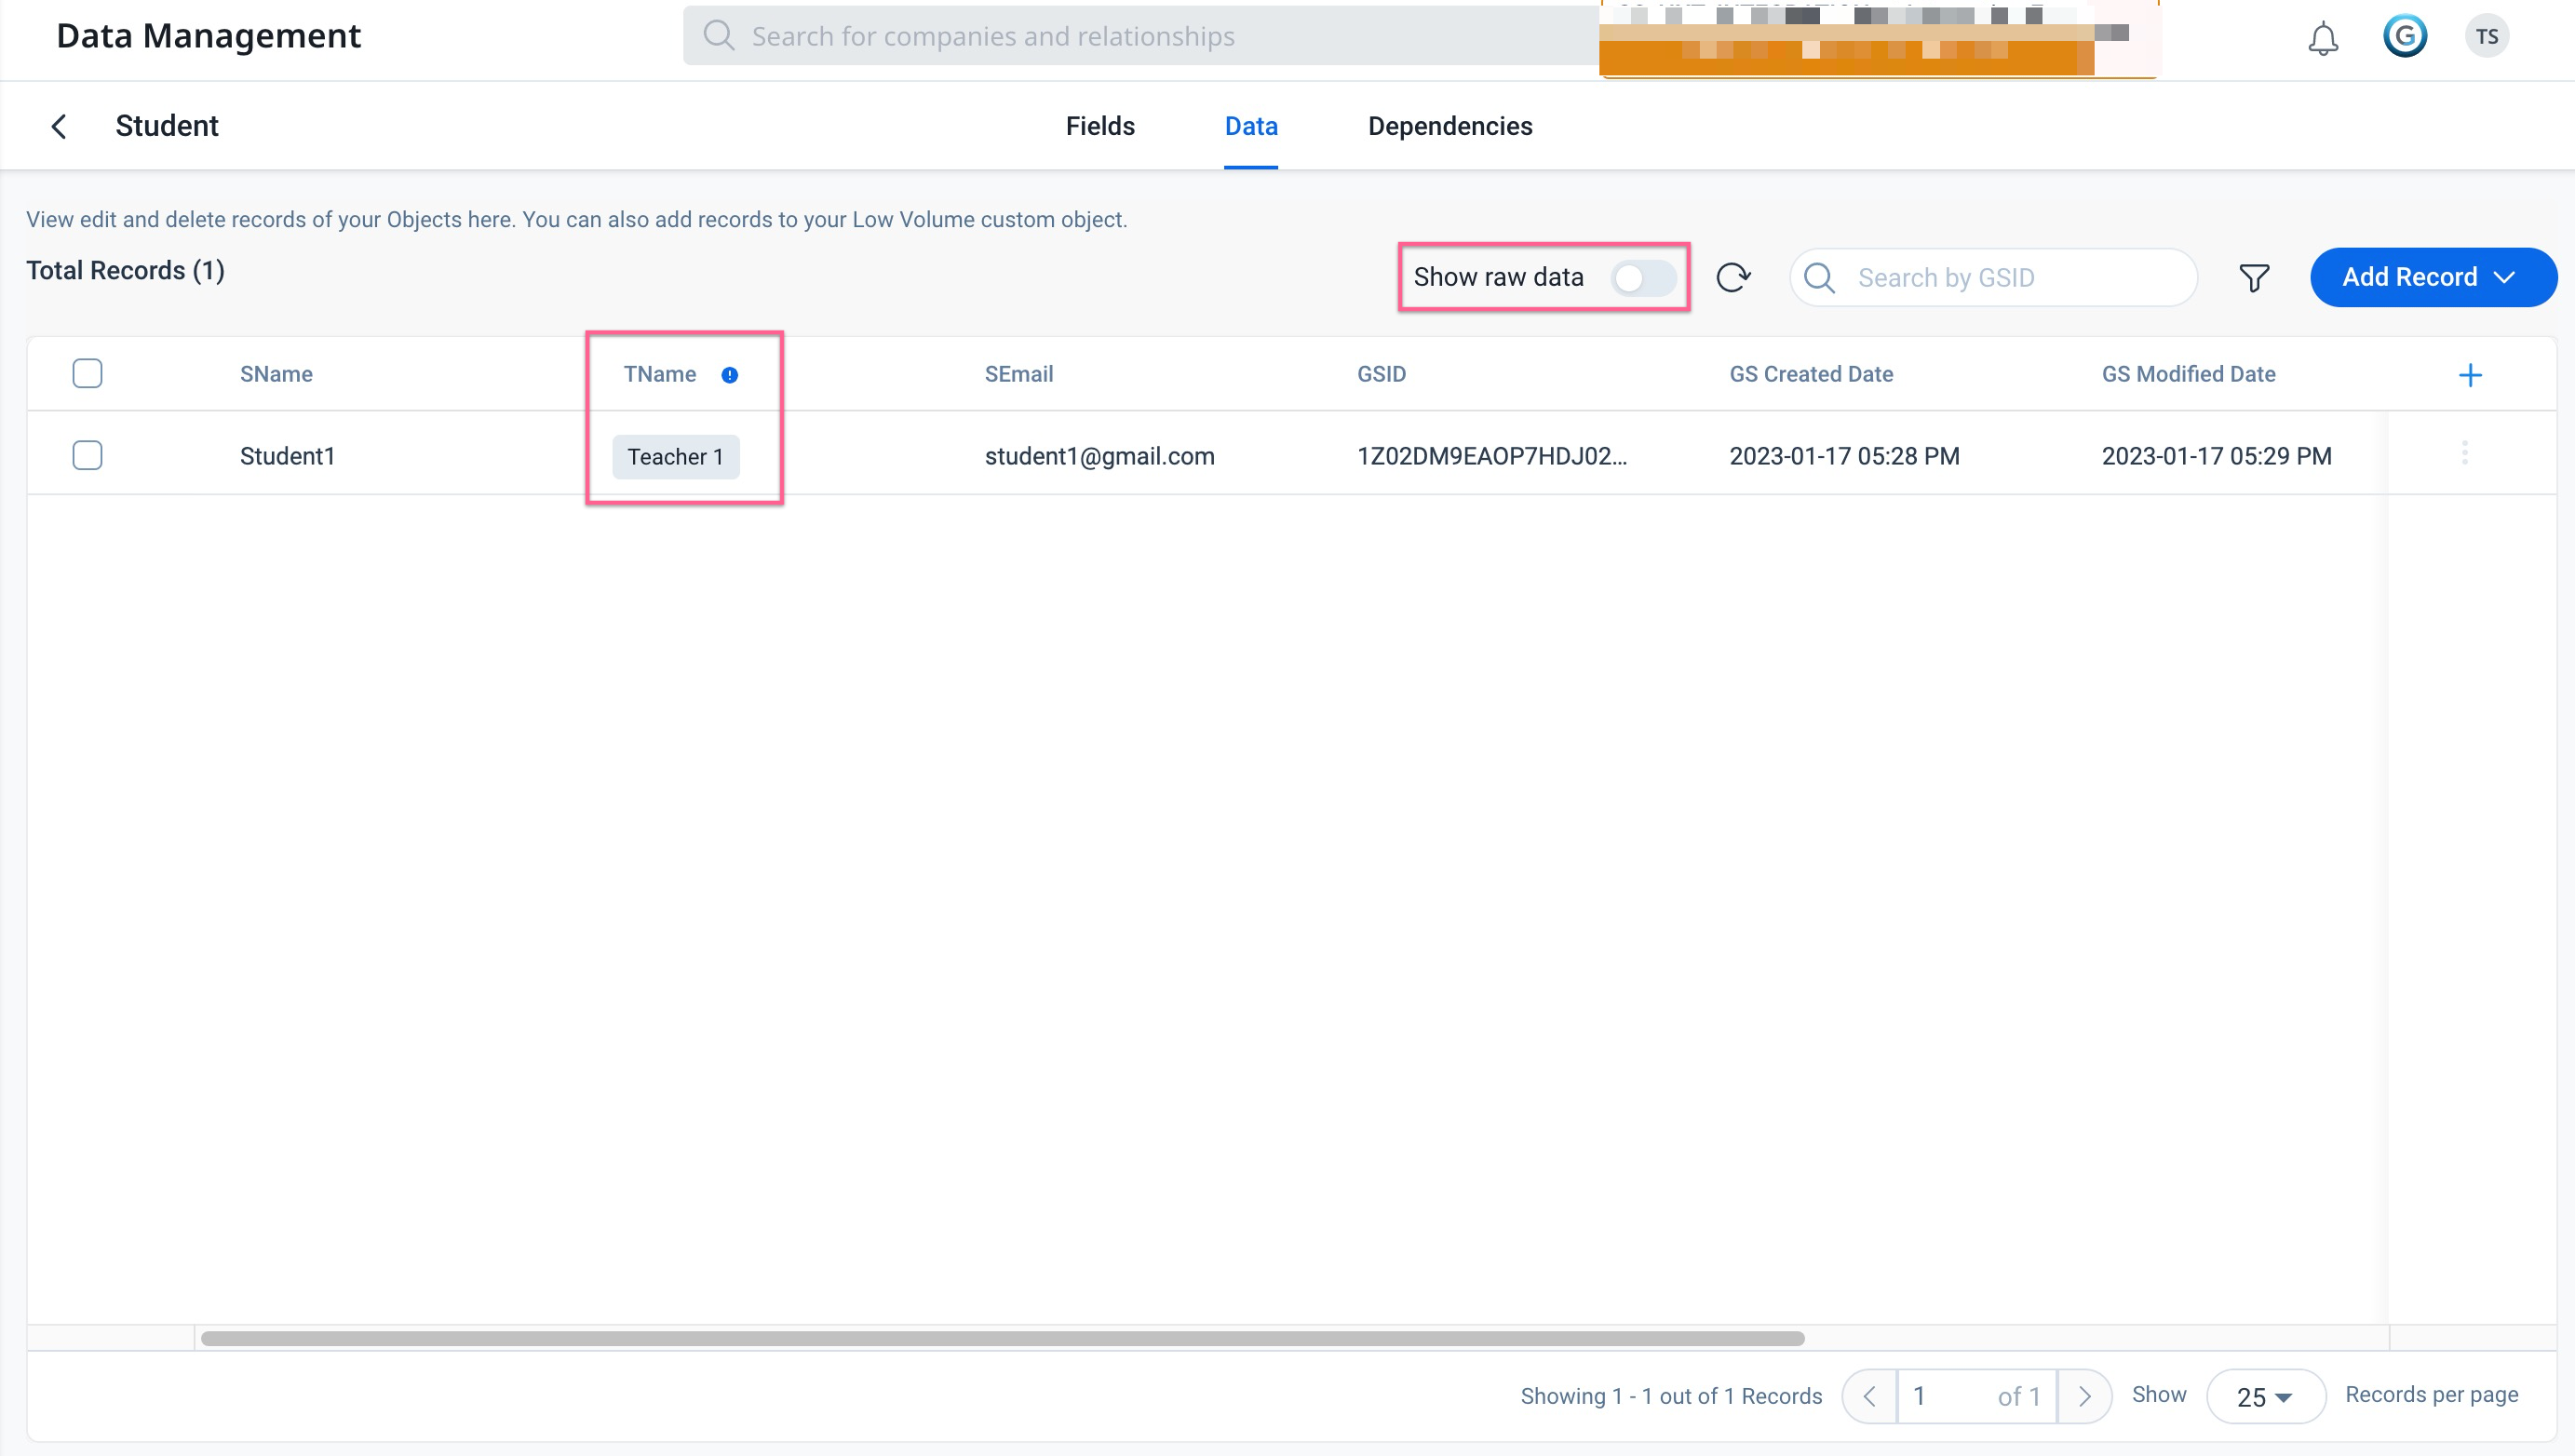
To view the Display Record Name field, Toggle OFF Show raw data. Admins can now see the record names for the assigned fields.
Identifiers
Admins can define the key field(s) that must be used on an object to update or upsert the existing records. This is primarily introduced to avoid updating the existing data with the wrong key fields (as it can corrupt the entire object data) and ensure that Update / Upsert operations are allowed ONLY when the valid keys are used.
Note: You cannot select Identifiers for System and Standard objects.
To select an Identifier:
- Click the name of an object.
- Click the Identifiers tab.
- From the Select Identifiers dropdown, select the fields that would be automatically used when "Update" or "Upsert" operation is performed in the data load process.
Note: A Maximum of 6 Identifiers can be selected.
- Click Save. A confirmation dialog is displayed.
- Click Yes.
IMPORTANT: Once Update key(s) are defined, subsequent Update or Upsert operation in the data Ingest (S3 connector , Gainsight Bulk API, or Rules engine > Load to Gainsight Object) is allowed only when the same update/upsert keys are used. If the keys are different, the update/upsert process would fail. Therefore, exercise caution while enabling this feature for an existing object. Existing rules will fail if the update keys are different. Gainsight strongly recommends that you create a new object, and experiment with this feature.
Objects Summary Ribbon
The summary ribbon at the top of the Objects tab under the Data Management page displays a summary of high level critical information pertaining to the Objects of your tenant.
To enable, click the Object Stats option. This opens the summary ribbon that displays the following information:
- Number of Standard objects
- Number of Custom objects
- Number of Low Volume Custom Objects

Object Stats provide insights into critical metrics and are updated every 24 hours.
Fields Summary Ribbon
The summary ribbon at the top of the Fields tab under the Data Management page displays a summary of high level critical information pertaining to the Fields of your object.
To enable, click the Fields Stats option. This opens the summary ribbon that displays the following information:
- Total Fields
- Number of Custom Fields
- Number of Formula Fields
- Number of Required Fields
- Number of Identifiers
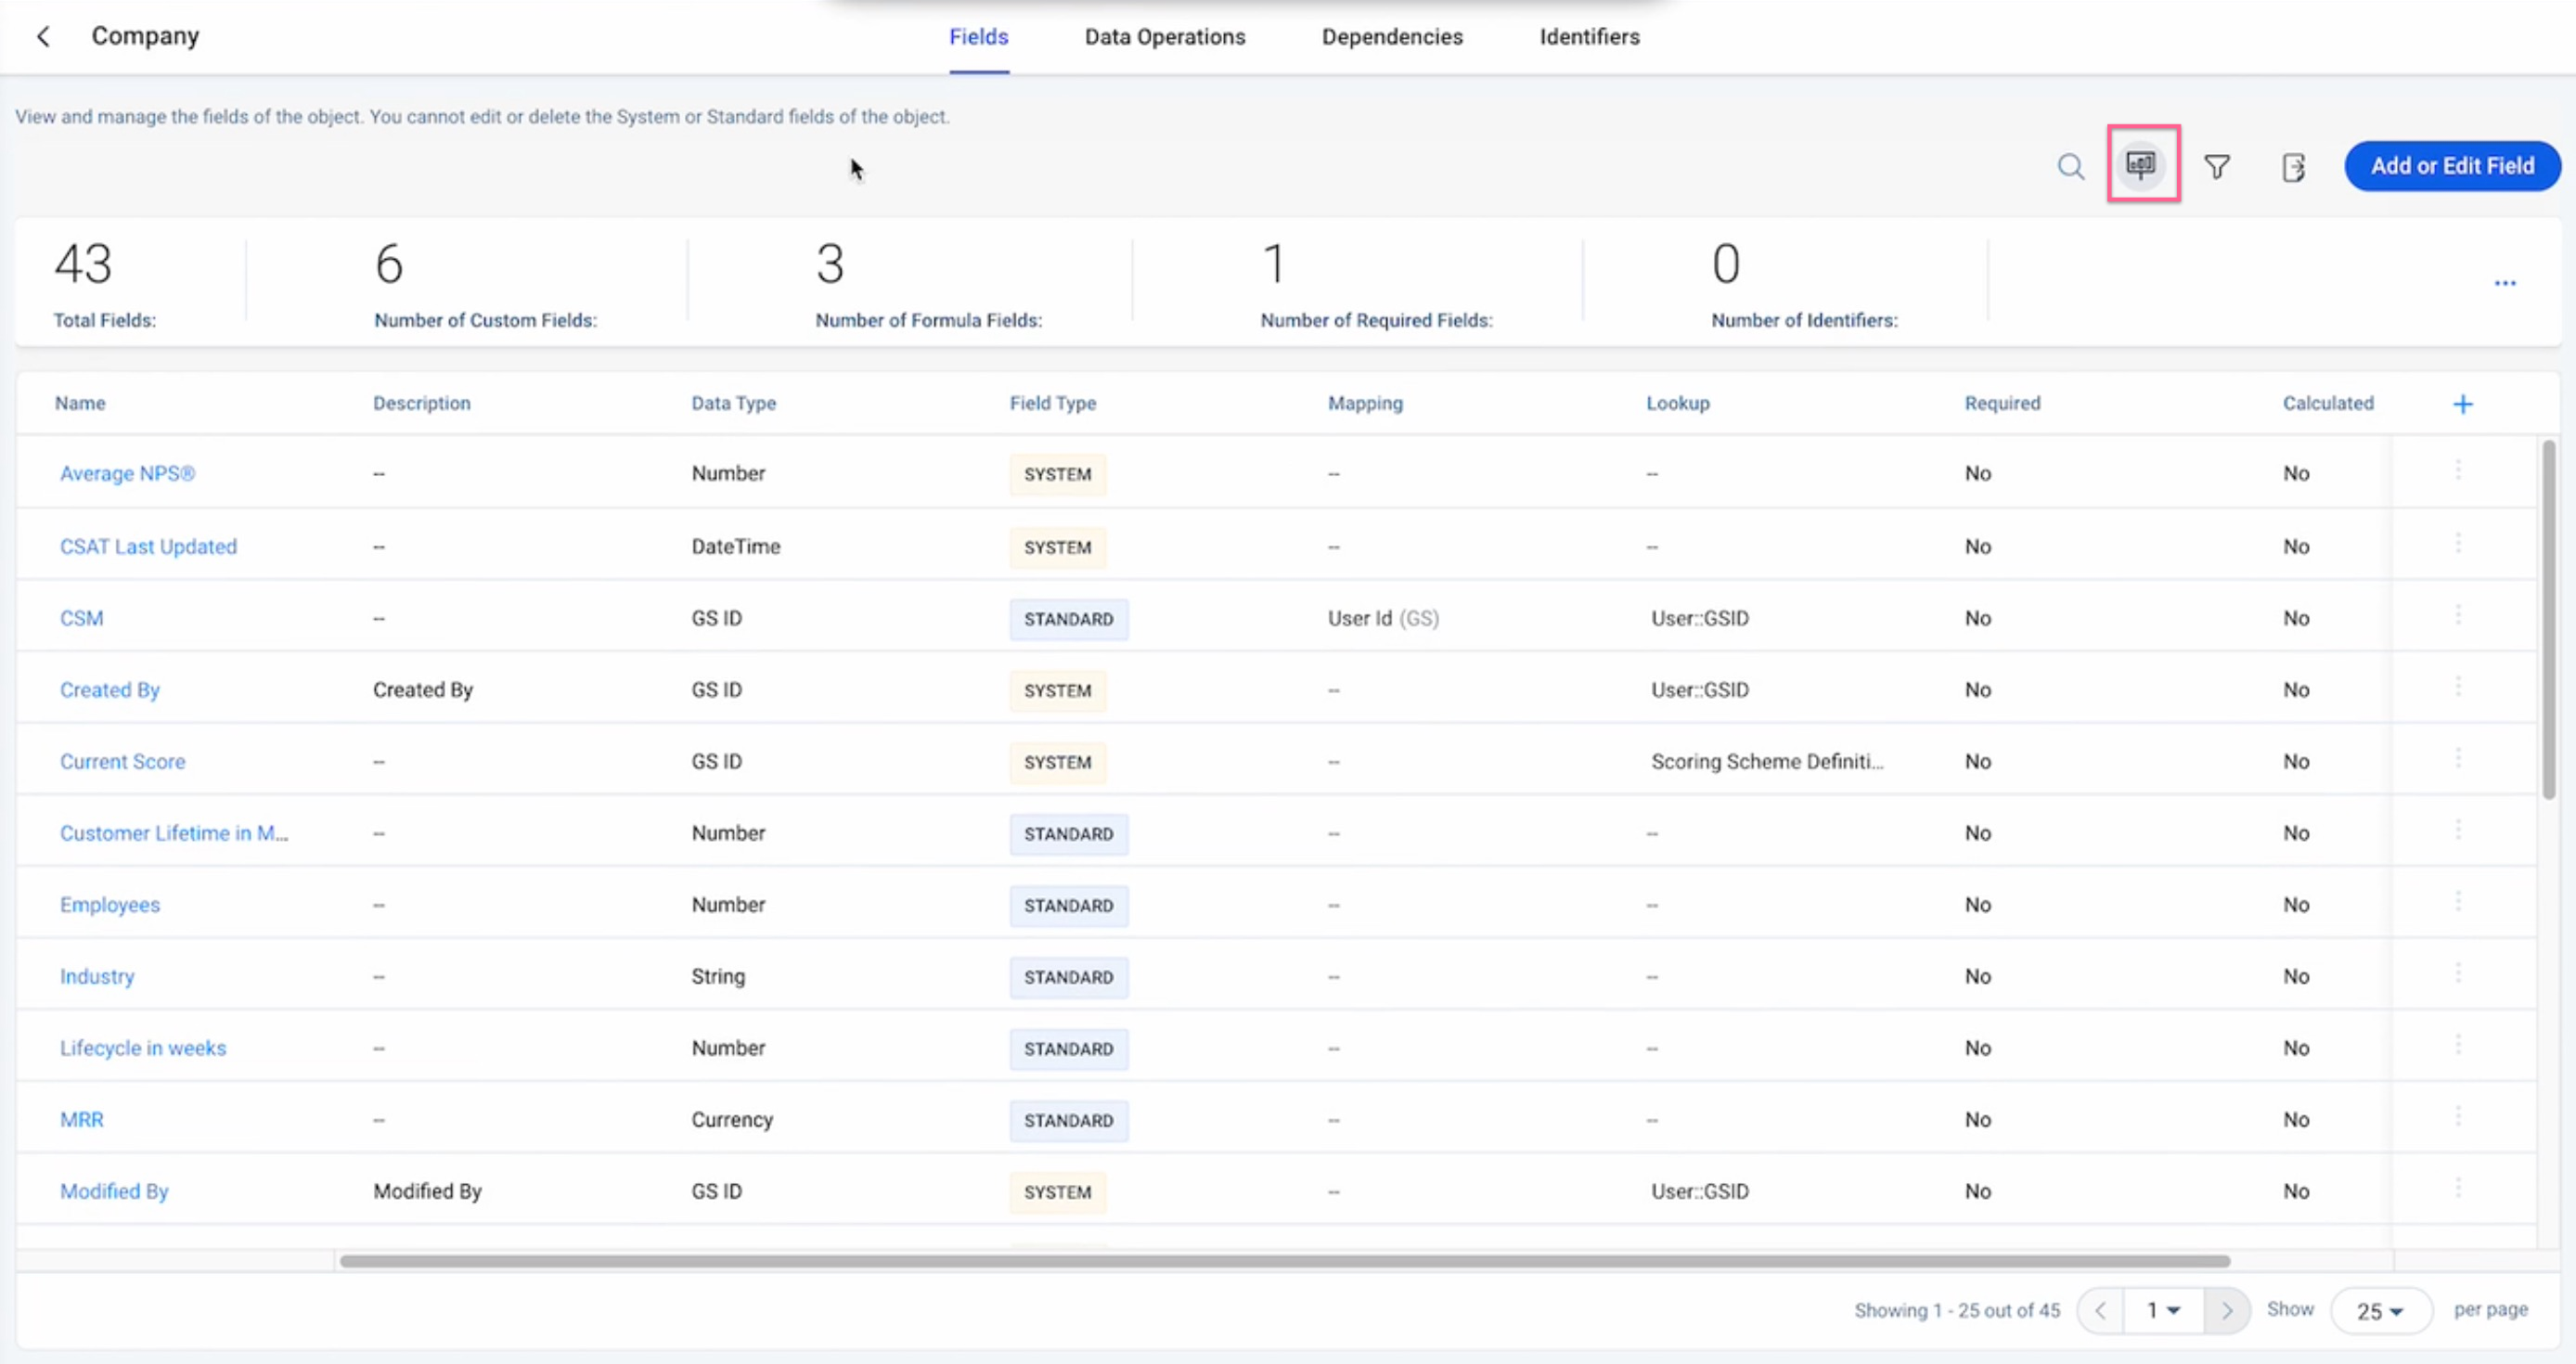
Fields Stats provide insights into critical metrics and are updated in real time.
Conditions for ‘On Delete’
- You can see only None item in the On Delete option while applying MDA join from a:
- Custom field in the User or Person object.
- Custom field of any object to either User or Person object.
- Both of these conditions are imposed to make sure that none of the records are deleted from either User or Person object.
- By default, On Delete option in the existing MDA joins is None from a custom field in any object. On Delete option in the existing MDA joins is set to None from any field to either User or Person object and vice-versa.
- You can select any On Delete option in a custom field of Who ID data type. This option allows you to reset records in this field when the corresponding person lookup record is deleted from the Data Operation page.
- Currently, On Delete option does not work even when you can delete records from a custom object (from the Data Management page) that has lookup to another custom object.
Supported Data Types
The following table explains all the types of data supported in Gainsight:
| Data Types | Description | Information |
|---|---|---|
| String |
The Custom String data type The Standard String data type |
Any text. Maximum text length is 500 characters. This data type can be mapped (Join Field data type) to String, SFDCID, and Email. Any text. Maximum text length is 255 characters. This data type can be mapped (Join Field data type) to String, SFDCID, and Email. |
| Boolean | The Boolean data type | 0 or 1; True or False |
| Date | The Date data type |
Stores the date component.
|
| DateTime | The DateTime data type |
Stores the date along with time.
|
| Number | The Number data type |
A whole number or number with decimal places. Formula Support: Formulas are supported through Formula Builder; they must be set from the Tenant Management. |
| SFDC ID | The SFDC ID data type |
Note: Gainsight does not allow the creation of SFDC ID data type fields. However, we continue to support existing SFDC ID data type fields. When data is being loaded to an Gainsight object with SFDC ID as a data type, the application checks and converts 15 digit IDs to 18 digit SFDC ID. If the SFDC ID value is not a 15 digit or an 18 digit record, data would be rejected. SFDC ID field can contain NULL. This data type can be mapped (Join Field data type) to string and SFDCID. |
| GS ID | A 36 digit unique GSID is assigned for identification of each externally exposed “Object” and “Record” from Gainsight. It is assigned automatically to each record in Gainsight. You can import GSID of a record from one Gainsight object to another through data import lookup while ingesting data through Gainsight Bulk API, Rules Engine, and S3 Connector. For more information, refer to the Data Import Lookup article in the Additonal Resources at the end of this article. | |
|
The Email data type Info |
When data is being loaded to an Gainsight object with Email as a data type, the application validates the email ID with the following criteria. The email ID must have:
This data type can be mapped (Join Field data type) to String and Email. |
|
| Dropdown List | This data type is available for all custom fields in Gainsight Standard and custom objects. You can use this data type field in other functionalities as required. For more information, refer to the Dropdown List article in the Additonal Resources at the end of this article.. | |
| Multi Select Dropdown List | This data type is available for all custom fields in Gainsight standard and custom objects. This is used when a user wants to store multiple values for the same record. For more information, refer to the Dropdown List article in the Additonal Resources at the end of this article. | |
| Rich Text Area |
Limitations:
|
|
| Currency |
|
|
| Percentage |
|
|
| Who ID | A field of this data type can be created in any standard or custom object. This field has the ability to dynamically join with the User or Person object to identify a user or person uniquely from the current object. This helps to build reports on the current object and join the selected fields from the Person or User object. | |
|
What ID URL |
Admins would be able to create a field of this data type in any standard or custom object. This field has the ability to dynamically join with another standard object to fetch the source information. This helps to build reports on the current object and join the selected fields from the standard object. Currently, Gainsight does not support to create a new field of this data type. You can use this Data type to store web site addresses. You can ingest values into these data type fields that start with either http:// or https:// prefix and end with .com, .org, or any other suffix. If you try to ingest values without the prefix or suffix, such values are not ingested. |
Edit an Object
To edit the Object:
- Click the three vertical dots menu of the Object to be edited. The Edit Object page is displayed.
- Edit the Object Display Name and Description as required.
- Click Next.
- Edit the Fields within the Object as required.
- Click Save.
Edit a Field
To edit Fields:
- Click the three vertical dots menu of the object and select View Fields.
- Click Add or Edit Field. The Edit Object page is displayed.
- Click the Expand icon to view the details of the field to be edited.
- Modify the fields as per your requirement.
Note: You can modify more than one field and review all changes at once
- Click Review Changes. The Review Changes pop-up with all the updated fields information is displayed
- Click Cancel.
Note: This will not cancel your changes but will take you back to the Edit Object page.
- Click Save.
Delete an Object
Admins can delete any unwanted or unused Gainsight custom object and any custom field in the Gainsight standard or custom objects. The specific objects and the fields can be deleted irrespective of whether they have data or not. These objects and fields can be deleted when they do not have any dependencies (it is not being used in any of the consumption areas). To delete a custom object or field, Admins should remove its dependencies first.
To delete an object:
- Click the three-vertical dots icon of the object and select Delete Object. A confirmation dialog is displayed.
- Click OK.
Notes: If the object has any dependencies, the object cannot be deleted. you can remove any dependencies on the custom object and repeat the above steps to delete the Object.
Delete a Field
To delete a custom field in an object:
- Navigate to Administration > Customer Data > Data Management.
- Click the Custom object whose field is to be deleted. The Fields tab appears.
- Click the three-vertical dots icon corresponding to the required field.
- Select Delete Field.
The Delete Field popup appears, calculating and displaying all the dependencies the field has on other product areas of Gainsight.
Notes:
- You can only delete a custom field that does not have any active dependencies or lookups. In such cases, the Delete Field popup displays a message as follows:
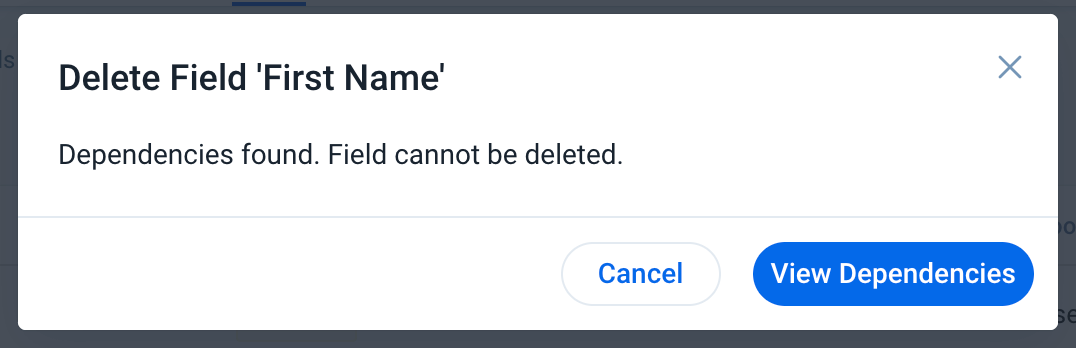
-
You can remove the dependencies on the custom field and repeat the steps to delete the field. Click View Dependencies to view a list of the field's dependencies on all the application areas.
Load Data into the Gainsight Object
| IMPORTANT: This feature will be available for new Data Management (Horizon Experience) as part of upcoming V6.32 April release. |
Once you have created a Gainsight Object, you can load data into the object. It is designed to load small files (under 1 MB). The purpose is to manually load a small data file and view the object data in the data browser to verify its structure.
For loading large files, please consider other methods like loading data via Gainsight Bulk API or Gainsight S3 connector for data import.
Delete Data from a Gainsight Object
| IMPORTANT: This feature will be available for new Data Management (Horizon Experience) as part of upcoming V6.32 April release. |
You can delete records from the custom objects only from the Data Management page. You can delete whole data from a custom object or filter records as required and delete them. For more information on how to delete data from an object, refer to the Delete Data from a Gainsight Object section in the Older version of this article or refer to the Mass Delete Records section of the Data Operations article.
Additional Resources
For more information on managing data in Gainsight, refer to the following articles:
- Gainsight Matrix Data Architecture Overview
- Gainsight Data Management
- Usage Data Overview
- Gainsight Objects
- Advanced Operations in Data Management
- Data Operations
- Gainsight Company Object
- Gainsight User Object
- Gainsight Person Object Model
- Dropdown List
- MDA Joins
- Data Import Lookup