Create Guide Engagement
This article explains how to create a guide engagement using the new PX Engagement editor. For more information on how to create guides using the previous version of the editor, refer to the How to Build Gainsight PX In-App Guide Engagement.
Overview
A Guide engagement helps you to create a walkthrough of a specific feature, or bring user attention to a critical or new addition to the user interface. You can create a single step guide to assist users with one or more features of your application. You can also create a multi-step guide with a sequence of tool tips and dialogs that navigate the user through different screens of your application.
The following video is a quick walkthrough on how to create a Guide Engagement.
Prerequisites
- The target application URLs for launching the Guide Engagement must be mapped in the Product Mapper of your Gainsight PX subscription.
- Ensure that you have copied the target URL to create and launch the In-App Engagements.
Create In-App Guide Engagement
Gainsight PX Editor helps you create Guide engagements in a fast and seamless way.
To create a guide engagement:
- From the left pane, click Engagements.
- Click Create.
- Enter a name for the Guide engagement.
Note: Gainsight PX recommends you to name the guide so that others can easily identify its purpose and/or location. - (Optional) Select the environment. This is applicable only if you are using multiple environments.
- Select the type of target application: Web App or Mobile.
- Click on the Guide icon.
- (Optional) Enter a description.
- Click Create.
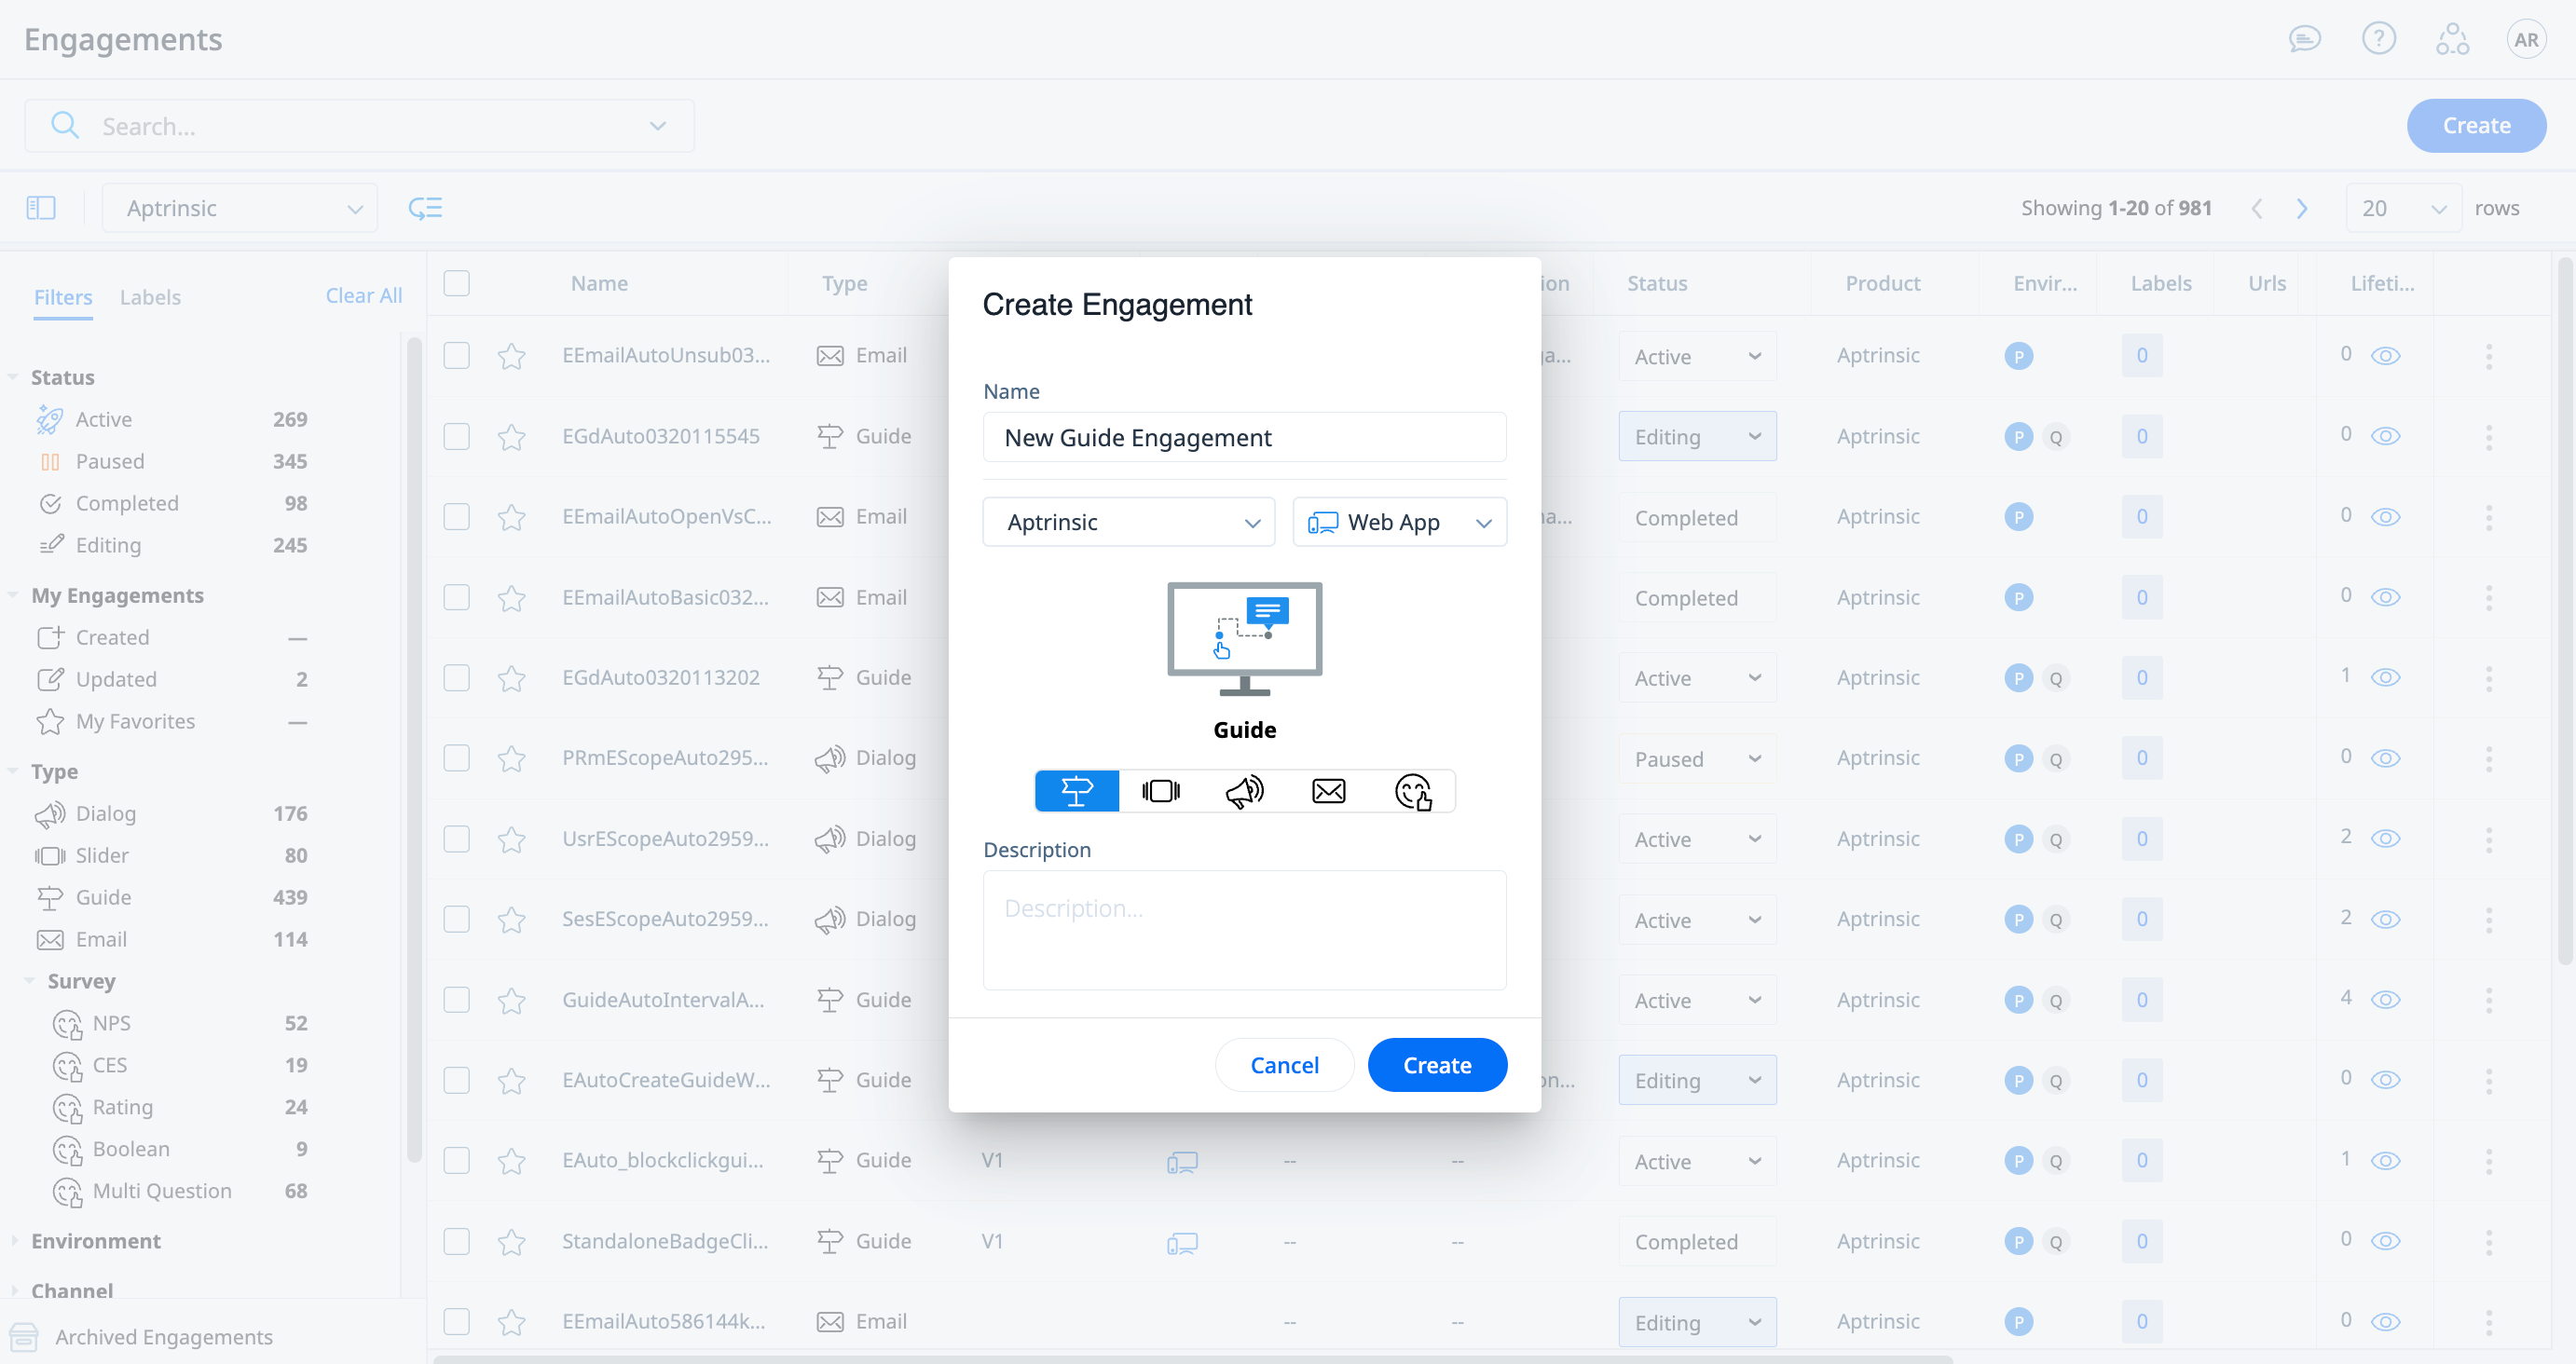
Following are the steps to create a Guide engagement:
Set Audience
Audience is the group of intended viewers for the engagement. Select the target audience based on User, Account and/or behavioral Rules to trigger the engagement guide.
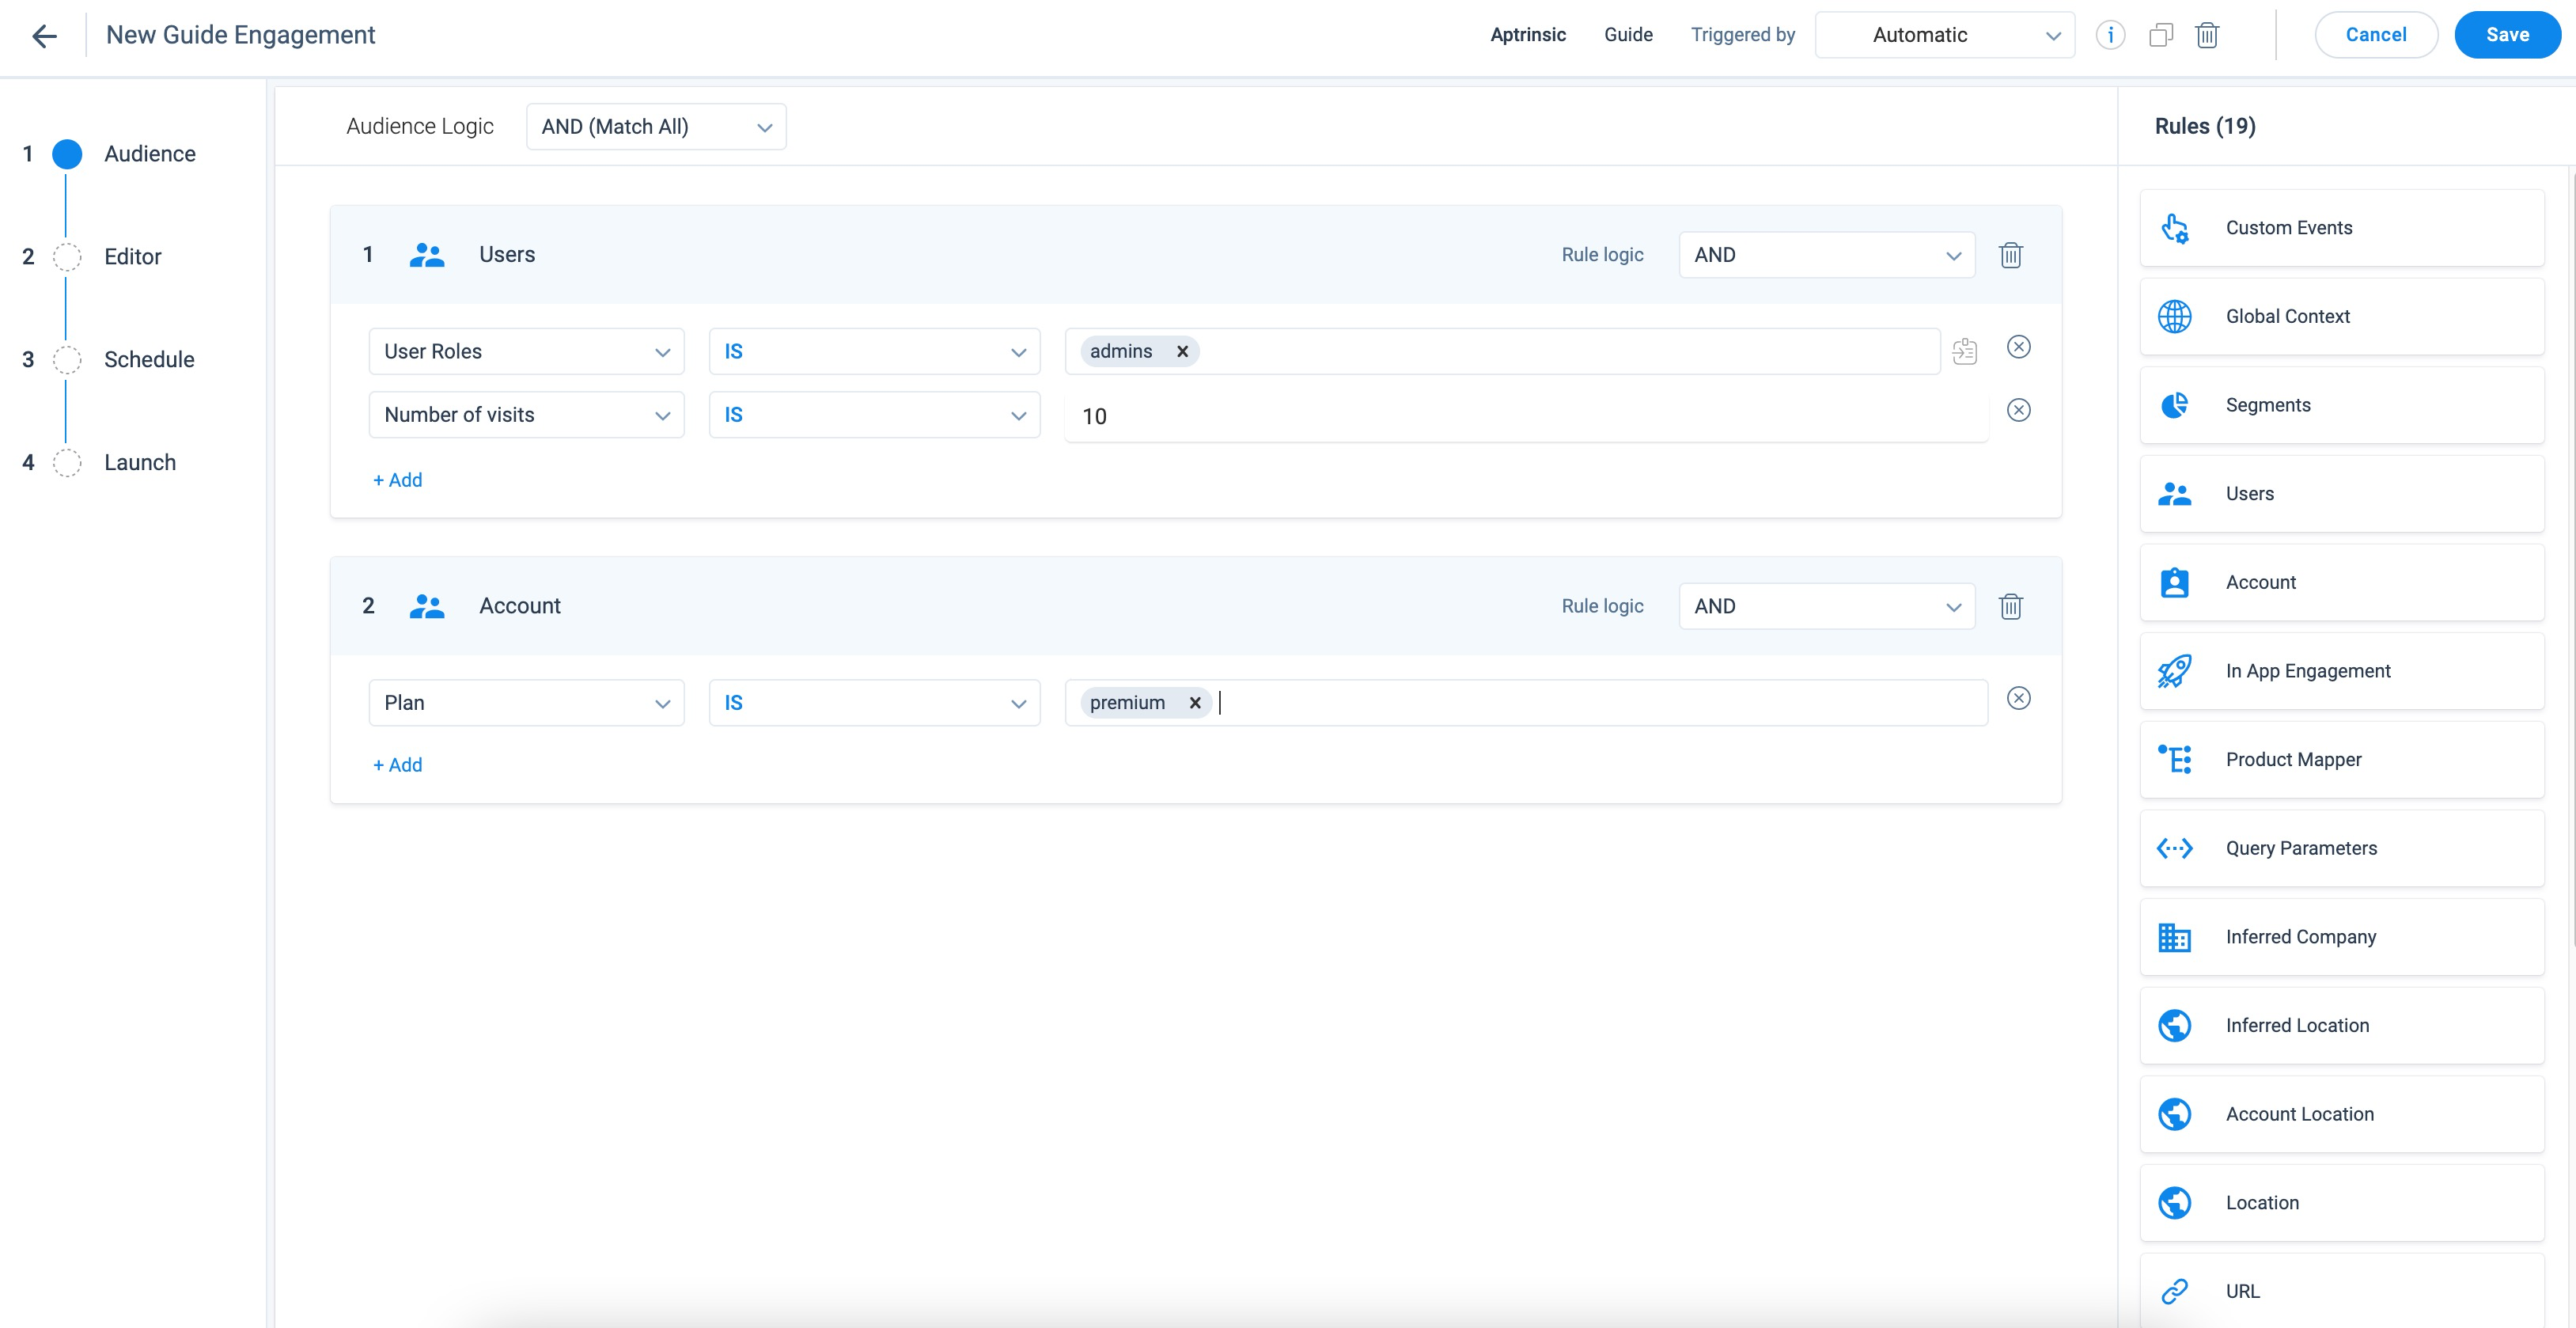
For more information about how to select the audience for engagements, refer to the Audience Selection (Engagements) article.
In-App Editor
The WYSIWYG editor is easy-to-use, and provides you the flexibility to design your engagements seamlessly.
IMPORTANT: In the initial phase, the In-app editor is available only for Guide engagements. Gainsight PX is working to bring-in this editor experience to other engagement types soon.
In the Editor section, you can edit the engagement within PX.
To edit the engagement in the target application:
- Click Edit In-App.
- Enter the URL of your product.
- Click Launch. Gainsight PX displays the editor in your application.
Select a Template
Select the template based on your use case. Optionally you can also customize the steps for the engagement.
To select a template/step:
- From the bottom pane of the in-app editor, click Select Template.
- From the Template Picker window, select a template.
- From the Step Picker window, select the steps for the Guide.
- Click Apply.
Use Gainsight Standard Templates
The standard templates recommended by Gainsight helps in faster engagement building by eliminating the need to create engagements from scratch each time. For more information on the Gainsight Standard templates, refer to the Engagement Templates article.
Use V1 Templates in the New Editor
The templates saved in V1 Editor can be used in the new Editor.
To use engagement templates from V1 Editor in the new Editor:
- In the Template Picker window, navigate to V1 Templates.
- Select a template.
- From the Step Picker window, select the steps for the Guide.
- Click Apply.
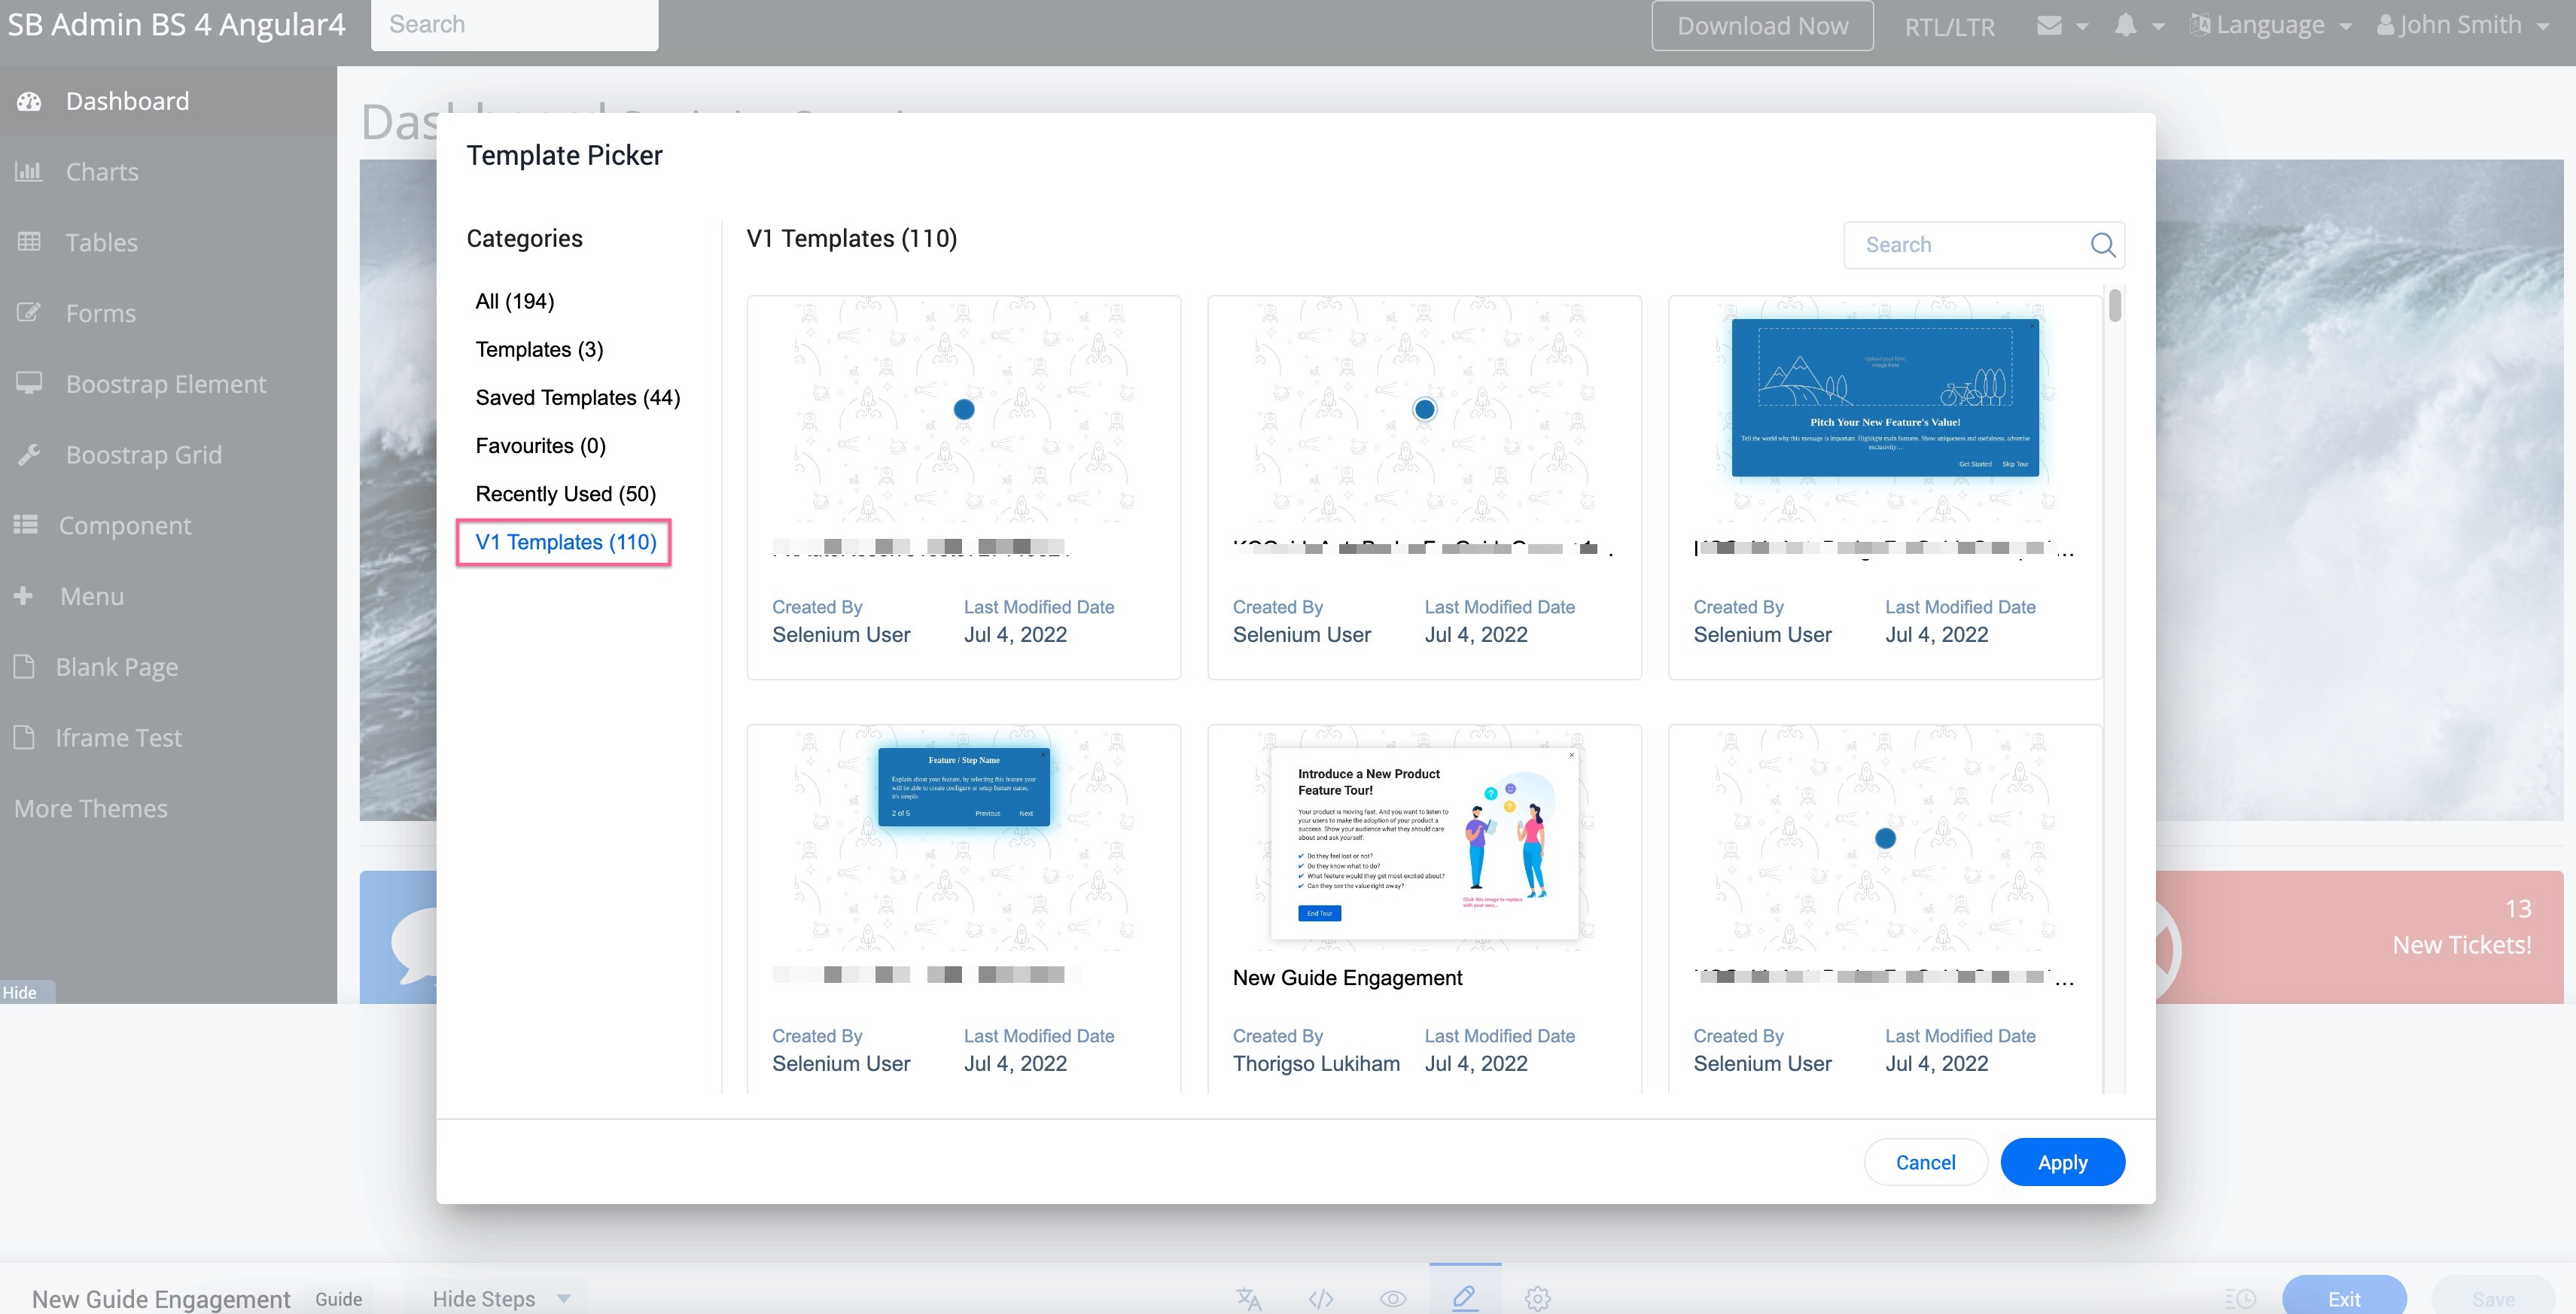
Replace a Template
To replace a template with a new one:
- In the In-app editor at the bottom, click Replace Template. A warning message is displayed.
IMPORTANT: The new template overwrites the current engagement content. This action cannot be undone. - Click Ok to continue.
- From the Template Picker window, select the required template on the left pane.
- From the Step Picker window, select the steps for the Guide.
IMPORTANT: The new template overwrites the current engagement content. This action cannot be undone. - Click Ok to continue.
- Click Apply.
Configure Navigation for Dialog Step
You can perform the following configurations in the Navigation element of the floating Editor.
-
Set the Actions to be performed when the user clicks on the Start or the Next button.
- Look for next element: Navigates the user to the next element in the guide.
- Redirect to URL: Navigate the user to a specific URL page within the product to be able to continue the engagement on that page.
-
From the Available Buttons section, select the checkbox for the button you want to display in the slide. Format the navigation buttons as desired.
- (Optional) Select the Skip Button checkbox to allow the user to skip the engagement.
- (Optional) Select the Previous Button to allow the user to navigate to the previous step in the Guide.
- (Optional) Select the Restart Button to allow the user to restart the Guide again.
- (Optional) Select the Snooze Button to allow the user to view the Guide at a later point in time.
-
The Use browsing history checkbox is enabled by default. You can redirect users to different URLs using $px-auto-resolve. Enabling this option allows Gainsight PX to use the browser history.
Note: This option is not available when the Step Counter is applied to the Guide.
Auto Save
The edits made to an engagement in Editor are saved automatically after every two minutes. This avoids losing the unsaved changes incase of a snag.
Note: The Auto Save feature is availably only for In-App editing.
To enable auto save for each product:
- Navigate to Administration > SDK Settings.
- From the Engagements section, enable the Enable content auto-save in the new Engagement Editor toggle switch.
- Click Save.

Click on the Revert to previous version icon, to revert saved changes.
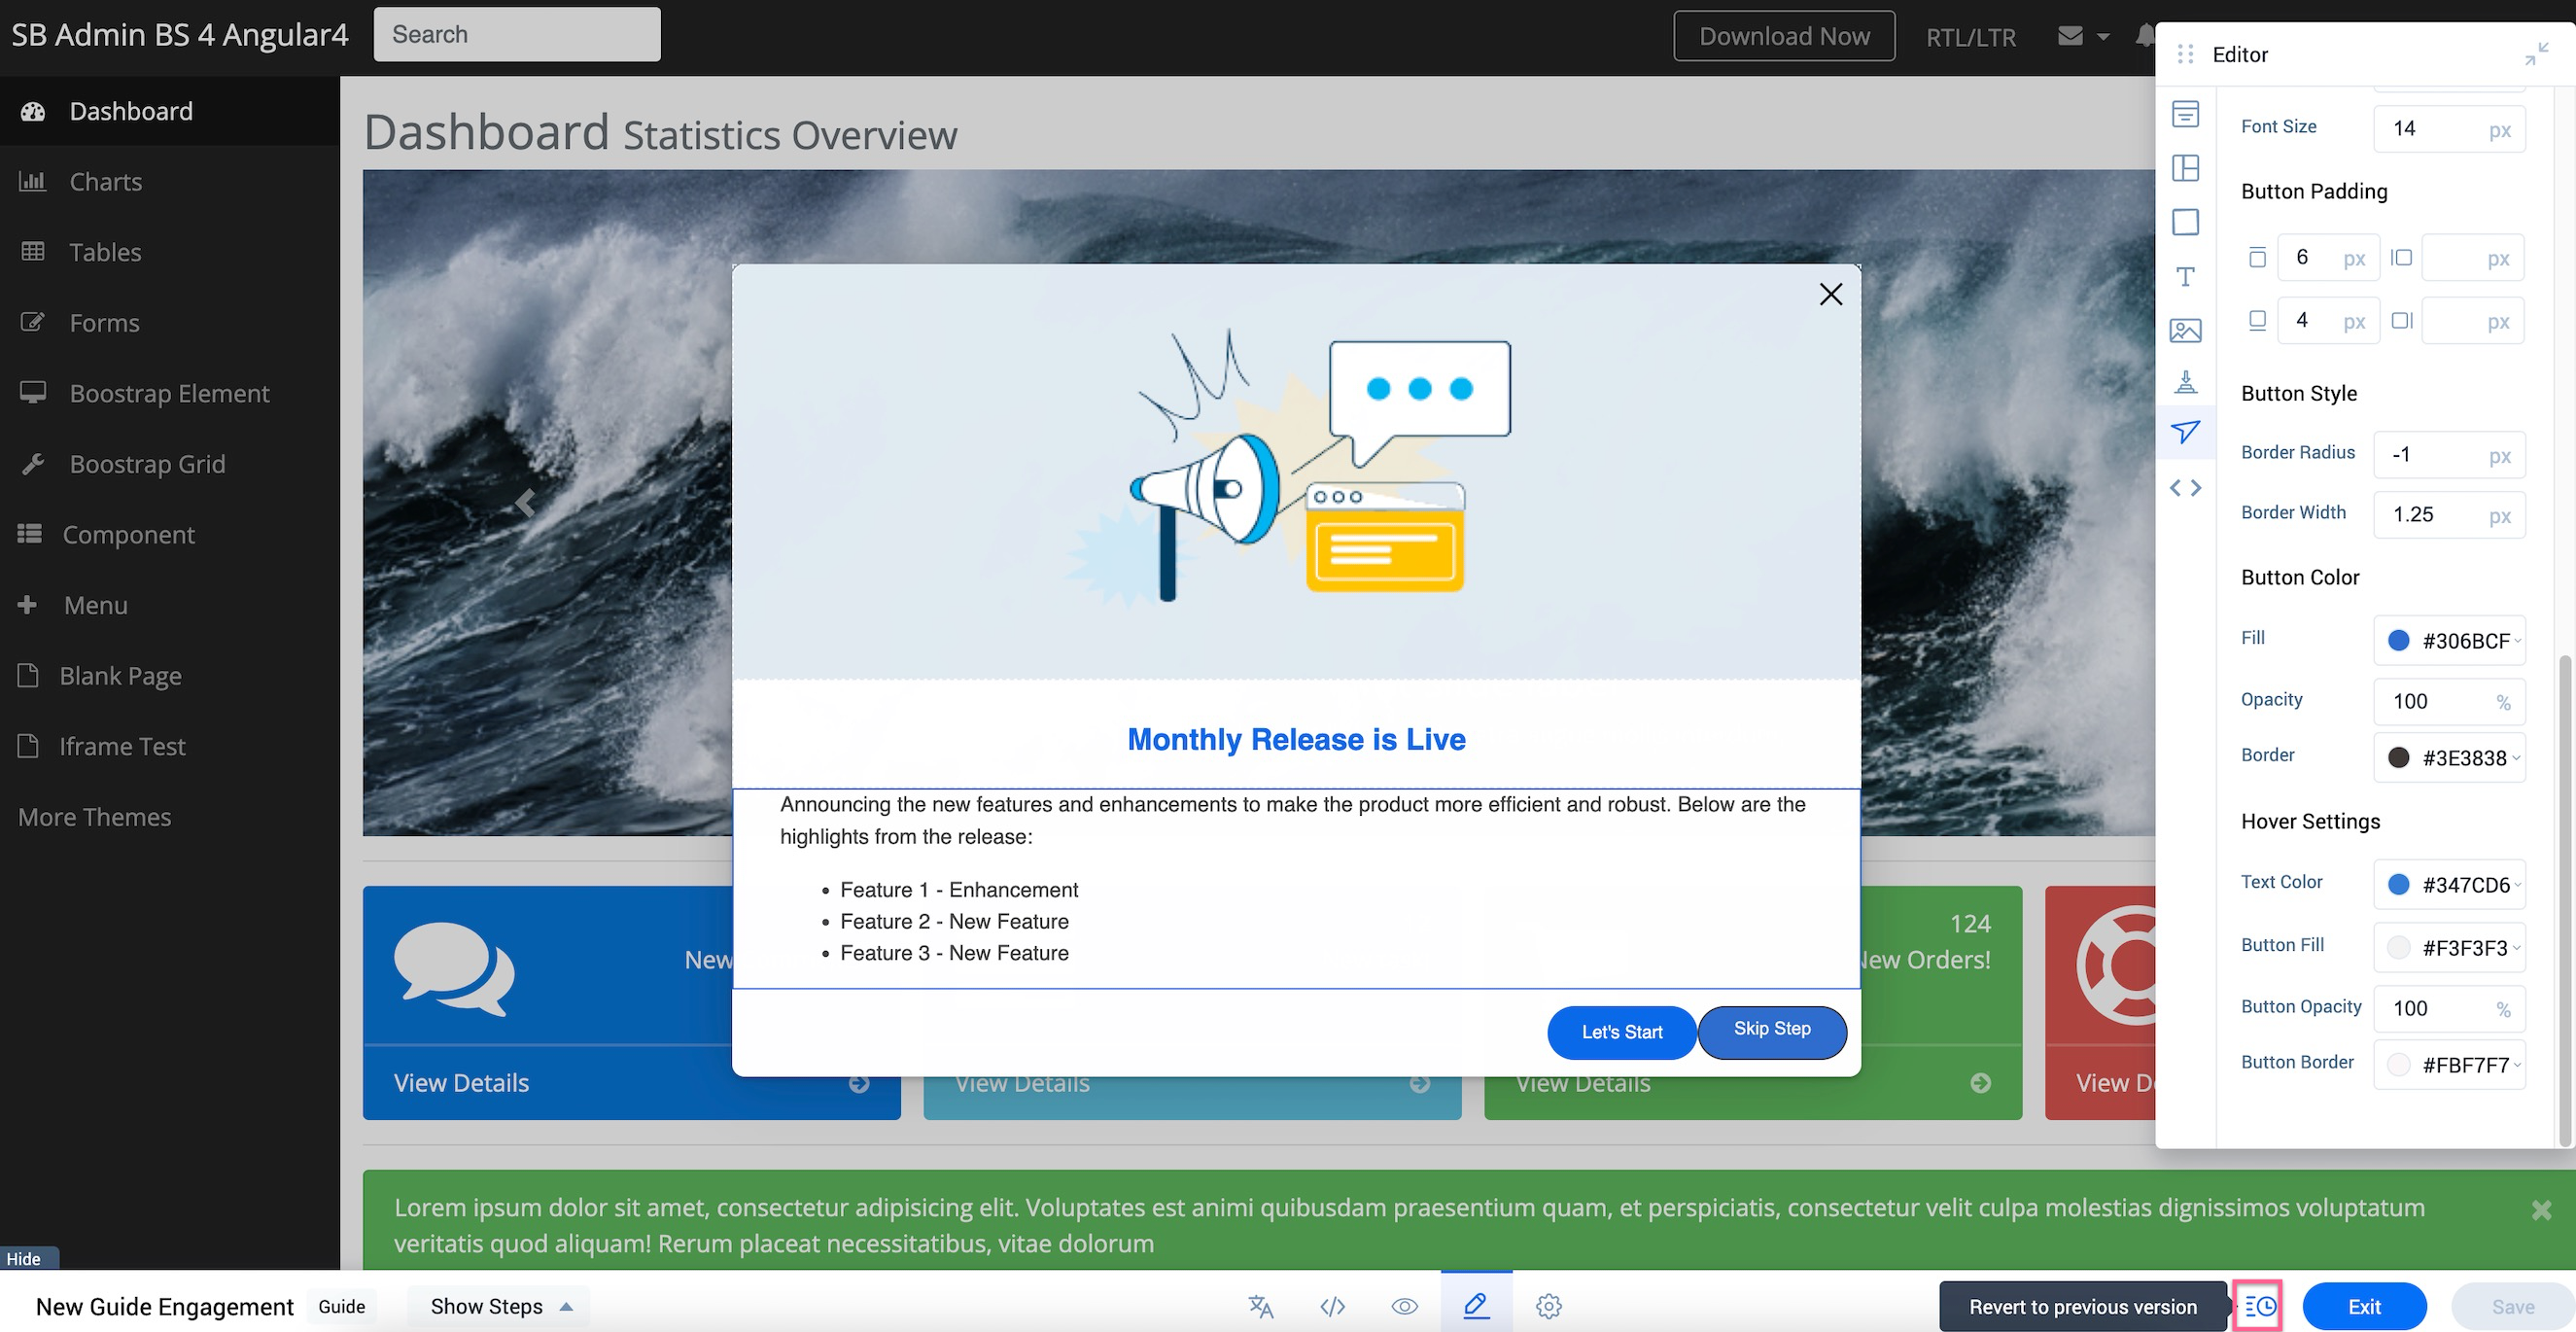
Use Code View to Configure Settings
The footer pane of the Editor provides you the option to view the programming code of the editor that caters to advanced use cases. The Code View helps you modify the engagement content in CSS and HTML formats. The step CSS takes precedence over the engagement CSS.
Preview Engagement
You can preview the current step of the guide engagement to verify how the engagement is displayed on the application interface and to make further modifications.
To preview only a selected step of the guide:
- Click the eye icon on the footer pane of the editor.
- Select Preview Current Step.
After you finalize the appearance and content of your engagement, save and preview the engagement.
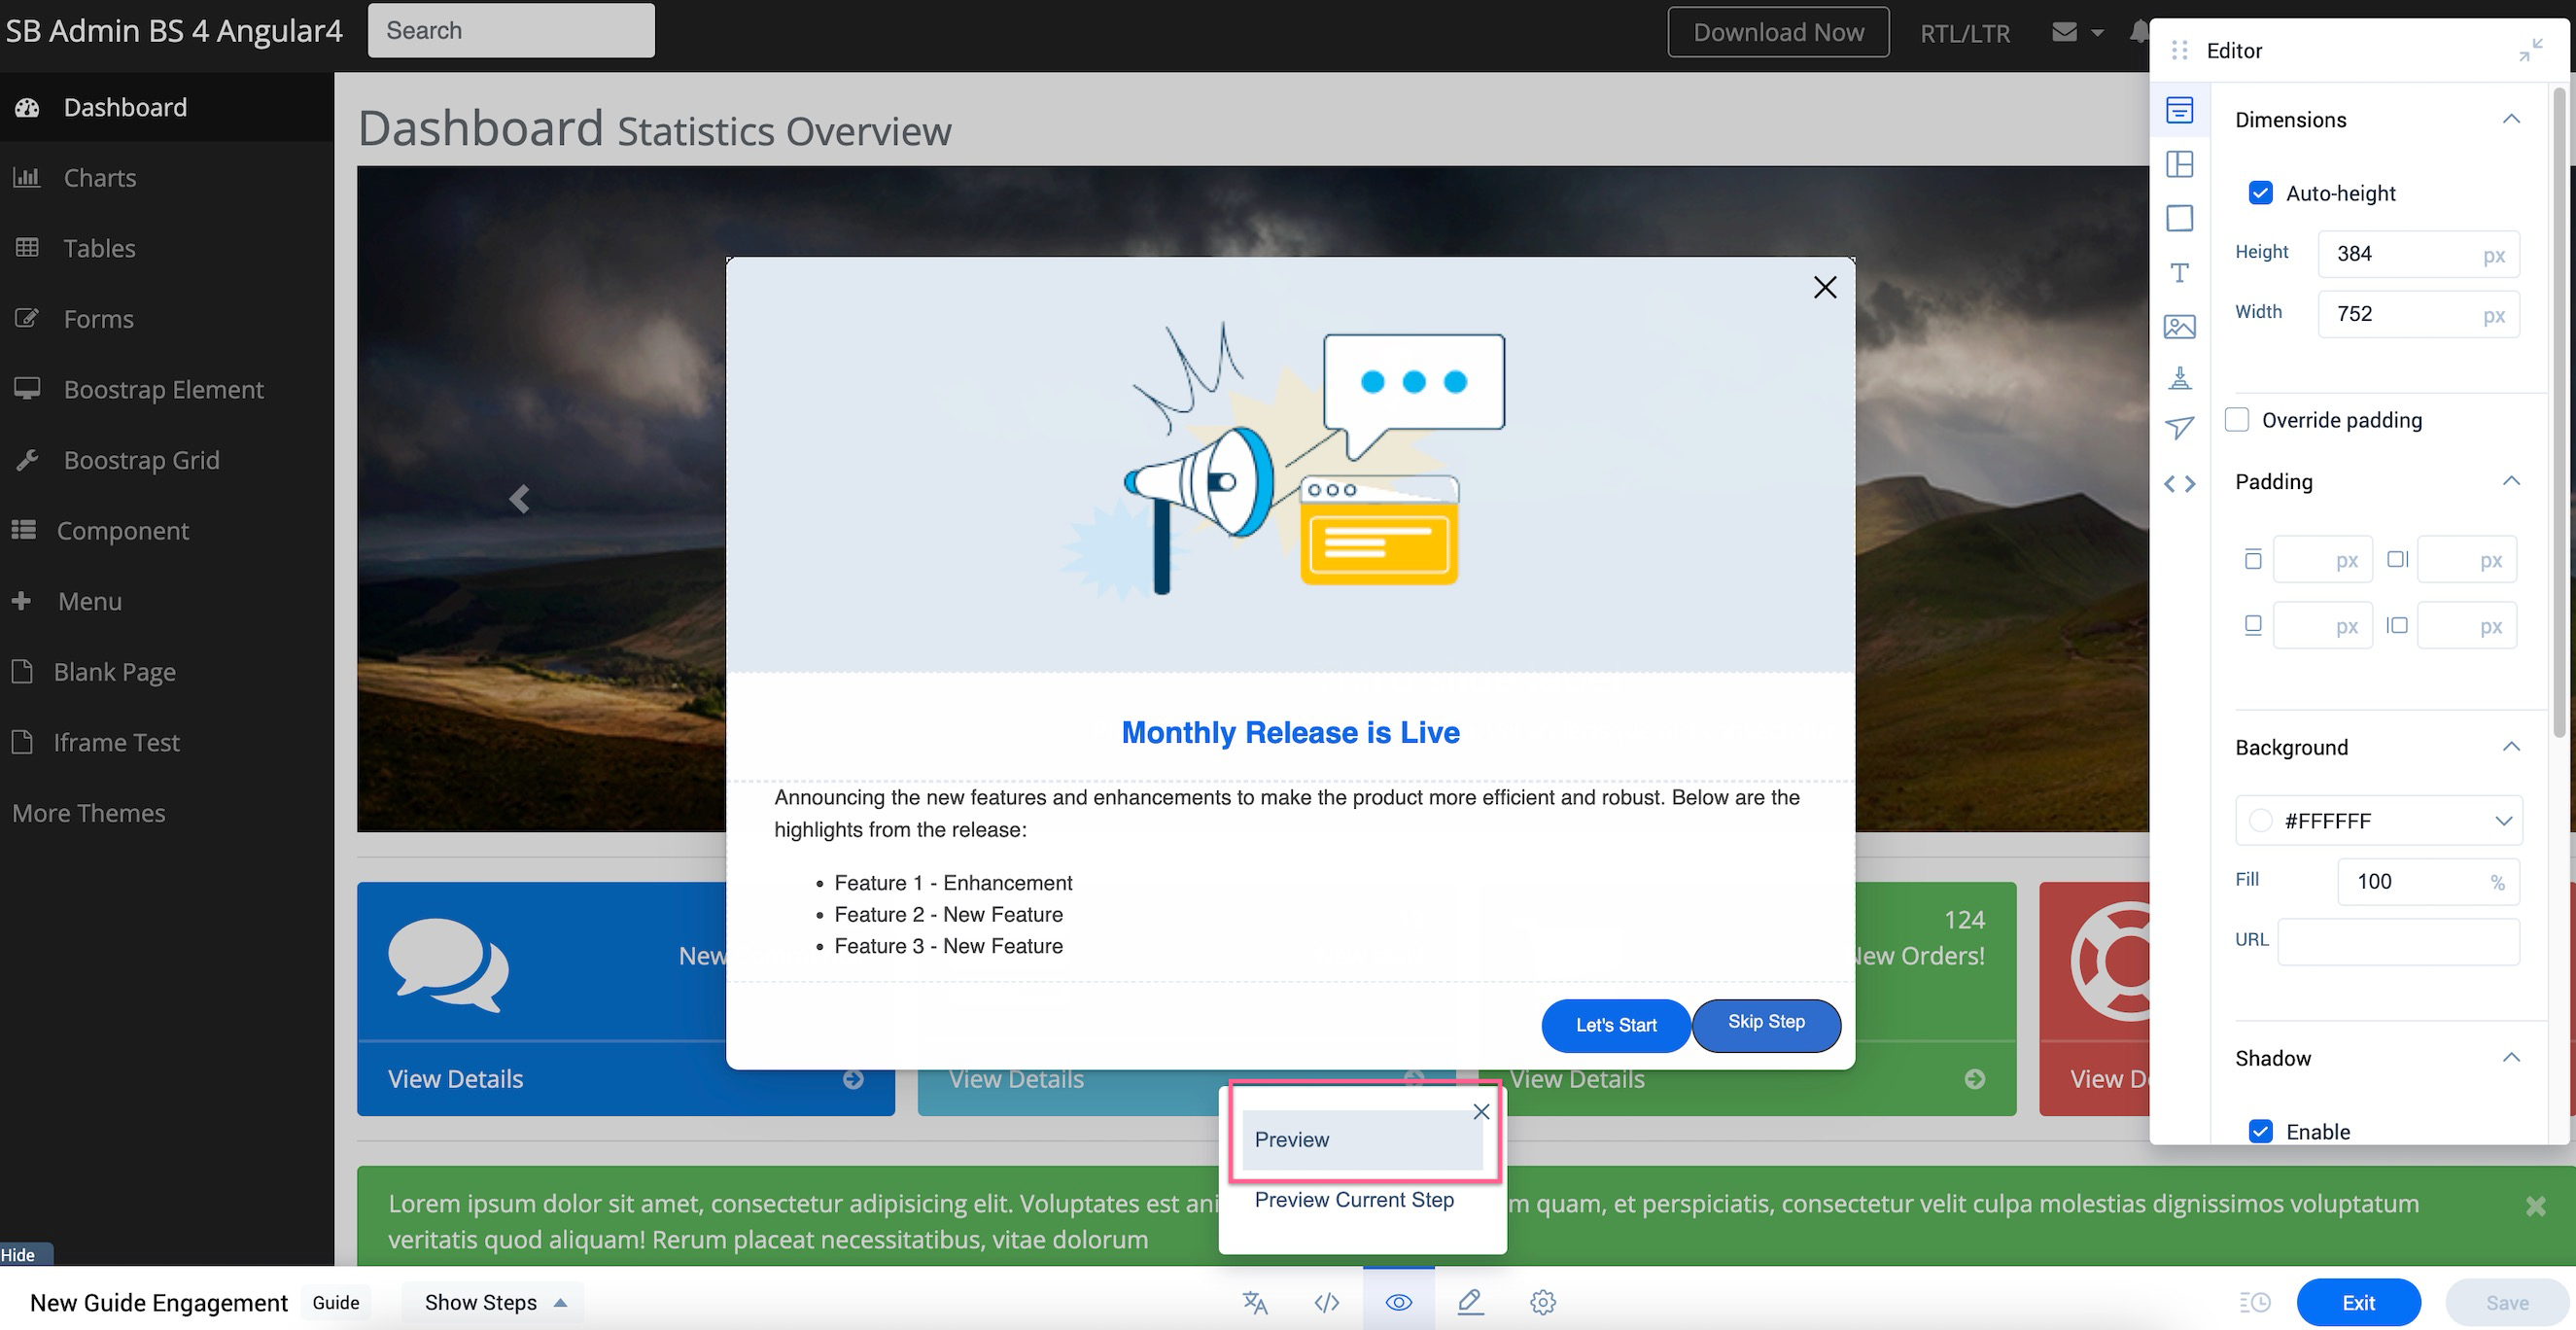
To preview an engagement:
- Click the eye icon on the footer pane of the editor.
- Select Preview. The steps and Editor floating pane are minimized to provide you a full preview of the engagement.
Schedule Engagement
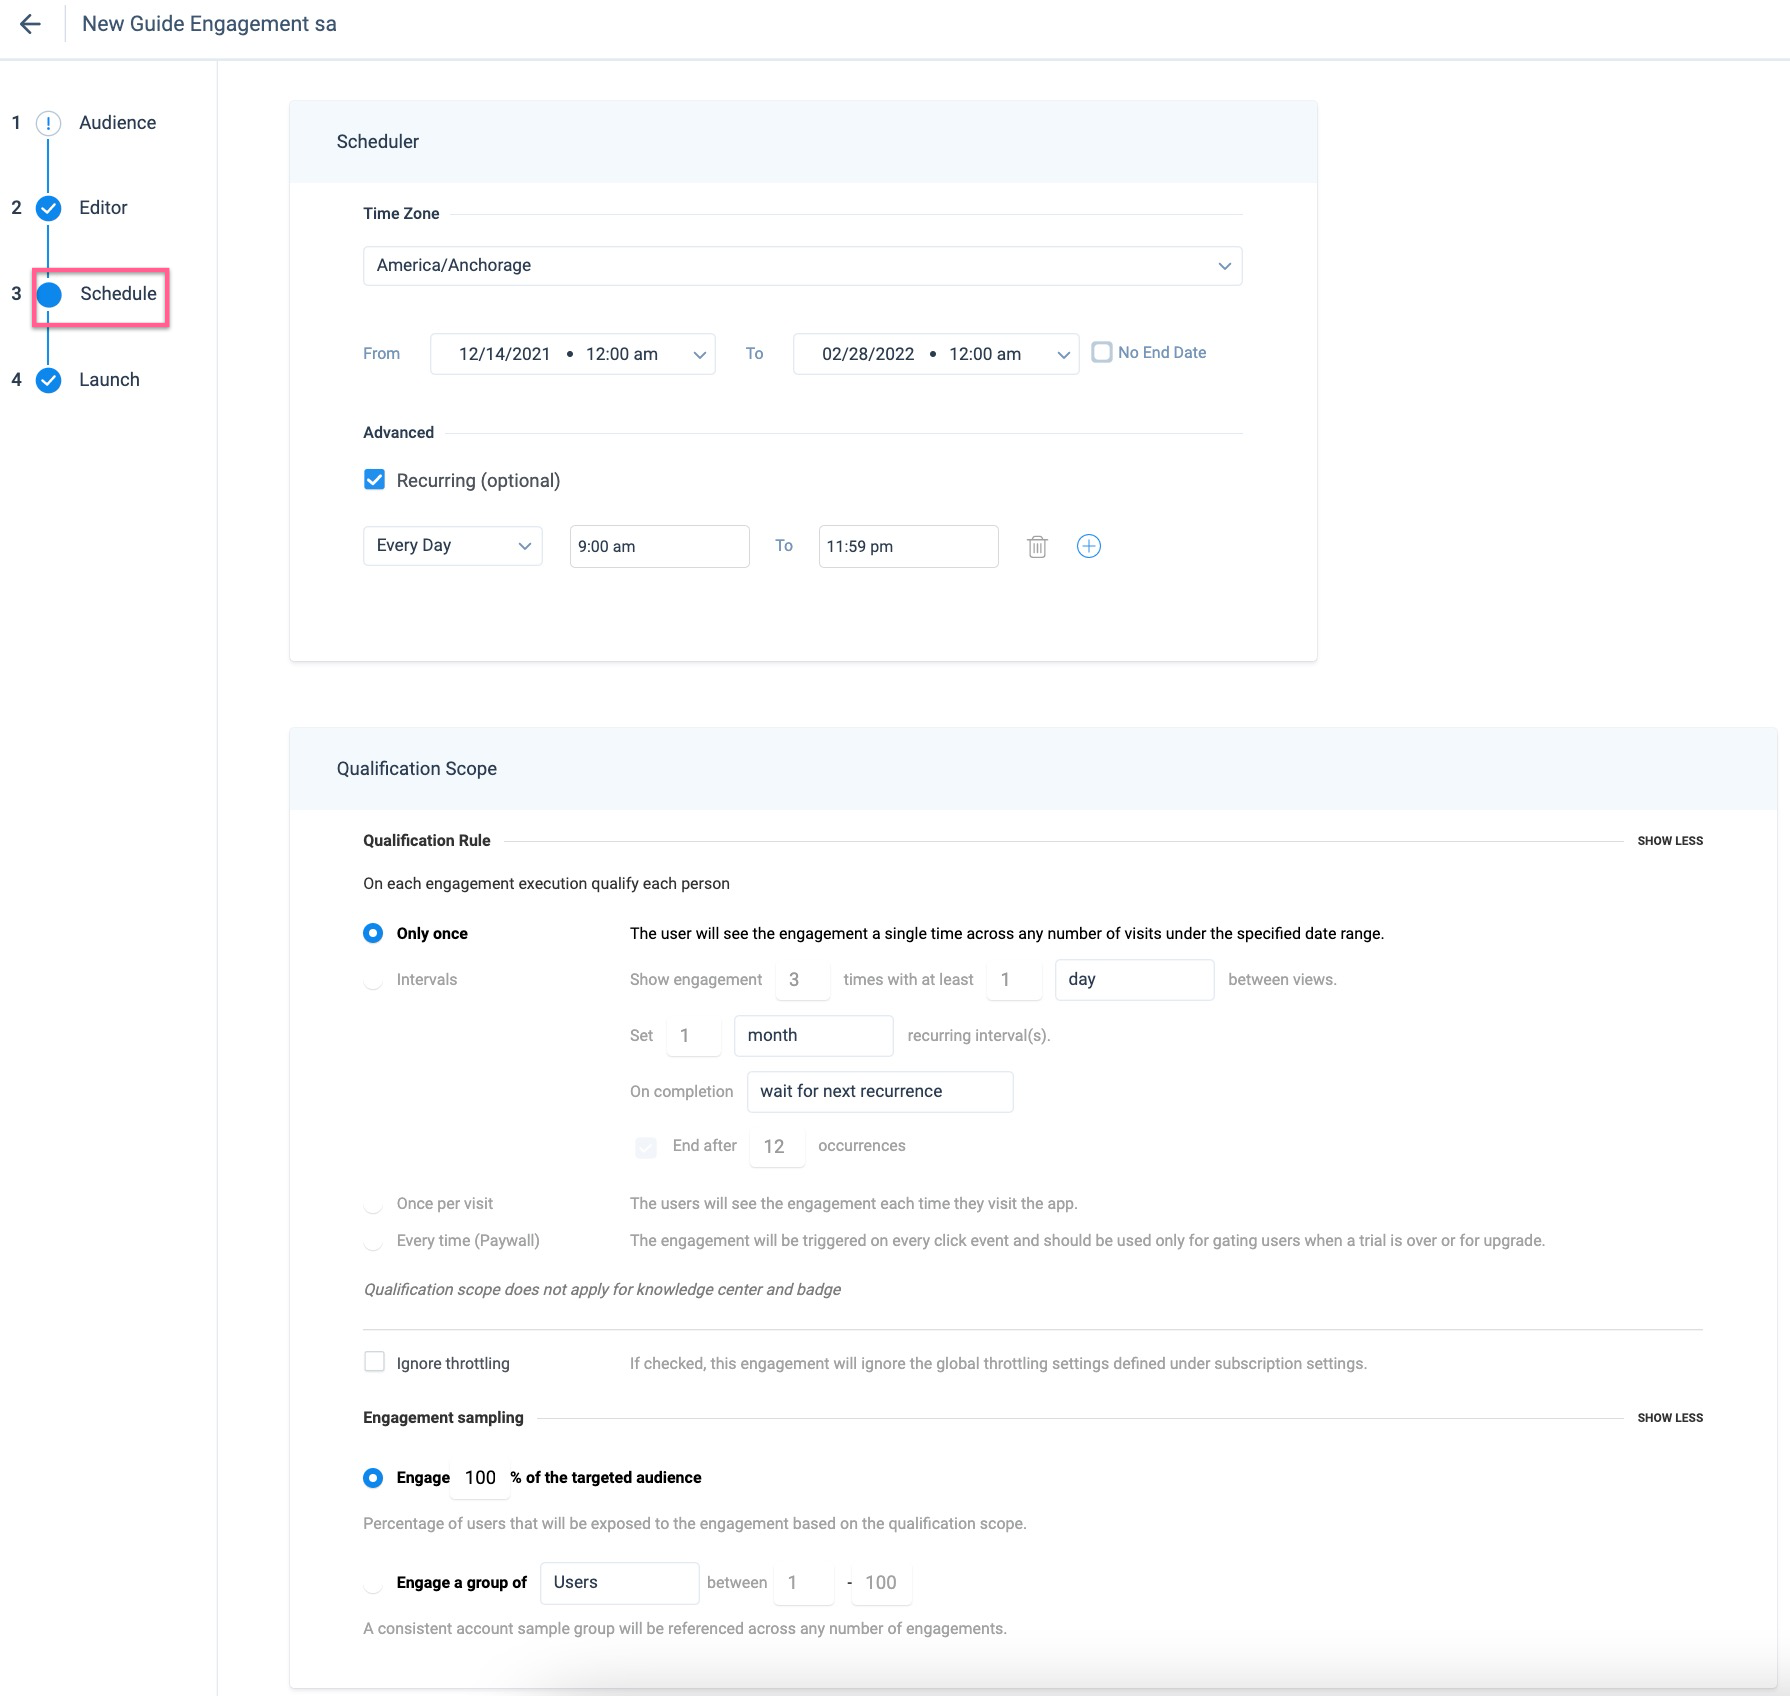
Schedule your guide to control when the engagement needs to be be active and the threshold frequency of displaying it to the users. Specify the number of times and additional intervals in which you want to automatically re-engage your users (for example, display the engagement).
In the Schedule step, set the From and To Date for the engagement. You can also set the engagement to appear on the target application at recurring intervals such as daily or on a specific day of the week.
For more information on the In-App Engagement Scheduler, refer to the Engagement Scheduler article.
Launch Engagement
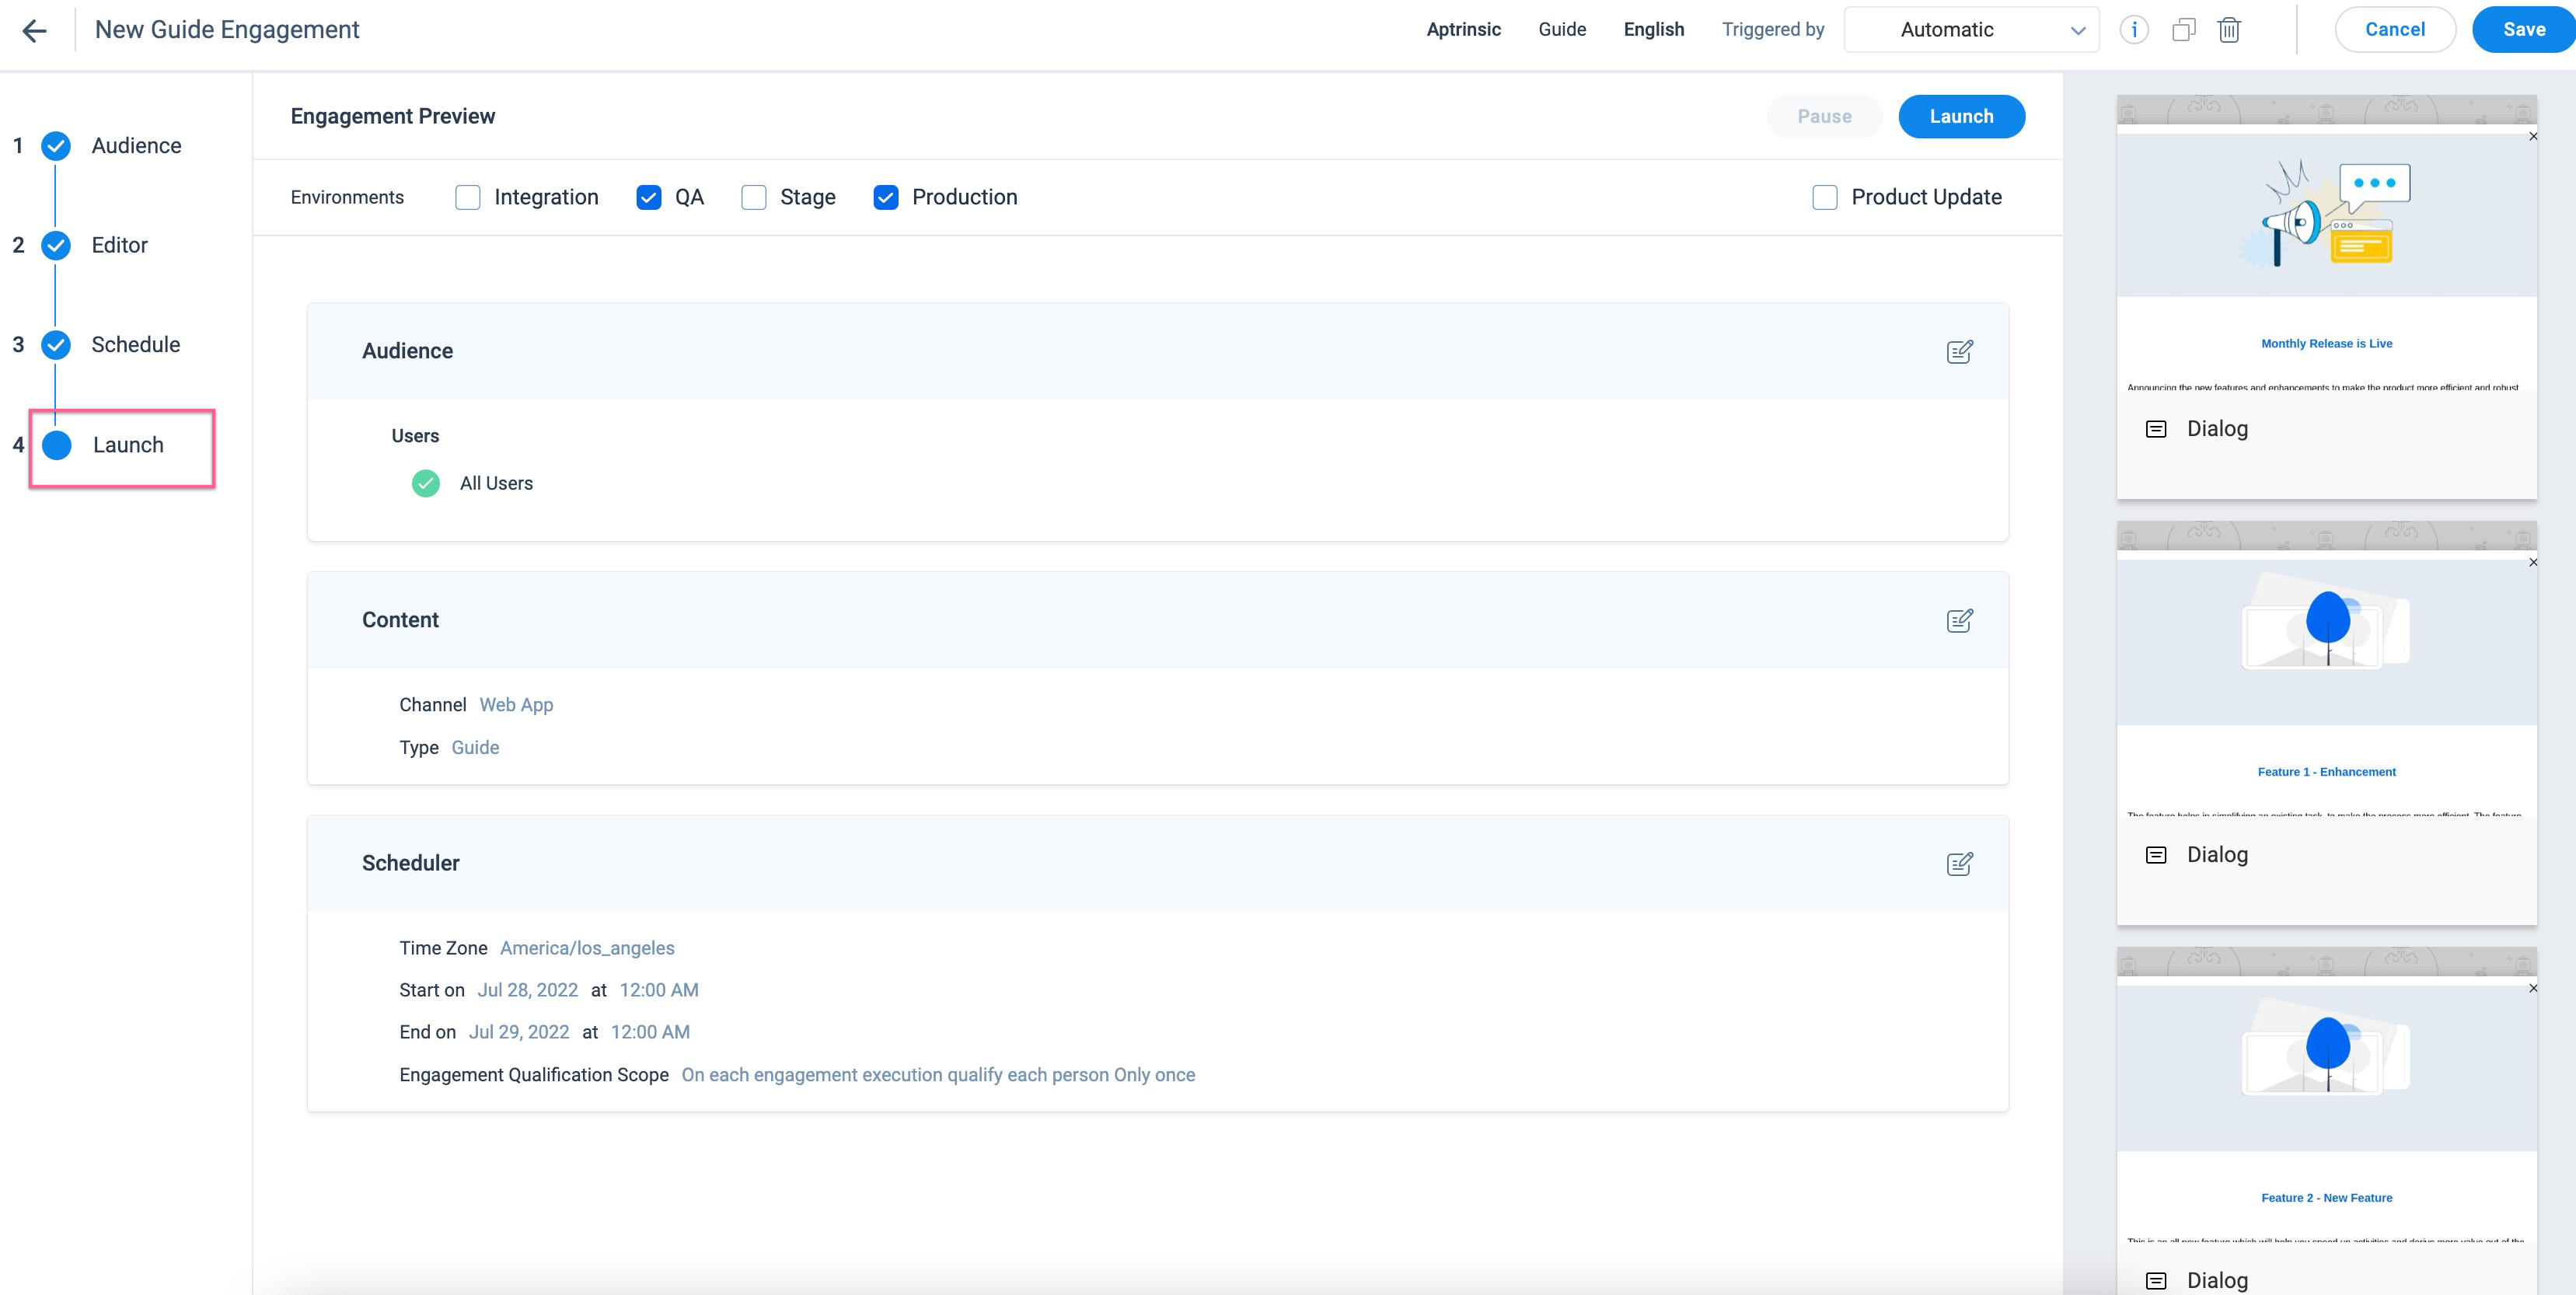
This section gives you an overview of the configurations for your engagement and validates them automatically. Click Launch to launch the engagement.
Gainsight PX does not allow you to launch the engagement if:
- Steps in the Guide are not mapped to the UI elements
- Audience rules are not defined accurately or saved
- Changes to any of the step are not saved
Build Cross-Product Guides
If you are an enterprise account holder with multiple subscriptions and multiple products, you may need to create product tours that traverse across products. You can build Guide engagements across multiple products within a subscription or across subscriptions within a subscription group.
To enable this feature for your subscription, contact Gainsight PX Support. You need to provide your subscription and domain details along with this request.
Additional Resources
For more information about the advanced features of the new editor, refer to the following articles: