Audience Selection (Engagements)
This article explains how to configure the target audience when building user engagement.
Overview
Gainsight PX powerful platform collects your product's usage data as your users create events but what data is not useful without the ability to leverage it for your needs. This is where audiences and audience selection come into play.
Audience selection can be applied all over the Gainsight PX platform, from our powerful reporting (For example, cohort/retention, feature adoption, funnels) and down to the real-time user engagement launching (For example dialogs, sliders, surveys, etc).
Audience Selection for Engagements
The first step when building a user engagement is to select the audience to target. An Audience can be defined based on either or both the user/account's demographics, feature usage, platform, custom events and/or combined in-app behaviors and more!
You can use the audience rules to define the criteria. For more information on the audience rules, refer to the Audience section of the Anatomy of Engagements article.
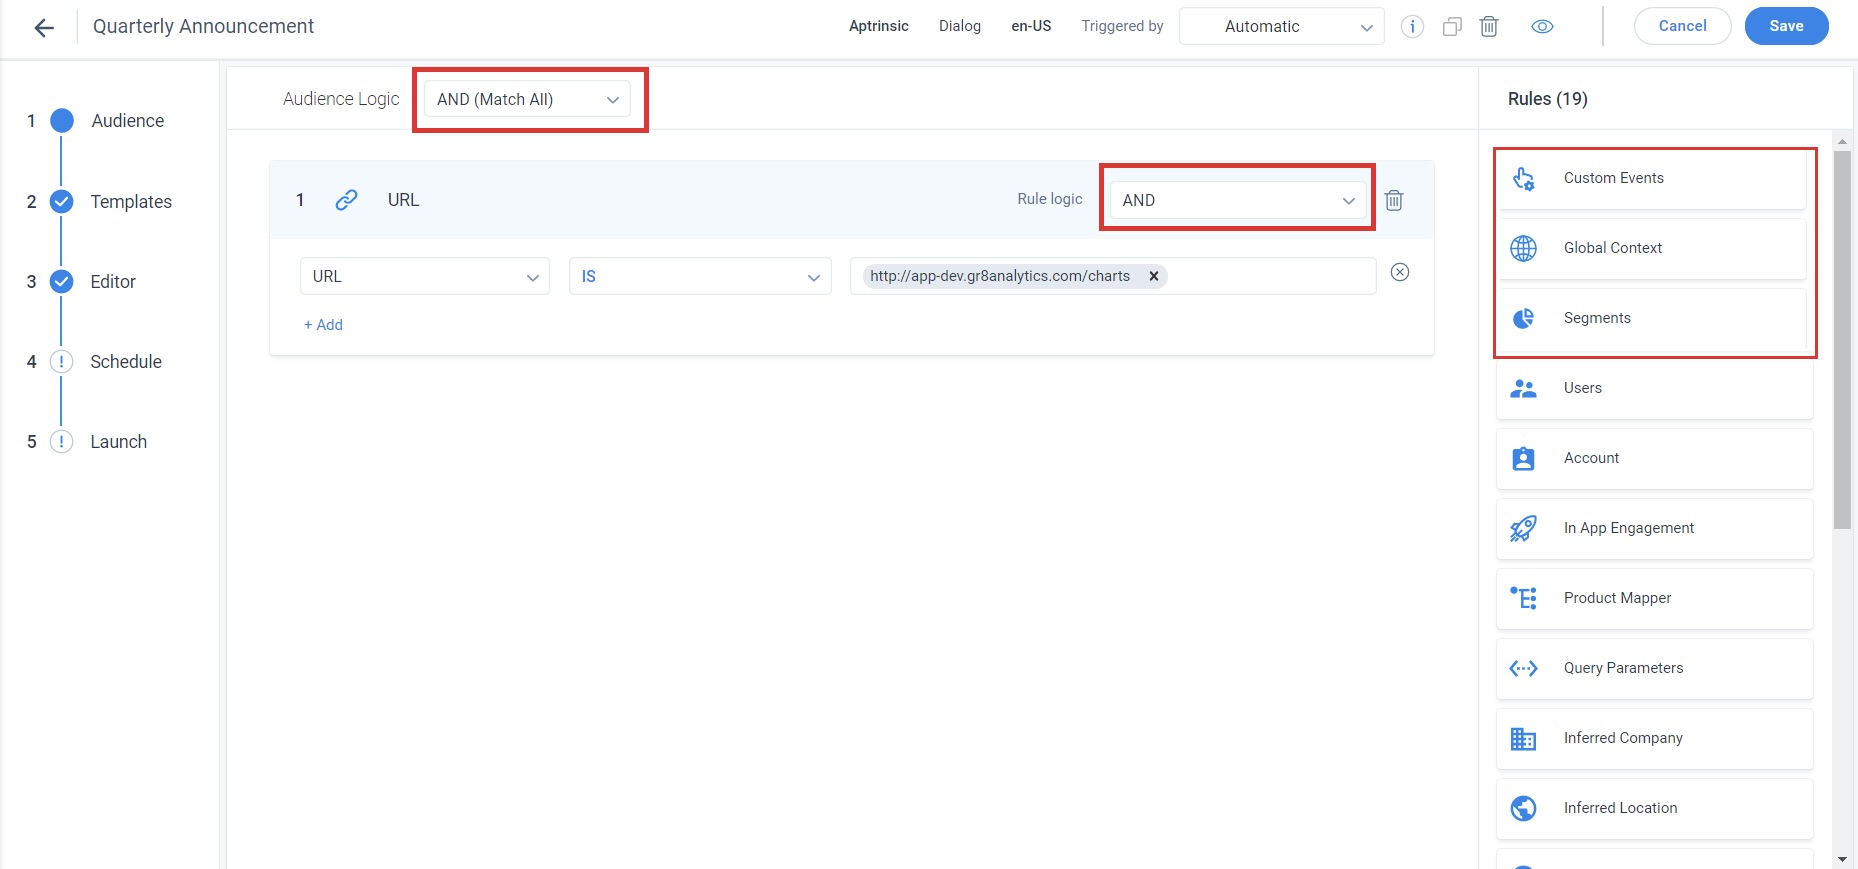
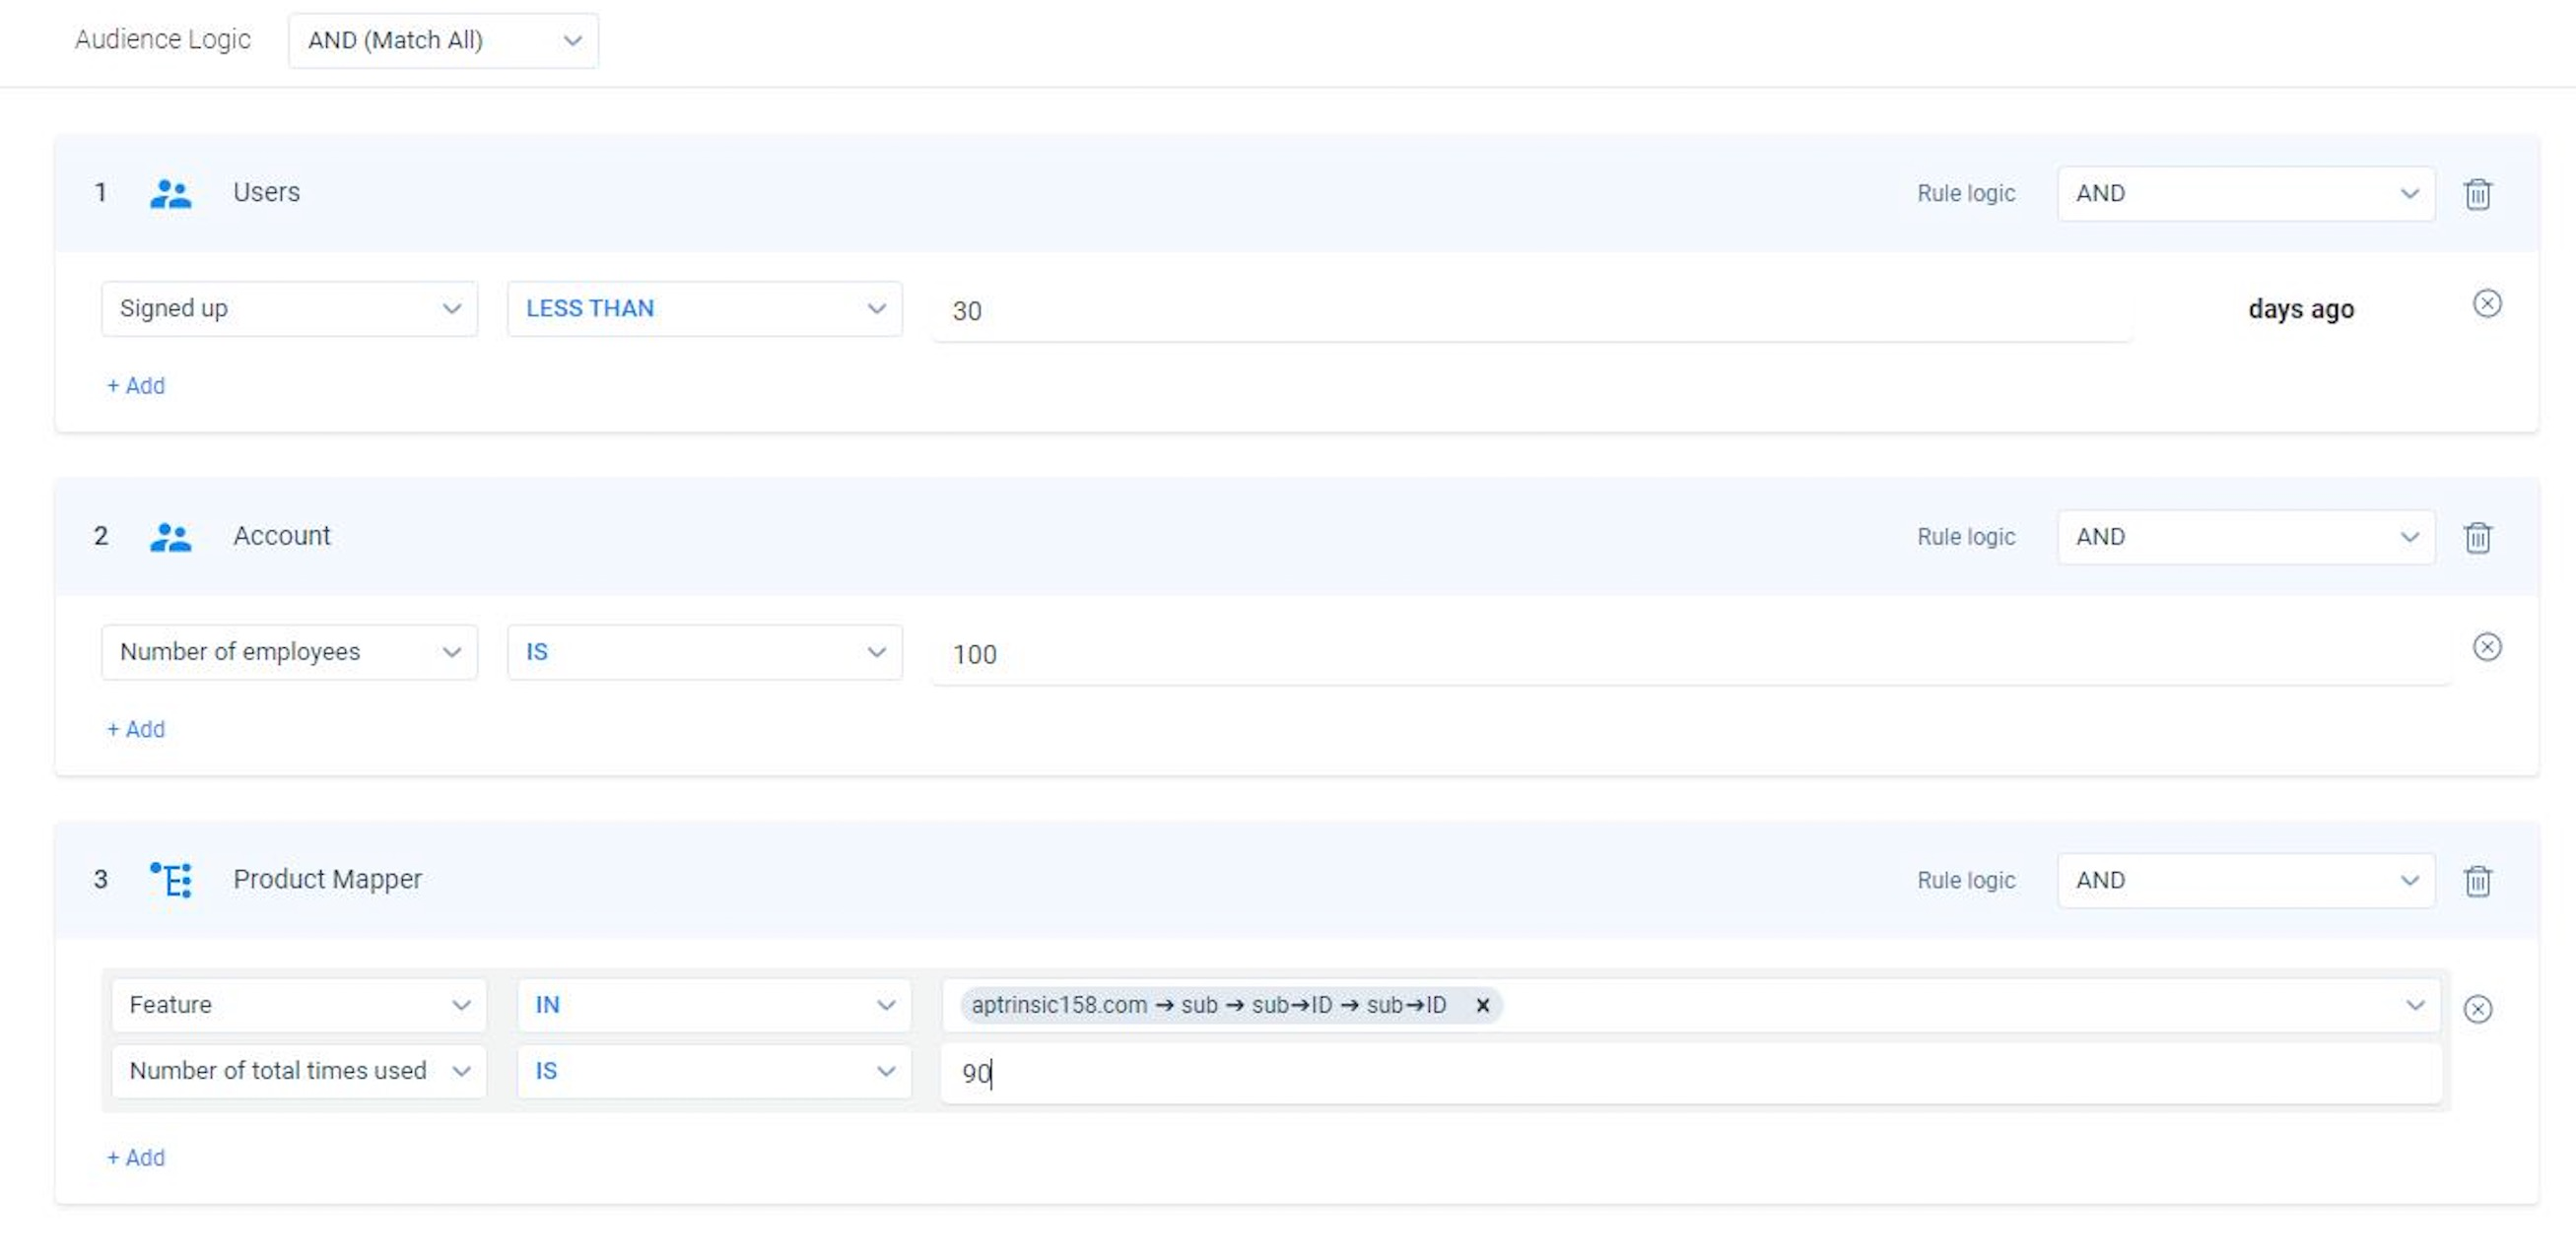
When defining audience criteria, you can combine them with simple or advanced conditional logic. The following image shows the sample audience logic.

The above engagement is configured to target an audience of Admin Users who have visited the product more than 10 times, belong to a Premium account, and have used the 'People Maps -> People Maps - View Influence' feature more than 14 days ago.
Take notice of the powerful Rule Logic options within each block as well as across each block to allow for powerful advanced targeting based on BOTH user/account profile attributes as well as behavioral.
For more information about all frequently asked questions, refer to the In-App Engagements FAQs article.
 Preview the Estimated Target Audience
You can preview the estimated list with target audience in real-time. This is helpful for complex audience rules where estimating the target audience in real-time can be challenging.
To preview the target audience:
- From the left menu, click Engagements.
- Create a Guide Engagement. For more information on how to create an engagement, refer to the Create In-App Guide Engagement section in Create Guide Engagement article.
- From the left pane, click Audience. For more information on Audience selection, refer to the Audience section in Anatomy of Engagements article.
- In the Audience section, add and configure the required rules.
- Click Preview button. You will get a list with the number of estimated target audience based on the 7 days of historical data.
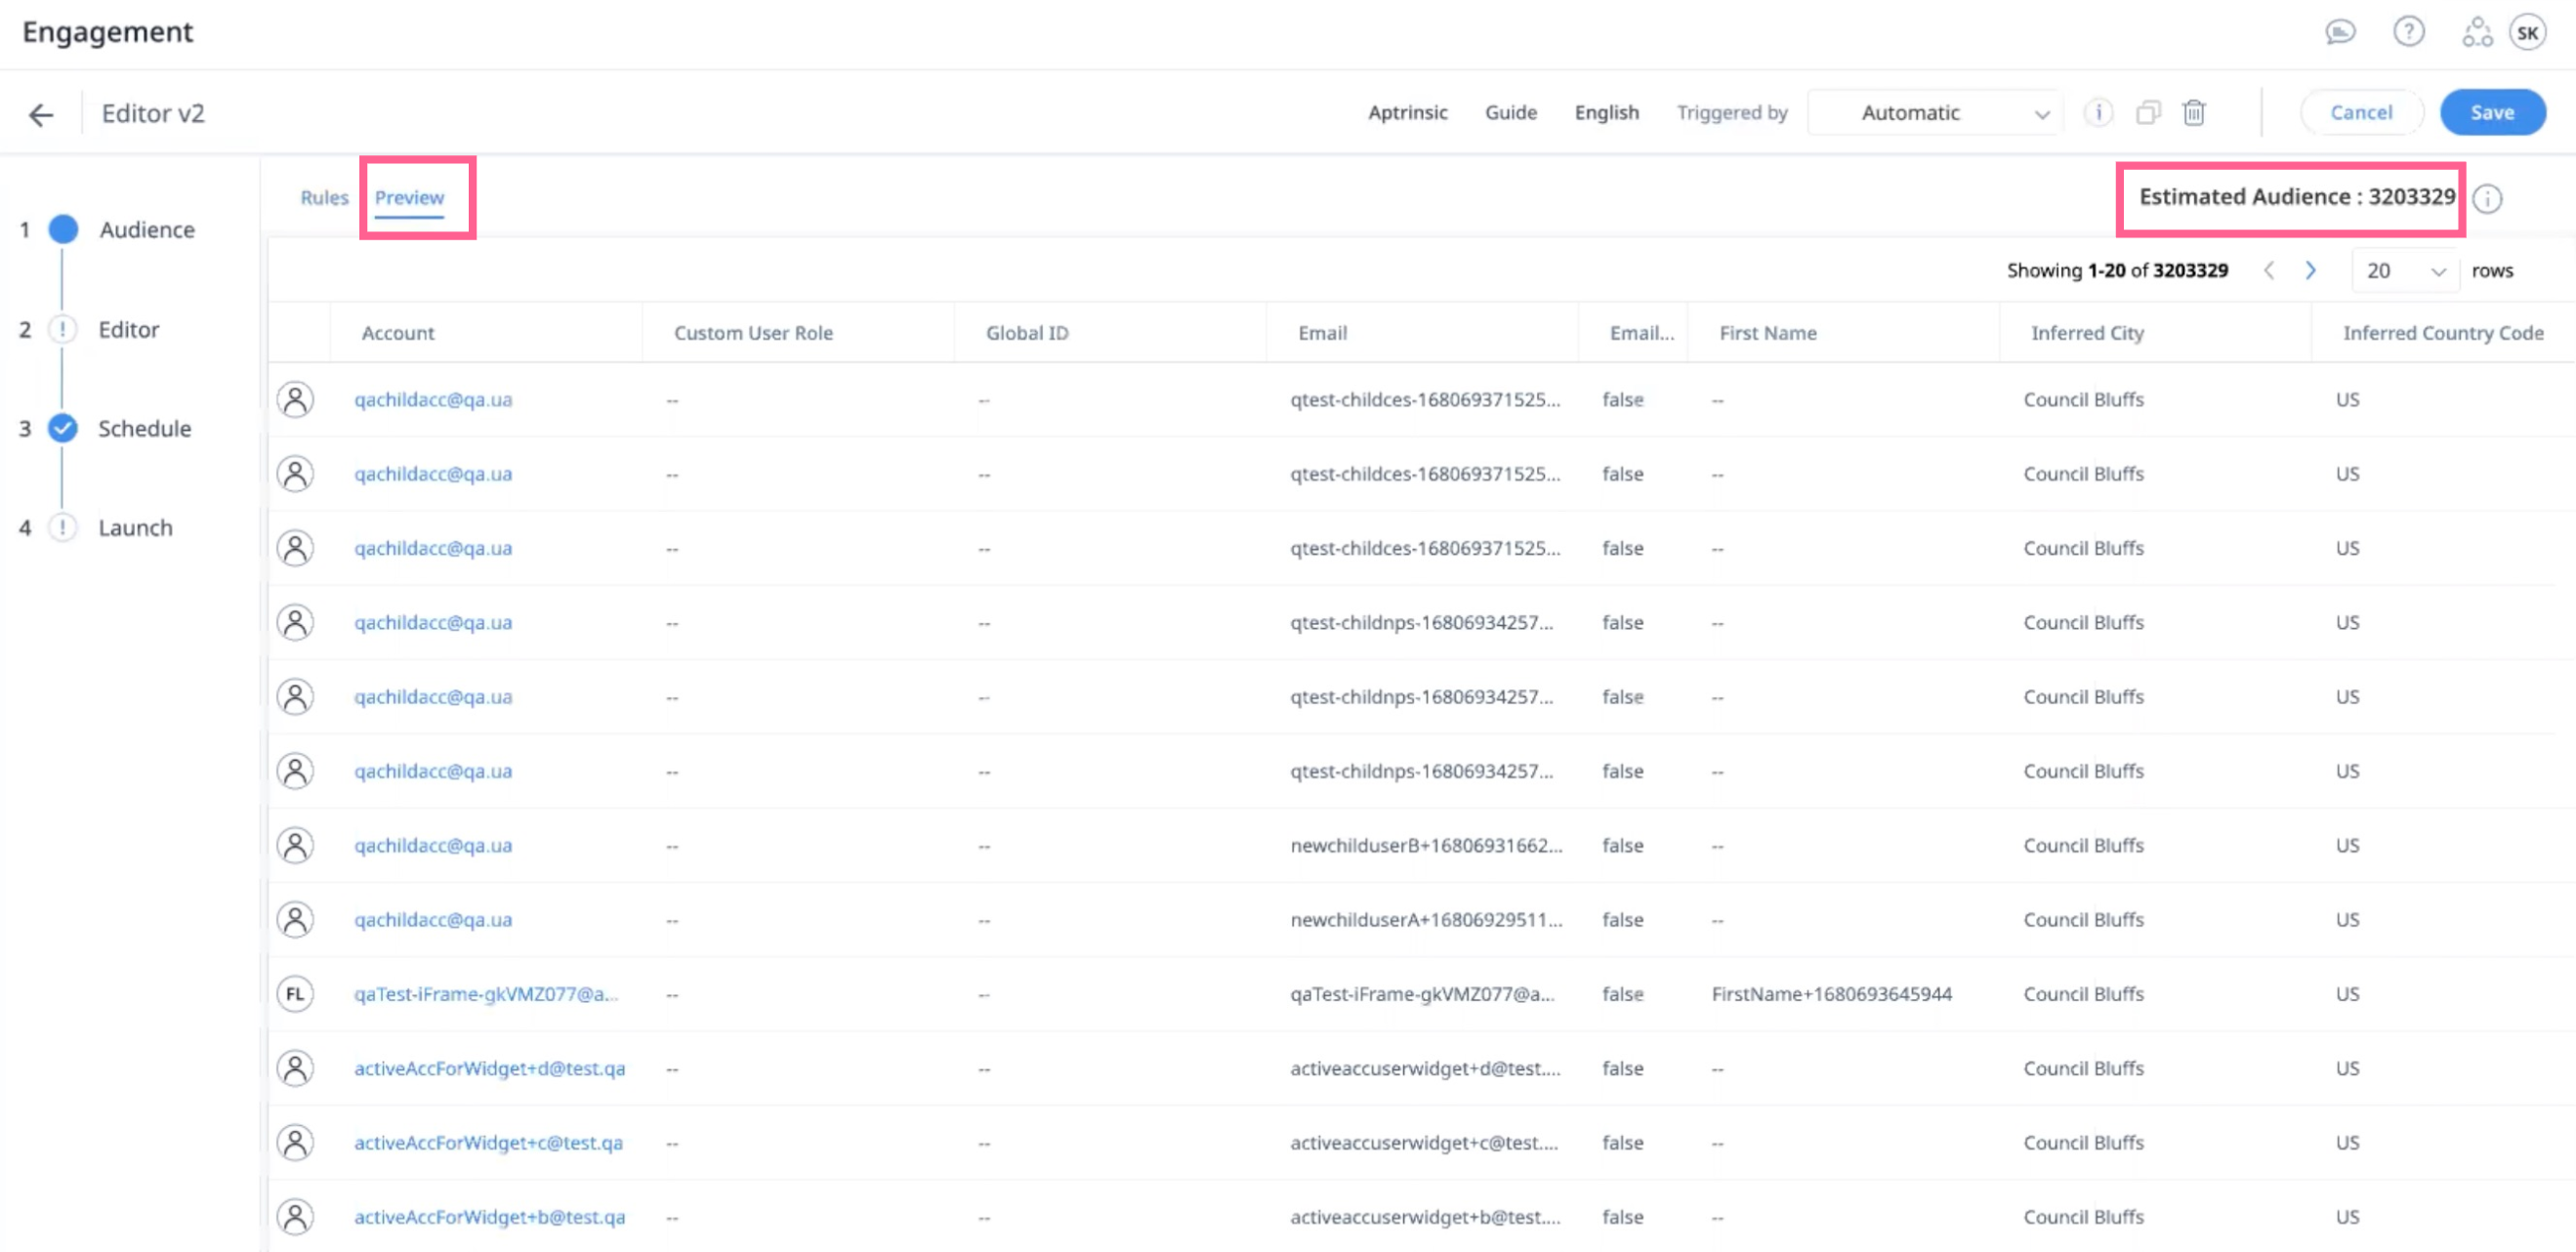
Note: While the estimates for static rules are definite, the estimates may vary in real-time for dynamic rules such as global context, browser usage, and so on.
Audience Selection Use Cases
Configure Cross-Product Engagement Audience
Gainsight PX supports launching an engagement in a certain product based on feature or module usage in another product.
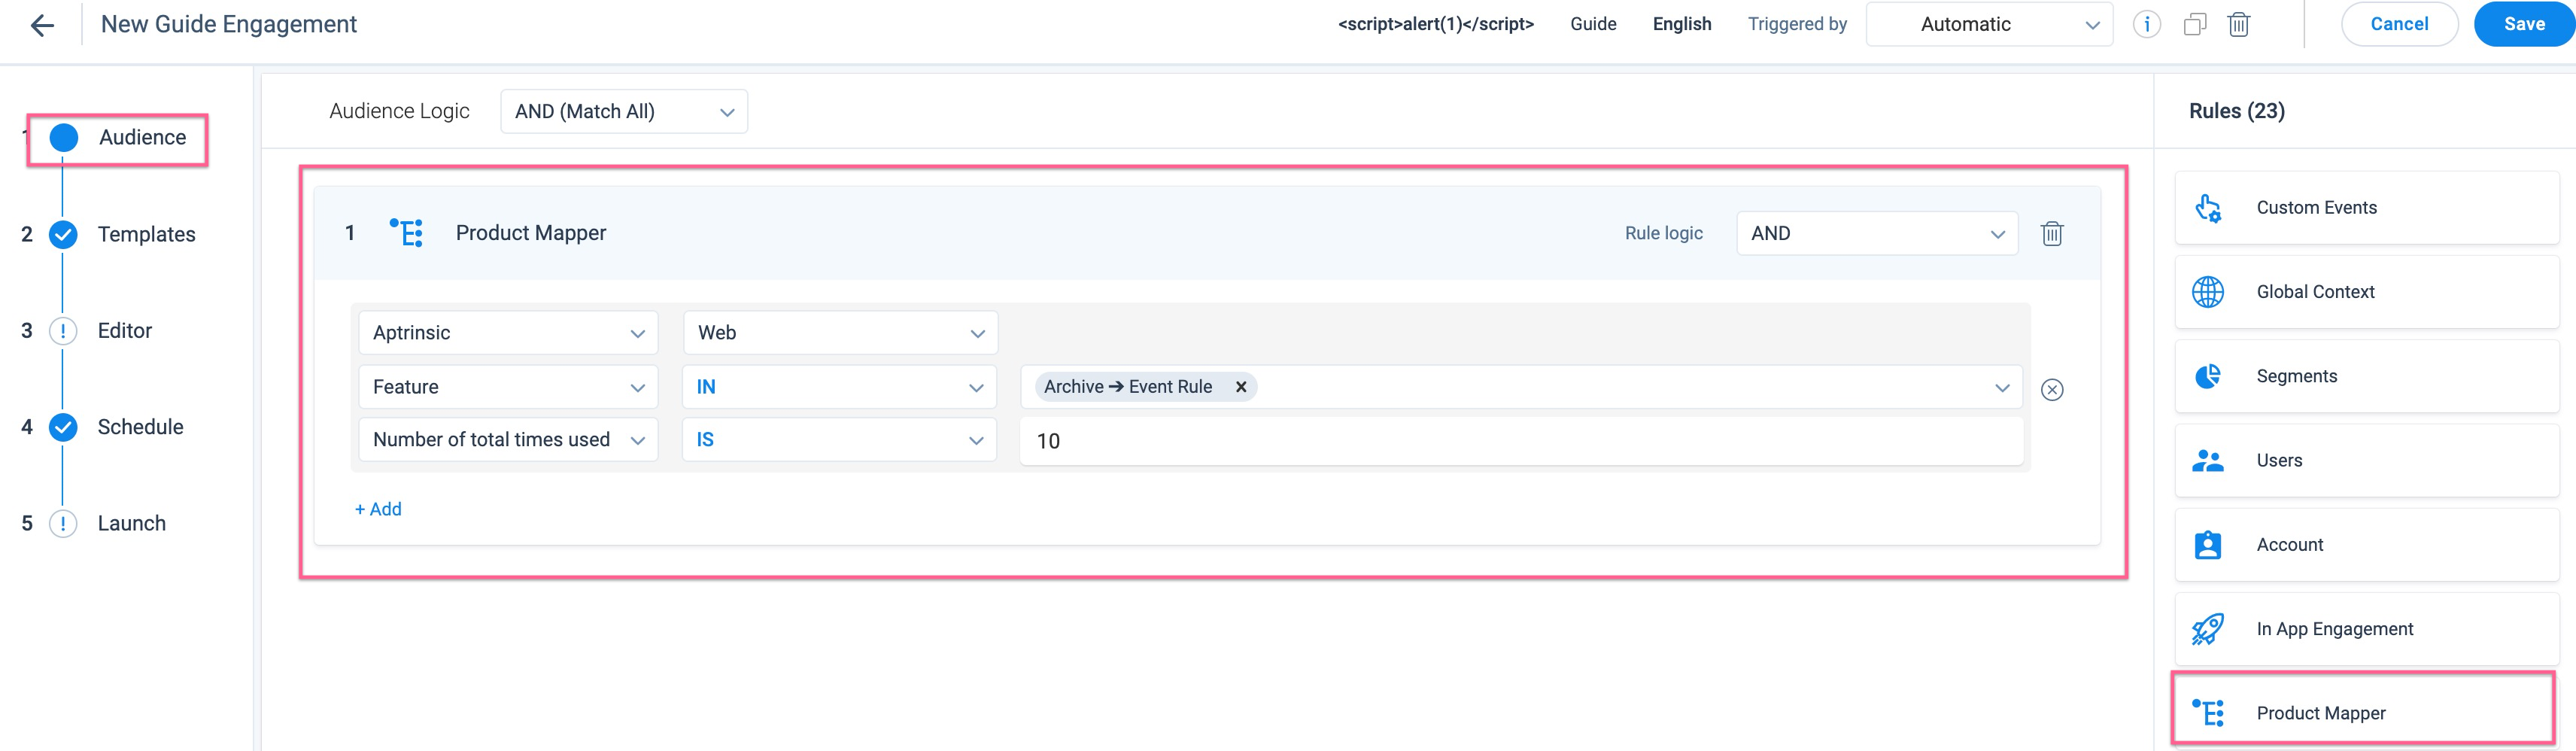
To select cross-product engagement Audience, configure the Product Mapper audience rule.
Example Business Use Case:
Consider that a company has two products A and B. You can launch a Guide engagement for a cohort of users in product A based on a specific feature adoption in Product B. In the image below, the Guide engagement is launched in Product A for those users who have used the Archive > Event Rule feature in Product B (Aptrinsic) for 10 times.
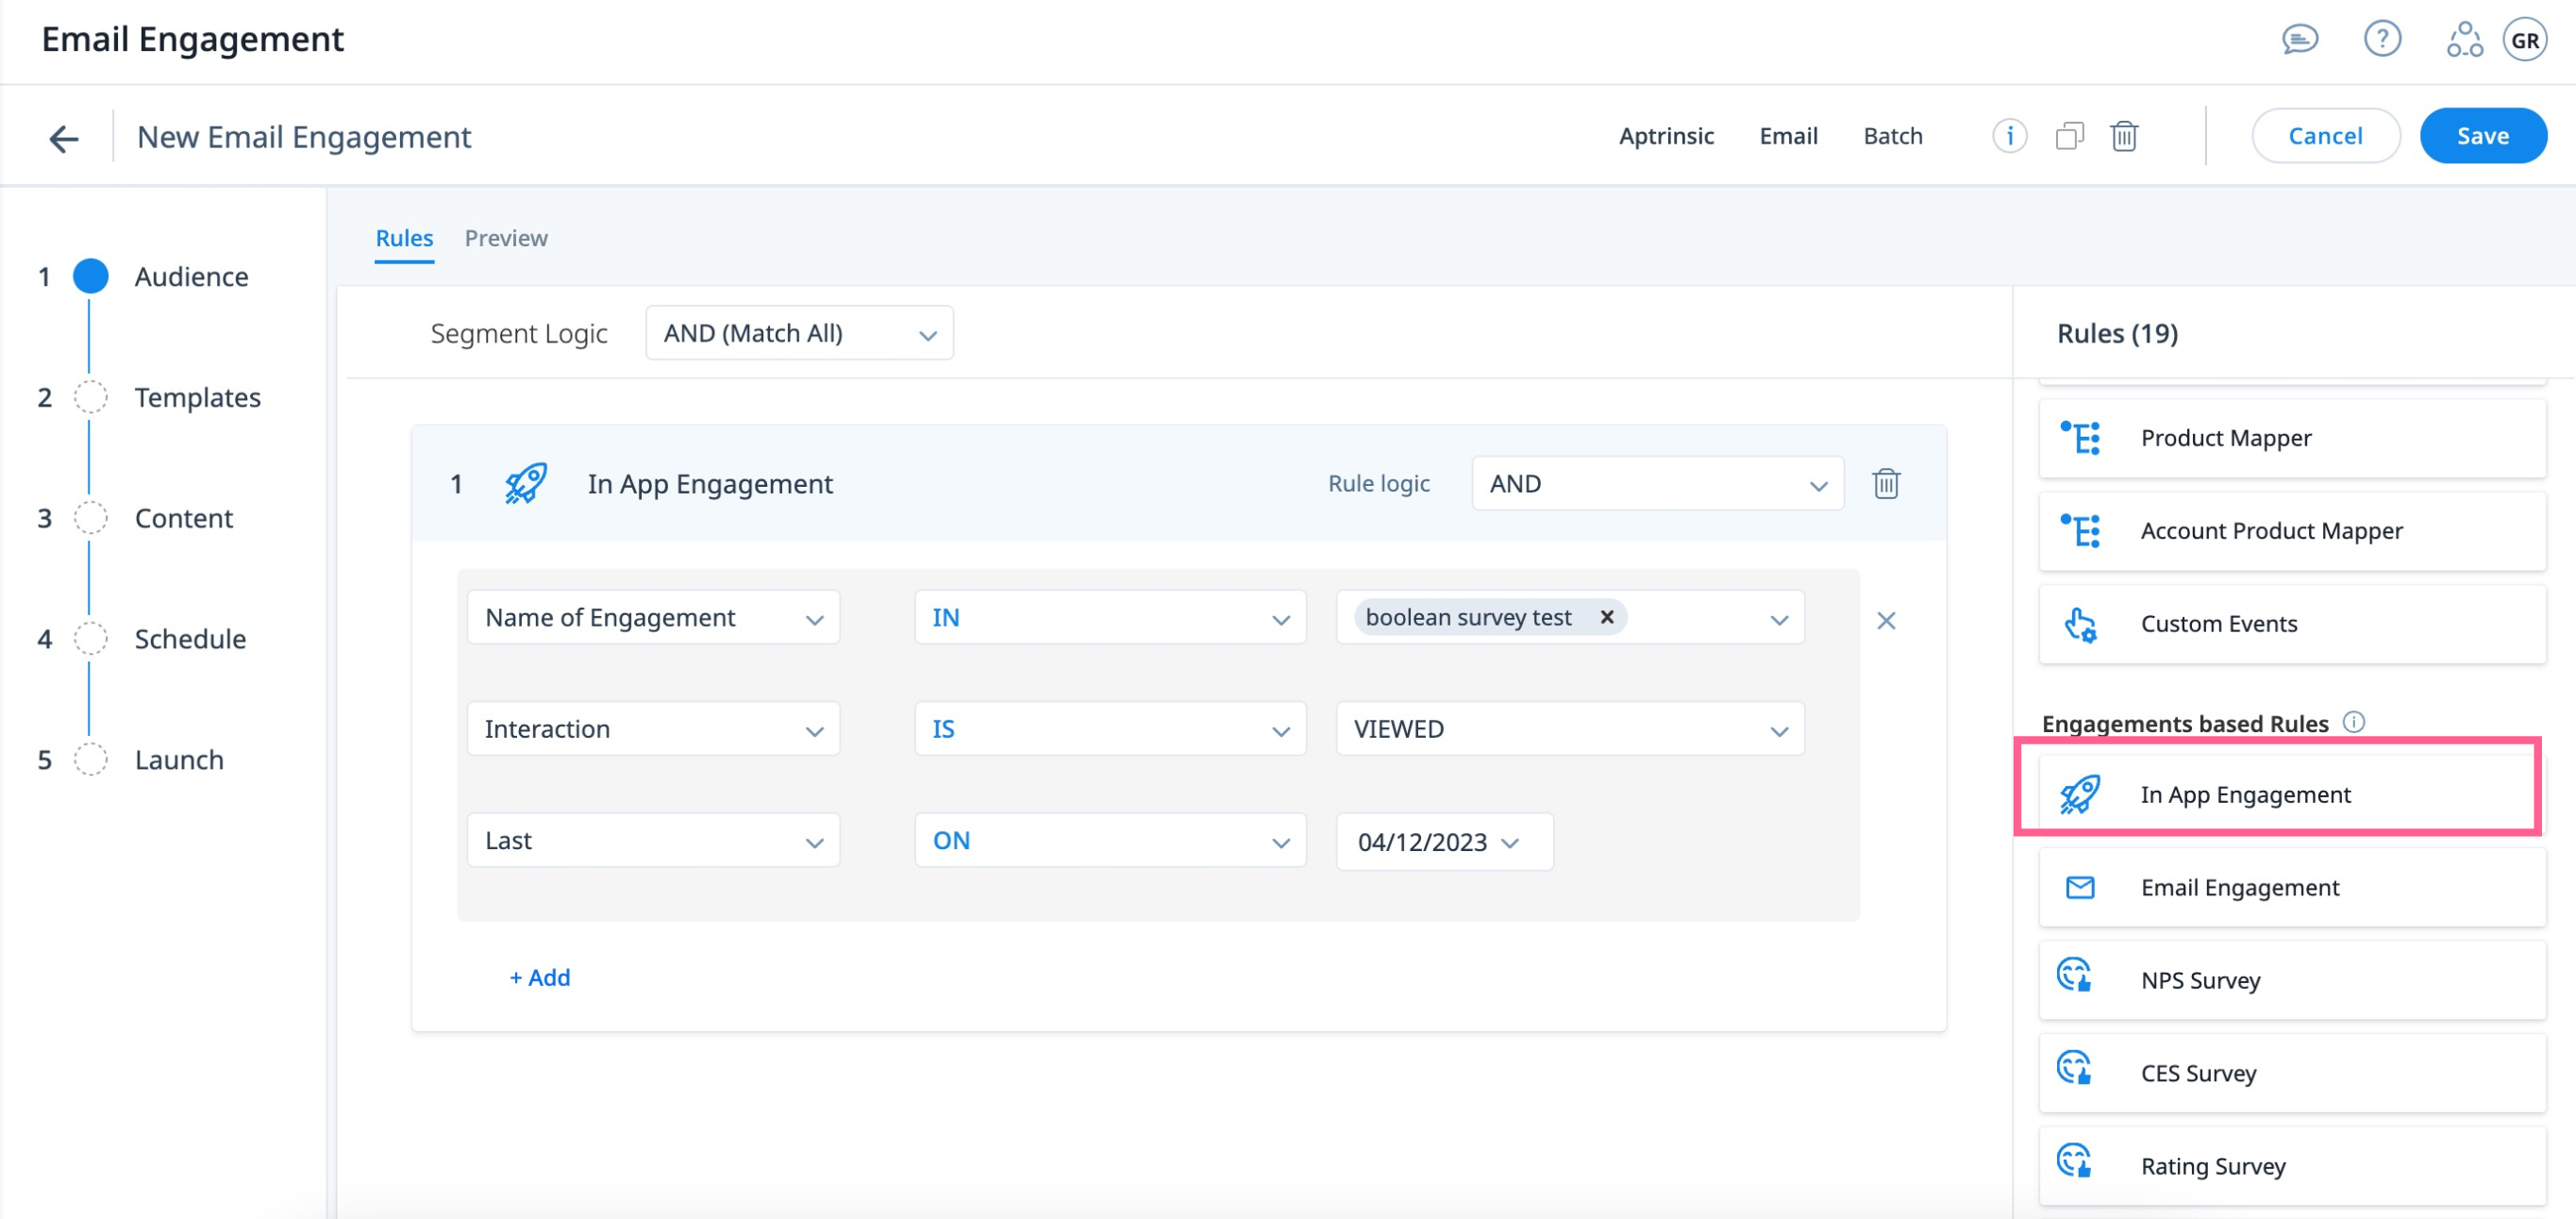
Trigger Email Engagements Based on In-App Engagement Rules
Gainsight PX supports the In-App Engagement Rule for email engagements in the Audience selection of engagements. This allows you to deliver targeted and personalized email engagements to the qualified users based on their specific interactions with the application.
This improves engagement rates by ensuring that you can send relevant content to the users. For example, if a user has not used a specific feature (by not viewing a targeted In-App engagement) for a long time and needs to be intimated, an email can be automatically triggered and sent to the qualified user.
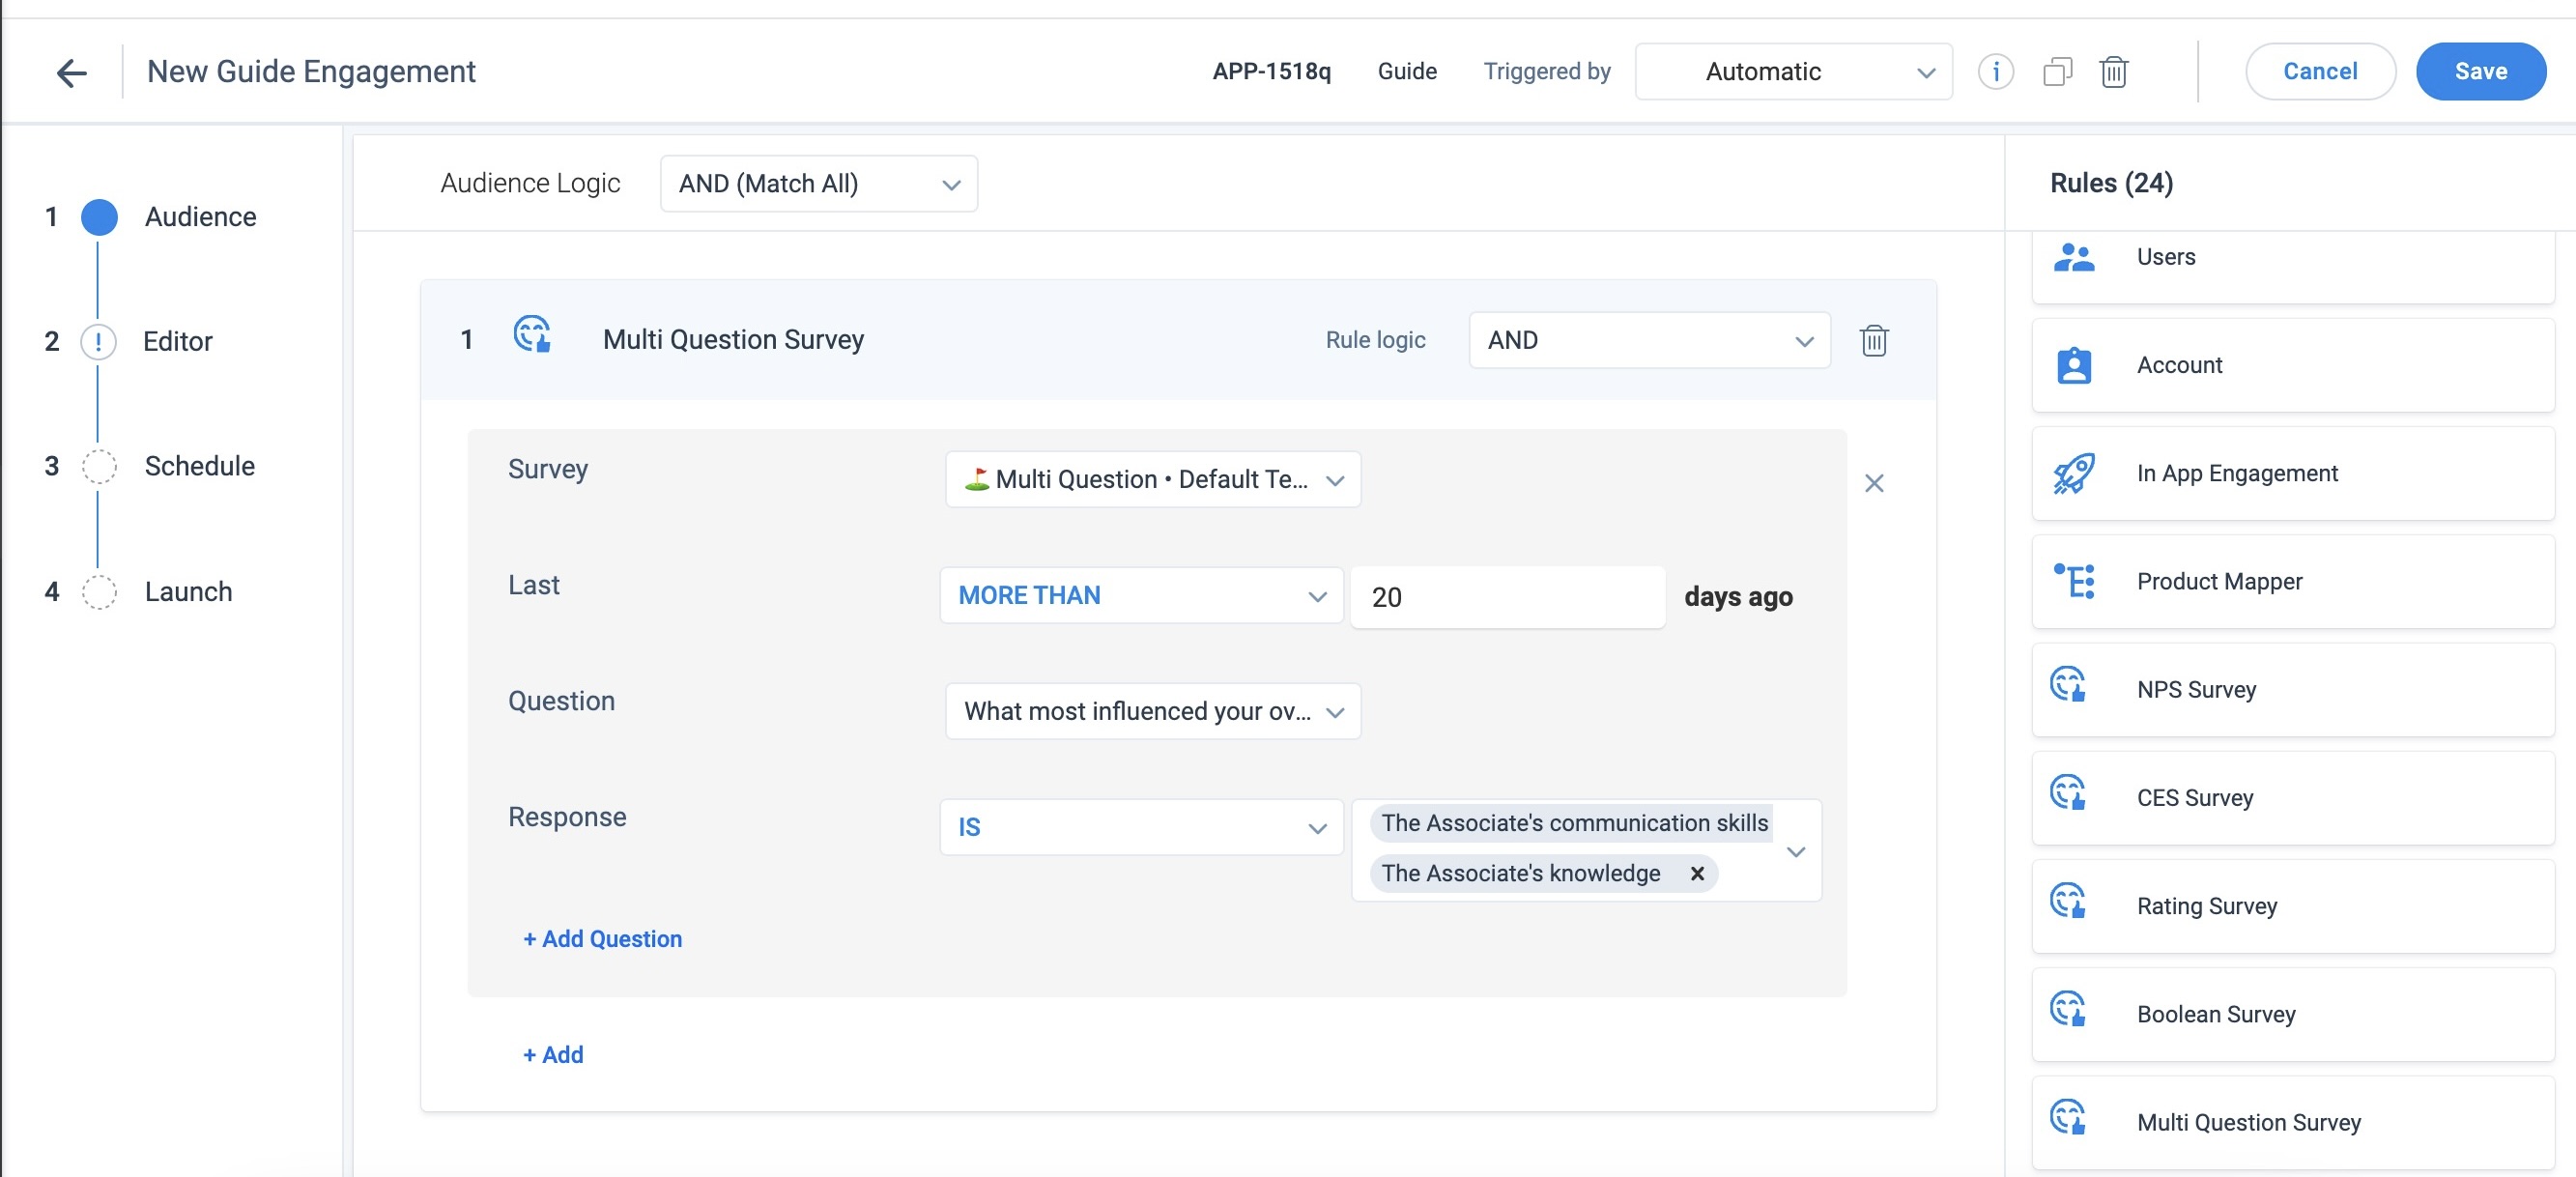
Launch Engagements Based on Multi Question Survey Responses
Gainsight PX supports the Multi Question Survey rule in Audience selection of engagements. This allows you to trigger qualified guide, slider, dialog and survey engagements based on precise survey responses. You can use the audience rules to define the criteria. For more information on the audience rules, refer to the Audience section of the Anatomy of Engagements article.
To trigger personalized engagements based on survey response, select the question, response operator, and responses that meet the criteria. When defining audience criteria, you can combine them with simple or advanced conditional logic.
To configure the Multi Question Survey rule:
- From the left pane, click Audience.
- Click Multi Question Survey rule. Multi Question Survey block appears.
- From the Survey dropdown list, select the desired survey.
- Select number of days or a define a time period to validate the response.
- From Question dropdown, select a question and define Response logic to validate the responses.
- (Optional): Click Add Question to add another question and define a response logic.
- (Optional): Click Add to add another block and repeat the above mentioned steps.
- Click Save to save the engagement.
The following image shows the sample Multi Question Survey rule logic.
Multi Choice Question Response Operator Logic:
Based on the response operator selected, the user qualifies for the engagement as follows:
| Response Option | Condition |
| IS | If the response provided by the user matches exactly with the responses listed in Rules |
| IS NOT | If the response provided by the user does not exactly match the response combination configured in Rules |
| IN | If any one of the responses matches with the response configured in the Rules |
| NOT IN | If the response is not part of the response combination configured in the Rules |
Evaluate URL Rule for Engagements
Gainsight PX supports Audience rule evaluation for engagements both at entry and exit for engagements so that only the relevant engagement is displayed to users when they navigate between the pages of your application. If the URL does not match the audience criteria, the engagement is not displayed.
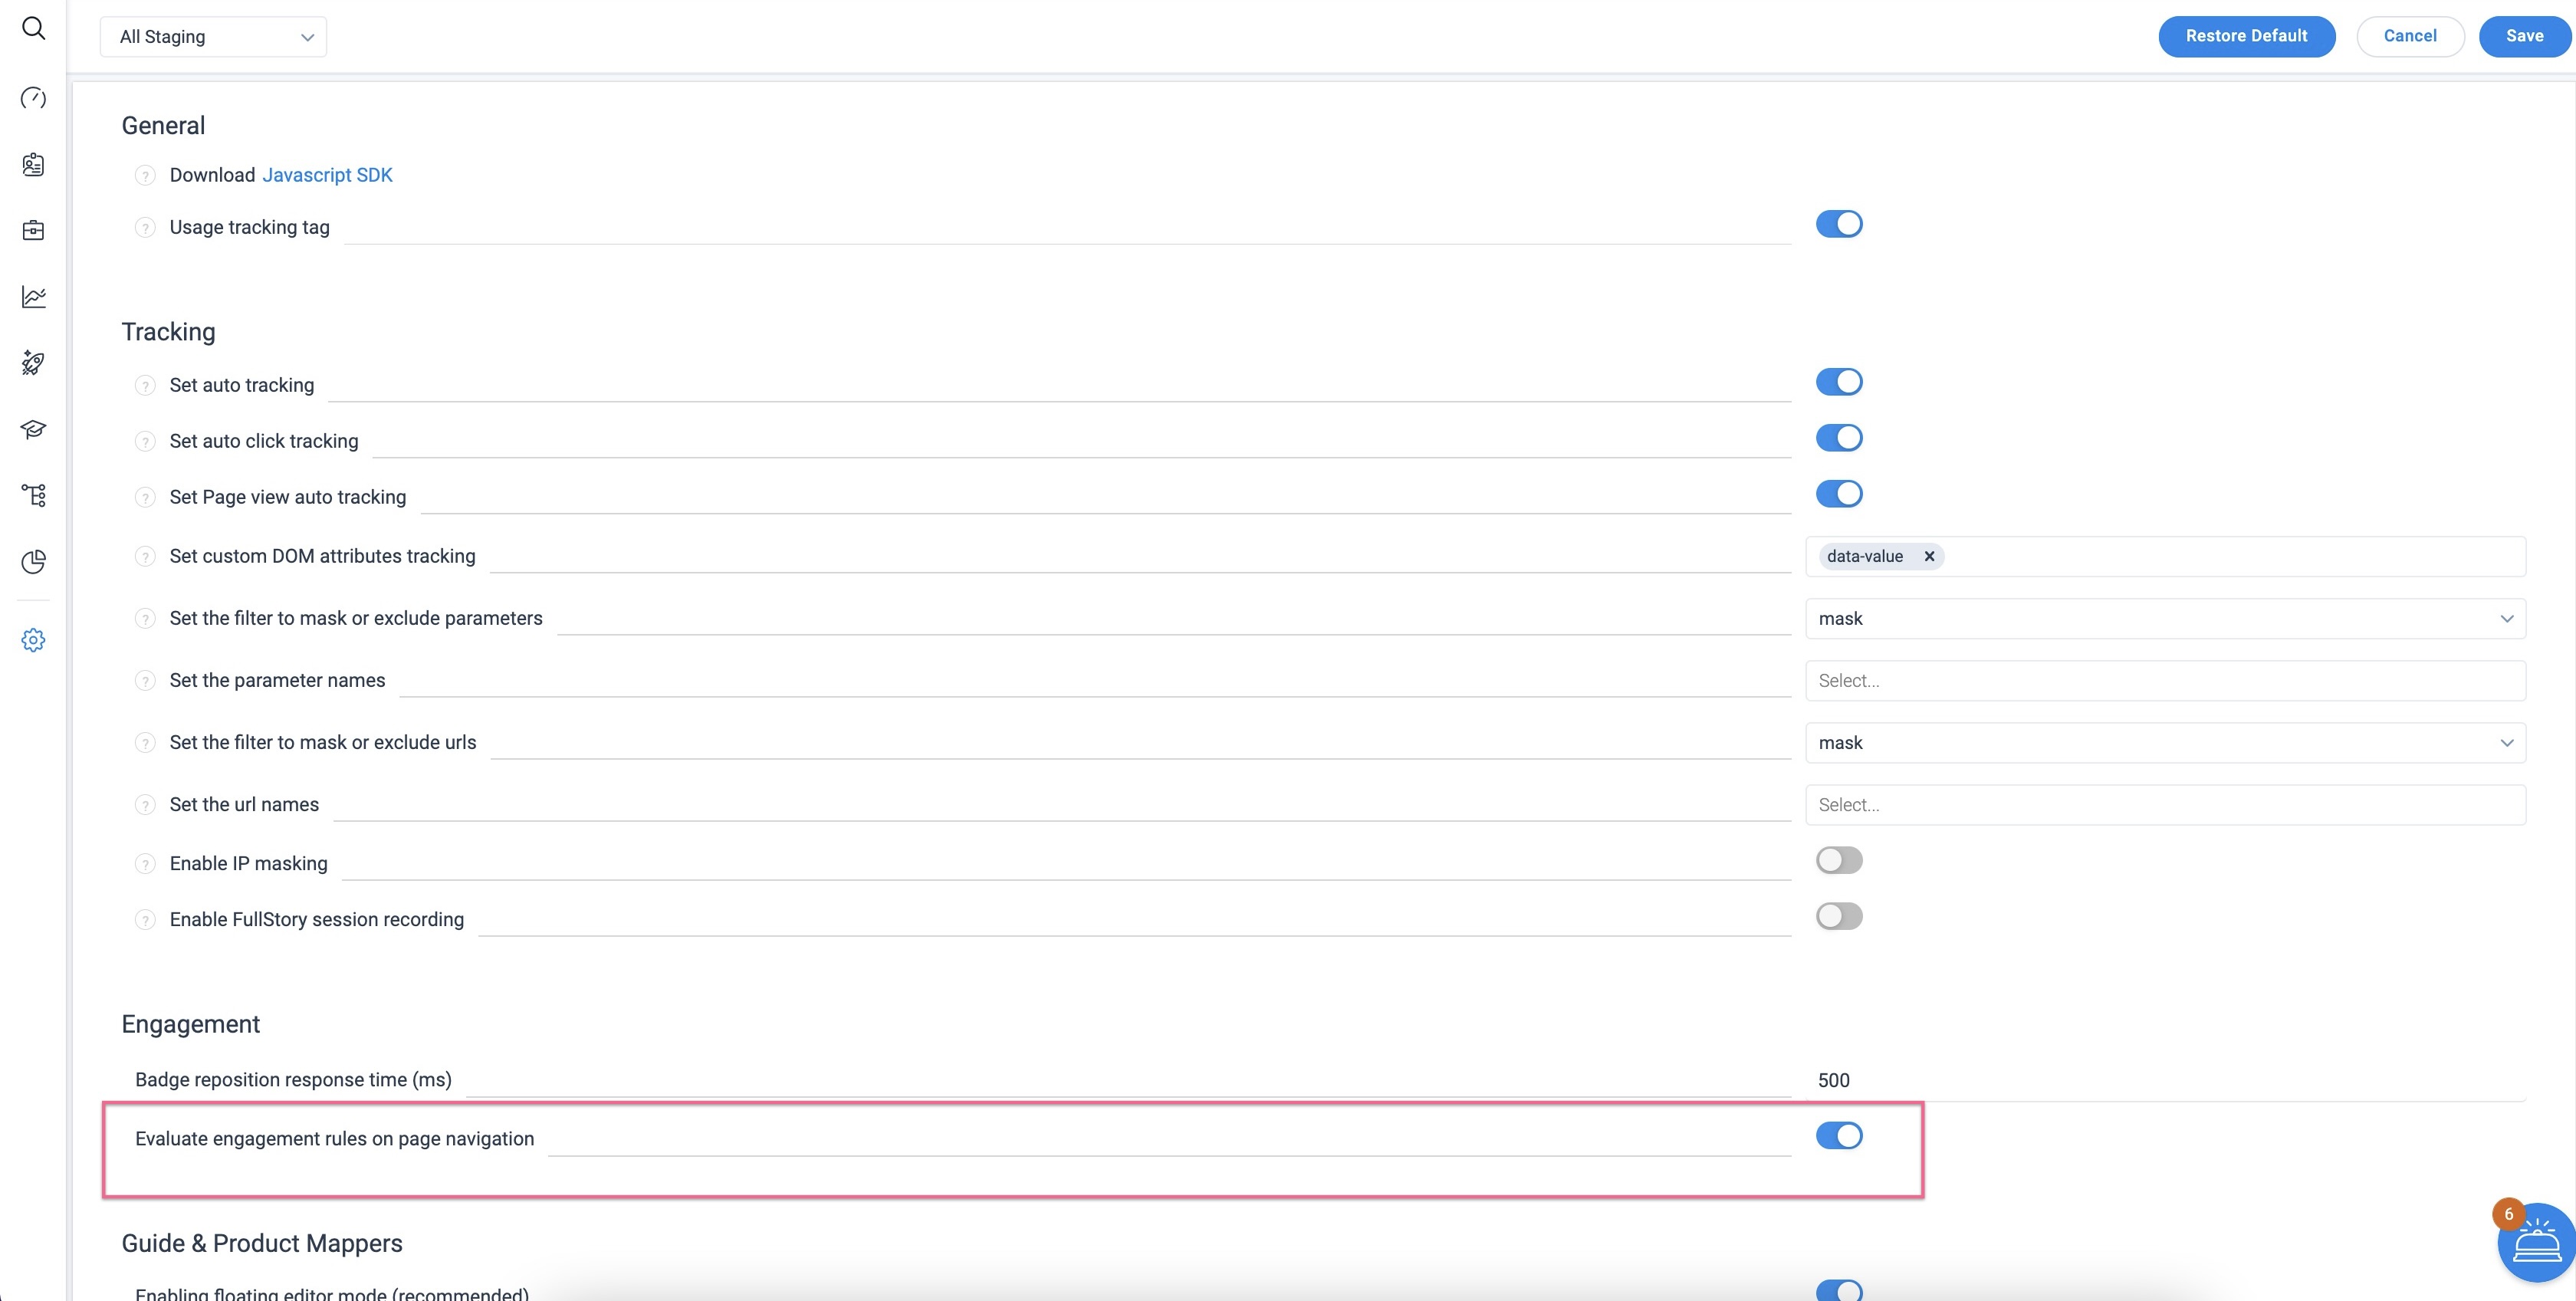
To use this feature, turn ON the Evaluate engagement rules on page navigation toggle on the Administration > SDK Settings page.
Business Use Case: Consider that you have configured a Survey engagement to be displayed on the Home page of your application. You set the Audience criteria using the URL Audience Rule. When a user lands on the Home page of your application, the Audience Rule is evaluated, and the Survey engagement is triggered. If the user navigates to another page in your application, the engagement will close immediately.
In case the Evaluate engagement rules on page navigation is turned off, the Survey engagement continues even if the user navigates to another page on your application until the Survey is completed or closed by the user.
Note: This feature is applicable to all the PX engagement types except the Guide engagement.
Launch Engagements after programmed time intervals
It can be overwhelming when users are prompted to view and respond to engagements immediately after signing to the application. To avoid this, you can trigger engagements after a pre-set time lapse.
To configure the time interval:
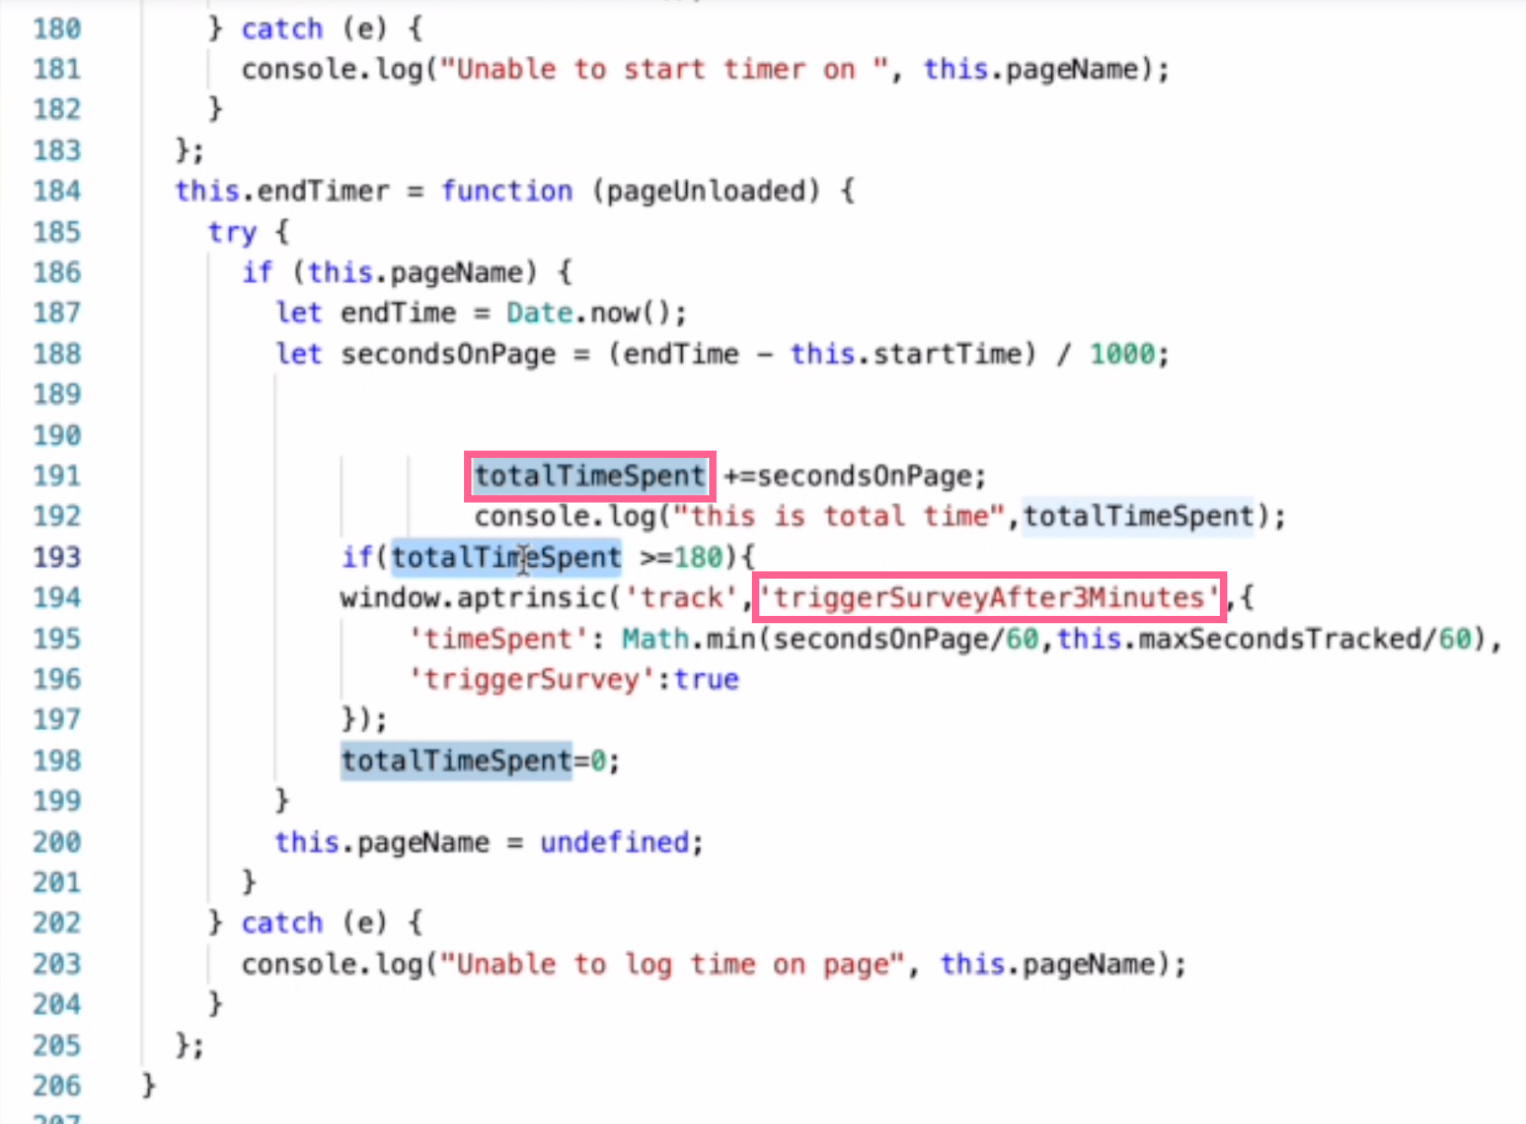
- Configure the functions as mentioned in the Tracking Time Spent on a Page section of the JavaScript Utilities article to track the time that the user has spent on the application. You can then trigger a Custom Event to launch the engagement. For example: By configuring the properties, you can trigger a Custom Event after the user spends three minutes on the application, as shown in the following image of the code snippet:
- Configure the Engagement Audience using the Custom Event you created using the following steps:
- From the left pane, click Audience
- Click Custom Events
- From the dropdown options, select the Event Name and select the Operator as IS. Select the Custom Event name you created.
- From the Properties dropdown options, select timeSpent. Select the Operator as GREATER THAN and enter the time after which the engagement needs to be launched.
Note: You can add and configure the Properties for a Custom Event according to the requirement.