Gainsight NXT Release Notes 6.10 January 2020
Short on time? Watch this 5-min. video overview to see what's new in the 6.10 release!
Gainsight CS Release Notes Version 6.10 contains the following subsections:
- New Features in Gainsight which may require the Admin to setup new processes or re-think existing processes.
- Enhancements (per module) describe improvements made in the existing product capabilities.
- Issues Addressed contains issues which were reported by customers and are fixed in this release.
![]() : This symbol indicates that an enhancement originated as a customer suggestion on the Gainsight Community.
: This symbol indicates that an enhancement originated as a customer suggestion on the Gainsight Community.
New Features
Multi-Currency
Multi-currency support for new NXT customers: New NXT customers who onboard Gainsight NXT after the V6.10 Release, can enable the Multi-Currency feature to support multiple currencies across Gainsight. When Admins enable the Multi-Currency feature, various related changes are visible across Gainsight functionalities.
For existing customers who are using single-currency support, we're developing a migration framework to upgrade you to Multi-Currency. We will upgrade customers in batches over the next few months. If you have any questions, please contact your Gainsight Client Outcomes Manager (COM).
Enhancements
Data Management
In Gainsight Data Management, an admin can perform to setup data in the Gainsight Matrix Data Architecture (MDA). Admins can create and manage Gainsight Objects from the Data Management page. As an analogy, a Gainsight Object and its field(s) can be thought of as a database table and its columns. Data Management can be accessed from Administration > Operations > Data Management.
New Currency Management Page
A new Currency Management page is introduced to host the setting for Tenant level Currency code. This currency code setting is moved from the Application Settings page > Currency ISO Symbol field, to the new Currency Management page as Tenant Currency field. Admins can navigate to the Currency Management page from Administration > Operations > Currency Management. The Tenant Currency setting here is the default currency for your data if the system is unable to identify the currency code for any specific currency data.
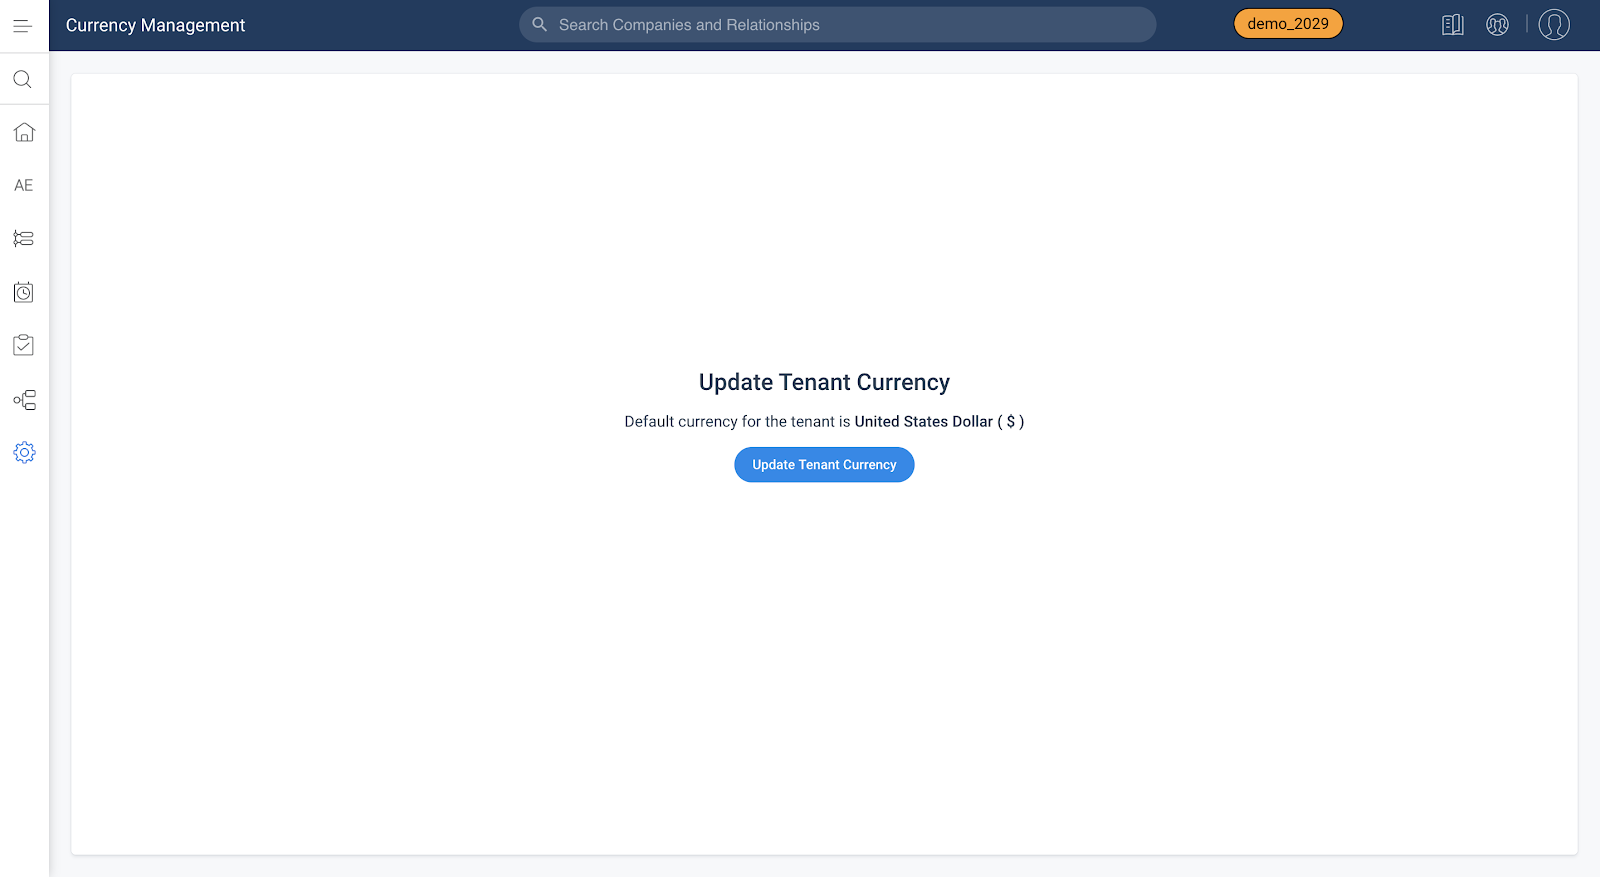
Default currency for the tenant is United States Dollar (USD). You can change the Tenant Currency as shown below:
- Navigate to Administration > Operations > Currency Management.
- Click Update Tenant Currency.
- Select a different currency than the one already selected.
- Click Update.
Note: Tenant Currency is also called Corporate Currency.
Timeline
Timeline is the official record of your customers. It allows you to log information regarding customer interactions in a way that enables you to quickly gather insights and drive action. The Timeline View in the Customer or Relationship 360 allows you to log and view activities that help you track customer interactions over the course of a customer’s life-cycle. The Timeline View in the Customer or Relationship 360 allows you to log and view activities that help you track customer interactions over the course of a customer’s life-cycle. The Timeline tab in the CTA Detail View allows you to log activities for a specific CTA. These activities will also appear in the Timeline View in the Customer 360.
Salesforce Activities Integration with Timeline
Gainsight NXT in Salesforce CRMContent in this section supports Gainsight NXT accessing through Salesforce Login. To learn more about Gainsight NXT in Salesforce, click here.
- Click here to expand for more information on how to Integrate Salesforce Activities in Gainsight Timeline
- Admins can now sync Activities from the Event and Task Salesforce objects into Timeline. This means if a customer is switching systems, they can bring historic data into Timeline. And if other cross-functional teams use Salesforce Activities to capture touchpoints, these can be displayed in Timeline to avoid users going back and forth between multiple systems. The Timeline UI is more consumable and intuitive for users to view the complete activity history.
Prerequisites
You must set the Type field for Salesforce Events and Tasks to be visible for your profile.
Integrate Salesforce Activities to Timeline
To begin integrating Salesforce activities to timeline, navigate to Administration > Activities and Timeline > Integration.
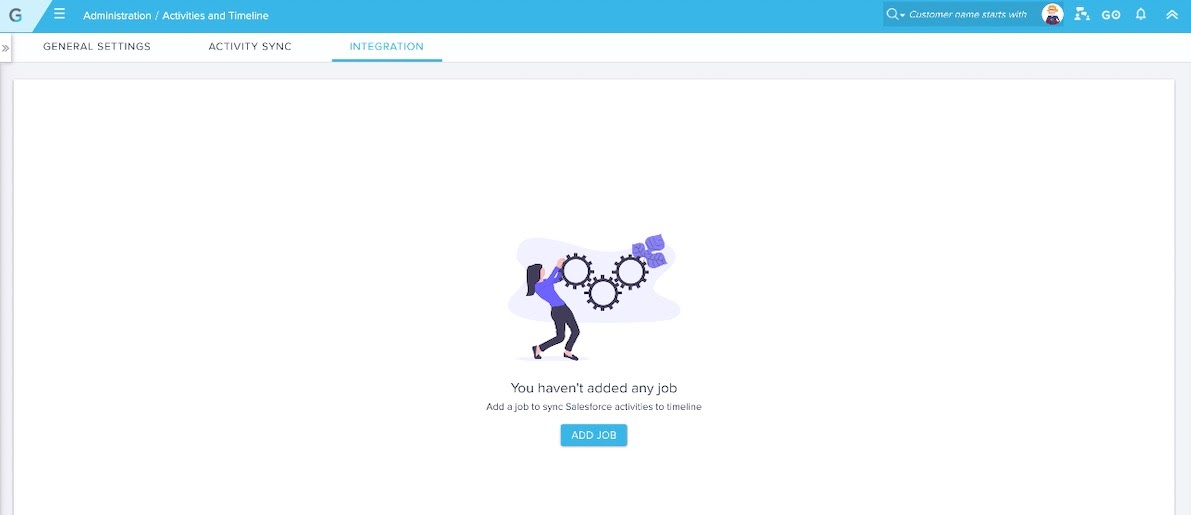
For a detailed step by step description of how to configure the Integration, refer to the Integrate Salesforce Activities in Gainsight Timeline article.
Journey Orchestrator
Journey Orchestrator is your center for automated communications. It leverages the power of automation to make your job easier as you communicate with customers at scale. Gainsight enables customer success teams to launch automated emails based on customer attributes such as health score, product usage, survey results and lifecycle stage. Through automation, you can scale customer touches and engage with a growing list of customers often and effectively.
Pick List Datatype Fields in Programs
Note: This enhancement was released in the 6.9.2 Patch on Dec. 24, 2019. We are including it here for your awareness.
Previously, when customers mapped Picklist fields of Gainsight objects to a token, emails were sent with ID's instead of resolved values. In order to allow admins to add Lifecycle Stage (picklist data type) as a token in email templates, Gainsight now supports Picklist data type fields in Programs.
To use the picklist fields in Programs, admins must first create custom fields in the standard and custom objects with data type as Dropdown List and select an associated category for mapping to this field. For more information on how to create a custom category, refer to the Dropdown List and Multi-Select Dropdown List article.
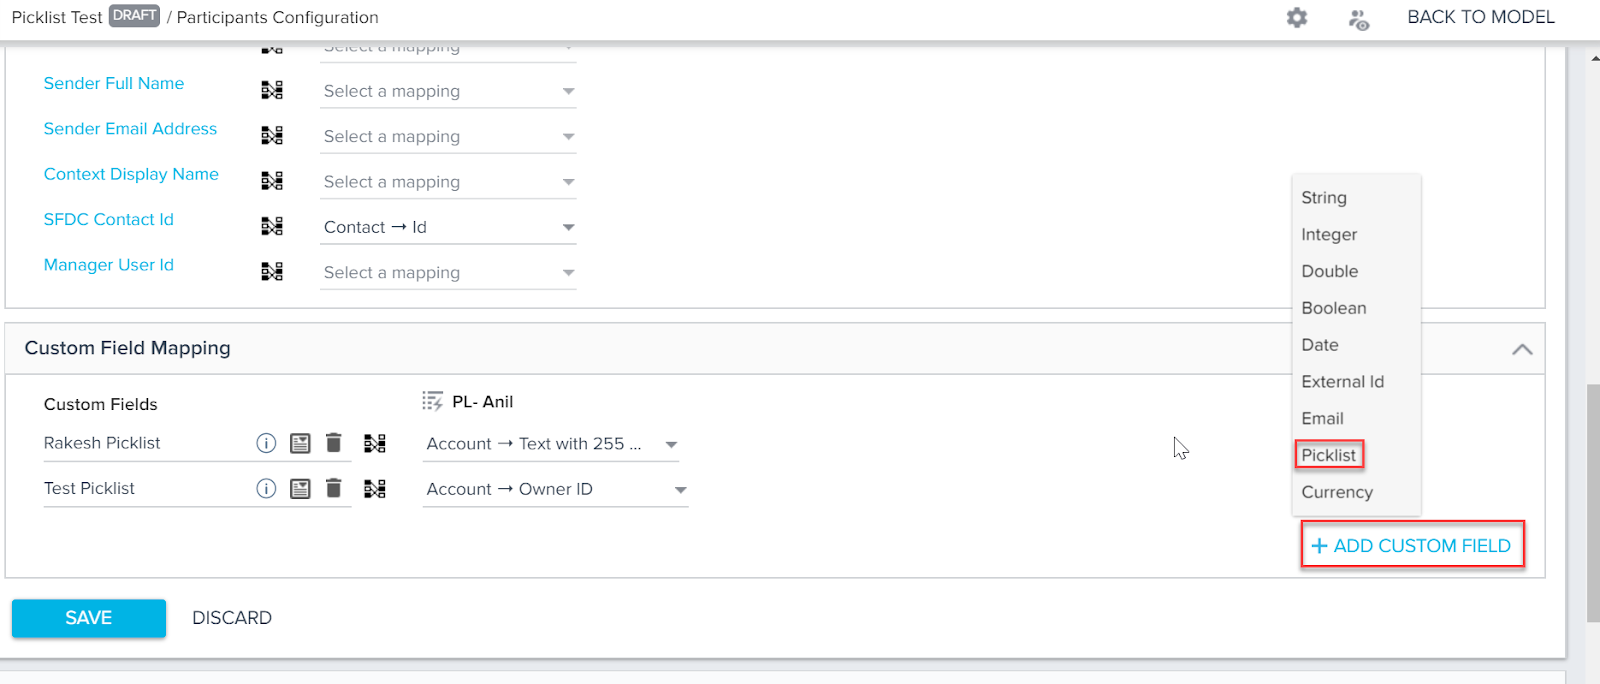
Admins can then use the Custom Field Mapping section in the Participants Configuration page to add Picklist fields defined in the Data Management page with data type as Dropdown List.
To add a Picklist data type field in Program:
- Navigate to Journey Orchestrator > Programs.
- Click to open an existing program, or click +CREATE to create a new program.
- In the program model configuration screen, click the green Participants icon. The Participant Configuration page appears.
- In the Participants Configuration page, click the Mapping Participant Sources section.
- In the Custom Field Mapping section, click +ADD CUSTOM FIELD and select Picklist data type field. The Category dialog appears.
- Select the Picklist type from the dropdown option.
The following are the details of resolution process:
- If ID is provided, it resolves and retrieves the Name and displays it on the Participant grid.
- If Name is provided, it resolves to ID and stores in database. But, in the Participant grid it always displays Name.
- Click SAVE.
- Select which source field to map to the picklist field.
After a Picklist Field is created, admins can add it as a token while configuring any program Email Step, and it can be used while configuring any text field in the Create CTA and Close CTA steps.
Admins can select the conditions in the Conditional Wait step based on the Calculated Field configured on the picklist field created. These picklist fields can also be used as a filter option while configuring Calculated Fields and using reports in email templates.
When admins preview the Conditional Wait and Email Template steps, it displays the actual values of the Picklist field configured.
Email and Programs List View UI Changes
Previously, options like Information, Edit, Clone, Delete, Activity Feed, and Analytics were only visible when users hovered on an existing email template or program. The User Interface for accessing the above-mentioned options have changed. With this release, the Information (icon) is directly available in the List View of Email Template and Programs page, and other options are available under the three dots for a particular email template or program.
Note: The Activity Feed and Analytics options are only available in the List View of Programs page.
Increased Email Template Versions
Previously, admins could only create a maximum of 15 email versions in Journey Orchestrator Email Templates. Since admins could only add up to 15 versions, they were forced to create multiple Programs if they needed more than 15 versions. Gainsight has now increased the limit Email Versions to 20.
Business Use Case:
As an admin, I want to create one program for all users, from various countries, by creating one version per language. Email Template versions support this.

Data Designer
Data Designer (BETA) is a new feature that makes it easier for you to discover richer, more meaningful insights from your customer data. It helps by simplifying the most time-consuming step of data analysis, preparing the data for analysis.
Mappings in Data Designer
Note: This enhancement was released in the 6.9.2 Patch on Dec. 24, 2019. We are including it here for your awareness.
Data Designer now auto imports the mapping information from Gainsight Data Management. Mapping is used by other functionalities of Gainsight, such as Reports, Rules, JO, etc., to identify core fields such as Company Name and treat it specially. (Hyperlinks, Filters autosuggest, etc.)
Mapping: Mapping is the mechanism which Gainsight applications use to identify special fields like, Company Name, Relationship Name, User Name, CTA, Timeline Subject, etc., across Gainsight (eg. Reporting, Rules).
IMPORTANT: To support mappings for a Name field, you must also add the corresponding ID field and carry it to the last step of Data Preparation.
Refer to the following table to see how to make mapping work.
| Object | Field for which mapping is required | Mandatory Field to carry forward until last task |
| Account | Account Name | Account ID |
| Relationship | Name | GSID |
| Company | Name | GSID |
| User | Name | GSID |
Business Use Case: Using Rules, you can now trigger CTAs for a CSM, when there's a customer NPS® or Usage drop. Previously, when you setup a rule using the Data Space created from Data Designer, even after you added a CSM field to the Setup Rule page, you could not see a CSM field in the Setup Action page to trigger CTAs for a CSM.
Other Functional Impacts:
- You can now apply a Global Filter on Company Name for reports created on Company Object and Data Space from Data Designer.
- You can now see hyperlinks in reports created on a Data Space. For example, you can see Company Name, Relationship Name, etc., records in reports as hyperlinks.
- You can now see auto-suggest in Reporting filters.
Email Assist
Email Task and Send Email features in GS Assist help CSMs send emails directly to contacts from Cockpit. CSMs can send an email directly from Cockpit when they need to reach out to customers to determine a suitable time to conduct EBRs; or to gather more details about negative responses to an NPS® Survey.
Restrict Email Templates Available in Send Email Service
Previously, all of the email templates defined by the Admin in the Email template page were displayed to all users while using the Send Email (Ad-Hoc Email Service) option in Cockpit. Admins did not have any control over which email templates could be accessed by CSMs when they are using the Send Email option. With this enhancement, CSMs can access only those email templates for which their admin has provided access, to prevent CSMs from selecting an incorrect template or wasting time looking for relevant templates.
In order to restrict certain Email Templates, Gainsight has added the ‘Available to Users’ toggle option in the Email template page.
The following are some of the benefits of using Restricted Email Templates:
- Ease of consumption of email templates
- Increase in adoption rate
Note: By default, all templates are displayed to users while using the Send Email option. The admin has to manually revoke access in order to restrict the relevant templates to users.
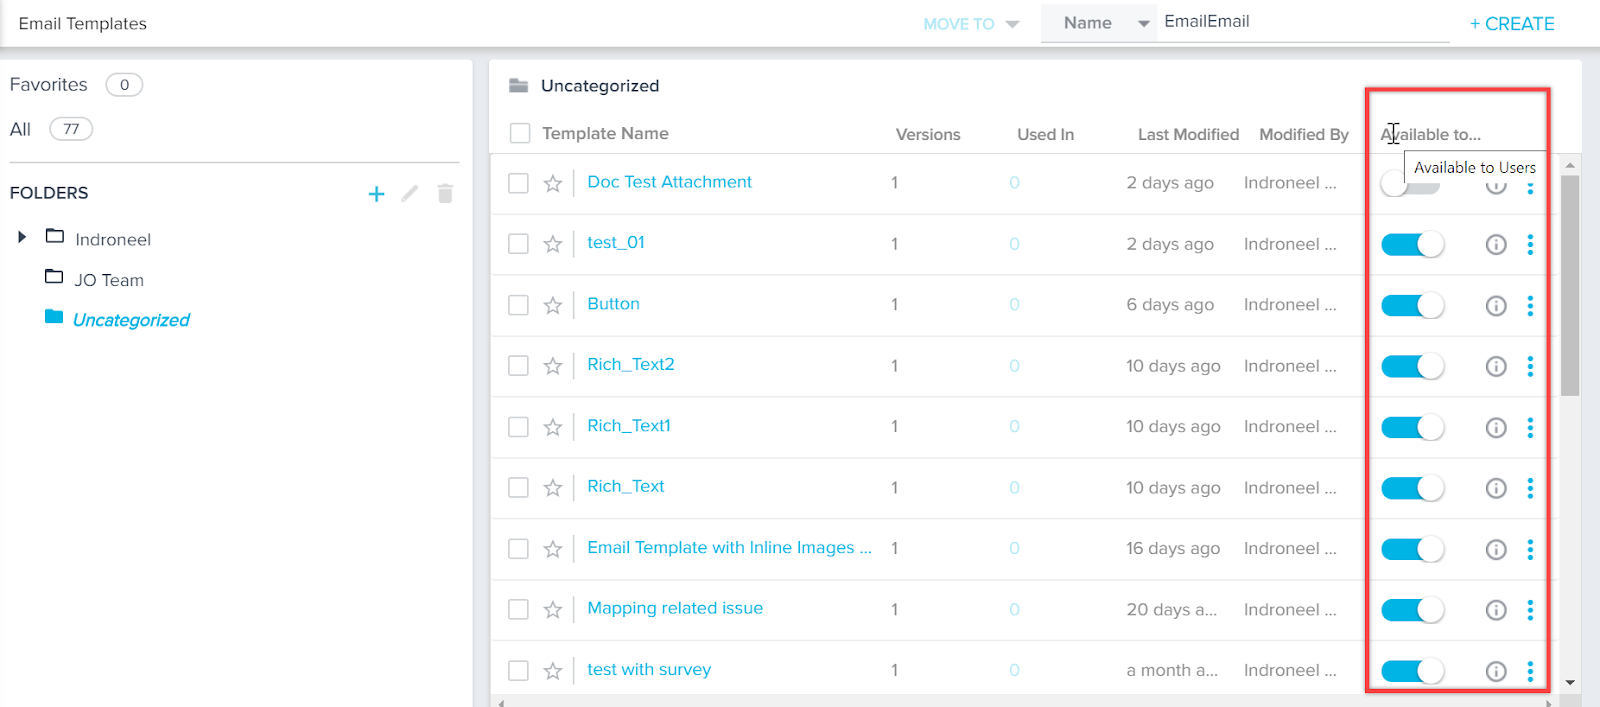
When ‘Available to Users’ toggle is ON, then that email template is available for users to select while using the Send Email option from Cockpit.

For more information on how to use the Send Email (Send Ad-Hoc Email) option from Cockpit, refer to the Send Email Tasks from Cockpit article.
Admins can also use bulk actions on the Email Templates page to allow or restrict access to selected email templates for users. Once the admin selects more than one template, the following options appear:
- Available to Users: If this option is selected, the selected templates are available while using the Send Email option.
- Not Available to Users: If this option is selected, the selected templates are not available while using the Send Email option.
Email Assist Attachments Sync to Timeline
Previously, Email to Timeline sync could sync only the Emails that are sent using Playbooks and Send Email options, but not the attachments in the email. With this enhancement, the email attachments are also synced to the Timeline activity.
The following are the supported attachment file types; jpg, jpeg, gif, png, bmp, pdf, doc, docx, txt, ppt, pptx, xls, xlsx, and csv.
The number of emails and the attachment size limits to be synced are based on the Timeline Activities limits. For more information, refer to the Log Customer Emails as Timeline Activities article. If the size and number of attachments synced are higher than the permissible limits, the system automatically selects the random attachments as per the limit. An email notification is sent to the concerned user about the number of attachments skipped, but not the exact names of attachments.
Business Use Case: If a CSM shares a QBR report as an attachment with a customer using the Send Email option, the file is synced to the Timeline activity for future reference.
.gif?revision=1)
Renewal Center
Renewal Center helps quota carrying CSMs and Renewal Managers forecast and manage their book of business. By enriching Salesforce Opportunities with Customer Success insights, as well as calculating a Likelihood to Renew score for each opportunity, Renewal Center enables your team to efficiently manage and predict renewals and related upsell, recognize risks in a timely fashion, and report on key metrics.
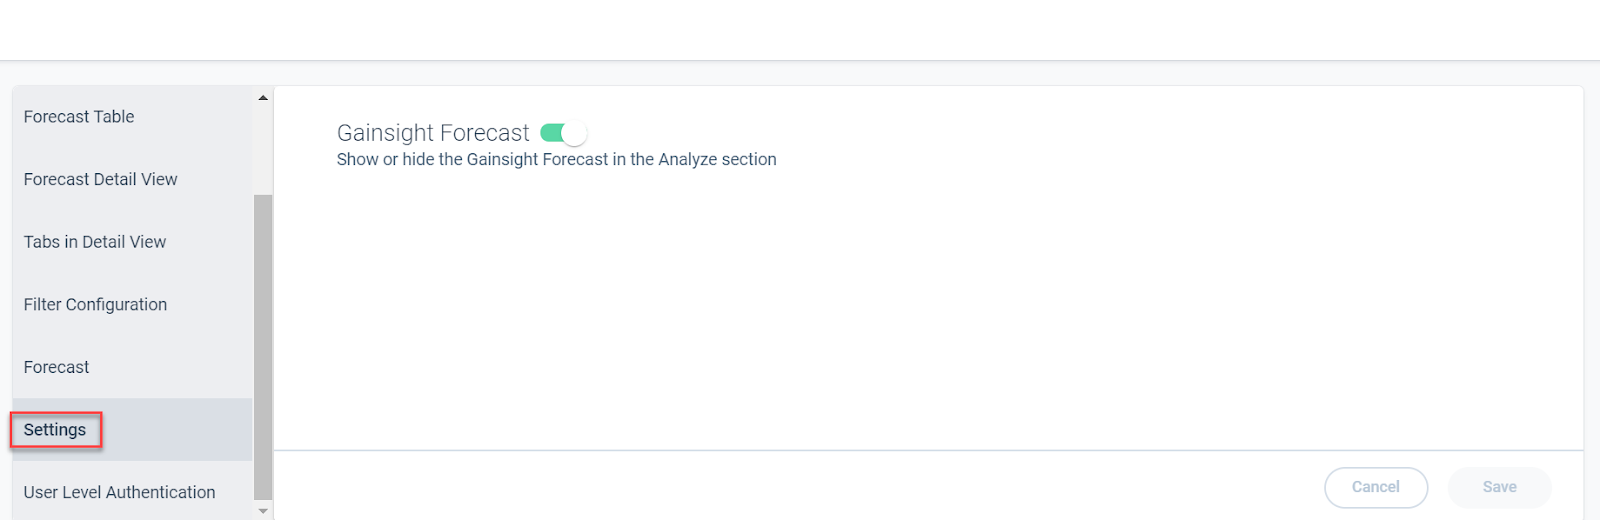
Control Visibility of Gainsight Forecast
Admins can now set the Gainsight Forecast to be displayed or hidden from end users in the Renewal Center Analyze page. This is useful for customers who are early in their deployment of Gainsight CS and may not have established Health Scorecard, a primary data requirement for supporting the Data Science in Renewal Center. These customers can immediately gain value from the rest of Renewal Center. Once Health Scorecard has been established, customers can update this configuration to show the Gainsight Forecast.
Gainsight Forecast predicts the total revenue for a selected time period, by considering all the qualifying opportunities. This field uses values from the Data Science Forecast Amount field. To learn more about how various calculations are performed in the Renewal Center, refer to the Renewal Center Metric Calculations article.
This enhancement allows you to hide this field, if required.
To use this enhancement:
- Navigate to Administration > Renewal Center Configuration.
- Click the Settings section.
- Turn the Gainsight Forecast toggle switch on or off, as required.
- Click Save.
Support For User Locale Date Format
Gainsight now supports and honors the user locale settings applied in your Gainsight tenant. As a result, the Date and Date Time Data type fields in Renewal Center now display values in the locale format selected. Previously, dates were displayed only in US locale format. This enhancement allows you to view the dates in your regional format.
To use this enhancement:
- Navigate to General > Application Settings. You can see that currently the Date values are displayed in US format.
- Select the required locale from the Locale drop-down menu.
- Click SAVE.
You can now see that the Date values are displayed in German format.

Renewal Center UX Improvements
The Renewal Center User Page is now improved to provide you with a better experience. Previously, when you were on the Forecast tab and refreshed the page, you were automatically redirected to the Analyze tab. This behavior is now improved and you are not redirected to the Analyze tab. You may also now bookmark the Forecast tab to go directly there.
Rules Engine
Rules Engine is designed to improve your underlying customer data to produce superior customer outcomes. It can perform powerful multi-step, in-memory data transformations for large datasets in Gainsight within one rule. Transformations include aggregations, multi-dataset merges, formulas and time-series calculations; helping your team to better identify meaningful data signals.
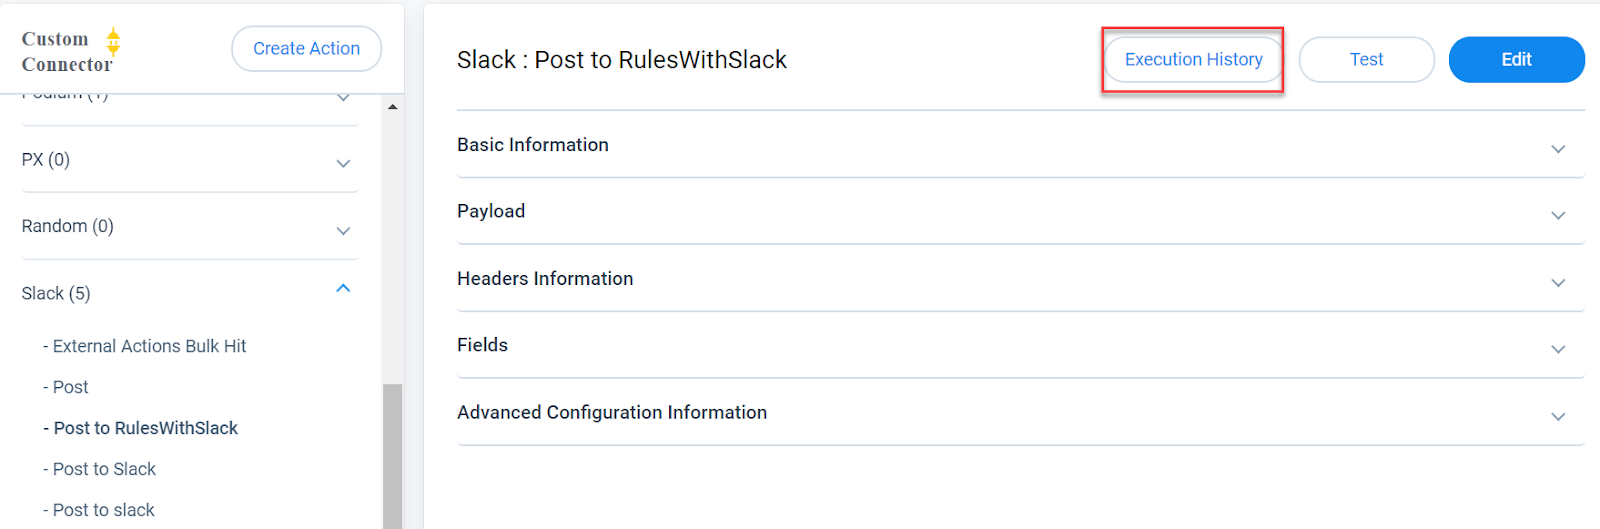
Execution History in External Actions
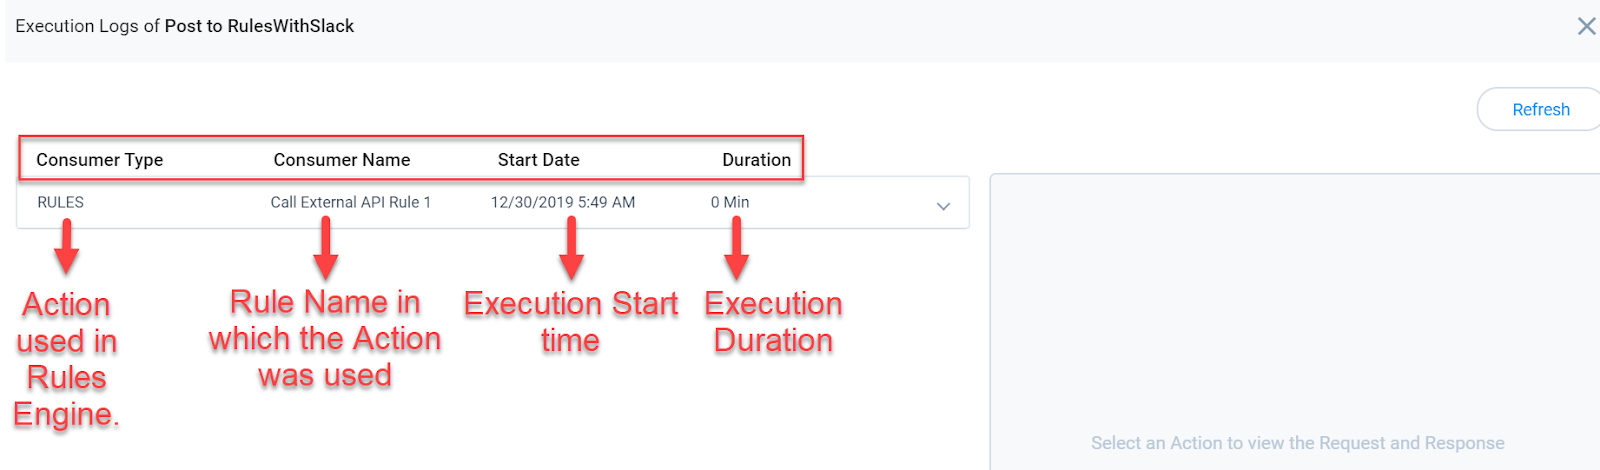
Gainsight now provides you insights on the execution details of each Action, created in the External Actions page. The new Execution History tab displays the results of Actions used in the Rules Engine and Journey Orchestrator modules.
This enhancement helps you view execution details like:
- Action used in Rules Engine or JO.
- Rule or JO Program name on which the action was applied.
- Execution status for each record.
- API Request and Response body for each record.
The Execution History tab has four main columns:
- Consumer Type: This column helps you identify if the action was executed on a Rule or JO program.
- Consumer Name: This column displays the Rule or JO program name.
- Start Date: This column displays the date and time at which the execution started.
- Duration: This column displays the time taken to complete the execution.
To use this enhancement:
- Navigate to the Administration > Operations > External Actions page.
- Select the action for which you wish to view the Execution logs.
- Click Execution History.
- Expand the execution pane to view record level detail.
- Click Request / Response for a record to view its API Request/Response body.
- Click Refresh to view the latest execution data.
Mobile
The following enhancements were released around Dec. 24, 2019. We are including them here for your awareness.
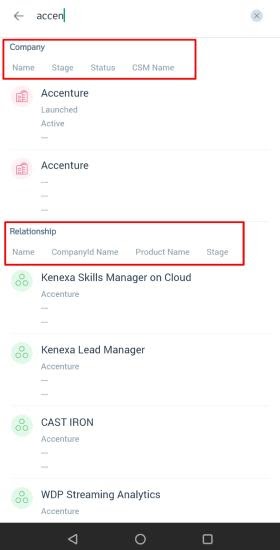
Search Configuration
Company and Relationship search configuration from the web app is now automatically applied to Timeline. For example, if you've configured search to allow finding a Company by its CSM or a custom unique identifier, the same option will extend to Timeline in mobile.
New Version Alerts
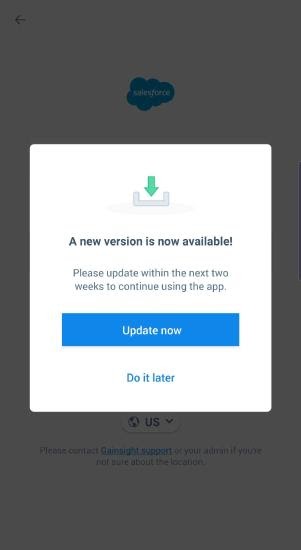
You should always have the latest Mobile enhancements and fixes, so we've added an in-app notification for new releases. You can now see the following dialog while logging into Gainsight, if there are any New Version updates. Ensure that you upgrade your App to at least version 1.1.6 to start receiving the alerts on New Versions.
To upgrade your App, tap Update now. Tapping Do it later skips the upgrade and closes the dialog.
IMPORTANT:
- This dialog appears every time you try logging-in, until you upgrade your app to the latest version.
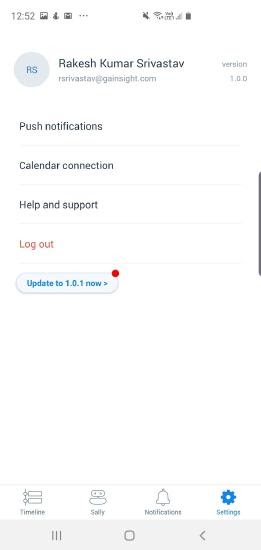
- You can also upgrade your App from the Settings screen. Tap Update to 1.X.X now> to upgrade.
People Maps
Capture your contacts in an organizational chart to understand the roles and relationships of the people you do business with across your customer base. Explore the org chart to understand who influences whom within a company and drill-into a person for deeper insights.
Restrict Person Record Deletion in C360/R360
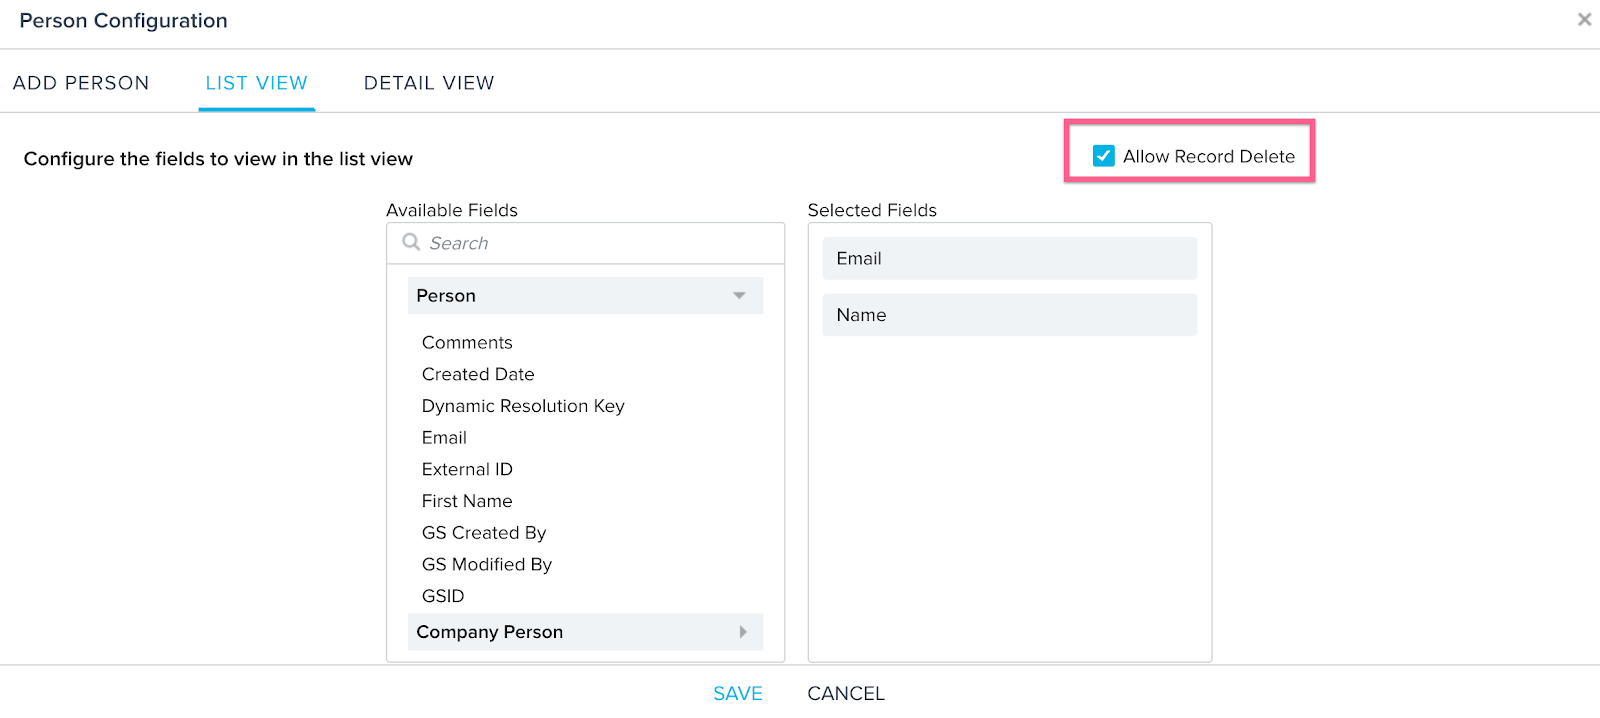
Admins can now control the end user’s ability to delete person records from the C360/R360 page. Earlier, anyone could delete person records from the C360/R360 > Person section. A new checkbox is now introduced for Admins to select/disable the ability to delete the person records at C360 Layout Configuration > Person Section Configuration > LIST VIEW.
To see this enhancement in the configuration of Person section for C360/R360 layouts:
- Navigate to the C360/R360 Layouts page.
- Create a new layout or edit an existing 360 layout to add the Person section.
- Select the Edit option of the respective layout.
- Add the Person section from LOCAL Available sections to the Selected section.
- Click the Gear icon of the Person section on the right pane. Person Configuration dialog appears.
- Navigate to the LIST VIEW tab.
- Select the Allow Record Delete checkbox to allow end users to delete person records from the C360/R360 page.
For more information on the configuration of the Person section in the C360/R360 page, refer to the Configure 360 Person Section article.
Gainsight Analyzer
The Gainsight Analyzer monitors various causes of failures or inefficiencies in performance of the application, so you can quickly identify, isolate, and remediate any performance issue that impacts the user experience by following the recommended actions to improve performance.
File Analyzer
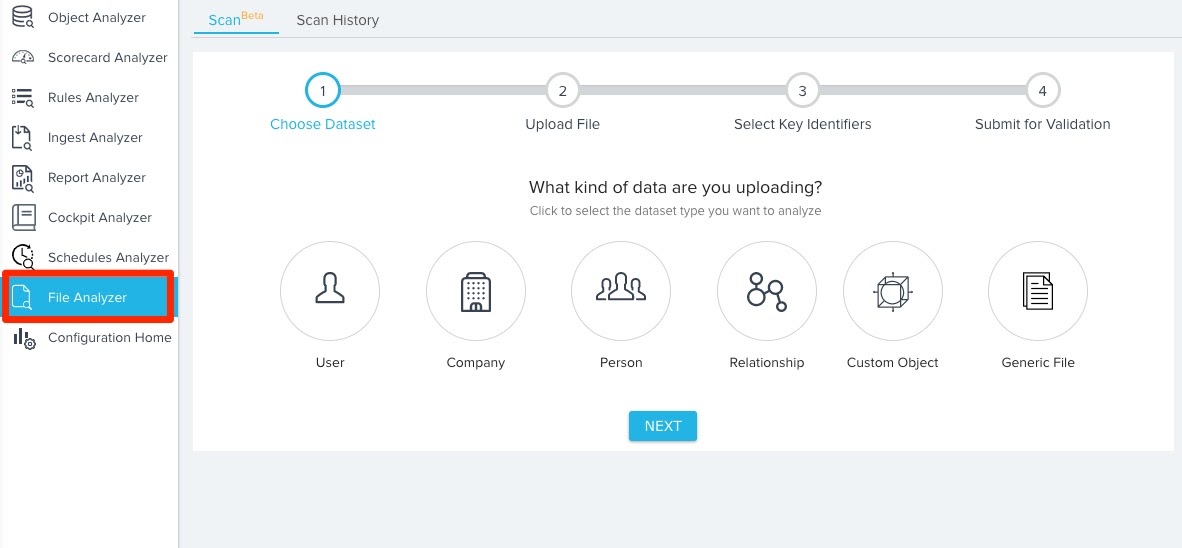
Previously, there was no way to scan a file in Gainsight before uploading it. This meant that Gainsight Admins had to upload CSV files for new person records or journey orchestrator participants, without knowing if specific records would fail. With this release, Gainsight admins will have access to the File Analyzer, enabling them to proactively scan files and identify any potential issues before uploading them. Admins can also scan files after an upload failed to identify the root cause of the failure.
To access the File Analyzer, navigate to Administration > Operations > Analyzer > click the File Analyzer tab on the left pane.
For more information on the File Analyzer, refer to File Analyzer Admin Overview.
Limitations:
- Only CSV/TSV file formats are supported.
- The File Analyzer supports uploaded files that are less than 10 MB and S3 files that are less than 100 MB.
- Uploaded files should contain headers.
- Compressed and Encrypted files are not supported.
- Files uploaded to the analyzer, and any generated error files, will be stored in your S3 bucket for 30 days and will be deleted after this time.
Cockpit Analyzer
Cockpit Analyzer helps Admins analyze and understand the Cockpit configuration and usage of it. This analysis helps admins to concentrate on improving Cockpit configuration by removing the redundant/unused data, as well as understand the workload of CSMs, and fine-tune CTA creation to drive optimal use of Cockpit.
To access the Cockpit Analyzer page, navigate to the Administration > Operations > Gainsight Analyzer > [click the Cockpit Analyzer icon on the left pane].
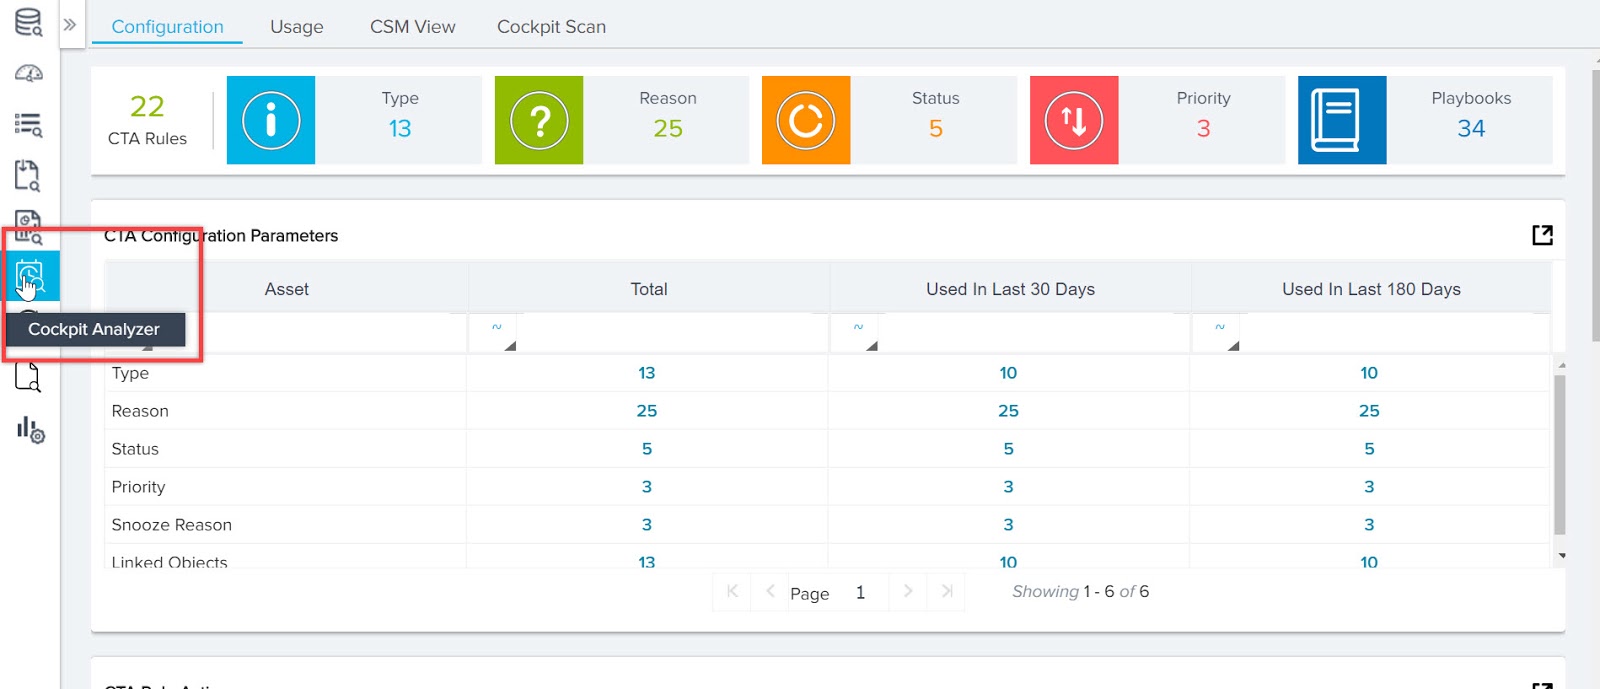
Cockpit Analyzer consists of the following tabs to analyze data:
- Configuration
- Usage
- CSM View
- Cockpit Scan
Use Cases:
The following are the business use-cases of the Cockpit Analyzer feature:
- As a GS Admin, you may want to improve Cockpit configuration by removing redundant or unused data.
- As a GS Admin, you may want to understand the potential reasons for the errors that occur in CTA Rules.
- As a CSMs Manager, you may want to understand Cockpit usage such as the workload of CSMs.
For more information about the Cockpit Analyzer feature, refer to Cockpit Analyzer Admin Overview.
Adoption Explorer
Adoption Explorer helps manage your customer’s usage data in the Gainsight environment, and quickly surface the most relevant view of usage data across your customer base. Adoption Explorer offers powerful segmentation capabilities to manage multiple product lines, more robust control of aggregations and calculations, and totally re-imagined visualizations to surface deep insights. Customer’s usage data at Company and/or Person level can be stored at both daily and weekly level along with their entitlements. Using the ingested data, admins can define new derived fields without the need of Rules Engine.
Drill-Down of Usage Section in AE Layouts
Usage reports can give you better insights when you correlate them. Usage Sections/Reports in AE Layouts now support Drill-down views that help correlate the data. In the Adoption Explorer usage section, when you click on any point in a graph/chart, it opens a new window in which you can now see a drill-down view of the data associated with that data point. Once you are in the drill-down page, you can further select and add additional fields to the drill-down view, from the list of fields available under the object dropdown list, and then correlate the data to derive deeper insights.
Drill-Down Reports: these reports allow users to navigate to a different layer of data granularity by clicking on a specific data point. Drill-down allows users to explore multidimensional data by navigating from one level down to a more detailed level. This allows users to view aggregated, summary data and then hierarchically explore deeper levels of the data for more specific analysis.
The following image is the Standard Drill-down report that is shown based on the configured usage section.
You can also create a Custom Drill-down report on a usage section to explore deeper levels of the data for more specific analysis. For example, assume your usage section/report is built on Company Usage Data and you may want to drill-down and correlate company data with person data. To achieve this use case, you can build a custom drill-down report using Person Usage Data as a Source, on the Company Usage Section/report.
Business Use Cases
- Assume, you have a Top 10 Users report and you may want to find out what all features were used by a user in the selected time frame. This gives you a better understanding of the Feature habits of a Power User.
- Assume, you have per Account > Stacked Feature Chart (for Pivoted Reports) and you may want to find who all (persons) in that Account are using a specific feature in the same time period. To achieve this use case, you can now easily drill down to data from different sources between Company Usage data and Person Usage data to see who in that account used that feature.
For more information on how to create a custom drill-down report, refer to the Drill-Down of Usage Section article.
“PARTIAL SUCCESS” Status added to Logs
Previously, during job execution, when there is any invalid data in the source records, Logs displayed either SUCCESS or FAILURE. But now, LOGS display PARTIAL SUCCESS status, if there is any invalid data in the source.
To view the job details, click  on the right hand side of the job. For more information on job details, refer to View Job Details.
Company Intelligence
Company Intelligence helps users to stay informed about their customers and competitors. It processes information through Slack by searching publicly available information on the companies and signals in which they are interested. For more information, refer to the Company Intelligence Overview article.
Currency Code Dropdown in Filters
Gainsight has introduced a new dropdown list for selecting Currency Code in Filters while configuring the Companies section. All the currency codes that are enabled at the tenant level are displayed in this dropdown selection. This dropdown list is only displayed if you select currency fields such as ARR, MRR, etc. in Filters.
Sally
Powered by AI, Sally makes rich Gainsight data easily accessible through simple conversation. Chatting with Sally is just like chatting with a real person and machine-learning technology helps Sally get smarter with each interaction. Not only can Sally provide answers to a diverse set of questions about your customers, Sally can also update customer data, provide information on health scoring, current risks, and opportunities. Your company can quickly collaborate on the latest customer intelligence to more rapidly deliver customer outcomes across all parts of your organization.
Query all fields in In-App Sally
Previously, only summary, health score, NPS® survey, CSM, CTA summary, recent activities, and renewal date intents of the Company/Relationship custom and standard objects were available for querying in In-App Sally. With this release, In-app Sally now supports querying of all the fields that are available in the Company/Relationship custom and standard objects.
To view the fields defined in the Company/Relationship objects, navigate to Administration > Operations > Data Management page and click on the Company/Relationship objects.
Note: Only the users with full Gainsight license can query for all Company/Relationship fields in order to reduce information security risks.
The following are some examples of the new info you can query:
- ARR
- Renewal Date
- MRR
- Original Contract Date
- Stage
- GSID

Issues Addressed
C360
-
Inconsistent Date Fields in R360: Date fields in the R360 were previously displaying in different date formats across the summary and card views. This issue has since been resolved, and the date fields are displaying in consistent formats as expected.
-
Widget Report Failed to Load in C360: Previously, the Open Cases widget report would not load when displayed in the C360 Summary page. This issue is now resolved, and widget reports are displaying as expected.
Reporting
- Custom Colors in Dashboard are getting changed when exported: Previously, custom colors configured for dashboards were getting changed when users export a Dashboard as PPT. This issue is fixed now.
Cockpit
-
Unable to Save the Number Type Fields with Decimals in CTA and SP Detail Sections: Previously, in CTA and Success Plans detail sections, when users provide any value with decimal points in the Number Type fields it was changing to an whole number upon saving. This issue is now resolved and users could save the values with decimal points.
User Management
-
When a user has logged in through SSO to Gainsight NXT (like Google Authentication or other SAML Authentication), this user login history has not displayed in the User Management > user record. This issue is now resolved and user login history is now recorded properly.
| NPS, Net Promoter, and Net Promoter Score are registered trademarks of Satmetrix Systems, Inc., Bain & Company and Fred Reichheld. |