Group Send User Guide
This article explains how users with applicable permissions and full user license can access person records, manage lists, and send emails using the People widget in Gainsight Home. To use this feature, the users must be mapped to the standard Company or Relationship field on both the Company and Relationship objects.
Overview
Group Send allows users with applicable permissions to manage person records and send targeted bulk emails directly from the new Gainsight Home. For more information on migrating to the new Gainsight Home, refer to the Change Document for Gainsight Home article.
Journey Orchestrator (JO) remains the primary tool for setting up multi-step, high-volume email campaigns. Group Send is designed for users to communicate with mid or low-touch customers.
With Group Send, you can:
- Create and manage people lists (Static and Dynamic)
- Send bulk emails to up to 2,000 recipients per email (limit can be decreased by admin, if needed).
- Log emails to Timeline and track engagement
- Access sent emails using Email Manager
- Recall emails within two minutes
- Create and share personal email templates
- Track email engagement metrics such as open, click, bounce, and failure counts
Note: This feature is supported only when a user is assigned to a Company or Relationship using Group Send Access permissions.
People Lists
A List is a collection of Person records from your book of business. Lists help you:
- Segment contacts for targeted engagement
- Send personalized bulk emails
- Automate contact updates based on set criteria
Note: Users with applicable permissions can create lists and send emails only to the person records assigned to them. This ensures access is restricted to their own book of business in the People widget.
Create a List
Follow the steps to create a list:
- In the new Gainsight Home, select People tab.
- From the Person List dropdown, select the Company or Relationship tab based on the type of list being created.
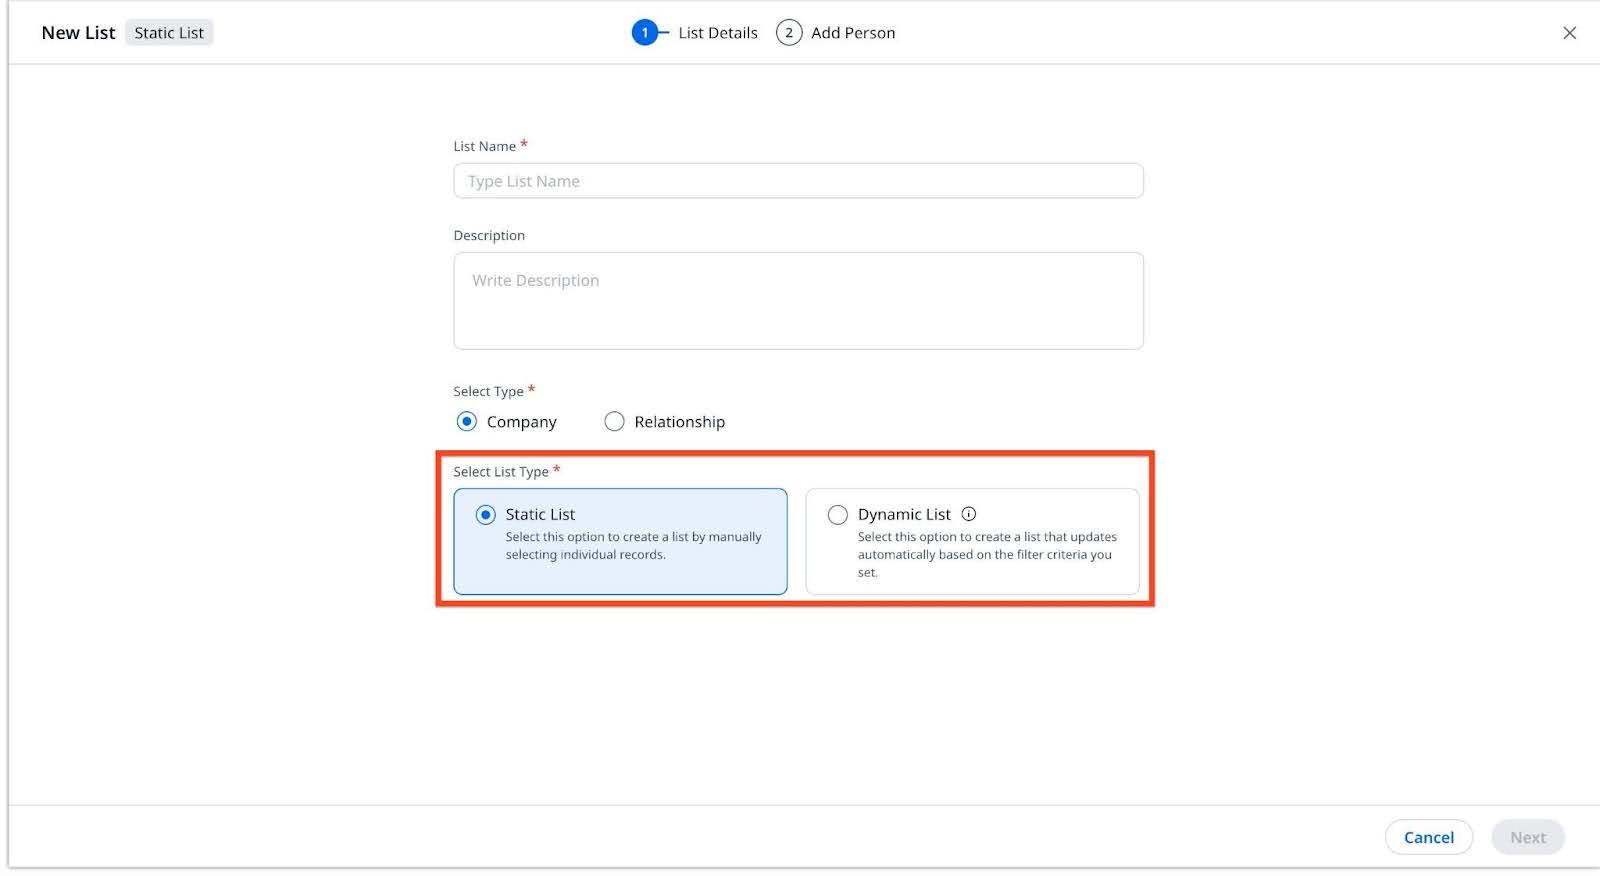
- Click Create New to create a new list. The New List page appears.

- Enter a List Name.
- (Optional) Enter a Description for the list.
- From the Select Type option, choose a person type (Company or Relationship).
- From the Select List Type option, choose a list type (Static List or Dynamic List).
.jpg?revision=1)
The different types of lists are:- All Person: Includes all Person records assigned to the user.
- Custom List: You can create your own lists based on your business needs:
- Static List: Manually create a list of Person records, ideal for one-time bulk emails, where the target audience is fixed and does not update dynamically. For more information on how to create a static list, refer to the Static List section.
- Dynamic List: List generated based on filter criteria set by you and are automatically updated based on saved filter criteria. For more information on how to create a dynamic list, refer to the Dynamic List section.
Note: However, when an admin updates the companies or relationships in a Group Send Access Control setting, any ineligible contact records are automatically removed from both the static and dynamic list. This ensures that users can send emails only to authorized contacts.
- Click Save List to save the list.
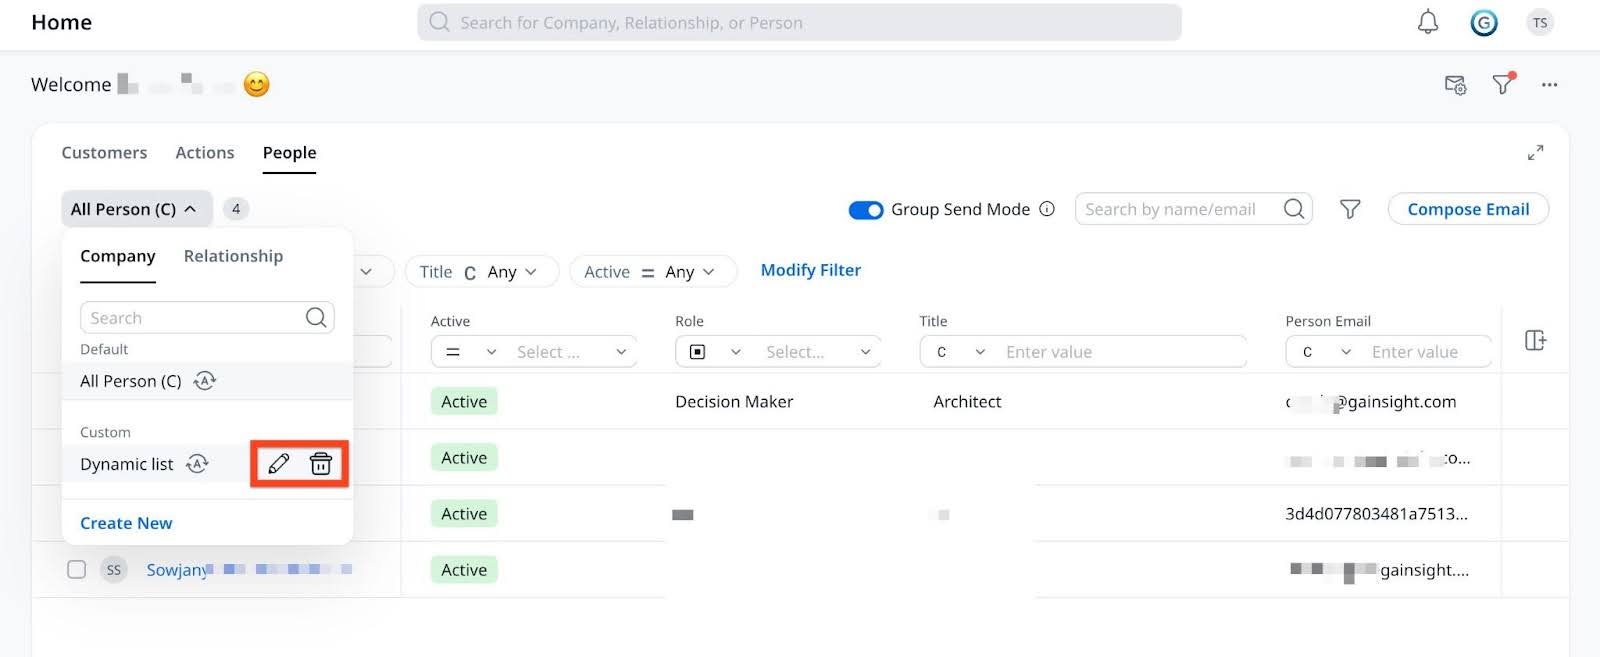
- (Optional) Click Edit or Delete icon to edit or delete a list.
Note: The Dynamic icon next to a list indicates that it is a Dynamic List, distinguishing it from a Static List.
Static List
After completing steps 1–7 to create a list, follow the below steps to create a Static List:
- In the Select List Type option, select Static List.
- Click Next. The New List page appears.
- Click Add Person to List. The Add Person to List slide-out panel appears.

- Select the checkbox beside Person Name and click Add. The New List page appears.

- Click Save List to save the static list.
Dynamic List
After completing steps 1–7 to create a list, follow the below steps to create a Dynamic List:
- In the Select List Type option, select Dynamic List.
- Click Next. The New List page appears.
- Click Add Filter Criteria. The Configure Filters screen appears.
- Select values for Object, Field, Operator, and Value from the dropdown list.
- (Optional) Click the Plus icon to add a new row or the Delete icon to remove a row.
- Click Save.

- Click Save List to save the dynamic list.
Use the People Widget
You can access person records in the People tab within the Portfolio multi-tab widget (alongside Customers and Actions) in the Gainsight Home.

The People Widget displays person records from both Company and Relationships sorted by last modified date.
You can perform the following actions in People tab:
- View and manage person records
- Create and manage People Lists
- Send bulk emails using selected lists
Group Send Mode
Users can use the Group Send Mode toggle in the People widget to control how contacts are displayed. Based on the toggle state, contacts are shown either according to the Gainsight Home global filter or according to admin-configured access controls.

Group Send Mode Toggle Behavior
- When Group Send Mode is turned off
- People widget displays all your contacts based on the GS Home global filter. However, any Group Send actions, such as creating a list or sending an email, are not available.
- When Group Send mode is turned on
- People widget displays the relevant Companies and Relationships contacts based on access controls configured by the admin. Email-sending permissions continue to be governed by the assigned permission bundle. Enabling this toggle does not grant email-sending access to end users.
For more information on Configure Group Send Access Control, refer to the Group Send Admin Guide article.
Filter Records
To refine the results, use the Filter option within the People widget.

Customize the People Widget
You can customize the People widget as per their requirements. To customize the People widget display:
- Select the Layout icon in Gainsight Home.
- Check or uncheck the boxes next to each field name to show or hide them. You can also change the column order by dragging the column headers to the desired position.
- Click Apply.

Edit Fields
You can use the Edit icon to update fields in the People widget if those fields are marked as editable by the admin.

Edit permissions vary by object and field type, as described in the following table:
| Standard fields | Custom fields | Custom lookup | Standard lookup | |
|---|---|---|---|---|
| Company Person (CP) | Yes (for example, Title) | Yes | Yes | Yes |
| Relationship Person (RP) | Yes (for example, Role) | Yes | Yes | Yes |
| Person | Yes (for example, Name, Email) | Yes | No | No |
| Company | No (for example, ARR) | No | No | No |
| User | No (for example, Name) | No | No | No |
Create Personal Email Templates
You can create personal email templates to create consistent, branded messages for recurring communications.
Prerequisites: For you to create your own personal email templates, Admin needs to assign the Manage Personal Email Templates permission bundle.
Note: Personal email templates are only available while sending email from the new GS Home.
Perform the following steps to create an email template:
- Navigate to Email Manager from Gainsight Home.

- From the Email Templates tab, click New Template to create a new email template.

- In the Create a New Template form:
- In the Template Name field, enter a name associated with the template.
- (Optional) Enter a description for the template.
- Select the folder where you want to save the email template.
- Select Non-Operational or Operational as the Email Type.
Note: An operational email template is used to send essential, customer-specific information and bypass opt-out requirements. While non-operational email templates include a footer that allows recipients to unsubscribe from future emails.
If you have selected Non-Operational email type perform the below steps:- From the Select an Opt-Out Category dropdown list, choose a category.
A custom opt-out category lets organizations define tailored email opt-out options helping reduce broad unsubscribes and improve targeting. These categories are configured by Admins. - From the Select an Opt-Out Page dropdown list, choose an opt-out page.
A custom opt-out page provides recipients with a tailored unsubscribe experience based on selected categories, ensuring compliance and clarity in non-operational emails. These pages are configured by Admins.
- From the Select an Opt-Out Category dropdown list, choose a category.
- Click Save.

- Once the template is created, the email designer page opens automatically. On the designer page, you can enter text, add images, links, attachments, videos, tokens and much more that can be tailored to meet organizational and branding needs. For more information on getting started with designing an email template, refer to the Design Email Templates for Group Send article.
- (Optional) Once the template is ready, use Preview to view the template. For more information, refer to the Preview section.

- Click Save.
Manage Templates
Once an email template is created, it appears on the Email Templates page. You can edit, clone, delete, or add the template to Shared Templates using the three-horizontal dots menu beside a template.
Note: There are three types of email templates available:
- My Templates: Templates created by an individual user for personal use.
- Shared Templates: Templates shared within a team of users. These are not accessible to all users.
- Global Templates: Templates created by admins and accessible to all users.

Preview
The Preview option in the email template enables you to view the designed email template before using it in a program or outreach.

The following options are available in Preview:
- View: The preview is available in the following views:
- Desktop view
- Tablet view
- Mobile view
- Split View: The Split View option helps you select two layouts at a time from Desktop, Tablet, or Mobile to compare how the email template looks on different devices.
- Share: The share option enables you to copy a shareable link of the email template preview page.
- Version: This dropdown displays the available versions of the email template. You can select the required version of the email template to preview. For more information on the email template version, refer to the Versions section.
- Send Test Mail: The Send Test Mail option enables you to enter one or more email addresses to whom the test mail is to be sent. A test mail is sent to test the formatting related issues and to confirm the overall accuracy of the email.
Note: The Send Test Mail option sends the email without any attachments. - Dark Mode: The Dark Mode option changes the display to use dark backgrounds and light colored texts, making it easier to read in low-light settings.

Versions
Versions are multiple forms of the same email, contained within a single email template.
Business Use Case: Marketing teams can create different versions of an email template to personalize messaging for various customer segments such as new users, power users, or churn-risk accounts, without building separate email templates.
Note: The Default version of the email template cannot be deleted.
Create Email Template Versions
To create versions of an email template:
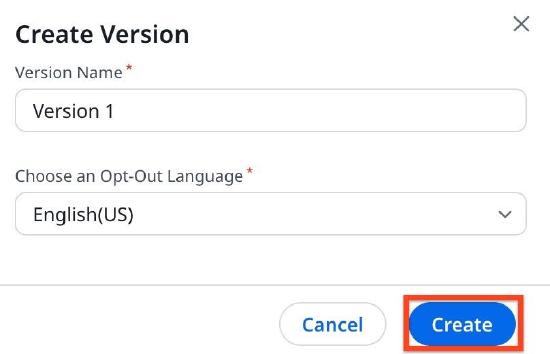
- Click New Version adjacent to Version. The Create Version window appears.
Note: You can create a maximum of 20 versions.

- In the Version Name field, enter the name of the version.
- From the Choose an Opt-Out Language dropdown list, select an opt-out language.
Opt-out Language refers to the language in which the opt-out settings are displayed to users. Admins can configure a multilingual Email Subscription page containing the Opt-out Settings. - Click Create.
Note: You can Edit, Clone, and Delete versions by clicking the three-vertical dots adjacent to each Version.

Send Bulks Emails to People Lists
You can send bulk emails using People Lists in Gainsight Home. For more information on how to create a list, refer to the Create a List section. To send bulk emails using lists:
- In the People widget of new Gainsight Home, click Compose Email. The Compose Mail page appears.
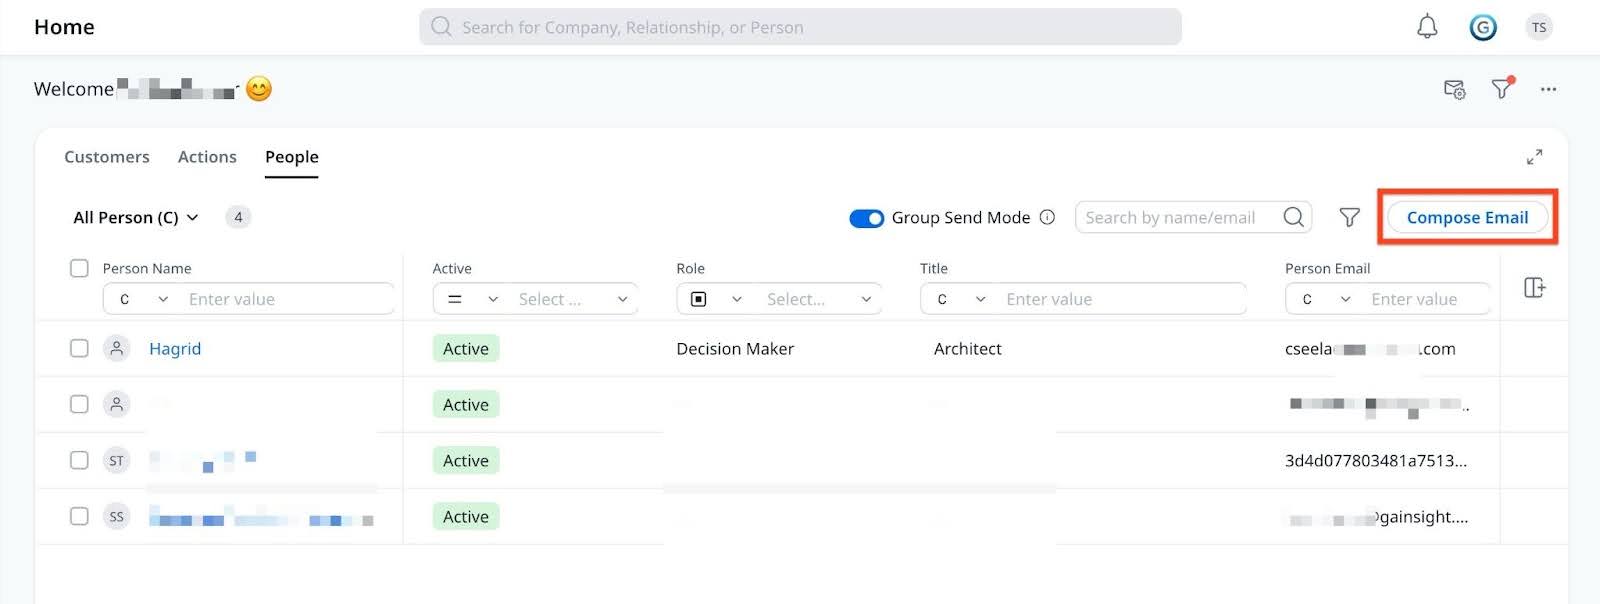
Note: Alternatively, to send an email to specific people, select the checkboxes next to their names and click Send Email to open the Compose Mail page.

- In the To field, select one of the following tabs:
- People: Manually search and add recipients.
- List: Send an email to all members of a pre-created people list.

Note: The Add Reply-To in BCC option is enabled by default to ensure that users receive a copy of emails sent using this feature in their inbox through the BCC line. If a user prefers not to receive these emails, they can uncheck this option.
- To view people in a specific list, along with the date and time of the last email sent to each recipient, select the list from the left side panel dropdown.

- (Optional) To remove a recipient from the list, click the Delete icon.

Note: Removing a recipient from the list in Compose Mail does not modify the original list. - Select the Group by Company/Relationship checkbox. This ensures recipients from the same company receive a single, shared email instead of individual emails. This helps streamline communication for company-wide messaging.
For Example:- Recipients A, B, and C exist.
- A and B belong to the same company, while C is from a different company.
- A and B receive one common email.
- C receives a separate email.
Group by Company/Relationship functionality is only applicable for operational emails. For non-operational emails, the Group by Company/Relationship selection checkbox is not available. Additionally, this feature is not supported in the following scenarios:
- The email template includes tokens from Company Person, Relationship Person, Person, Survey or User objects.
- The template contains a report filtered using To Recipients > Person.
- Select a template from the Select Template option or draft the email content.

Note- If the My Templates folder in Select Template layout is empty, users are automatically redirected to the Global Templates folder.
- Selecting the New Template option redirects you to Email Templates in Email Manager.

- Click Preview & Send. Non-operational email templates include a footer that allows recipients to unsubscribe from future emails.

- By default, the Log to Timeline checkbox is selected. To prevent emails from being logged to the timeline, clear this checkbox.
Note:- If the email is logged to timeline, you can preview the email as a recipient by selecting their names from the Email Preview As Viewed By dropdown list on the Timeline page.
- A timeline activity is not created if all recipients of an email are internal users. If at least one Company Person or Relationship Person is included, the internal users are excluded from the Timeline entry.
- Timeline activities created from Group Send emails cannot be edited.
- External recipients are not displayed as a list within the activity; instead, their names appear in the As Viewed By dropdown.
- The complete list of external recipients is available in the Activity Timeline object.

- Click Send to send the email.
Manage Sent Emails
You can access sent and draft emails through Email Manager in the Gainsight Home.
Prerequisites: For Email Manager to be available, admin needs to ensure following:
- Activate the People Widget in the GS Admin page
- Assign the Group Send permission bundle
To access sent and draft mails, navigate to Email Manager > Outbox, accessible from the top-right corner of GS Home.
Some functionalities available on Outbox page are:
- Undo: You have an option to recall an email within two minutes of sending, using the Undo action. This saves the email as Drafts in Outbox. To recall an email:
- Click the Undo option after sending an email.
- Alternatively, navigate to Email Manager > Outbox and select Undo to recall the email.

- Alter Date Range: By default, the Outbox displays emails sent from Gainsight Home within the past 90 days. You can customize this view using the Custom option in the Last 90 Days dropdown. The maximum filter range is 365 days.

- Refresh: Use Refresh to reload the page.
- Person Filter: Use the Person option to search by company name or email id and streamline your email in Outbox accordingly.

- Search by Email Subject: Use this option to find emails based on their subject line.
Email Analytics
You can track email performance metrics such as Opened, Clicked, Bounced, and Failed for each sent email.
To view these metrics, navigate to Email Manager > Outbox, then click an email to open the Email Engagement Details slide-out panel.
The following metrics are available for each sent email:
- Opened: Details of recipients who opened the email.
- Clicked: Details of recipients who clicked at least one link in the email.
- Bounced: Details of emails returned due to invalid recipient addresses.
- Failed: This can be any failure, for example spam, unsubscribe, rejection, or blocks.

Note: The Clicked count displays how many recipients opened the email and clicked at least one link.
Some additional functionalities on Email Engagement Details page are:
- Advanced Filter: Refine engagement metrics based on specific criteria. For example, to view details of emails that were not opened:
- Set the Field to Email Delivery Status
- Set the Operator to not in
- Set the Value to Opened

- View Email: Preview the content of a sent email.
- Search by Name or Email: Find emails by recipient name or email address.