Instrument Your Product Manually using Product Mapper
This article explains how to use the Product Mapper modeling and instrumentation tool.
Overview
Product Mapper allows you to model your product using a simple and powerful hierarchical tree structure that is designed to help you quickly and effectively map your product’s features and associate the tracked user events into the corresponding features and modules with zero coding.
Prerequisite
To use Product Mapper, ensure that the Gainsight PX tracking code is configured in your application. Anatomy of Product Mapper. For more information, refer to the Install Gainsight PX on Your Web App article.
Instrument Your Product
Product Mapper is an easy to use way of describing your product features with a simple point-click-describe method. Modules and features can be organized to match your application. For example, you can organize by modules and features or you can nest sub-modules under modules and add features at any level.
To map your application:
- Navigate to Product Mapper from the main menu.
- In the Build Your Product Tree section, click Get Started.
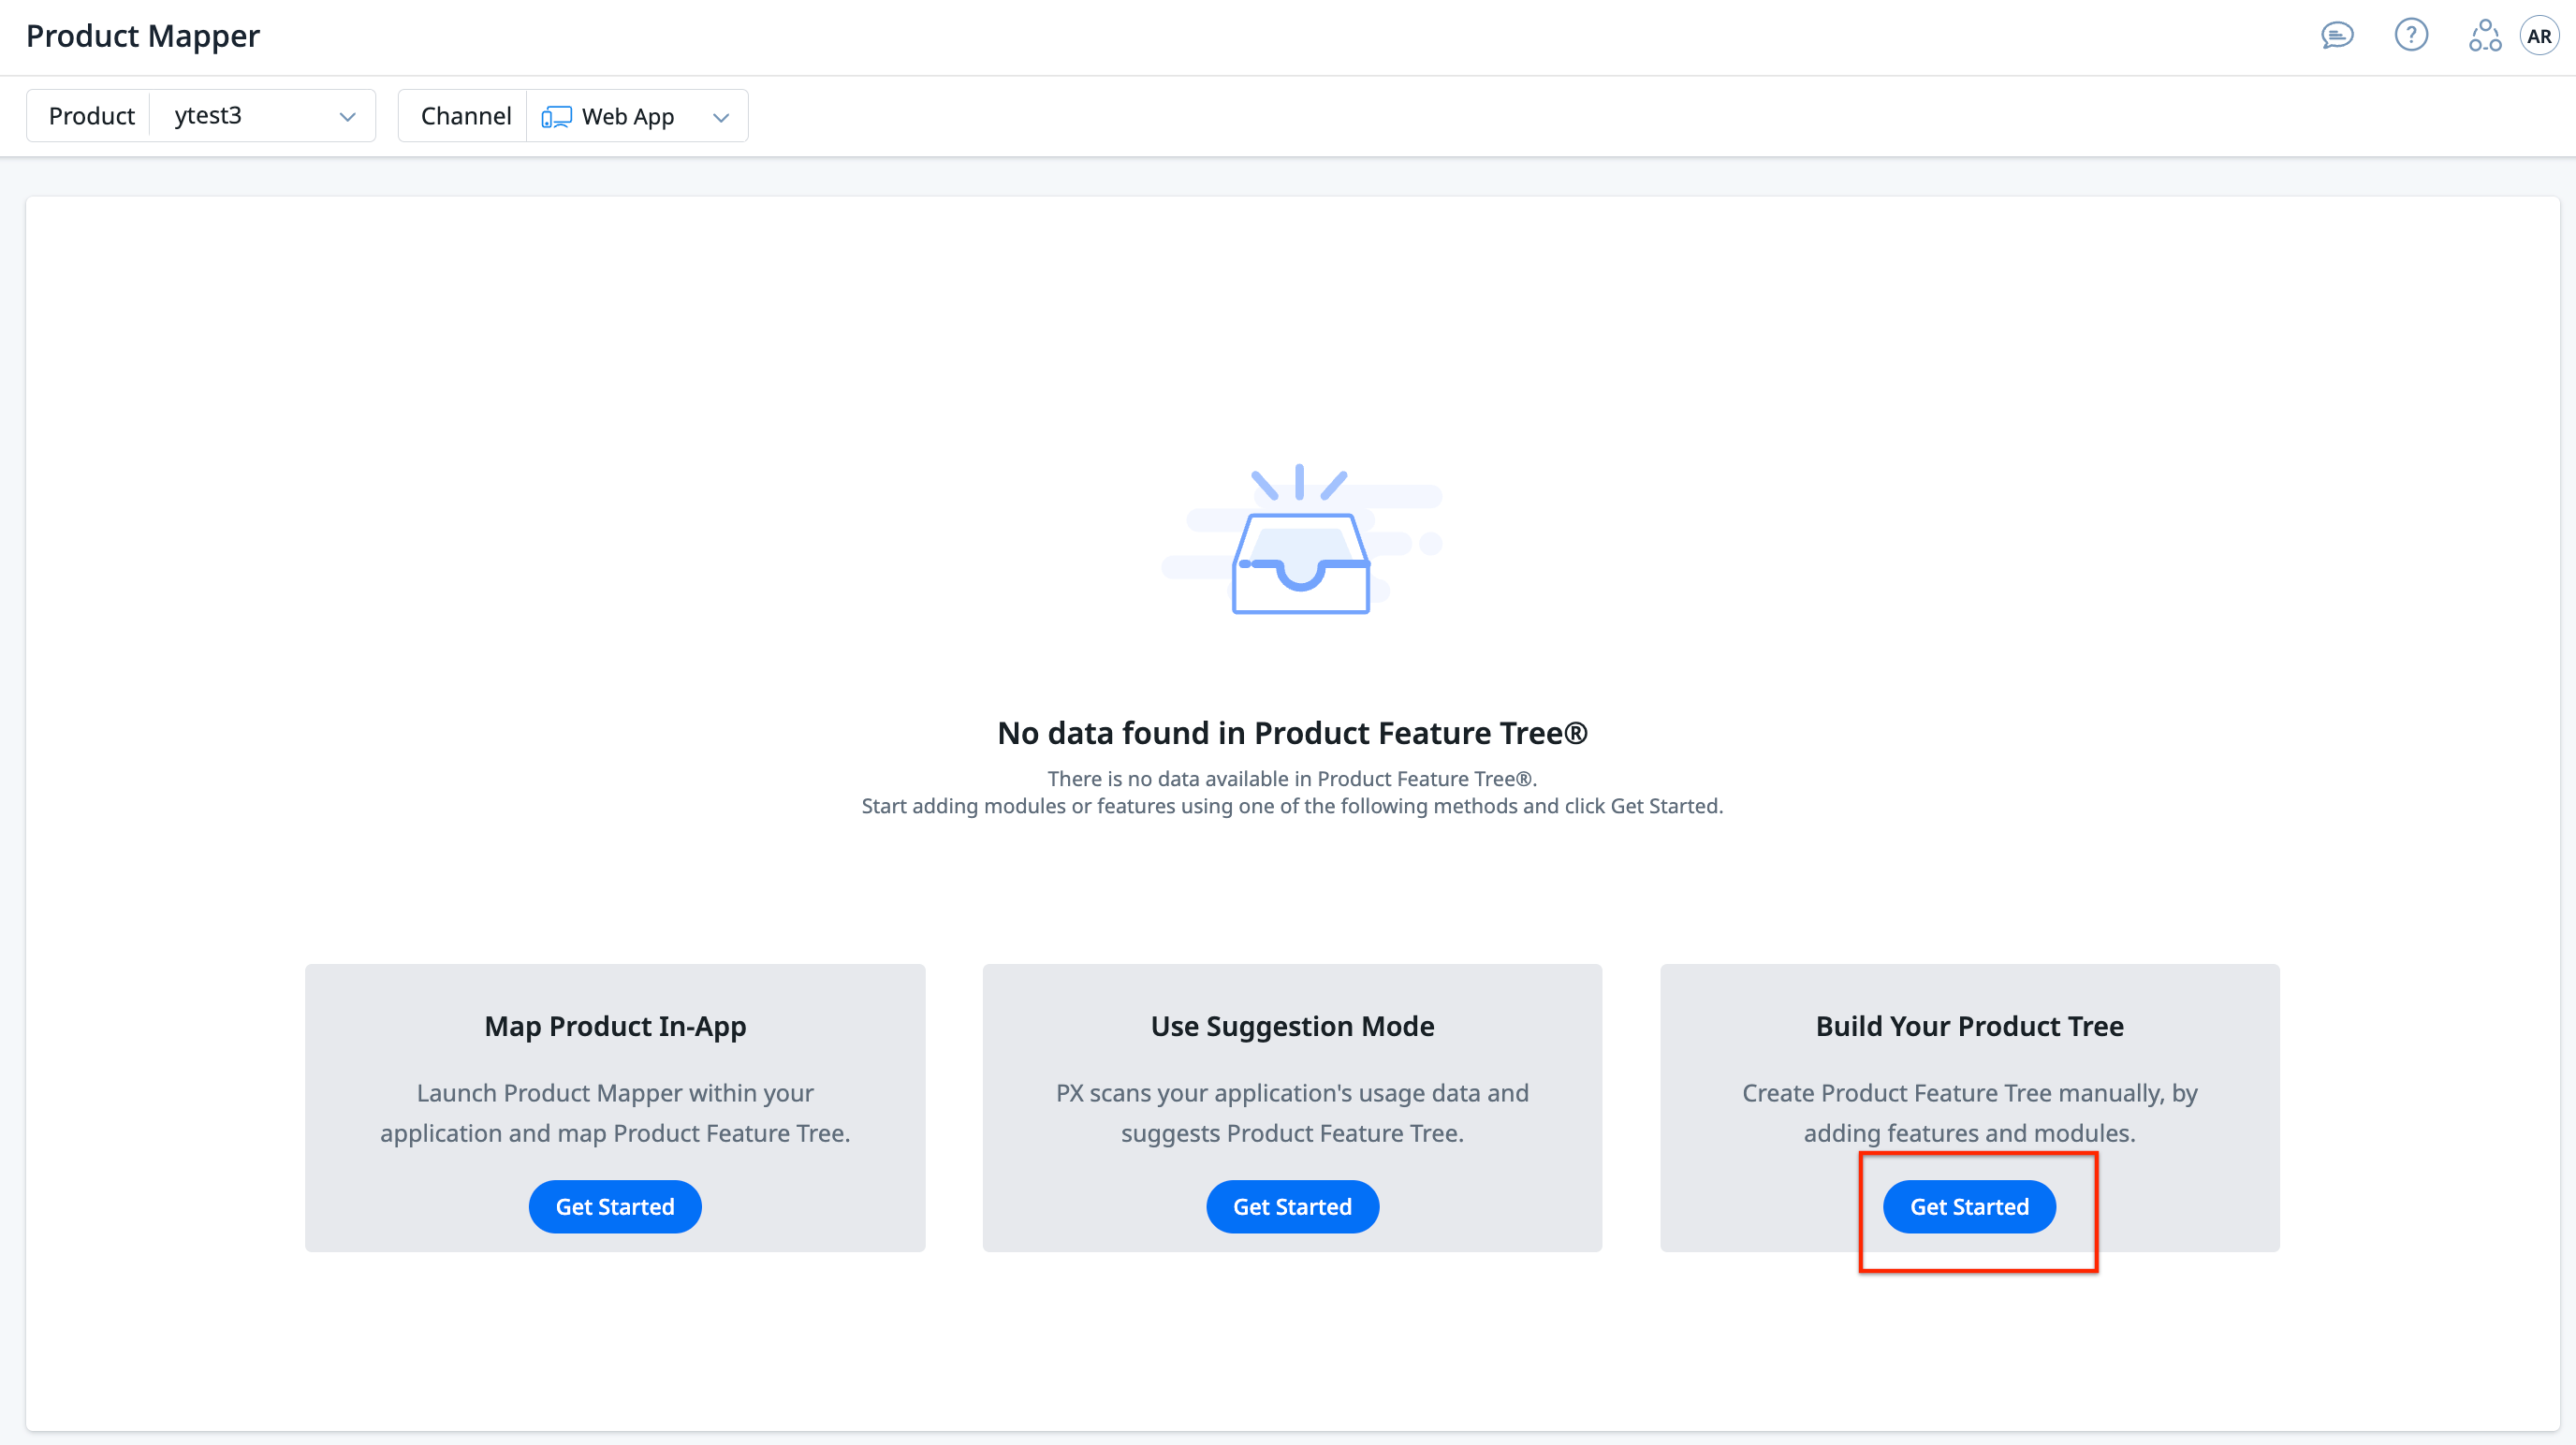
Note: If you already have a tree created, clicking Product Mapper from the main menu directly takes you to Product Mapper,
The Product Mapper feature helps you organize your product's features into a hierarchical tree structure. To instrument your product:
Add Modules
A Module in Product Mapper represents a module in your product which can be a section, tab, or window of your application. While modeling your product, use modules and sub-modules driven by the way you describe your product and the way the UI is built.
To create Modules:
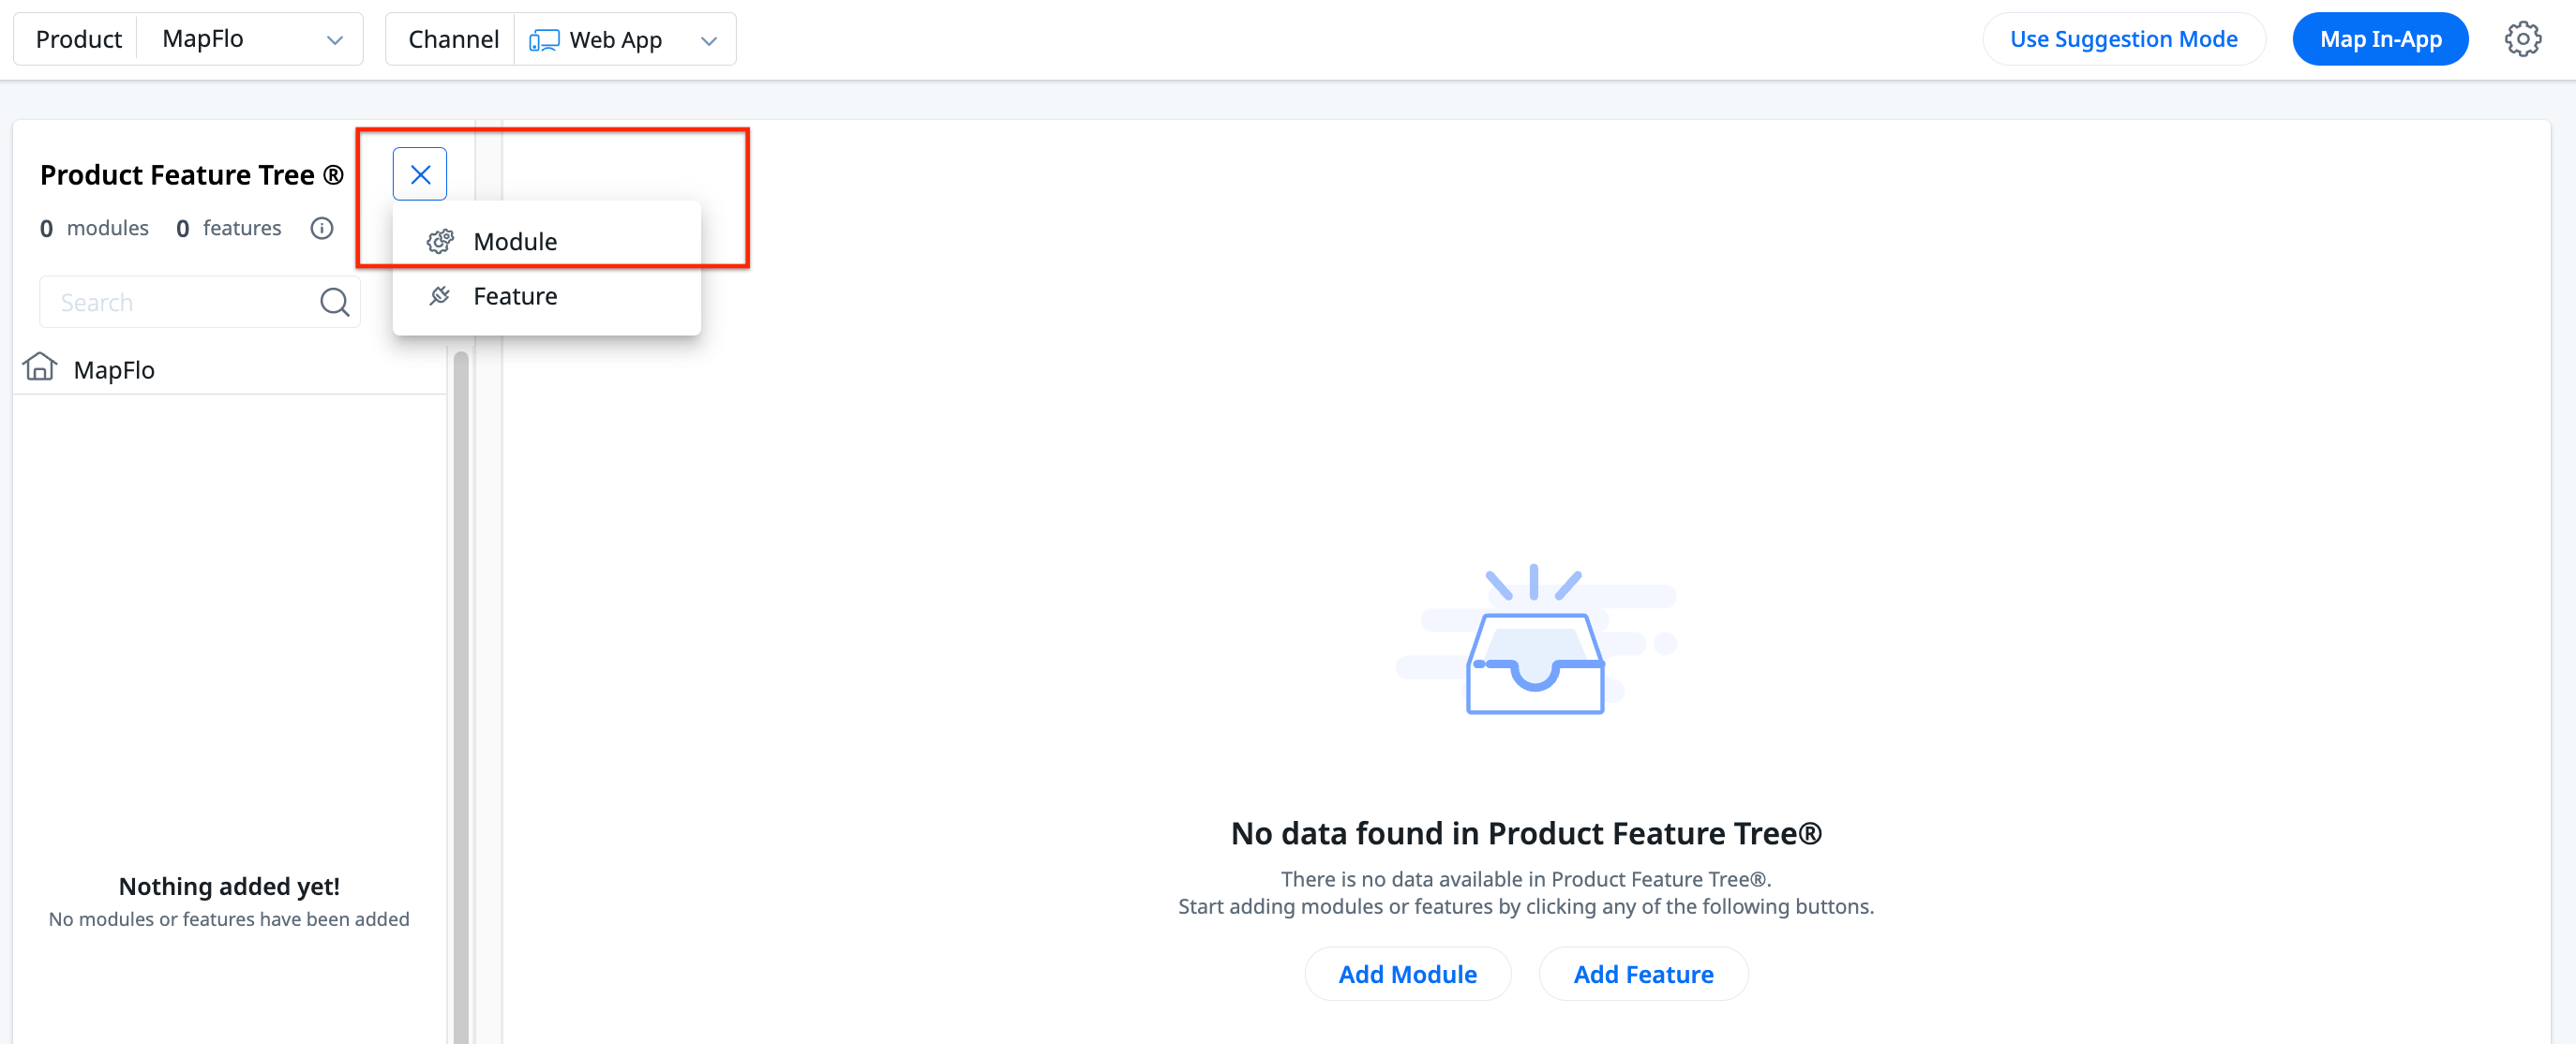
- Click Product Mapper from the left pane.
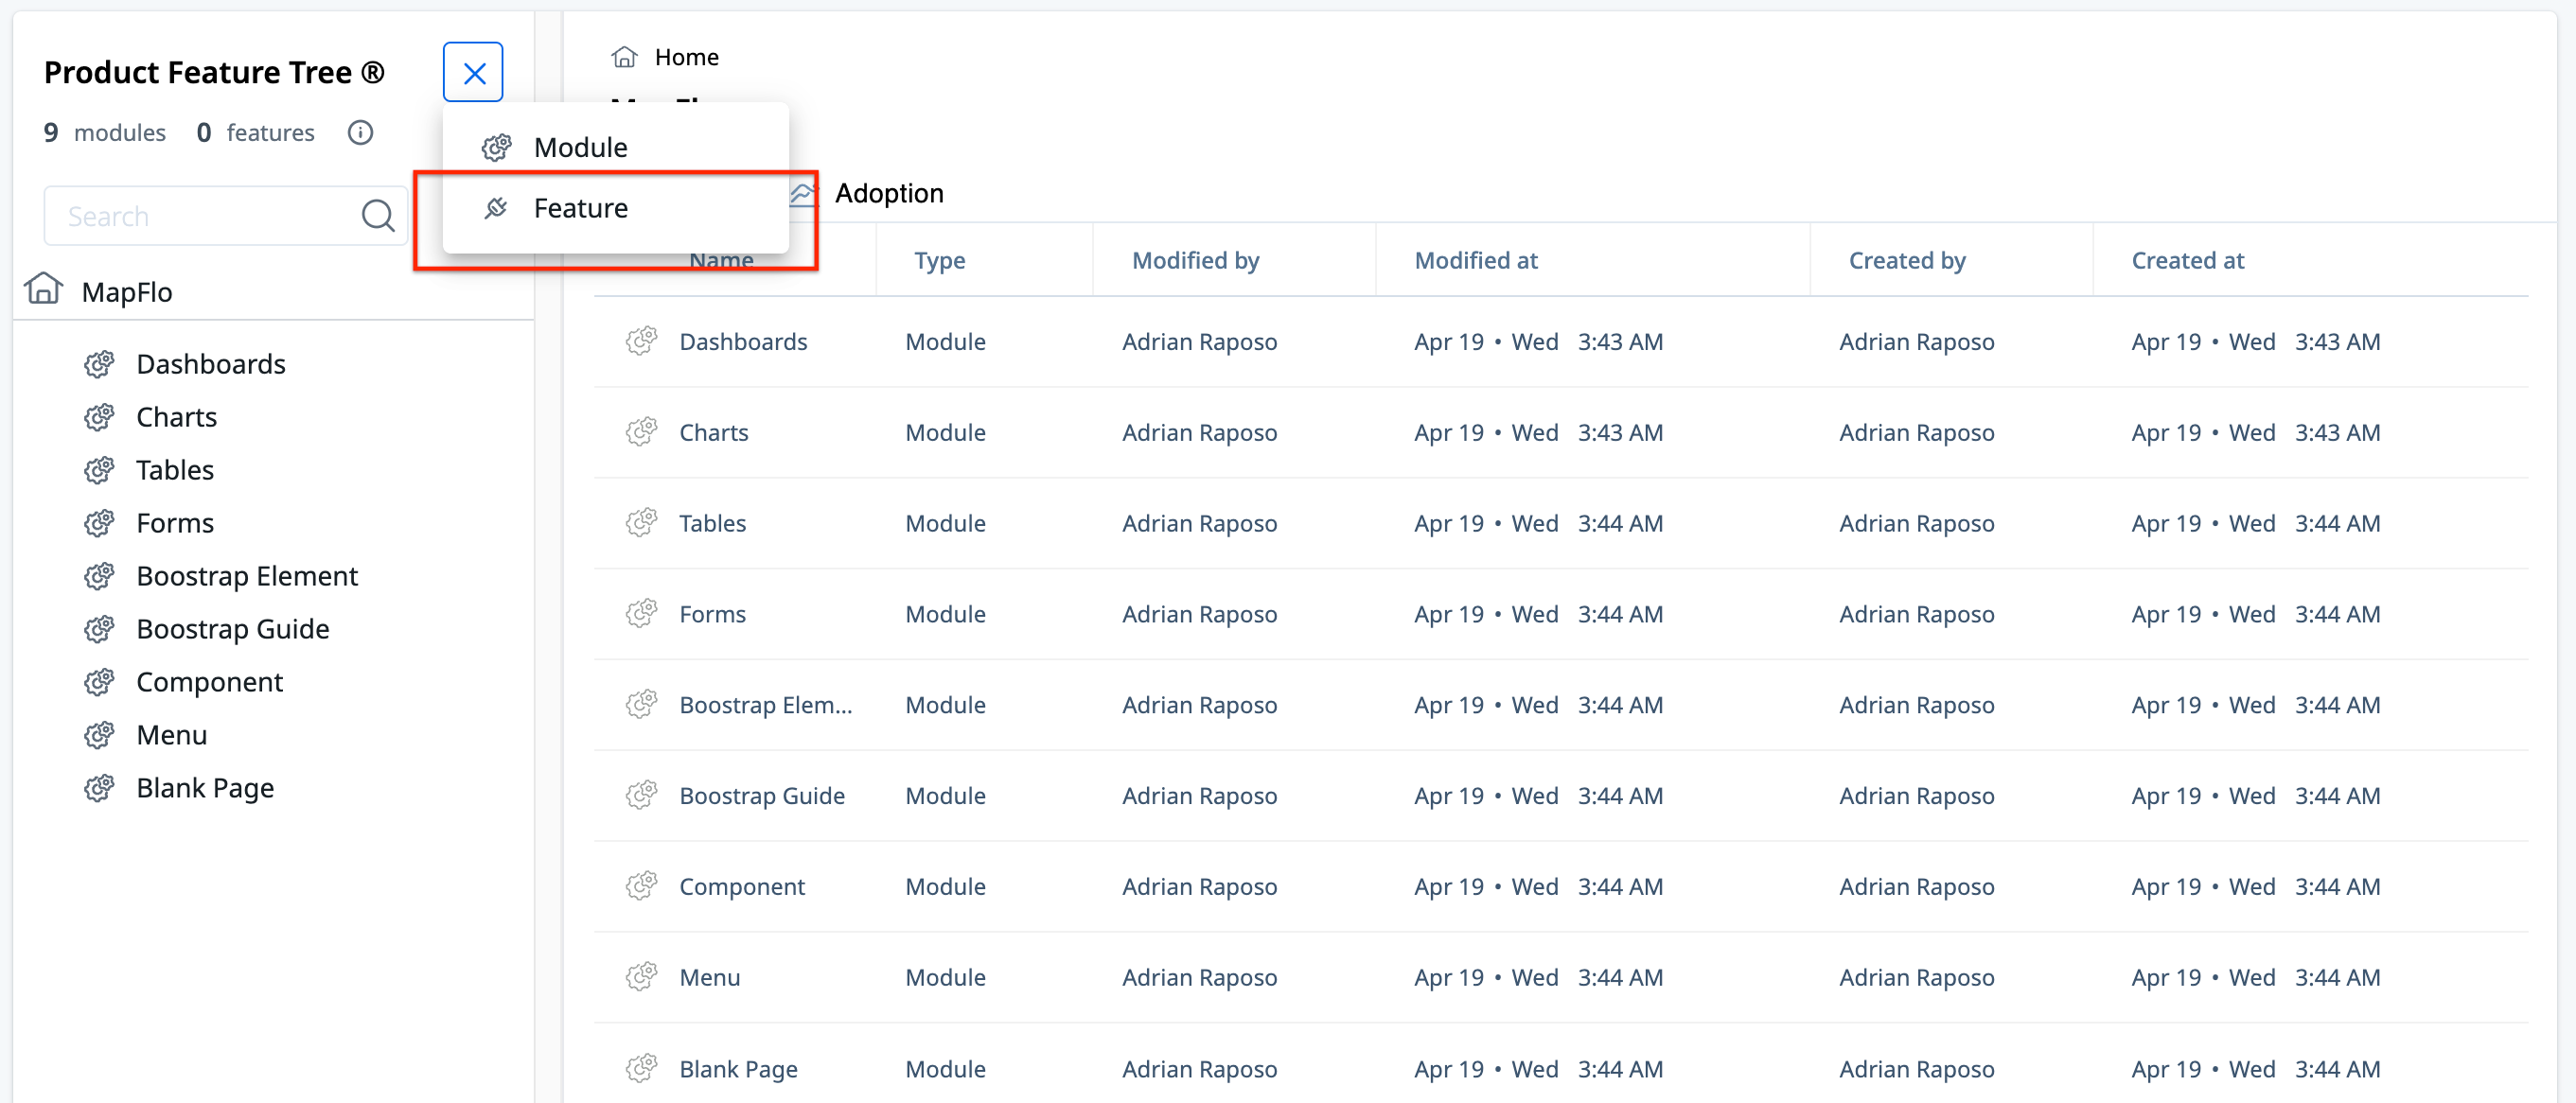
- In the Product Feature Tree® section, click the Add icon and select Module.
- Enter the module name in the text box that appears and press the enter key. A new module is created.
- (Optional) To create nested modules, click the Edit icon of parent module and select Add New Module.
- Continue to add modules or sub-modules corresponding to sections of your application.
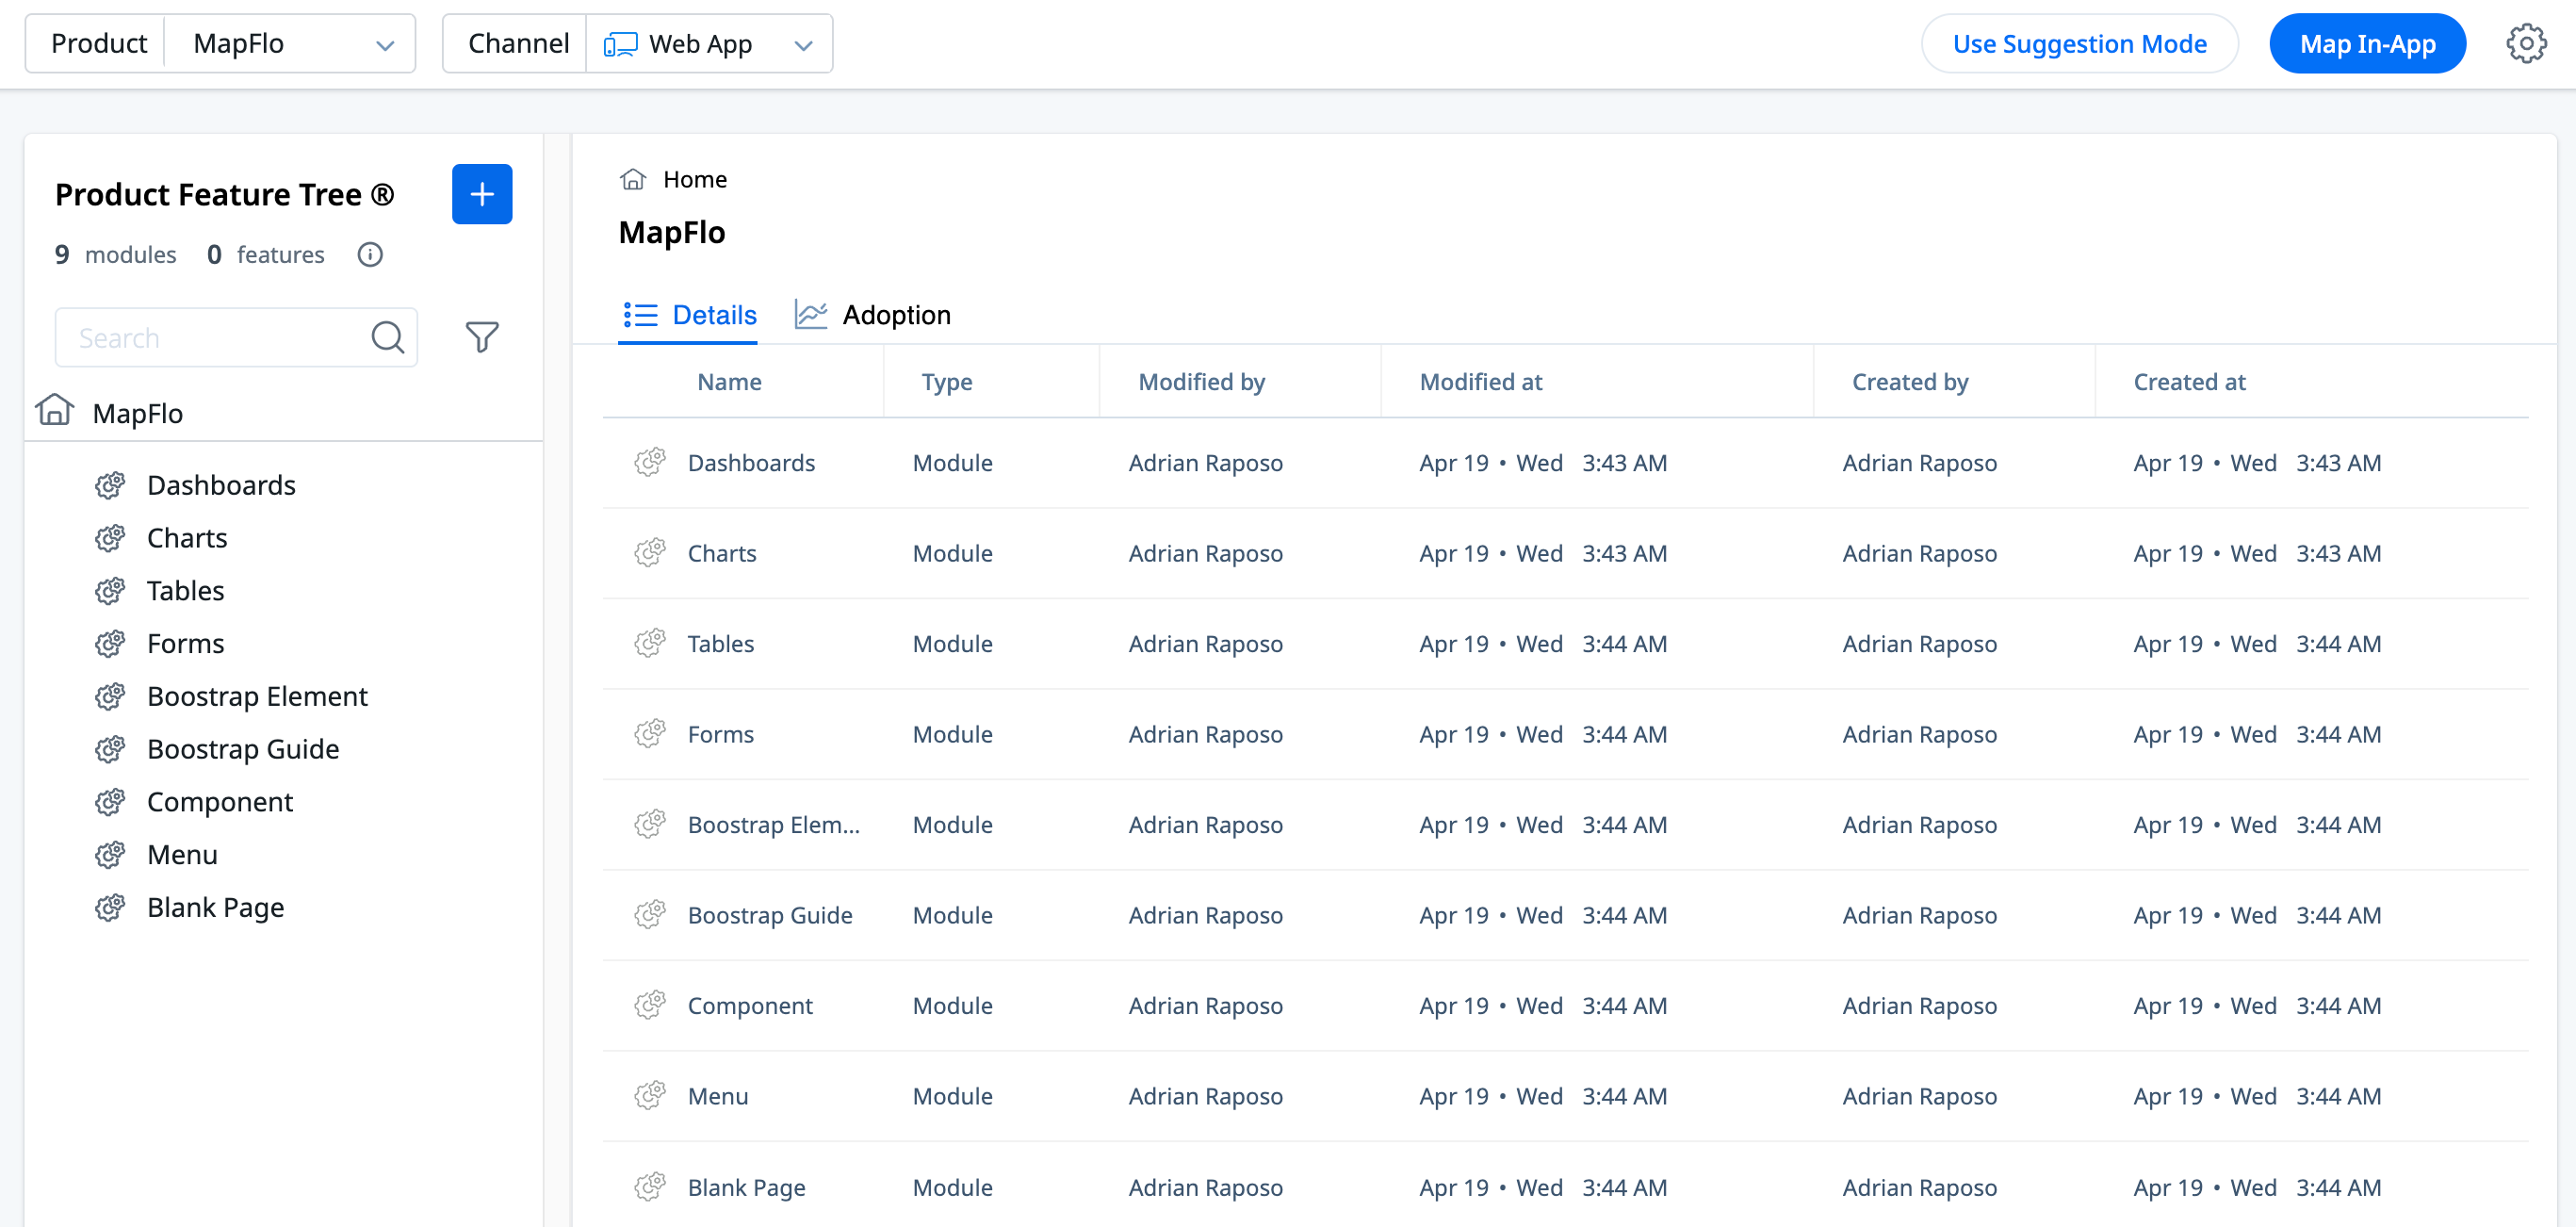
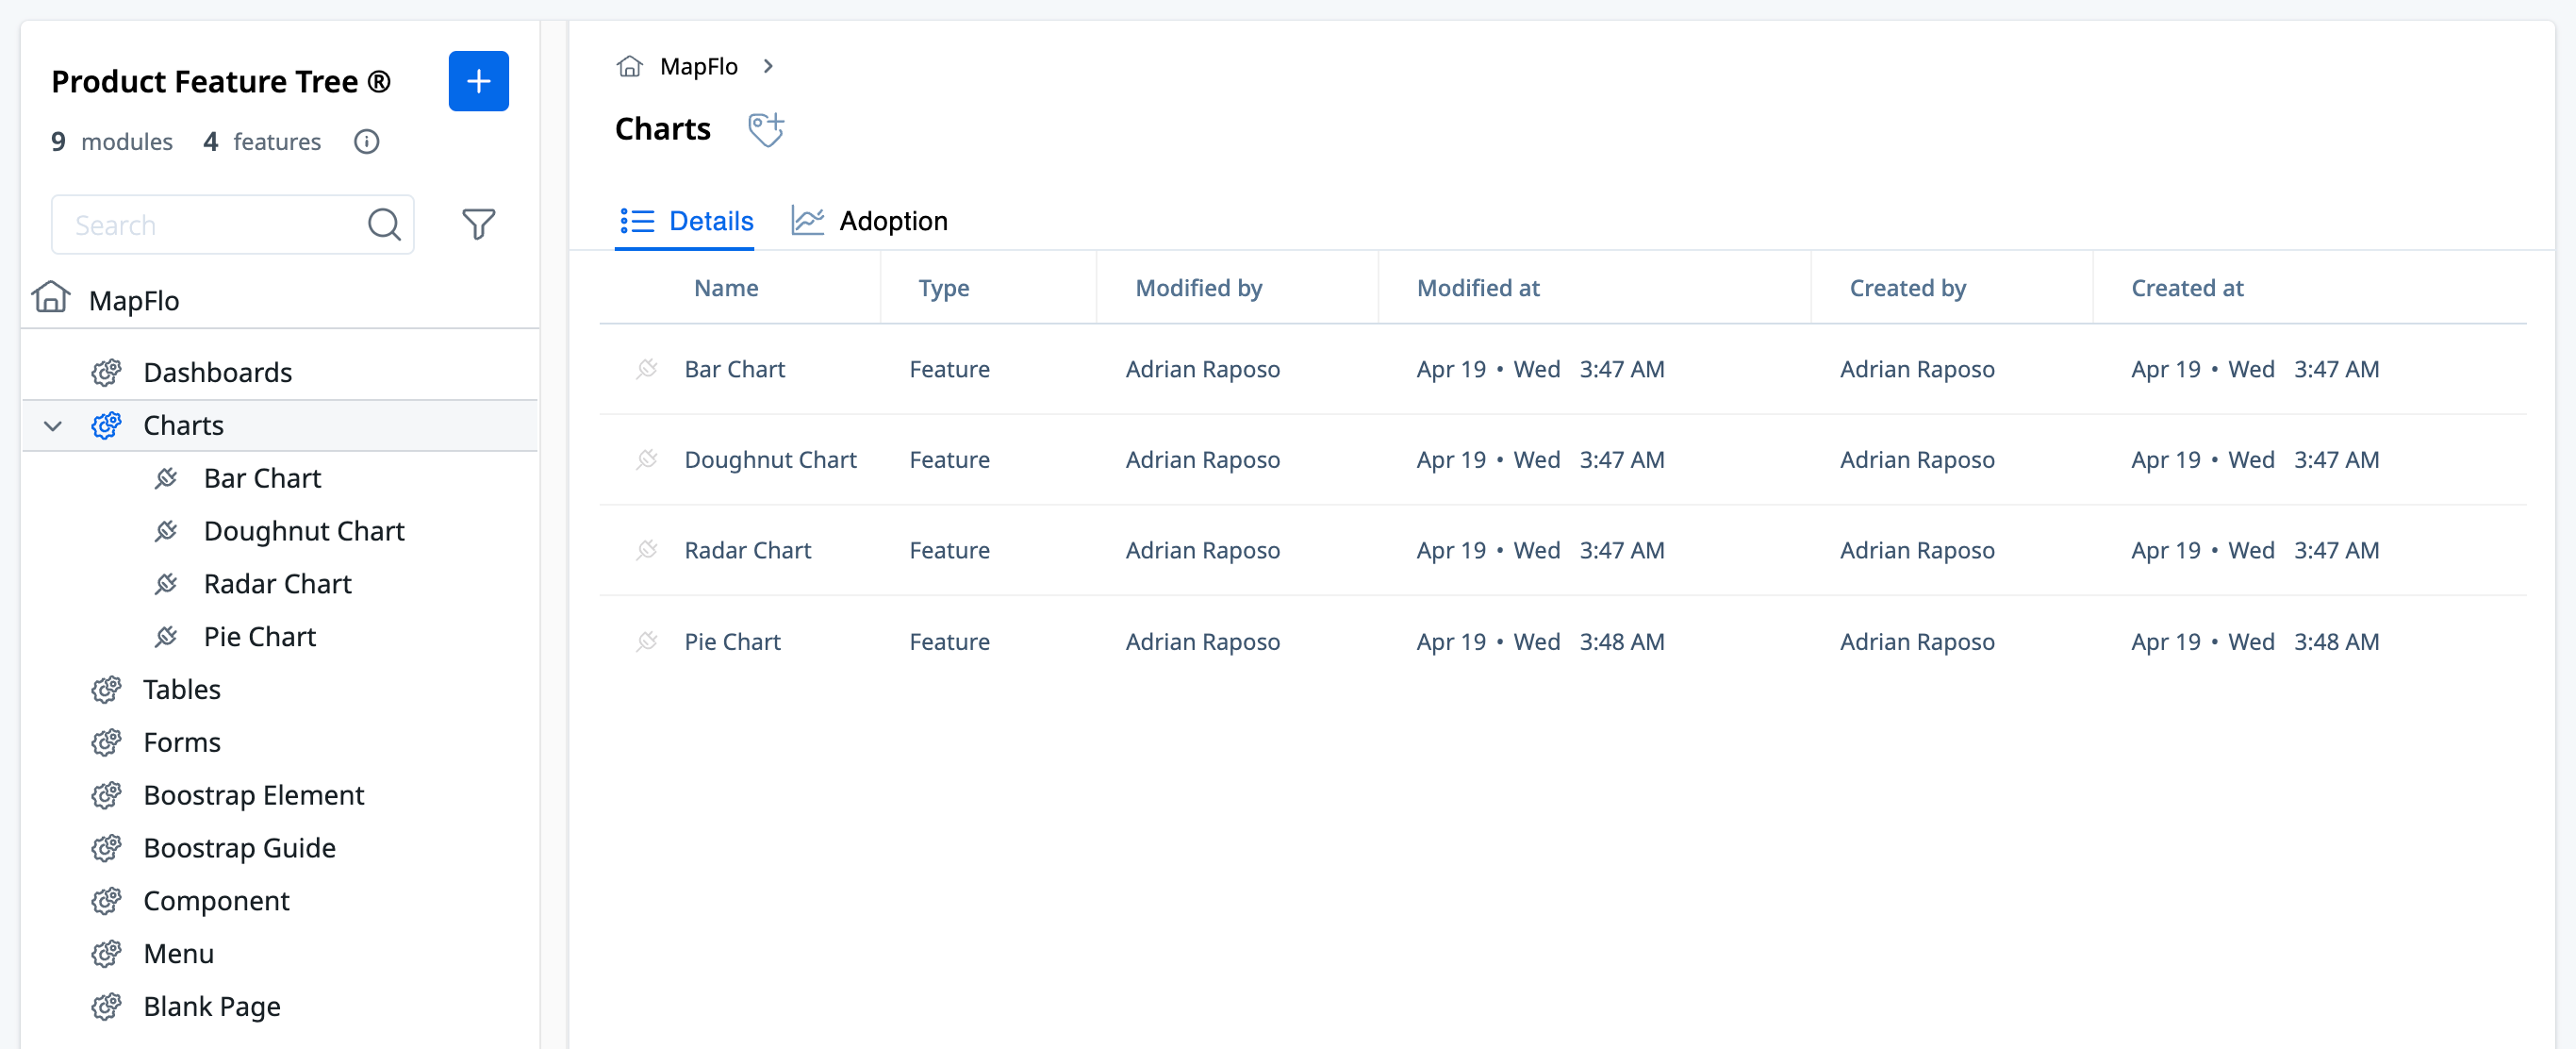
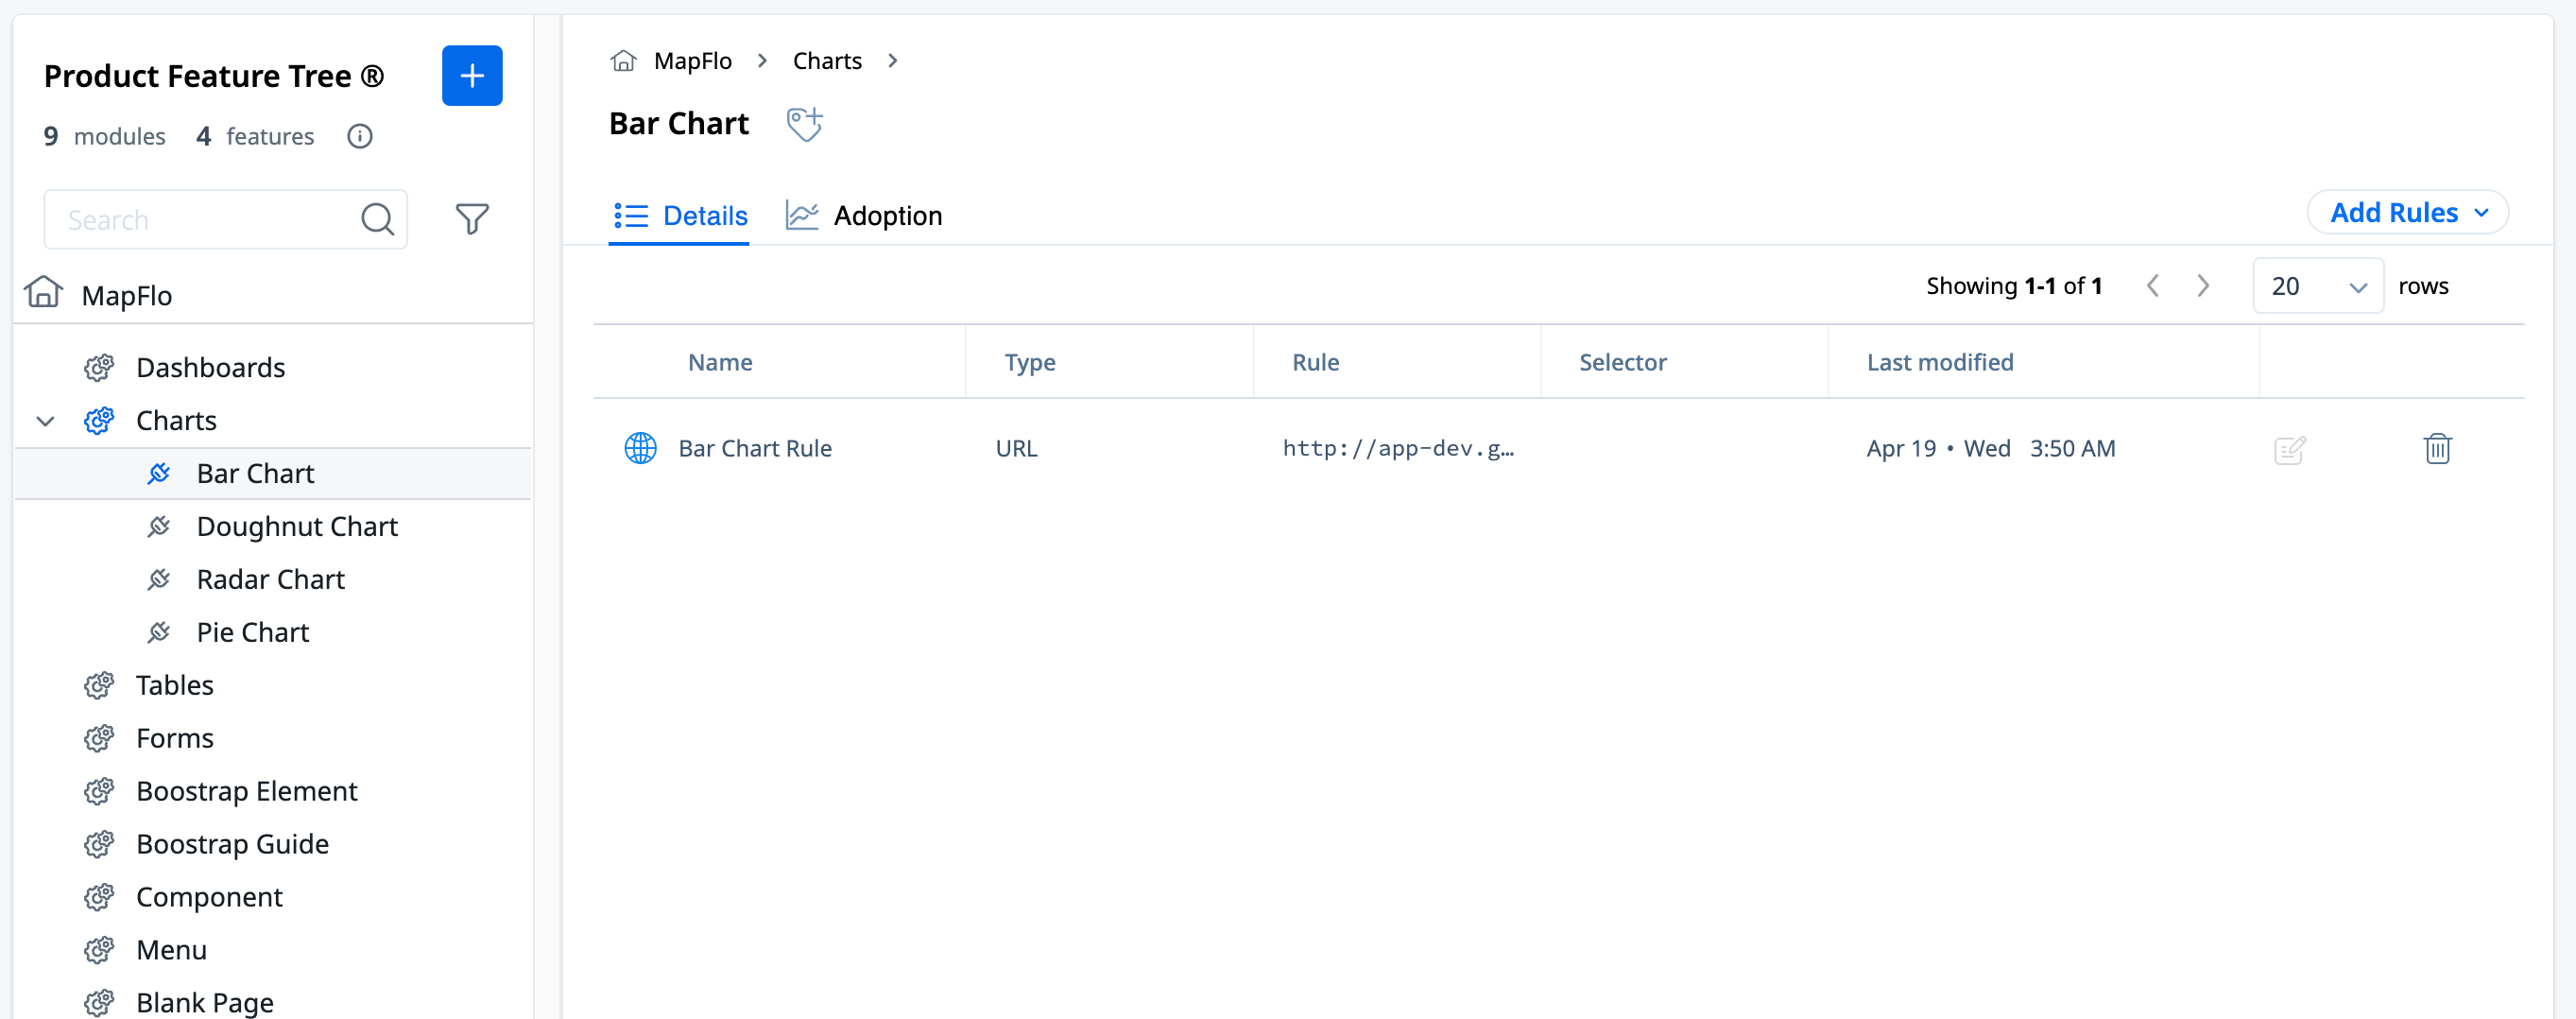
You can see that the application is modeled into a product tree. This product tree has many modules; Dashboards, Charts, Tables, and so on. Collectively the modules form the product tree of the application.
Add Features
A feature in Product Mapper represents a feature in your product. Once you have added modules, you need to add features for each module to track various metrics on your web page.
To add features:
- In the Product Feature Tree® section, click the Add icon and select Feature.
- Enter the feature name in the text box that appears and press the enter key. A new feature is created.
-
Continue to add features for modules or sub-modules corresponding to your application.
Add Rules
Features consist of rules that are mapped to events from your application. The following are the types of rules you can use in a feature:
URL Rule
A URL rule is used to track the pageview event. In a single-page application, Gainsight PX generates a pageview event on URL change even if the page is not reloaded.
To create a URL rule:
- Select the feature from the Product Feature Tree section.
- Click Add Rules.
- Select URL Rule. The URL Rule popup appears.
- In the URL Details section, enter the URL of the page to be tracked. In this example, the URL of the Charts page is entered. This tracks the number of page views for the Charts page.
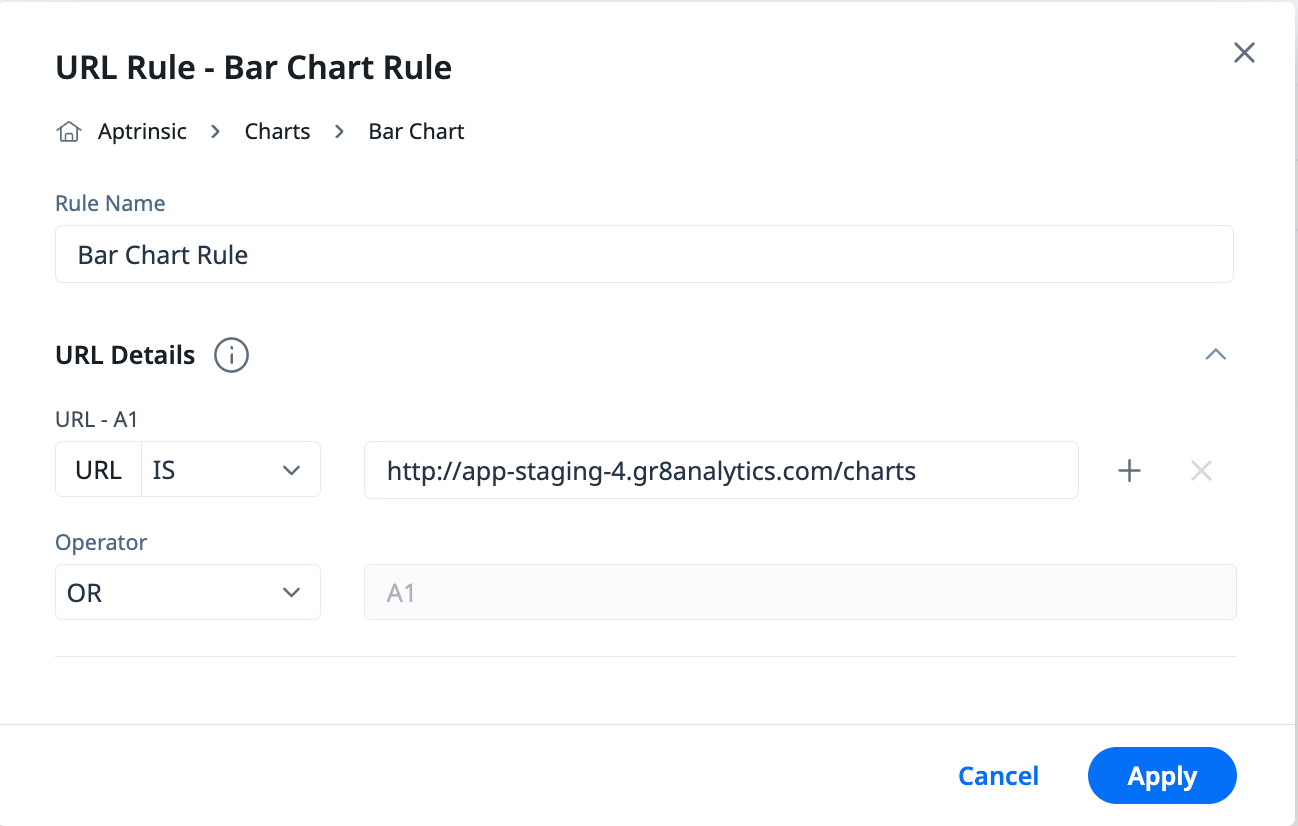
In the above example, whenever a user opens the above URL (accesses the Charts page), the rule is matched and the count of the number of Charts views is incremented by one.
- Quick Tip: Use Wildcards for multiple instances of a URL. Click to expand.
- You can use a Wildcard (*) to match multiple instances of a URL. Additionally, you can also use wildcards to match a rule. Consider a scenario in which you have multiple URLs for the Home page (for instance, Home/v1, Home/v2, Home/v3 and so on), but all three URLs redirect to the same Home page. In such cases, you can use the asterisk (*) wildcard to match all instances of the Home URL, as shown below:
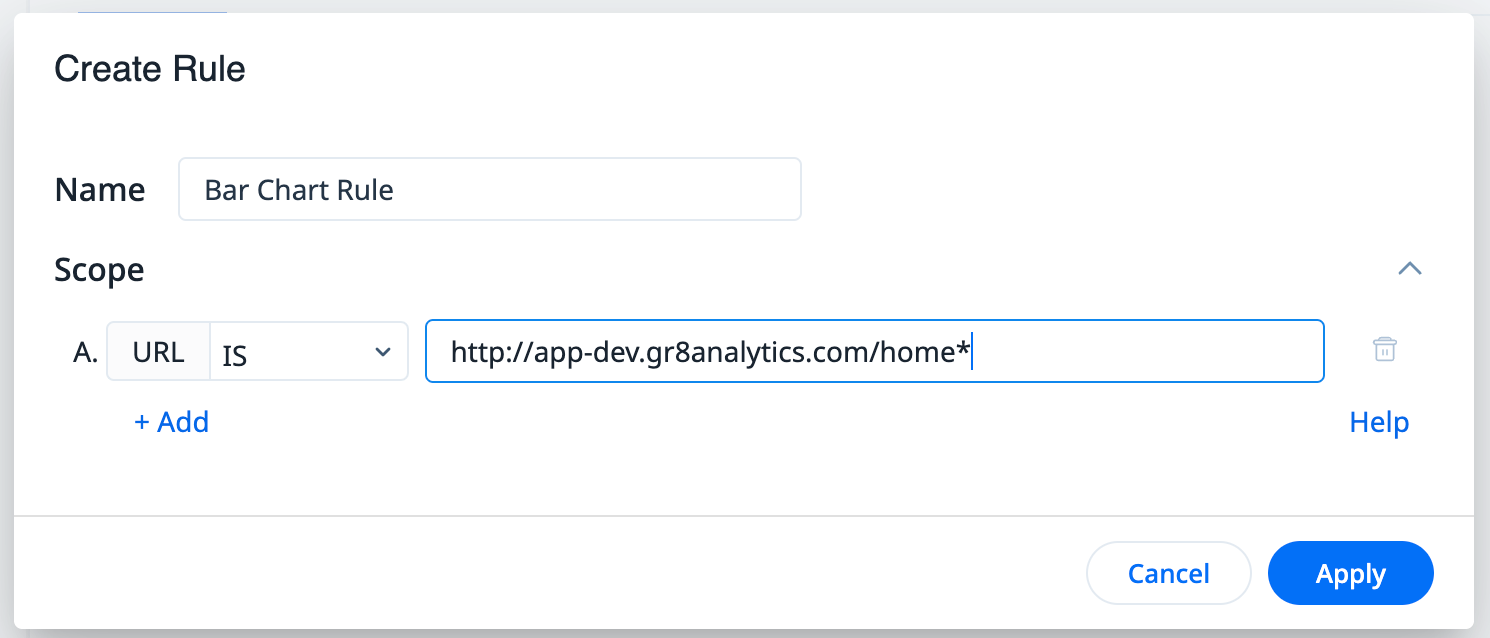
In this case, the Home page view is incremented, irrespective of the URL used to access the page.
You can also use the wildcard at the beginning of the URL in case you have multiple instances of the URL.
- (Optional) Click the + icon to add multiple URLs.
- In case of multiple rules, define the logic using the Operator field.
- Click Apply. The rule is created in the selected feature.
UI Element Rule
The UI Element rule tracks the number of times a clickable UI element (such as button) is clicked by matching against the DOM element using a unique CSS Selector.
Create UI Element Rule
To create a UI Element rule:
- Select the feature from the Product Feature Tree section.
- Click Add Rules.
- Select UI Element Rule. The UI Element Rule popup appears.
- In the URL Details section, enter the URL of the page to be tracked.
- On a separate browser tab, open your application and navigate to the page on which the button is located.
- Right-click the required button and select Inspect.
- Identify the code block which contains the code for your button.
- Right-click the code block and select Copy > Copy Selector.
- Return to Gainsight PX and paste the code in the Selector - Custom field.
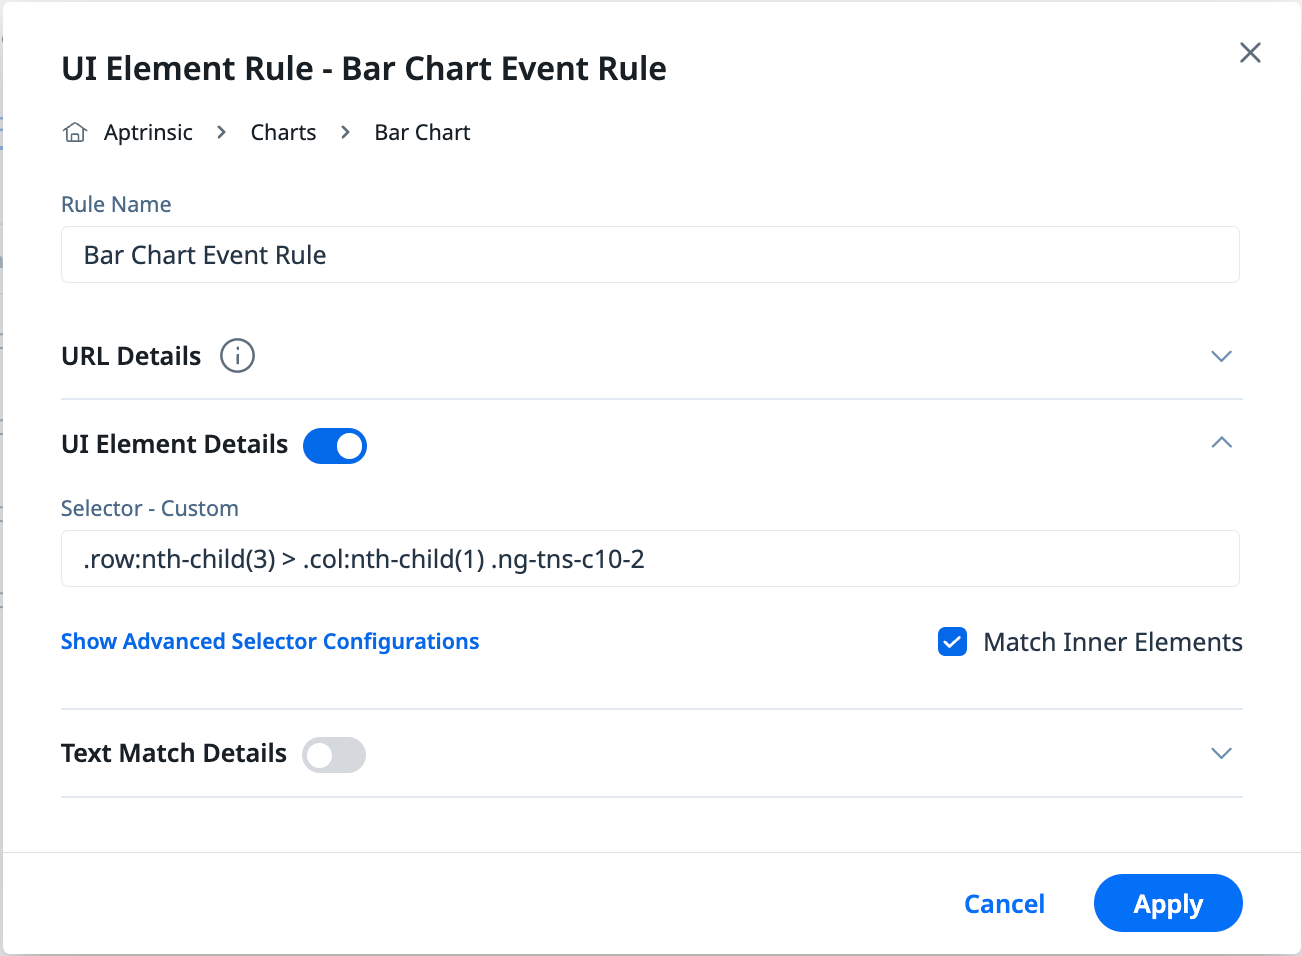
- Click Apply.
Create UI Element Rules with Text Matches
You can use the Match Text option to create features with text match only. This helps in preventing applications with dynamic UI elements from experiencing CSS selector match issues, and provides flexibility to map the unique elements faster.
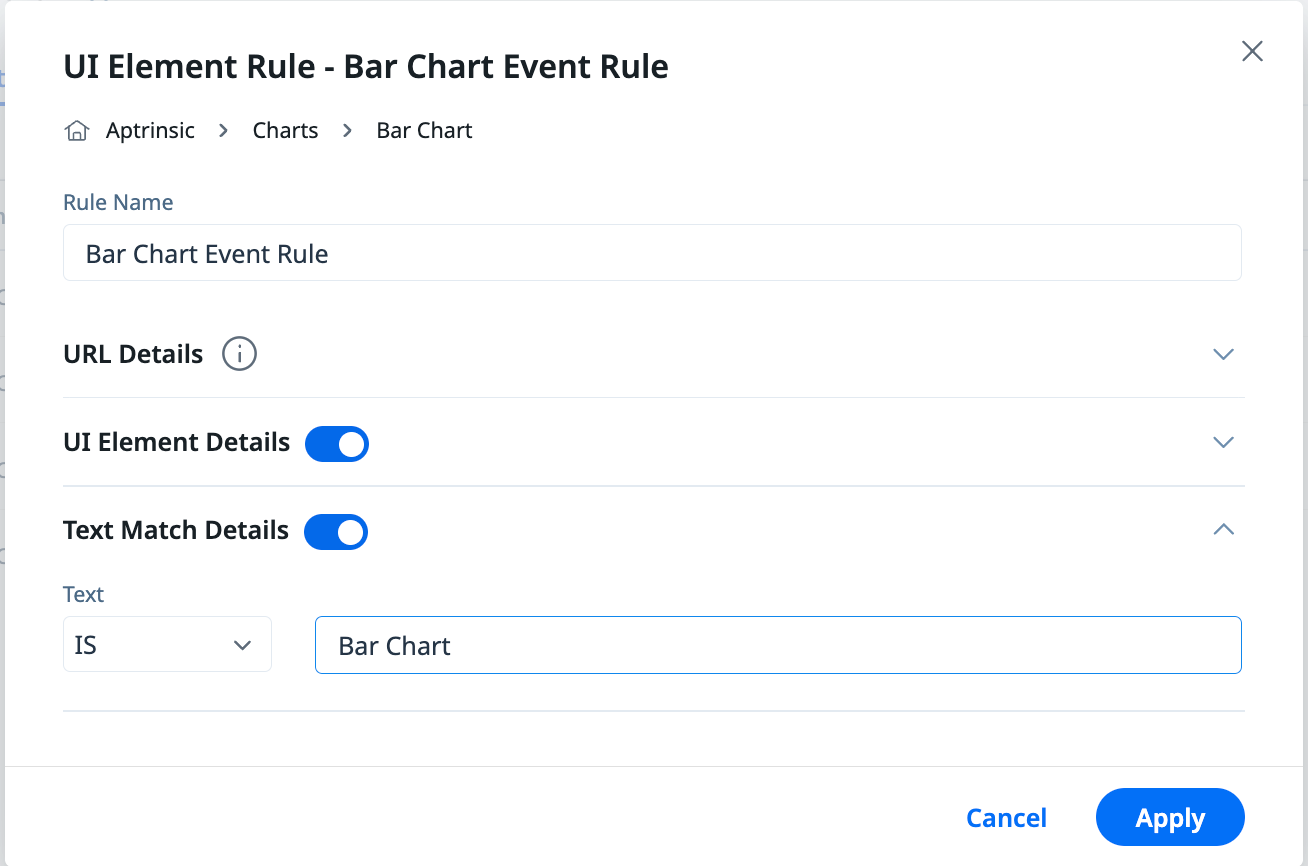
- In the UI Element Rule window, enter the URL and Custom CSS Selector.
- Turn on the Text Match Details toggle switch.
- Select the logic identifier and enter the text to be matched.
- Click Apply.
Note: Rules created using the Text Match option cannot be backfilled.
Create Rules with Only Text Matches
You can use the Match Text option to create features with text match only. This helps in preventing applications with dynamic UI elements from experiencing CSS selector match issues, and provides flexibility to map the unique elements faster.
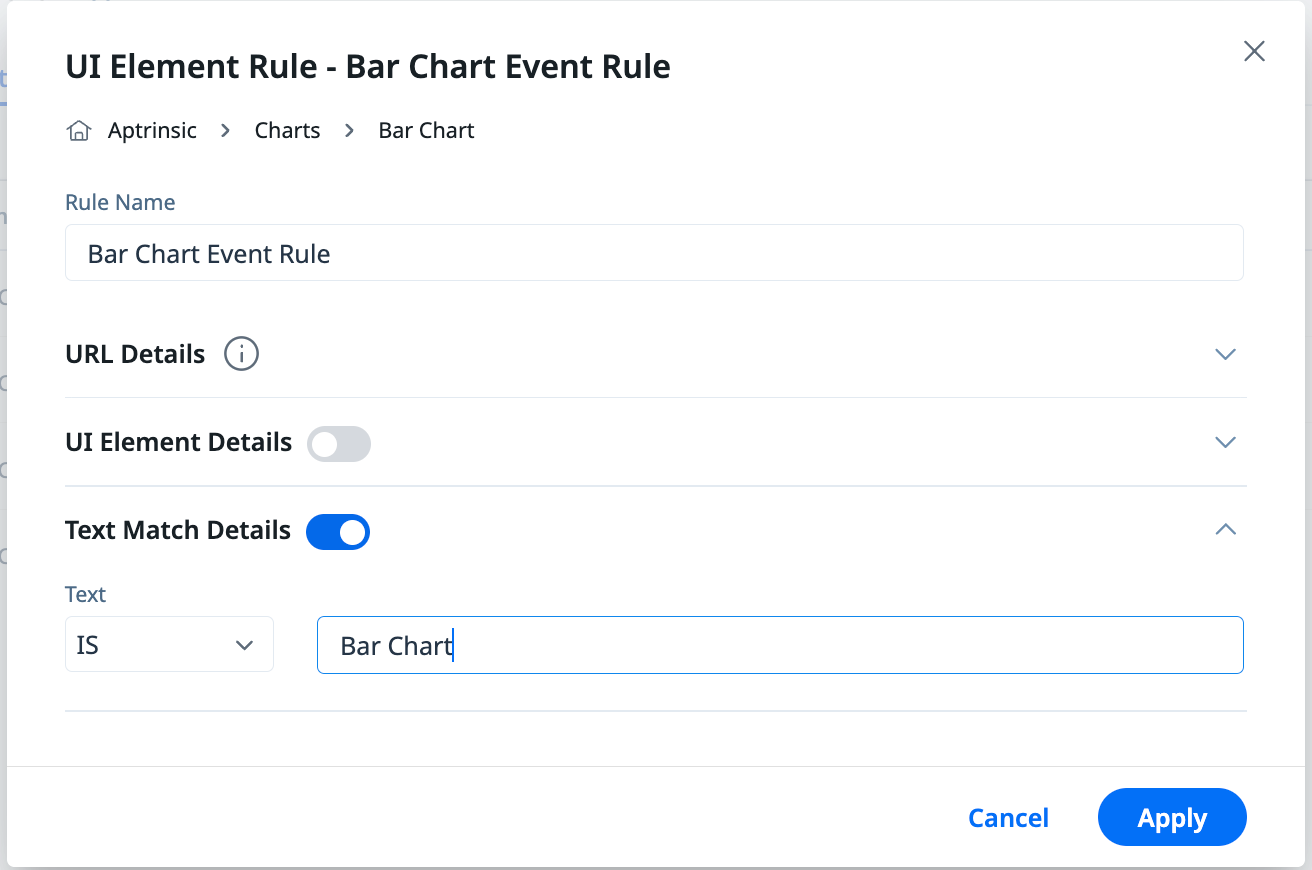
- In the UI Element Rule window, enter the URL of the application.
- Turn off the UI Element Details toggle switch.
- Turn on the Text Match Details toggle switch.
- Select the logic identifier and enter the text to be matched.
- Click Apply.
Note: Rules created using the Text Match option cannot be backfilled.
Advanced DOM Tracking
You can configure the tracking code to use DOM elements present in your application. For more information, refer to the Advanced Instrumentation article.
Custom Rule
A custom event is used to track parts of your application that are not present on the UI. The Custom Rule tracks events triggered using API.
To create a Custom rule:
- Select the feature from the Product Feature Tree section.
- Click Add Rules.
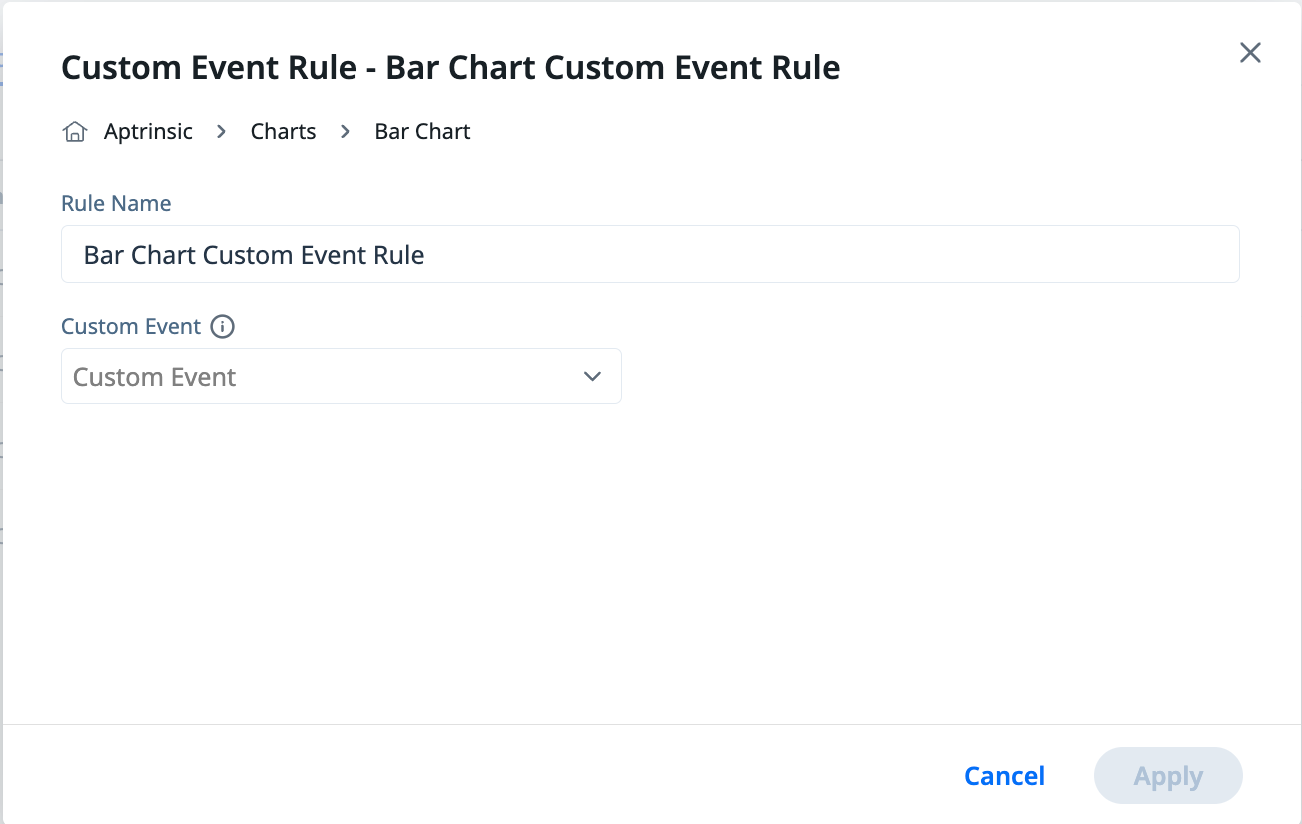
- Select Custom Event Rule.
- In the Custom Event Rule window, select the Custom Event that should be tracked. The list of Custom Events available here are created by your Developers. For more information on Custom Events in PX, refer to the Use Custom Event API article.
- Click Apply.