Install Gainsight PX on Your Web App
This article is a checklist for the initial installation of Gainsight PX.
Introduction
Welcome to Gainsight PX!
Although the initial installation should be straight-forward, we have put together this checklist to make it simple.
If you're using Segment.com refer to the Install Gainsight PX using Segment for web apps article.
Still here? Great, once you complete the following steps, your Gainsight PX Installation will be complete so that your events and their associated users/accounts from your product will be flowing into Gainsight PX.
Here's a quick setup video:
Create your Product Definition and Gainsight PX Tag Code
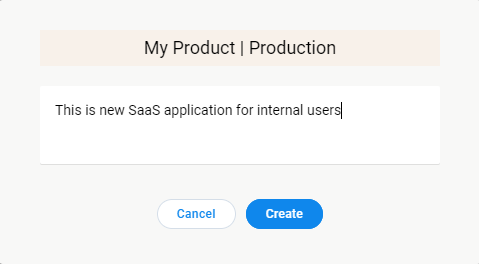
Navigate to Administration > Products and create your product definition and click Create, for example:
| Try it on the PX application: US Customers, EU Customers |
Once the product definition is created, you will see that there is a tab for each channel you can generate Gainsight PX Tag for (i.e. Web App, Website). Let's create the Web App tag for this product by entering in the URL of your Web Application. For example, https://www.gainsight.com/product-experience/
The URL you enter is for informational purposes only and what you enter there does not impact your use of Gainsight PX. Nevertheless, it is good practice to enter in the URL there to keep track of which of your products is assigned to which tags.
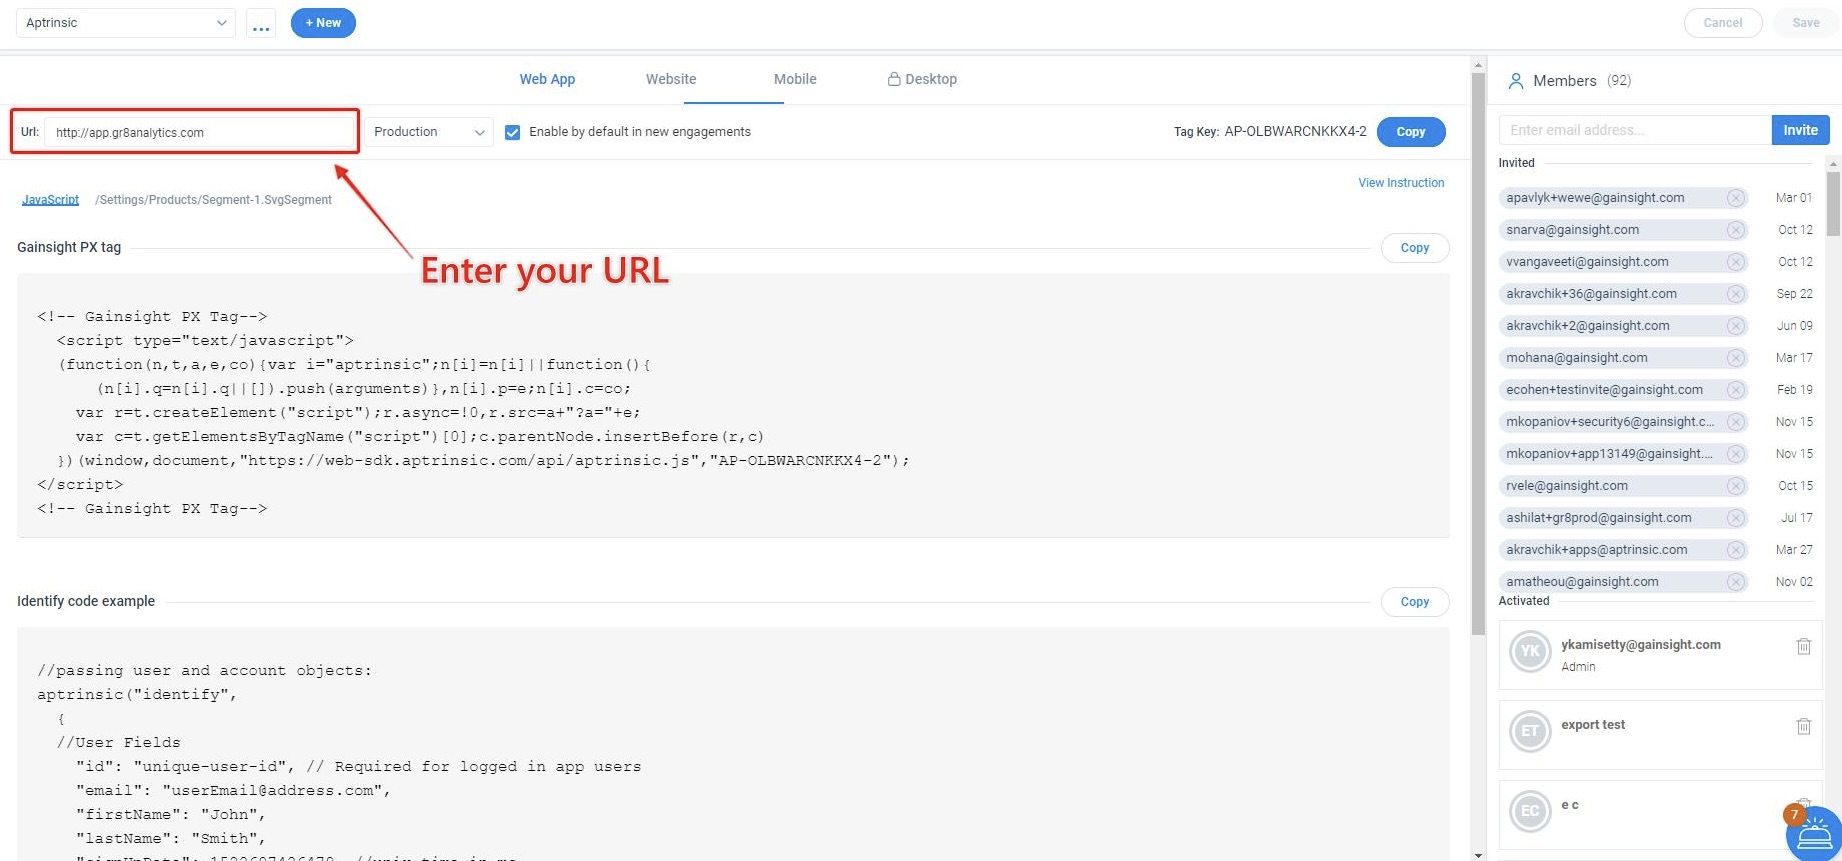
Now you have created the tag that will be associated with your product and channel (i.e. Web App or Website). If you also have a website channel that you want to track leads from, click the Website tab, enter the URL for your website.
Notes:
- You can create, track, and build engagements for more than one product. Repeat the process for your additional products.
- You can also configure product definition for multiple instance that you plan to use with Gainsight PX subscription such as Staging, Testing and Production.
- The free version of Gainsight PX allows you to create one product definition.
Rename Your Product Environment
After you configure product definition for your product instance, you can customize the name of the environment as used internally within your organization. This helps you easily identify the product environment across the application when you create an engagement or want to track analytics for events.
Note: You can rename the default environment name and reset it to the default name as required.
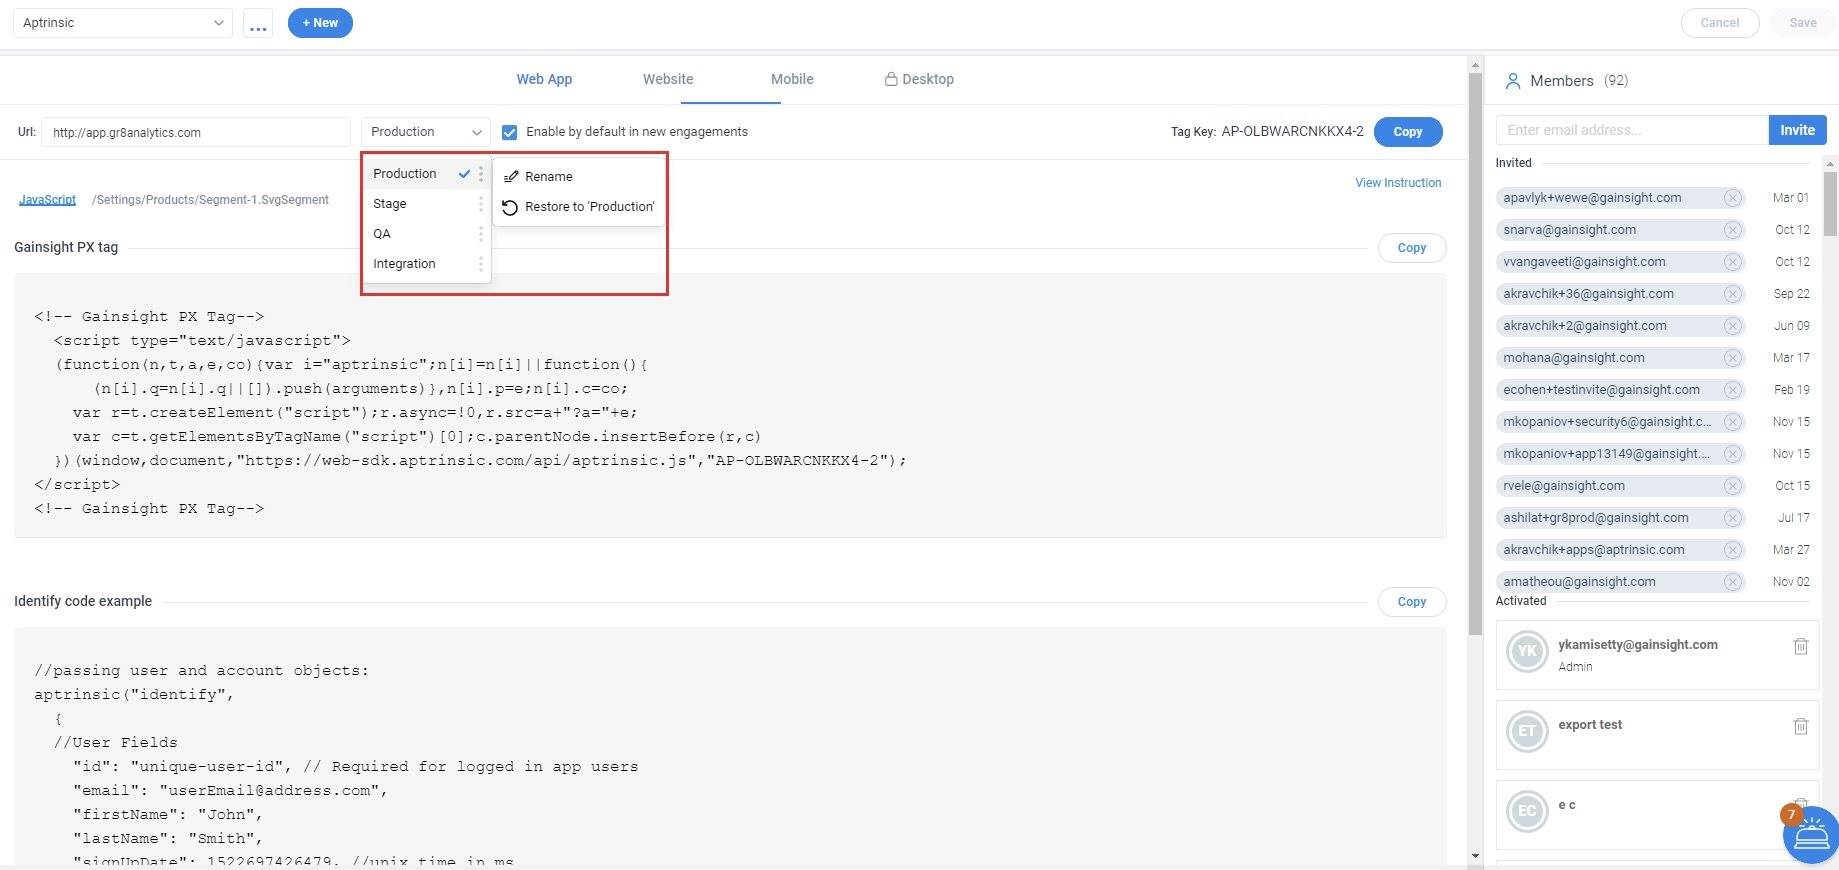
To rename the working environment of your product:
- Navigate to Administration > Products.
- In the Environment dropdown field, click the ellipsis icon for the environment.
- Click Rename.
- Enter the name of your choice.
- Click Enter.
To reset the name to default, click the Restore to <<Environment Name>>.
Get the Tag Installed on to your Web App and Web Site (Developer Assistance Needed)
Once you have the Gainsight PX Tag generated (STEP 1), click on the Copy button to copy the Gainsight PX Tag code on to your clipboard.
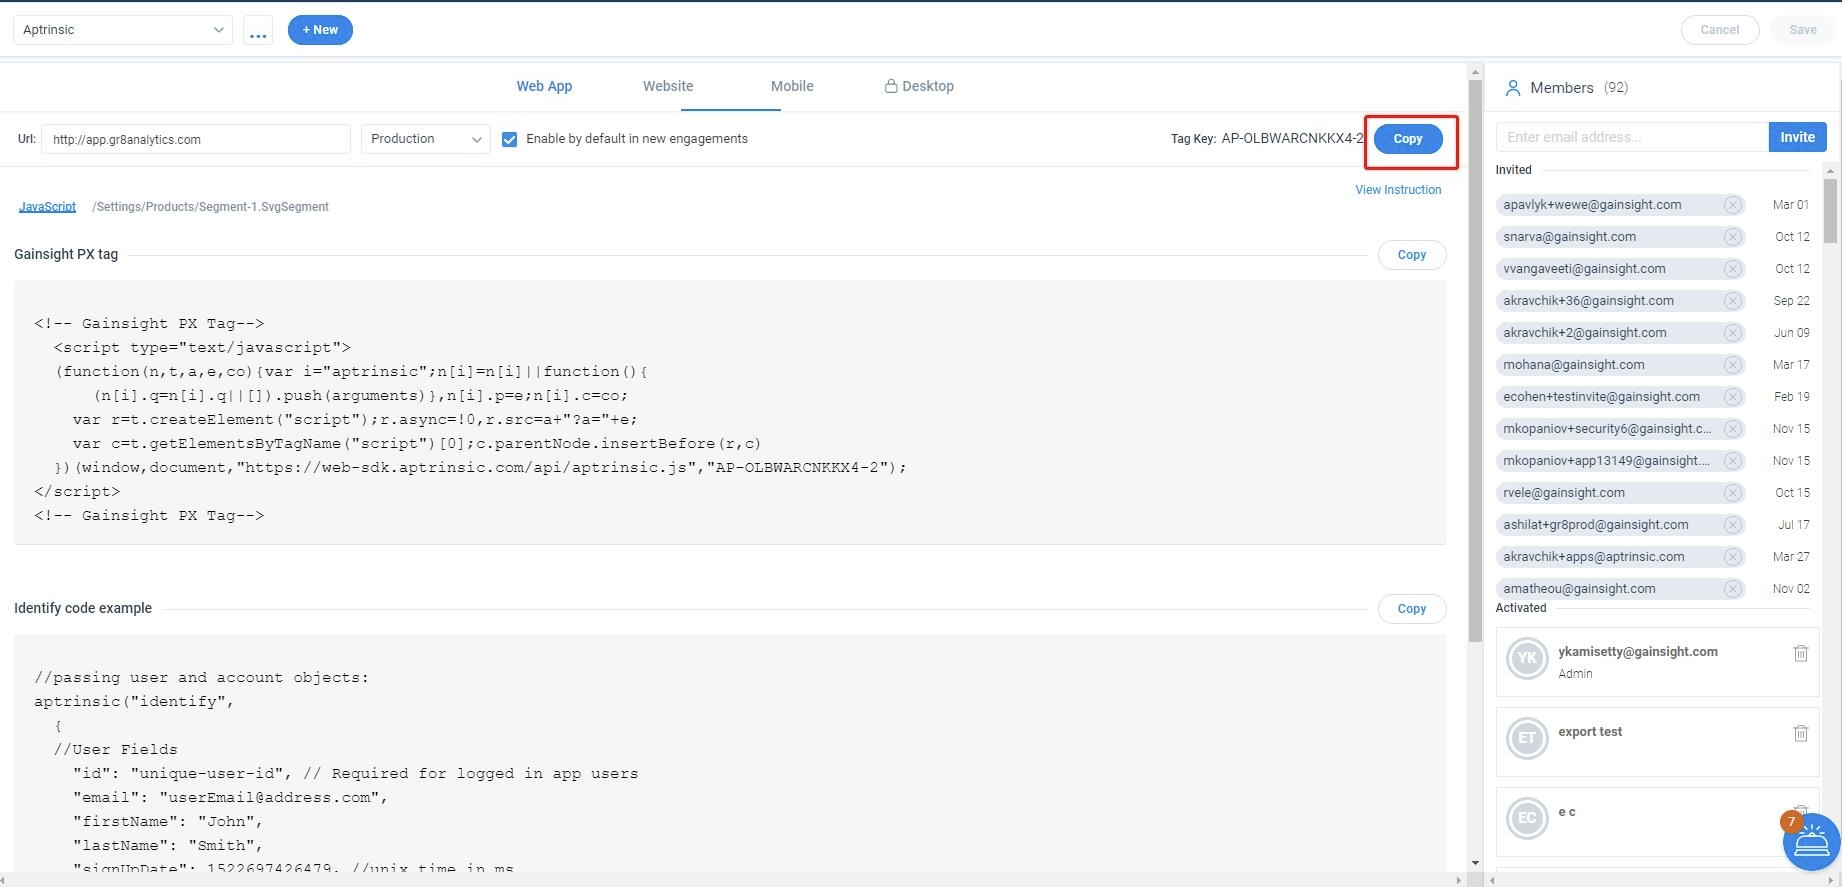
Now you can paste the tag into an email, Slack or JIRA ticket and send it to your developer with instructions to add it to the <head> section of your web application (or website) as close to the opening <head> element as possible and below any dataLayer=[{...}] declarations.
If you do not install the tag and identify code, data does not flow into Gainsight PX. This makes PX Analytics, Reporting, and Engagements non-functional.
In Identify Code, User id is the minimum requirement. The more attributes you send at the User or Account Level, the more you can slice and dice the analytics.
Note: User id and Account id are case-sensitive. Ensure to check and send them in right format.
Gainsight recommends that you send the actual User sign-up dates for correct representation of analytics and for triggering onboarding engagements to 'actual' new users.
Check out the sample verbiage below that you can use for the note to your developer.
Use the PX Tag for Website as per the Gainsight PX Subscription: There is no charge for this functionality. It works as mentioned in the following:
- Add the Website tracking code (the “-1” key) which tracks the anonymous usage and that usage will be stored/maintained in Gainsight PX database.
- That anonymous user/data won’t be exposed to PX UI anywhere until that user fills out a form on the website in which case a lead is created on Gainsight PX and exposed on the UI with all the previous usage data.
Code the Identify Call In Your Application (Developer Assistance Needed)
The identify() call is javascript code that your developer must add to your product. This call must be made from your application where the user authenticates so that your web application can provide user and account information of the user that generates and sends events to Gainsight PX.
Here's the coding instructions you can share with your developers
******************************************************************
*** BEGIN SAMPLE EMAIL TO DEVELOPER TEAM ***
******************************************************************
Hi Dev Team,
We've signed up to use a vendor called Gainsight PX that will allow us to build in-application experiences (i.e. tooltips, sliders, and guides) to help us with product adoption and user retention. As part of their installation, we need to perform both of the below tasks:
Task 1
Add the Gainsight PX tag to our code to push our web app's events to the Gainsight PX platform.
Install the Gainsight PX Tag to the section of our web application, as close to the opening element as possible and below any dataLayer=[{...}] declarations.
Here is the tag to add to our production web application
[REPLACE THE XXXXXXXXXXXX WITH THE TAG FROM STEP 1]
Task 2
In our production web application, we'll need to also push the correct user/account over to Gainsight PX so that we can associate the events that are tracked (i.e. clicks, page views, etc.) with the correct user/account.
Please add the below javascript to the location of where the authentication code takes place in our web app.
If you can be sure to include all of the known user and account attributes that we have for that user and account by referencing their API name, here is the full list of out of the box attributes and their API names.
If there are other attributes we should send to Gainsight PX, just let me know and I can set them up in Gainsight PX as custom attributes (here).
//passing user and account objects:
aptrinsic("identify",
{
//User Fields
 "id": "unique-user-id", // Required for logged in app users
"email": "userEmail@address.com",
"firstName": "John",
"lastName": "Smith",
"signUpDate": 1522697426479,

//unix time in ms
"plan" : "gold",

//Custom attributes - please create those custom attributes in aptrinsic via Administration to be tracked.
"price" : 95.5,
"userHash": "" // optional transient for HMAC identification },
{
//Account Fields
"id":"IBM", //Required
"name":"International Business Machine",
"Program": "Platinum"
// flat custom attributes
});
******************************************************************
*** END SAMPLE EMAIL TO DEVELOPER TEAM ***
******************************************************************
Verify Your Setup
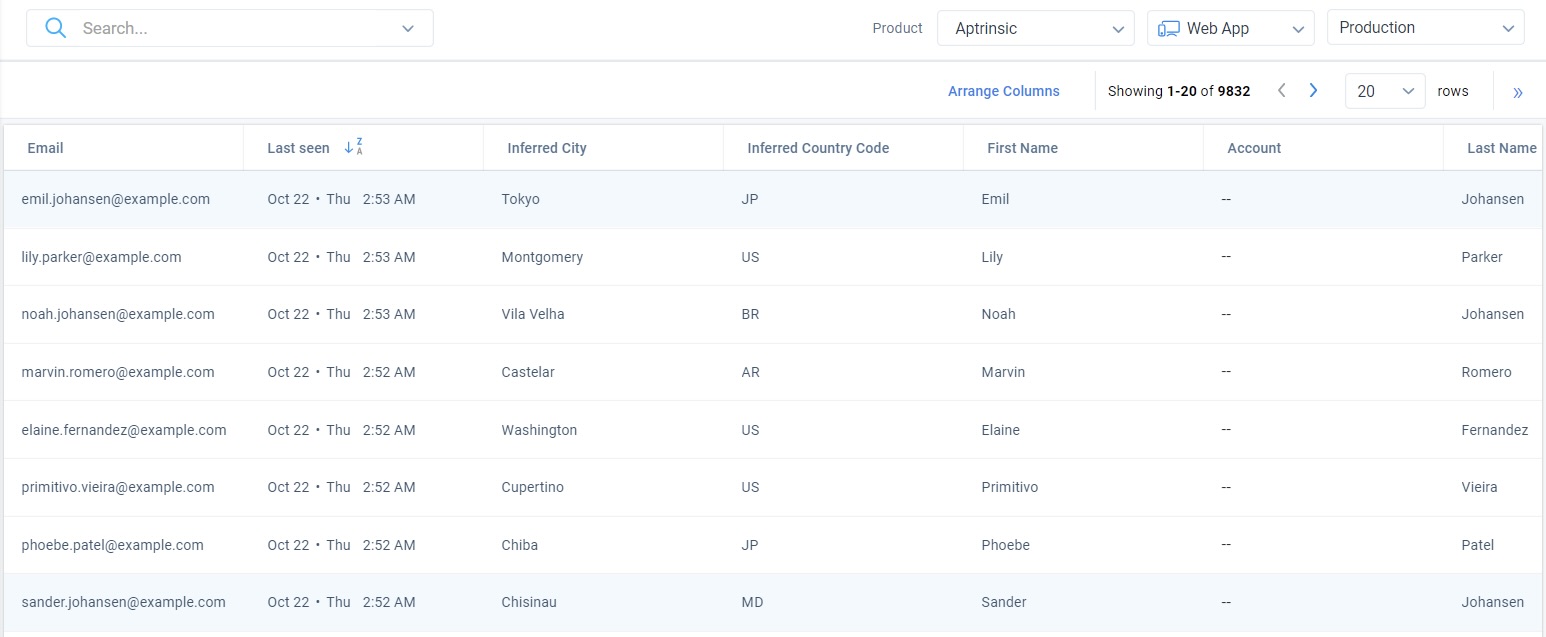
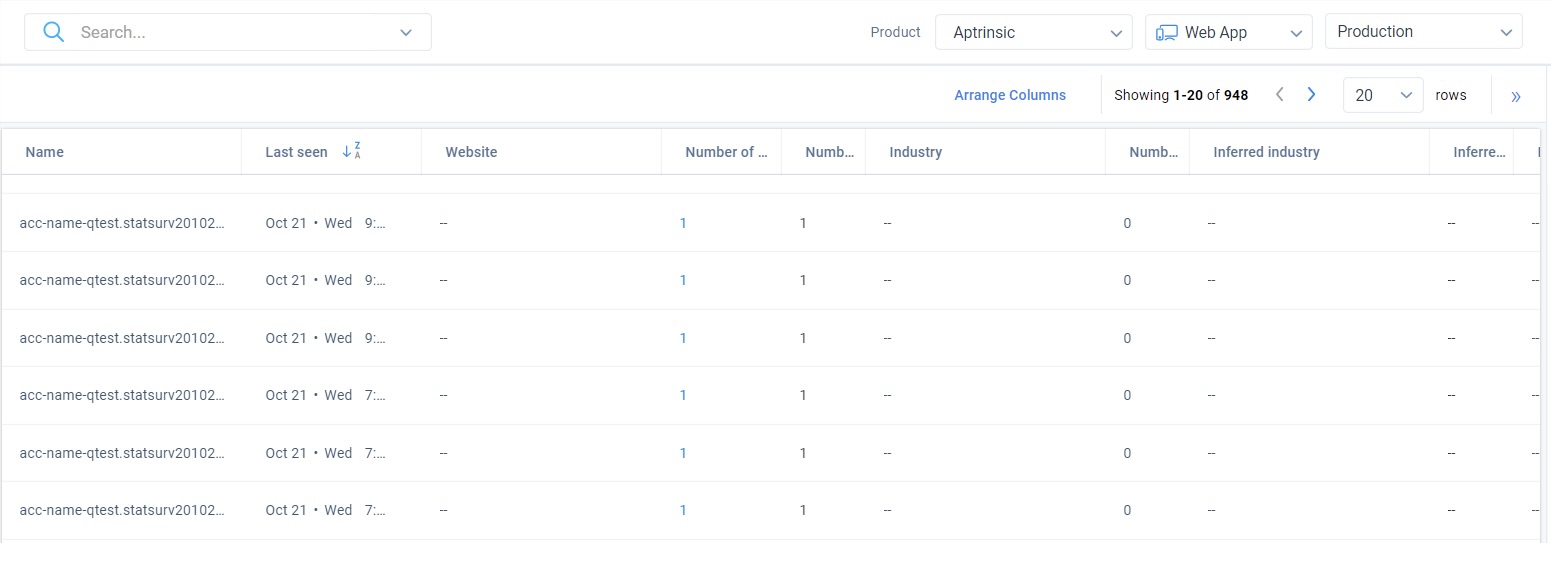
Ensure you see users in Audience Explorer and you can see accounts in Account Explorer.
Audience Explorer
Account Explorer
Workspace to Manage Multiple PX Subscriptions
Managing multiple Gainsight PX subscriptions is easy with PX Workspaces. This functionality helps in providing a unified engagement experience to your users. A PX Workspace brings together the engagement usage data from all your products that are associated with different PX subscriptions which helps you seamlessly manage users, engagement templates, throttling for engagements and analytics.
Notes:
- Global User ID (globalId) attribute must be passed to Gainsight PX platform via the Identify Call to leverage the PX Workspace capability. The call to this new field looks like:
aptrinsic("identify", {id: "user-id", email: "user-email@sample.com", globalId:'global-user-id'})
For more information on the identify() call, refer to the Code the Identify Call In Your Application section.
- This feature is available for enterprise customers. Contact Gainsight PX support to create a workspace for all your PX subscriptions.
Configure Global Admin
Gainsight PX introduces the capability to create a Global Admin role who can manage settings globally across the subscriptions in your Workspace.
The key benefits of this enhancement are:
- Facilitates easy management of all subscriptions.
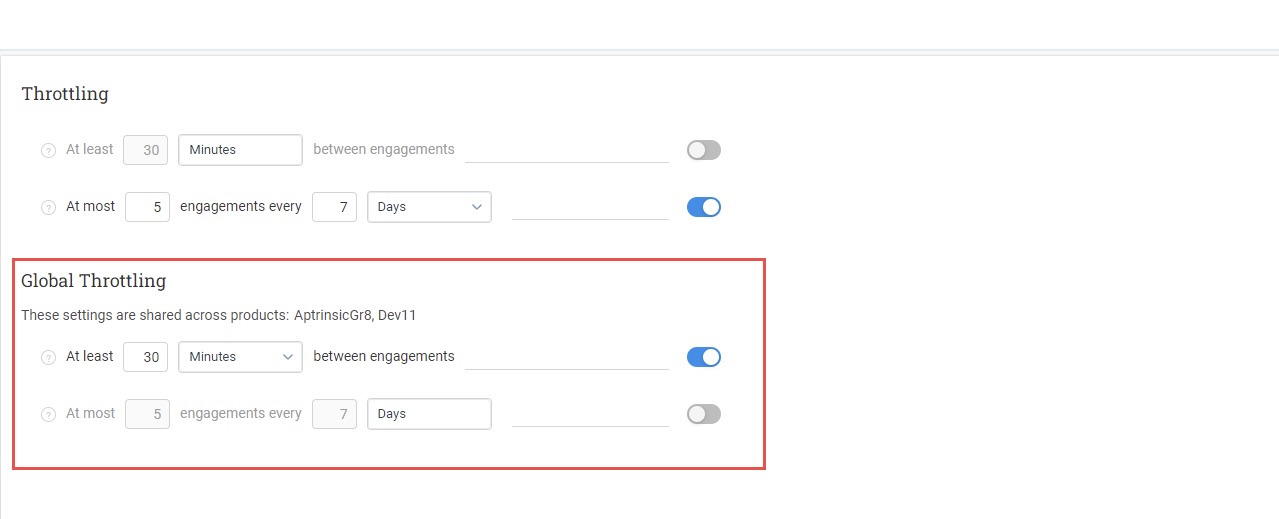
- Ability to configure Global Throttling settings that provides consistency of engagement throttling across all your subscriptions.
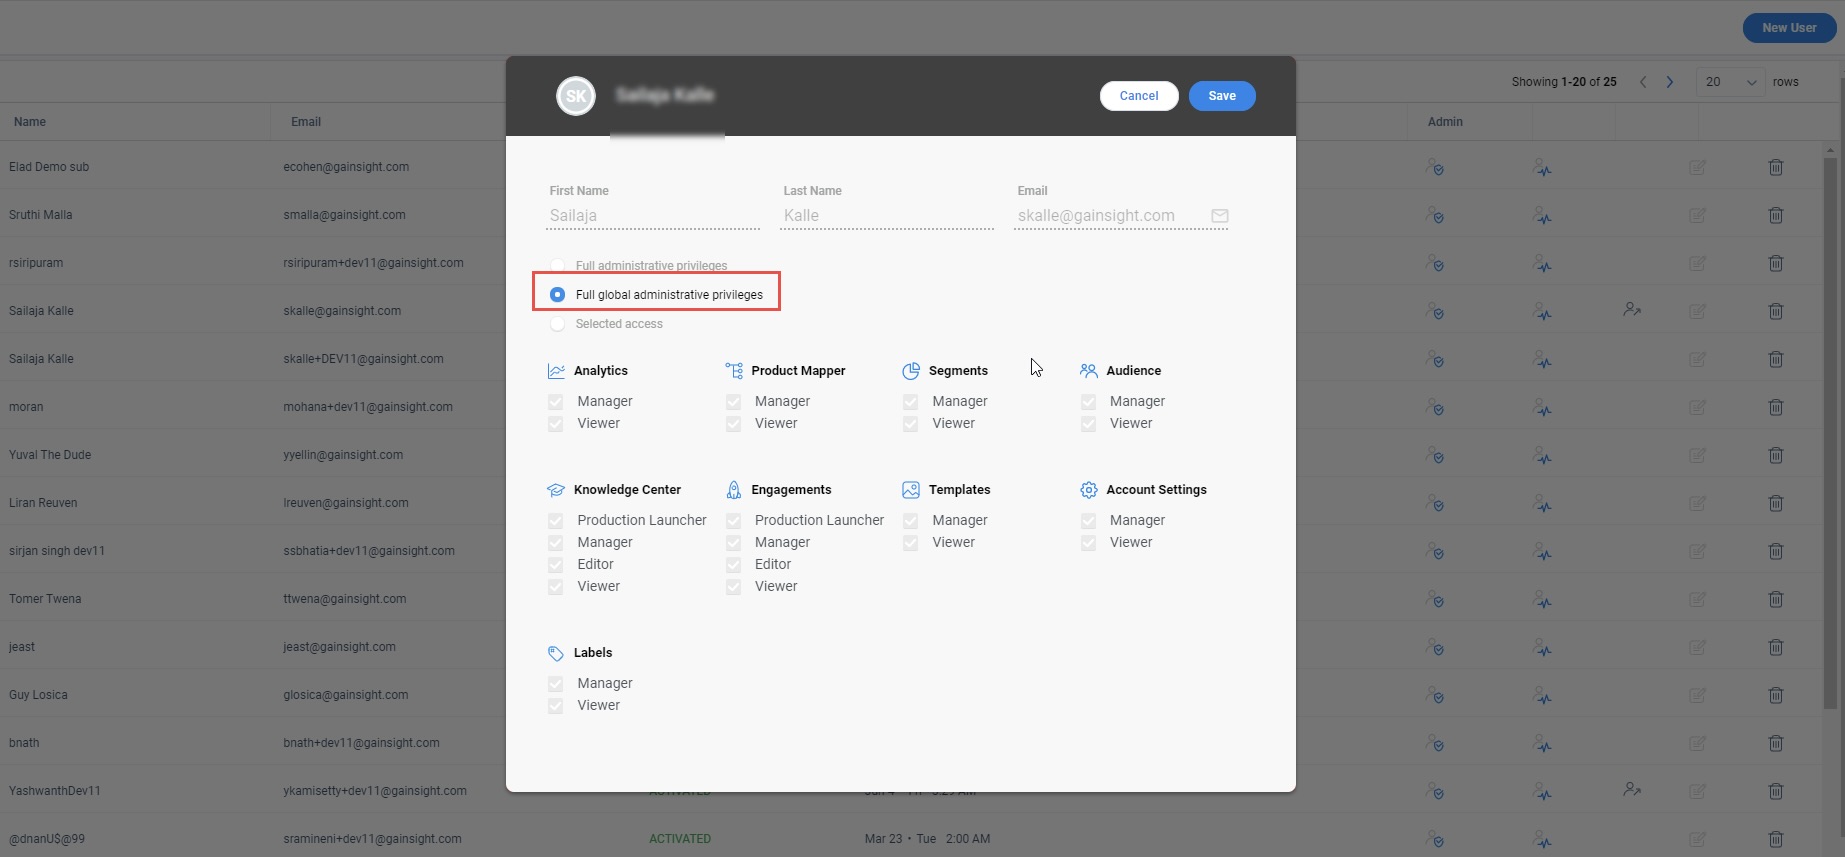
To assign Global Admin permissions to a user, navigate to Administration > User Management, and select the Full global administrative privileges option for the user.
Set User Preferences using Global User ID
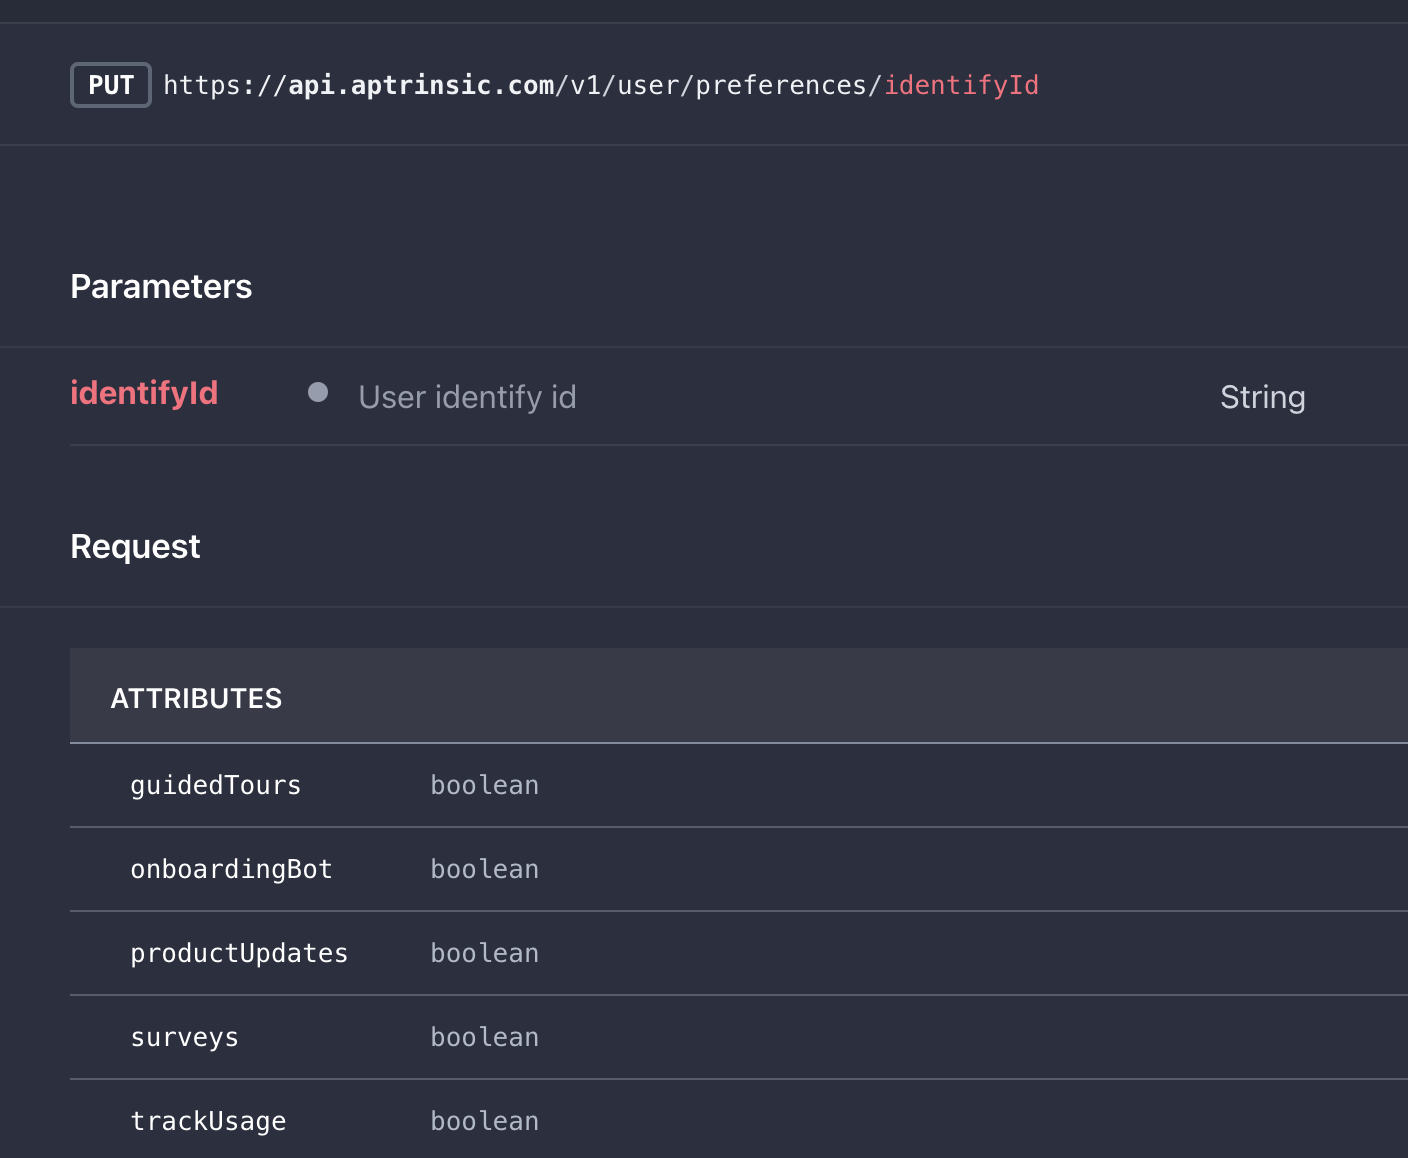
Admins can set the user preferences globally for users across multiple subscriptions belonging to the same subscription group. This can be achieved if the targeted users have the Global User ID configured. The preferences can be set for all the users with the same Global User ID using User Preferences API, similar to setting preferences to any user with identifyid. For more information on this, refer to the User Preferences for Tracking and Engagement article.
To set the Global User ID for the users, add Global User ID to the user object in the Identify Call.
Example:
aptrinsic('identify', {id: 'user-id’, globalId: ‘global-user-id’});
For more information on identify call, refer to the Work with Gainsight PX Web SDK article.
Note: Prior to configuring this enhancement, contact Gainsight PX Support to verify if all your subscriptions belong to the same Workspace.
Share Engagement Templates Across Subscriptions
Sharing engagement templates across multiple PX subscriptions helps admins to ensure that standard CSS template based engagements are used across their product portfolio.
Note: Only the user with Global Admin privileges can share the engagement templates.
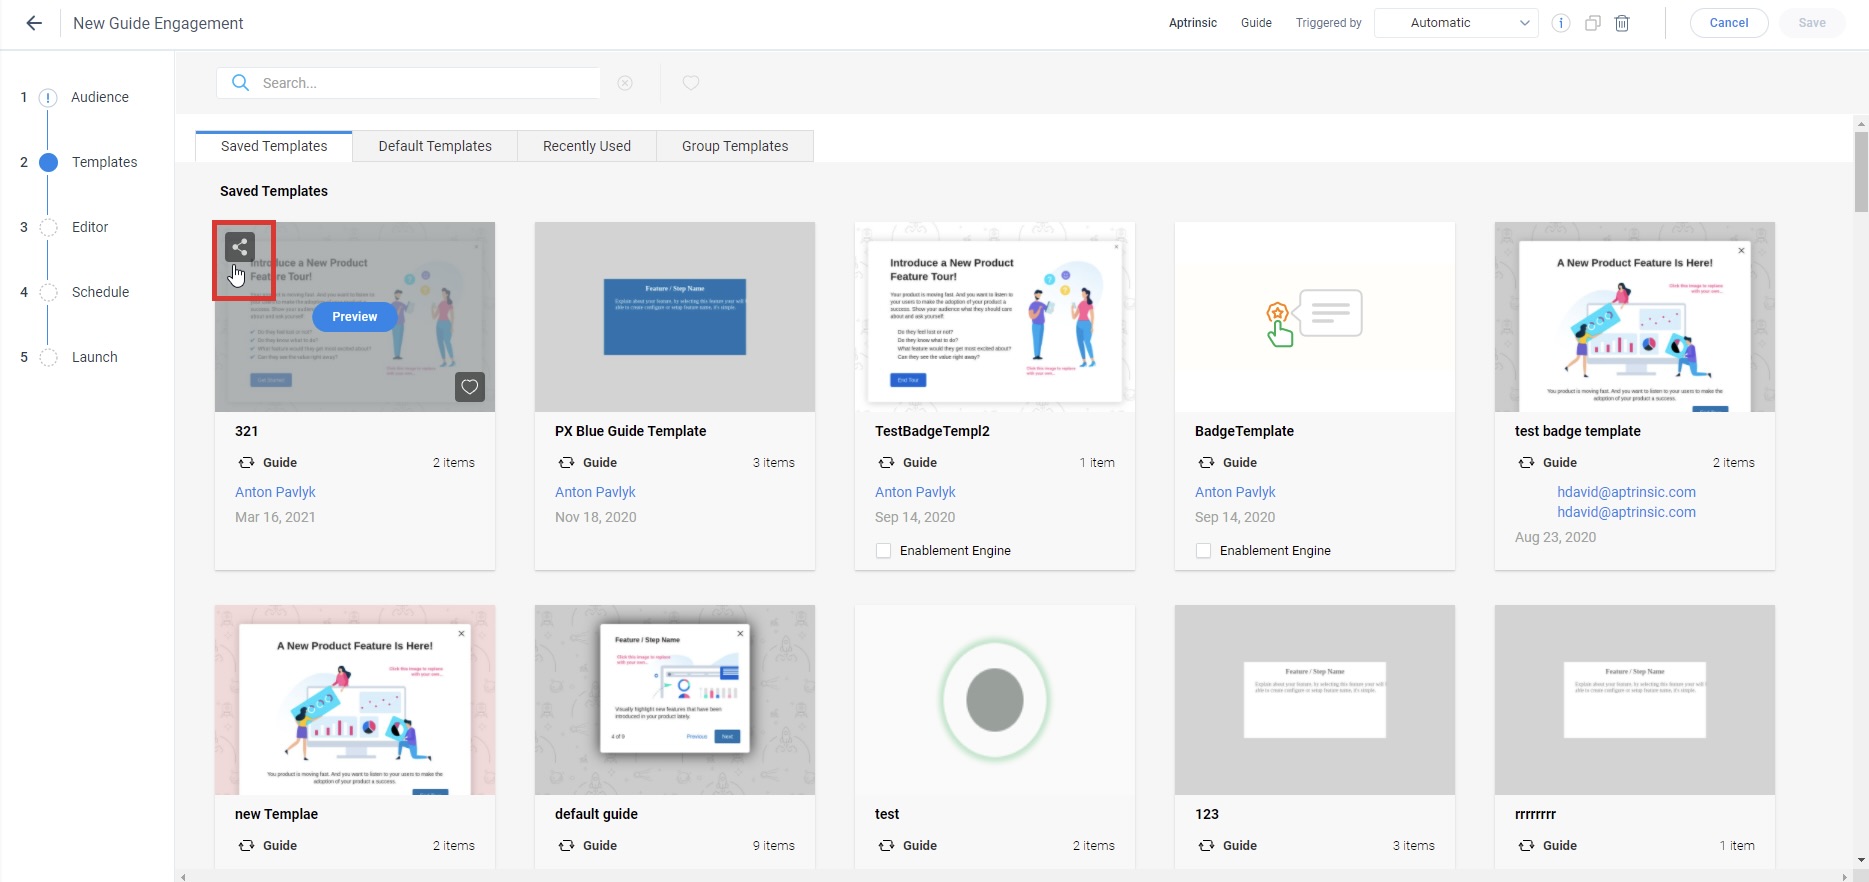
To share a template, hover over the template and click the Share icon. The template is displayed in the Group Templates tab of the engagement Templates section.
Troubleshooting
I am unable to view users
Check that the identify call is triggered from your application, you can use a simple chrome browser console and trigger an identify call manually.

Use this test code:
aptrinsic('identify',{"id":Date.now(),"email":"test@aptrinsic.com","firstName":"John","lastName":"Smith"});
I am unable to view accounts
Check that the account object has valid id, you can use a simple chrome browser console and trigger an identify call manually.
aptrinsic('identify',{"id":Date.now(),"email":"test@aptrinsic.com","firstName":"John","lastName":"Smith"},{"id":"account"+Date.now(),"name":"account test"});
If you cannot execute the code and get an exception it means the tag is not installed. For further troubleshooting, refer to the Troubleshoot FAQ article.
To learn about all frequently asked questions, refer to the PX Tag and Identify Code Installation FAQs article from the Additional Resources section.
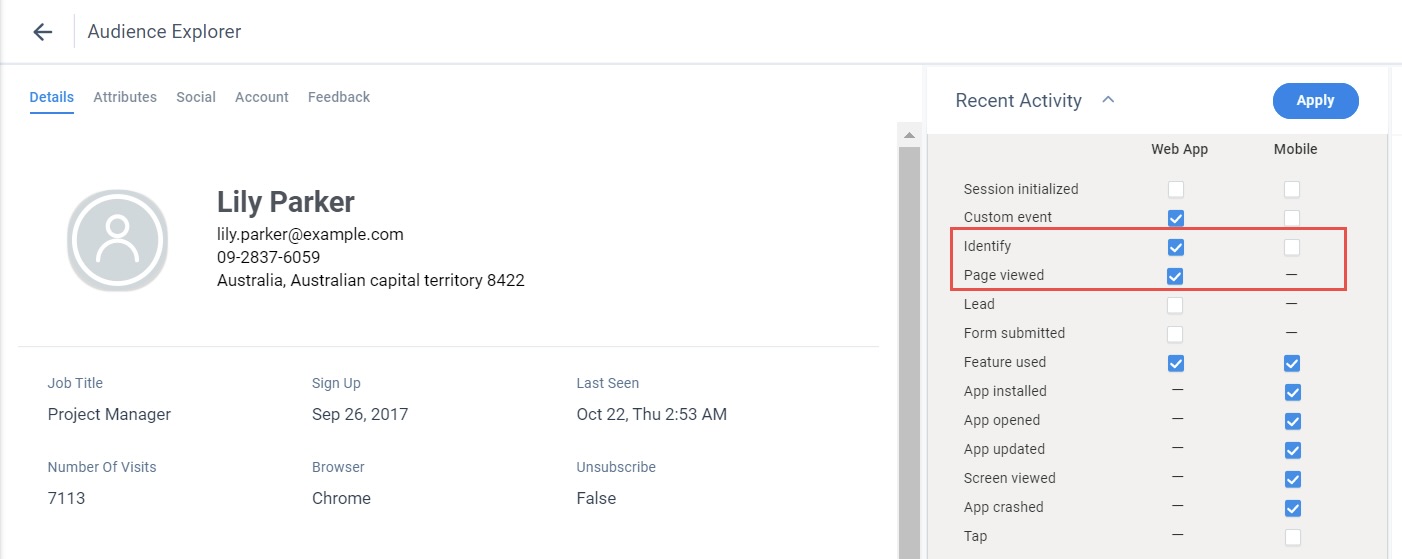
I am unable to view Identify and View Data for users
To view the Identify call data and viewed events for a user:
- Navigate to Audience Explorer.
- Select the required user click Full Profile.
- Click the Recent Activity menu icon and select the Identify and Page Viewed checkboxes.
- Click Apply.