Additional Features in Product Mapper
This article explains the additional features in Product Mapper that aid in the management of your product tree and its components.
Overview
Gainsight PX Product Feature Tree® allows you to model your product using the hierarchical structure to map your features. You can organize by modules and features or you can nest sub-modules under modules and add features at any level.
Once you have mapped your product and created the product tree, you can use the following features in Product Mapper to perform advanced actions on the tree:
- Labels
- Filters
- Host Settings
- Clone product tree
- Backfill
Prerequisites
To use the below features, ensure that you have the product tree using either the Suggestion Mode, In-App Mapper, or the standard Product Mapper. For more information, refer to the Instrument Your Product Using Product Mapper section of the Product Mapper® Overview article.
Feature Labels
Labels help you organize features and modules in Product Mapper. They make it easier to select a group of relevant features or modules to create analytics reports. You can use the labeled features/modules to build queries using Query Builder and to export feature usage data using Data Export or Integrations.
To create labels:
- In the Product Feature Tree® section, select the feature or module for which you want to create a label.
- Click the Add Labels icon.
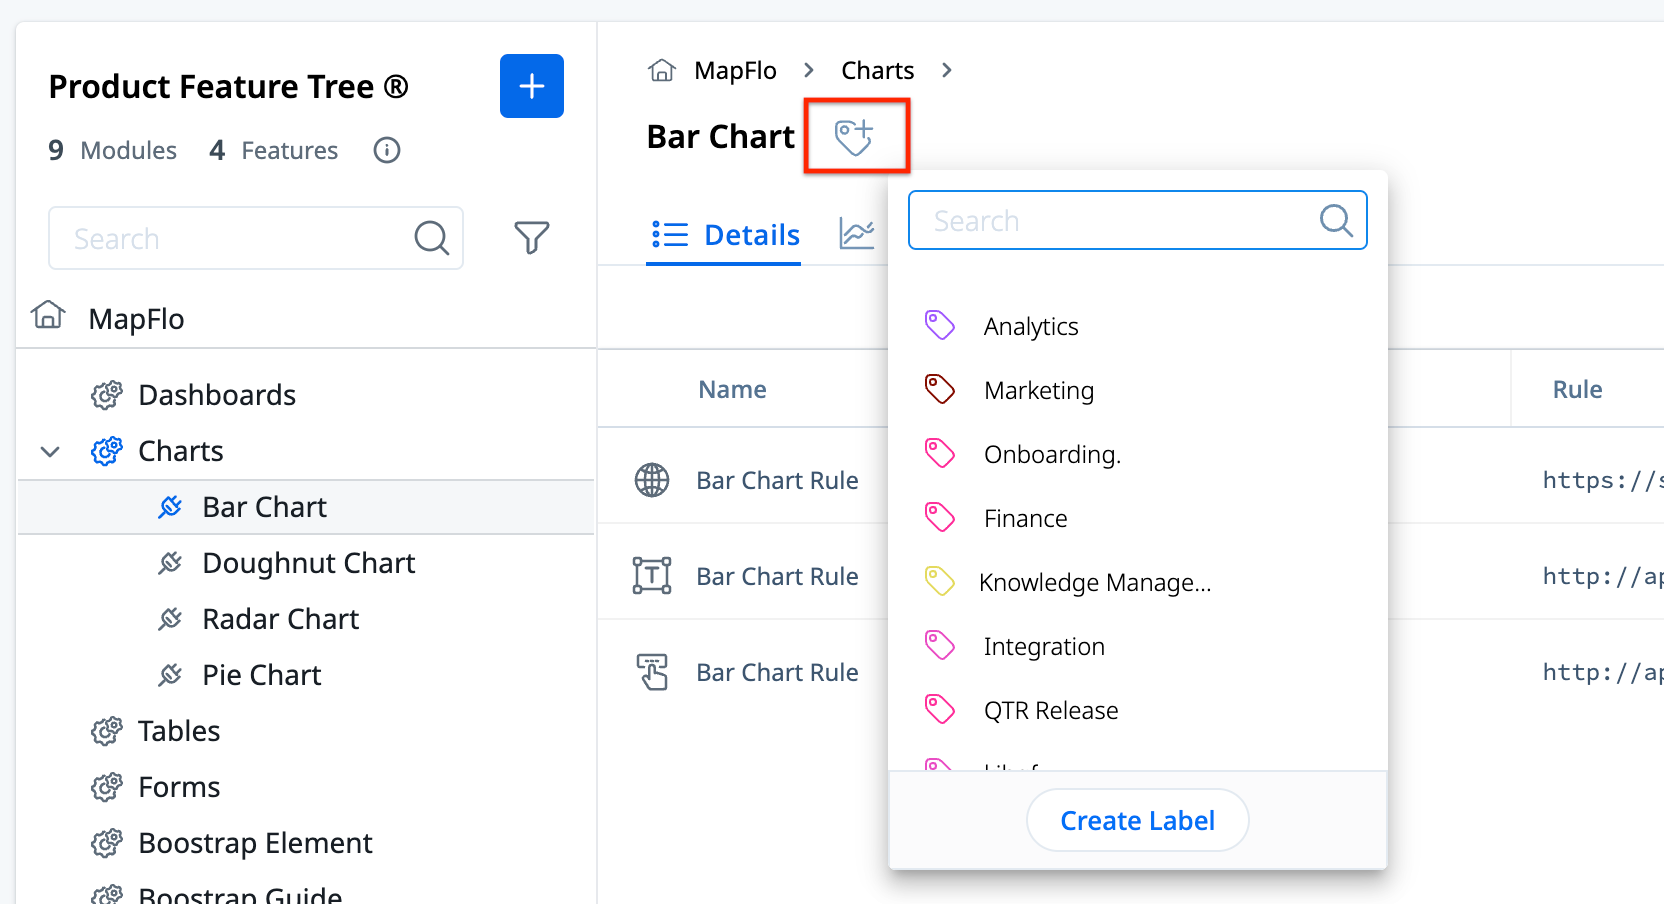
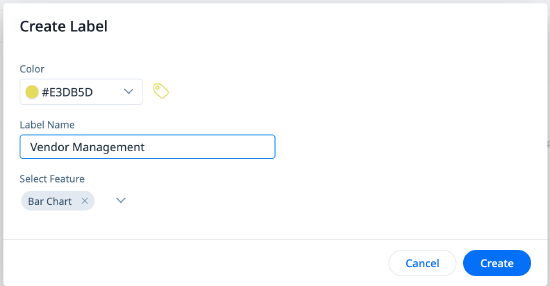
- Click Create Labels. The Create Label window appears.
- Select a color for the label to help you identify and distinguish it.
- In the Label Name field, enter a name for the label.
- (Optional) In the Select Feature section, select additional features or modules you wish to tag with this label.
- Click Create.
Notes:
- You can add a maximum of 10 features or modules to a label.
- You can create a maximum of 20 labels per product.
For more information on creating Data Exports using labels, refer to the Use Labels to create Data Exports section of the Bulk Export Custom Reports from PX article. For more information on building queries using feature labels, refer to the Use Labels for Feature Events section of the Query Builder article.
Filters in Product Feature Tree
Filters on Product Feature Tree allow you to quickly find what you need by narrowing down your product tree using multiple criteria such as Tree Items (empty or non-empty modules and features, Modified by, Labels, and Rule Type.
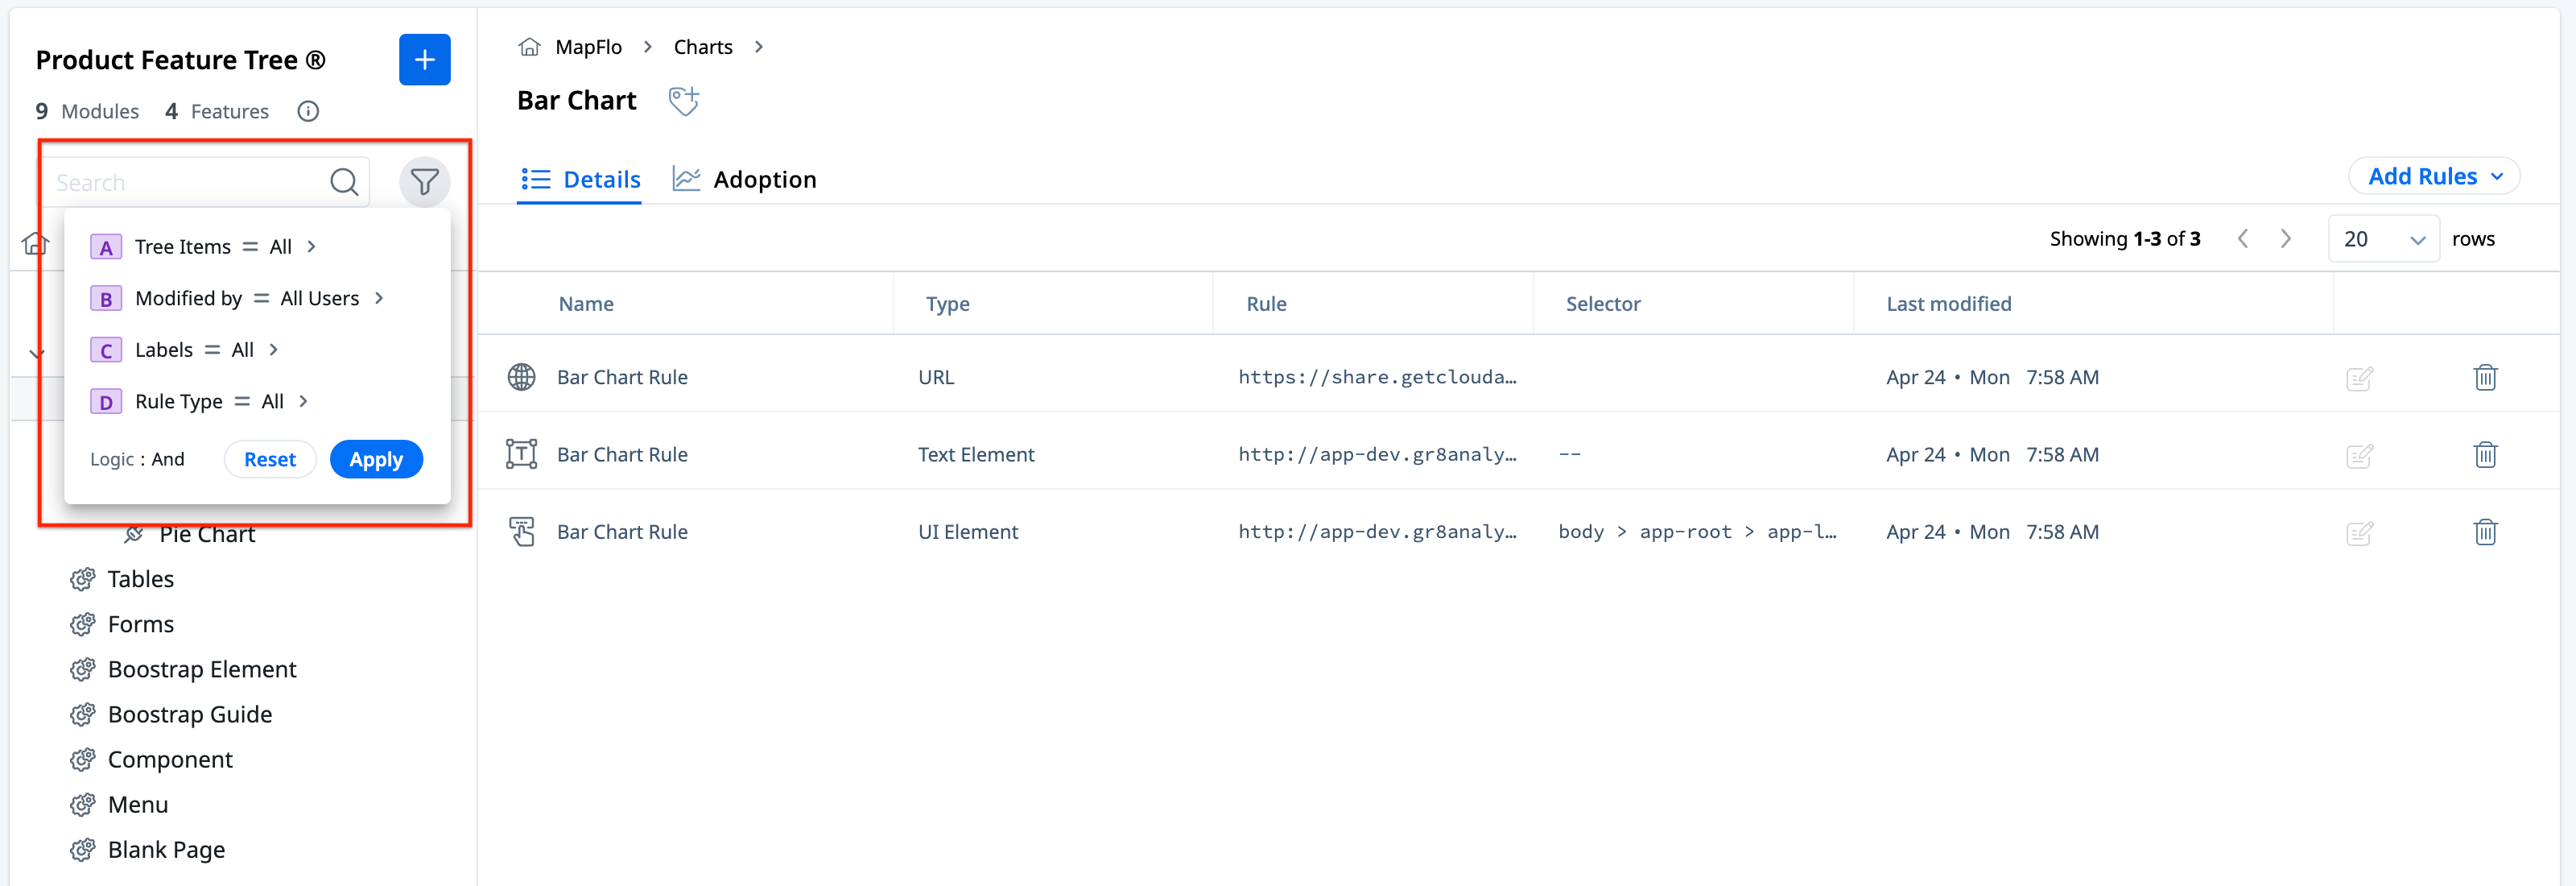
Note: The default logic in case you have multiple filters is AND.
Host Settings
Host Settings provides you with a list of all URLs (hosts) used in your Product Mapper, along with the number of rules in which a host has been used. Additionally, you can update multiple rules with just a simple click of a button.
Business Use case: Consider that an app called www.gainsight.com is being used as a URL rule in Product Mapper. Now, consider that Gainsight starts using new domains for each of its locations; www.us.gainsight.com for US, www.apac.gainsight.com for Asia Pacific, www.au.gainsight.com for Australia, and so on. Using Host Settings, you can update the existing host from www.gainsight.com to www.*.gainsight.com and all the geographic locations are tracked automatically.
To access the list of URLs, click the Host settings icon from the top-right corner:
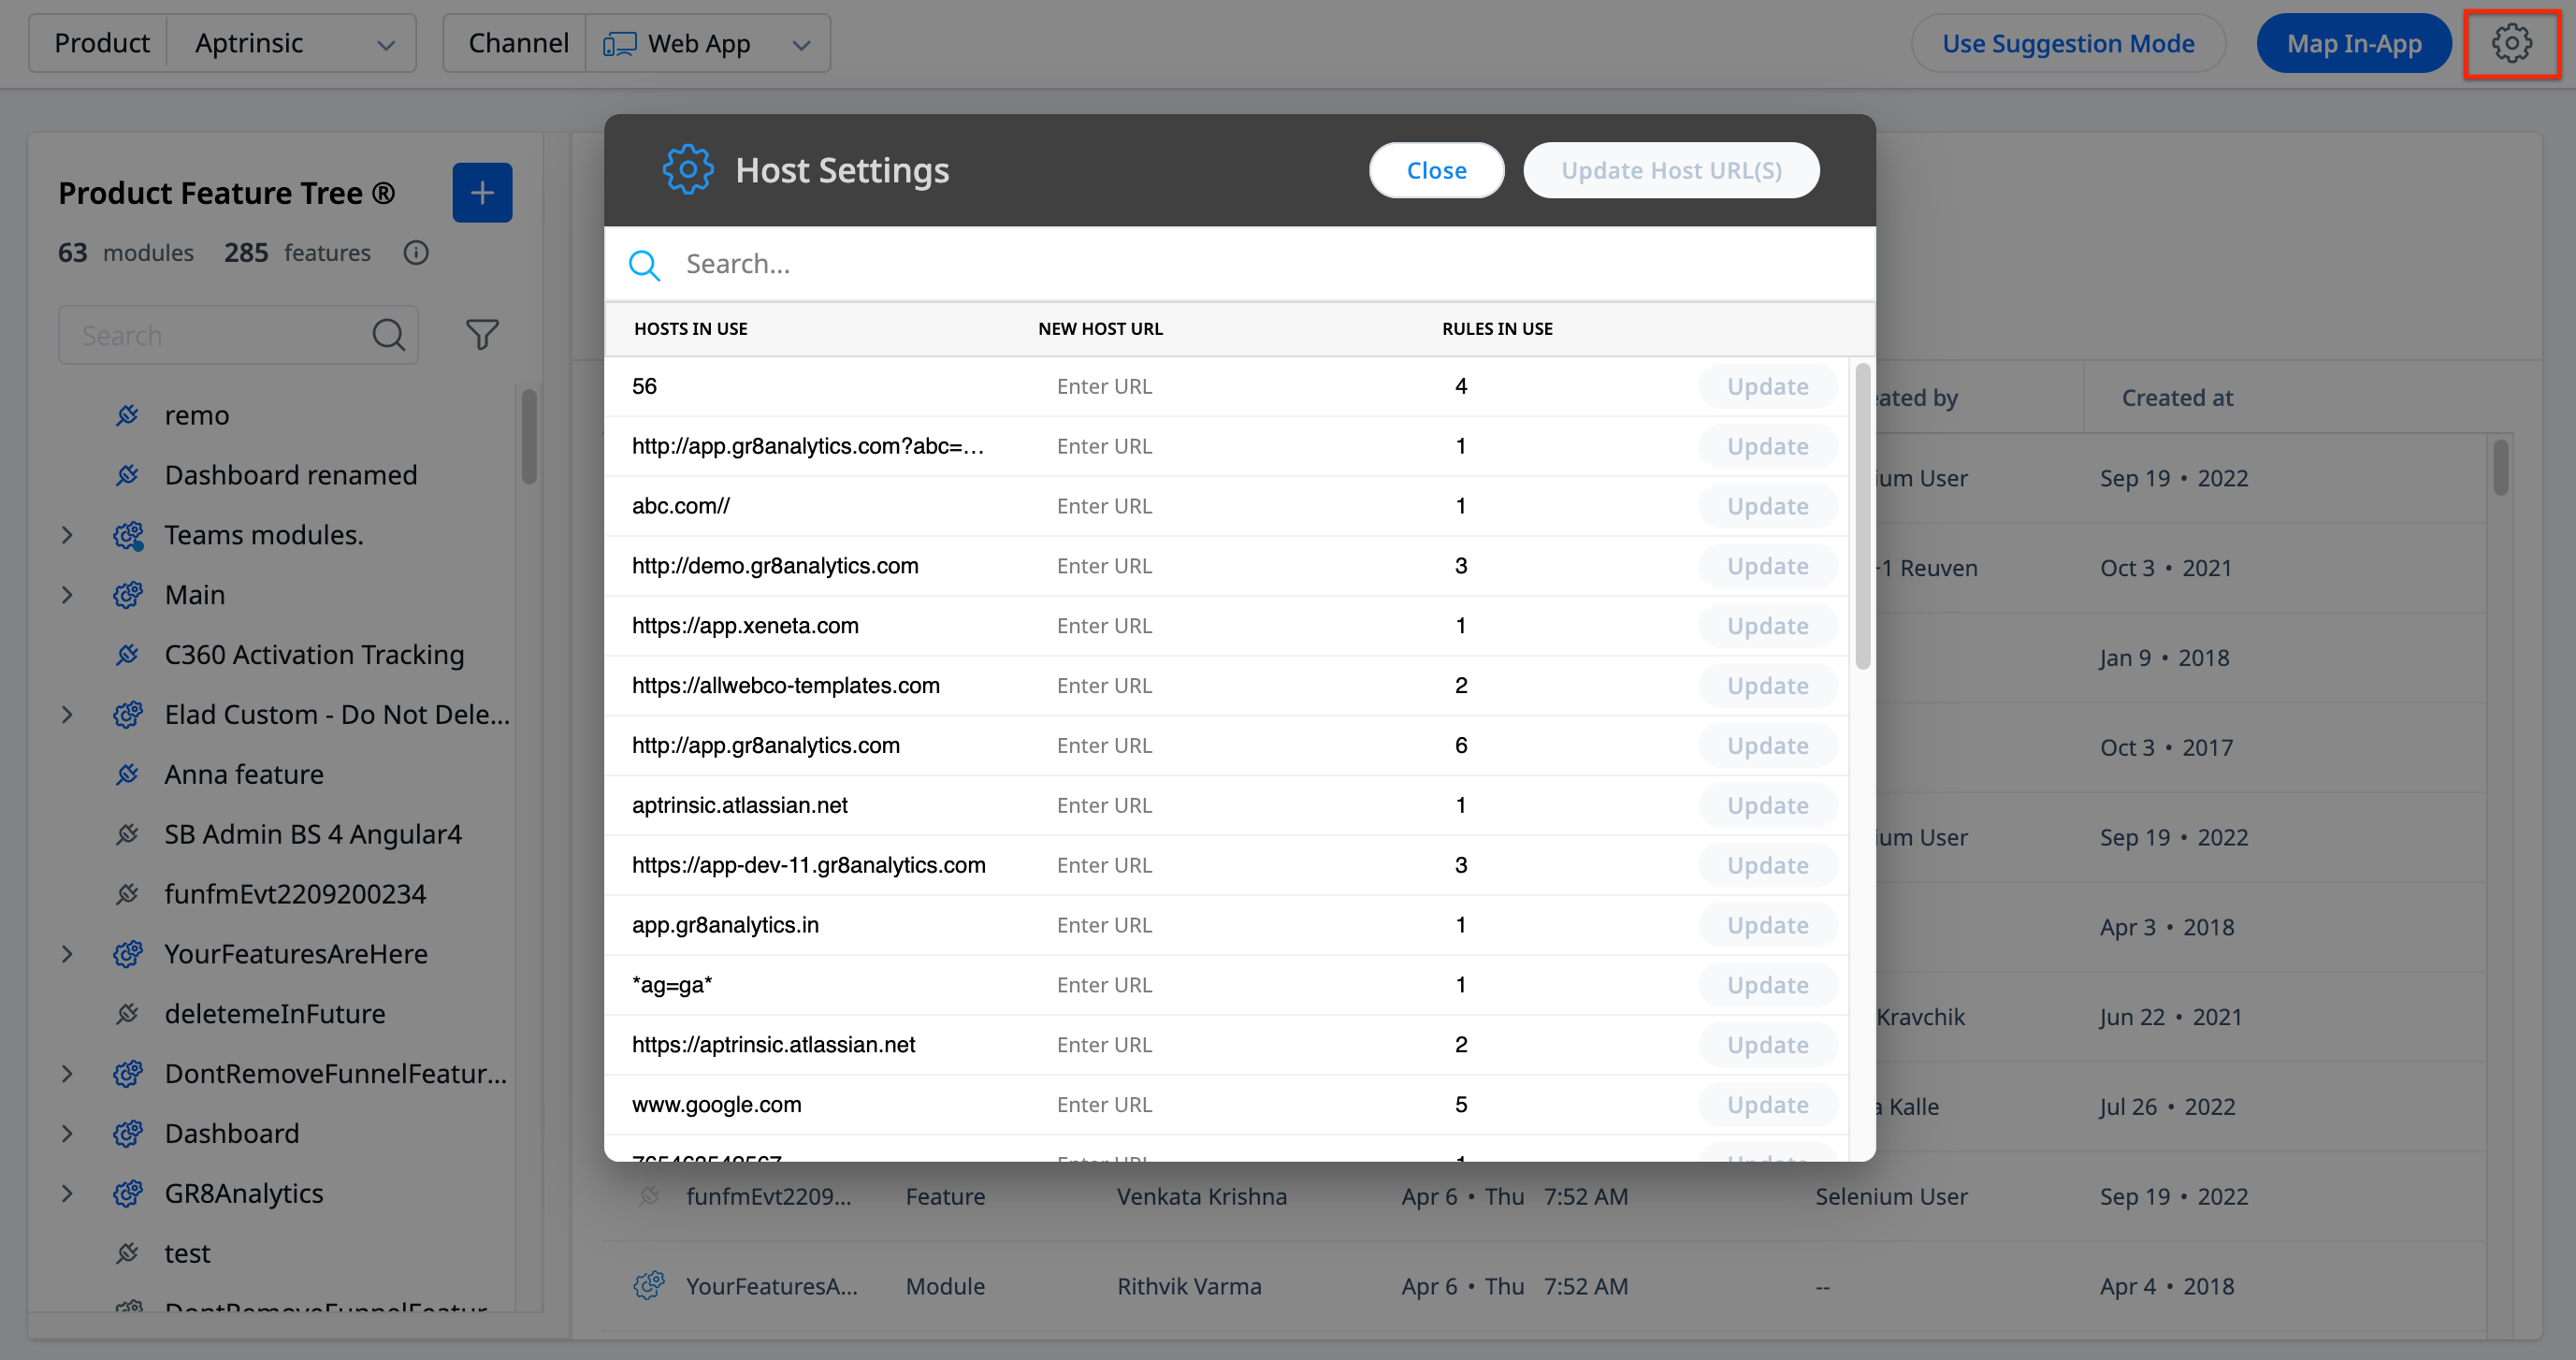
To update a URL, enter the new URL in the NEW HOST URL column and click Update. The URL Rule for that host is automatically updated. If you modified multiple hosts, click the Update Host URL(s) button at the top.
Notes:
- You can also use wildcards to include multiple hosts.
- You can update only valid URLs. If you enter an invalid URL, the host update process fails.
- To copy the URL of a host, hover the mouse by the URL and click the copy icon.\
Clone Product Feature Tree
Clone your product feature tree to create a copy and thereby reduce the efforts of creating the similar feature tree from scratch. You can modify the parameters such as the URL, UI Element and Module/Feature names as required, and associate the tracked user events into the corresponding features and modules.
Example Business Use Cases:
- When you want to track user events on multiple environments of your product such as Staging, QA and Production, cloning the parent Product Feature Tree simplifies your task.
- A user wants to maintain the product tree for two or more products that are similar to each other in structure.
To clone the product tree:
- In the Product Feature Tree ® page, hover on the module/feature and click the Edit icon. Alternatively, you can also right click a module or feature to access the Edit menu.
- Click Clone from the menu options. The Clone Summary window is displayed.
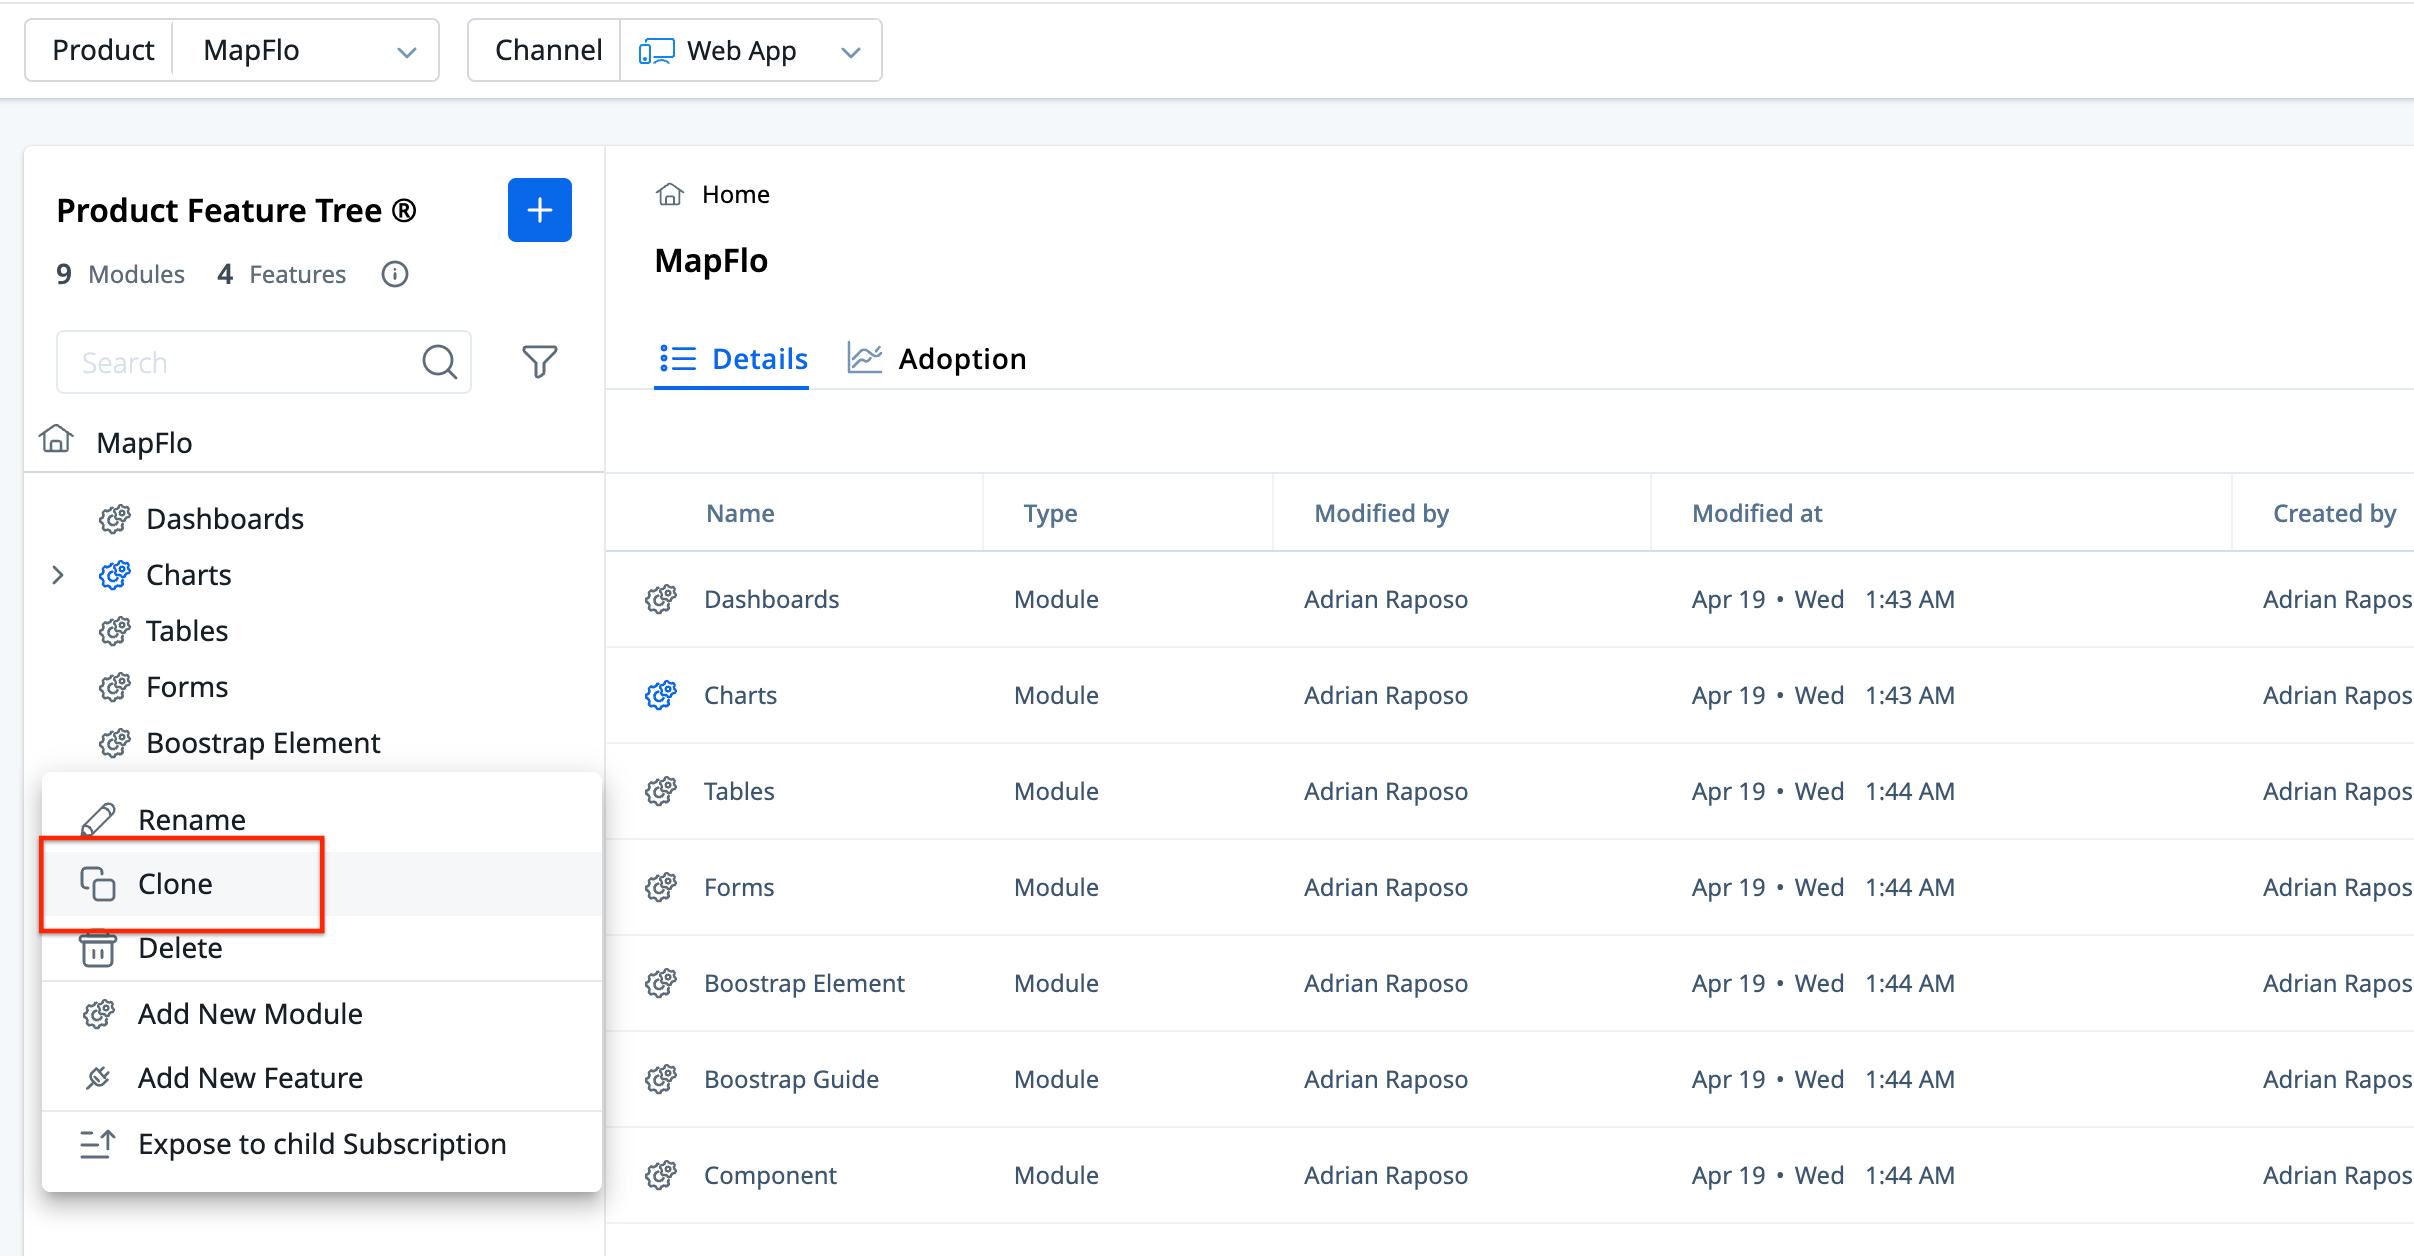
- Select the product to which you wish to add the cloned module/feature.
- Select the Find and Replace Values check box to define the find and replace functions and modify the values for the cloned module.
Note: You can modify the URL, UI Element and Module/Feature values from the existing module. - Click Add to define the find and replace for new attributes.
- Click Next.
- Review the changes and click Clone. The new module appears in the product tree list with the title ‘<existing module name> (cloned)’.
Note: Use the Reorder icon next to the edit icon for the module/feature to rearrange the order in the product tree list.
Remove Parts of the Product Feature Tree
Over time, certain modules, features, or rules in your product tree may become outdated or no longer relevant, due to UI changes, product restructuring, or evolving instrumentation needs. Product Mapper allows you to delete such items directly, from both in-app as well as the manual experience.
You can delete a mapped item (module, feature, or rule) if it is no longer needed. For example, if a previously tracked button is removed from your application, or a module was mapped in error, you can clean up your product tree accordingly.
- Navigate to the Product Feature Tree section in the in-app or manual mapper.
- Click the Edit icon for the required module, sub-module, feature, or rule.
- Click Delete. This is a permanent action and cannot be reversed.

Backfill
Gainsight PX allows you to perform a backfill action on any mapped feature. With Backfill, you can choose a feature and execute historical data collection against this feature.
Notes:
- If a feature includes text rules, these rules cannot be backfilled. However, all other rules within the feature will still be eligible for backfilling.
- By default, PX does not track any clicks for custom DOM attributes. To track these, you need to add the attributes to the SDK configuration.
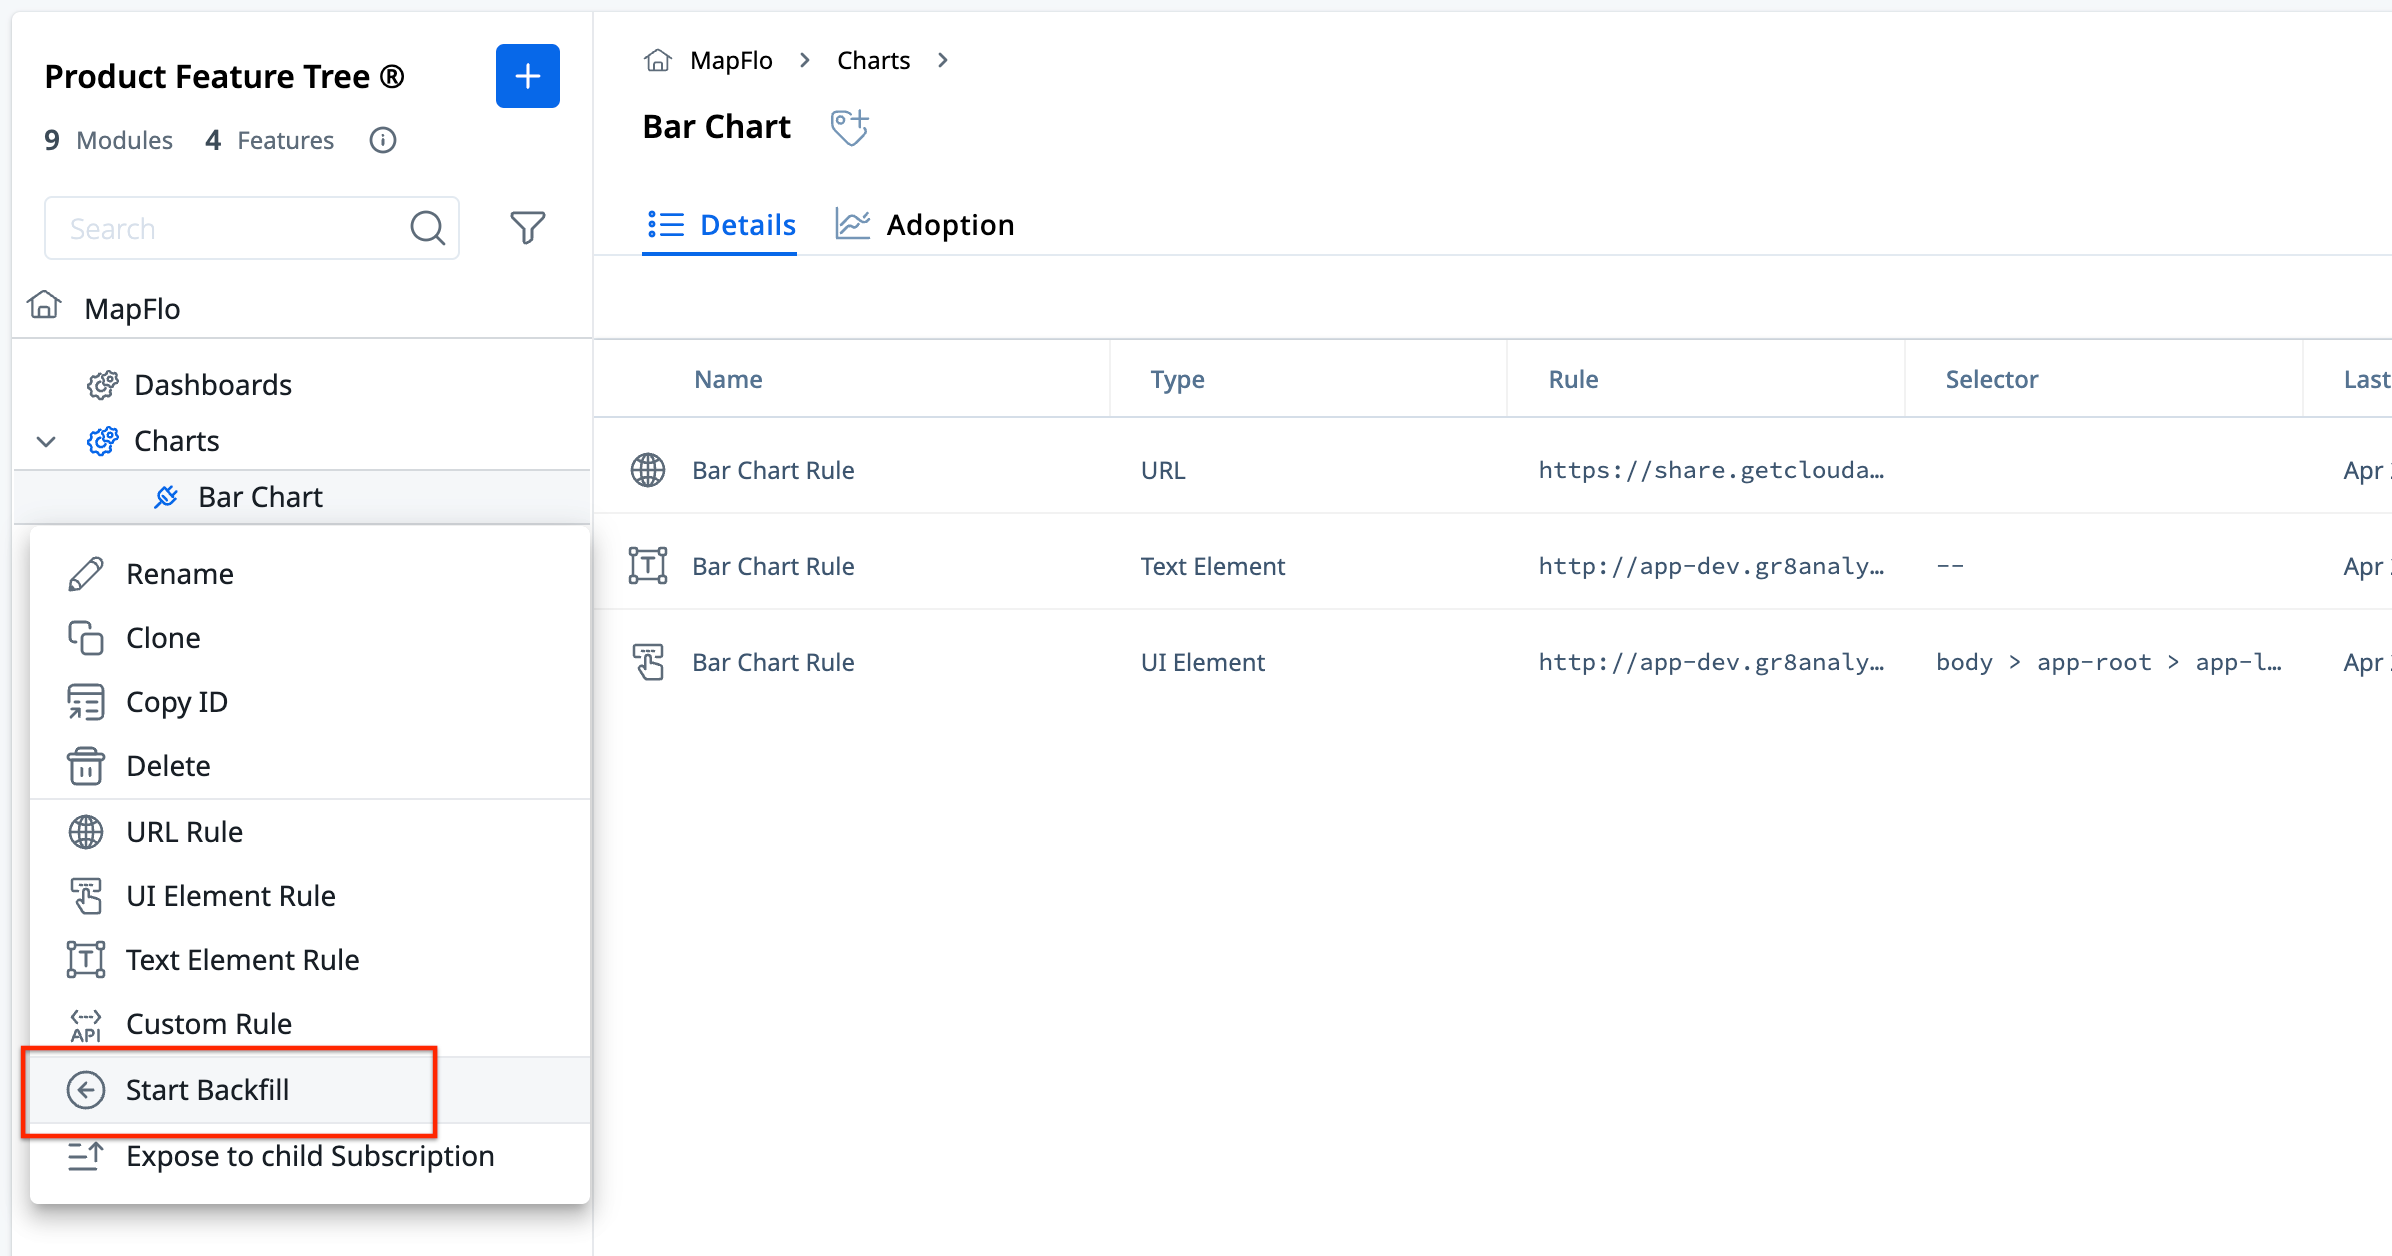
To backfill:
- In the Product Feature Tree section, click the Edit icon for the required feature.
- Click Start Backfill.
Important considerations about Backfill:
- You need to perform backfill for each feature individually.
- The backfill process collects up to 365 days of historical data from all the events.
- Backfill processing starts 15 minutes after the last feature Backfill request of a subscription.
- Each time there is a backfill request, Gainsight PX waits for 15 minutes before starting the actual Backfill process. If there is a new request for another feature of the same subscription during these 15 minutes, then this feature is added to the upcoming backfill processing. Another 15-minute wait window starts now. If no new feature Backfill requests are received during this wait window, then the Backfill processing starts.
- A single Backfill request can work with multiple product trees.
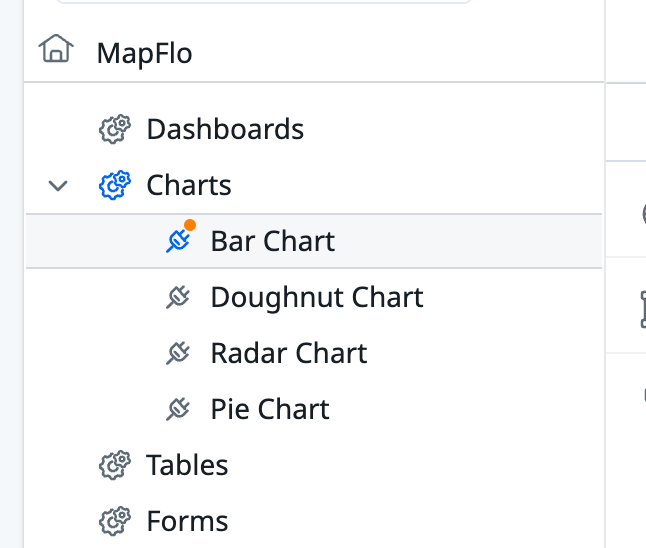
- When you click the Start Backfill button for a feature, an orange dot appears for the feature to indicate the ongoing Backfill process.
- Backfill processing time can vary between 5 - 48 hours, after which the historical data appears in Analytics.
- For instance, if you need to create a backfill for 10 features, then it is recommended to create Backfill requests for all the 10 features at the same time.
- If you edit the URL details of an existing feature in the Mapper and then perform backfill, the process adds the events but does not delete the historic events data. In this case, the best practice is to add a new URL rule event on the same feature as opposed to creating a new feature altogether. You can then delete the historic data if the data is irrelevant or if it overlaps with the new data.