Install Gainsight PX with Google Tag Manager
This article explains how to install Gainsight PX using Google Tag Manager.
Overview
This checklist is for those who use the Google Tag Manager (GTM) for tag management to install Gainsight PX. If you are using another method, check the following:
Still here? Great, perform the following steps to install Gainsight PX using GTM.
- Create your Product Definition and Gainsight PX Tag Code
- Setup Gainsight PX in Google Tag Manager (GTM)
- Make the Identify call (developer assistance needed)
- Verify Your setup
After the installation is successful, events and associated users/accounts from your product are updated in Gainsight PX.
Create your Product Definition and Gainsight PX Tag Code
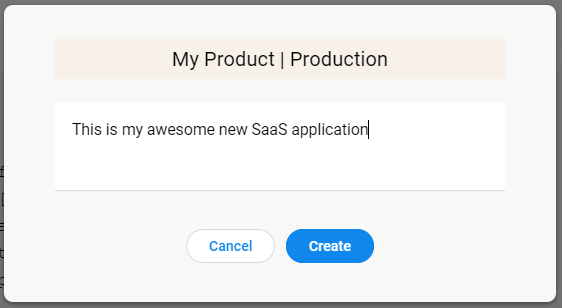
- Navigate to Administration > Products and create your product definition. Following image shows you an example.
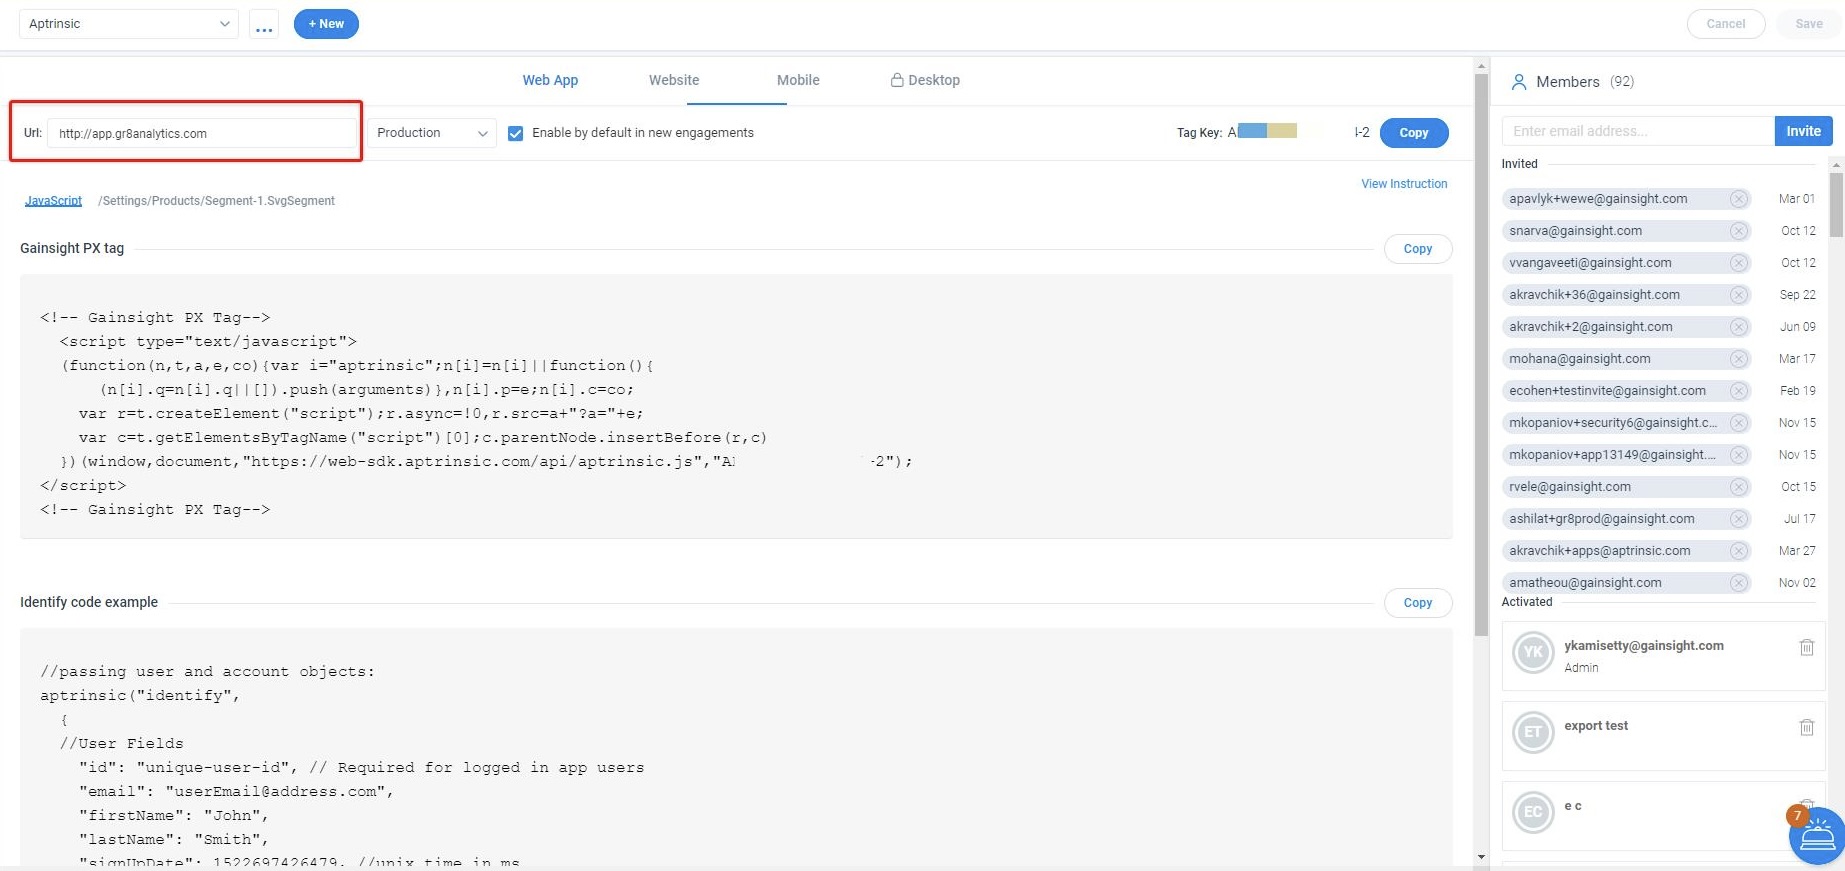
A tab for each channel is displayed such as Web App and Website for which the Gainsight PX Tag can be generated. Let's create the Web App tag for this product.
- Enter the URL of your Web Application. For example, https://www.gainsight.com/product-experience/
The URL you enter is for informational purposes only and what you enter there does not impact your use of Gainsight PX. Nevertheless, it is good practice to enter in the URL there to keep track of which of your products is assigned to which tags.
Now you have created the tag that will be associated with your product and channel (i.e. Web App or Website). If you also have a website that you want to track leads from, click the Website tab, enter in the URL for your website to create the tag for the website channel.
NOTE: Gainsight PX allows you to:
- Create, track and build engagements for more than one product. Repeat the process for your additional products.
- Define a product for each of your environments such as staging and production that you plan to use.
If using the free version, Gainsight PX allows you to define only one product.
Setup Gainsight PX in Google Tag Manager (GTM)
If you do not have a Google Tag Manager Container setup for your website and product, refer to the Setup and install Tag Manager article from the Additional Resources section.
Now that your container is installed, you are ready to add the Gainsight PX Tag. In the Google Tag Manager, do the following:
- Click on Accounts and select your account
- From the navigation menu, click on Tags.
- Click New.
- Set the tag type for Gainsight PX as Custom HTML.
- Copy the tag from the Gainsight PX tag section of the Products screen in Gainsight PX for the product you are setting up and paste into the tag text box.
- Specify triggers for All Pages.
- Click Save.
- Change the name to 'Gainsight PX Tag'. Else, specify your product or website in the tag name.
- Finally, preview the tag to ensure make sure everything looks and behaves as expected.
- When you are ready, click Submit in the top-right corner of the screen.
- Enter a Version Name and Version Description to describe the changes.
- Click Publish.
Make the Identify call (developer assistance needed)
The identify() call is javascript code that must be added to your product. This call should be made from your application where the user authentication is done to identify the user and account information of the user that is generating and sending events to Gainsight PX.
We have created the following sample message that can be sent to your development team.
**********************************************************************
BEGIN SAMPLE EMAIL TO DEVELOPER TEAM
**********************************************************************
Hi Development Team,
We've signed up to use a vendor called Gainsight PX that will allow us to build in-application experiences (i.e. tooltips, sliders and guides) to help us with product adoption & user retention.
We have set up our Google Tag Manager account with the Gainsight PX tag but as a final step, need to make the below identify() call to the location of where the authentication code takes place in our web app so that events collected are correlated with the correct user/account.
If you can be sure to include all of the known user and account attributes that we have for that user and account. Click here to see a list of all attributes available to us, we can always add more custom attributes as needed.
//
window.aptrinsic('identify',
{ // User Info
// Required
'id': '1',  // Can be a unique id such as a number, GUID or email address
// Optional
'email': jane@acme.com',
'lastName': 'Rox',
'type':'N/A',
// add custom attributes
'department':'product'
},
{ // Account Info
// Required
'id':'100',
// Optional
'name':'Acme, Inc.',
'website’:'www.acme.com',
// add custom attributes
'vertical':'Fintech'
});

//
*********************************************************************
END SAMPLE EMAIL TO DEVELOPER TEAM
*********************************************************************
Verify Your Setup
After your development team confirms that the above steps are completed and the code is pushed, log in your Gainsight PX subscription to check whether the events, users and accounts are updated from your application.
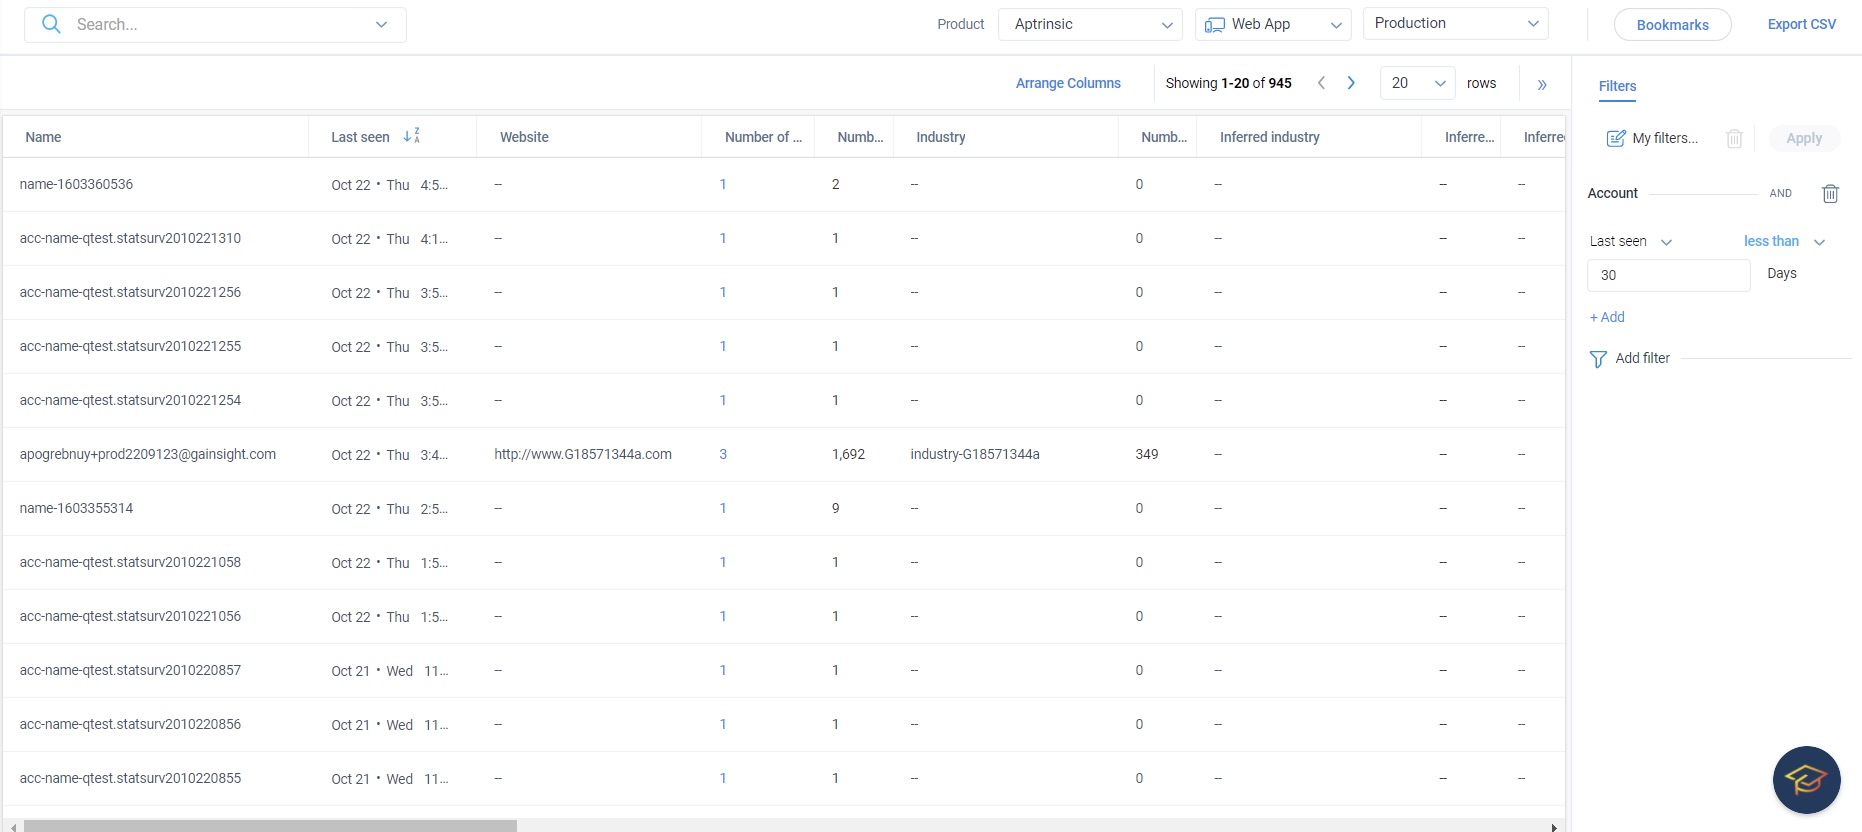
Users details are shown in Audience Explorer and Accounts are listed in Account Explorer.
Audience Explorer
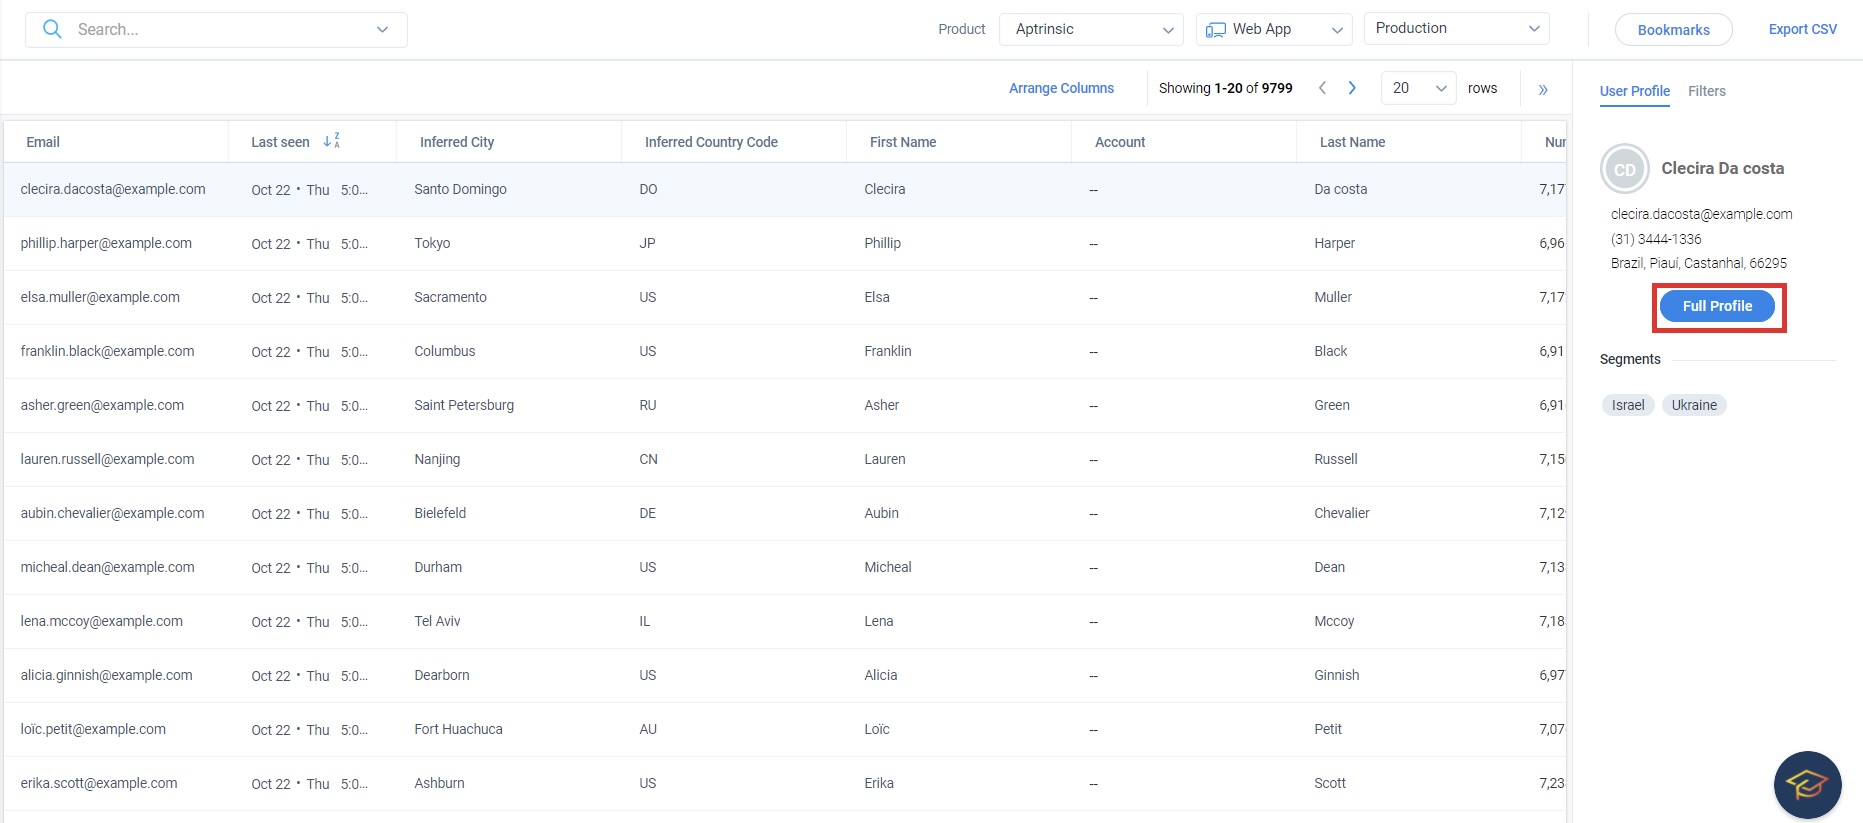
Select one of the users and click on the Full Profile button on the User Profile tab to see the recent activity.
Accounts Explorer
Refer to the Troubleshoot FAQ article from the Additional Resources section for more help if you do not see users or events updated in your Gainsight PX subscription.
INSTALLATION COMPLETE... you are now ready to start using Gainsight PX!
Now, check the Product Mapper® Overview article in the Instrument your Product guide from the Additional Resources section to get started :)
Additional Resources
| Troubleshoot FAQ |
| Product Mapper® Overview |