Step Navigation in Guide Engagements
This article explains how to configure standard navigation between the steps in an engagement.
Overview of Standard Navigation Buttons
Admins can configure the navigation that the user performs within the engagements steps. This configuration is applicable only for the enagagements created using the new Editor.
The configuration can be done in one the following ways:
- Use standard navigation buttons.
- Add custom buttons. To know more about configuring custom buttons, refer to the Configure Custom Button article.
Enable Optional Footer Configuration
Use standard navigation buttons to help users to navigate within the engagement. When an engagement is created using the standard template, the steps have standard navigation buttons and step counter in the footer section. You can link the buttons to the next element in UI or to redirect to another page.
To link the standard navigation buttons to an element in UI or redirect to another URL:
- From the left pane, click Engagements.
- Create a Guide Engagement. For more information on how to create an engagement, refer to the Create In-App Guide Engagement article.
- Click In-app Editor to configure actions for custom buttons.
- From the floating Editor, click the Navigation option.
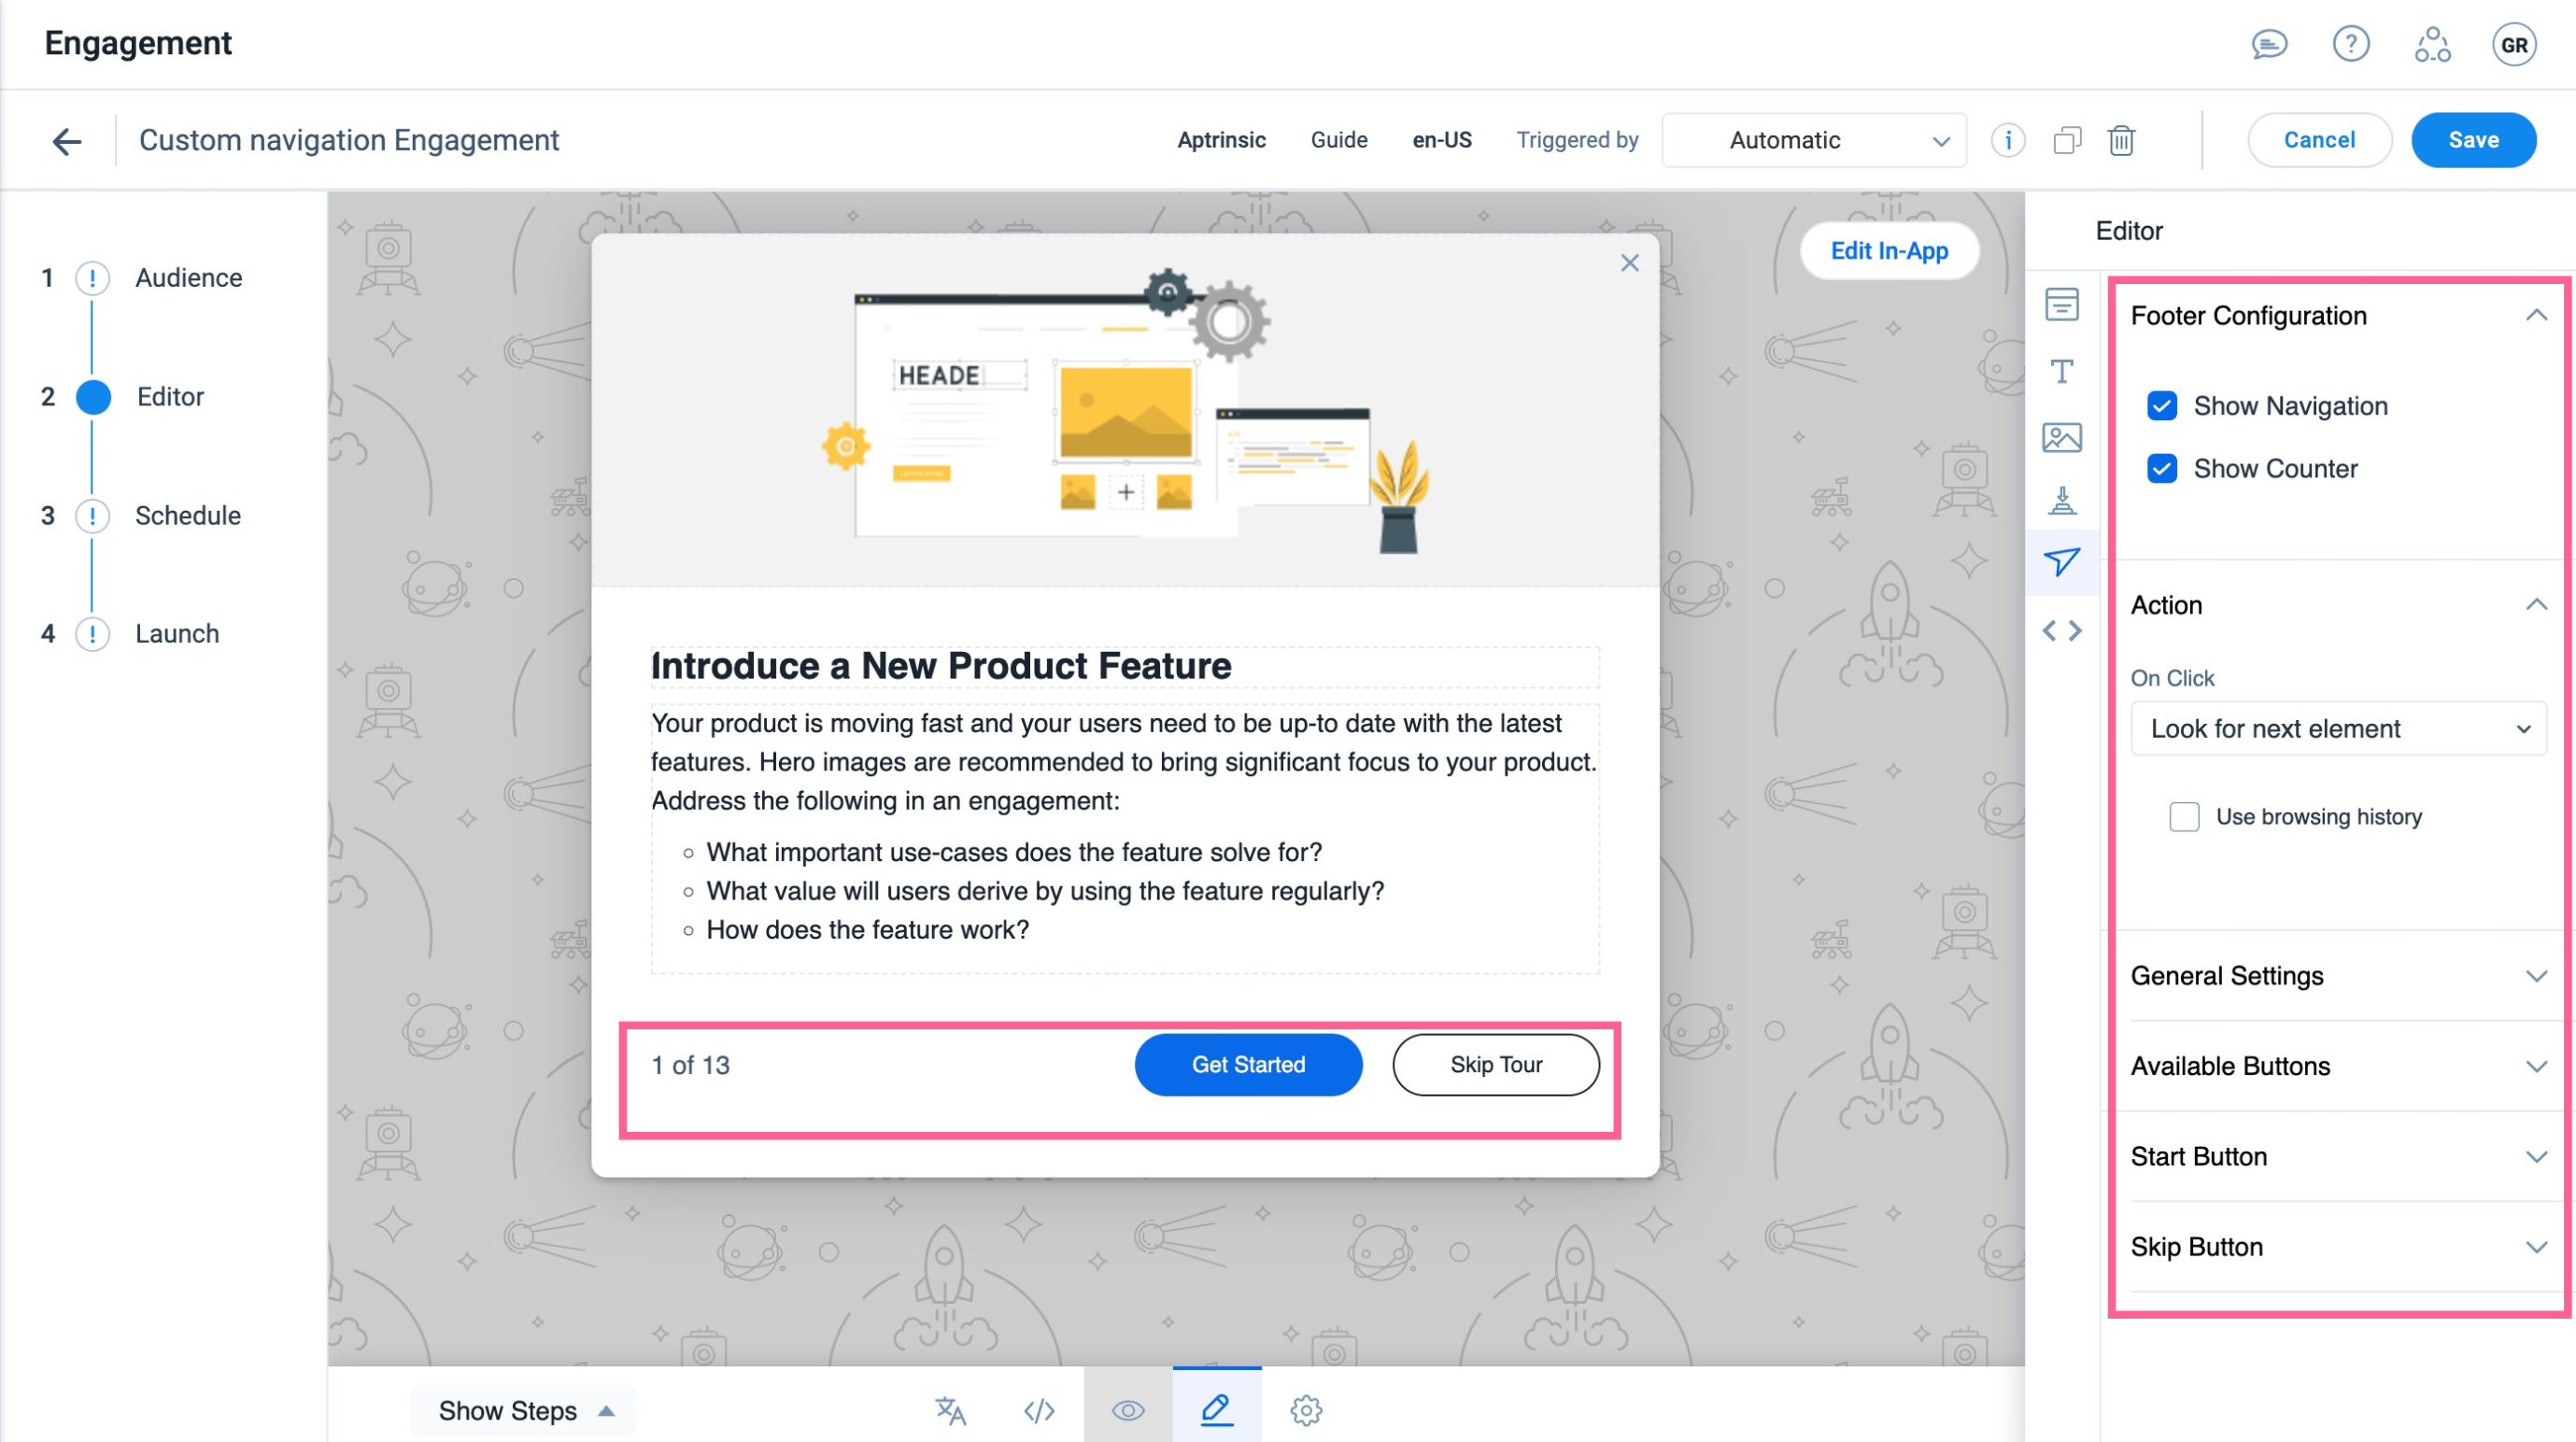
- Select the following options:
- Show Navigation: To enable the standard navigation buttons in the footer section.
- (Optional) Show Counter: To enable the step counter in the footer section.
- From the Action section, select either of the two options from the On-click dropdown menu:
Note: the On click option is only available for Start, Next and End buttons
- Look for next element: To navigate to the next element in UI.
- Redirect to URL: To navigate the user to another page or URL. You can select Open Tab in new URL checkbox to redirect the users to a new tab and view the guide there seamlessly without any interruption.
- For Previous buttons, select Use browser history option that helps PX to go back to the previous step if it was on a different page on the application.
- In General Settings, select the Override Global Settings checkbox to exclude the global settings configuration for the button.
- From the Available Buttons section, select the buttons you want to add to the step.
Note: It is recommended not to use Skip and Snooze buttons simultaneously.
- To customize the selected buttons, click on the specific button to find various button Label, fill and border formatting options.
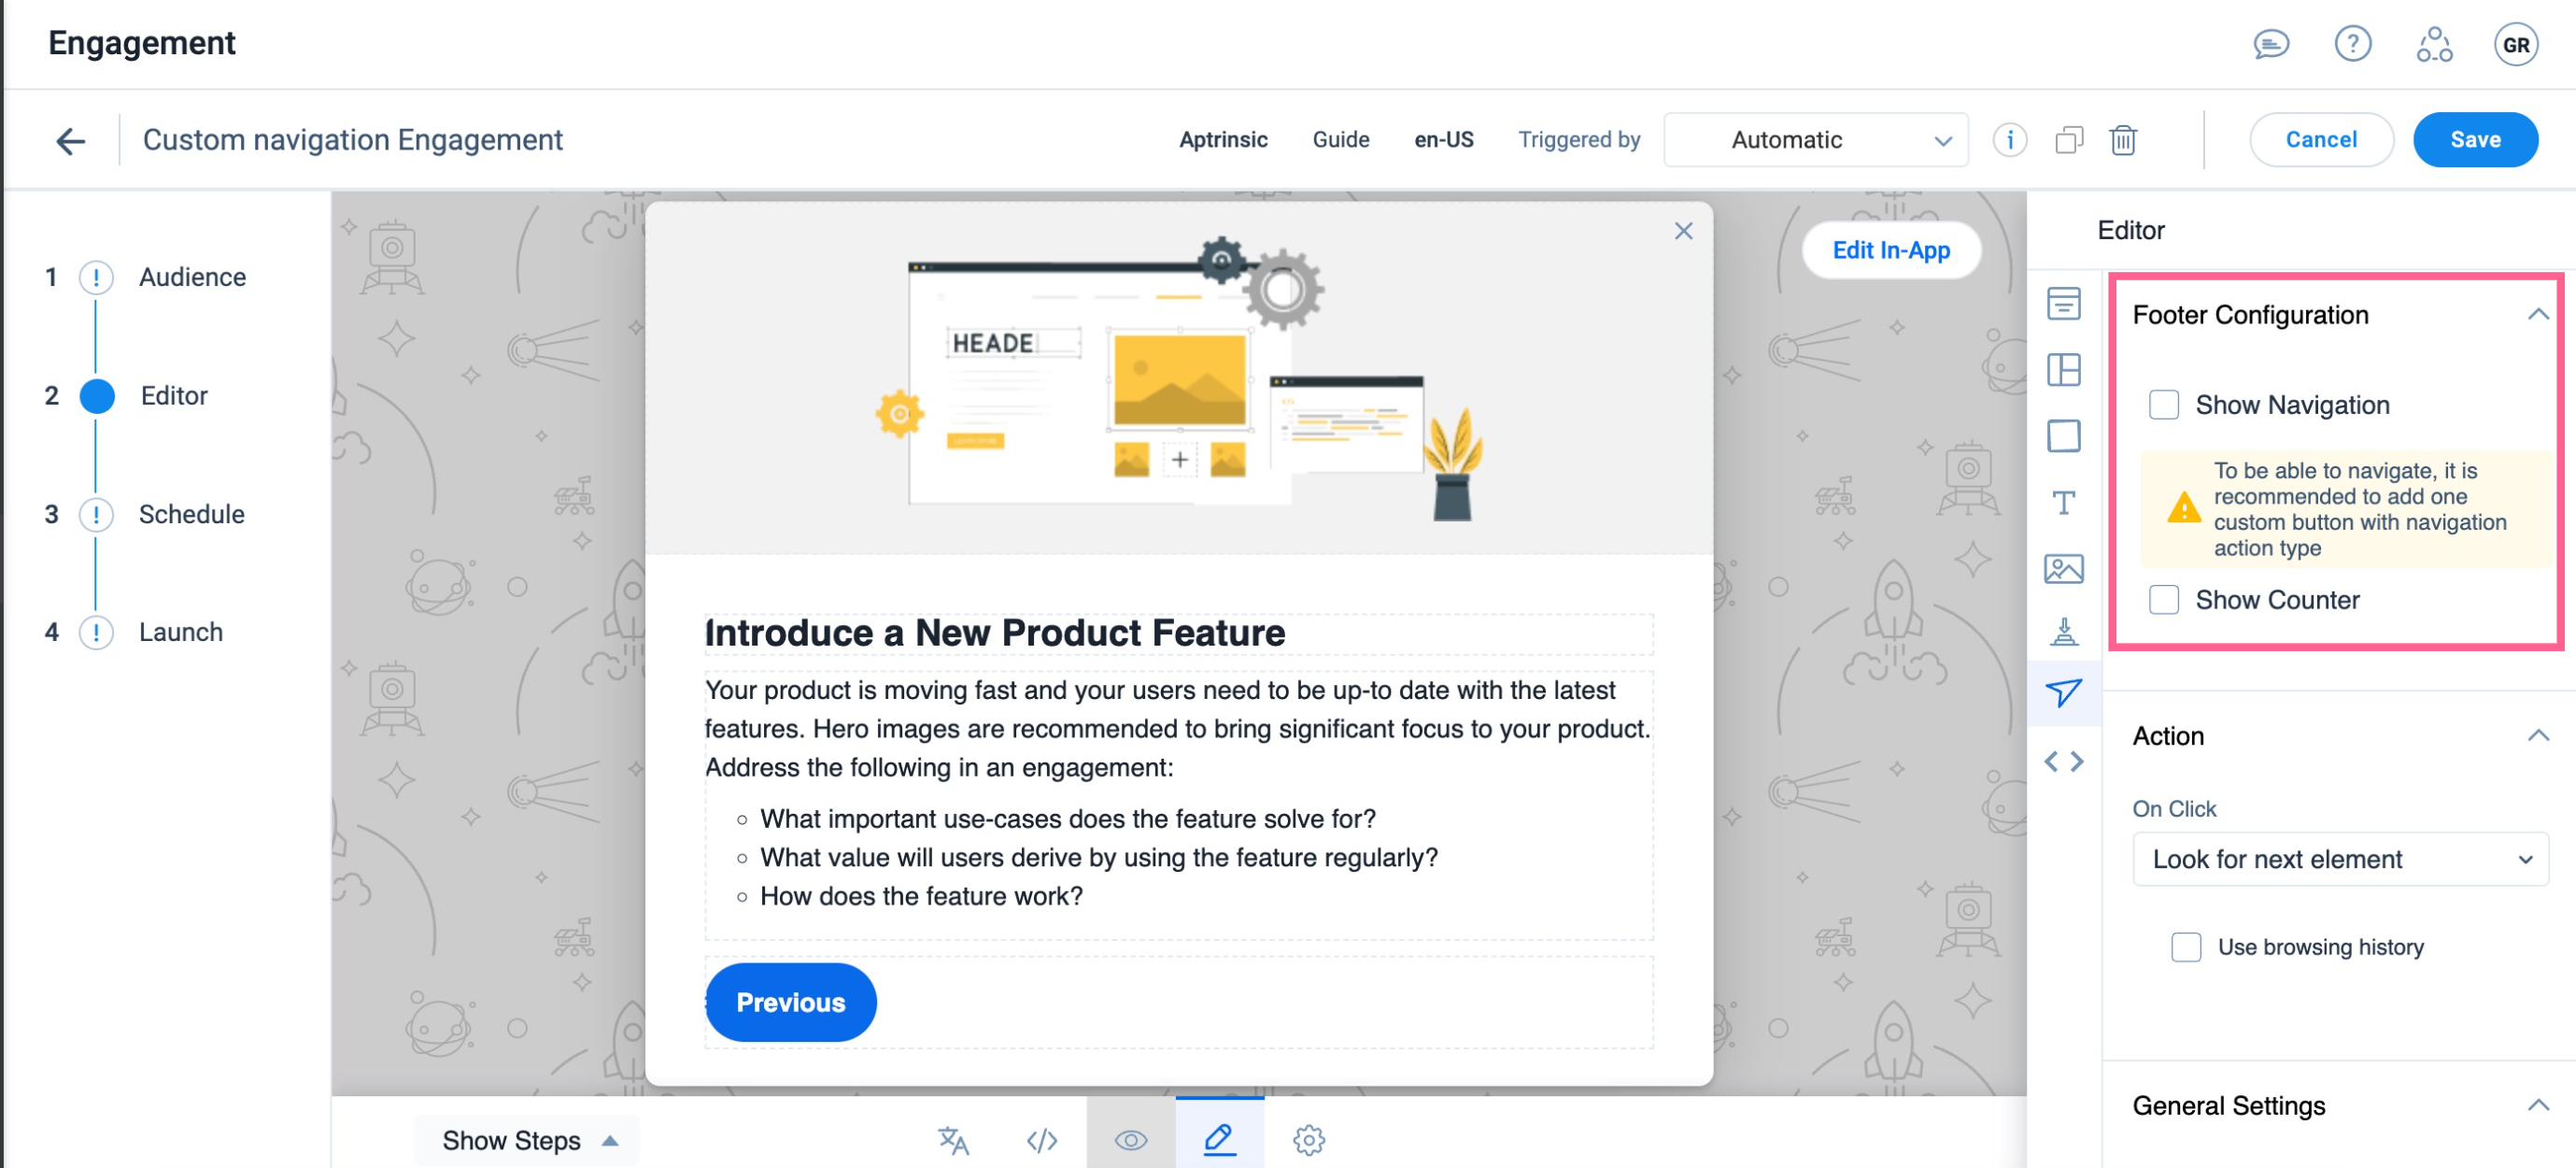
Delete standard Navigation Buttons
The standard navigation buttons can be removed by clearing the footer configuration options.
Admins can configure the user navigation within the engagement using the custom buttons. For more information on Custom Buttons, refer to the Configure Custom Buttons article.
Sample Business Use Case:
Consider that an admin wants to create a dialog engagement using the new Editor. As the dialog engagements does not have navigation elements, exclude the standard navigation buttons from the Guide engagements by clearing the footer section from the navigation section on the editor. This helps to create dialog engagements without being dependent on CSS to hide the footer section.
To delete the optional navigation buttons:
- From the left pane, click Engagements.
- Create a Guide Engagement. For more information on how to create an engagement, refer to the Create In-App Guide Engagement article.
- Click Editor to configure actions for custom buttons.
- From the floating Editor pane, click the Navigation icon.
- In the Footer Configuration section, clear the Show Navigation and Show Counter checkboxes to remove the navigation buttons and step counter, respectively.