Branching in Guide Engagements
This article explains how to customize the navigation flow and create branches in the Guide engagements.
Overview
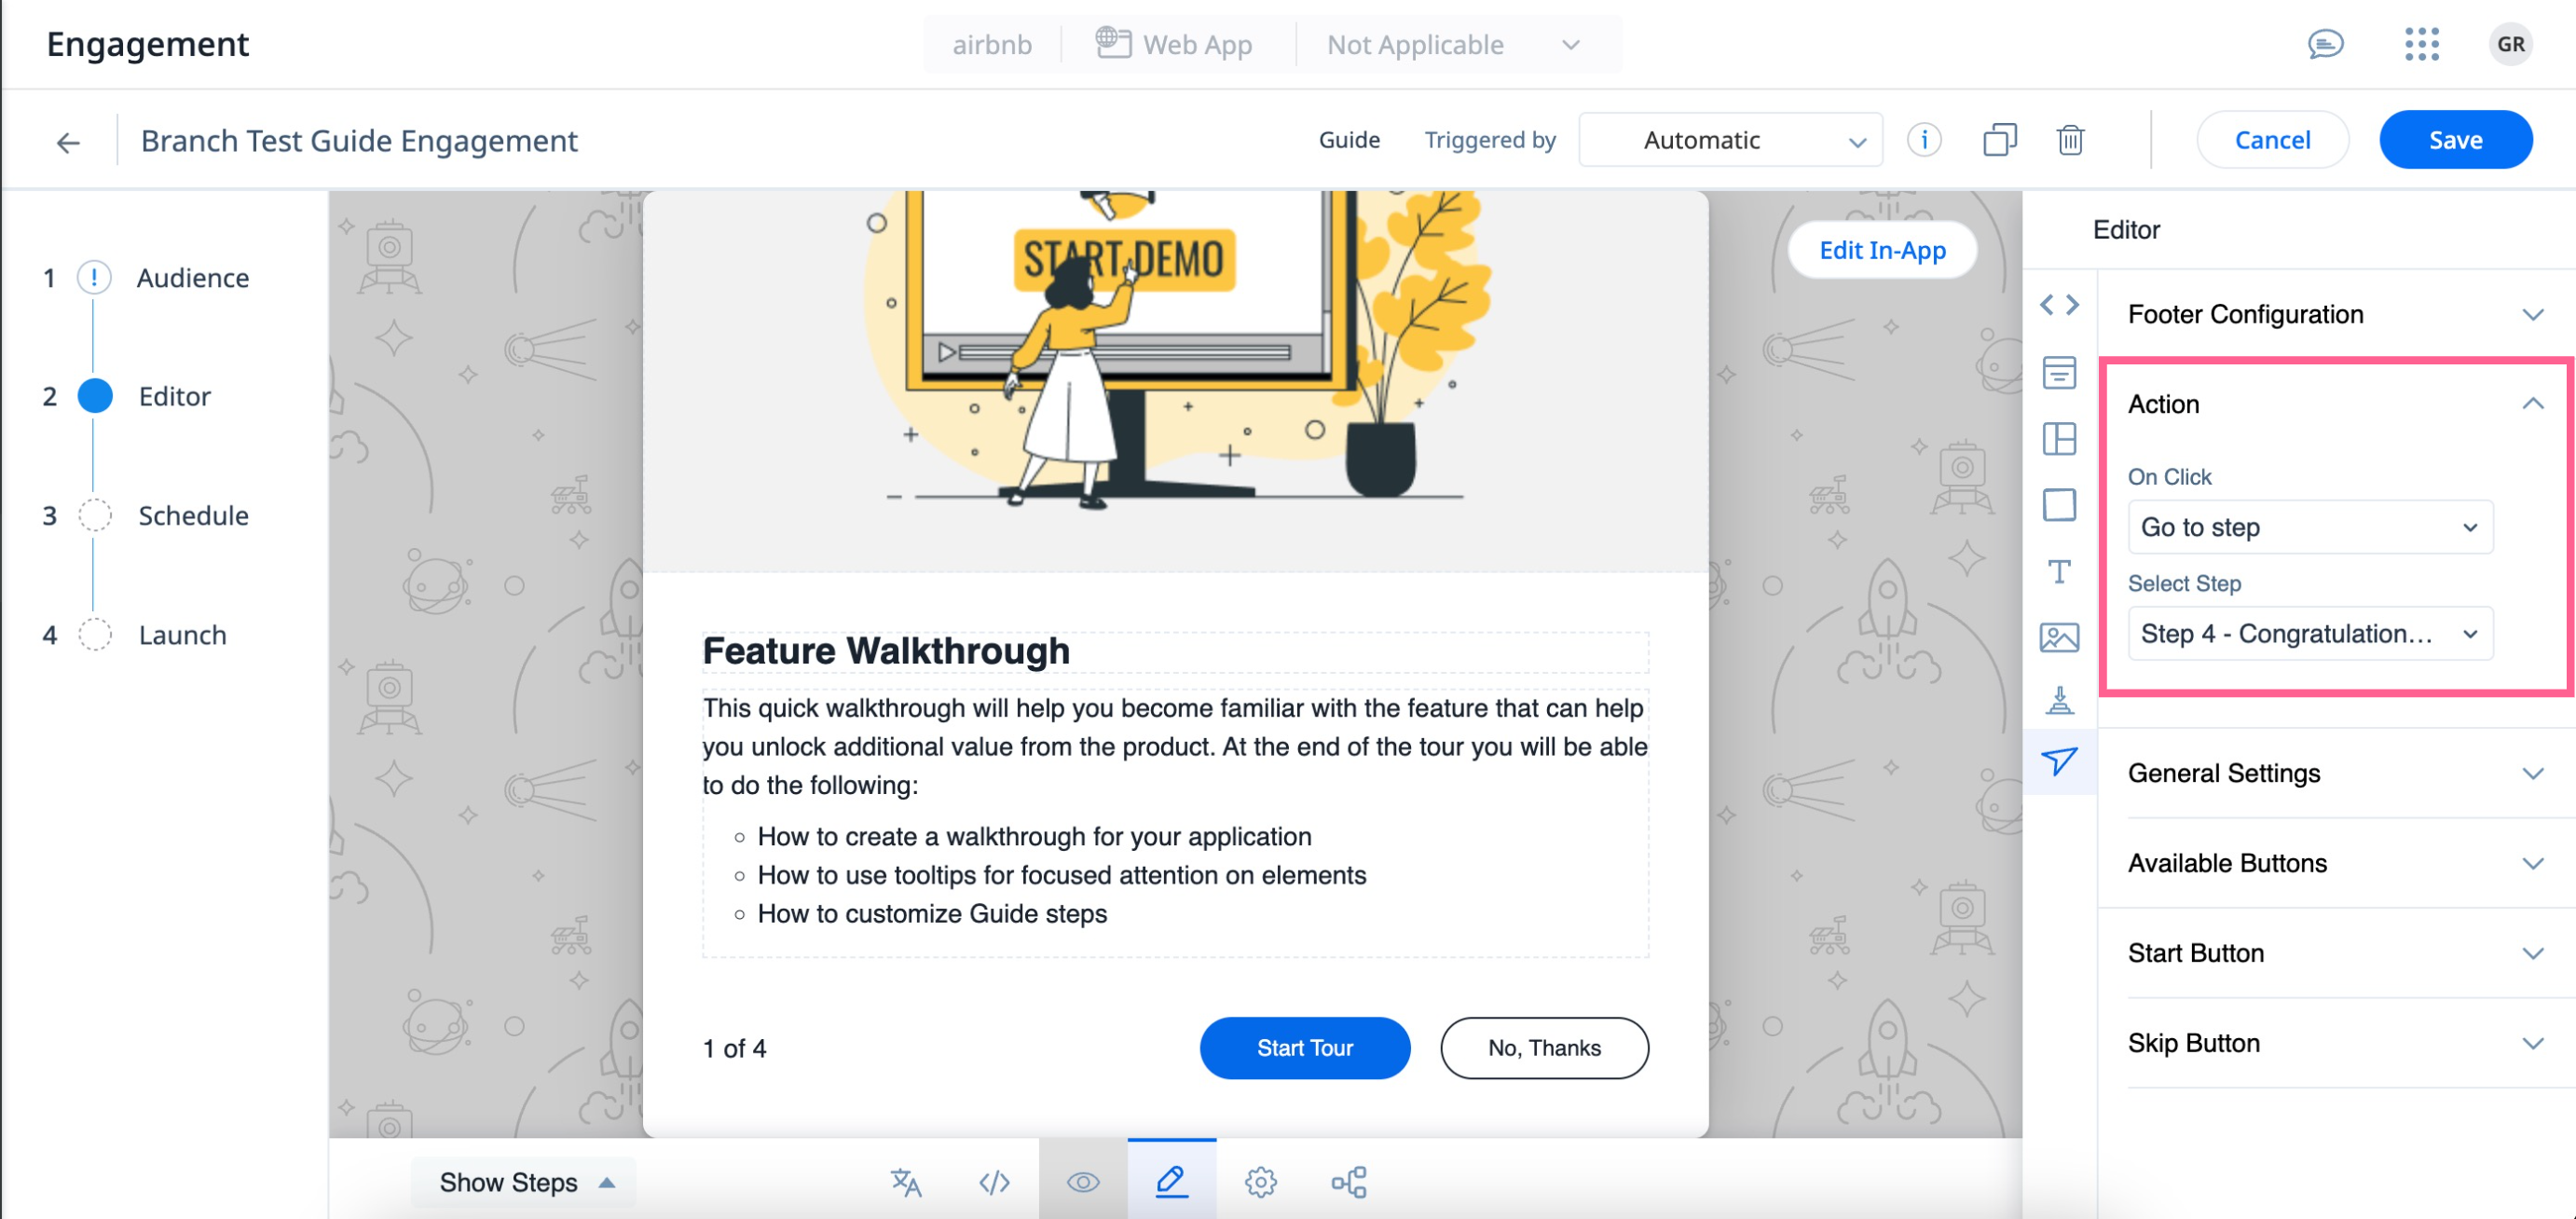
The branching capability for Guide engagements created in New Editor empowers you to direct the flow of Guide engagements. You can include and configure custom CTA buttons within each step which grants users the flexibility to navigate directly to the preferred step, rather than adhering to a strict sequential flow. You can also customize the navigation path to the preferred next step when a tool-tip is skipped.
| IMPORTANT: The branching feature is relevant only if the guide is created using New Editor. |
Example Business Use Cases:
-
Consider during user registration, a user profiling engagement is sent out with product information. The users are asked to specify their job role including options such as Product Manager, Marketing Specialist, Customer Success Manager(CSM), and Sales Representative. Once a user chooses the role, they are guided to the tailored onboarding step that explains how the product benefits them in their selected role. This personalized approach ensures users receive relevant information for a smoother onboarding experience.
-
For a more personalized learning experience, an engagement containing three different learning levels is shared with the users. When the user picks one, they are taken to a specific step with detailed information related to the selected level. This approach keeps users engaged and provides them with the information they need for their learning.
Customize the Flow in Guides
The default flow in a guide engagement is sequential. For example, if a guide has three steps, step one is followed by step two, and then step three. However, you can customize the flow of the guide by adding CTA buttons in the engagement steps.
To customize the guide flow:
-
Create a Guide engagement. For more information on creating Guide engagements, refer to the Create Guide Engagement article.
-
Add custom buttons of different action types to the steps in the Guide engagement. For more information on inserting custom buttons, refer to the Insert Custom Button section in the Configure Custom Buttons article.
-
(Optional) Use standard navigation buttons in the footer section of the step and customize the Action section to customize the guide flow. For more information on how to configure standard navigation between the steps in an engagement, refer to the Step Navigation in Guide Engagements article.
-
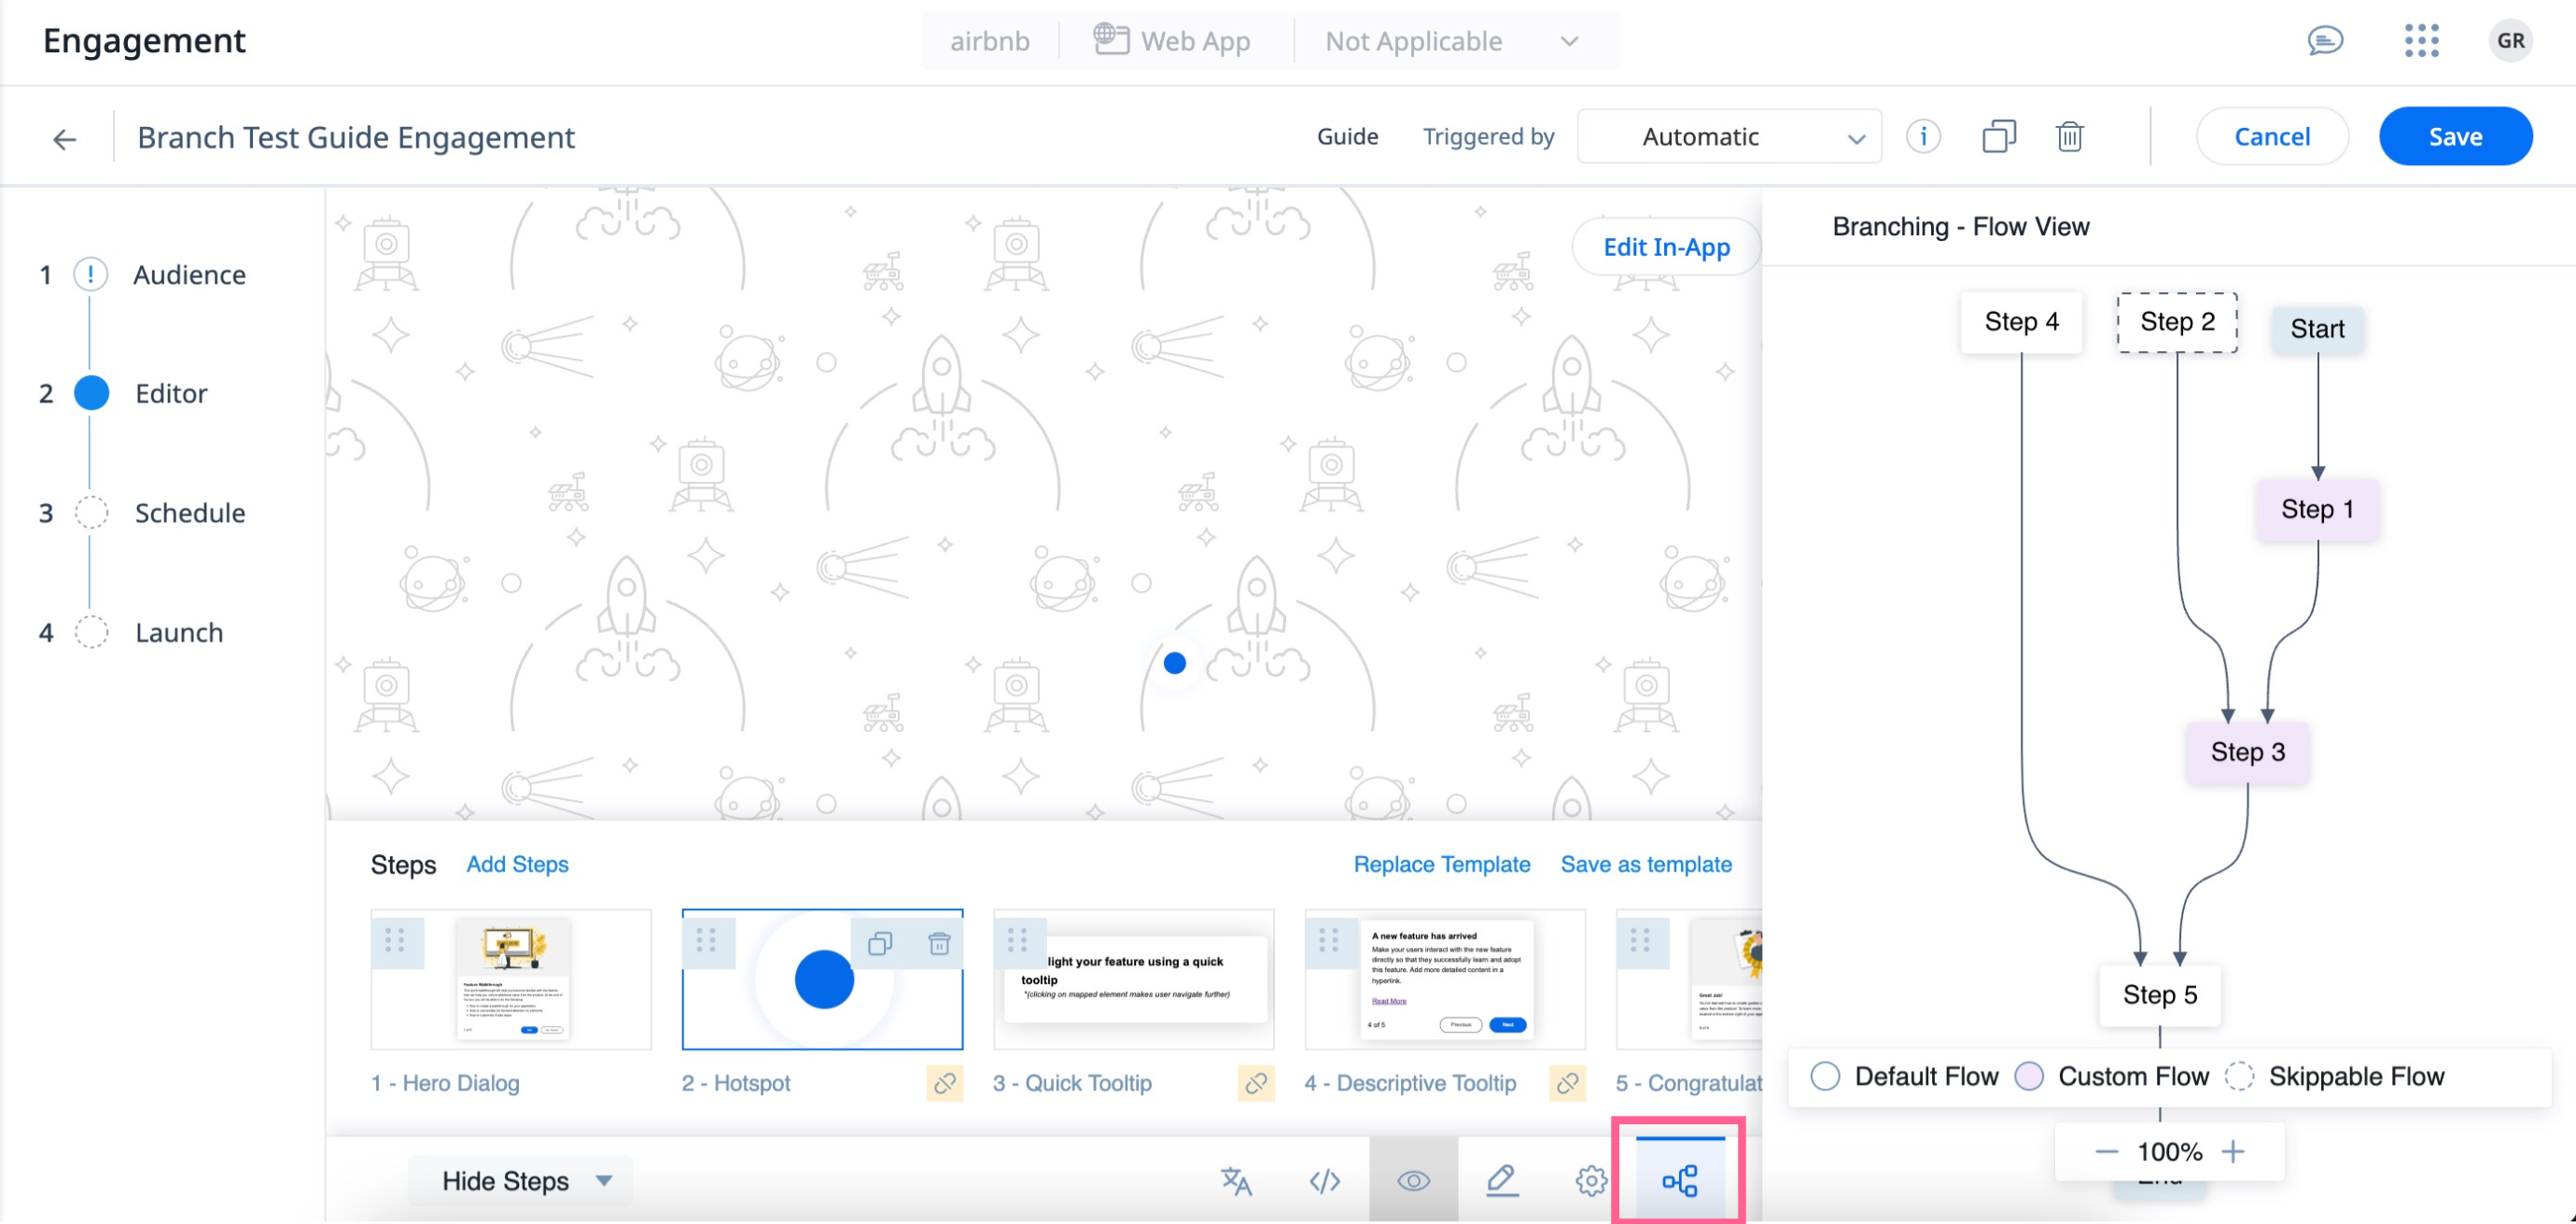
To easily understand the navigation between the steps, click the Branching flow icon at the bottom to assess the flow of the guide using Flow View. There are three different types of flows that can be viewed using the branching-flow view.
- Default Flow: The Default flow is a standard guide progression flow that adheres to a predefined sequence of steps, ensuring users follow a linear path. In this flow, users move from one step to the next in a fixed sequential order of engagement with the content.
- Custom Flow: The Custom flow is a tailored by the user which displays the preferred sequence of steps and navigates through the guide allowing for a personalized and adaptable experience.
- Skippable Flow: The Skippable flow is a flow of steps with skippable option enabled are displayed with the next steps as per configuration.
|
IMPORTANT:
|
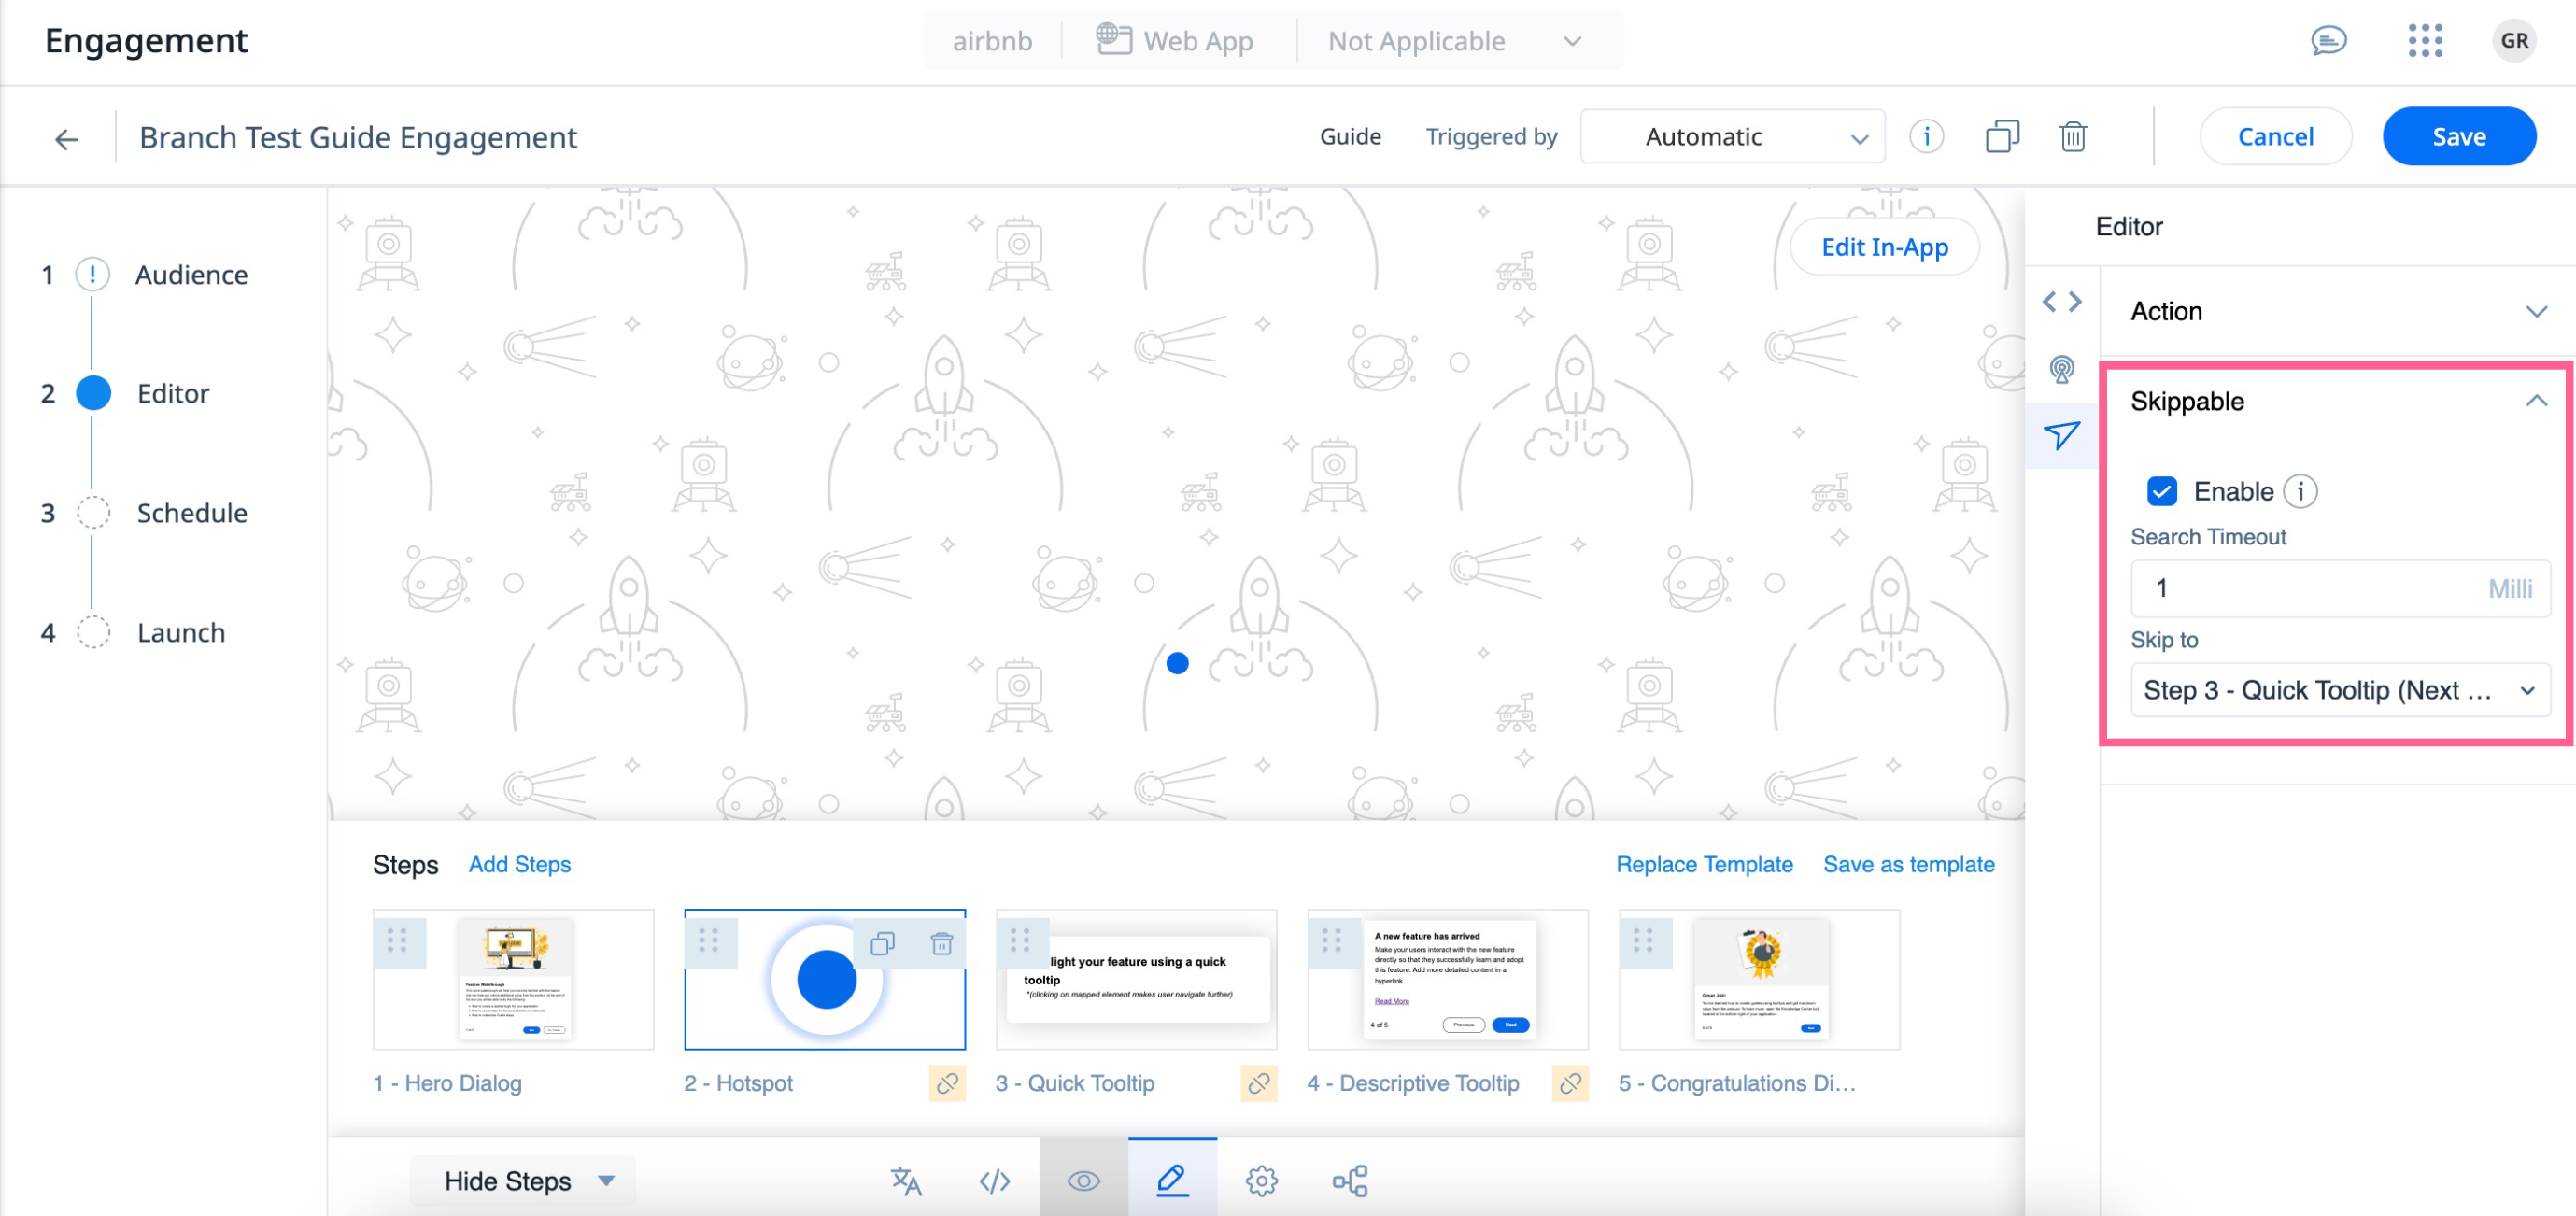
Use of the Skippable Feature
The Skippable feature in Guide engagements helps you to create a seamless experience for your users. It allows you to customize the step to which a user is directed to, when interacting with a tooltip or hotspot that is mapped to an unavailable feature.
To enable the skippable option:
- Navigate to the tooltip or hotspot step in your guide template.
- From the Editor slide-out panel, click the Navigation icon.
- In the Skippable section, select the Enable checkbox to enable the skippable feature.
- Enter a preferred Search Timeout for the application to search for the UI element.
- From the Skip to drop-down menu, select the next step to direct the user to the preferred step.