Overview of Engagements
This article provides an overview of engagements, types of PX engagements and other key components that you must know of when you create an engagement.
Overview
An engagement is an approach to interact with your target audience at a defined time. You can configure and launch in-app announcements, provide tooltips, send automated emails, and surveys using engagements. These communications can be interactive and help you to share information, receive feedback, and engage customers thereby increasing customer adoption and advocacy for your product.
Following are a few examples of engagements:
- Send automated Welcome Email to new customers
- Show the ‘How To’ carousel/slider about new release features
- Walk-through or guide users around a set of new features
- Engage users who have not used a specific feature
- Notify Admin or Power users about the application maintenance activities or other announcements
- Show custom message to users whose account renewal date is less than 30 days away
- Send an NPS® Survey to users who signed up more than 30 days ago, and logged in at least four times
- Send a Customer Effort Score (CES) to users who used a key feature
Following are the key items to consider when you build an engagement:
Target Audience
Target audience refers to the group of users or recipients to whom you want to display the engagement. Audiences can be defined based on either or both the user/account demographics, feature usage, platform, custom events and/or combined in-app behaviors. For more information on audience selection for engagements, refer to the Audience Selection article from the Additional Resources section.
Types of Engagements
This section describes the following types of PX engagements:
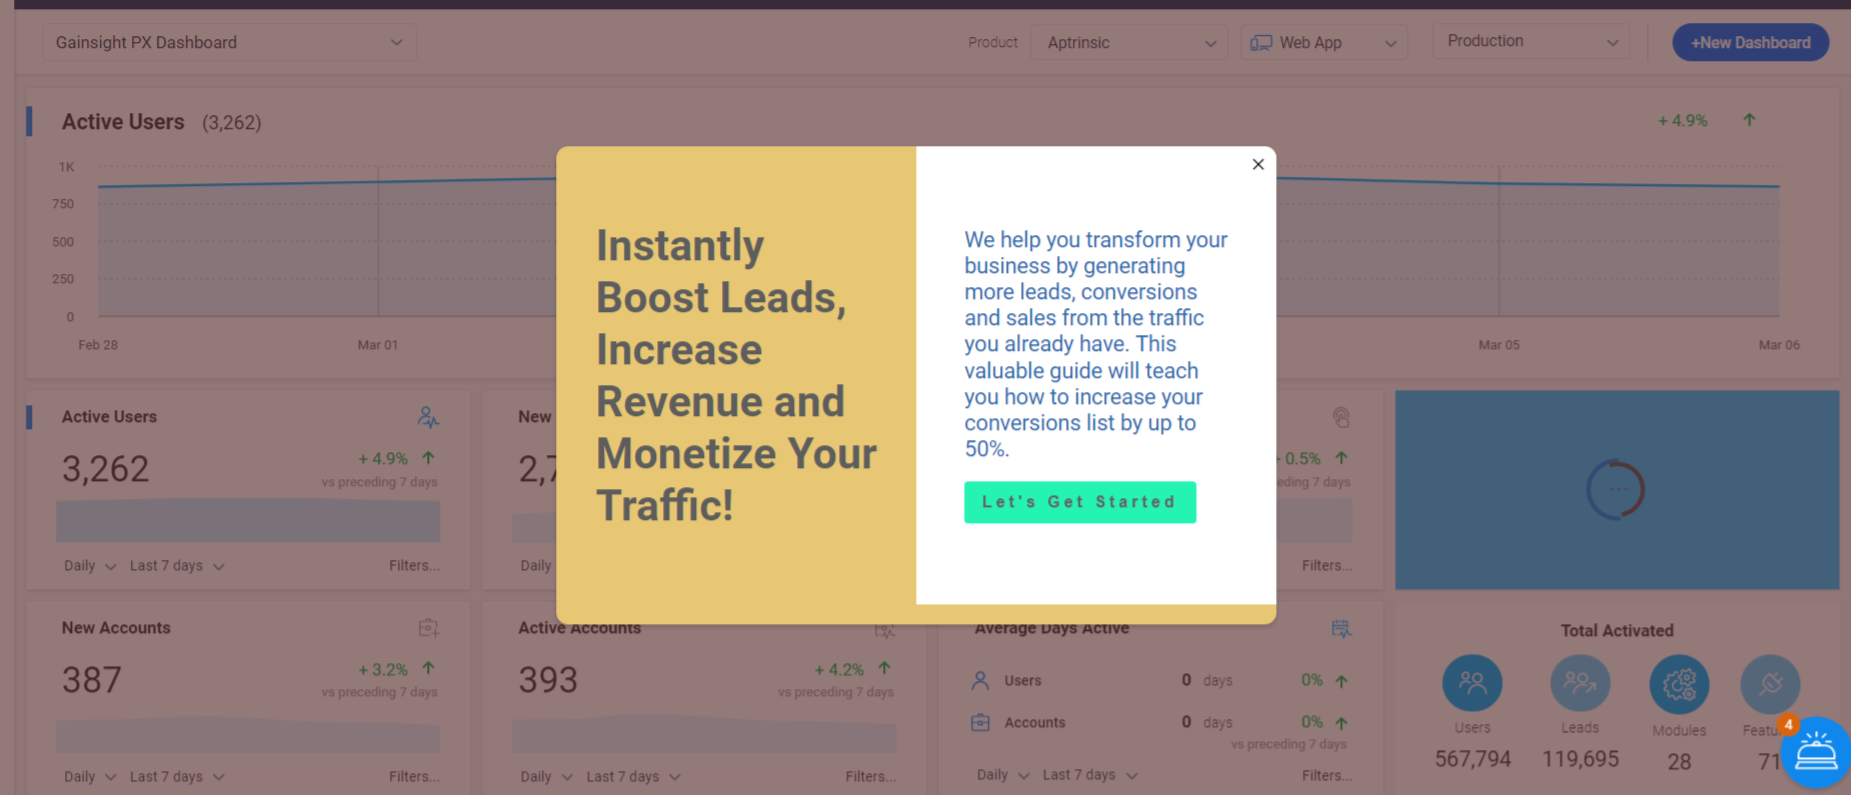
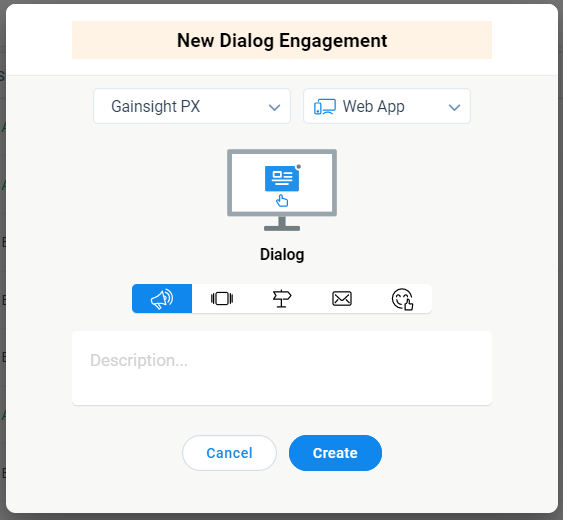
Dialog
A Dialog engagement is a window that pops up as a lightbox in the middle of an application page and has no navigation.
Note: You can configure and launch Dialog engagements based on the device type. For more information on how to configure the Dialog based on device type, refer to the Create Additional Templates for a Dialog Engagement section of the Dialog Engagement article from the Additional Resources section.
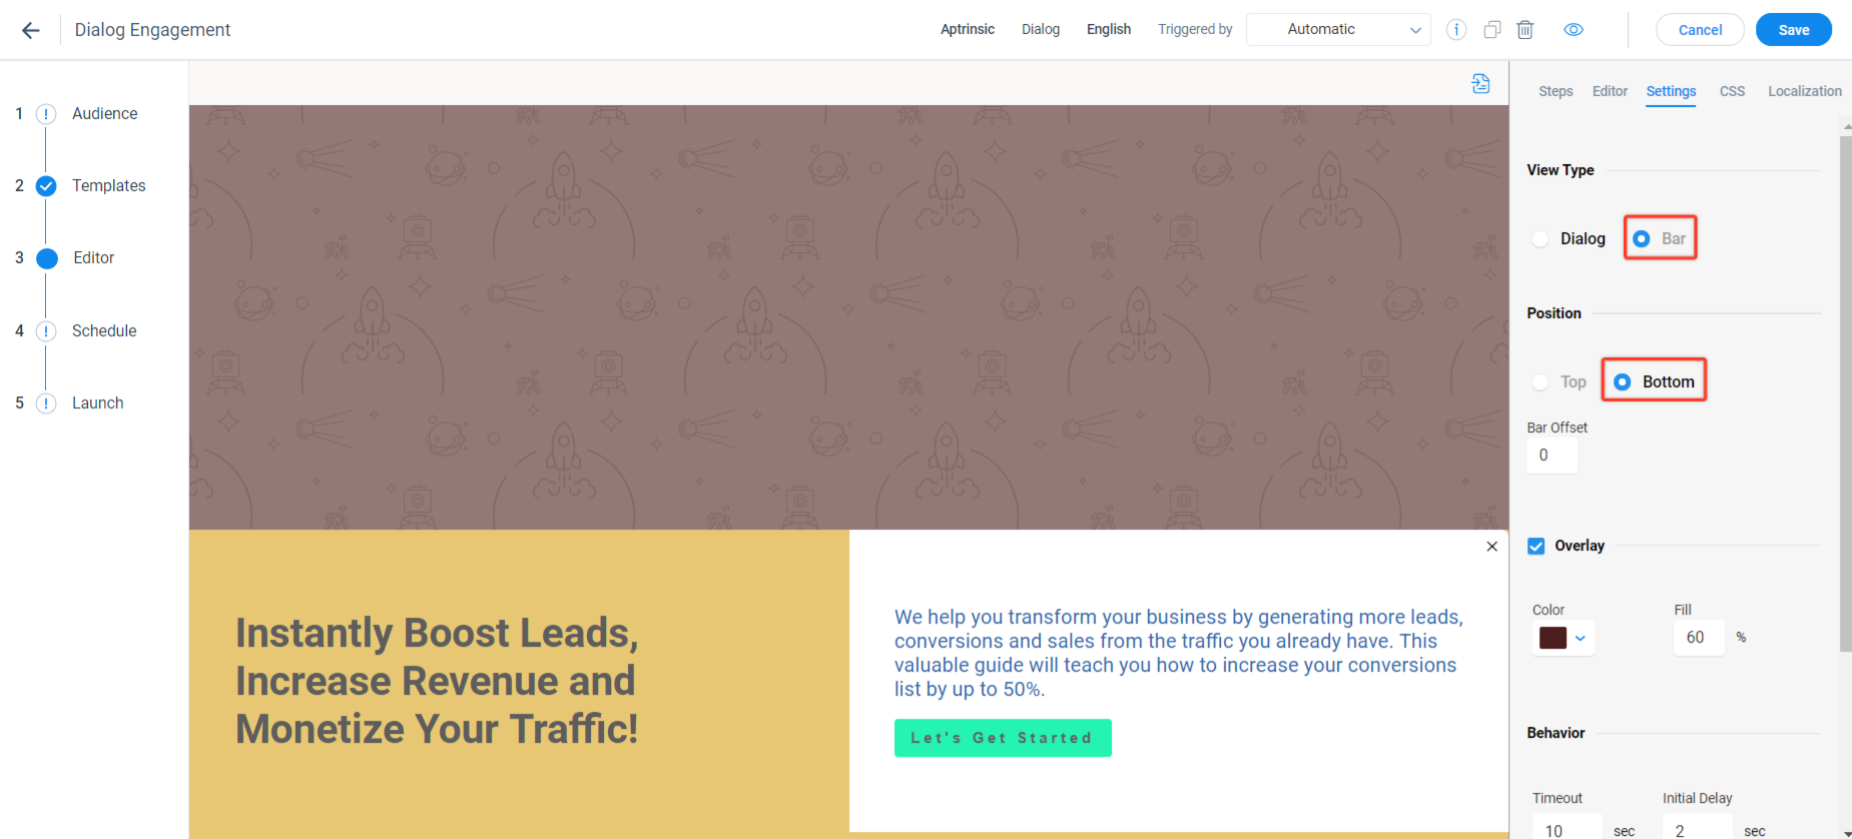
Dialog-Bar
A Dialog - Bar engagement is a pop up window that appears at the top or bottom of a screen.
To set an engagement to Bar view:
- On the editor step, navigate to the Settings tab.
- In the View Type section, select Bar.
- Select Top or Bottom in the Position field.
To customize the size of the bar engagement, navigate to the Size section on the Editor tab.
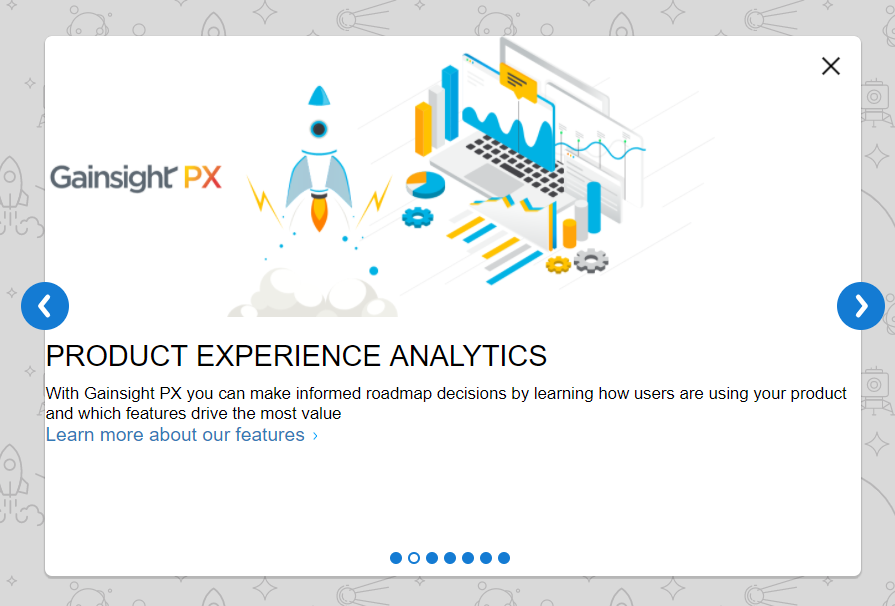
Slider/Carousel
A Slider engagement is a carousel style set of windows that allow the user to navigate through the slides to access the content of the slider. A right arrow click displays the next slide and a left arrow click displays the previous slide. Sliders allow you to communicate multiple messages or announcements like new features added in a release.
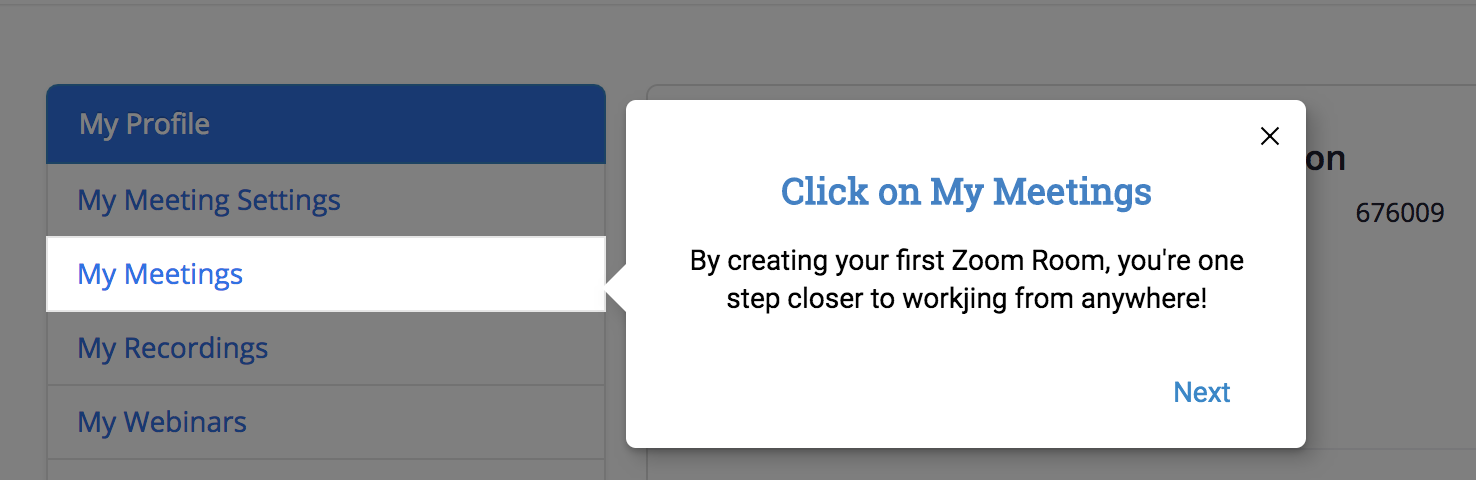
Guided tours
A Guide engagement allows you to create a walkthrough on a specific feature. You can either create a single step guide to assist users with one or more features of your application, or a multi-step guide with a sequence of tooltip and dialogs that navigate the user through different screens of your application. A guide engagement has the following components:
- Hotspot: A Hotspot is a colored circle which is used at the start of the guide to inform users about the presence of the guide. You can configure the hotspot beacon for a less invasive guide launch.
- Dialog: You can either use the Dialog engagement within a guide engagement, or independently.
- Tooltip: A tooltip is a small information box, attached to some UI component. Tooltip describes the UI component to which it is attached.
Surveys
Collect feedback about your product and measure customer satisfaction at a granular level using in-app survey engagements. Surveys provide you insights about customer opinions, help you assess product usage patterns, identify risks and enhance your product or services. PX supports the following types of survey engagements:
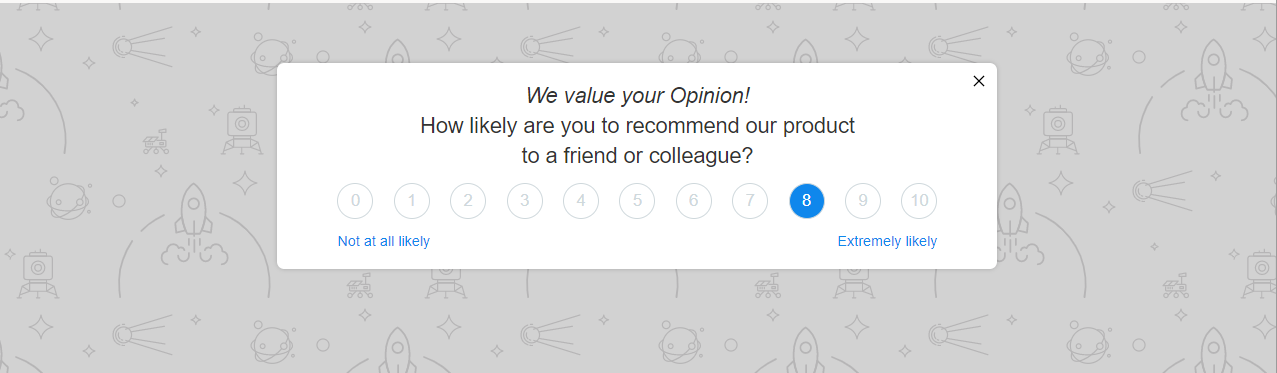
Net Promoter Score® (NPS®) Survey
Net Promoter Score® (NPS®) survey is a method to measure customer’s satisfaction with your product or service and predict business growth. The NPS® is calculated based on asking customers a question that predicts the probability of both retention and advocacy. Customers respond to the question by rating you on a scale of 0 to 10. This survey allows customers to provide open-ended comments or suggestions about your product or service.
For example, you could ask your customers: “How likely is it that you would recommend this product/company to a friend or colleague?” Based on their response, you can classify them into one of these categories: Detractors, Passives, and Promoters. For more information on how to build NPS® survey, refer to the Create NPS Survey Engagements article from the Additional Resources section.
Customer Effort Score (CES) Survey
Customer Effort Score (CES) survey helps you measure the ease with which customers use your product or services. This survey allows the customer to rate your product/service on a Likert Scale of 1 to 7. A score in the 1-3 range implies that the user faced difficulty in using your product or service while the score in the 4-7 range implies that the user found it simpler and easier while working with your product.
This survey allows customers to provide open-ended comments or suggestions about your product or service. For more information on how to build a CES survey, refer to the Use Customer Effort Score Survey (CES) article from the Additional Resources section.

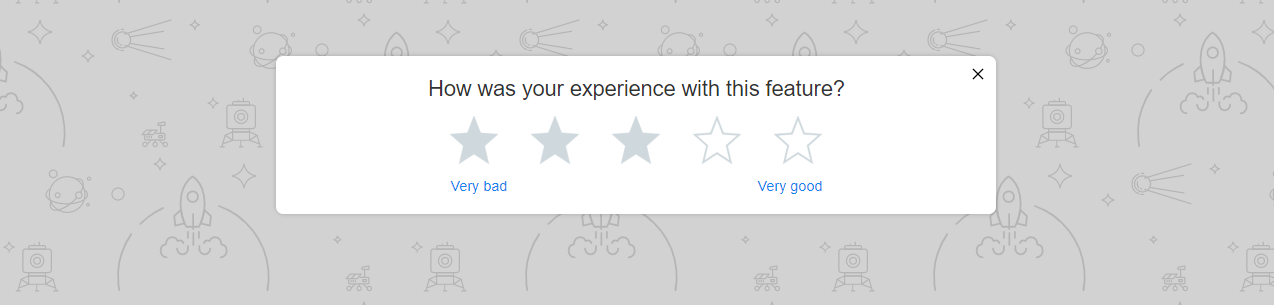
Rating Survey
With a Rating survey, you can create a survey where you ask customers to indicate how satisfied they are with your product or service. You can create single or multiple questions and provide the option to choose the answer from a rating scale. The rating scale helps you to measure the responses in a quantitative manner.
Note: The scale should be created in such a way that respondents can clearly differentiate each option and choose the relevant answer. For example, you could provide a 5-point scale with two positive answers, two negative answers, and one neutral answer:
- Strongly disagree
- Disagree
- Neutral
- Agree
- Strongly Agree
For more information on how to build a Rating survey, refer to the Use Rating Score Survey article from the Additional Resources section.
Boolean Survey
Boolean survey is a way to measure customer satisfaction over a new feature or one of the core features of your product. The survey consists of a single question with a thumb signal that allows the user to provide straightforward feedback.
For example, you could ask users a direct question like: “Did you like our new feature?”. A thumbs-up in reply indicates that the user is happy with your product while thumbs-down indicates that the user is not happy with your product. This survey also allows customers to provide open-ended comments or suggestions about your product or service.

For more information on how to build a Boolean survey, refer to the Use Boolean Survey article from the Additional Resources section.
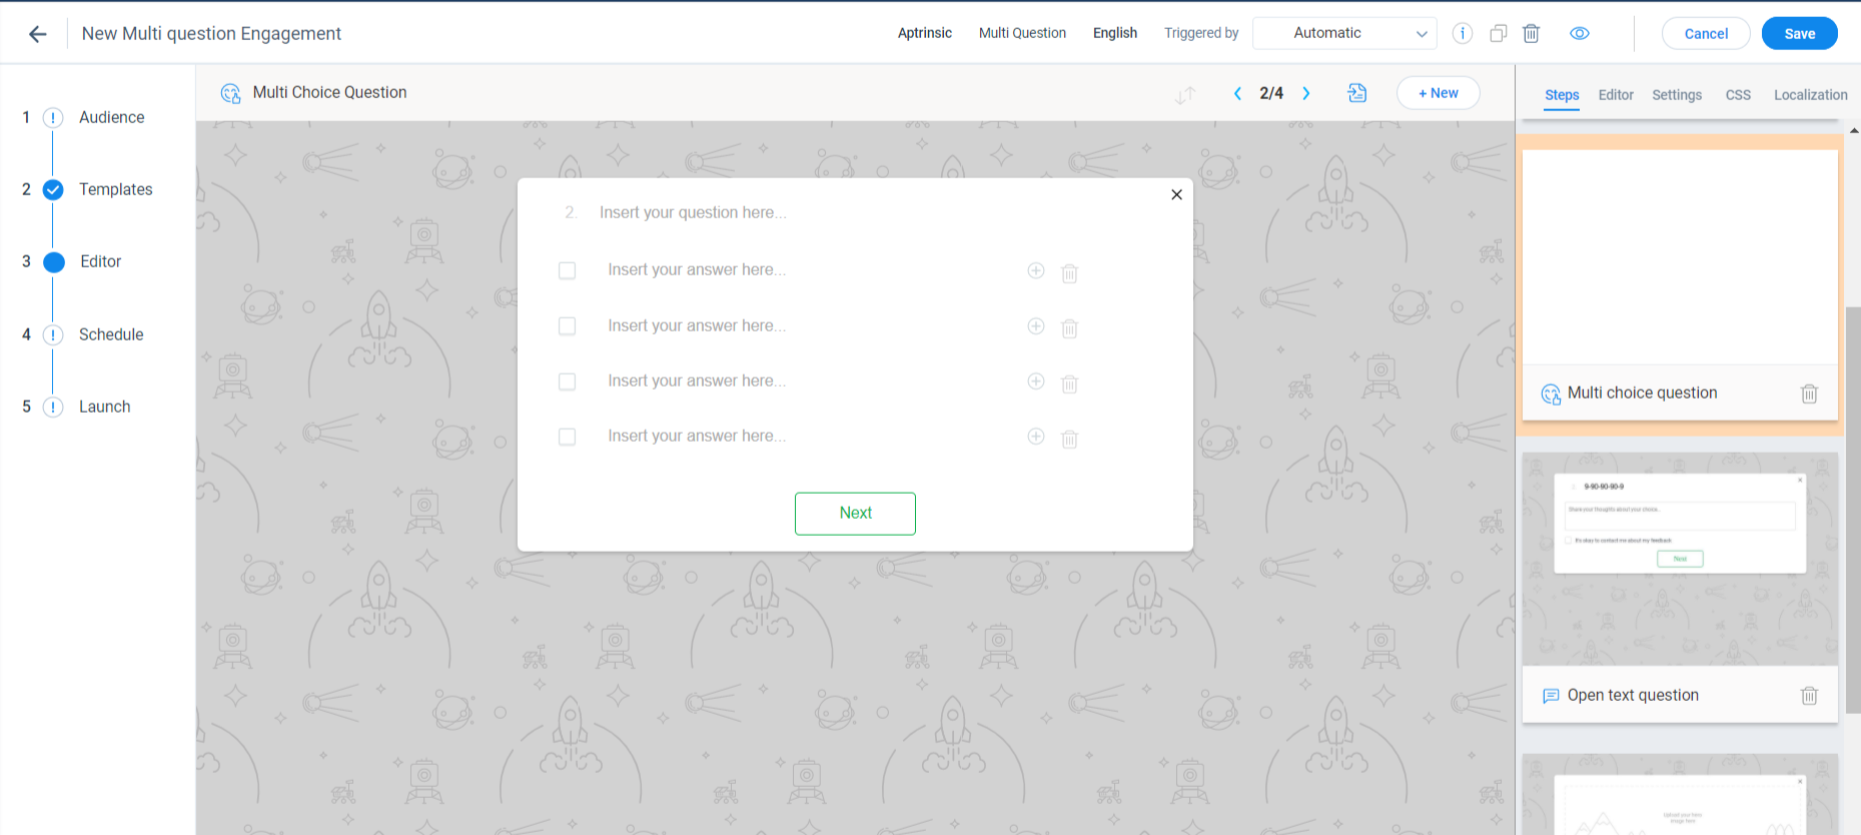
Multi-Question Survey
A Multi-Question survey allows you to ask questions wherein the respondent can choose one or more answers from the options you define. This makes it easier for your customers to complete the survey. You can also use a Dialog in this survey.
PX multi-question surveys support the following types of questions:
- Multi choice: This question allows you to provide a set of answers wherein the respondent can select one or multiple answers.
- Open Text: This question does not provide any options and the respondent must enter answers manually.
For more information on how to build a Multi Question survey, refer to the Use Multi Question Survey article from the Additional Resources section.
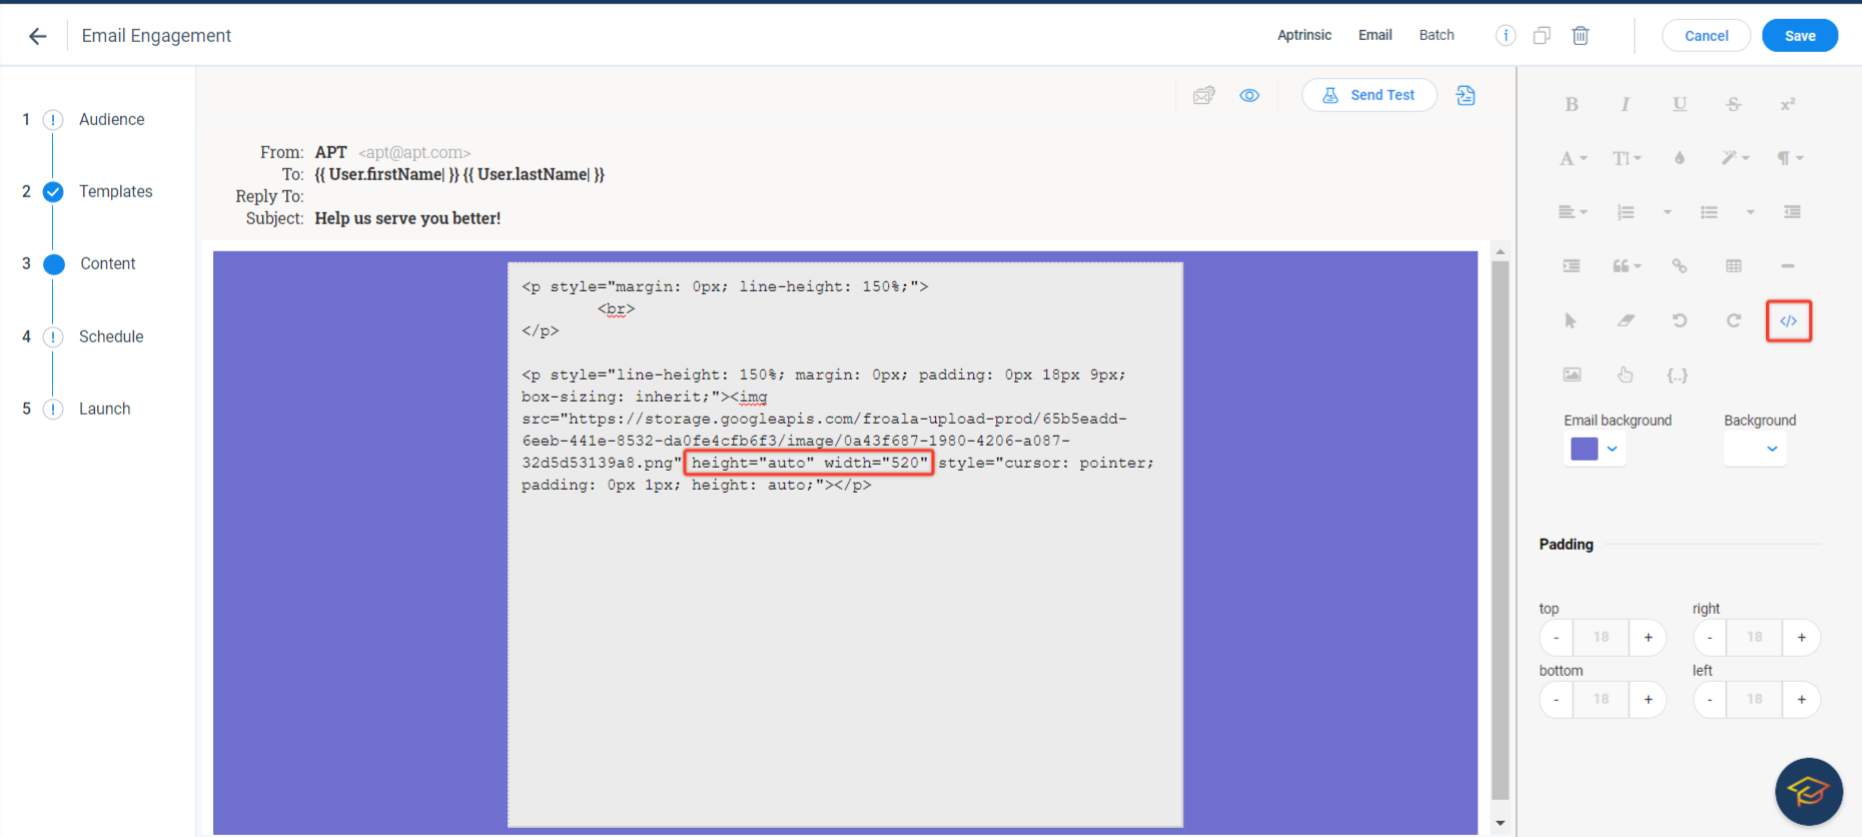
An email engagement helps you to interact with your subscribed contacts and measure how they engage with your brand or product. This also helps you with design and content decisions, and create effective campaigns.
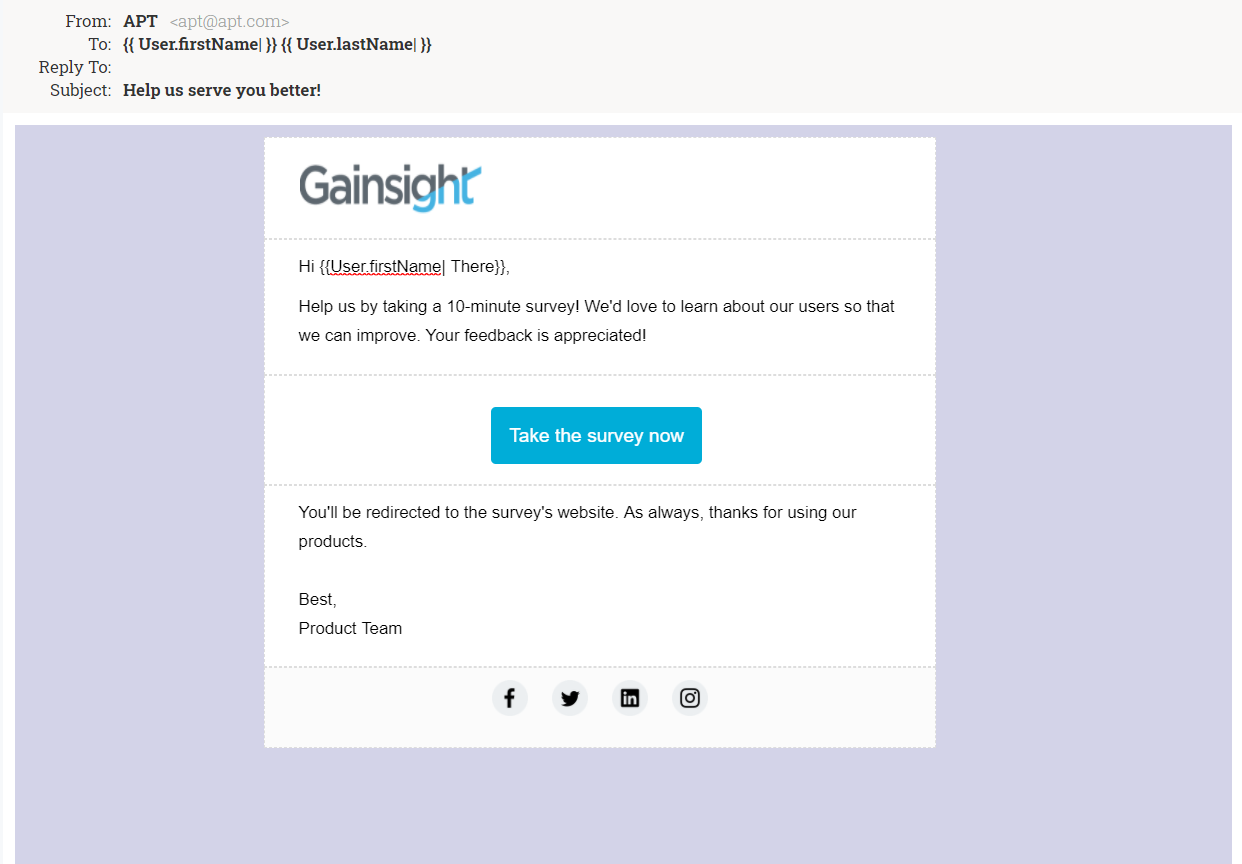
Gainsight recommends you to set height and width parameters for your email engagement to avoid resolution problems and provide a better experience. For example, you could set width="520" height="auto".
For more information on how to build an Email Engagement, refer to the Email Engagement for Releases article from the Additional Resources section.
Engagement Schedule
After you select the target audience and template for your engagement, define the duration (start & end date) and scope (session vs. user) for your engagement and launch it.
Scheduling for in-app engagements differs from email engagements. For example, an email engagement does not require the user to log in to your application and is driven by a predefined schedule whereas in-app engagement triggers only when the user logs in to the application. For more information on engagement scheduling, refer to the Engagement Scheduler article from the Additional Resources section.
Create New Engagement
This section explains the procedure to create an engagement.
To create an engagement:
-
From the left pane, click Engagements. Following screen is displayed with all the engagements in your subscription and their status.
.jpg?revision=1)
From this screen you can quickly see some interesting information for each of the engagements, including:
- Total engagement views
- The state of an engagement
- The type of engagement
- ...and more
- Click Create.
- Enter a name for your engagement.
- Select the environment. This is applicable only if you are using multiple environments.
- Select the type of target application: Web App or Mobile.
- Select the engagement you want to use. Here, select the Dialog option.
- Enter a description. This is an optional step.
- Click Create.
- Select the target audience based on user, account and/or behavioral rules in the Audience step on the left.
Note: Your audience is a collection of options that can be assembled in an AND or OR state.
.jpg?revision=1)
- In the Templates step, select a template for the engagement.
- Customize the look and feel using the Editor tab or you can enter the HTML/CSS script in the CSS tab in the right section.
- In the Schedule step, select the time zone, start and end dates for your engagement and set it as a recurring one using the Recurring check box.
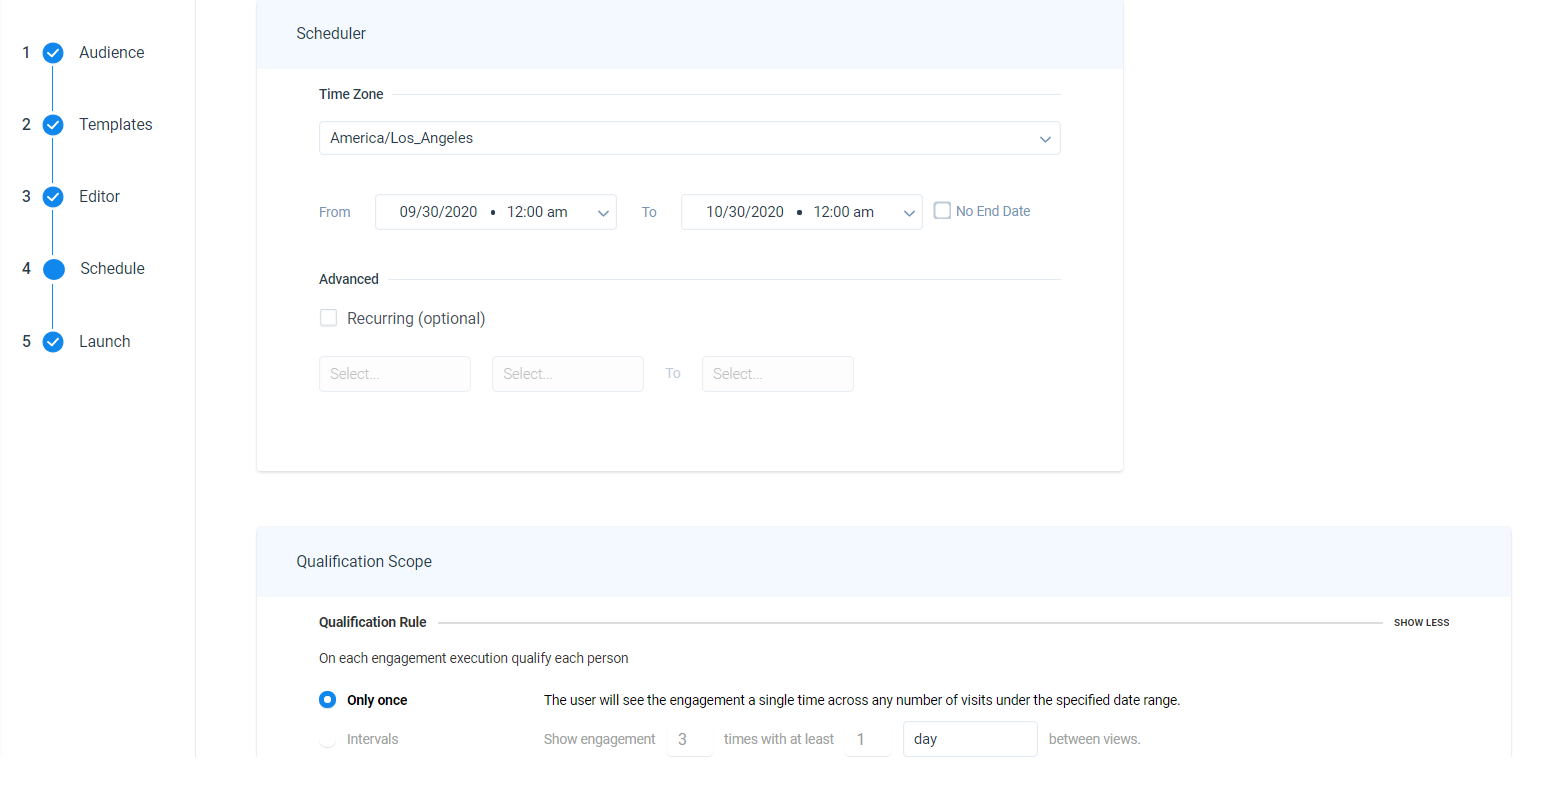
Note: Triggers are evaluated when users perform an action. For example, if you set a carousel / slider to trigger when a user logs in for the first time, it happens at event time, assuming the engagement is scheduled.
- Click Save.
- On the launch step, review the configurations and click Launch.
Note:
- To pause and edit an engagement, locate the engagement in the list view and select Pause in the Status column.
- To delete an engagement, pause the engagement and then click the Delete icon.
For the list of frequently asked questions, refer to In-App Engagements FAQs article from the Additional Resources section.
Create New Engagement Using an Existing Engagement
Gainsight PX allows you to create a new engagement by copying an existing one. This eliminates the need to create your engagement from scratch. With the engagement cloning feature, engagement copies can be created across different environments and products in your subscription. For more information on how to clone your engagement, refer to the Clone Your Engagements article from the Additional Resources section.
Additional Resources
| Net Promoter®, NPS®, NPS Prism®, and the NPS-related emoticons are registered trademarks of Bain & Company, Inc., NICE Systems, Inc., and Fred Reichheld. Net Promoter ScoreSM and Net Promoter SystemSM are service marks of Bain & Company, Inc., NICE Systems, Inc., and Fred Reichheld. |