Use Rating Survey
This article explains how to create the Rating survey engagement.
Overview
Rating survey is a great way to measure how satisfied the customers are with your product or service. Gainsight PX provides you the following rating survey types:
- Three-option Rating survey with smileys
- Five-option Rating survey with stars
Create Rating Survey
To create the Rating survey engagement:
- From the left pane, click Engagements.
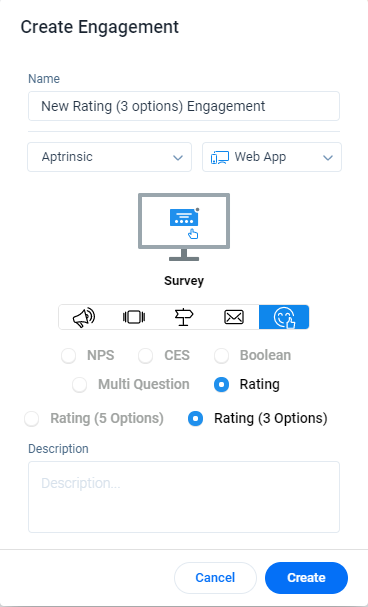
- Click Create.
- Enter the name for your engagement.
- Select the environment. This is applicable only if you are using multiple environments.
- Select the type of target application: Web App or Mobile.
- Click on the Survey icon.
- Select the Rating radio button.
- Select the Rating (5 Options) or Rating (3 Options) radio button as required.
- Rating (5 Options)- Launch the rating survey with 5 star options.
- Rating (3 Options)- Launch the rating survey with three smiley face options - Positive, Neutral, and Negative.
Notes:
- These smileys correspond to 1, 3, and 5 scores respectively of the existing 5-stars rating survey engagement.
- The engagement analytics (Survey Performance) report displays the smiley rating survey results comparing the 5-stars rating survey scores mentioned.
- Enter the description. This is an optional step.
- Click Create.
Do the following to configure and launch your rating survey engagement:
Set The Audience
The audience represents the set of behaviors you want to use in order to trigger the right experience. Gainsight PX allows you to use basic audience rule such as user signup date or more advanced rules that represent relevant adoption behaviors by using account attributes sourced by your CRM and feature usage rules based on the mapped features and modules.
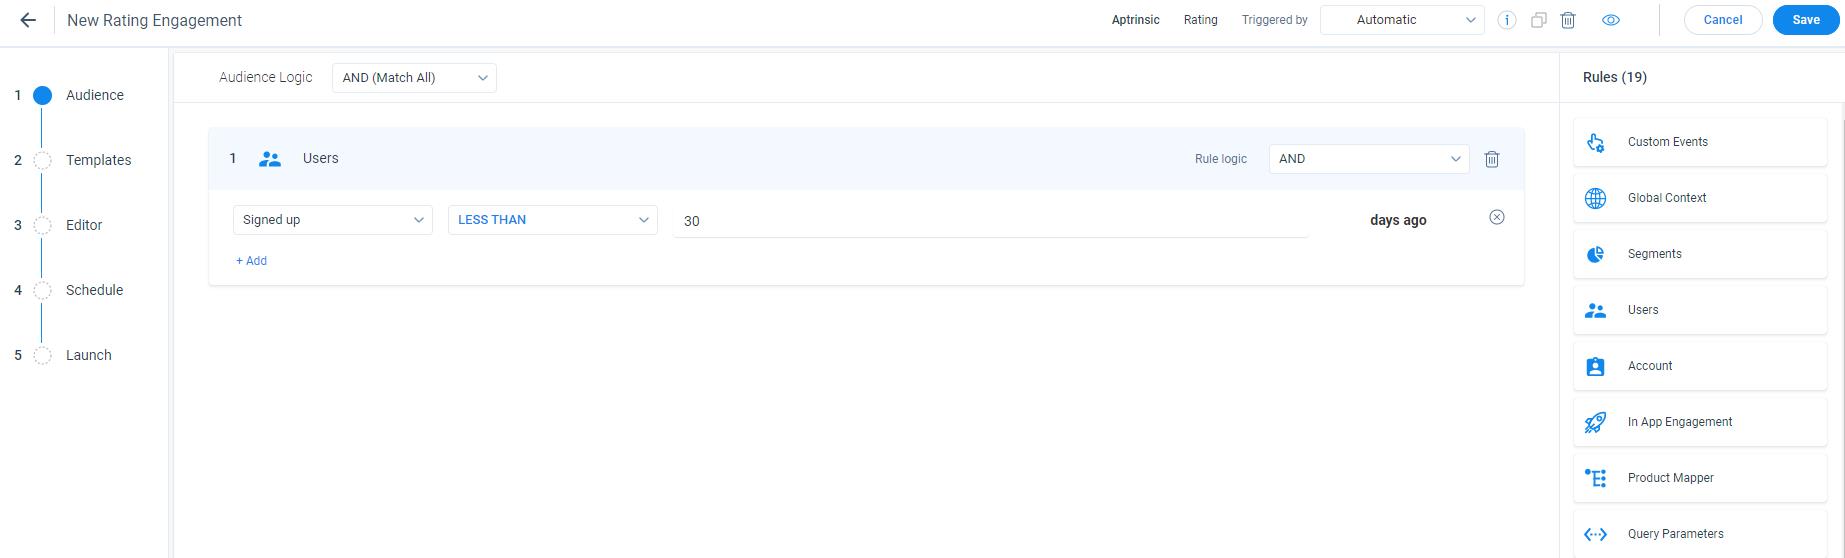
Simple Rules To Filter Audience
Set the criteria with a single rule to filter the audience based on combination of the selected rule and attribute. Following image shows the rule with simple attribute that targets audience who signed up to your product in the last 30 days.
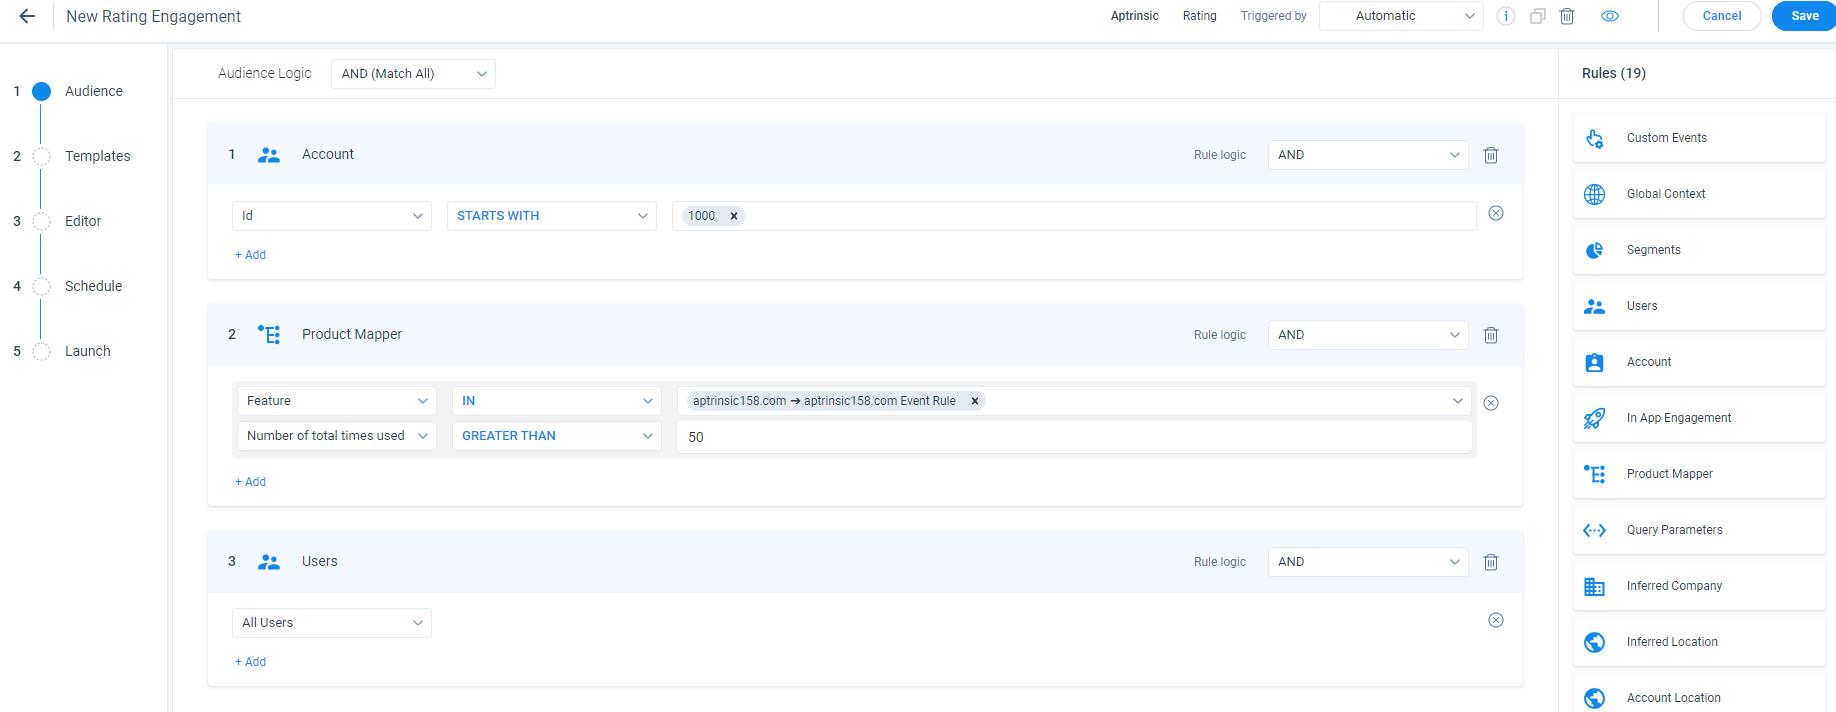
Advanced Rules To Filter Audience
You can select multiple rules to filter and target specific set of your audience for your engagement. Following image shows you the combination of rules which target all users whose Account ID starts with '1000' and have used the feature (example 'Events Rule') for more than 50 times.
Choose A Template
PX offers a library of engagement templates. Choose the template of your choice from the default or existing templates. You can also create your own and reuse these templates.
To use the default or existing template:
-
Navigate to the Templates section.
-
Hover on the template and click Preview. Templates are categorized into the following tabs:
- Saved Templates: Displays the list of your saved templates.
- Default Templates: Displays the list of default templates, provided by PX.
- Recently Used: Displays the list of your recently used templates.
- Click Use. You are navigated to the Editor section.
Design Your Engagement
Using the WYSIWYG editor, you can configure the content and look and feel like background color, text, border color and position of your engagement.
A Rating survey has the following steps:
- Rating: First step of your engagement shown to your audience. This is where customers indicate how satisfied they are with your product or service.
- Feedback / Comment: This step captures your customer thoughts and suggestions about the product or service.
- Thank You: Use this step to offer next steps or provide any perks. This is an optional step, and is turned OFF by default.
For more information on the Editor section of your engagement, refer to the Anatomy of Engagements article from the Additional Resources section.
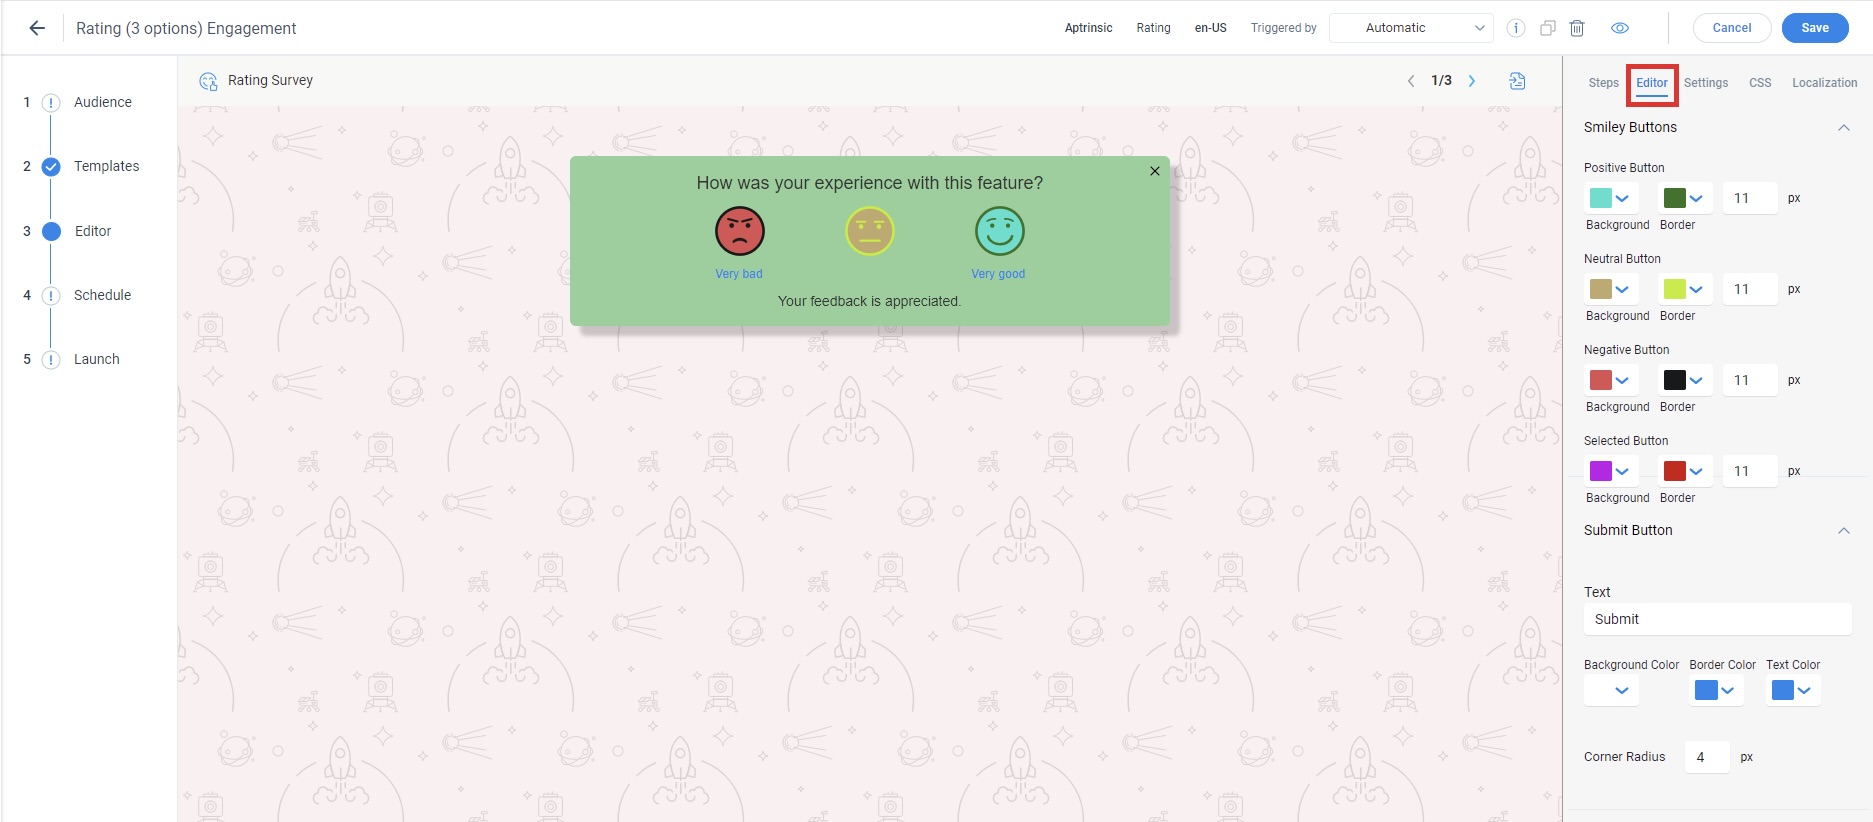
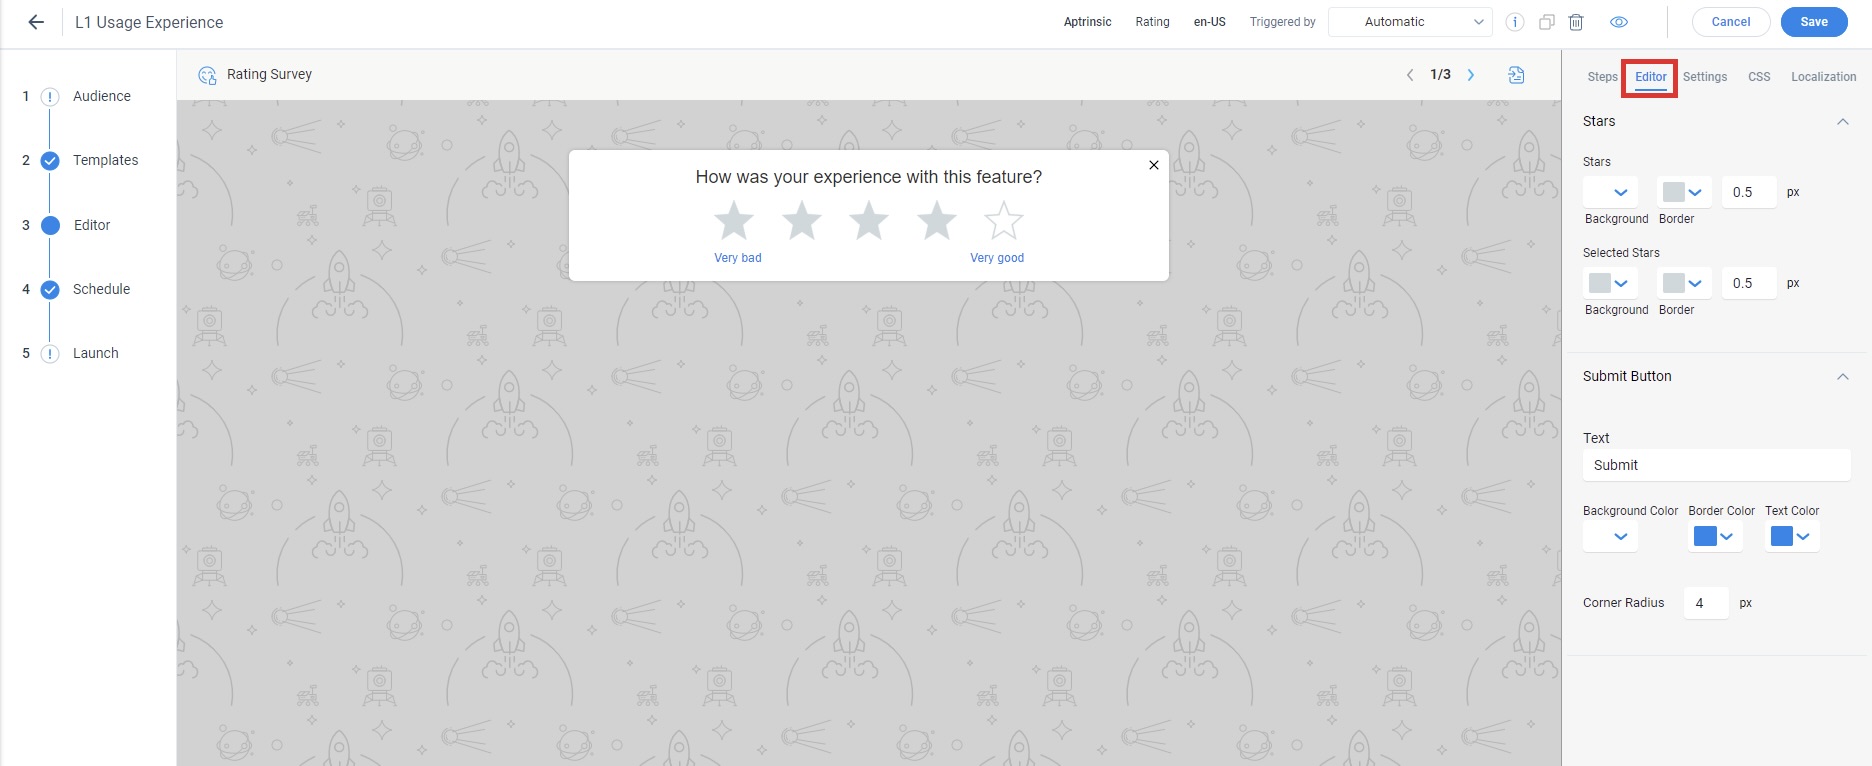
Step Settings
Use the Editor tab to customize the look and feel of the components like smiley buttons, stars, buttons, placeholder text and more for the survey steps. Some settings are applicable only to the step you selected on the Steps tab.
- Three-Option Rating Survey
- Five-Option Rating Survey
Engagement Settings
Configure additional settings for your survey engagement like width and height, background color, footer, overlay and more. These settings are applicable to all the steps.
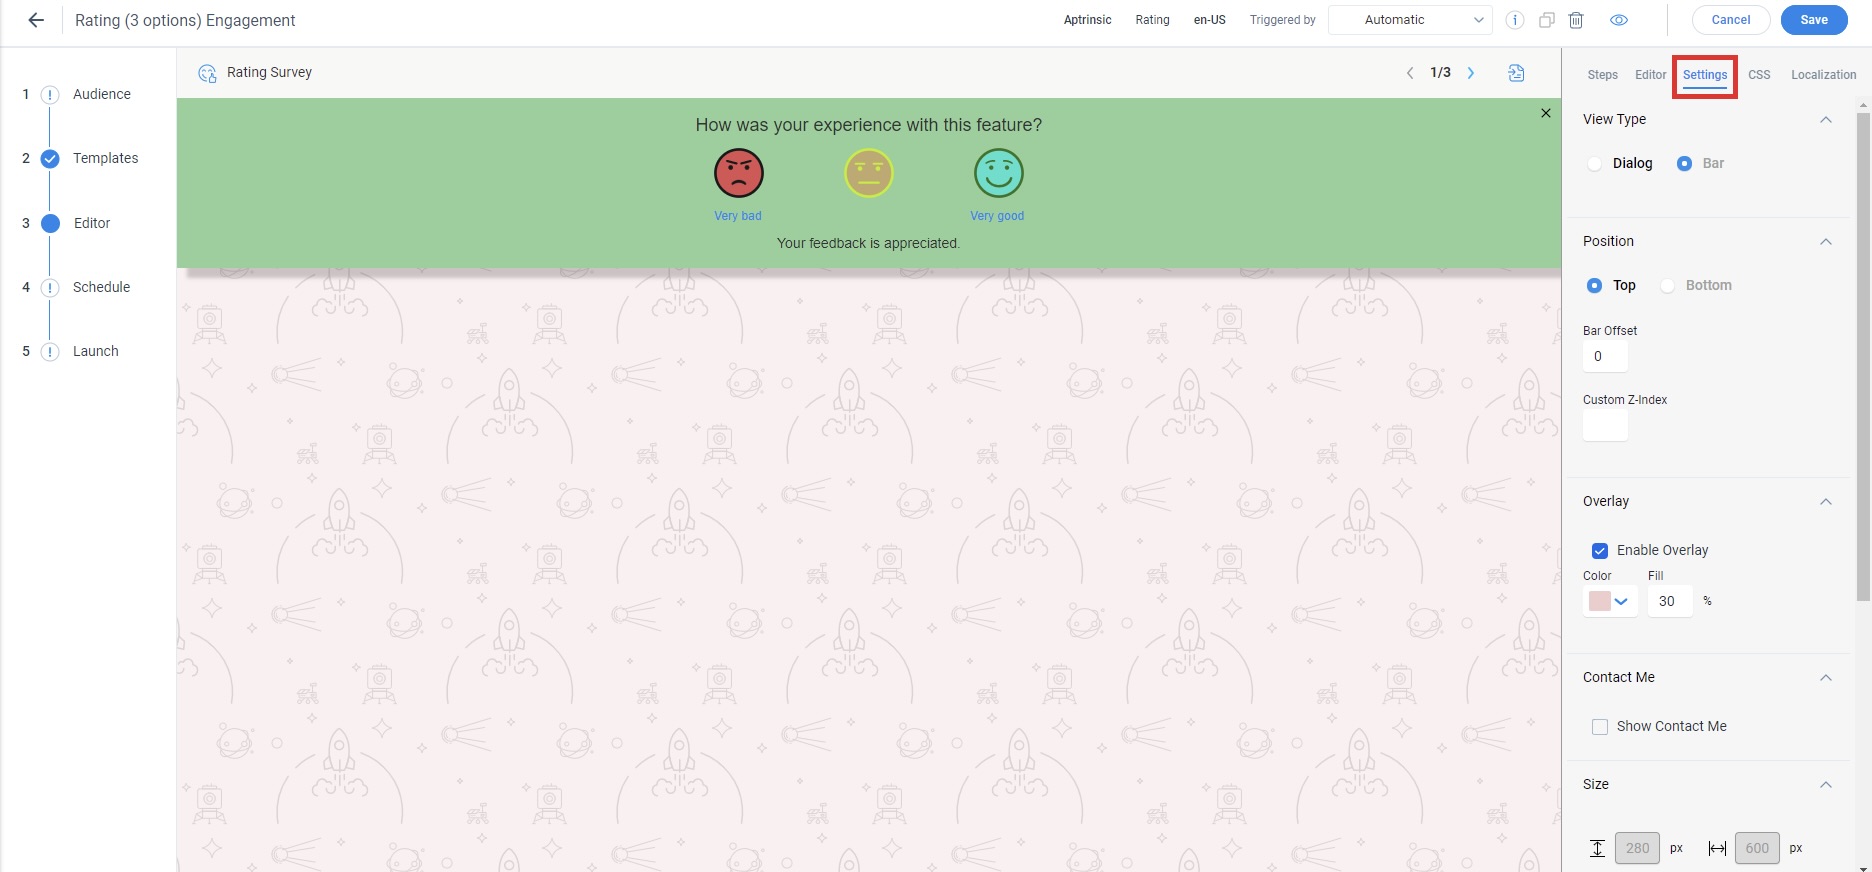
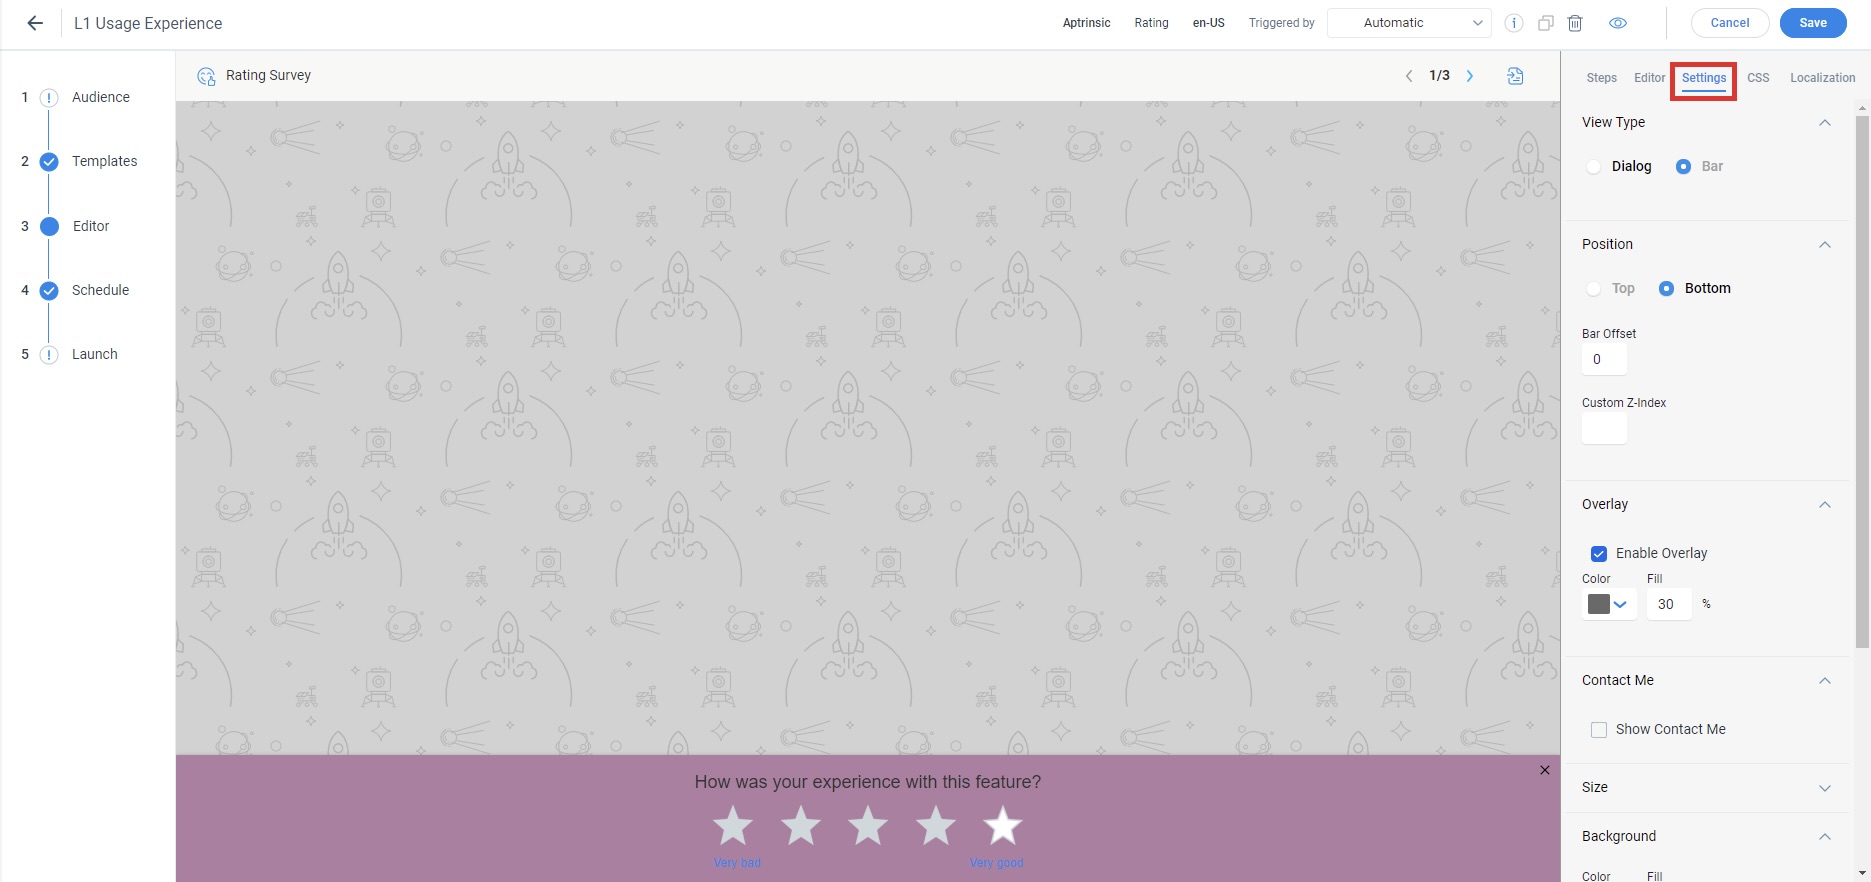
Use Bar Setting
Show your survey engagement as a banner and make it less intrusive to the user using the View Type section on the Settings tab. You can select the Position for the bar view of the engagement.
- Three-Option Rating Survey
- Five-Option Rating Survey
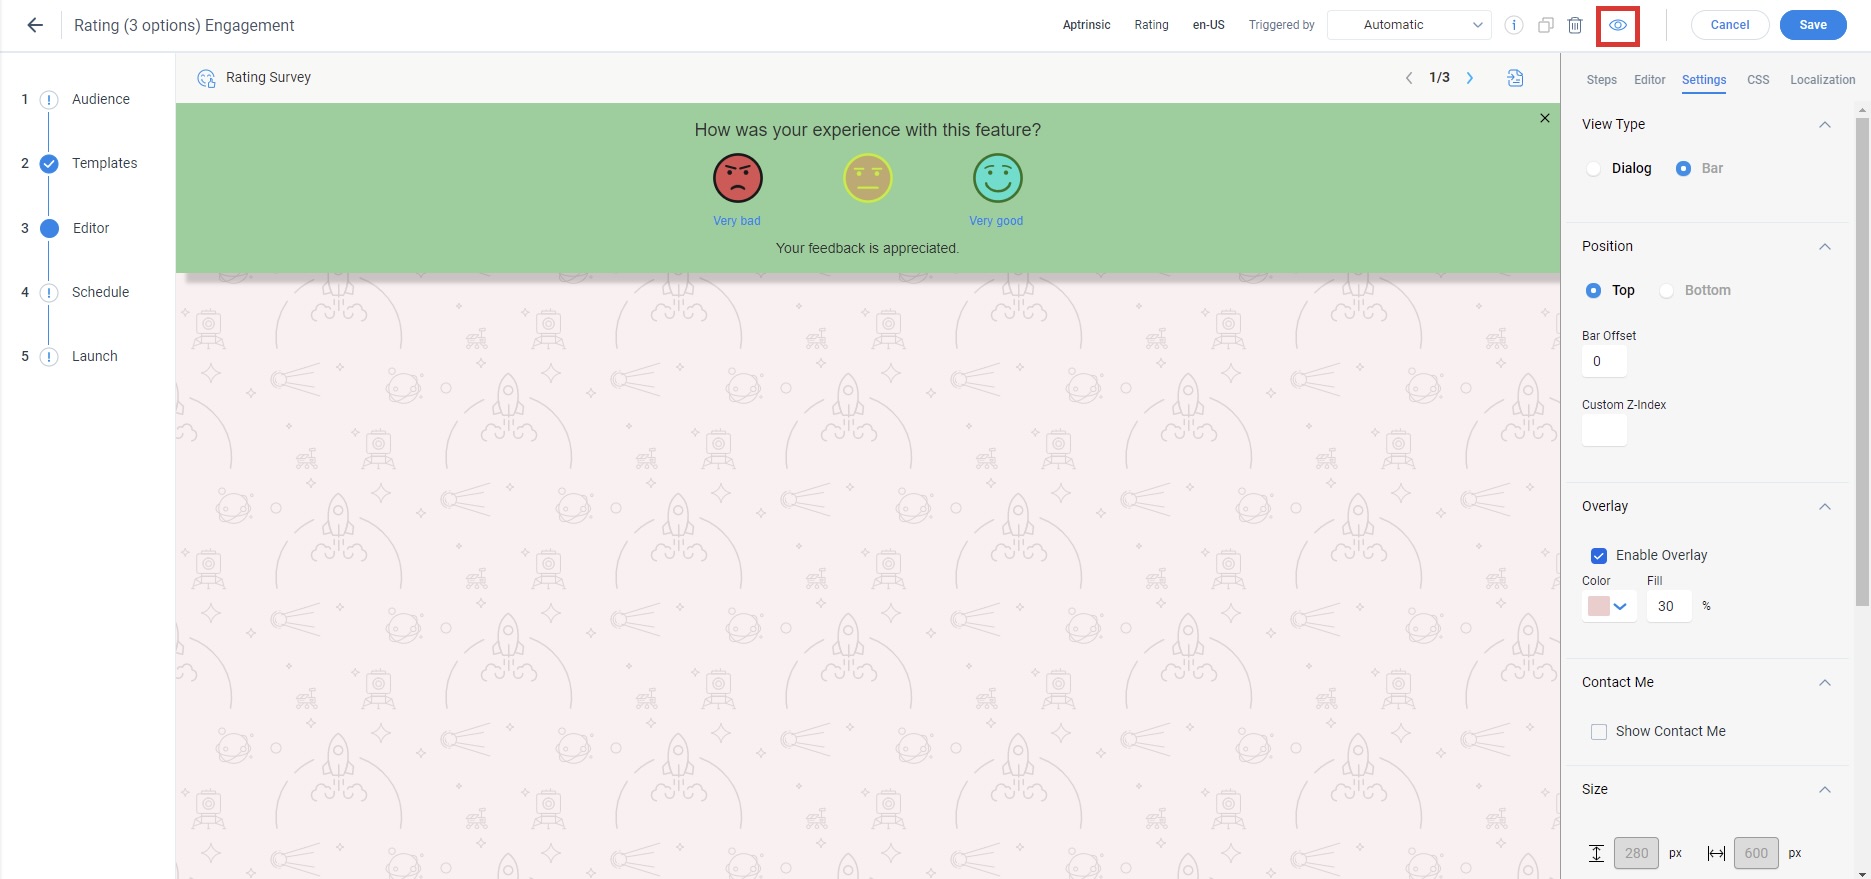
Preview
Use the 'eye' icon to review your engagement on the target application. Ensure the appropriate tag is installed.
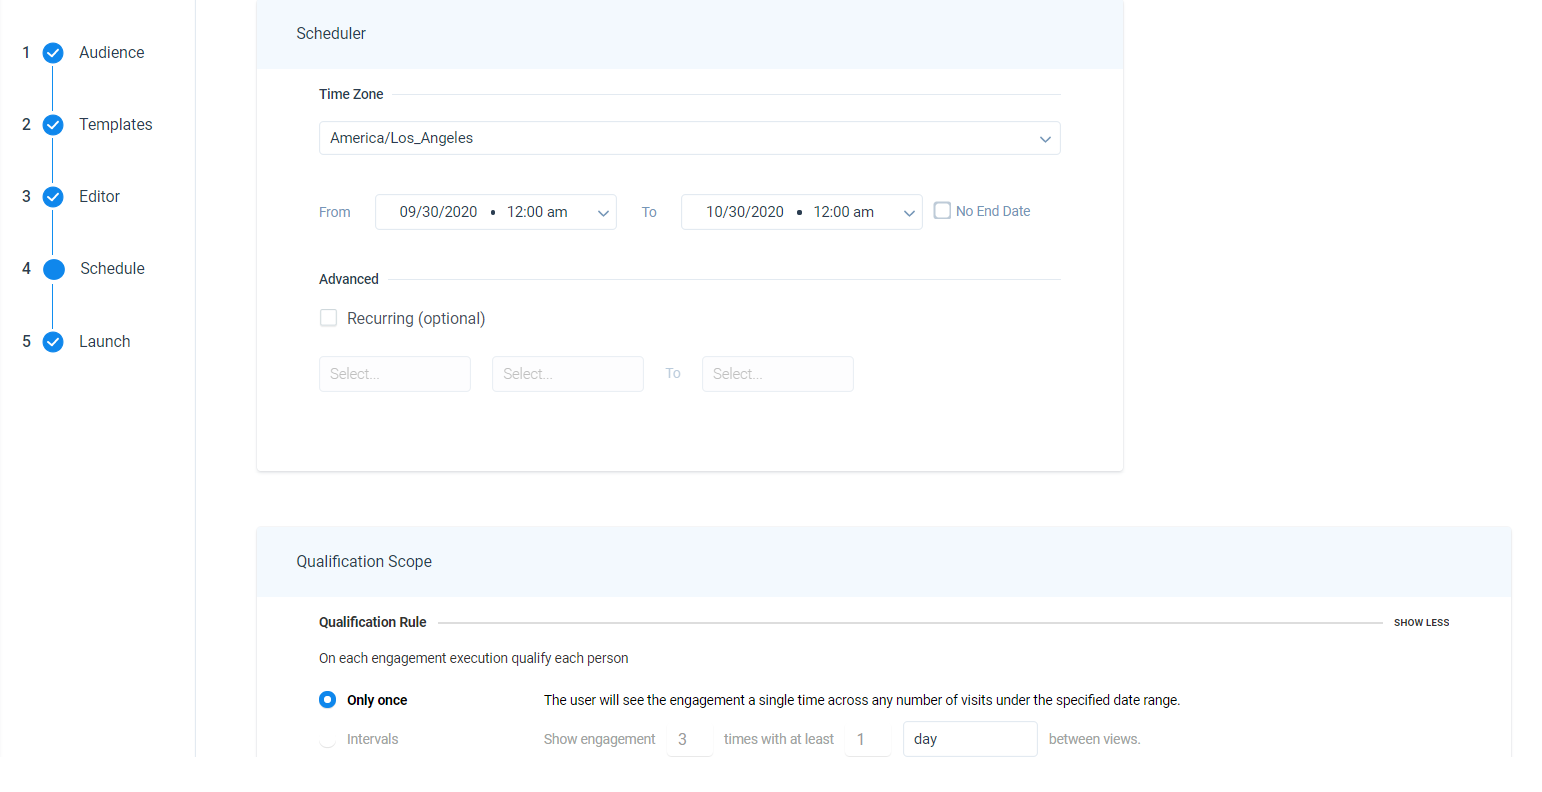
Schedule
The dynamic scheduler controls when the engagement should be active and the threshold of how many times it is shown to the users. You can specify the number of times and additional intervals in which you would like to automatically re-engage your users. For more information on the In-App Engagement Scheduler, refer to the Engagement Scheduler article from the Additional Resources section.
Launch
This section gives you an overview of the configurations for your engagement and validates them automatically. Click Launch to launch the engagement.
To learn about all frequently asked questions, refer to the Surveys FAQs article from the Additional Resources section.
Additional Resources
| Anatomy of Engagements |
| Engagement Scheduler |
| Surveys FAQs |