Gainsight NXT Release Notes 6.13 March 2020
| Note: For information about new functionality or fixes delivered in patch releases of version 6.12, refer to the Gainsight NXT Patch Release Notes: Version 6.12.X series article. |
Short on time? Watch this 5-min. video overview to see what's new in the 6.13 release!
Gainsight CS Release Notes Version 6.13 contains the following subsections:
- Announcements section describes important changes to the application that are implemented now or will be in the near future.
- Enhancements (per module) describe improvements made in the existing product capabilities.
- Issues Addressed contains issues which were reported by customers and are fixed in this release.
![]() : This symbol indicates that an enhancement originated as a customer suggestion on the Gainsight Community.
: This symbol indicates that an enhancement originated as a customer suggestion on the Gainsight Community.
Announcements
Browser Compatibility for Gainsight
Background
Gainsight Audience is broadly classified into the following categories:
- Gainsight Users: These are registered authenticated users who can login to Gainsight NXT and perform various actions.
- Non-Gainsight Users: These users are not the registered authenticated users which means these users cannot login to Gainsight. However, they are shared with some link through which they can view some of the Gainsight pages and take a few actions. For example, Survey Participant end user page (The Survey page where participants can submit the response), External sharing end user page.
Upcoming Changes
At present, the end user pages accessed by Non-Gainsight users with an older version of Internet Explorer (older than IE v11), are displayed a warning message. Although the warning is displayed, end users may still be able to perform the intended actions.
After May 2020, Non-Gainsight users who access pages like the survey response page will not be able to use them with Internet Explorer browser versions below 11. These pages can be accessed on the latest stable version of Internet Explorer v11, Microsoft Edge, Google Chrome, Mozilla Firefox, or Apple Safari.
Journey Orchestrator
 Archive Email Logs and Raw Events Data
With this release, Gainsight will be archiving data for Email logs and Email Raw Events. Only the data from the last one year is stored for logs and the last six months data is stored for raw events. The remaining data will be archived into the TechOps S3 bucket, customers will have to contact the TechOps team to retrieve old data.
Enhancements
User Management
User Management is an administration feature which allows a Gainsight Admin to add users to the Gainsight User object and grant Sally access to the required users. Admins can perform these actions from Administration > Operations > User Management.
Set Login Preference to Gainsight NXT to see Gainsight Notifications
Gainsight NXT in Salesforce CRMContent in this section supports Gainsight NXT accessing through Salesforce Login. To learn more about Gainsight NXT in Salesforce, click here.
Admins can now set login preference to Gainsight NXT to see Gainsight Notifications received through an Email. This is applicable only to the Gainsight NXT customers connected through Salesforce Connector. Gainsight NXT can be accessed either through Direct Gainsight Login or Salesforce Login. Earlier, the access preference to Gainsight for Email Notifications was not stable and is well defined now. Below are the two types of login preferences for Email notifications:
- Enable preferred Notification-NXT: When users click any hyperlink in the email notification, the system will redirect them to access Gainsight NXT through Direct Gainsight Login, where users need to enter their Gainsight login credentials to access the notification details inside the Gainsight application.
- Enable preferred Notification-SFDC: When users click any hyperlink in the email notification, the system will redirect them to access Gainsight NXT through Salesforce Login, where users need to enter their Salesforce login credentials to access the notification details inside the Gainsight application.
Gainsight email notifications notify users that a new CTA was assigned to them, they were mentioned in an Activity, a Success Plan was assigned to them, they received Survey Responses, etc.
Also, users can now set their preference to access Gainsight NXT for email notifications from the My Settings > Notifications > Channel Subscriptions page.
Admin Settings for Login Preference to Gainsight NXT to see Notifications
To set the login preference to Gainsight NXT to see Gainsight notifications received through Email:
- Navigate to Administration > Operations > User Management.
- Select Salesforce from the Users dropdown menu and select the required Salesforce Connection.
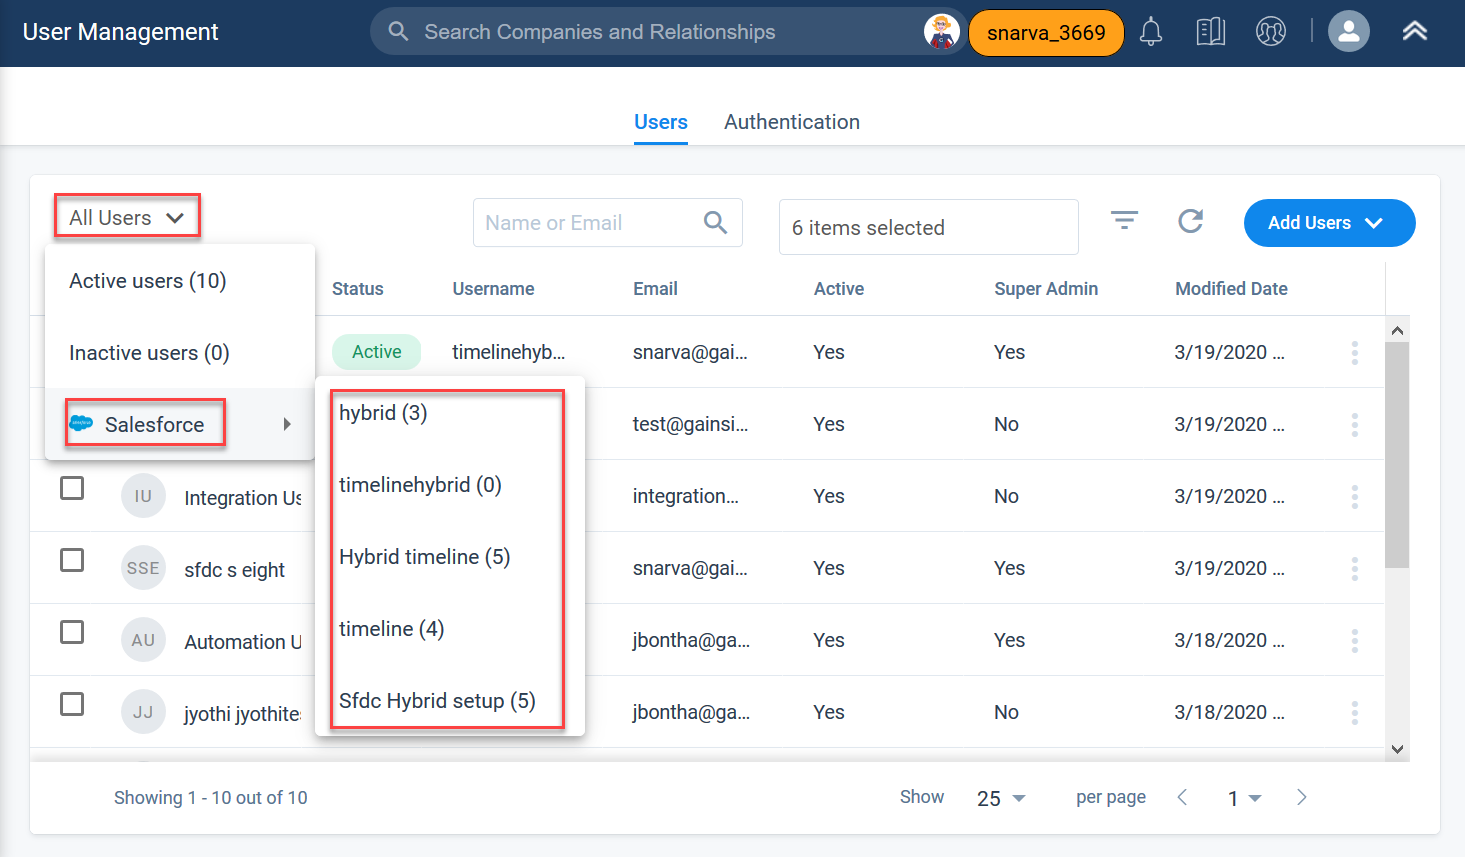
- Select the required users. You can see that the Ellipsis menu is enabled.
- Select one of the following options from the Ellipsis menu:
-
Enable preferred Notification-NXT
-
Enable preferred Notification-SFDC
-

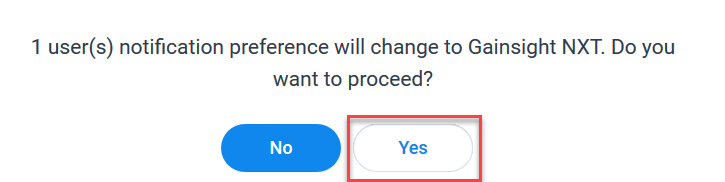
- Click Yes to confirm the notification preference.
User Settings for Login Preference to Gainsight NXT to see Notifications
To set the login preference to Gainsight NXT to see Gainsight notifications received through Email:
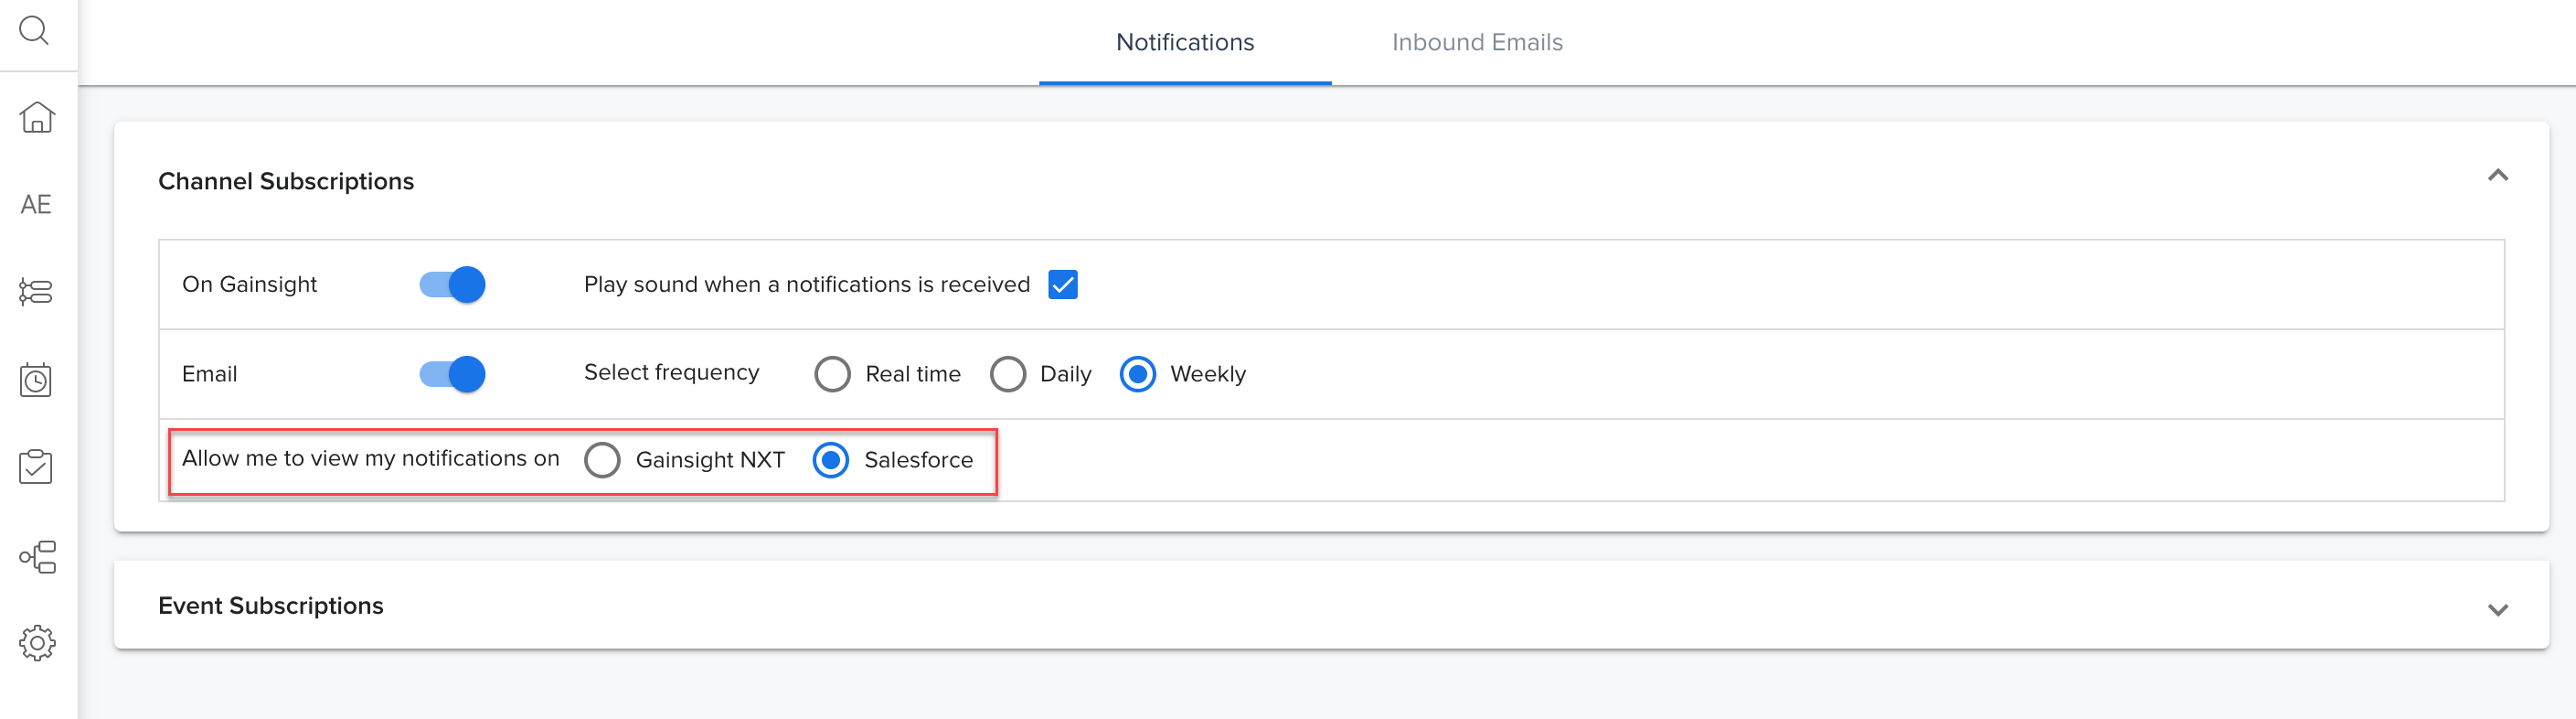
- Navigate to My Profile > My Settings > Notifications > Channel Subscriptions.
-
Select either Gainsight NXT or Salesforce in the ‘Allow me to view my notifications on’ field.
-
Click SAVE.
The user setting is visible only in Gainsight NXT accessed through Salesforce Login. This option is not visible in Gainsight NXT accessed through Direct Gainsight Login, considering the user Notification preference is NXT.
For more information on the User Notification settings, refer to the Setup User Notifications article.
360
The Customer 360 (C360) is a central hub of your customer’s business information in Gainsight. It synthesizes business data from various sources and provides you with a holistic view of your customers. This minimizes the preparation time for your customer meetings.
 360 Field Dependencies Visible on the Data Management Page
Previously, it was possible to delete fields from an object, even if that field was referenced in C360 or R360 layouts. This caused layouts dependent on the field to fail after the field was deleted. Now, 360 layout field dependencies are tracked and visible for each object from the Data Management page, and fields with layout dependencies can not be deleted until the dependency is removed.
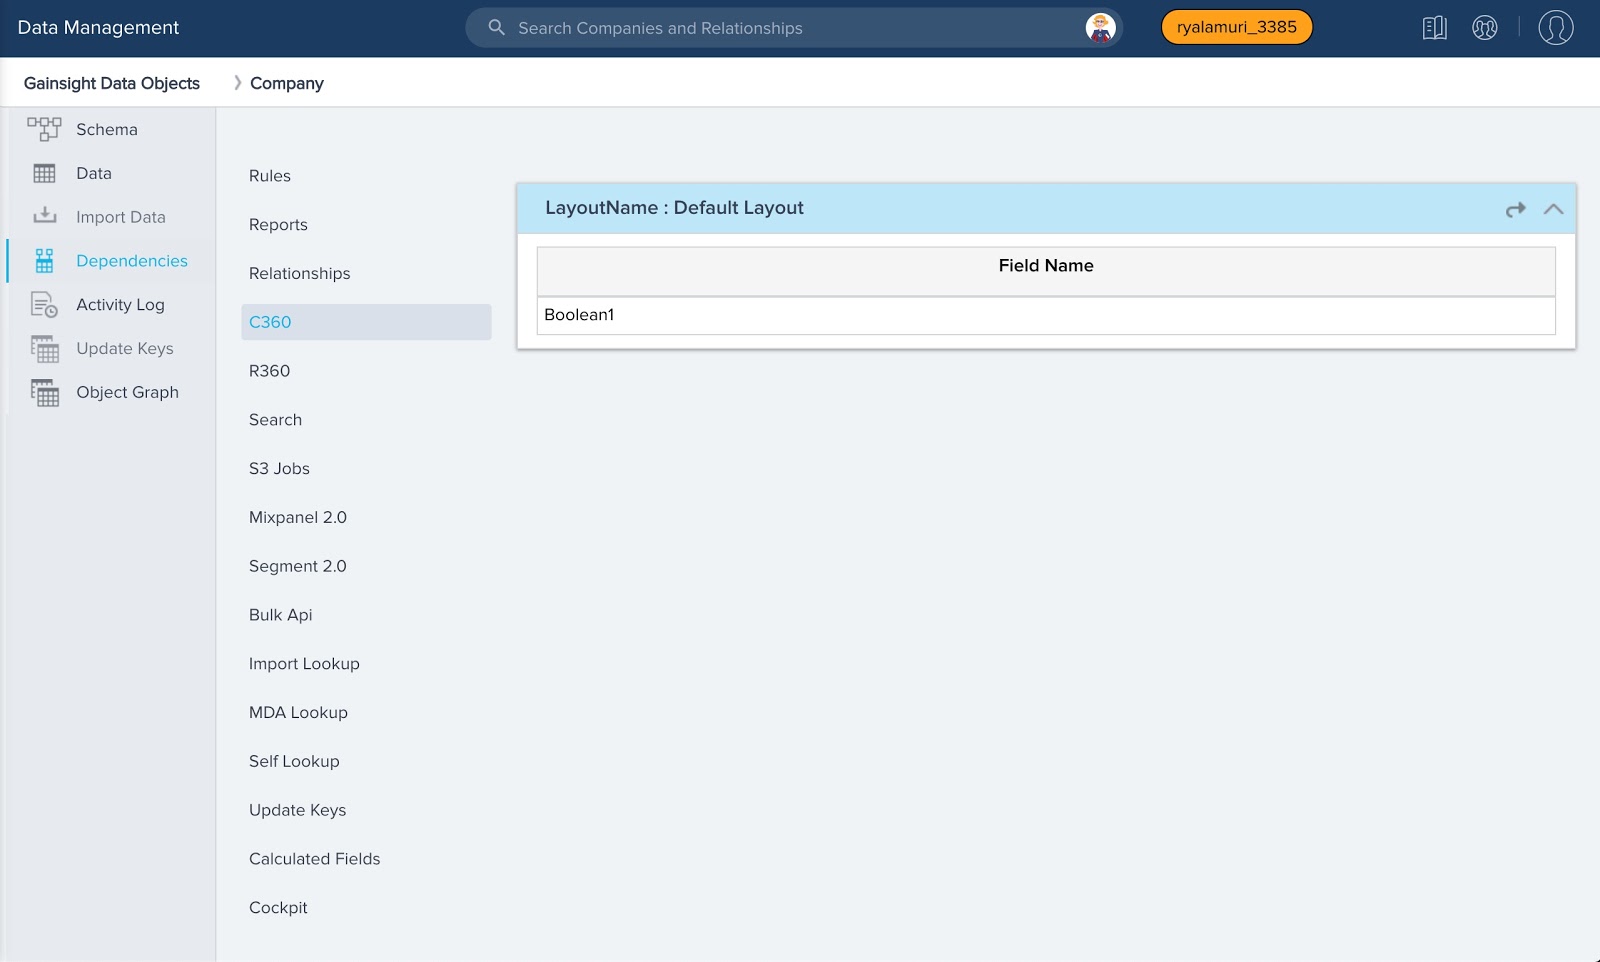
From the Dependencies tab, you can click the arrow icon to open each item in a new tab and remove fields from the dependent item.
Deleting Fields with Dependencies
When users attempt to delete fields from the Object Data > Schema page, the system will first check to see if the field has dependencies. If it does, the field will not be deleted in order to prevent the item (Ex: C360 Layout) from failing.
If a user does attempt to delete a field with dependencies, the following message is displayed: “The field cannot be deleted as it has dependencies. Please check the dependencies tab for more information.”
The field can be successfully deleted after it is removed from each dependent item. For more information on managing dependencies, refer to Gainsight Data Management.
Format of Number and Currency Fields based on User Locale
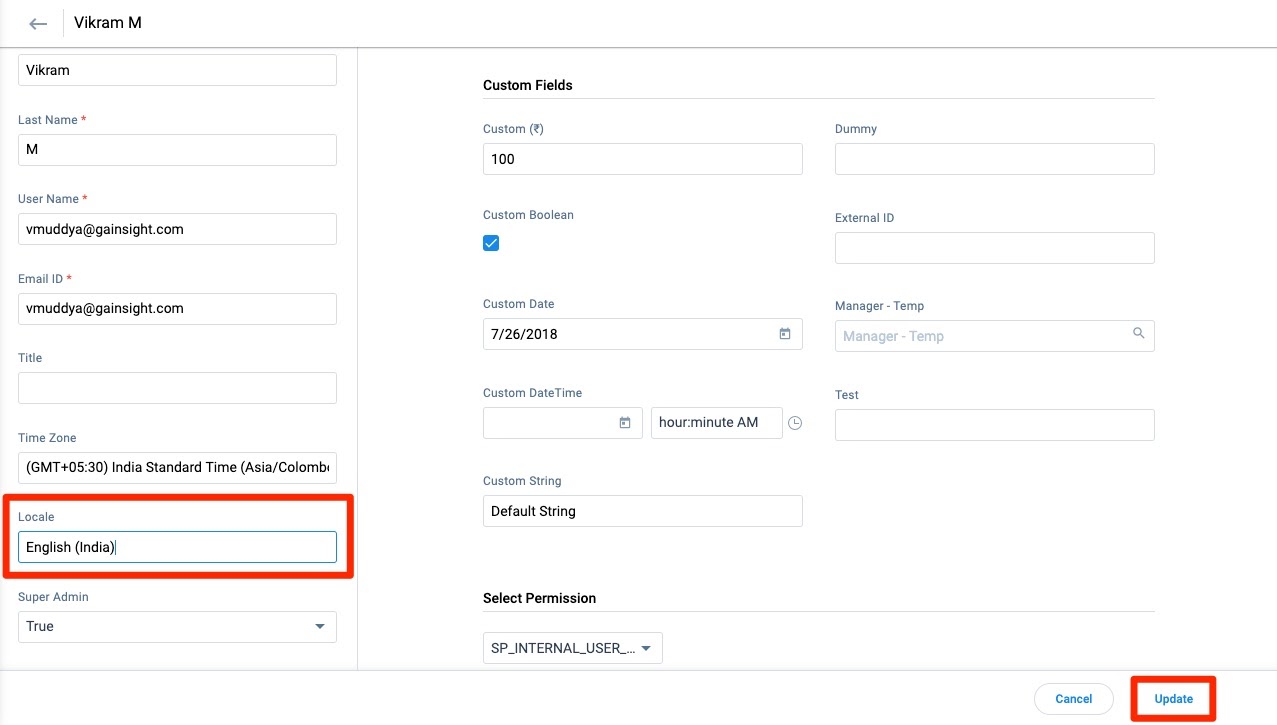
Admins have the ability to configure their users’ preferred locale from the User Management page, but previously this configuration only changed part of the user experience. This required individual users to work with data formatted based on their global org settings, regardless of their personal preferences, or work requirements. With this release, the display format for all number and currency fields on 360 pages will adhere to the user’s preferred locale, allowing for a more personalized user experience.
To configure a user’s preferred locale, take the following steps:
- Navigate to Administration > Operations > User Management.
- Click the kebab menu icon for the required user and select Edit User. This opens the user’s profile.
- Click the Locale field and select the user’s preferred locale.
- Click Update.
Notes:
- After a user’s Locale setting is updated, they will need to log out and log back in to see the changes reflected in their org.
- If an Admin does not configure a user's locale under the User Management page, data in the user's org will be formatted based on the tenant level locale setting by default. Admins can configure this setting under Application Settings. For more information, refer to Application Settings.
Configure Lookup Fields for Widgets
Previously, admins had no ability to configure the lookup fields used for 360 widgets. This limited admins if they wanted to set up a widget based on an object with multiple fields looking up to the company object. Previously, the system had no way of knowing which field to use for the lookup, but now admins can select the field they want to use during widget configuration. For more information on configuring widgets, refer to Configure 360 Summary.
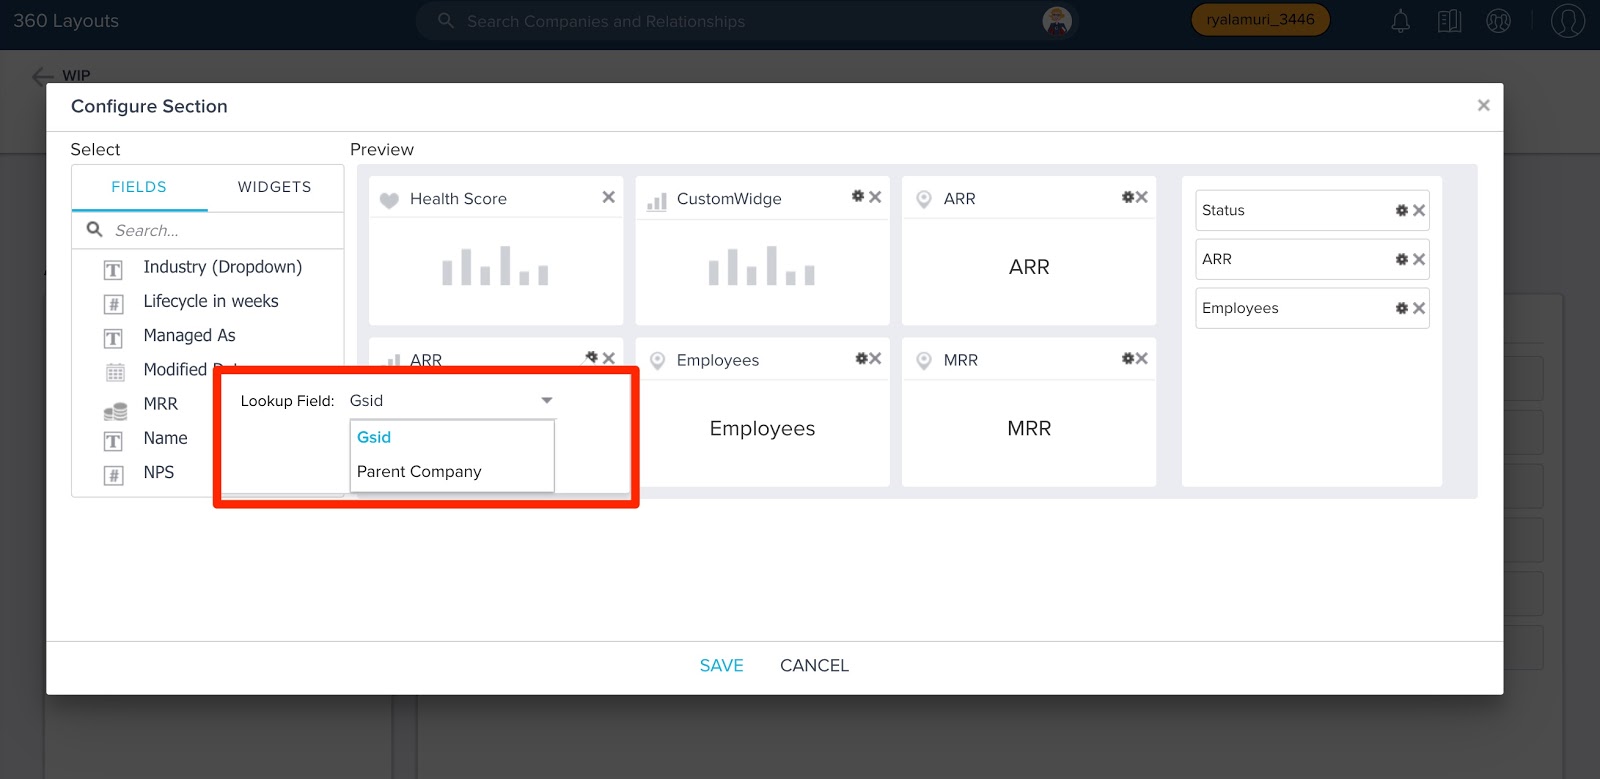
Note: For Gainsight NXT users accessing through Salesforce Login, this configuration option will only be available for Gainsight objects and fields.
Journey Orchestrator
Journey Orchestrator is your center for automated communications. It leverages the power of automation to make your job easier as you communicate with customers at scale. Gainsight enables customer success teams to launch automated emails based on customer attributes such as health score, product usage, survey results and lifecycle stage. Through automation, you can scale customer touches and engage with a growing list of customers often and effectively.
Use of Calculated Fields in Email Steps
When a participant enters a Program, the receiver and sender for an email might change in between, in the following scenarios:
- When CSM transition happens and a new CSM is assigned to the customer.
- When the Admin of the Company is changed.
- When the Sponsor of the Company is changed.
In all the above scenarios, since Gainsight previously did not allow you to add any dynamic data, such as Calculated Fields in the email addresses in an email step of a Program, the sender and receiver were incorrect if the CSM/User changes, which made the email content appear out of date. This has been troublesome and tedious for Admins to correct or debug.
To solve this issue, Gainsight now supports the use of Calculated fields in the Email Address fields. This allows the system to pick up the correct receiver and sender at the time of sending the email.
Business Use Case
As an Admin, I want to ensure that the email is sent and received by the correct person in order to make the communication more reliable for long-running Programs.
By default, all the email type Calculated fields created in the Participants Configuration page are displayed in the To, Reply-To, and From Email fields in an Email Step of a Program.
To use Calculated fields in the Email Steps:
- Navigate to Journey Orchestrator > Programs.
- Click to open an existing program, or click the +CREATE to create a new program. For more information on creating a new program, refer to Program List View and Create New Program.
- On the program model configuration screen, click the green Participants icon to open the Participant Configuration page.
- Expand the Calculated Fields section on the Participant Configuration page.
- Click +CALCULATED FIELD to open the Calculated Field page.
- Configure the new Calculated Field. Refer to Configuring Calculated Fields for more information on this step.
- Click SAVE to save the calculated field configuration.
- Click BACK TO MODEL and click the Send Email step.
- In the To or Reply-To or From Email fields, click the dropdown option to view the created calculated fields.
- Select the required calculated field in the To, Reply-To, and From Email fields.
- Click SAVE.
A new option is added in the Send Email page, called To Name field. By default, the recipient's full name is displayed, but Admins can modify it as per their requirements.
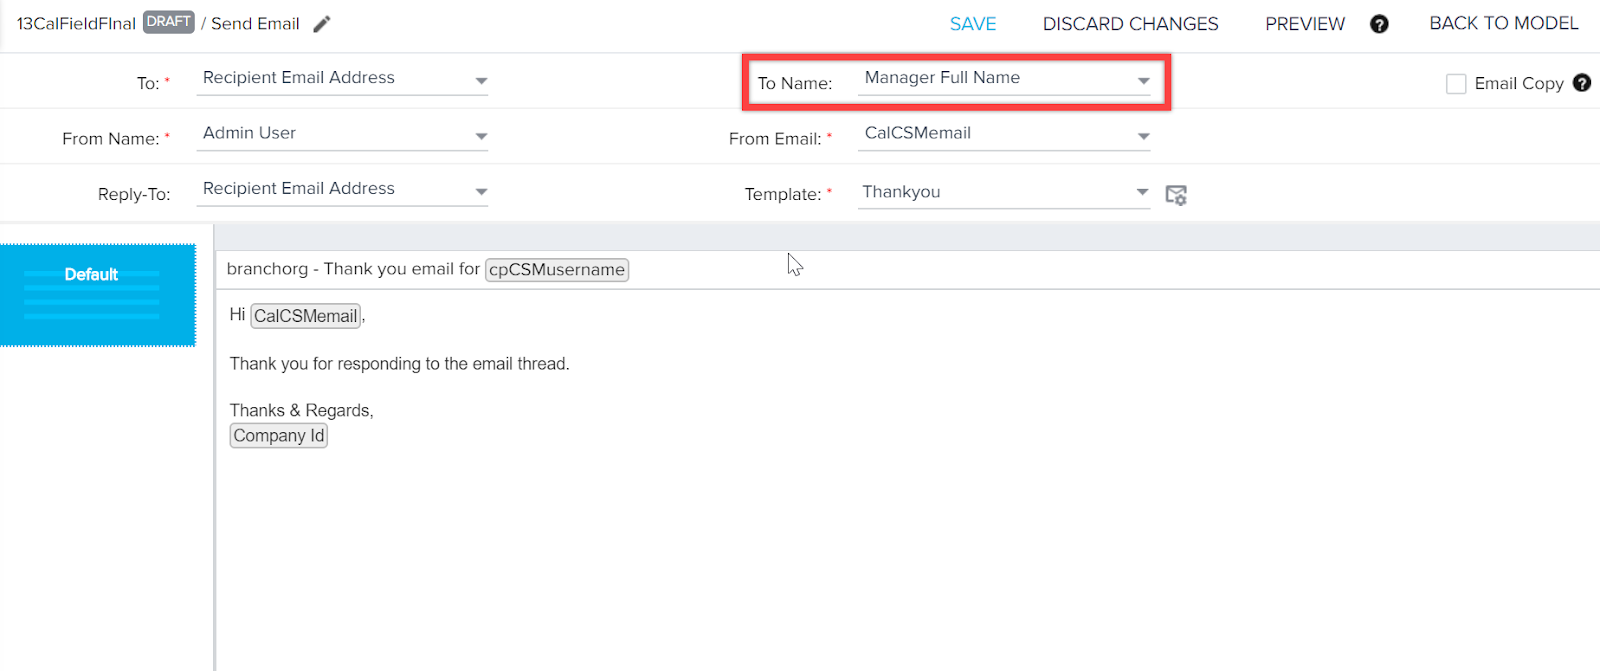
Note: Only the string type Calculated Fields are displayed for selection in the From Name and To Name fields.
If Admins select the Email Copy option, they can also add both email and string type Calculated fields to the Email Copy To field.
Renewal Center
Renewal Center helps quota carrying CSMs and Renewal Managers forecast and manage their book of business. By enriching Salesforce Opportunities with Customer Success insights, as well as calculating a Likelihood to Renew score for each opportunity, Renewal Center enables your team to efficiently manage and predict renewals and related upsell, recognize risks in a timely fashion, and report on key metrics.
New Load to GS Opportunity Action Type
This enhancement provides you an alternative method to populate standard fields that support renewal analysis (Target Amount, Forecast Amount, Final Amount, Due Date) and custom fields. Currently, you can only fetch data from the Salesforce Opportunity and synchronize it via the Salesforce Opportunity Connector job.
IMPORTANT: Gainsight recommends that you continue to use the Salesforce Connector when possible. This is required for any field that needs to be synchronized with Salesforce. If a field is not mapped in the Salesforce Opportunity Connector job, then any data update will only reside in Gainsight. It is also easier to configure and maintain the mappings.
Use cases:
- Update Target Amount, Forecast Amount, Final Amount, Due Date, and custom fields.
- This use case is ideal for those customers who do not already have this data in the Salesforce opportunity object and are unable to create corresponding fields in order to load this information. Rules Engine can be used to update this information directly to the Renewal Center from any other sources available to Rules Engine. This information would only reside in Gainsight. The Last Modified Date or Last Modified By fields in SFDC are not modified, since data is loaded only to the GS Opportunity object.
- Rules Engine can also be used to update fields that are mapped with a corresponding Salesforce Opportunity field. In this case Rules Engine would write to Salesforce first and confirm it passes Salesforce validation rules before writing to Gainsight. Last Modified Date and Last Modified By fields in SFDC would be updated and reflect the integration user.
- A process can be put in place to automatically create renewal opportunities when an opportunity is won. Fields required for renewal analysis can be automatically populated as a part of this process. For example, the close date of the won opportunity could populate the upcoming close and Target dates of the renewal opportunity. The final value of the won opportunity could populate the upcoming Target Amount and Forecast Amount. The opportunity owner can adjust the close date and Forecast Amount as more information about the status of the opportunity is known.
IMPORTANT: If you are using this action type to create new opportunities, you must ensure that you set up the Identifier appropriately. If the identifier matches with any of the existing records, the matched record is updated and new record is not created.
Notes:
- You must create Opportunity with all the required fields/data to pass SFDC validation rules.
- Gainsight will ensure if the Opportunity can be saved to Salesforce before saving it in Gainsight.
- The Created By field has the GSID of the Integration User. Integration user’s permissions/validations are honored
- This action type does not change requirement to use SFDC Opportunities.
For a detailed step by step process on how to use this action type, refer to the Use Load to GS Opportunity Action Type article.
Data Designer
Data Designer makes it easier for you to discover richer, more meaningful insights from your customer data. It provides a simple, easy-to-use solution to merge and transform your data, then make it accessible across the Gainsight platform for further analysis and exploration.
Sort operation in Preview
Preview Dataset in the Preparation tab is now enhanced with the Sort option which enables admins to sort all records based on their requirements, when there’s a large dataset.

S3 Data Source in Data Designer
Important: This enhancement will be available in Apr Patch 1 (Apr 7th 2020).
Data Designer is now enhanced to add Amazon S3 as a new data source. Admins can now create a dataset by fetching data from a csv/tsvfile in any S3 bucket (Gainsight Managed or Custom buckets).
Prerequisites:
- Create an S3 connection in the Connectors 2.0 page to sync csv data from S3 bucket to Gainsight. For more information on this configuration, refer Create an S3 Connection in Connectors 2.0.
- Before a dataset is created in Data Designer, make sure that the source csv/tsv file is available in the required S3 bucket.
Business Use Case: This enhancement is helpful if your organization’s IT infrastructure uses Amazon S3 as a data source to store customer success data, and you want to build datasets in Data Designer using that data.
To use this enhancement, navigate to Administration > Analytics > Data Designer, and open an existing dataset or create a new design. In the Preparation tab, under the Data Source dropdown list, you can now see Amazon S3 along with Matrix Data.
Once you select Amazon S3, you can see that the Gainsight Managed bucket and custom buckets configured in Connectors 2.0 are displayed on the left side pane.
For detailed instructions on how to create a dataset using S3 as a data source, refer Use Data from Amazon S3 in Data Designer.
Gainsight Data Management
In Gainsight Data Management, an admin can perform setup data in the Gainsight Matrix Data Architecture (MDA). Admins can create and manage Gainsight Objects from the Data Management page. As an analogy, a Gainsight Object and its field(s) can be thought of as a database table and its columns. Data Management can be accessed from Administration > Operations > Data Management.
User Locale is honoured In Data Management and Data Operations Pages
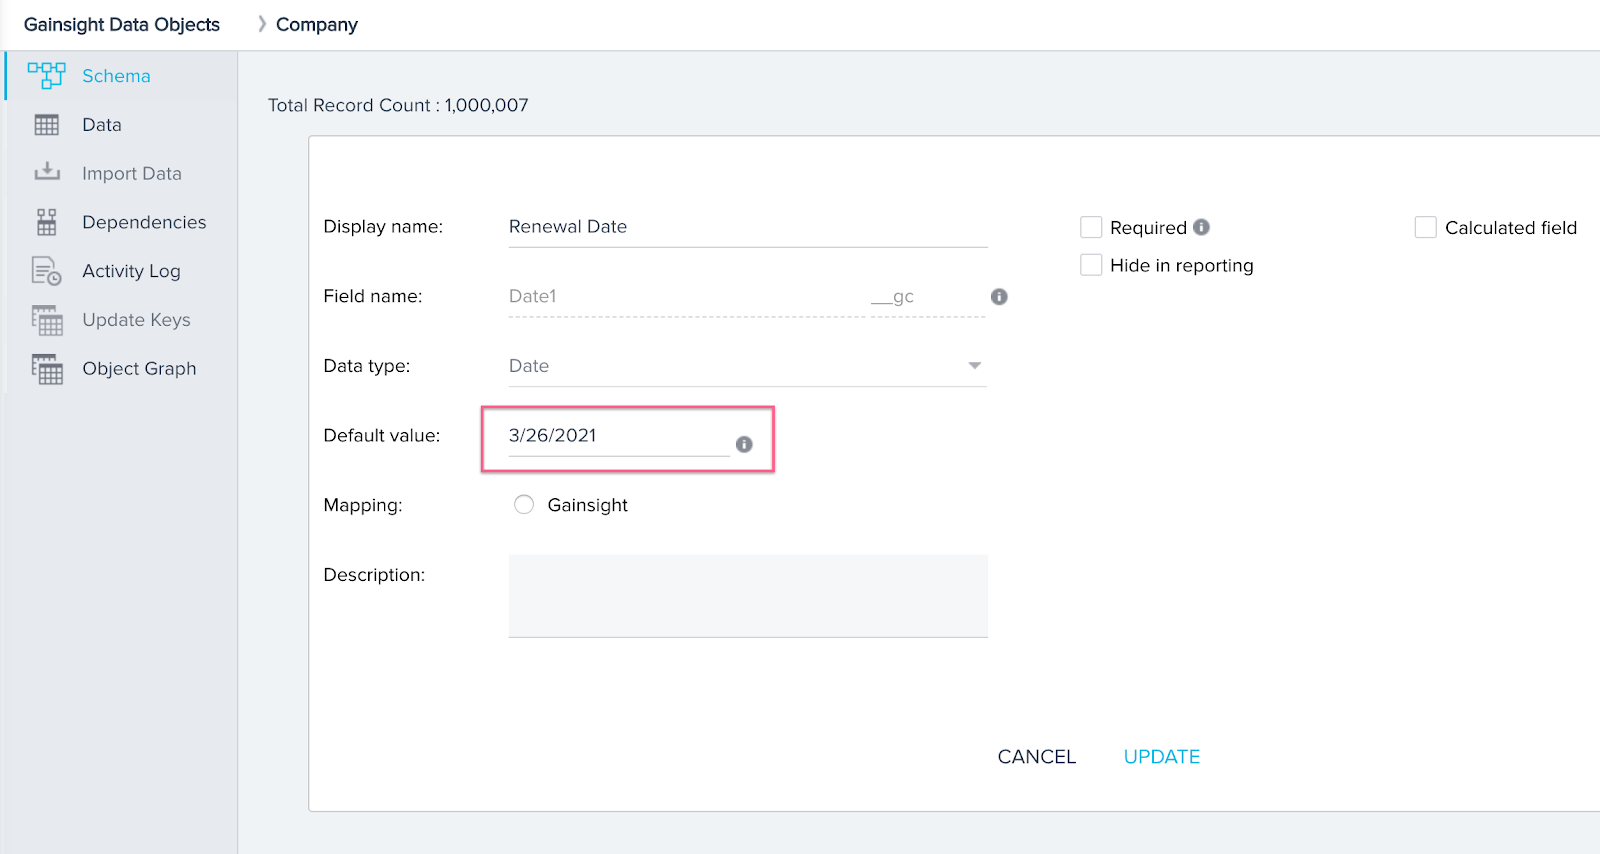
When Super Admins/Admins set a User Locale for any Gainsight user from the User Management page, the Date and DateTime format defined in the specific user’s Locale is honoured in the following Data Management pages:
-
Default value set for the Date and DateTime type fields
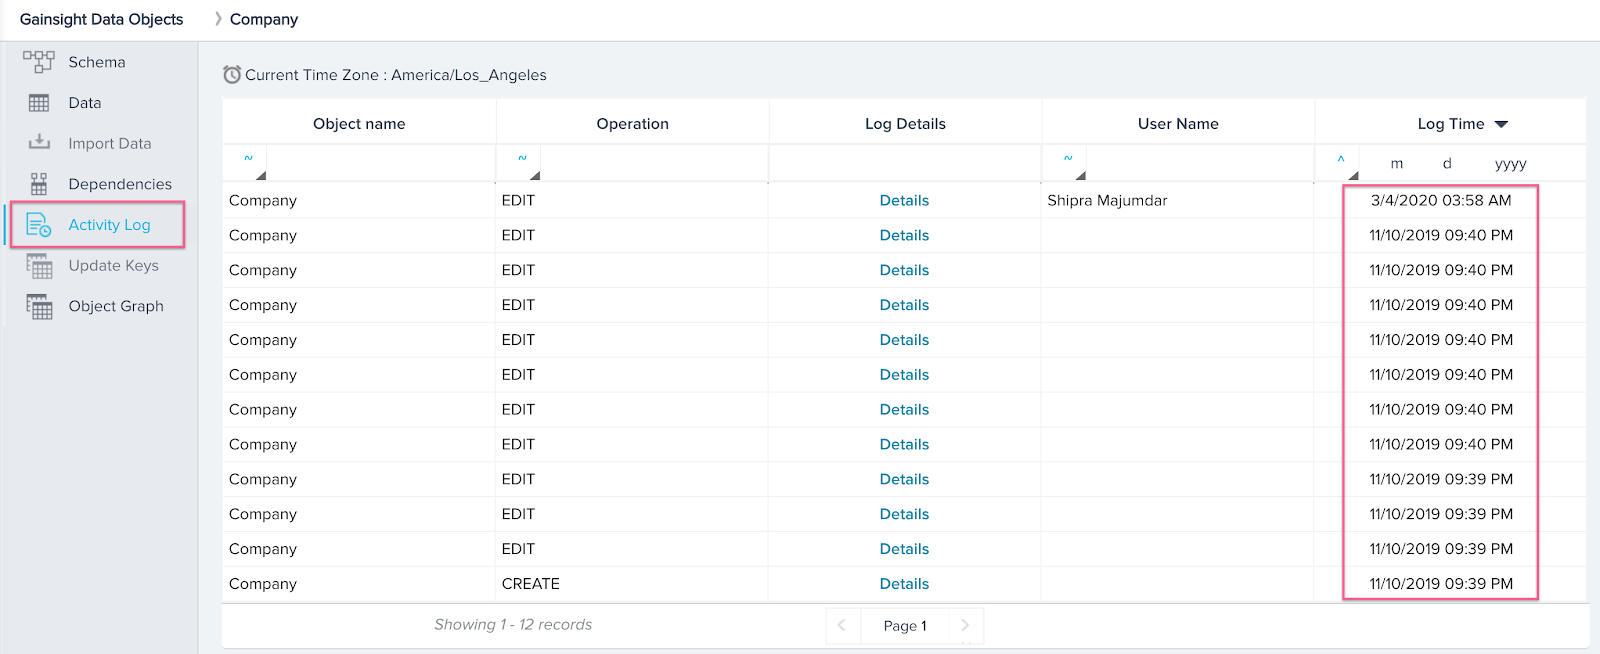
- Date and DateTime information shown in a Report on any object, from the Data Management > [Select any object] > Data tab.

- Date and Datetime information shown in the Activity Log of any object.
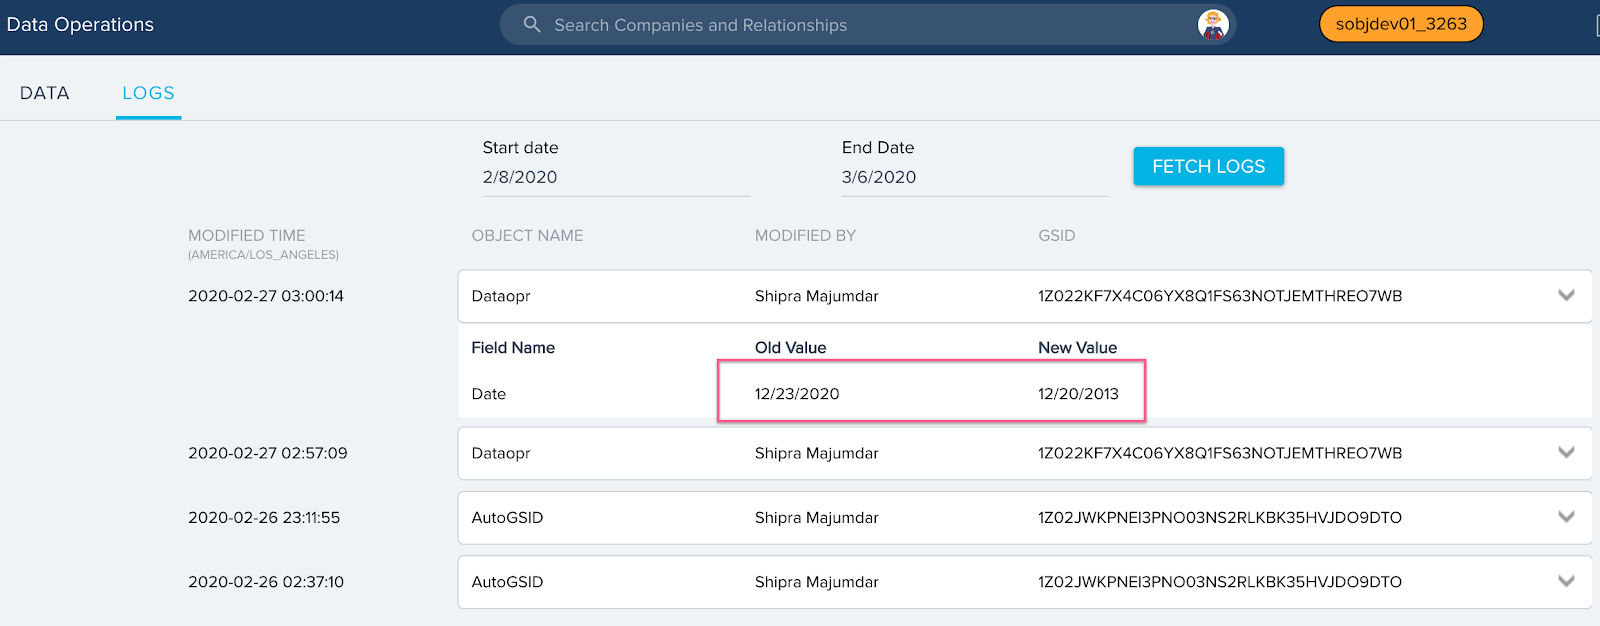
User Locale is honoured in the following pages from the Data Operations:
-
Date and Datetime information shown in the data from any object.
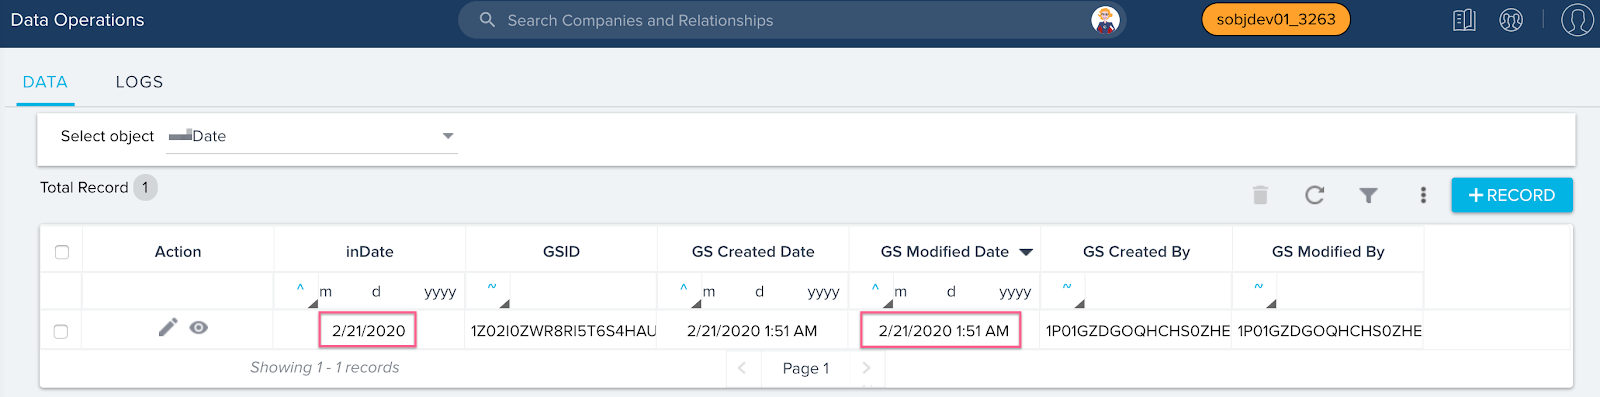
-
Date and Datetime information shown in the Logs of any object.
For more information on how an Admin can set User Locale for a specific user from the User Management page, refer to the Add Gainsight Users from User Management.
Note: Setting a User Locale is not mandatory from the User Management page. If an Admin does not set a User Locale, the default Locale setting from the Application Settings page is honoured across Gainsight. For more information on this setting, refer to the Application Settings article.
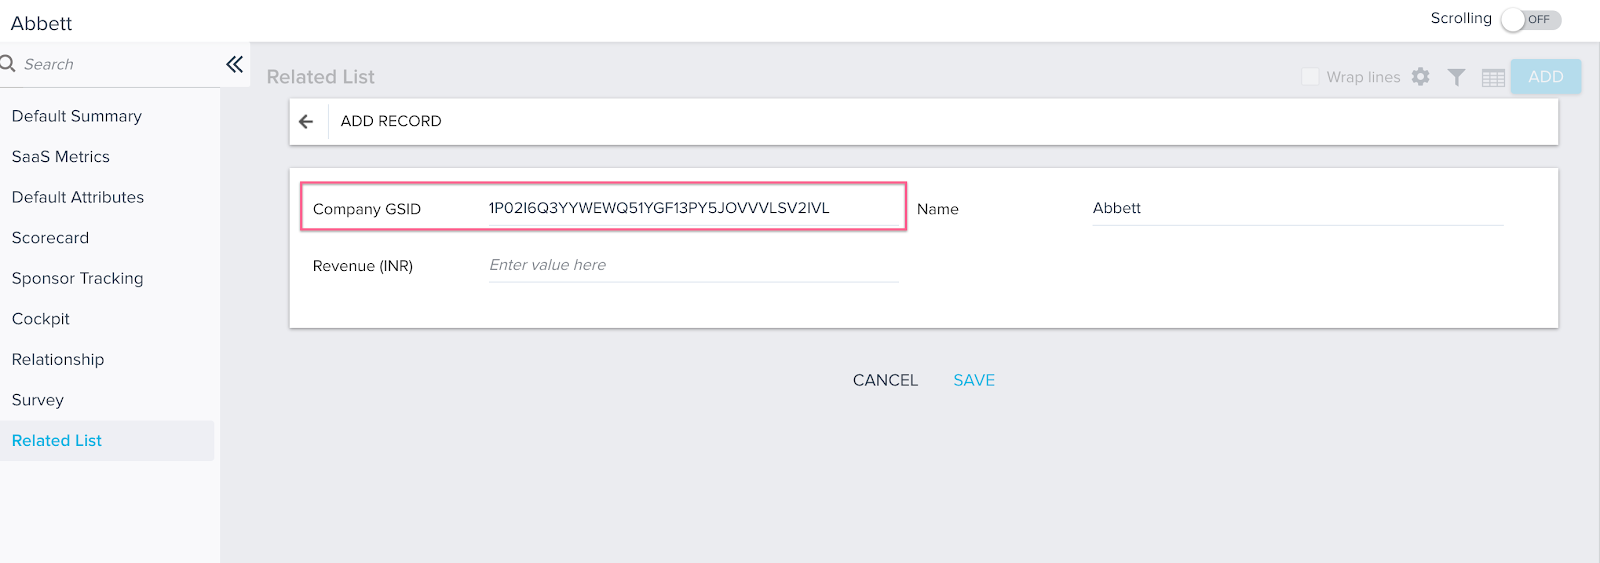
Auto Populate Company ID / Relationship ID in a Record on Low Volume object
While CSMs are creating a new record in a Low Volume custom object through the C360/R360 > Related List, the GSID of the Company/Relationship is populated automatically. Previously, while creating a new record in the Low Volume object, CSMs had to manually add the GSID to the Company ID/Relationship ID field in the Report.
To auto populate Company ID/Relationship ID, the report on the Low Volume object must contain the GSID field from the Company or Relationship object for the C360 or R360 page respectively.
Use case: CSMs can maintain a list of Cases/support tickets raised from the specific Company/Relationship in the related C360/R360 page. Details of the cases can be stored in a Low Volume custom object so that existing cases can be edited (Ex: Status Update) or new cases can be recorded in the custom object from the C360/R360 > Related List section.
For more information on creating a new record in the Low Volume object, refer to the Related List in the Customer 360 Details article.
People Management
Capture your contacts in an organizational chart to understand the roles and relationships of the people you do business with across your customer base. Explore the org chart to understand who influences whom within a company and drill-into a person for deeper insights.
Person Name field is auto Populated from the First Name and Last Name
Gainsight now auto populates a value in the Name field (concatenated) in the Person object using values from the First Name and Last Name fields, if it is Null. Previously, Name field was null if it was not inserted through a Person ingestion channel.
For example, If a person record has values for First Name and/or Last Name in the Gainsight application, the system will auto populate the Name field.
To see this enhancement:
- Navigate to C360/R360 > Person > Click +PERSON.
- Enter First Name and Last Name.
- Click Save.
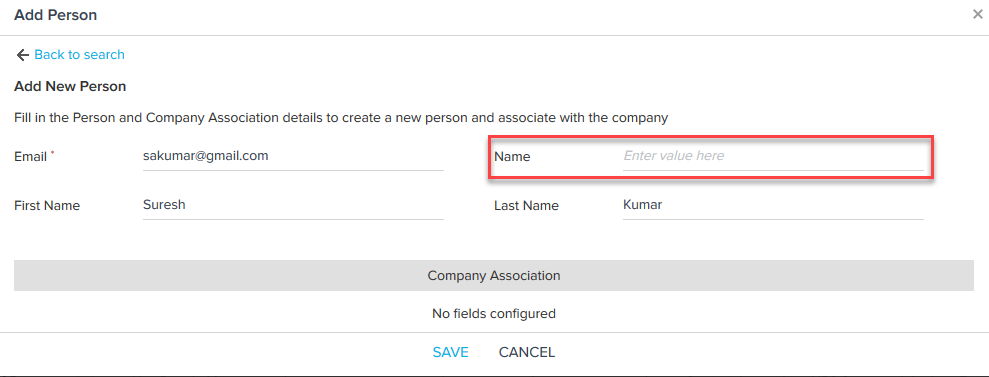
- Navigate to the Person List View page.
- Click the newly added Person to view the Person detail view. You can see that the Name field is auto populated.
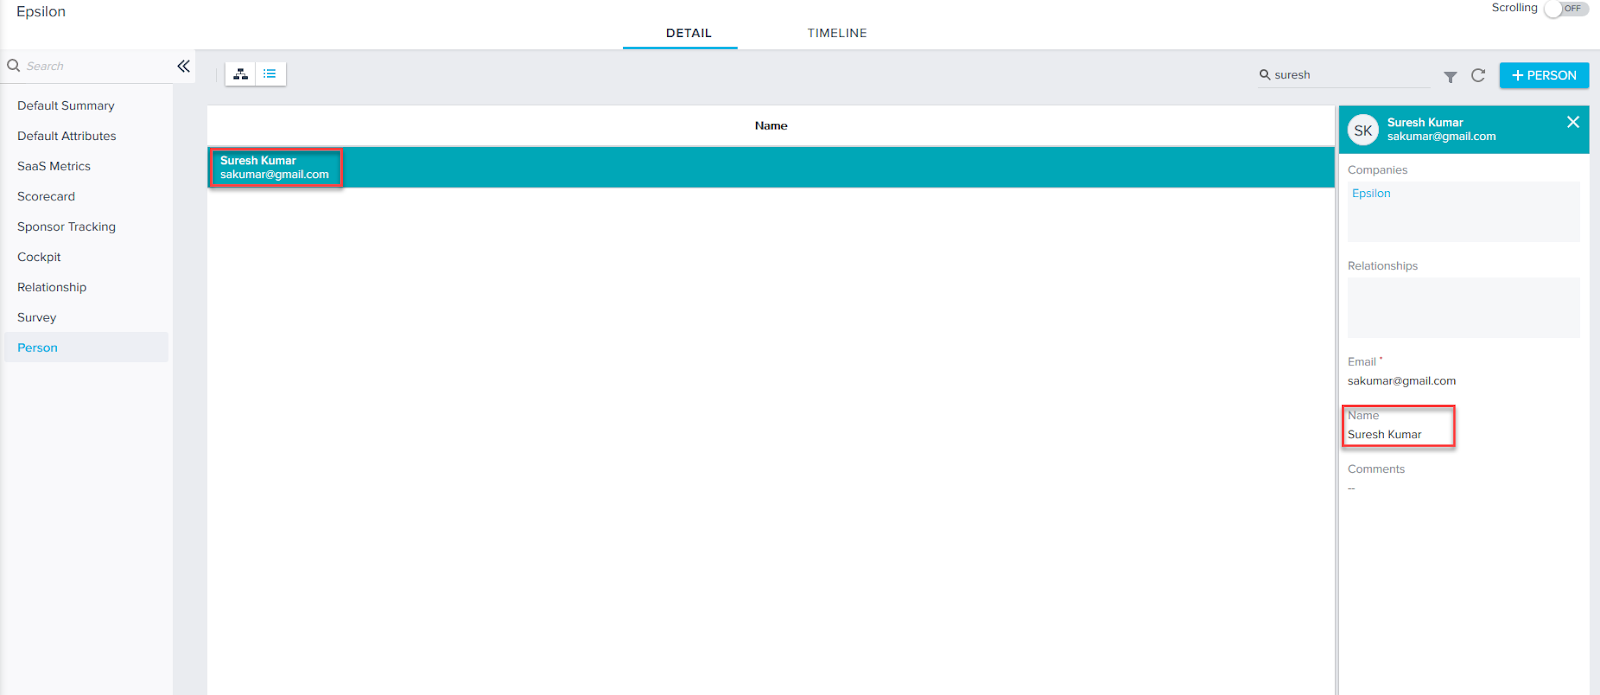
Note: While ingesting Person information through any channel (CRM Connector or CSV Upload), if you have mapped First Name and Last Name in the field mappings of the job configuration, but not the Name field, then the Name field is auto populated by Gainsight.
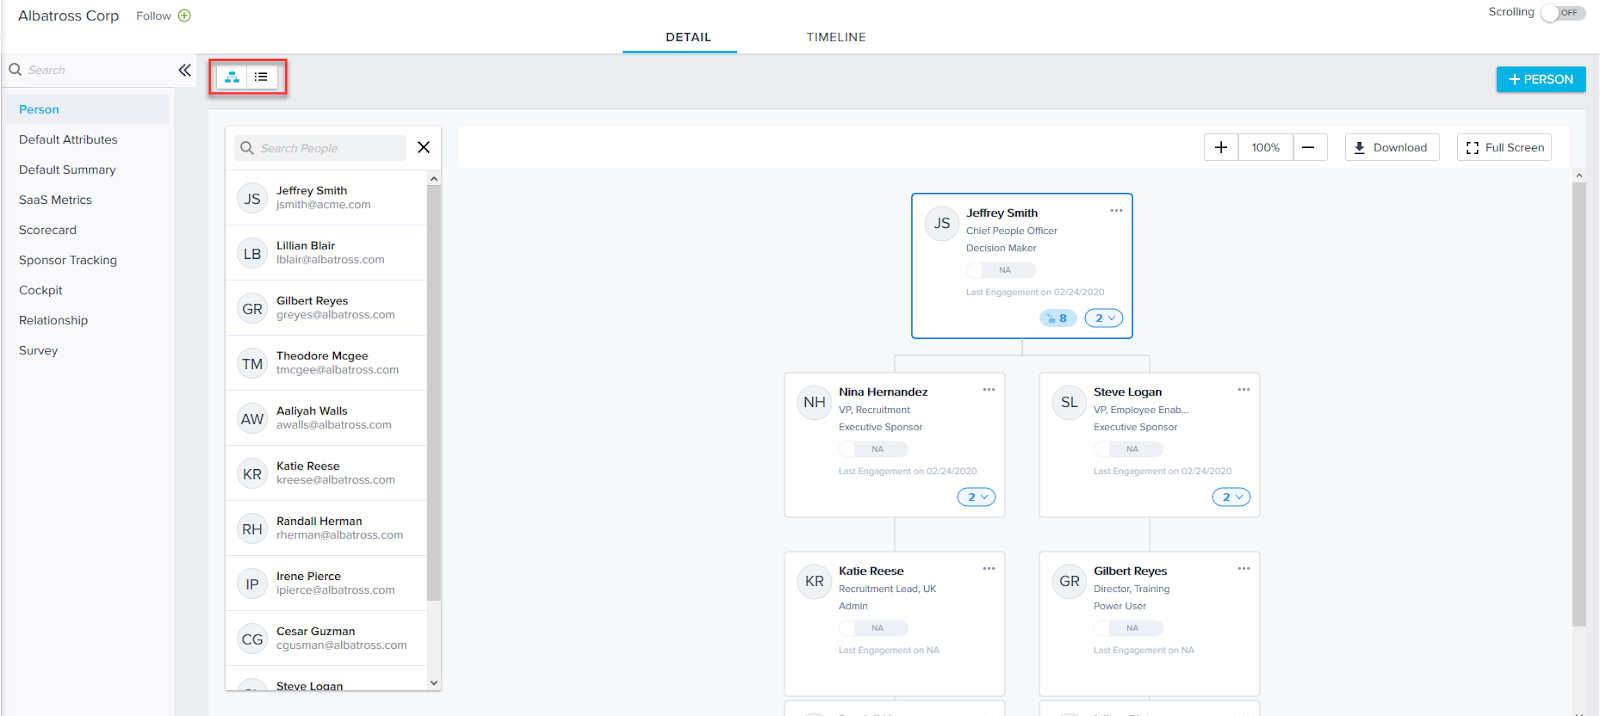
People Maps is the Default View in the Person Section
People Maps is now the default view in the C360/R360 > Person section. Previously, the List View was the default view in the Person section. Navigate to C360/R360 > Person section to view this change.
Replace a Person Directly in People Maps
CSMs can now directly replace a person in People Maps. If you want to replace a Person in People Maps, then the new Person must already be present in the Gainsight Person object and associated with the same company.
Previously, to replace a person, you had to add the new person to the People Map, and then add all the relationships again to the new person, such as Managers and Direct Reports. We’ve simplified the process to save users’ time.
Business Use Case: When an existing employee has left the company or changed roles, CSMs can directly replace the person in People Maps.
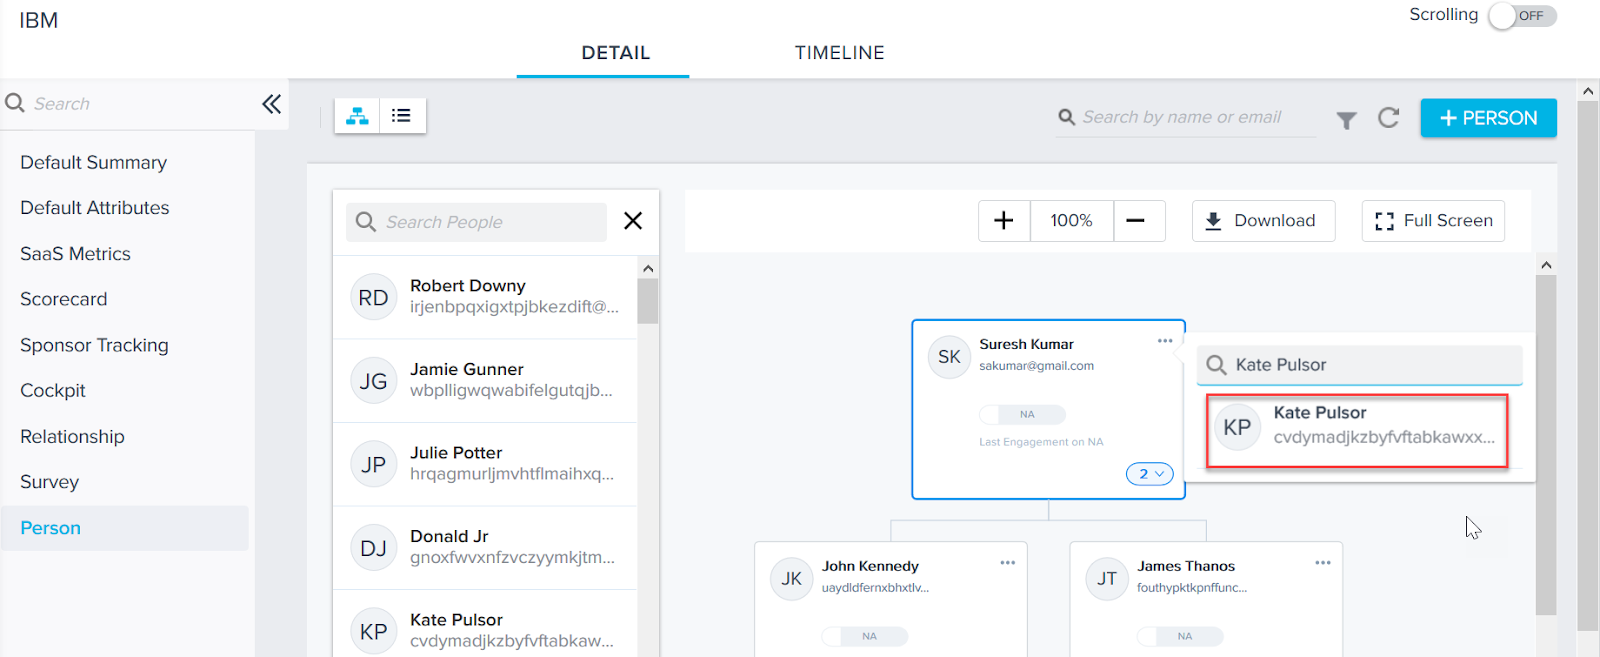
To replace a person:
- Navigate to the C360/R360 > Person page.
- Click the ellipsis menu in the person widget.
- Select Replace. Search People field is displayed.
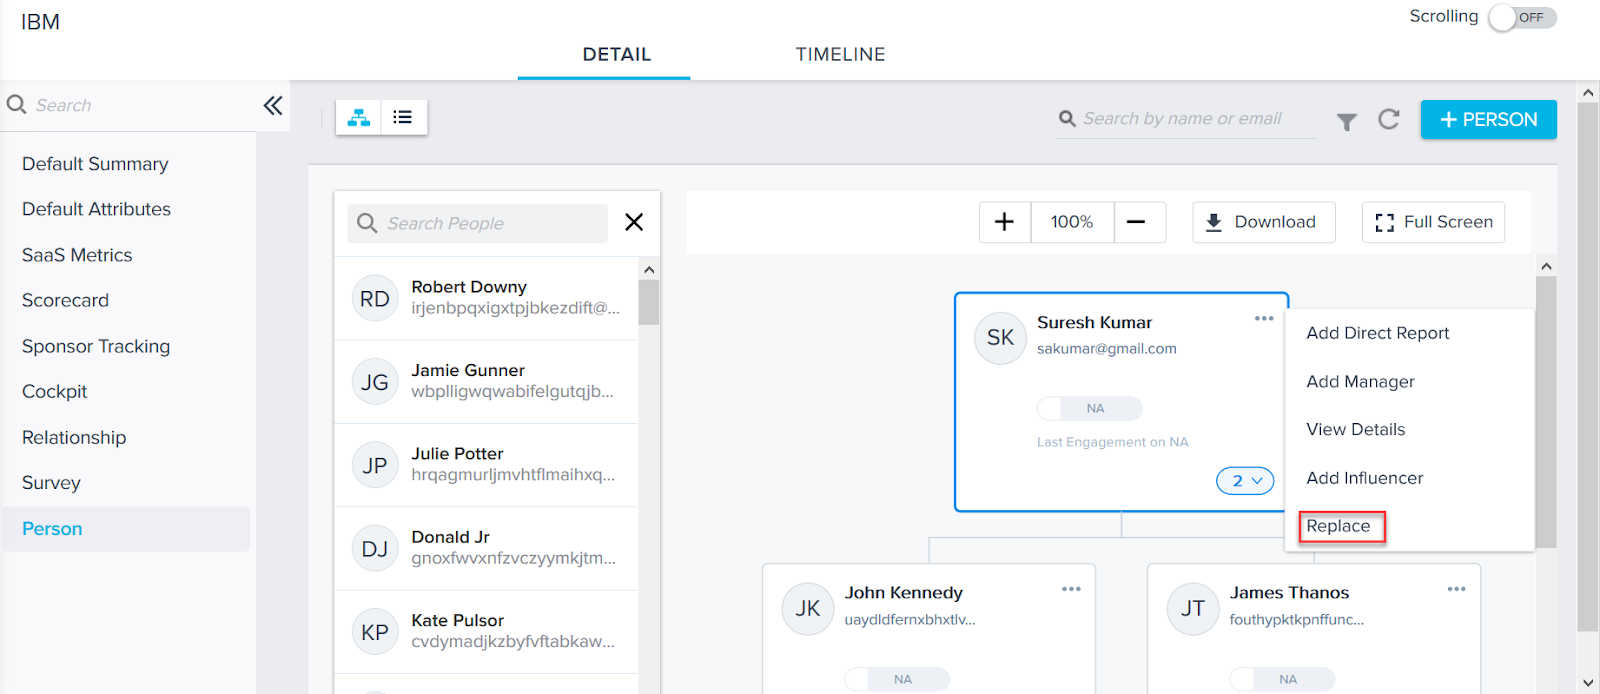
- Enter the Name of the Person and press Enter.
- Select the required Person from the results. You can now see that the old person is replaced with the new person.
For more information, refer to the Build People Maps article.
Issues Addressed
Cockpit
- Playbook Task/Success Plan Objective allowing non User GSIDs as Owner: Previously, when a user searched for a dynamic owner field in the Playbook task or Success Plan objective, the system was populating all the fields that had a lookup to "User" object. This issue is fixed now, and the system displays only the GSID fields that have a lookup to “User” object.
Note: This issue was also pertaining for Associate Person and Linked Object search, and is fixed now.