Gainsight NXT Release Notes 6.12 February 25, 2020
Short on time? Watch this 5-min. video overview to see what's new in the 6.12 release!
Gainsight CS Release Notes Version 6.12 contains the following subsections:
- Announcements section describes important changes to the application that are implemented now or will be in the near future.
- Enhancements (per module) describe improvements made in the existing product capabilities.
: This symbol indicates that an enhancement originated as a customer suggestion on the Gainsight Community.
Announcements
Journey Orchestrator
 Archive Email Logs and Raw Events Data
In the next release (v6.13), Gainsight will be archiving data for Email logs and Email Raw Events. Only the data from the last one year is stored for logs and the last six months data is stored for raw events. The remaining data will be automatically archived into customers’ S3 bucket, where you can still access it.
Enhancements
Journey Orchestrator
Journey Orchestrator is your center for automated communications. It leverages the power of automation to make your job easier as you communicate with customers at scale. Gainsight enables customer success teams to launch automated emails based on customer attributes such as health score, product usage, survey results and lifecycle stage. Through automation, you can scale customer touches and engage with a growing list of customers often and effectively.
Query Builder Execution History in Programs
Previously, admins were unable to monitor the execution history of the Query Builder source in Programs. As a workaround, you had to create a rule with the same sources to monitor the execution history. However, Gainsight now provides detailed logs for the activities that admins perform while building and fetching data in Query Builder. Apart from logs, Gainsight also provides other details such as execution history of query builder source in programs, status, data flow diagram, and downloading option for the result set.
Beside each Query Builder source in the Participants Configuration page, an Execution History Preview option is added for admins to view the logs, history, status, and flow diagram of the Query Builder.
Admins can view the following status symbols as Execution History Preview options:
 This status is displayed when the query builder source is successfully executed.
 This status is displayed when the query builder source is partially executed.
 This status is displayed when the execution of the query builder source has failed.
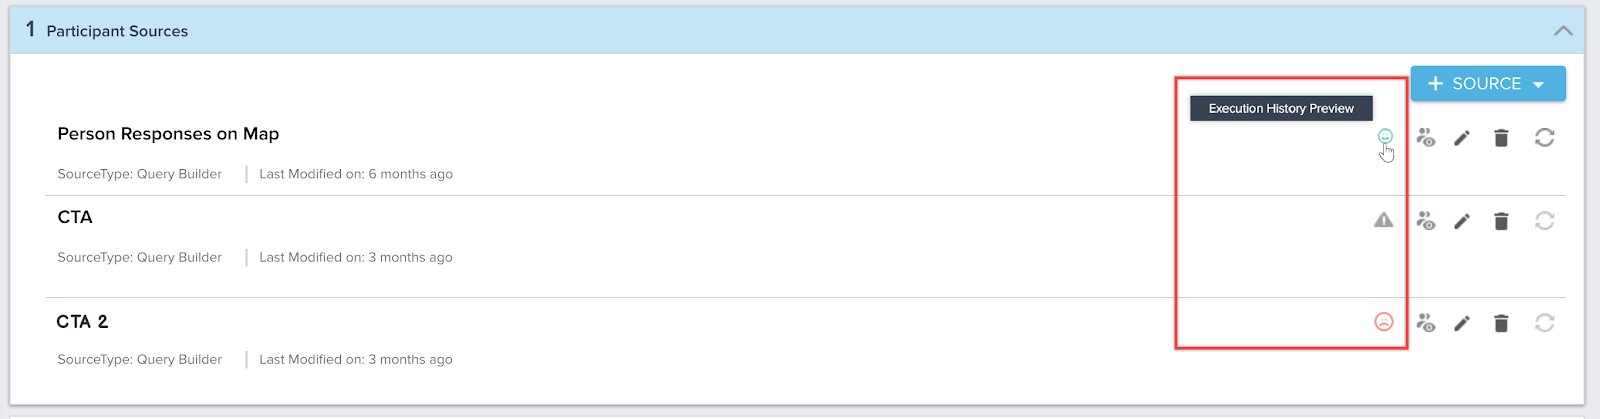
Admins can click the Execution History Preview option to view the preview of that particular Query Builder source in the following tabs:
- QUERY SETUP
- EXECUTION HISTORY
For more information on Query Builder Execution History, refer to the Add Participants to a Program article.
People Management
Capture your contacts in an organizational chart to understand the roles and relationships of the people you do business with across your customer base. Explore the org chart to understand who influences whom within a company and drill-into a person for deeper insights.
Add Gainsight Users as Influencers in People Maps
CSMs can now add Gainsight users as Influencers to People Maps from the C360/R360 > Person section > People Map page. This allows you to more accurately identify all of the key sources of influence on a customer, including internal teammates. Previously, only people within the customer’s organization (Company/Relationship) could be added.
Note: If you add Gainsight users to People Maps, they are added from the Gainsight User object.
To add a Gainsight user as an Influencer:
- Navigate to any Company or Relationship’s C360/R360 page > Person section > People Maps.
- Select Add Influencer from any person card’s menu. Add Person’s Influencer View is displayed.
- Select Within Company/Relationship from the Influencer Type dropdown.
- Enter the remaining details of the Influencer. For more information, refer to the People Maps article.
- Click SAVE.
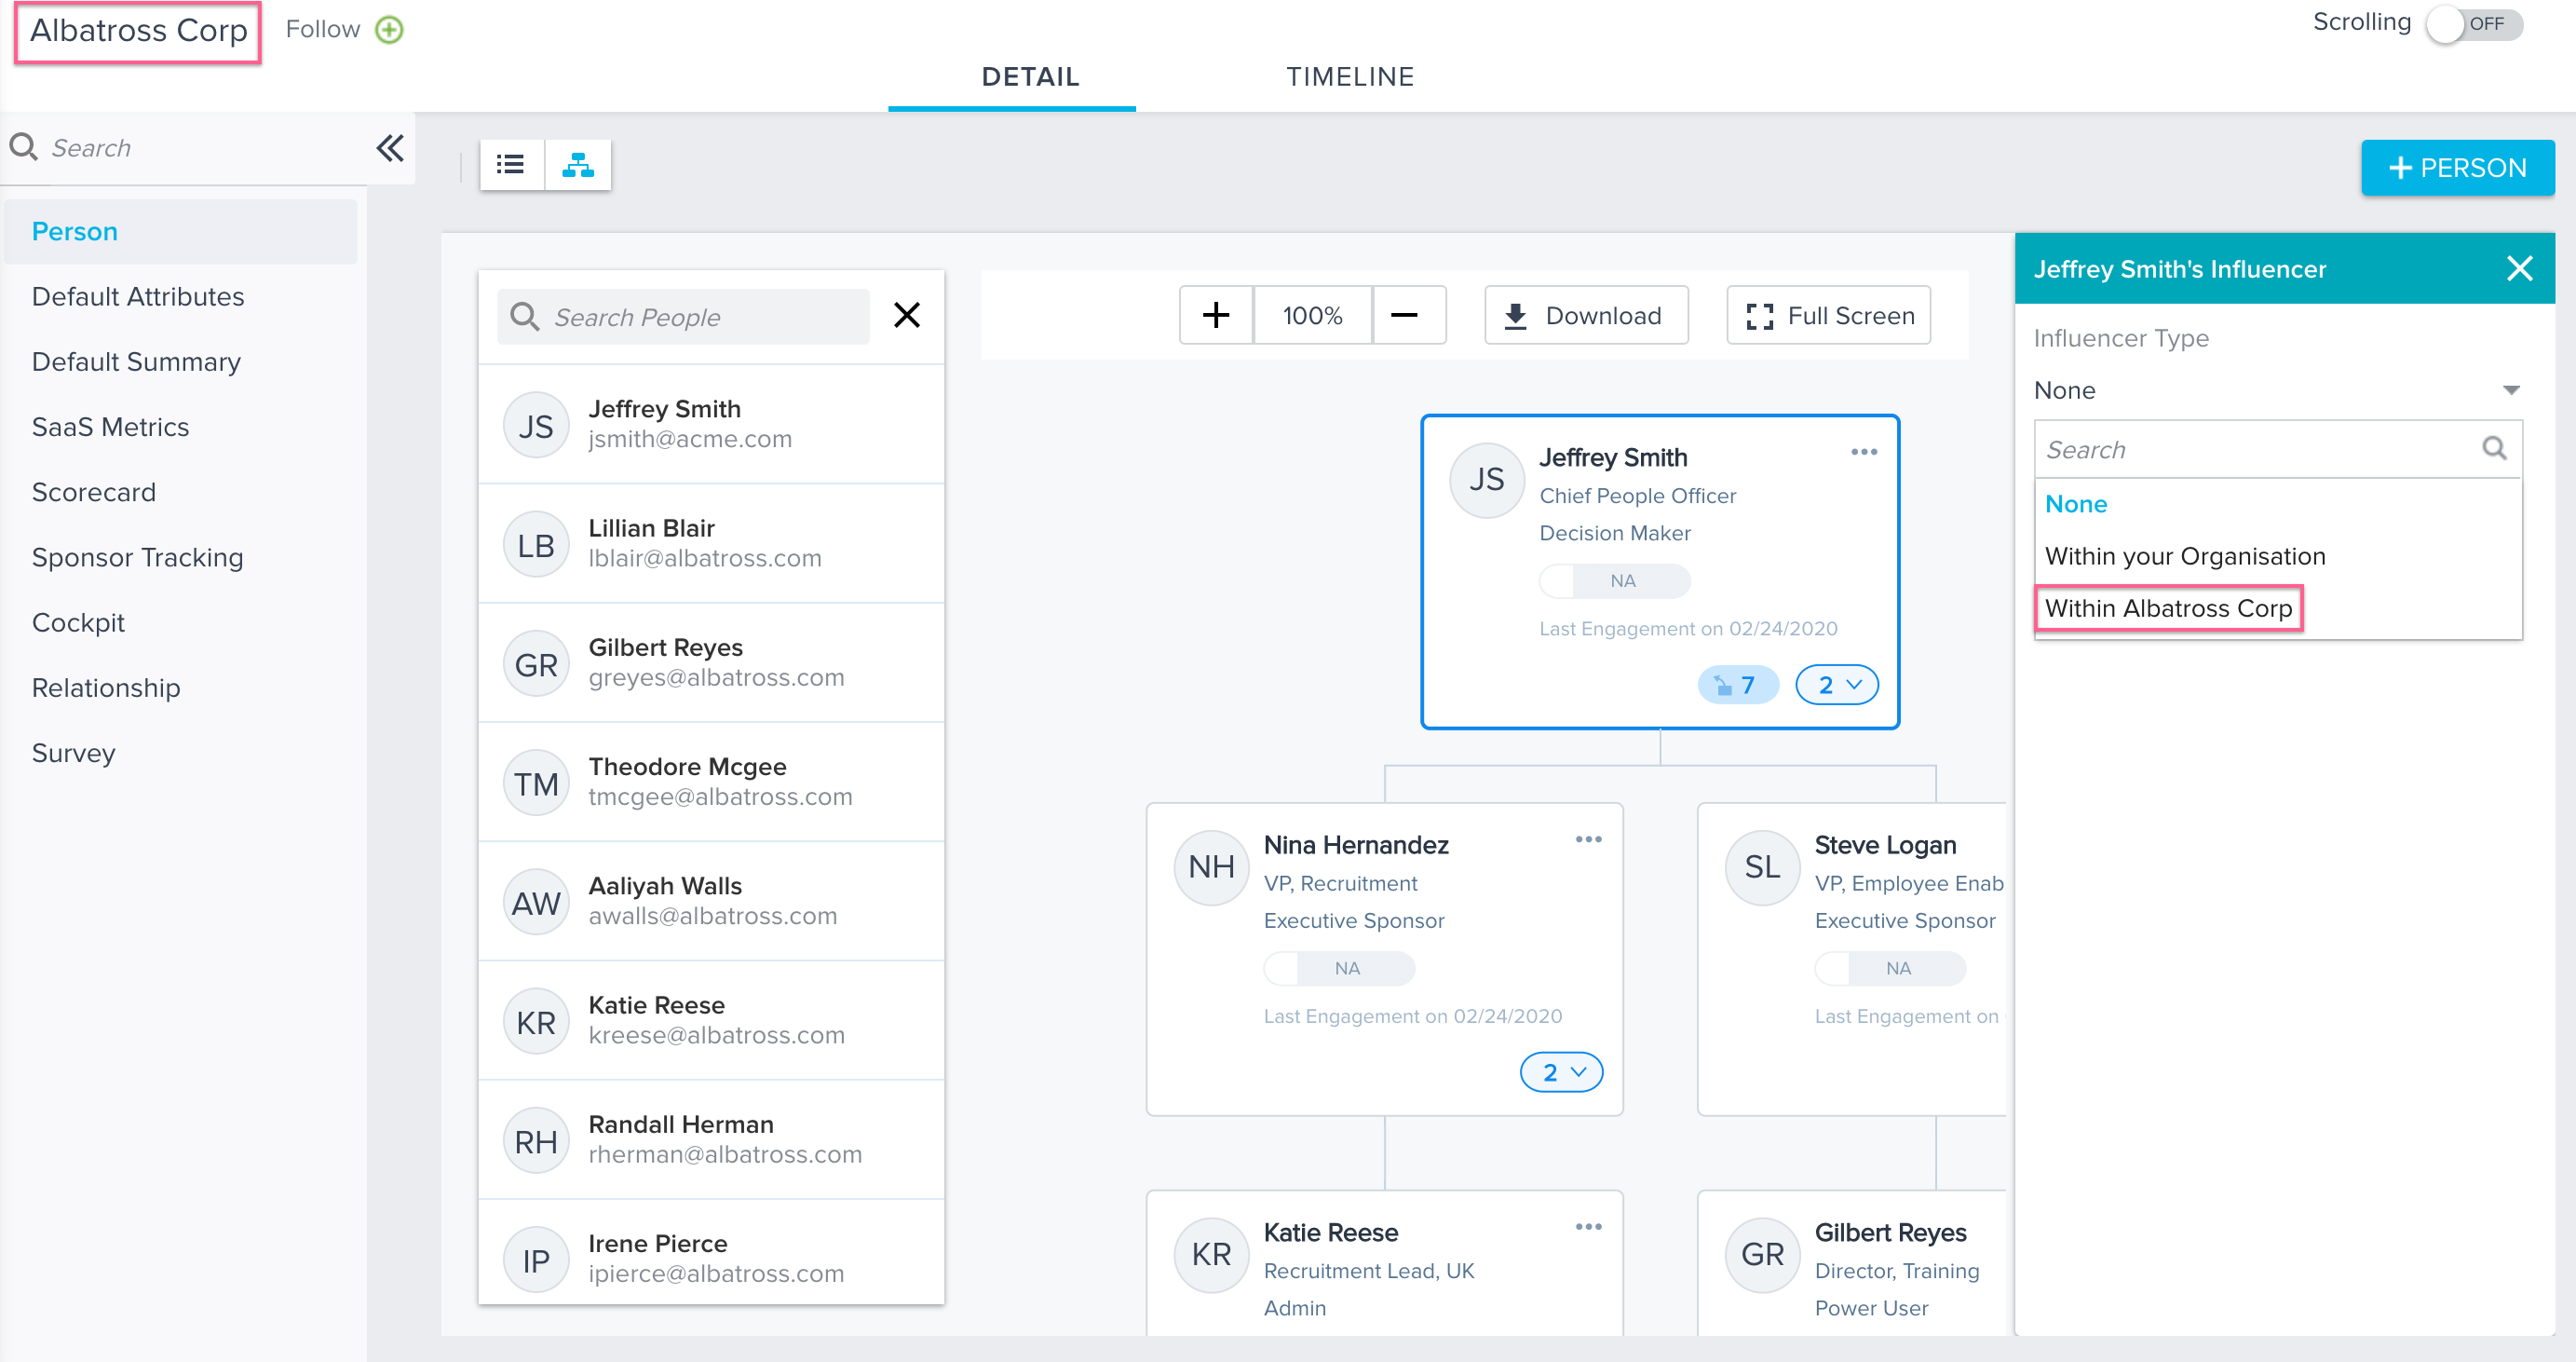
Note: To add Influencers to a person from the people within your customer’s organization (Company/Relationship), select Within your Organization.
You can now see all of the influencers on the left pane of the People Maps. These influencers are People from:
- Within Your Organization: your customer’s organization (Company/Relationship) and another Company/Relationship (People)
- Within Company/Relationship (C360/R360): Gainsight User
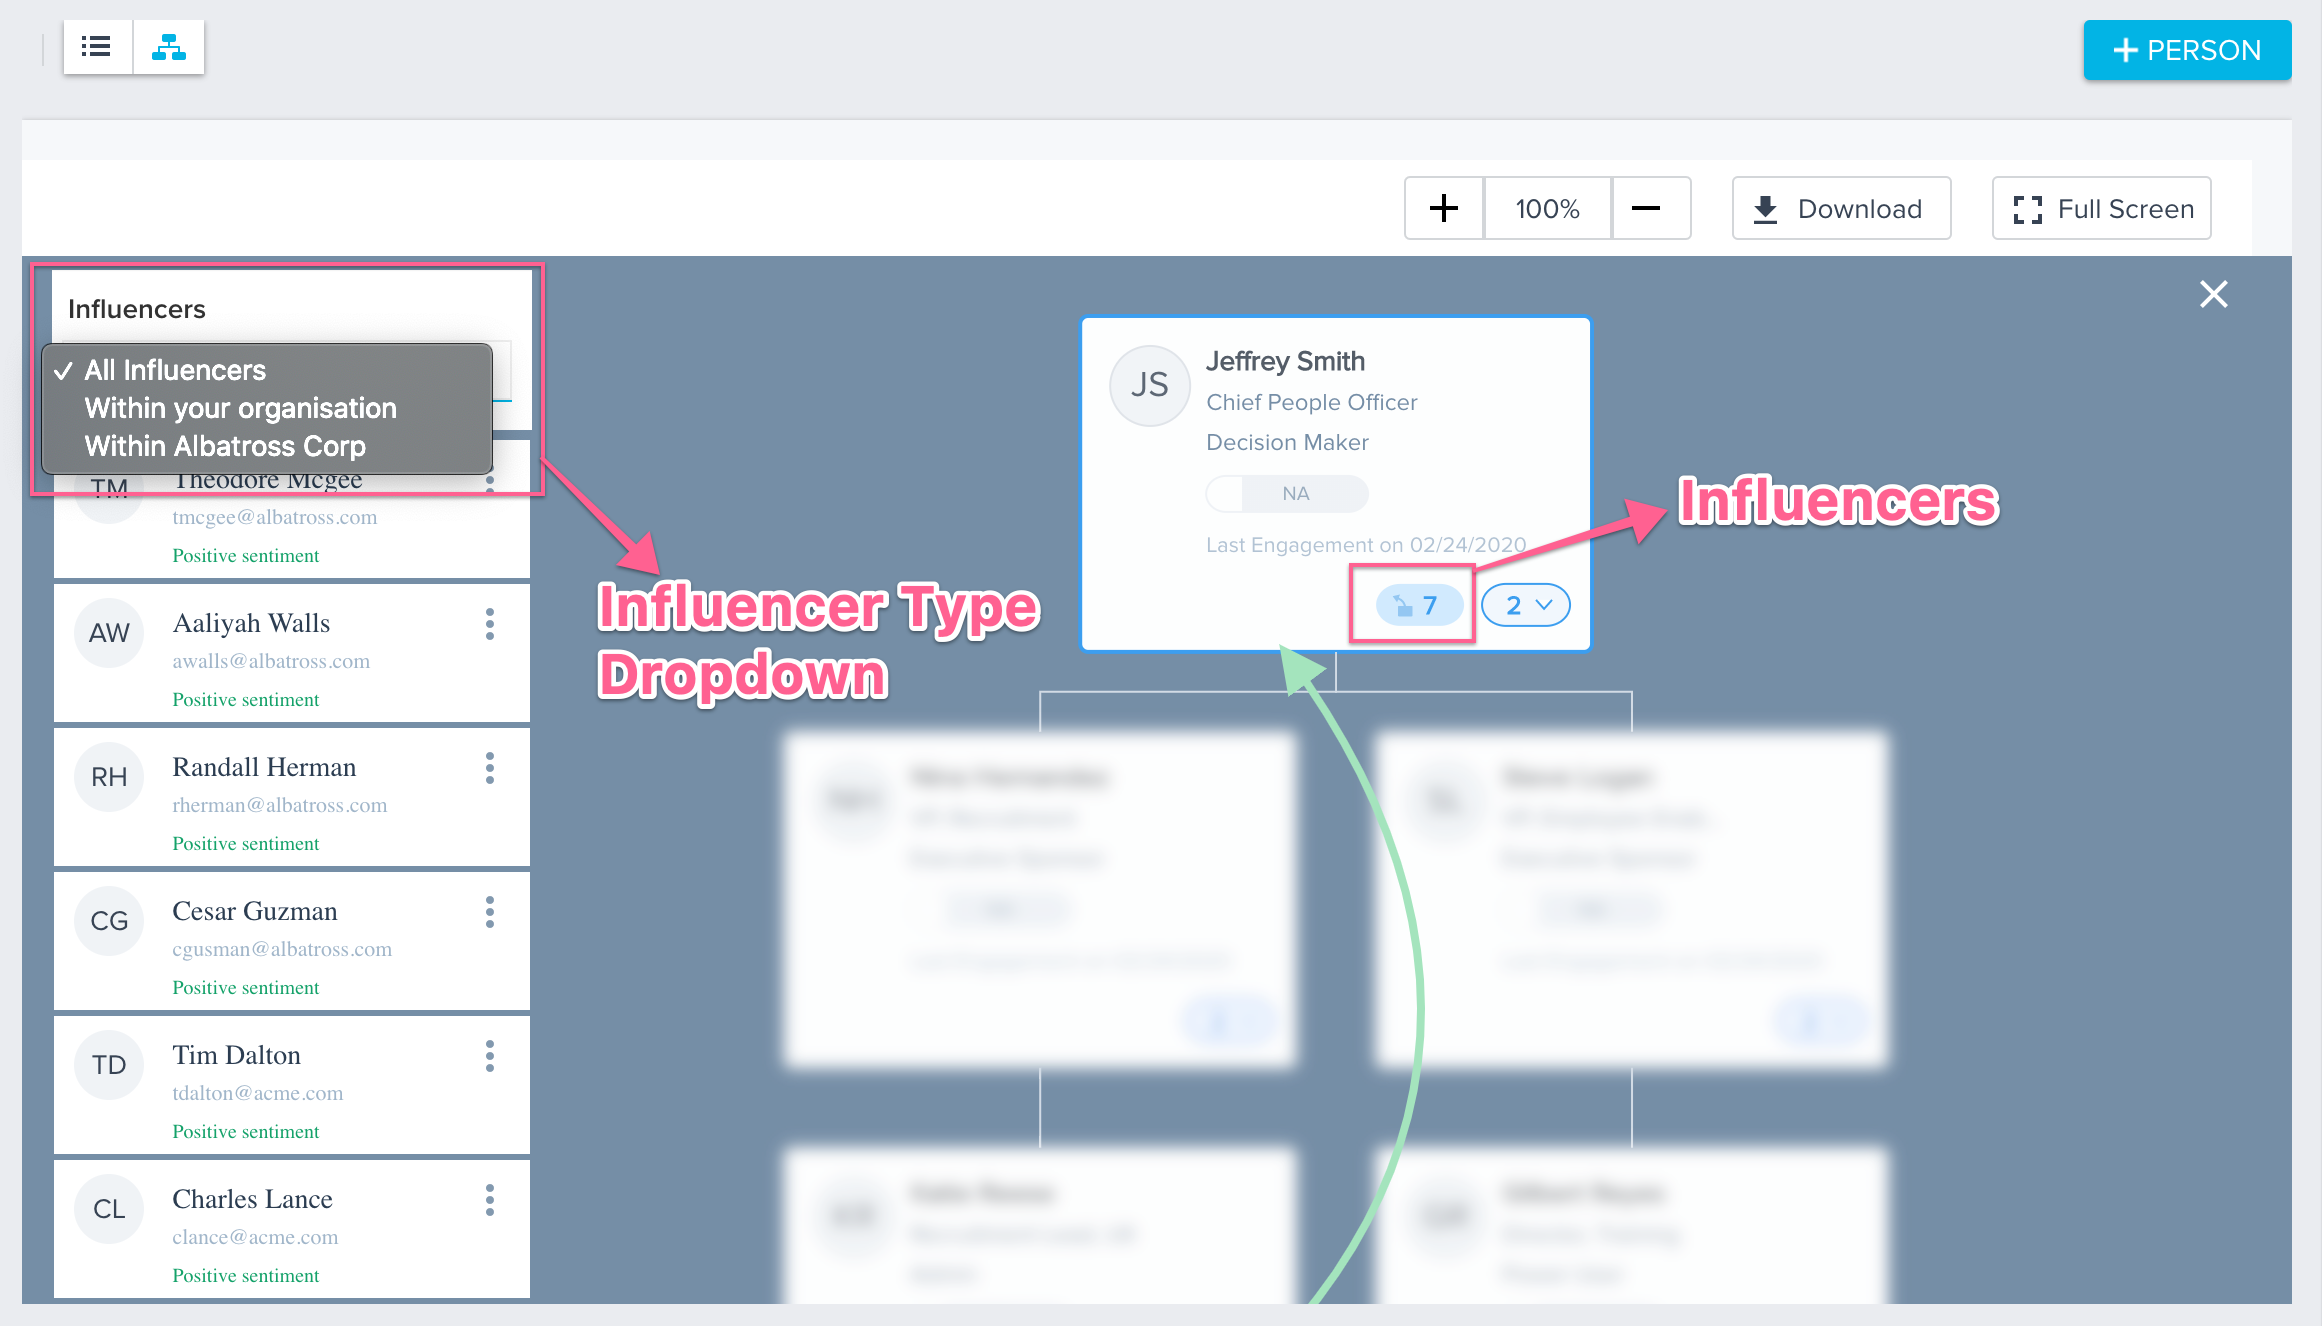
To see the list of Influencers:
- Select the Influencers icon from any person card’s menu. List of Influencers is displayed on the left pane.
- Select either Within your organization or Within Company/Relationship or All Influencers from the dropdown to see the respective influencers, as listed above.
Note: Gainsight users that you want to add to People Maps can be Active or Inactive in the User Management page. For more information, refer to the User Management article.
Renewal Center
Renewal Center helps quota carrying CSMs and Renewal Managers forecast and manage their book of business. By enriching Salesforce Opportunities with Customer Success insights, as well as calculating a Likelihood to Renew score for each opportunity, Renewal Center enables your team to efficiently manage and predict renewals and related upsell, recognize risks in a timely fashion, and report on key metrics.
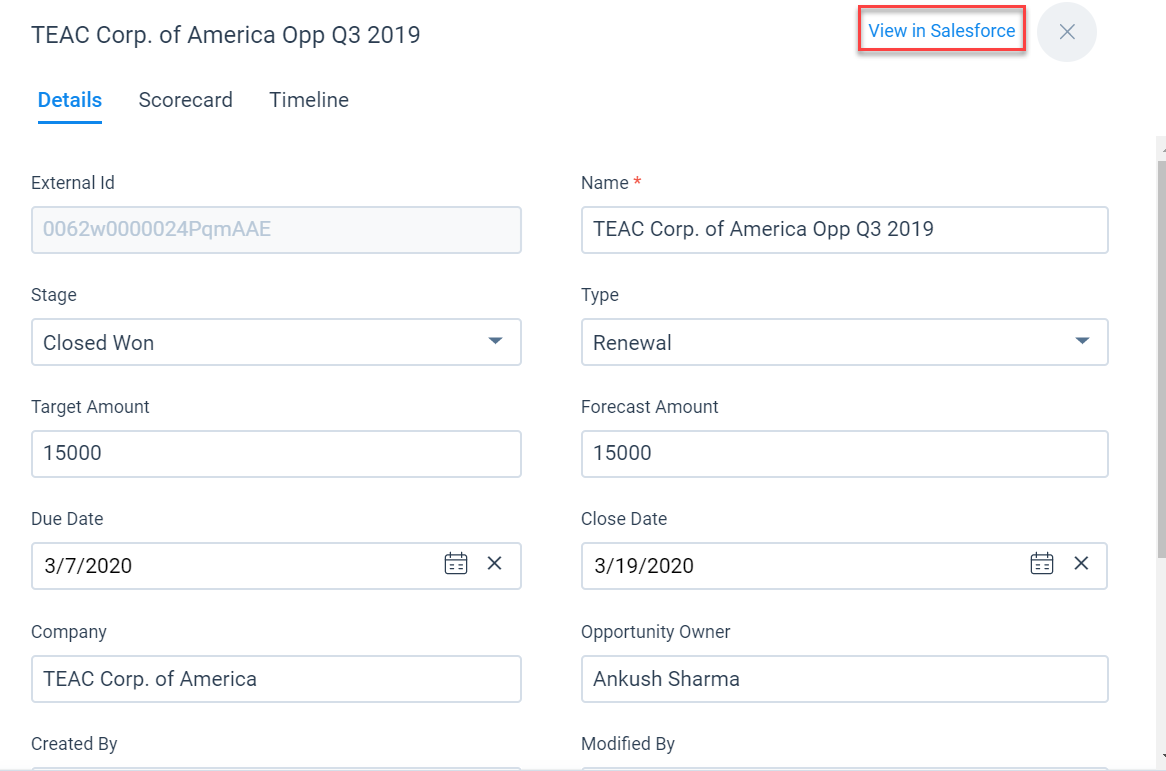
Easier Access to the Opportunity Detail View
You can now access the Opportunity Detail view by clicking the Opportunity name. Previously, clicking the Opportunity name took the user to Salesforce.
To view the Opportunity in Salesforce, a new View in Salesforce button is introduced in the detail view.
Likelihood Score Explanation
You can now view the factors contributing to the Likelihood Score in the Opportunities At Risk Action card. The Likelihood Score and the associated factors were previously available only on the Forecast page.
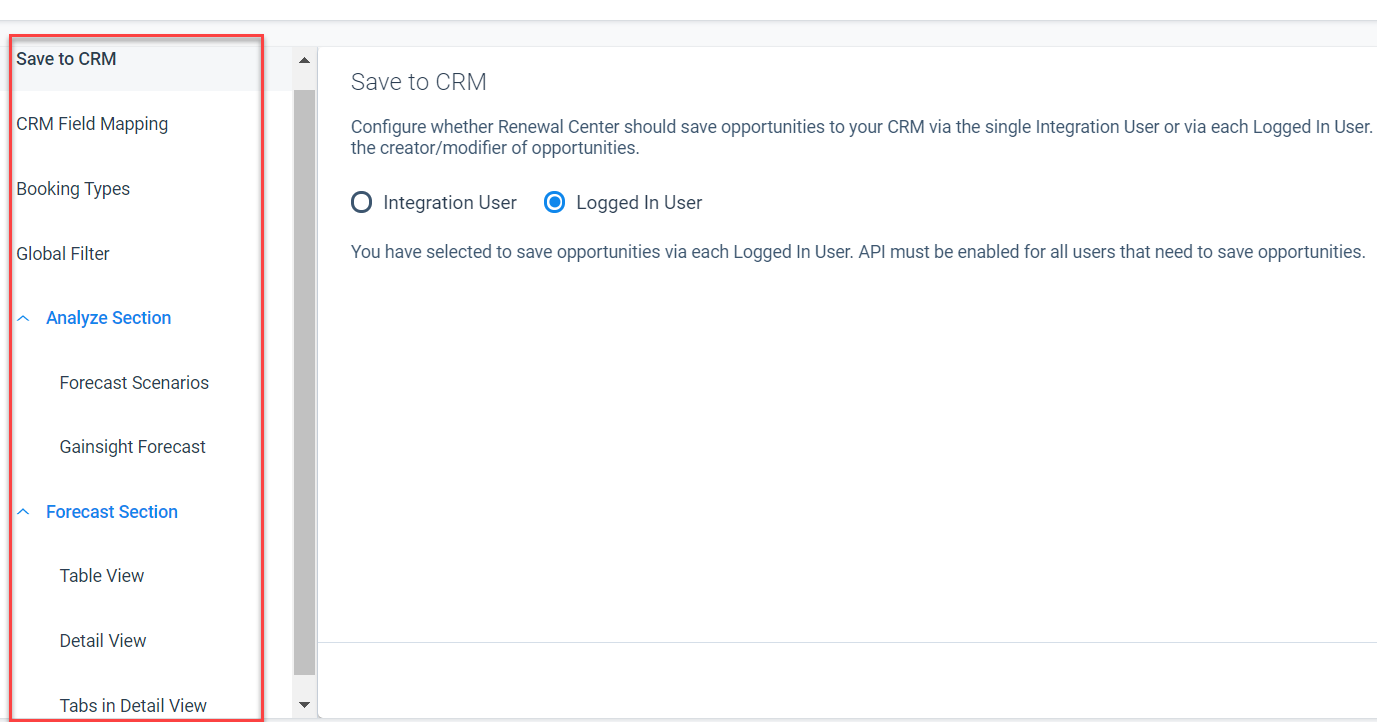
Simplified Configuration Navigation
Renewal Center Configuration has been re-organized to improve clarity and flow for Admins. Some of the configuration items are renamed and some are now nested.
Success Plan
With Success plans, you can capture, track activity and share progress on your customers’ key goals using Objective CTAs and their associated Tasks. Admins can create Templates for Success Plans to ensure a consistent approach to developing customer goals. Once configured, Success Plans can be manually created and viewed in the Customer 360 and Relationship 360. Admins can also create them using the Rules Engine.
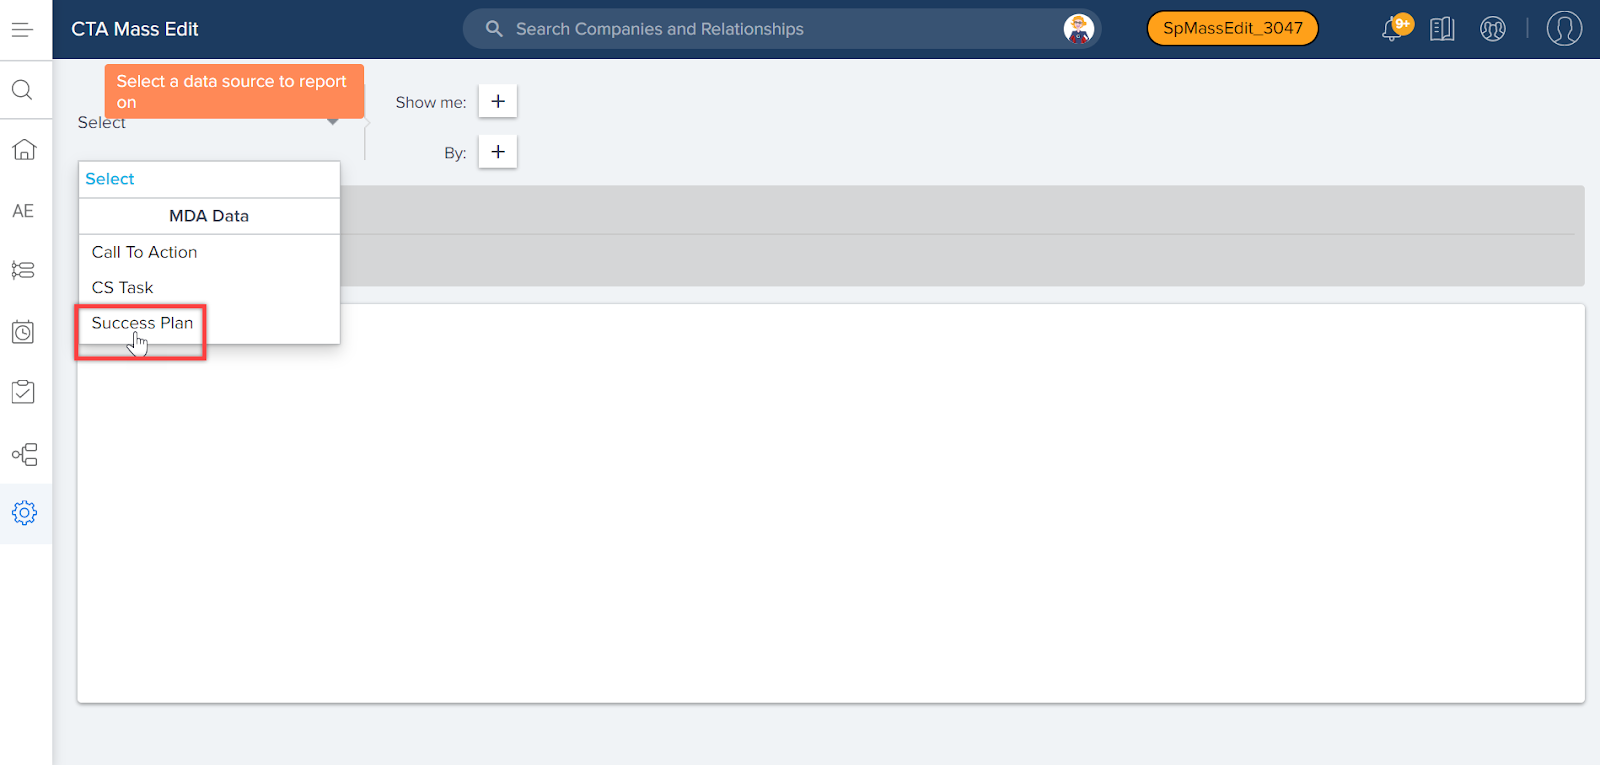
Ability to Mass Edit Success Plans
Until now Admins could only perform mass edits to Calls to Actions (CTAs) and Tasks using the Mass Edit feature. Gainsight now enables Admins to perform mass edit actions on Success Plans, including Reassign Ownership and Delete Success Plans in bulk.
Note: Admins can only reassign the ownership of a Success Plan to others, and not the individual Objectives and Tasks within it.
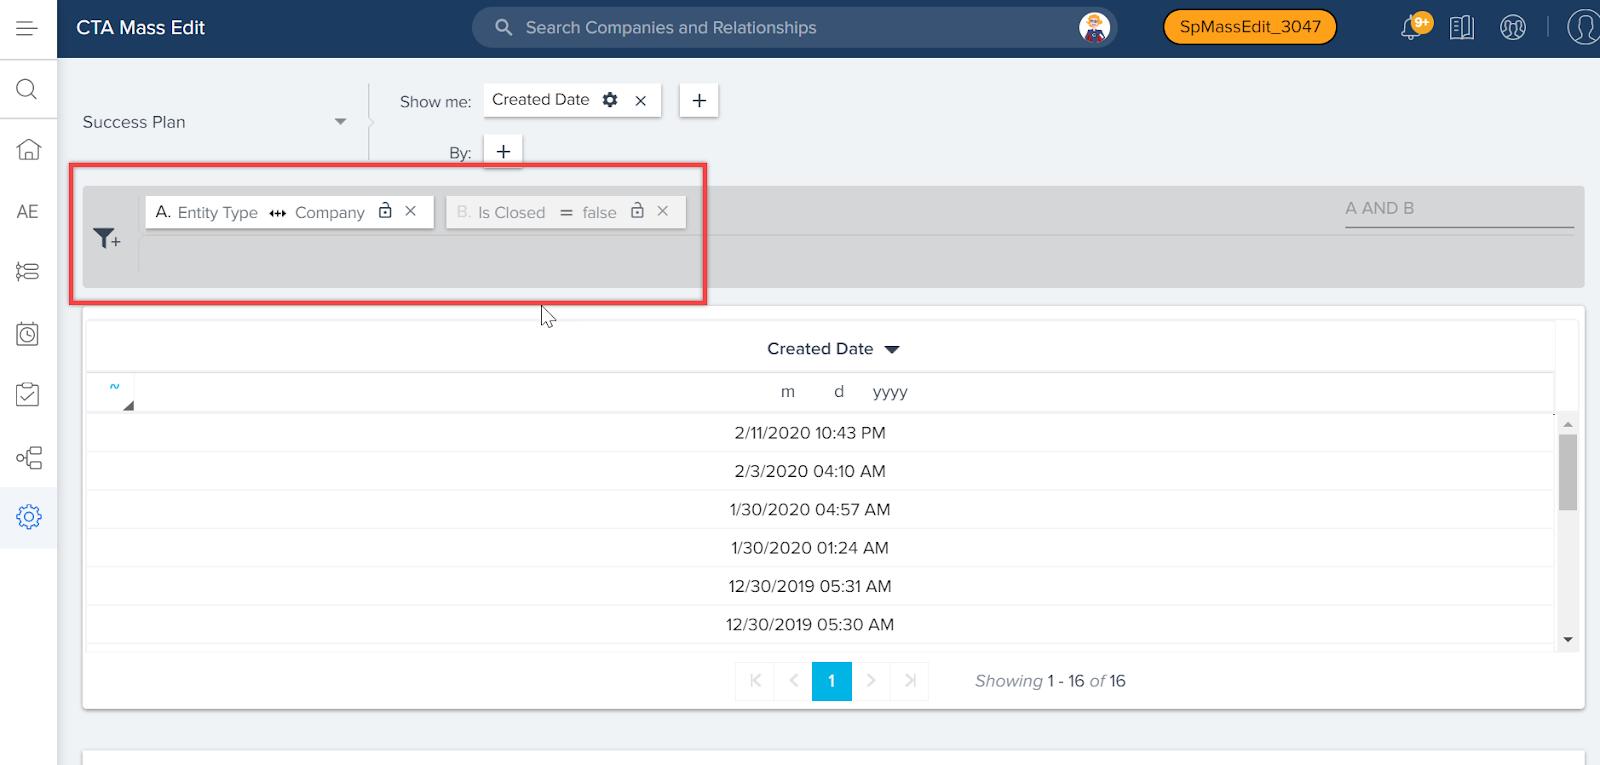
After selecting the Success Plan object from the source object dropdown list, you can see that the following two filters are defaulted in the Filters section:
- Entity Type Includes Company Filter: It is added so that the dynamic owner fields based on entity type can be displayed.
- SP Status != Closed Filter: It is added so that the owner of Closed SP’s are not updated.
For more information on how to perform Mass Edit on Success Plans, refer to the Mass Edit CTAs, Tasks, and Success Plans article.
Data Management
The MDA (Matrix Data Architecture) is Gainsight’s proprietary back end infrastructure that serves as the foundation for any instance of Gainsight. From data storage to Gainsight’s Rules Engine, the MDA is the invisible layer that Gainsight operates on outside of Salesforce. Gainsight designed the MDA in a very similar fashion to Salesforce, so that we can replicate multi tenancy within our product. Each Salesforce environment in which you have Gainsight installed and active will have its own tenant associated with the MDA.
Create Bulk Dropdown List Items through CSV file
Admins can now create dropdown list items in bulk by uploading a CSV file with the list of items. For example, if an Admin wants to create a dropdown list containing a list of 50 US states, they can be added as dropdown items through a CSV file, into the States category. The CSV file may contain the following headers:
- Name (required)
- Description
- Short Name
- Active
- Color
Note: Adding Name header in the CSV file is mandatory, but the remaining headers are optional.
For more information, refer to Dropdown list and Multi Select Dropdown List.
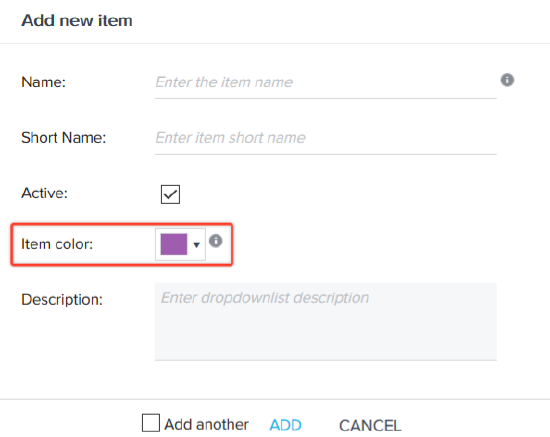
Color assigned to new dropdown List Category items
When an admin creates a new item in the dropdown list Category, a random color (other than White) is assigned to the item. Also, while creating items using a CSV file, if the item color is not defined in the CSV file, then a random color will be assigned for each new dropdown list item created. Previously, when a new item was created, by default the color White was assigned to the item. This change enhances the visibility of graphical reports on the dropdown list items.
To view this enhancement:
- Navigate to Administrator > Data management > Dropdown Lists.
- Click any category name.
- Click +ITEM and select Add Manually. You can see that a random is assigned to the new item that you are going to create.
Note: In a CSV file, Item color should be defined with a valid Hex code. For example, Blue - #0000ff.
Add new Items to the Standard Dropdown Category
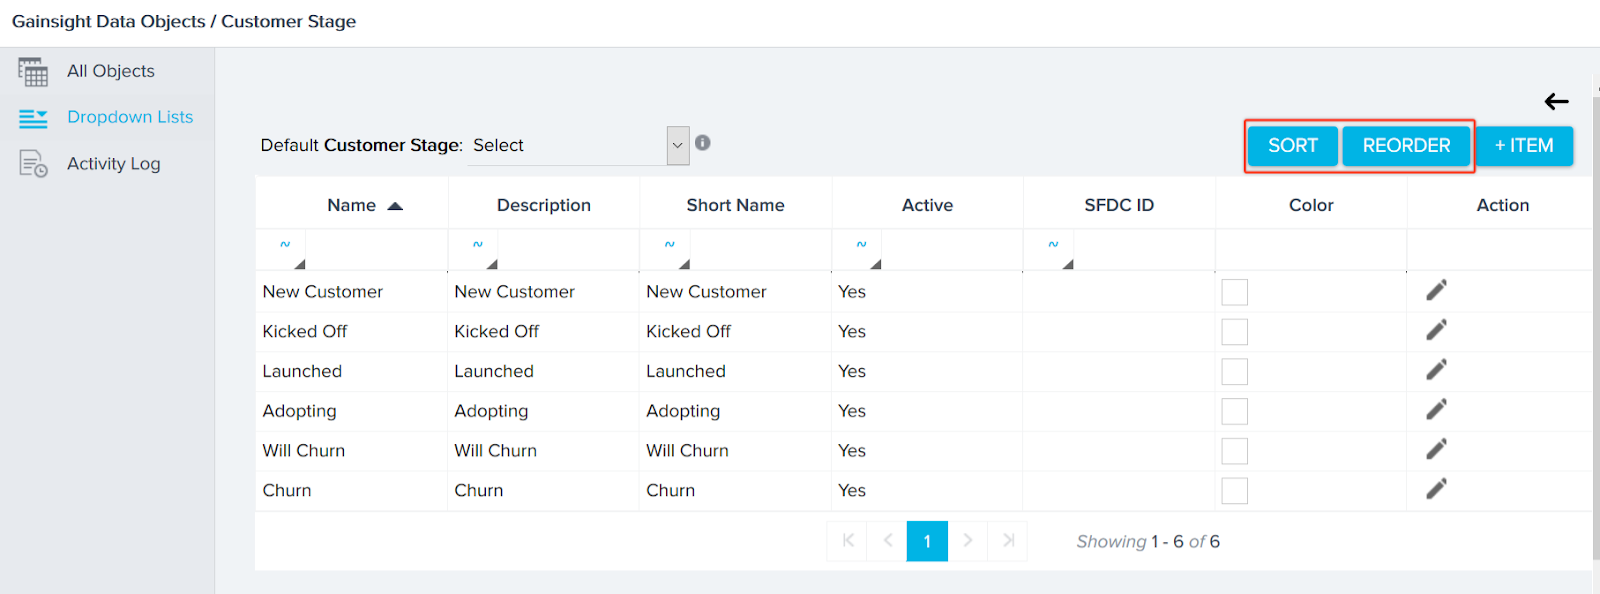
Admins can now add new dropdown items in a Standard dropdown category. Previously, the Standard dropdown category was not editable and admins could not add new dropdown items. For example, Admins can now add new items in Customer Stage, which is a standard dropdown Category. For more information, refer to Create Items in a category.
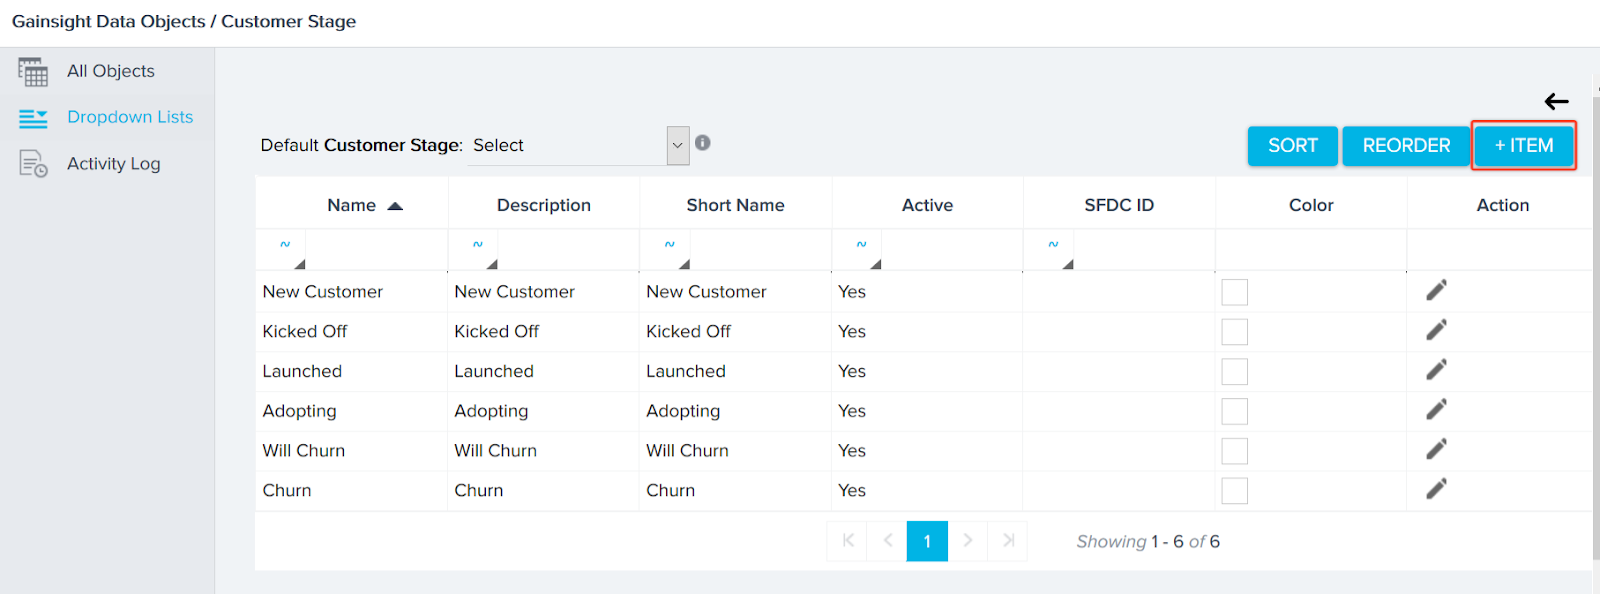
Sort/Reorder Dropdown Items in the Standard Dropdown Category
Admins can now arrange dropdown items in the required order in a Standard dropdown category, using the Sort or Reorder buttons. The dropdown list items can be displayed in alphabetical order or as defined by an admin for the end users.
To rearrange the dropdown items:
-
SORT: Click this button to sort the dropdown items in the alphabetical order.
-
REORDER: Click this button to rearrange the order of the items as per your preference.
Sandbox Management
Gainsight Sandbox Management provides the tools needed to manage your Gainsight Sandbox. A Sandbox is a copy of your production org, used for testing the latest features and functionalities that Gainsight has introduced with new versions.
New Sandbox Management page
Gainsight now allows Admins to create and refresh the Gainsight Sandbox orgs from the new Sandbox Management page. Previously, you were required to contact Gainsight Support to perform this.
A new admin page called Sandbox Management has been introduced to facilitate this enhancement. This page displays the number of Available Gainsight Sandbox orgs (remaining Gainsight Sandbox orgs out of the total orgs that you have purchased) and also the number of Gainsight Sandbox orgs which you have already created.
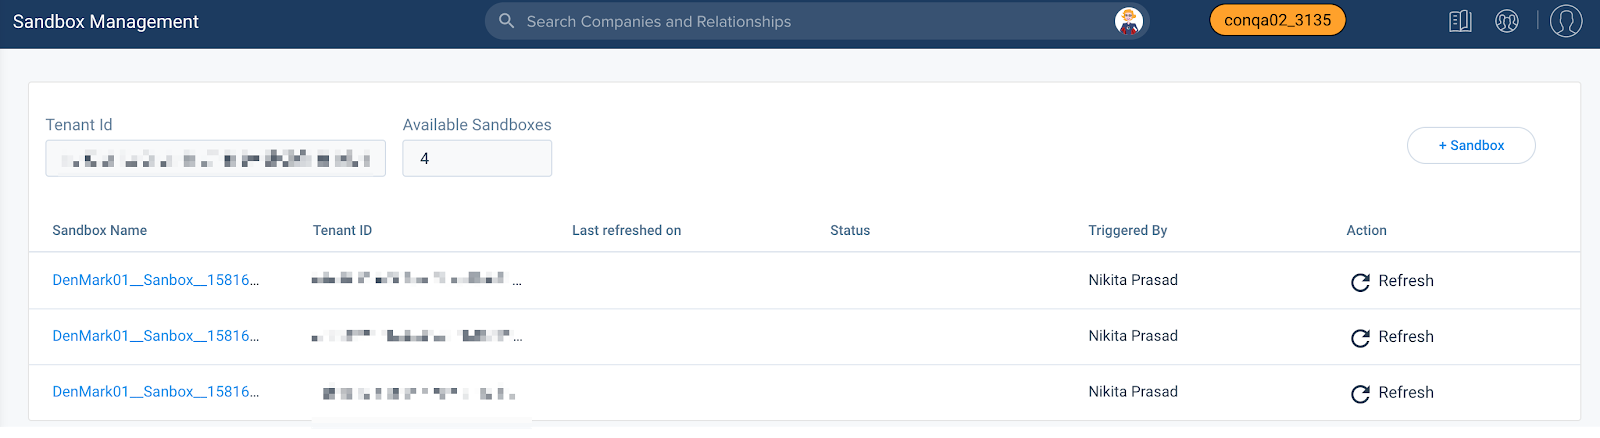
Numbers and details shown in the previous image are just for reference only (None of them are standard or real). You can see that three Gainsight Sandbox orgs are created out of seven orgs (licenses). You can create new Sandboxes using Production orgs up to another four.
To learn more about Gainsight Sandboxes and their management, refer to the Sandbox Management article.
C360
The Customer 360 (C360) is a central hub of your customer’s business information in Gainsight. It synthesizes business data from various sources and provides you with a holistic view of your customers. This minimizes the preparation time for your customer meetings.
Date and Time Display Format Based on User Locale
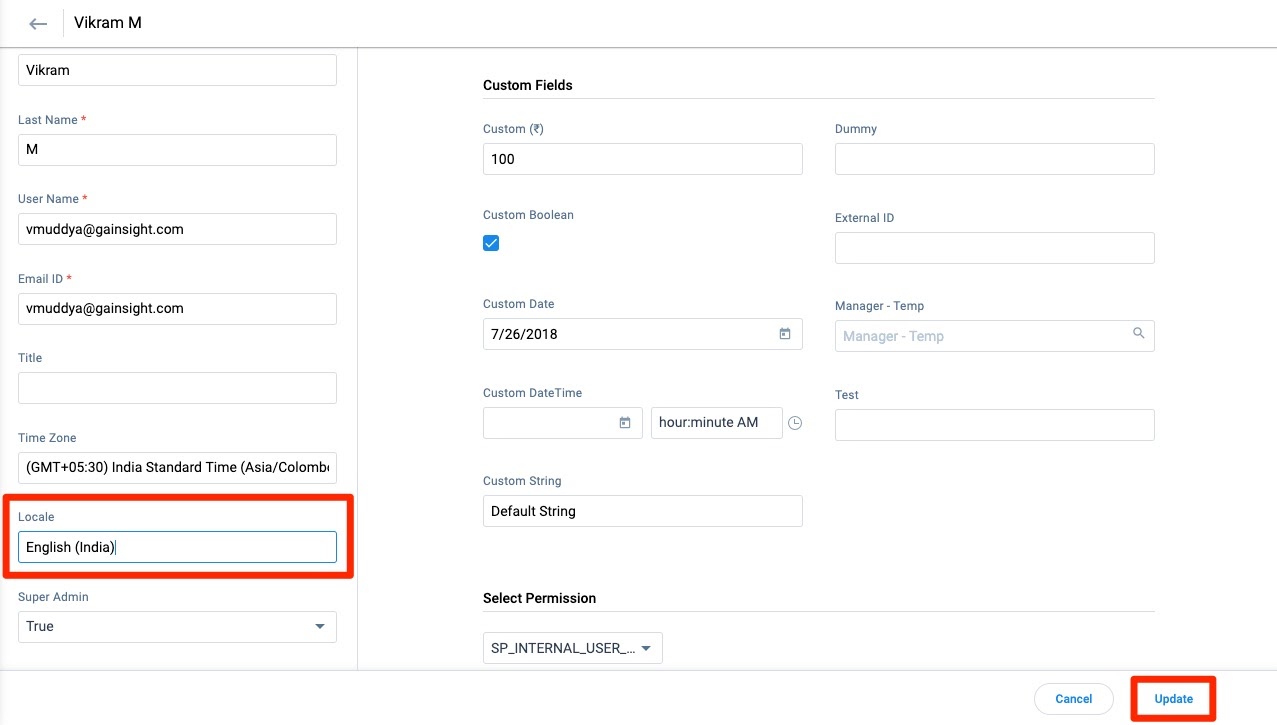
Admins have the ability to configure their users’ preferred locale from the User Management page, but previously this configuration did not change the user experience. This required individual users to work with data formatted based on their global org settings, regardless of their personal preferences, or work requirements. With this release, the display format for all date, datetime, and number fields on 360 pages will adhere to the user’s preferred locale, allowing for a more personalized user experience.
To configure a user’s preferred locale, take the following steps:
- Navigate to Administration > Operations > User Management.
- Click the kebab menu icon for the required user and select Edit User. This opens the user’s profile.
- Click the Locale field and select the user’s preferred locale.
- Click Update.
Note: If an Admin does not configure a user's locale under the User Management page, data in the user's org will be formatted based on the tenant level locale setting by default. Admins can configure this setting under Application Settings. For more information, refer to Application Settings.
Access SFDC Pages Directly from C360
This enhancement is only applicable to orgs that have the Salesforce Connector enabled.
Gainsight NXT in Salesforce CRMContent in this section supports Gainsight NXT accessing through Salesforce Login. To learn more about Gainsight NXT in Salesforce, click here.
- Click here to expand for more information on how to Access SFDC pages directly from C360.
-
For orgs with the Salesforce Connector enabled, C360 pages now have a kebab menu with options to directly navigate to the Company’s associated Account, Opportunity, or Contact pages in SFDC. Previously, the C360 did not have a direct link to these pages. This required users to take additional time to reference data in SFDC alongside the C360. Users now have a more convenient workflow.
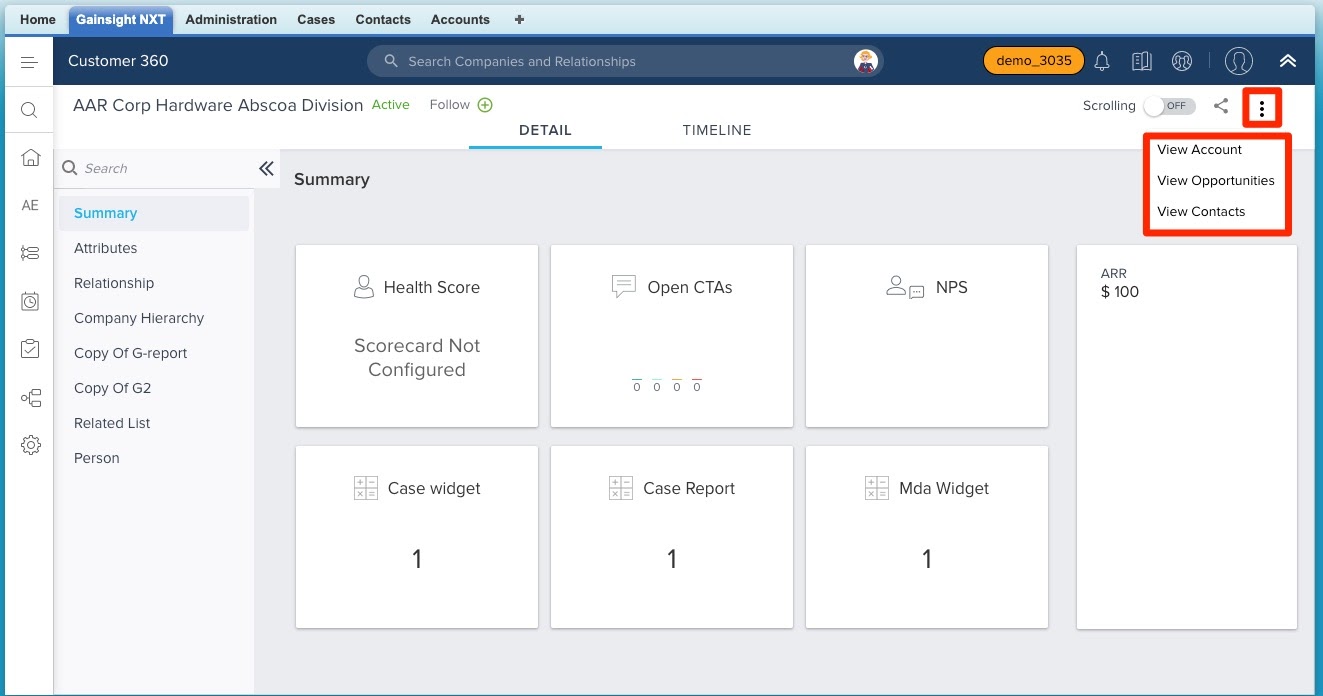
Note: These menu options are only available for Company records successfully synced to SFDC. For more information on connecting Salesforce to Gainsight, refer to Salesforce Connector Overview article.
View all Relationship Types in List View
It is now possible to filter for All Relationship Types in the List View of the C360 Relationship section. Previously, this filter option was only available for the Relationship section Card View of the C360. This enhancement will prevent confusion between the data displayed in each view.
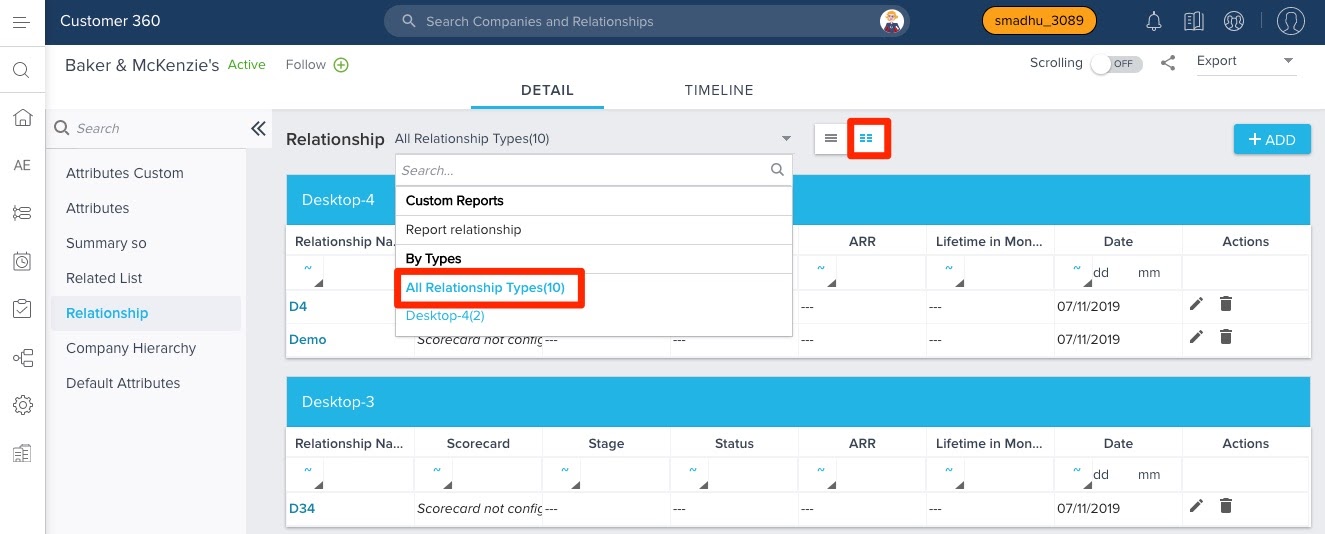
For more information on configuring the Relationship section of the C360, refer to Add Relationship Section to the C360 Page article.
Note: The All Relationship Types filter option will not be available for the List View if it requires displaying more than ten Relationship Types. This is to prevent display issues within the view.
Surveys
With Surveys, you can create highly customized surveys that capture customer insights and transform them into actionable next steps for your organization. You can easily create multi-page surveys with a variety of question types, including multiple choice, matrix, and a standard NPS® question type. Surveys give admins the ability to design and distribute surveys in Gainsight without a dependency on sites or features.
Bulk Import PX Surveys into Surveys
Gainsight Admins can now integrate Gainsight PX with CS Surveys to import and analyze PX survey engagement responses. Gainsight users can derive more customer insights from these survey responses and trigger followup actions from Gainsight CS. CSMs can analyze the PX survey engagement responses from the C/R360 page, as well as see a holistic view of survey responses from various sources for each customer.
After you configure the integration from Administration > Operations > Connectors 2.0 > CONNECTORS tab, navigate to the Surveys page to access this feature.
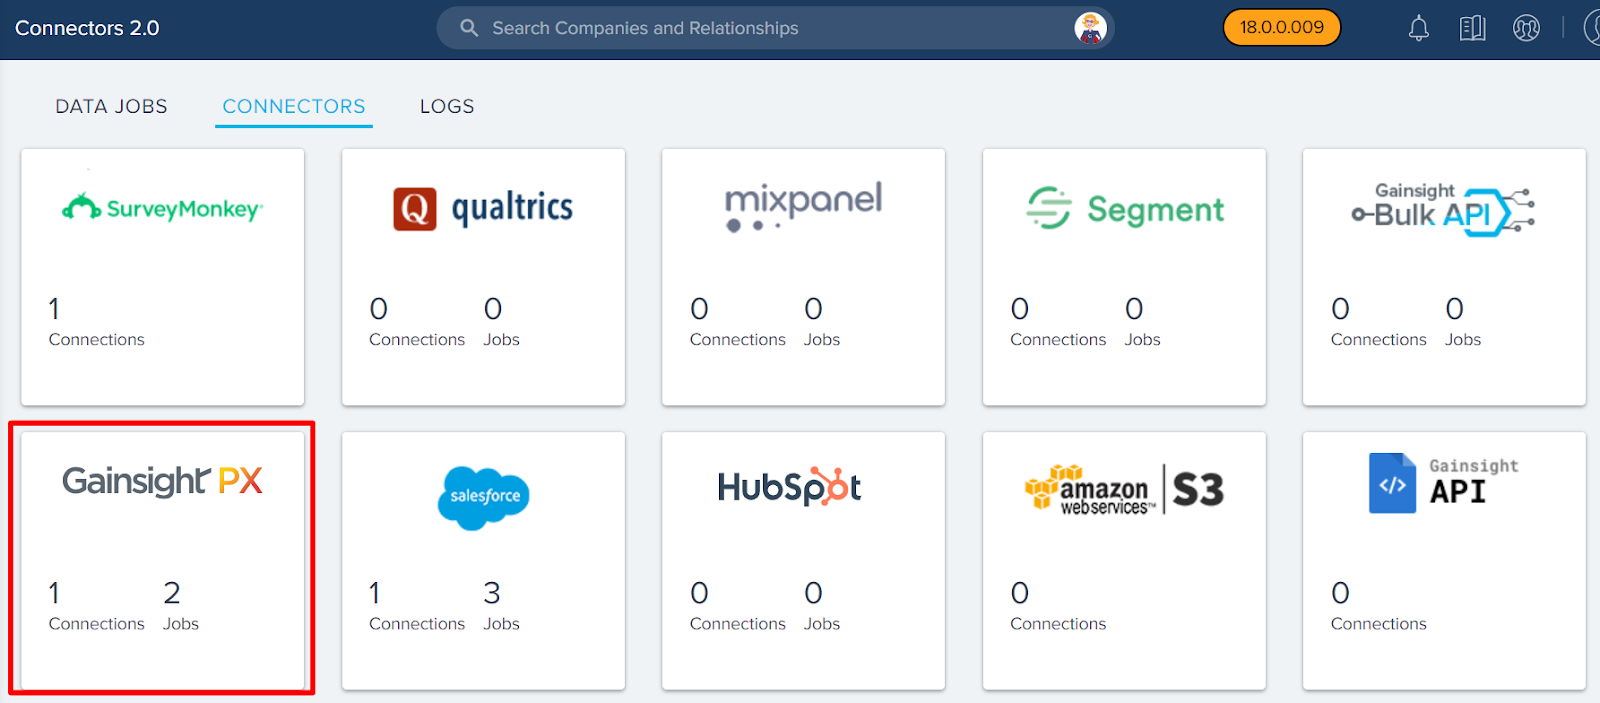
For more information on how to integrate Gainsight PX with Gainsight Surveys, refer to the Gainsight PX integration with Surveys article.
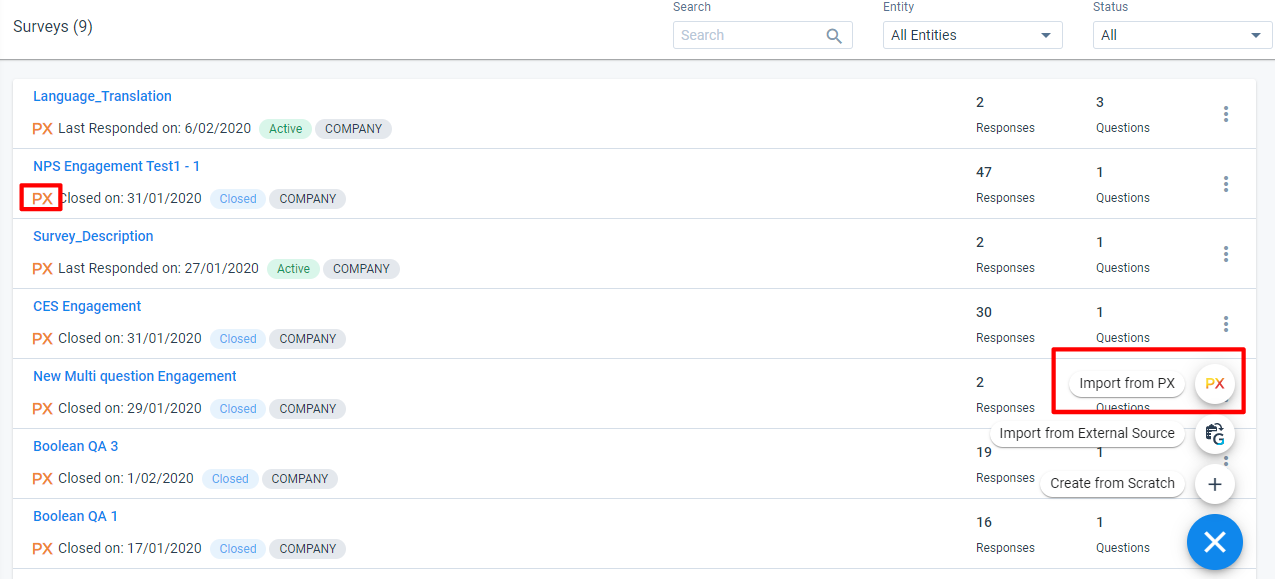
In the following image, you can see the Import from PX option when you click +. The Gainsight PX logo below the Survey Name identifies the surveys which are imported from Gainsight PX.
| Net Promoter®, NPS®, NPS Prism®, and the NPS-related emoticons are registered trademarks of Bain & Company, Inc., NICE Systems, Inc., and Fred Reichheld. Net Promoter ScoreSM and Net Promoter SystemSM are service marks of Bain & Company, Inc., NICE Systems, Inc., and Fred Reichheld. |