Send Emails from Cockpit
Gainsight NXT
This article explains how Customer Success Managers (CSM) or users with full license can send emails using Email Assist 2.0 from Cockpit.
Overview
Email Assist 2.0 helps you to send emails directly to your contacts.
Business Use Case:
A CSM can send an email directly from Cockpit to a customer to determine a suitable time to conduct an Executive Business Review (EBR) or to gather more details about a negative response to a Net Promoter Score ( NPS®) Survey.
Following are the options with which you can send emails from the Cockpit page:
- Ad-Hoc Emails: This option helps you to send emails using an email template from Cockpit (within a CTA) without applying a playbook. For more information, refer to the Send Ad-Hoc Emails section of this article.
- Email Tasks: This option helps you to send email tasks created in Playbooks. Admins can create Email Tasks in Playbooks and associate them with a Journey Orchestrator email template. Once the Playbook is applied to a CTA (using a Rule, or manually in Cockpit), the Email Task is visible to you. For more information refer to the Send Email Tasks section of this article.
Send Ad-Hoc Emails
Using Ad-Hoc Emails, you can send emails using an email template in a CTA.
Prerequisite:
Sending emails from the cockpit must be enabled from the Email Configuration page. To enable this functionality, refer to the Configure Emails to Send from Cockpit article from Additional Resources..
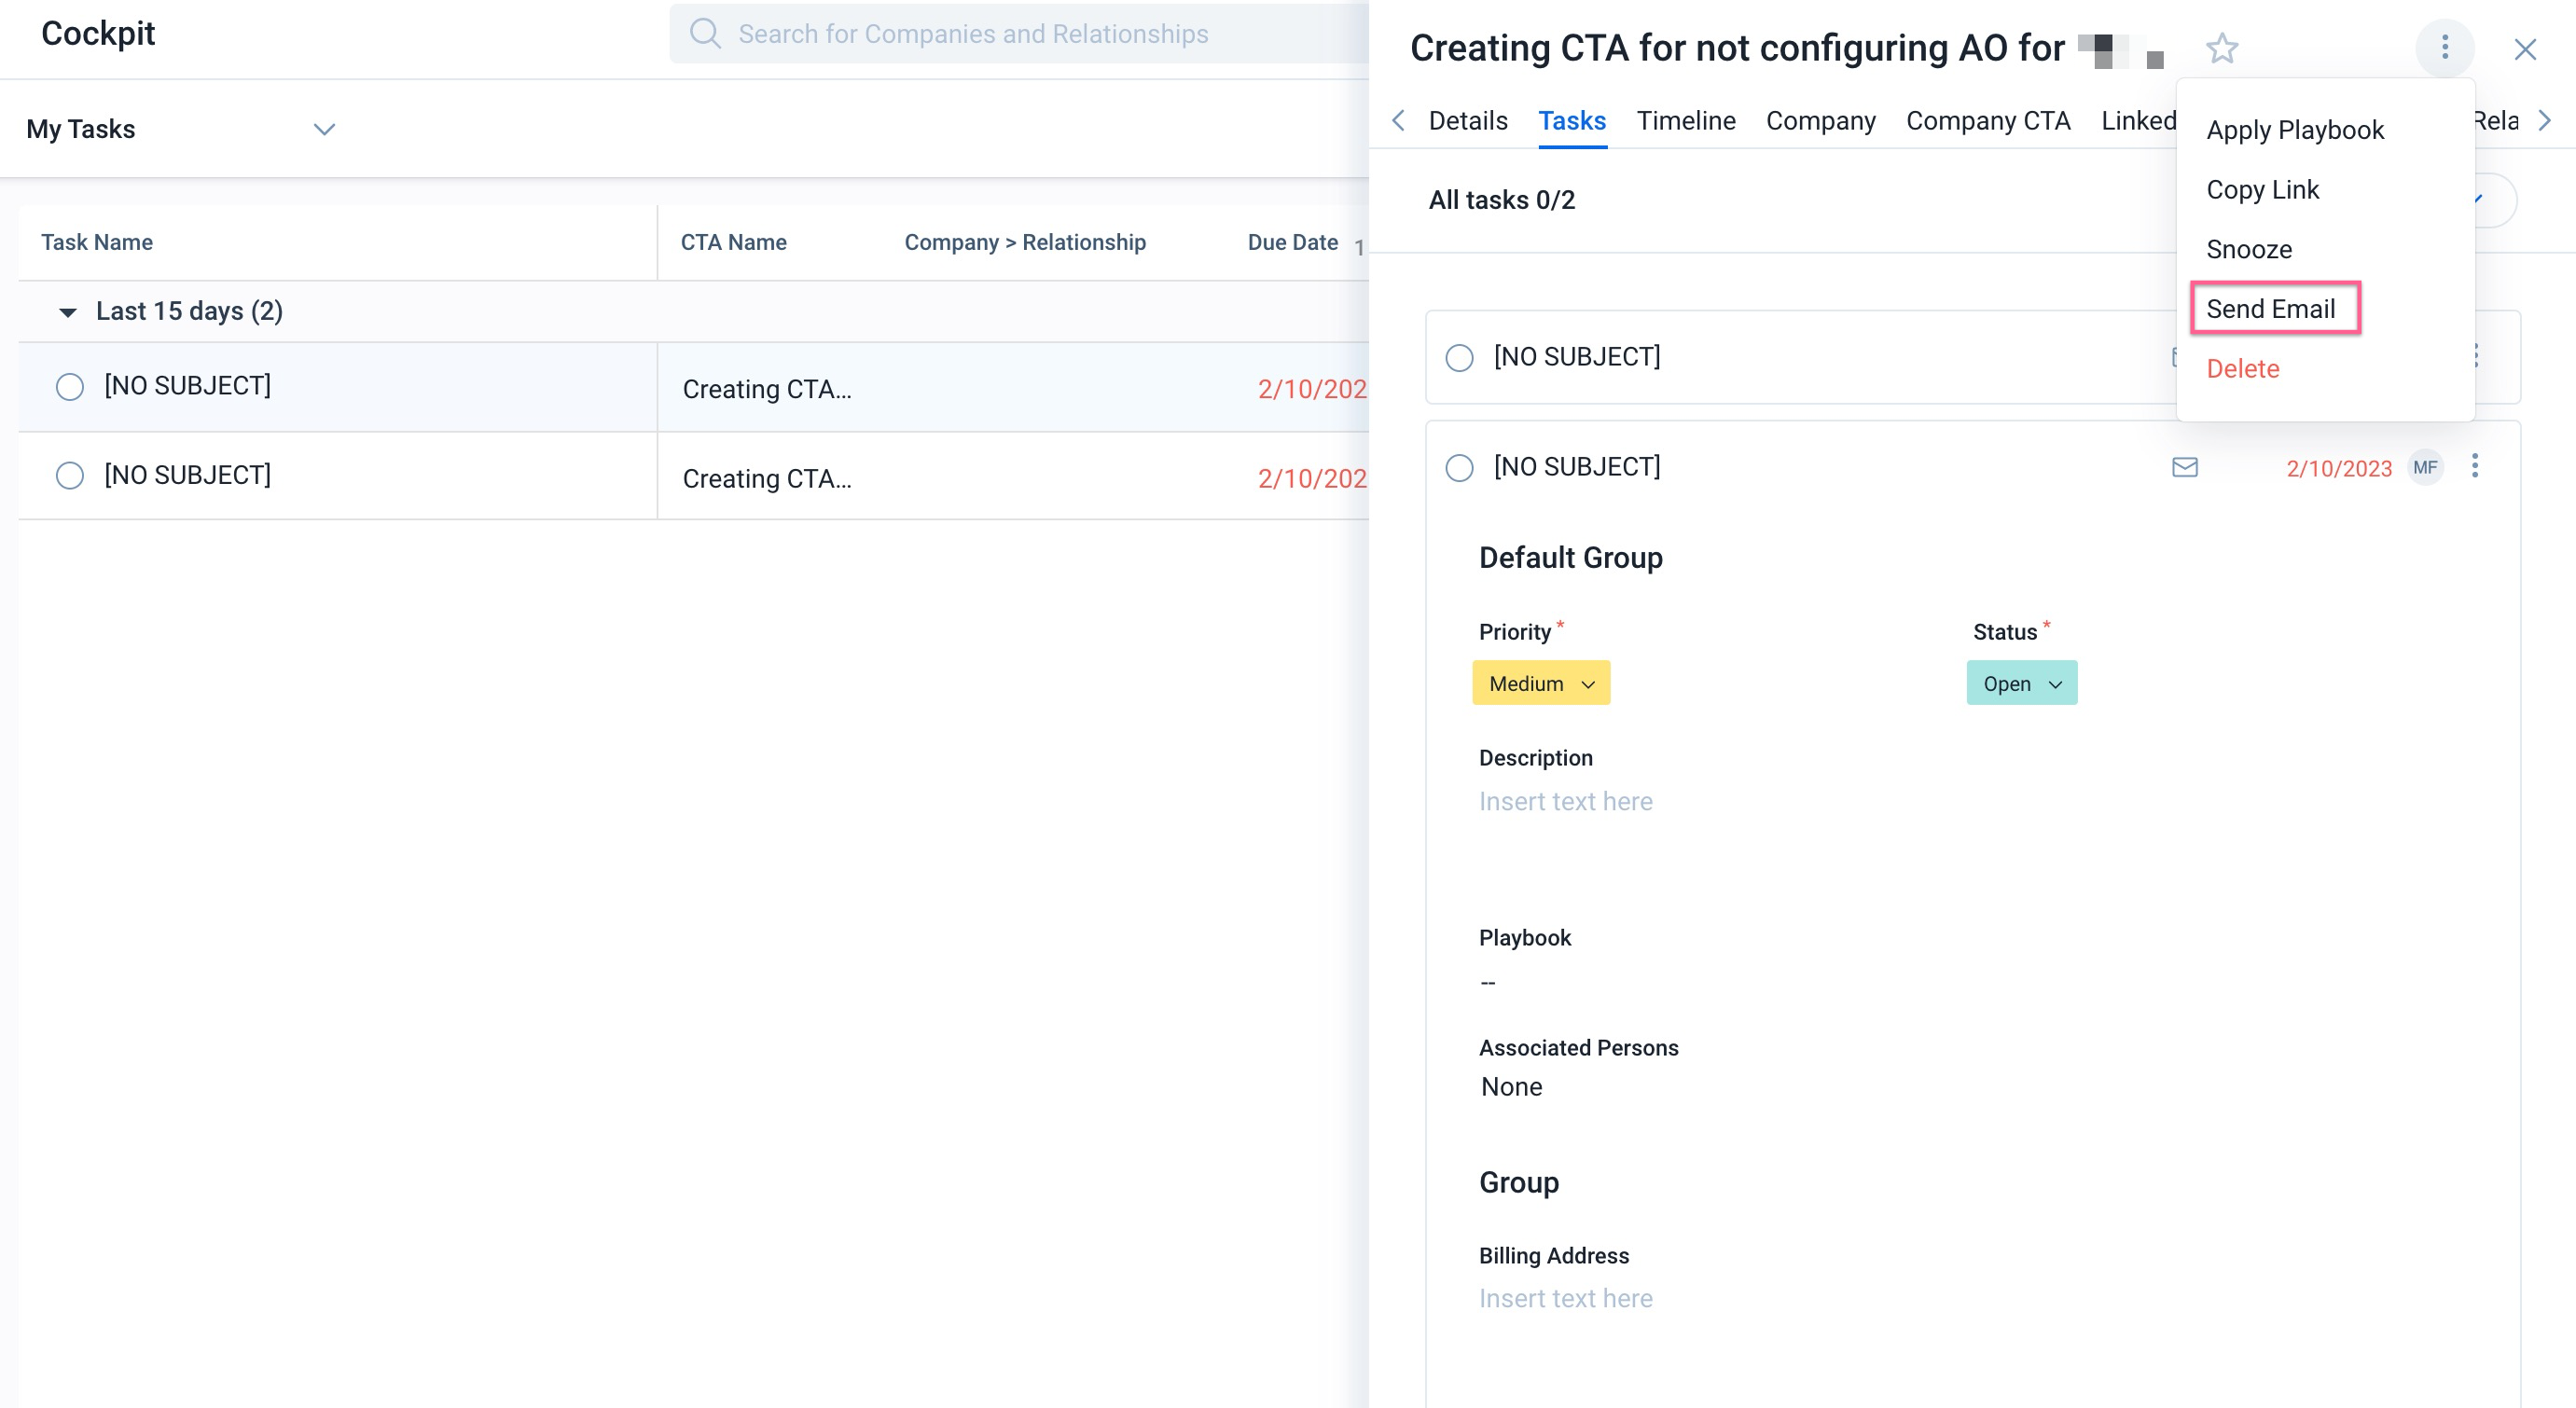
To send an email from the Cockpit page:
- Navigate to Cockpit > CTA list view.
- Click CTA Name from which the email needs to be sent. The CTA detailed view is displayed.
- Click the vertical-three dots in the CTA detailed view.
- Click Send Email. The Send Email window appears.
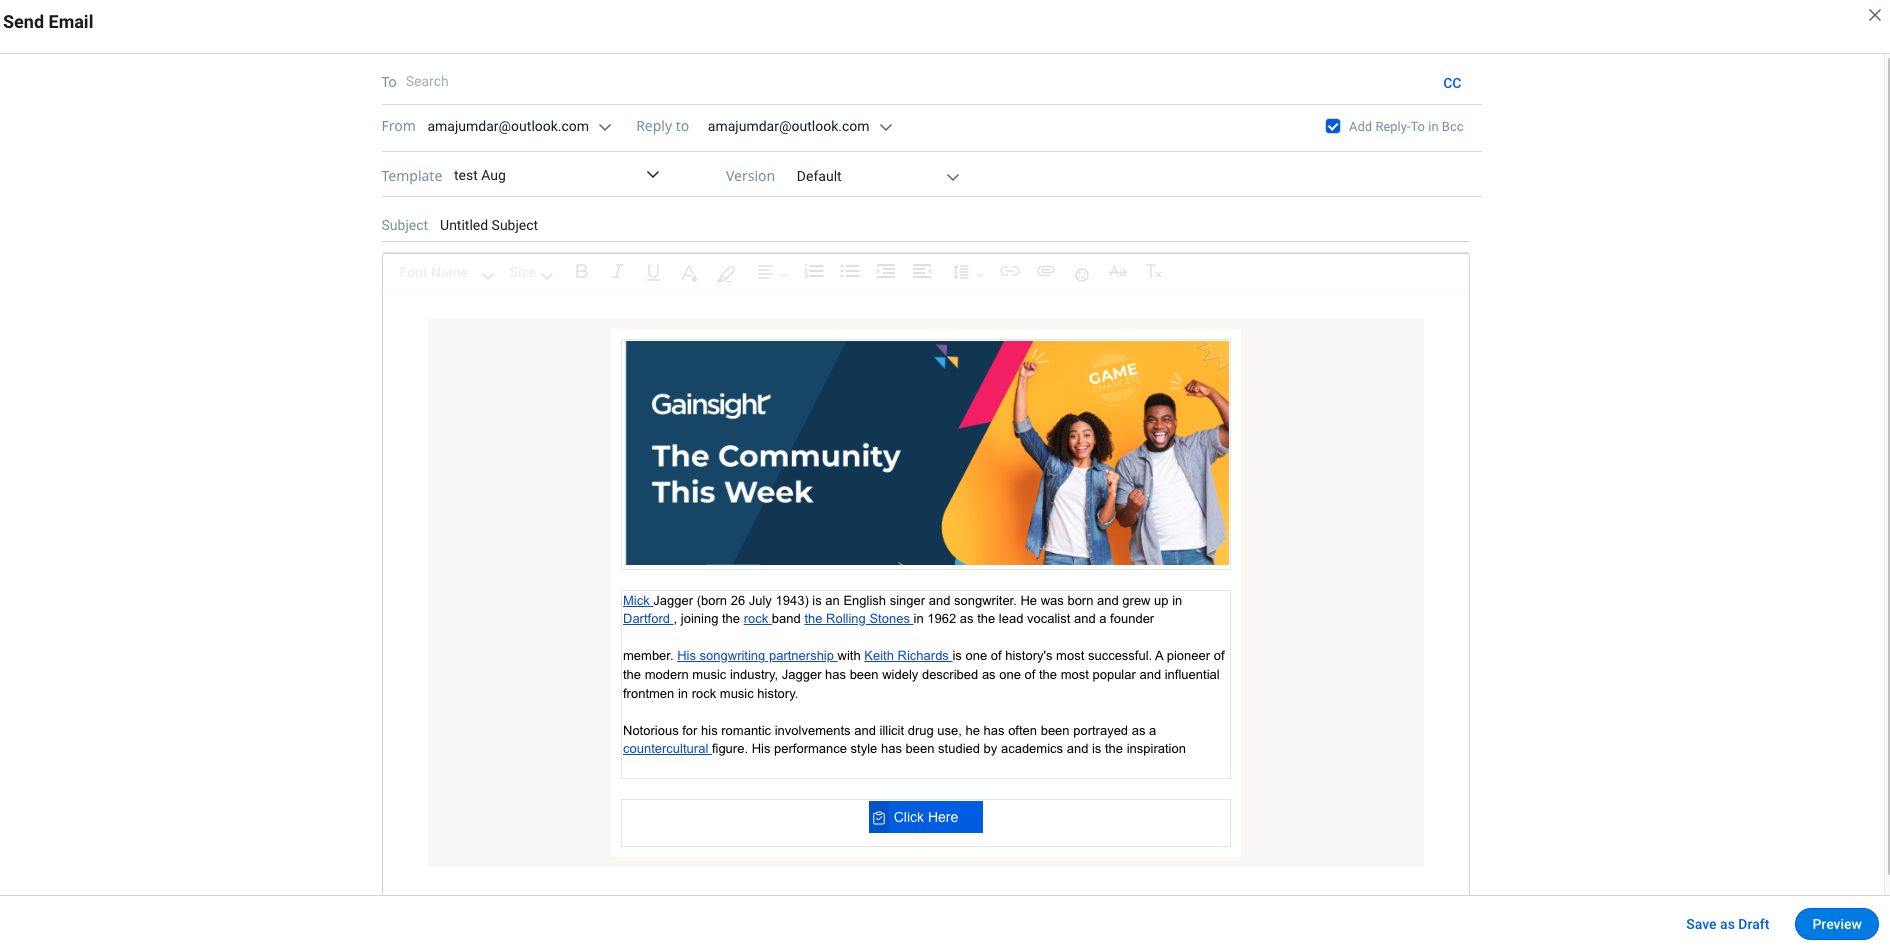
- In the To address field, enter the recipient's email ID(s).
Note:- A maximum of 25 recipients can be added in the To address field.
- For two or more recipients, the Send as Separate Email is selected by default, if the email contains the following template types:
- A Survey link.
- A Person or User object tokens.
- A Report having Person object filters.
- Separate Email threading experience is applicable as follows:
- Applicable only when the Send as Separate Email option is selected.
- Supported on Outlook and Gmail.
- Applicable to responses received from the recipient marked in the To field. Email replies from different recipients are no longer threaded together.
- Not Applicable for recipients in the CC and BCC fields.
- Not Applicable for the Out of Office auto-reply emails.
- The To field looks up the email addresses of 'Active users' along with the email of the Company Person / Relationship Person - Depending on whether CTA is for a Company or Relationship.
- (Optional) Click CC to add email ID(s) in the CC address field.
- Select the sender’s email ID in the From dropdown list.
Note:- Admins can limit the email Id options in the From field, allowing selection of email Id from only a single domain. To use an email Id from a different domain, please contact your Gainsight Administrator.
- Enable the Organization Wide Email Address option to send an email on behalf of the team. For more information on how to enable this feature, refer to the What’s New in Email Assist 2.0 article.
- From the Reply-To dropdown, select the sender’s email to receive the email response.
Note: Admins can limit the email options in the Reply to field, allowing selection of email Id from only a single domain. To use an email Id from a different domain, please contact your Gainsight Administrator. - (Optional) Select the Add Reply-To in the BCC checkbox, if the email id of the sender needs to be added in the BCC field.
- From the Template dropdown, select the email template.
The Subject and Email body in the email composer are populated with the tokens within the selected template.
Note: Click the maximize or minimize option next to ‘X’ in the upper right corner to resize the Send Email window.
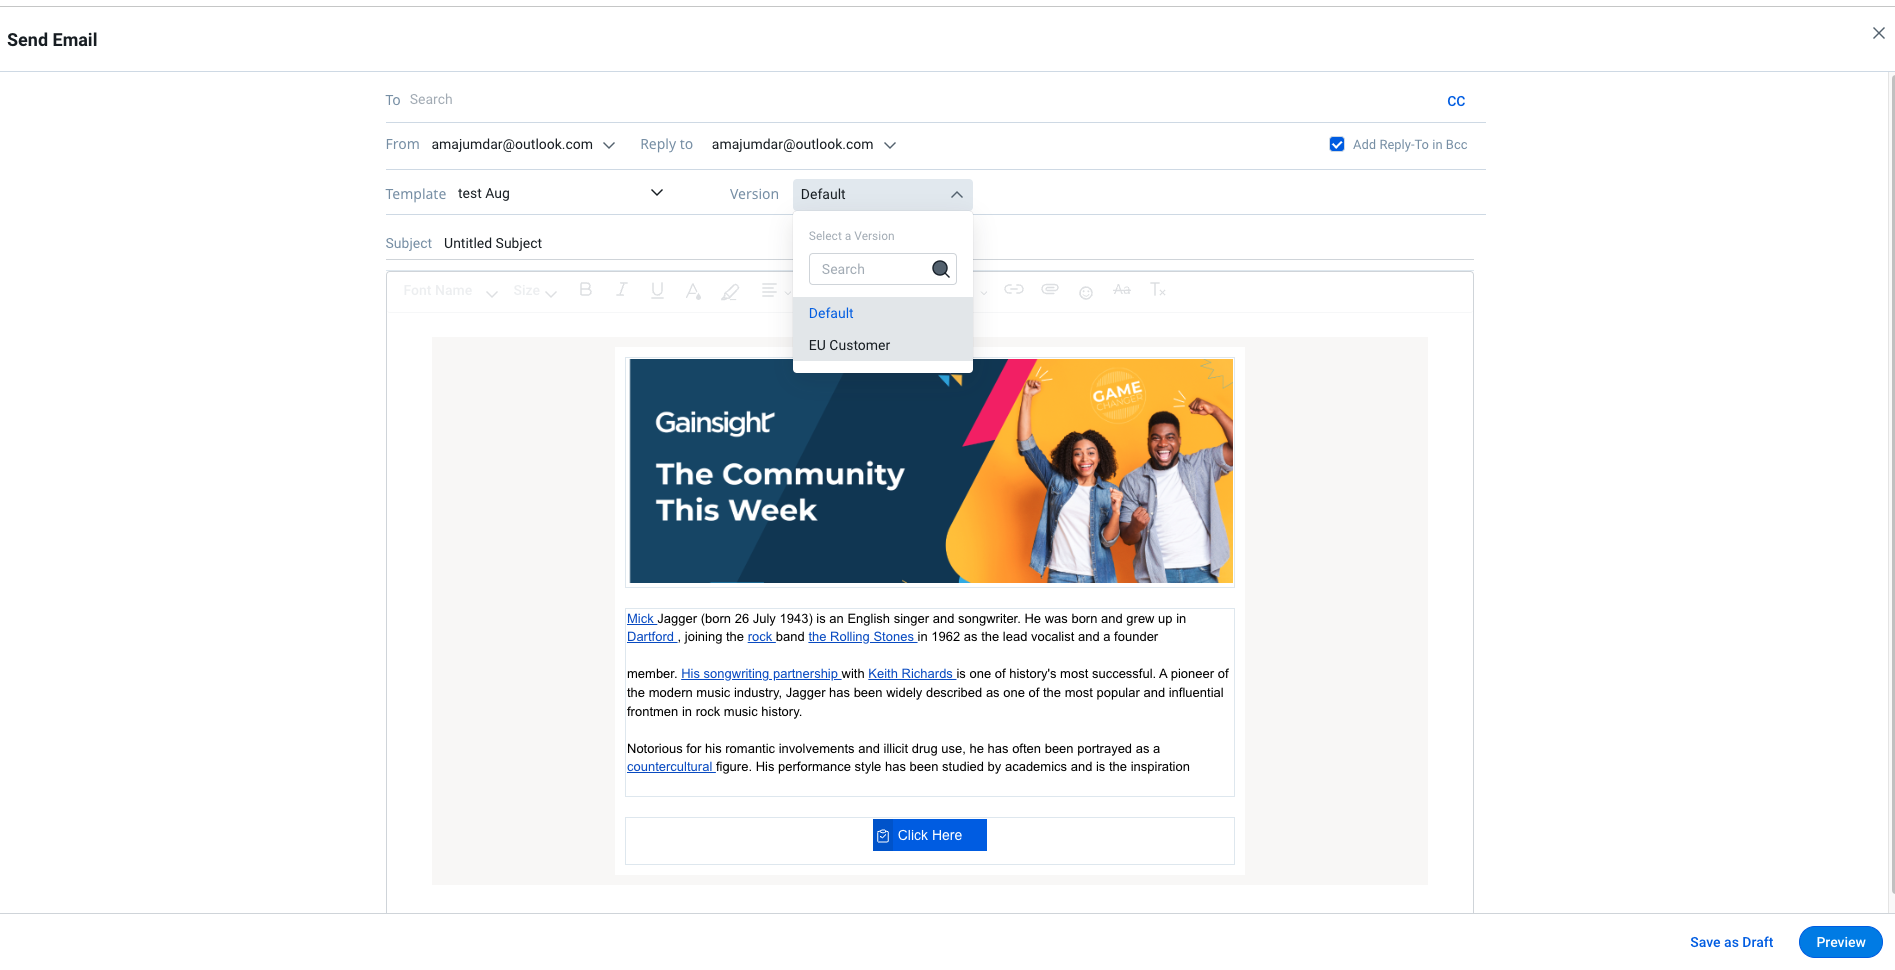
- From the Version drop-down list, select the version of the email template. You can select multiple versions of an email template to scale personalized customer communications.
For more information on how to create multiple template versions, refer to the Create and Send Multi-Version Emails article from the Additional Resources section
Note:
- The version of the template selected is applicable to all the recipients.
- Multi-version template selection is currently supported only for Send Email option from Cockpit.
- Once the version is selected, it cannot be changed if the Email is saved as a draft.
- Multi-version template selection is currently not supported in Playbook (admins cannot add a template version into Playbooks as email tasks) and Gainsight Assist Plugins.
- The maximum size of each file you can attach is 5 MB, and the cumulative size of your attachments and email body must not exceed 30 MB
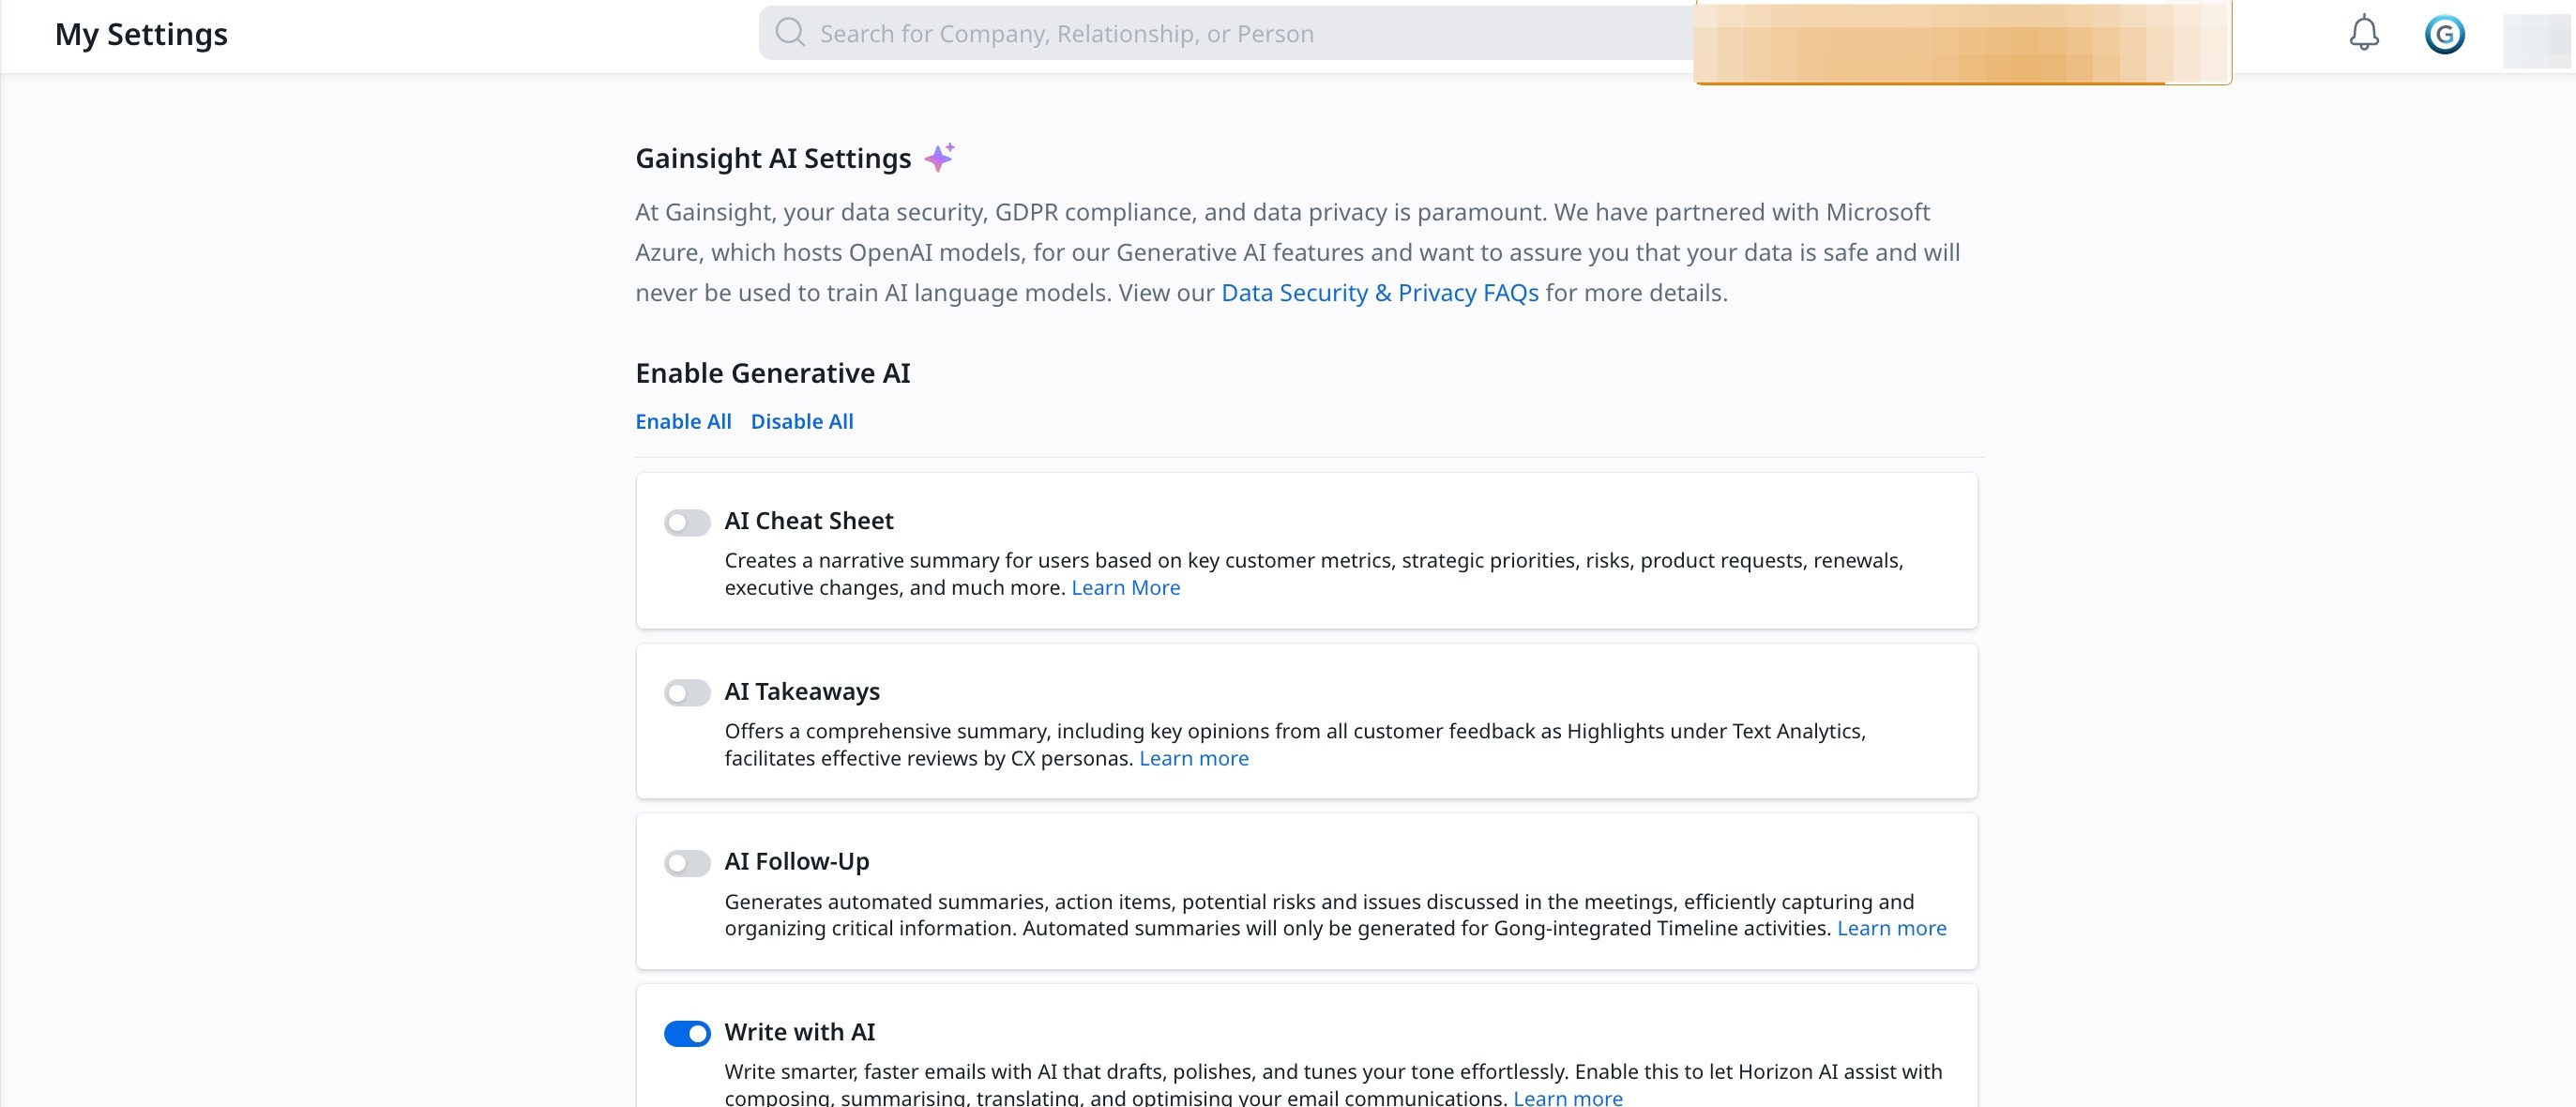
Write with AI
The Write with AI feature helps in drafting email content. It uses AI to automatically generate text for your email templates based on user prompts. It elevates your email experience by leveraging AI to boost efficiency and personalization in your email communications.
To add texts to the email using AI:
- Click Write with AI. A list of available prompts appears.
- Select the required prompt. The suggested AI-generated text appears.
- (Optional) Select a different prompt from the dropdown to make further edits to the suggested text.
- (Optional) Click the Regenerate icon to revise the suggested text.
- (Optional) Click Type prompt or Edit to add a different prompt that is not listed. You can type the required prompt directly into the text bar.
- Click Add or Replace to insert or substitute the original text with the AI-suggested text.

Note:
- Ensure the following key points regarding the use of AI model in Gainsight:
- All responses are generated solely by the AI model and may include inaccuracies or hallucinations. We advise users to exercise discretion and verify all information as needed.
- Gainsight does not apply any additional intelligence or modifications to the responses generated by the GPT model. Our platform simply facilitates the delivery of these AI-generated responses.
- To enable the Write with AI feature, ensure to Turn ON the toggle switch for Write with AI option from Administration > Gainsight AI > AI Settings.
.jpg?revision=1)
Edit or Delete Tokens
You can edit or delete the following types of tokens in the template:
Person or User Object Tokens
You can edit or delete the Person or User object tokens added to the template.
To edit Person or User object tokens:
- Click Person or User object token. The Edit Token Properties window is displayed.
- From the Mapping dropdown, select the required object token.
- (Optional) Click Remove Mapping to remove the selected object token. You can then select a new object token.
- Click Update to update the new Person or User object token in the email.
Note: To Delete a token, click x next to the token.

Report Tokens
The Report token added in the email displays the report’s name and visualization type. You can edit or delete the Report tokens in the Send Email window.
Edit Report Tokens
To edit the report tokens:
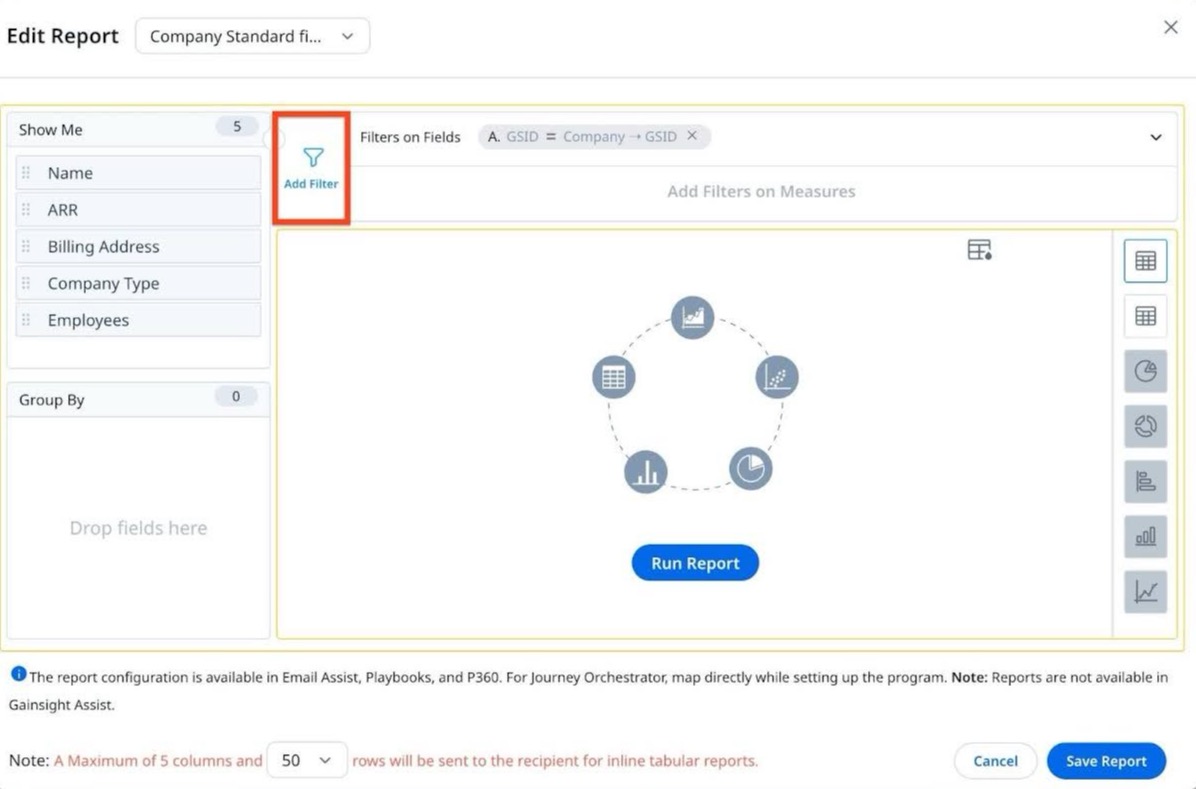
- Click Edit. The Edit Report window is displayed.
- From the Report dropdown list, select the report to be added.
- (Optional) Click the Add Filter icon to add filters.
Note: Consistent with the previous version, the new widget does not support Filter on Measure.
- From the Field dropdown, select a field.
- From the Value dropdown list, select one of the following fields to fetch the data.
- ‘To’ Recipients > Person
- Company > GSID
- Relationship > GSID
- Relationship Type > GSID
- Click Apply.

Note: To ensure accurate mapping when using Add Filter, select the specific field from the lookup dropdown, not the parent lookup field.
- (Optional) Click the Change visualization icon to select the required visualization type of the report.
Note:- CSMs can change the visualization of any report to a Tabular report if required.
- Tabular Report displays a table of only five columns and 20 rows.
- Click Run Report.
- (Optional) Click the Settings icon to select one of the following:

- Grid Options: Use grid options to freeze the first column and wrap text.
- Ranking and Sorting: Use ranking if you want to include Top (ASC) x or Bottom (DESC) x records based on a particular field in the report. For more information on how to use Ranking, refer to the Advanced Report Settings article.
Note: Currently, the configured Row Height for a report is not applied in emails sent from Cockpit, P360, or Journey Orchestrator.

- Click Save Report.
Delete Report Tokens
To delete the report token, click Delete on the Report token.
Survey Tokens
You can edit or delete a Survey token in the email.
To edit the survey token:
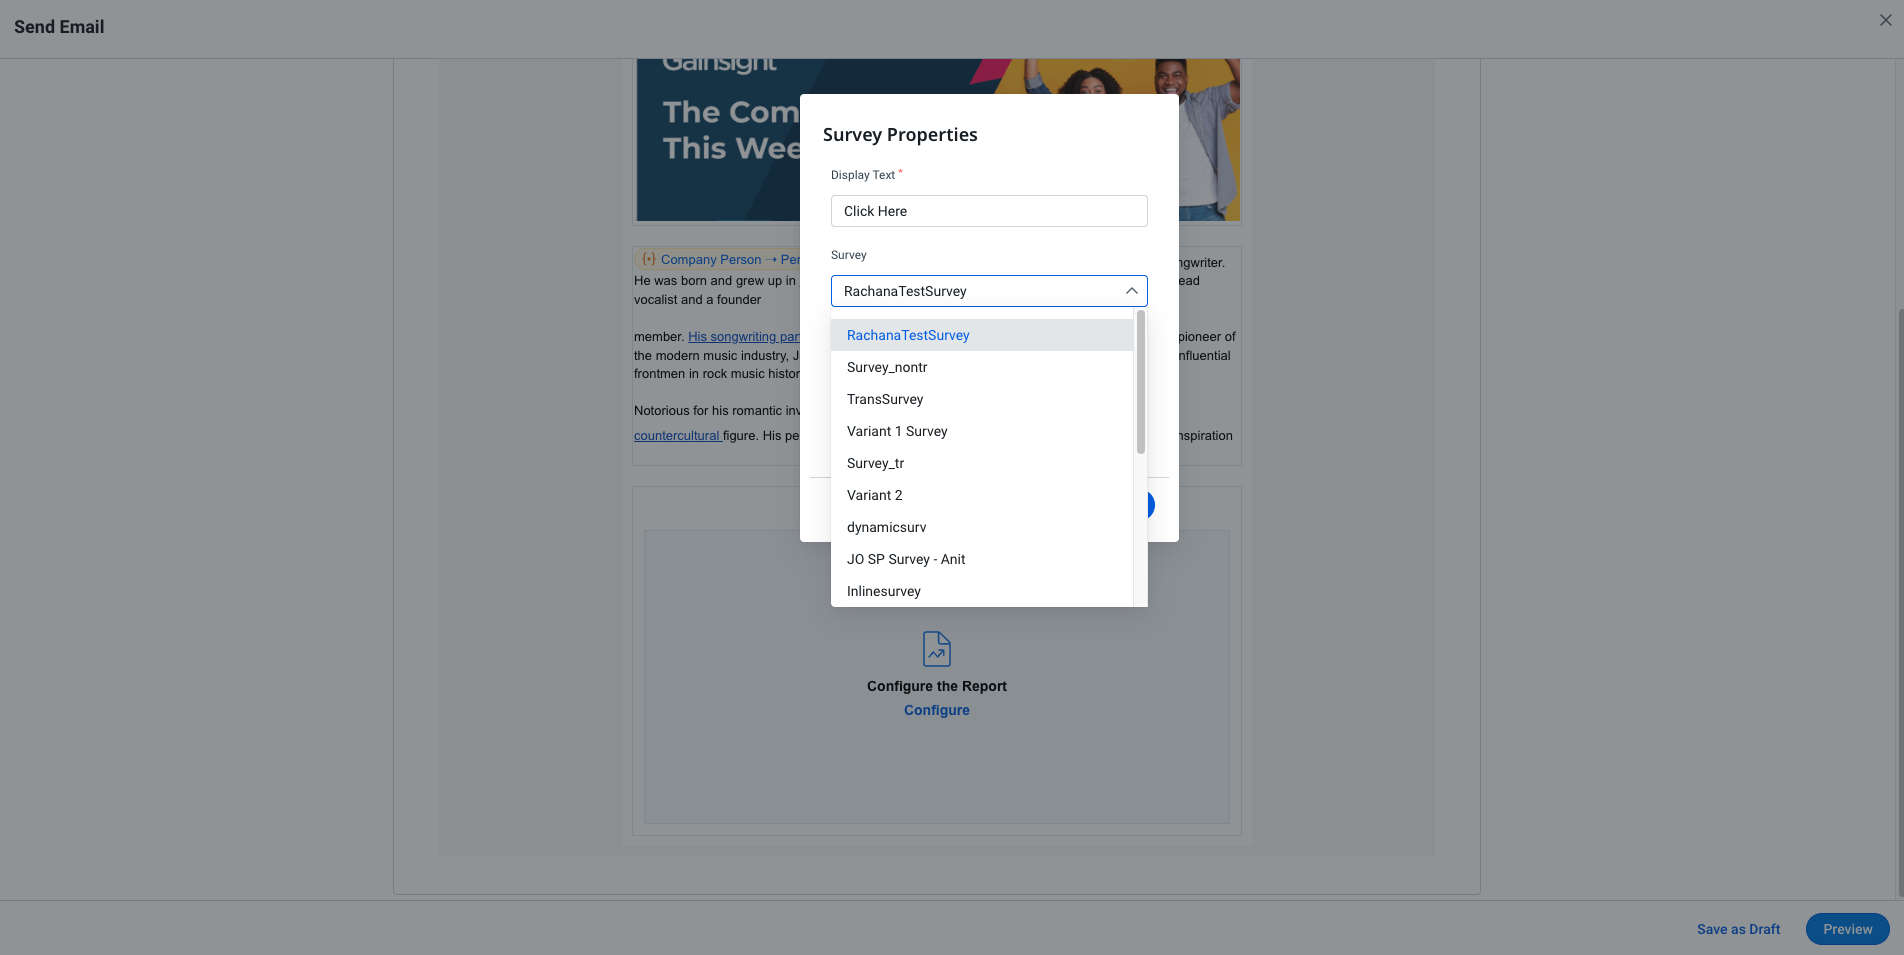
- Click the Pencil icon to edit the survey link. Insert Survey as Link window is displayed.
- From the Default Survey dropdown, select the survey to be added.
- Click Update.
Note: To delete the survey, click the Trash icon.
For more information on how to create a survey, refer to the Create a Survey article from the Additional Resources section.
Preview and Send Emails
Email Assist provides you with a Preview option to review the emails drafted for all recipients.
To preview an email:
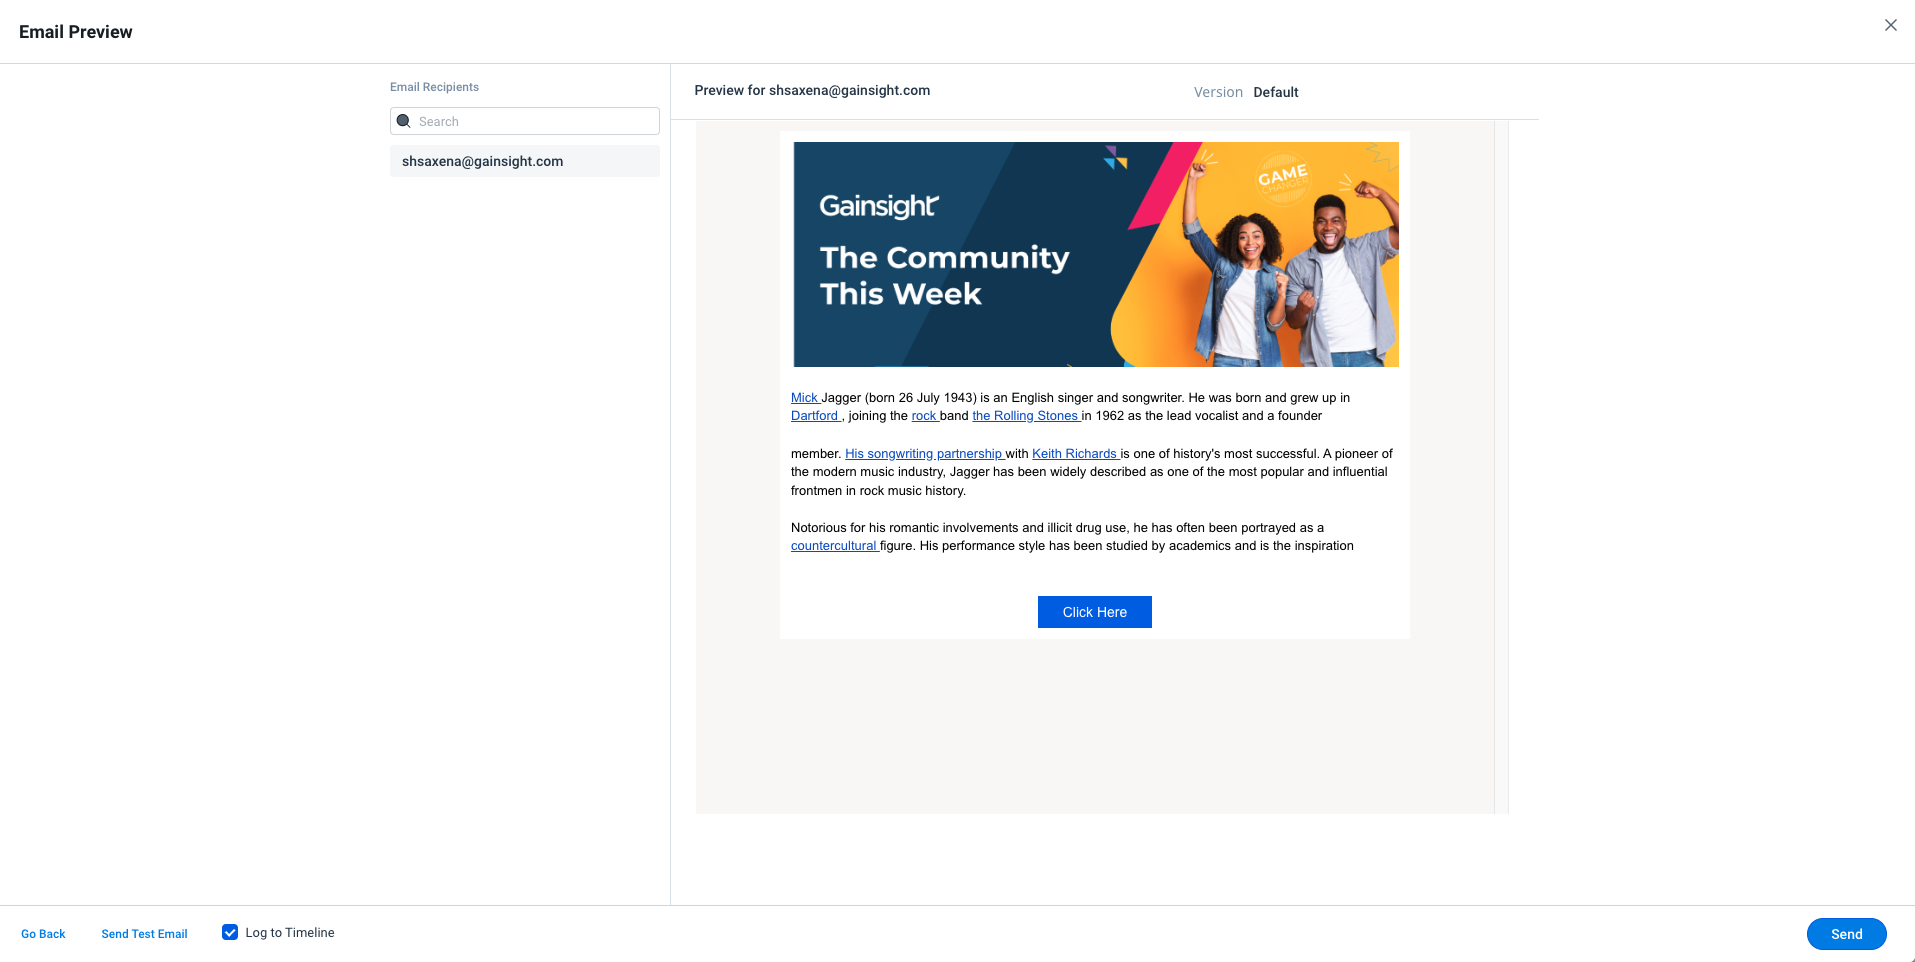
- Click Preview. The Email Preview window is displayed.
Note:- The left pane of the window shows the list of recipients added.
- The right pane displays the content of the email drafted.
- Click on the recipient's email address to view the content drafted for the particular email.
Note: The preview option is beneficial for multiple recipients where the email content is different for each recipient. For example, when using a Survey, Person, User, or Report tokens are used in the email content.
The following optional actions can be also performed:- Send Test Email: You can send a test email. To send a test email:
- Click Send Test Email. The Send Test Mail window is displayed.
- By default, the logged in user’s email is selected. Additional email addresses can be added in the address field.
- Click Send Test Email to send the email to the added recipients.
- Log to Timeline: Select the checkbox to create a Timeline Activity.
- Send Test Email: You can send a test email. To send a test email:
- Click Send to send the reviewed email.
Send Email Tasks
You can create email tasks in Playbooks to send emails. Once the email task is created, users can send emails from the Cockpit using these email tasks. For more information on how to create email tasks, refer to the Configure Emails to Send from Cockpit article from Additional Resources.
To send email tasks:
- Navigate to Cockpit > List view.
- Click CTA Name from which the email needs to be sent. CTA detail view is displayed.
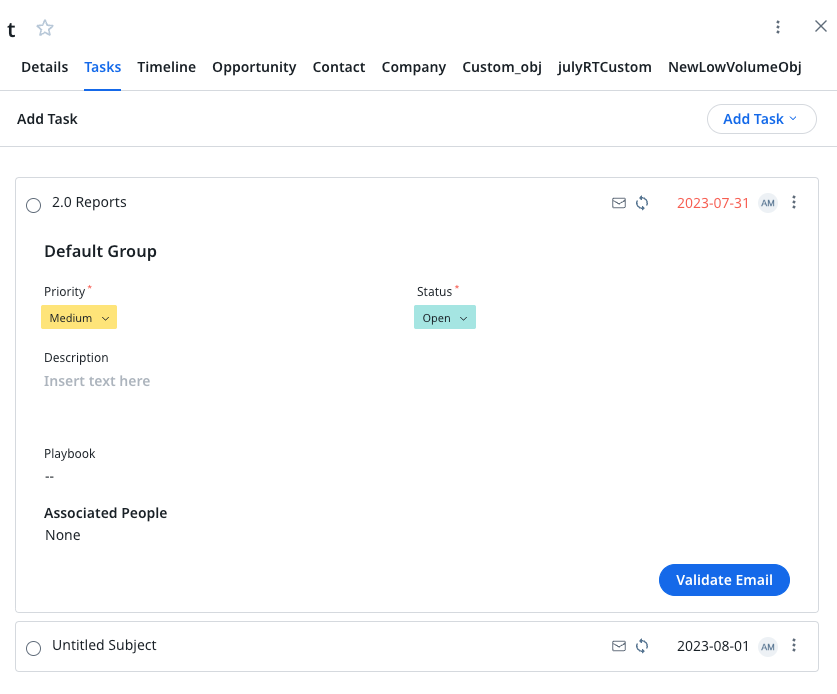
- Navigate to the Tasks section.
- Click the email task to expand the task's detailed view.
- Click Validate Email. The Send Email window is displayed.
Repeat the steps from the Ad-Hoc Emails section to send the email tasks.
Note: Since Email tasks use email templates created in Playbook, the template dropdown is not available when sending email tasks.
Email Stats
Email Stats contain details of all the instances when an activity was shared as an email.
To view the email stats:
- Click the Email icon next to the required Timeline Activity. The Sent Email window is displayed.
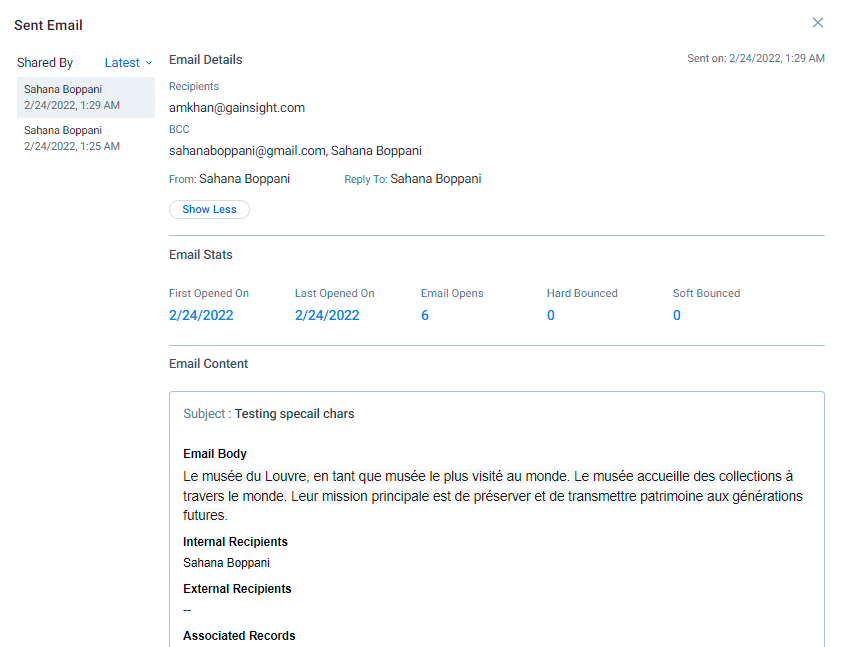
The following information is displayed.
- First Opened On: Displays the date on which the email was first viewed.
- Last Opened On: Displays the date on which the email was last viewed.
- Email Opened: Displays the total number of times the email has been viewed.
Note: Email Opened stats do not exclude machine-opened email numbers; they reflect the actual number of emails opened by humans.
- Hard Bounced: Displays the number of times the email was returned to the sender because the recipient’s address is invalid.
- Soft Bounced: Displays the number of times the email failed to send as it was temporarily denied by the recipient’s email servers. Click the number displayed here to see a list of recipients that experienced the Soft Bounce. You can then trigger to resend the email.
Additional Resources
- Configure Emails to Send from Cockpit
- Create a Survey
- Advanced Report Settings
- Create and Send Multi-Version Emails
- Write with AI (CS)
| Net Promoter®, NPS®, NPS Prism®, and the NPS-related emoticons are registered trademarks of Bain & Company, Inc., NICE Systems, Inc., and Fred Reichheld. Net Promoter ScoreSM and Net Promoter SystemSM are service marks of Bain & Company, Inc., NICE Systems, Inc., and Fred Reichheld. |