Job Chain Page
Gainsight NXT
| IMPORTANT: Gainsight is upgrading Connectors 2.0 with Horizon Experience. This article applies to tenants which have been upgraded to the Horizon Experience for Connectors 2.0. If you are using Connectors 2.0 with the previous version, you can find the documentation here. |
This article explains how to create, edit and delete a Job Chain. Learn about various options in the Job Chain page.
Overview
The Job Chain feature helps simplify the process of scheduling a group of related Jobs that you need to run in a particular sequence. This sequence is based on the scheduled time of the Job Chain.
For example, In a Job Chain, when Job A and B are in sequence, Job B starts automatically right after Job A finishes. However, connector jobs initiate data extraction as soon as the preceding job completes its extraction process.
Note: Although the data extracts are independent, the configuration specifies that the data load is sequential.
For example, if two jobs are in the queue, the first job starts fetching data, and upon completion, the second job begins data extraction. The initiation of the second job's extraction is not dependent on completing the Add to Destinations task in the first job.
Note: If a Job is added to a Job Chain, then the individual job schedule is ignored and the Job Chain’s schedule is considered and the jobs are run as per the sequence of the jobs in the Job Chain.
Business Use Case: If Admins want to sync Company Person data into Gainsight, they need to sync the Company data before syncing Company Person data. This is required because Gainsight validates Company data before syncing the Company Person data, and if the Company data is not present, then the Company Person sync will fail.
Options in Job Chain page
The following image shows options in the Job Chain page.
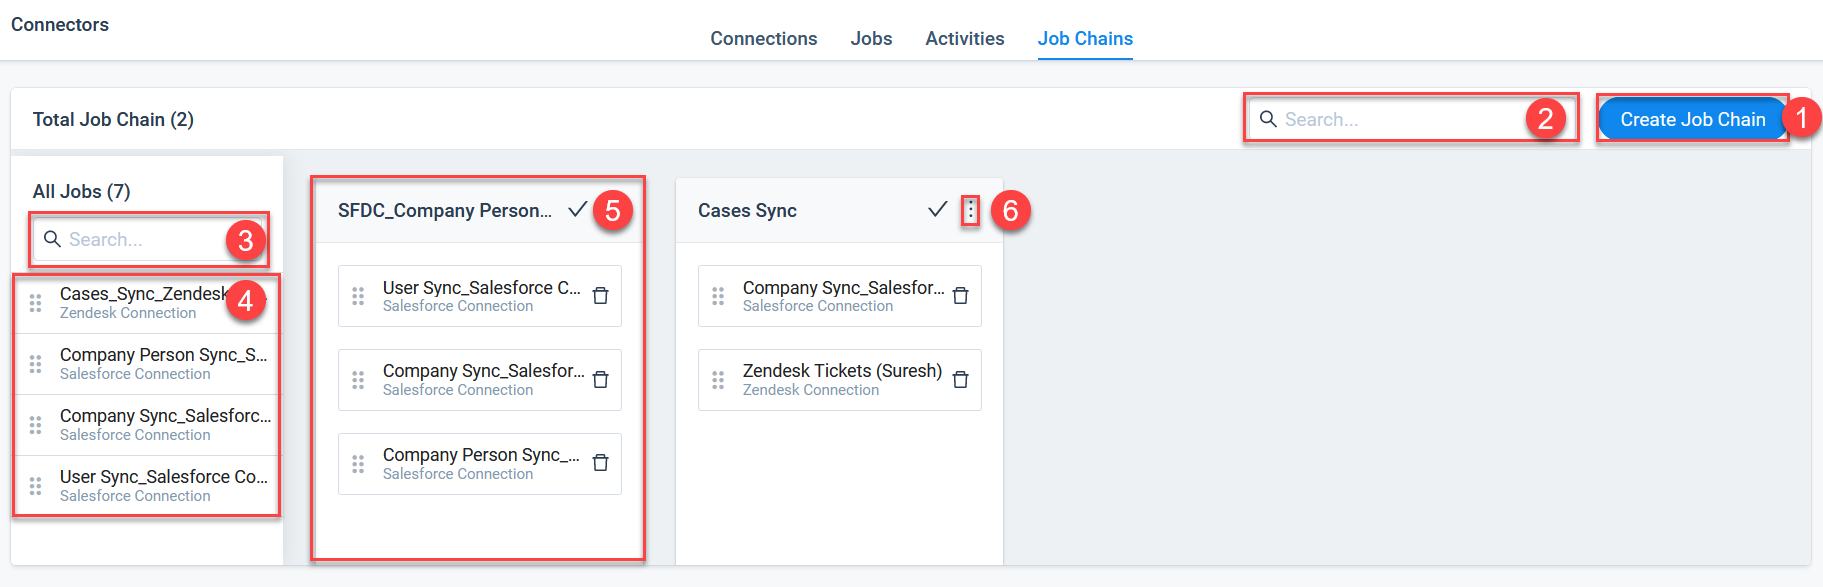
- Search: Search for a Job Chain by its name.
- Create Job Chain: Click this button to create a new Job Chain.
- Search Job: Search for an individual Job from the list.
- Job List: This section displays a list of jobs which you can drag and drop to any Job Chain.
- Job Chain: In a Job Chain, add multiple jobs in the required sequence, from the Job list using the drag and drop method.
- Job Chain menu: This is the job chain menu to edit or delete a job chain.
Create a Job
Create a job from the Jobs page. For more information, refer to the Jobs List page in the Additional Resources section at the end of this article.
Create a Job Chain
To create a Job chain:
- Navigate to Connectors 2.0 > Job Chains.
- Click Create Job Chain.
- Enter a name in the Job Chain Name field.
- Configure the Job Chain Schedule. For more information, refer to the Configuration of Job or Job Chain Schedule in the Additional Resources section at the end of this article.
- Click Create to create the Job Chain.
- Drag and drop the jobs in the required sequence from Job List to Job Chain.
- Click the Save icon in the Job Chain.
Notes:
- In the Job Chain, use the drag and drop method to change the sequence of Jobs.
- Click the Delete icon on a Job to remove the Job from the Job Chain.
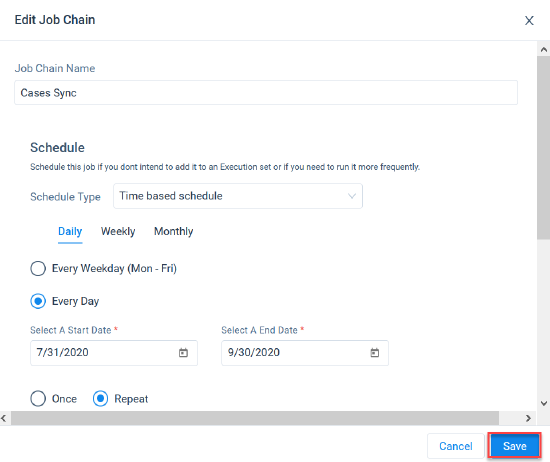
Edit Job Chain
To edit a Job chain:
- Click the context menu and select Edit Job Chain.
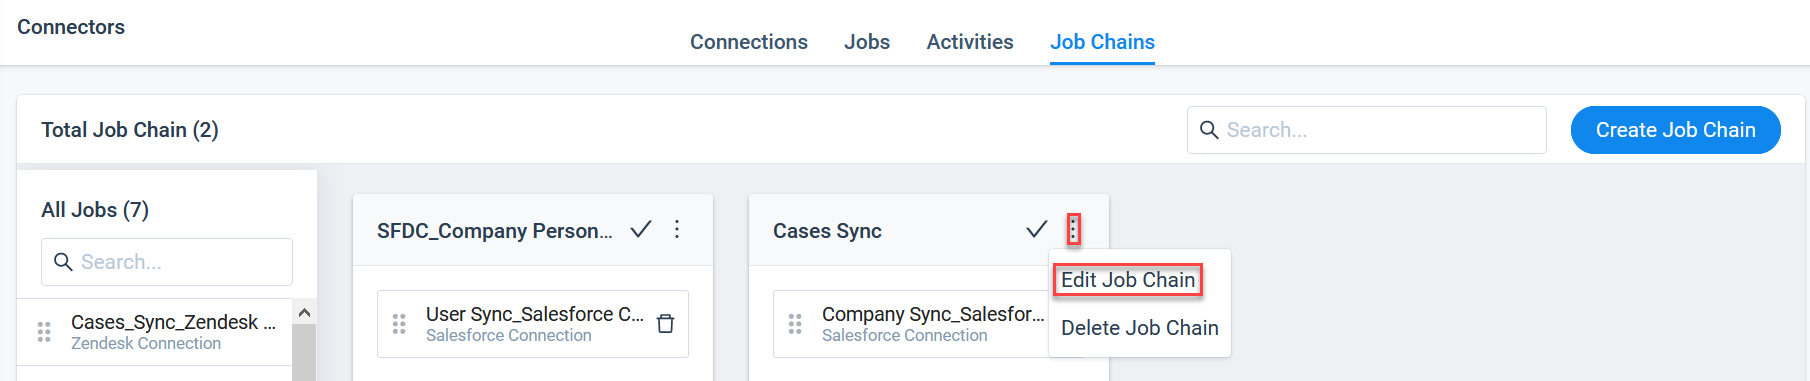
- Edit the Job chain as required.
- Click Save.
Delete Job Chain
To delete a Job chain, click the context menu, and select Delete Job Chain: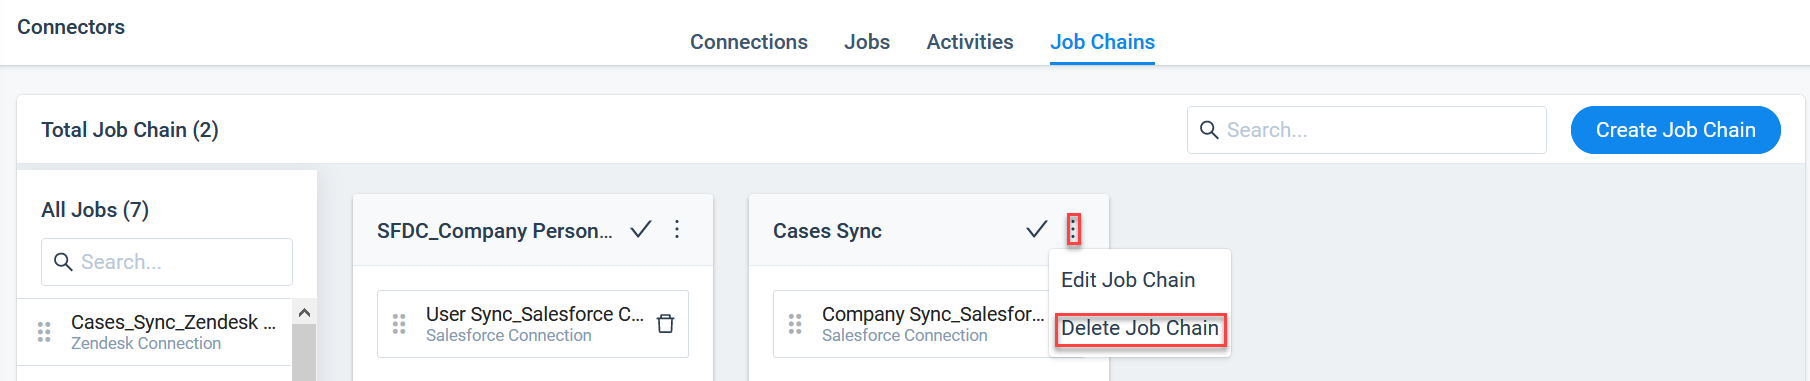
Additional Resources
For more information about Connectors, refer to the following articles: