Create Scorecards
Gainsight NXT
Overview
This article is the third item in a series of Scorecard configuration articles. Gainsight recommends you to refer the initial articles of the series and then start with this article. This article explains all the options available to configure Scorecards.
Once you configure Measures and Grading scheme, you can create and configure Scorecards. A Scorecard consists of Measures, or Measures Groups, or a combination of both. You can include any of the Measures or Measure Groups created on the Measures tab, in your Scorecards. By default, an overall score is present for every Scorecard. The overall score can be auto calculated and depends on the individual Score of all the Measures, which are included in the Scorecards.
Notes:
- You can create a Scorecard for a Company or a Relationship.
- A Company Scorecard can only include those Measures and Measure Groups which were created for a Company. Similarly, Relationship Scorecards can include only Relationship Measures and Measure Groups.
- A Scorecard for a Company and Relationship can have the same name, since they are created for different entities.
- You can create reports based on the Scorecard data.
Training Resources
If you're new to Gainsight administration, we strongly encourage you to complete our free web-based training, and then to sign-up for live instructor-led sessions. In the live sessions, you'll have opportunities to hear best practices, tips and tricks for troubleshooting, and to complete practice exercises in a training org.
Create Scorecards
To create a Scorecard:
- Navigate to Administration > Scorecard. The Scorecard screen appears.
- Select either Company or Relationship from the entity drop-down field depending on the type of Scorecard you want to create.
- Click Create.
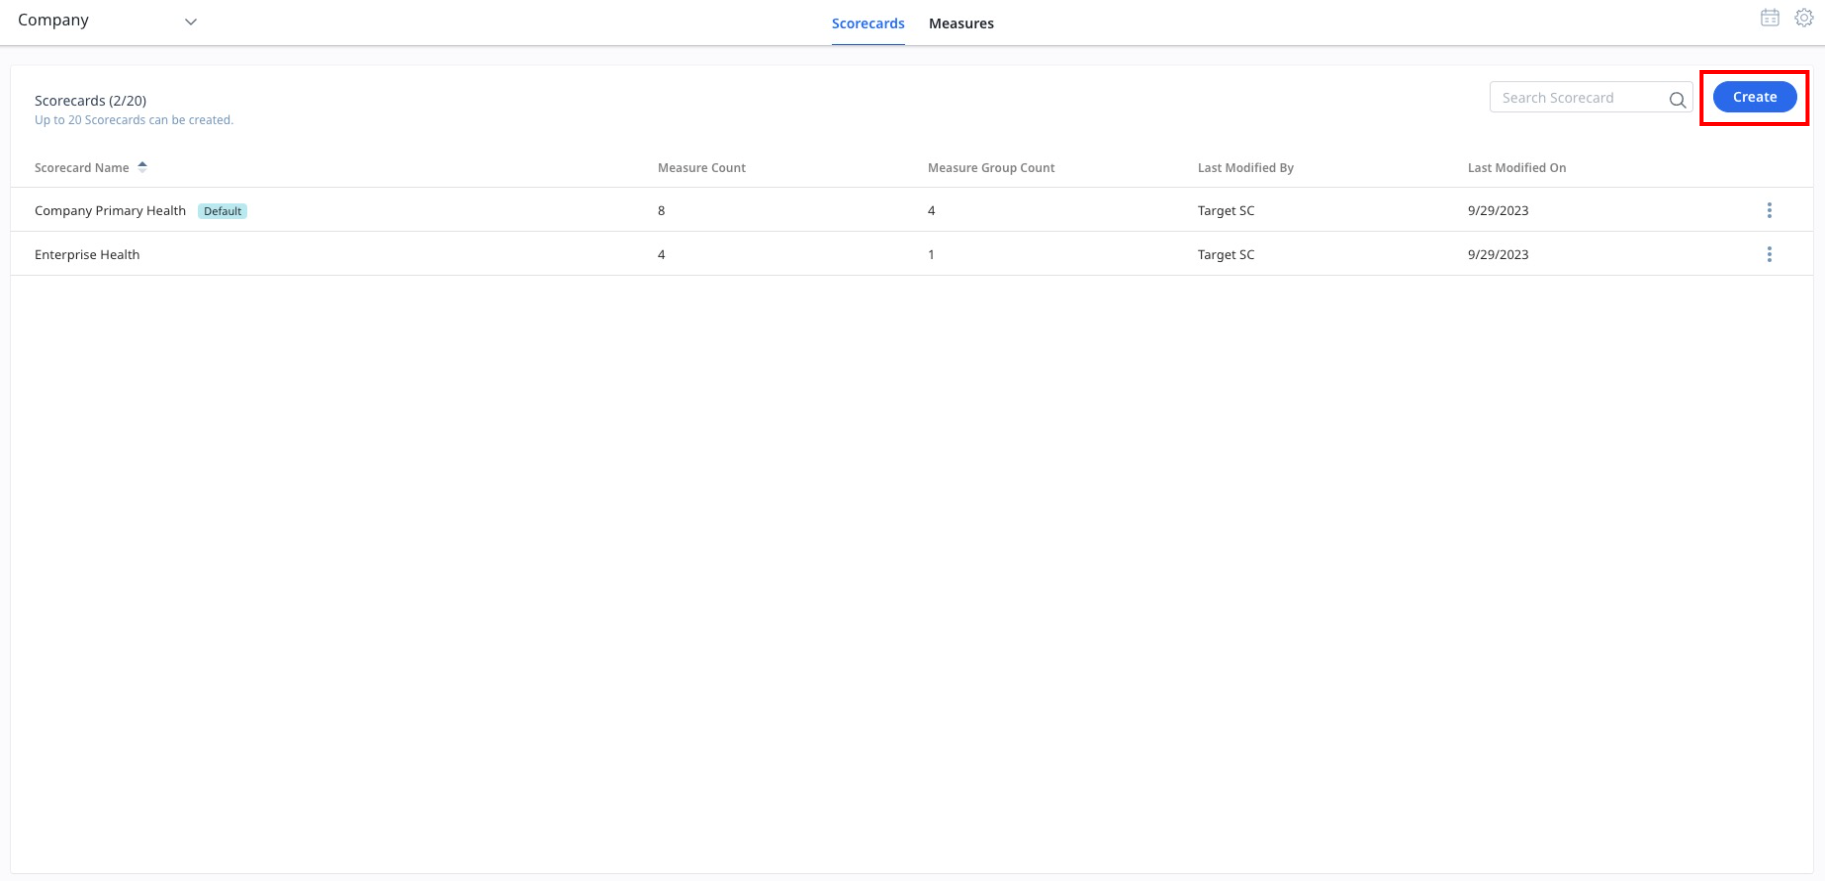
You must configure the following two sections in Scorecards:
General Section
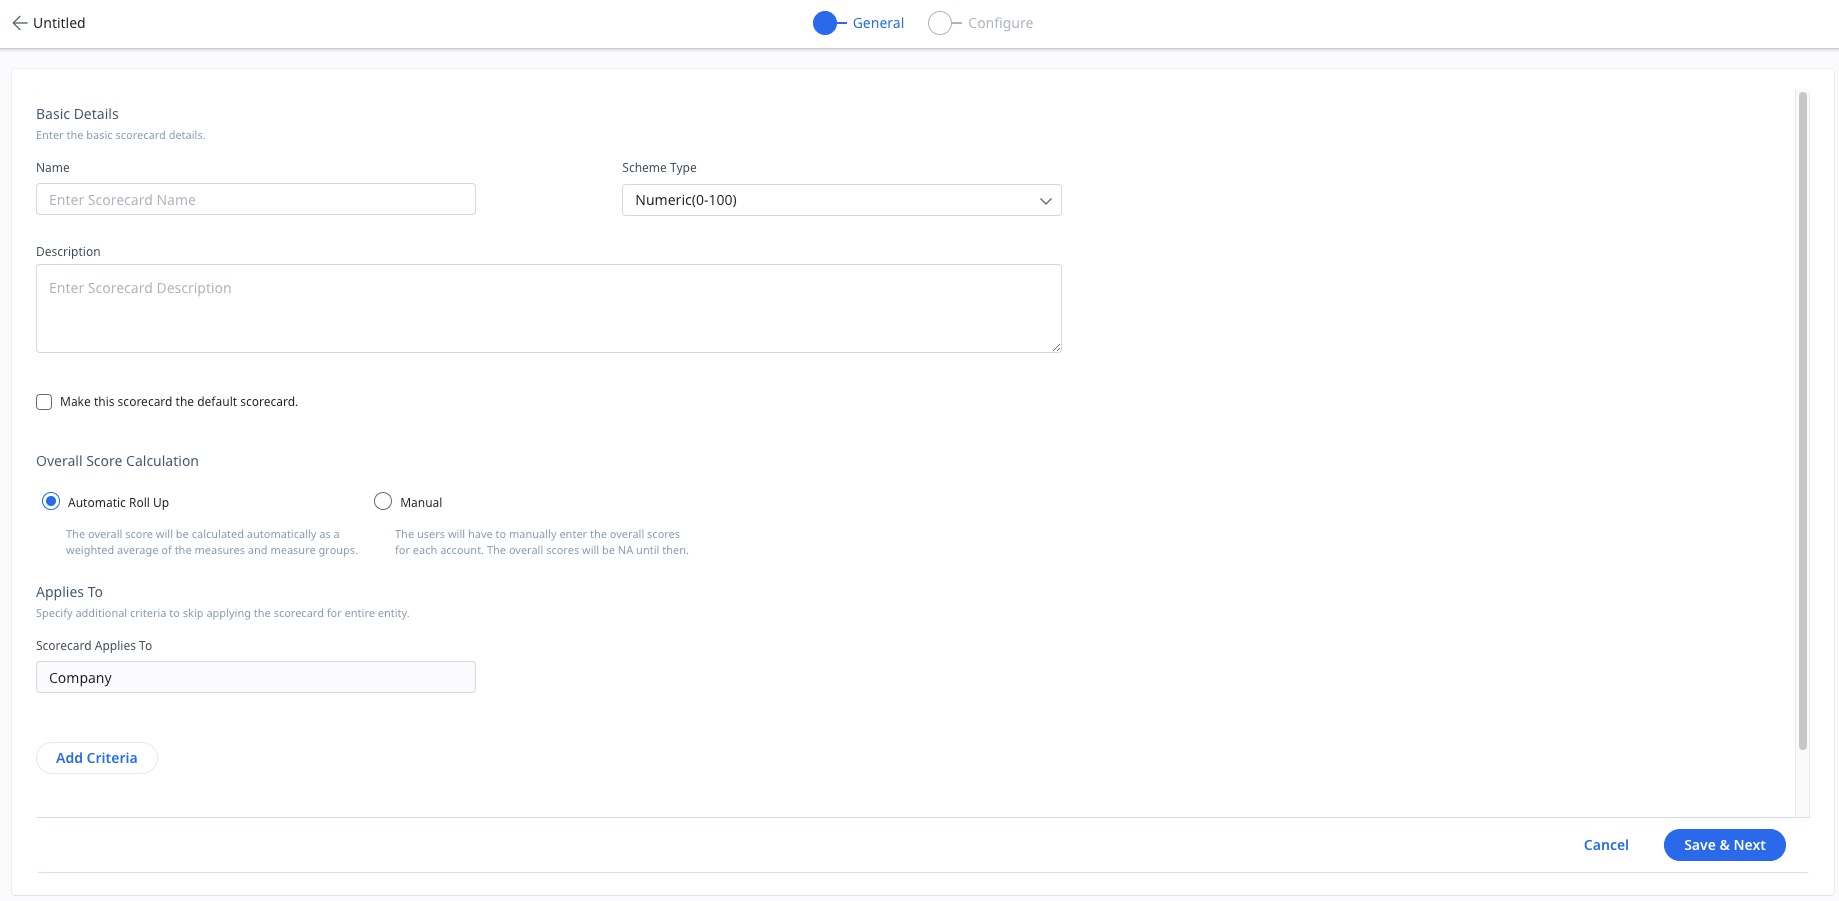
In this section, you can configure the Scorecards basic details, calculation method, and application criteria by performing the following tasks:
- Enter a name for the Scorecard, in the Name field.
Note: Scorecards cannot have identical names to Scorecards of the same entity type. - Select a scheme from the Scheme type drop-down menu. To learn more about Scorecard Schemes, refer to the Configure Scorecard Schemes article. The available schemes are:
- Numeric
- Color
- Grade
- (Optional) Enter a description in the Description field.
- Select the Make this scorecard the default scorecard checkbox, to set this scorecard as the default Scorecard. The default Scorecard plays a crucial role while assigning Scorecards to Companies or Relationships. For more information on Default Scorecard and Scorecard assignment process, refer to the Working with Multiple Scorecards article.
- Under Overall Score Calculation select from the following options:
- Automatic Roll Up: The overall score would be calculated automatically as a weighted average of the measures and measure groups.
- Manual: Users will have to manually enter the overall scores for each account. Overall Score will be NA until then.
- (Optional) If you don't want to apply your scorecard for the entire entity, you can specify additional criteria. Scorecards with criteria will only be applied to Companies or Relationships that meet that criteria. For more information on criteria, refer to the Configure Criteria section below.
- Click Save & Next. The draft of the scorecard is created and available on the scorecard list view page.
Configure Criteria
Adding criteria allows you to define various conditions for your scorecard. If a Company or a Relationship can satisfy these conditions, then this scorecard is applied to the respective Company or Relationship. The default Scorecard is not applicable to such Company or Relationship. You can use most Company or Relationship fields as a source for the criteria.
Criteria Limitations: The Date, Calculated, and Look-Up fields cannot be selected as part of scorecard criteria.
To configure a Criteria:
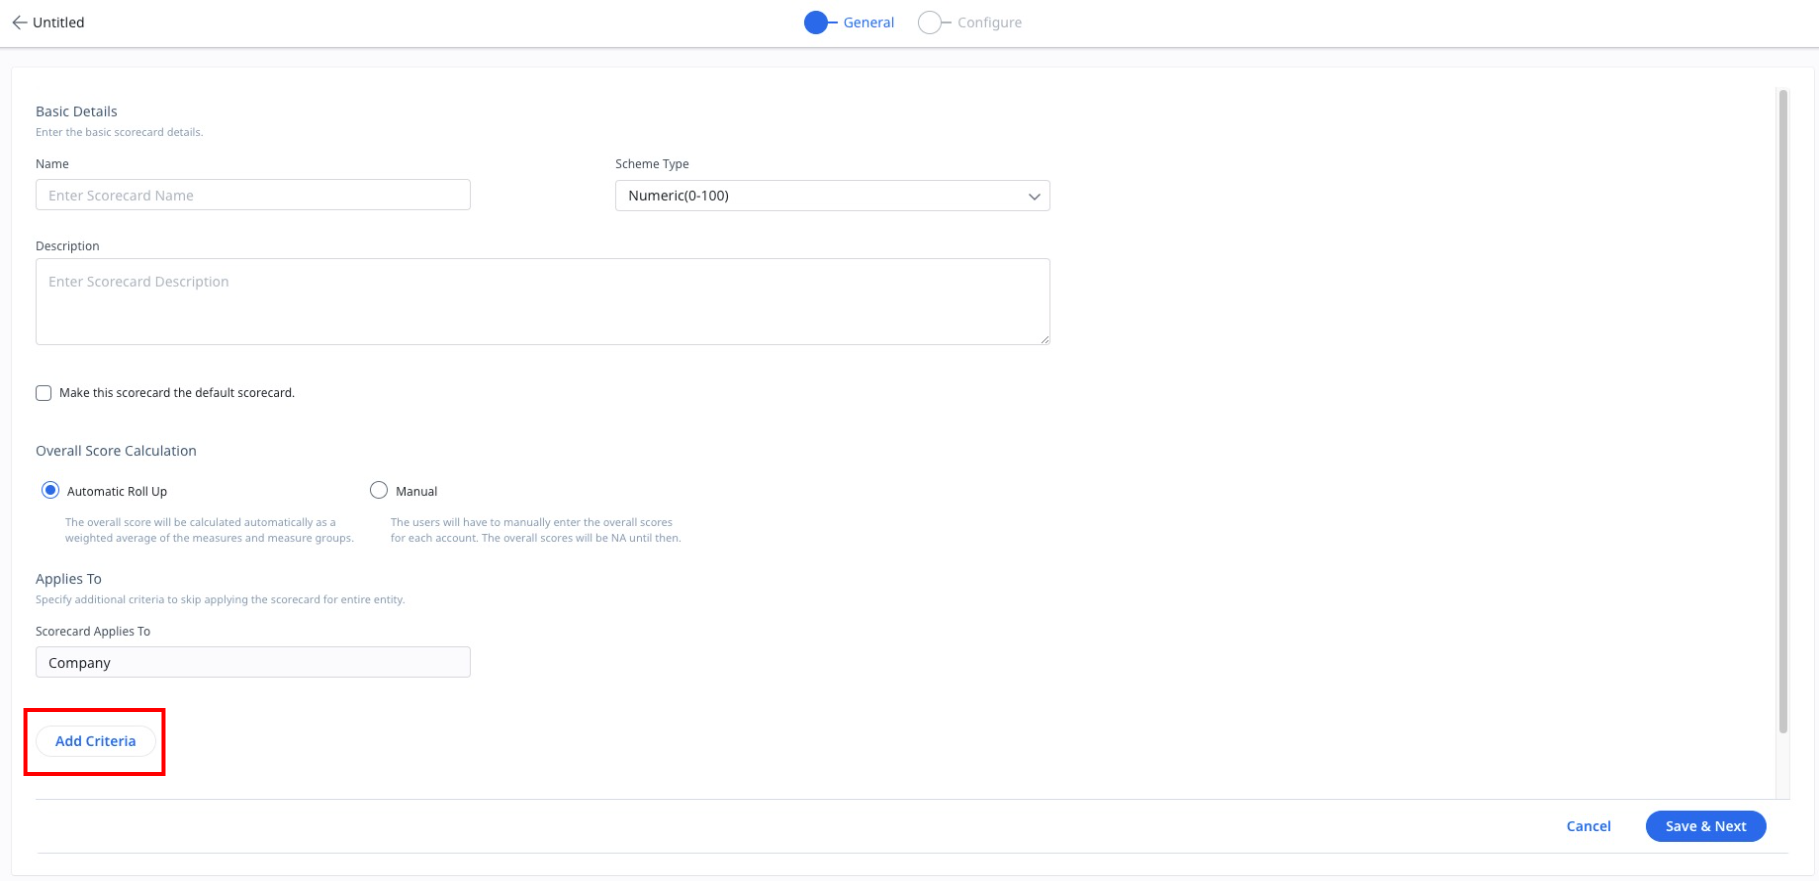
- Click Add Criteria.
- Form the required criteria by selecting the required fields and operators.
Note: Only the following field types can be selected for scorecard criteria: string, boolean, number, and picklist. - (Optional) Click + , to add more criteria.
- (Optional) Click X, to remove a criteria.
- Click Save & Next, to save the Scorecard.
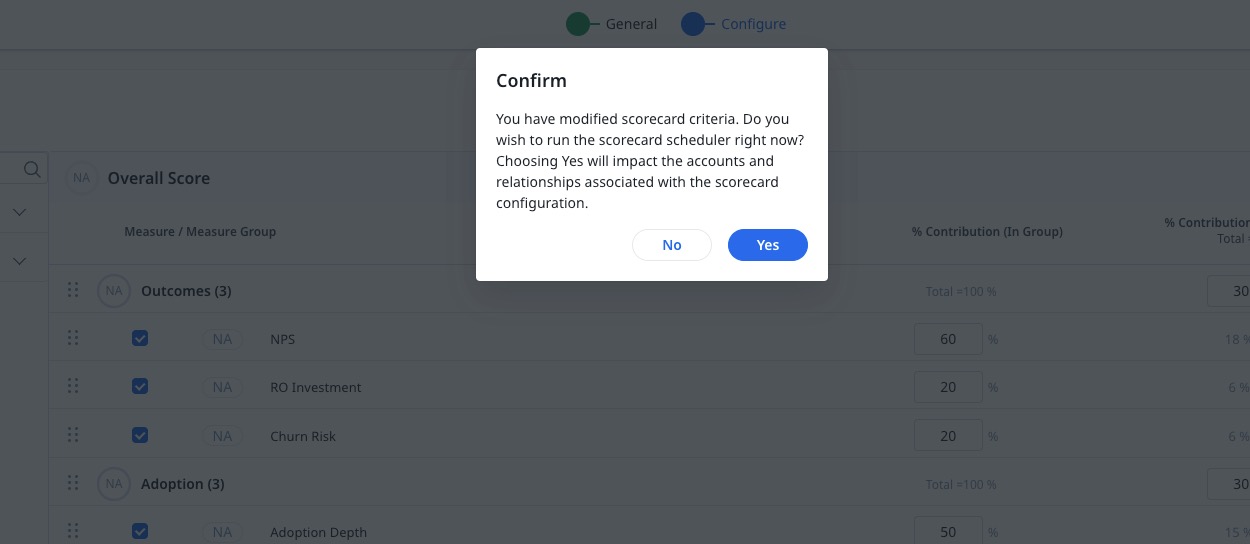
A confirmation box appears on the window. If you select the Yes option, the changes are applied immediately to the Company and Relationships. However, if you select No, the changes are applied when the Scorecard Resolver runs.
Configuration Section
In this section, perform the following tasks:
- Drag and drop the required measures and measure groups from the left pane.
Note: Measures can be added either individually or as part of a group. - (Optional) From the Measures drop-down list, select Create Measure to create a new measure.
- (Optional) From the Measure Groups drop-down list, select Create Measure Group to create a new measure group.
- Select the measures within measure groups to include in the Scorecard. You can reorder active Measures after they're added. For more information on this, refer to Reorder Measures section of this article.
- Enter the weight/contribution percentage for each measure and measure group. To learn more about configuring Weights, refer to the Measure Weights in Scorecards article.
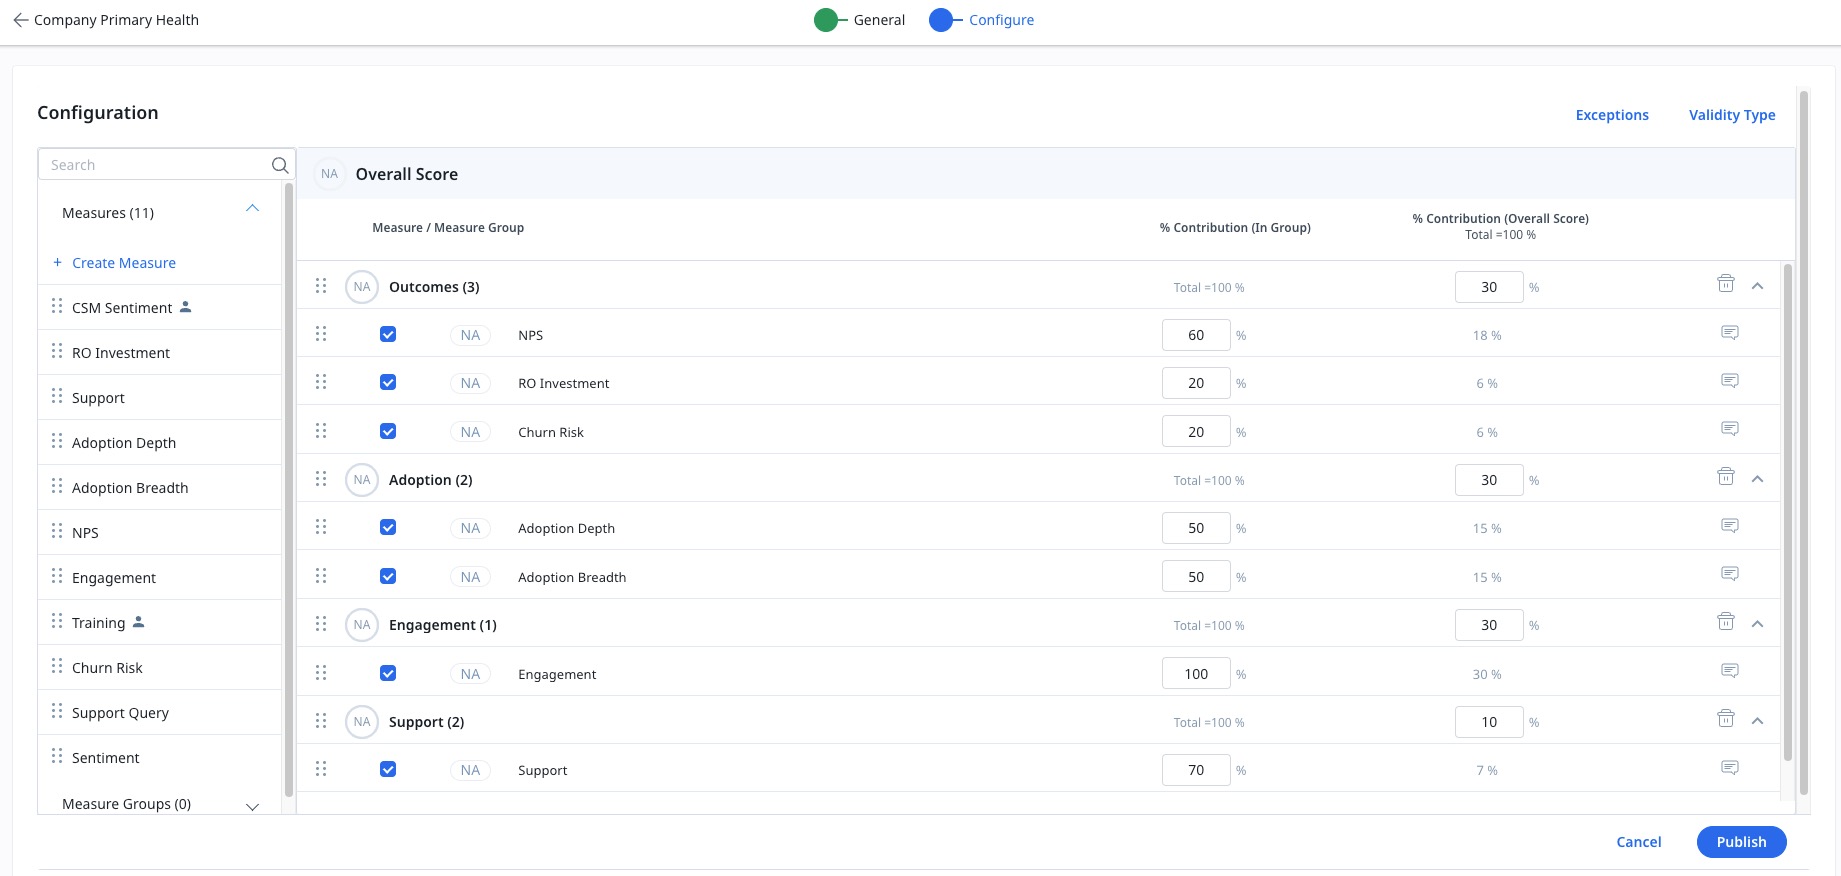
- (Optional) Click the help text icon on the right corner of a measure or measure group to configure the help text. You can configure help text for each Score Range. The help text you configure here, appears on the Mass Edit report, when you use the slider to modify the score for that measure or measure group.
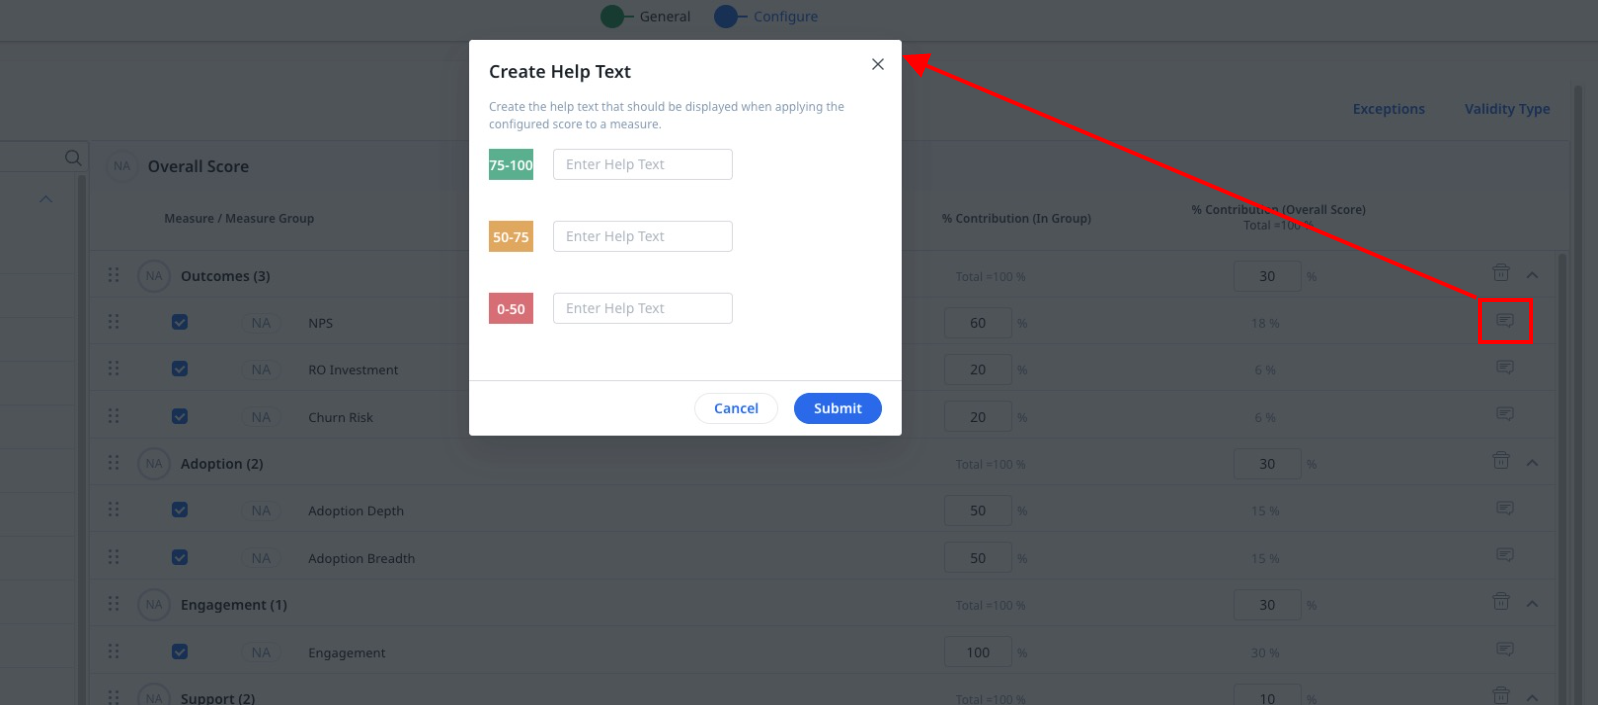
- (Optional) Click the delete icon on the right corner to remove the respective measure or measure group from the Scorecard.
- Click Validity Type. The Validity Period dialog appears.
- Select the Validity Type and Validity Period for each measure. Once the Validity period has passed, the measure displays a stale score.
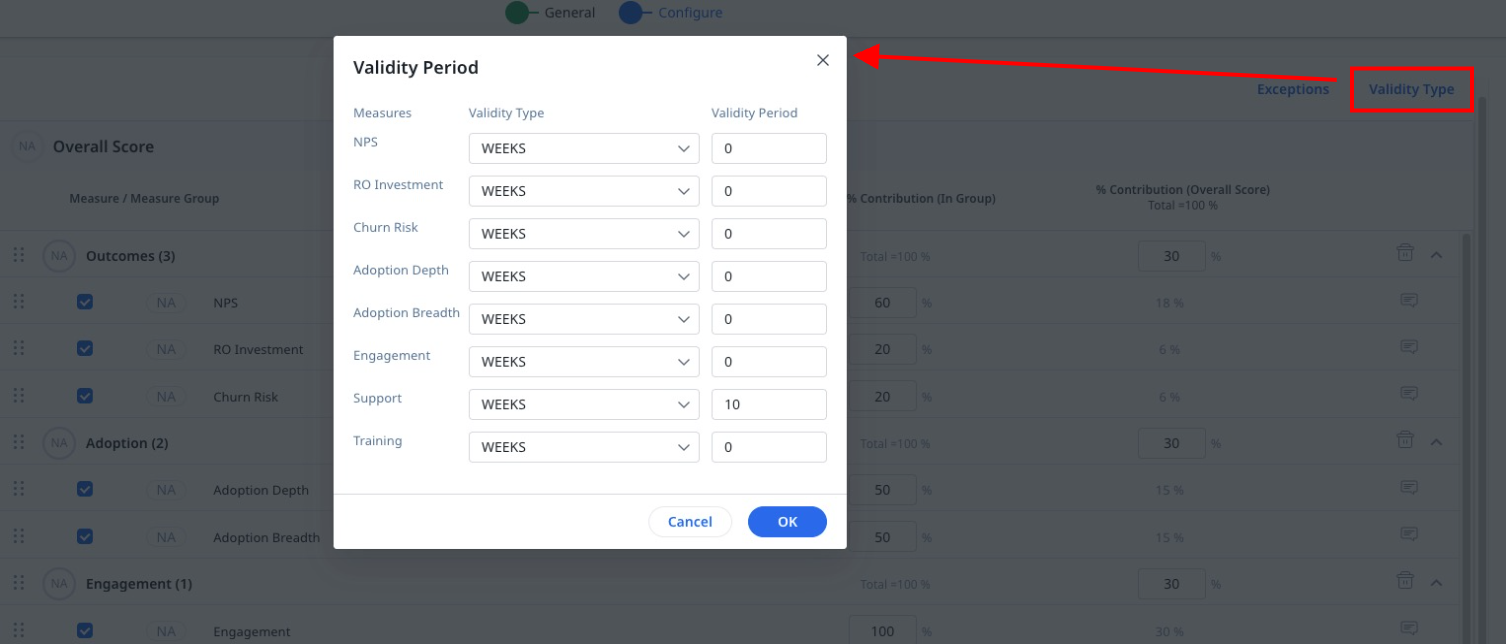
For example, if you set the Validity Period for 1 week on 1 Dec 2018. Your score is valid for 1 week till 7 dec 2018. However, if you modify the score on the 6th Dec 2018, the validity is extended for one more week, starting from 6th day. The new Validity Period would be 6 Dec 2018 - 12 Dec 2018. If you update the Score within the Validity Period (6-12 Dec), the Validity is extended by another week, starting on the date on which the Score was modified. This rule applies for other Validity Types also.
Notes:
- There is no notification triggered when a validity period expires.
- Scores are included in scorecard calculation regardless of their validity.
- Click Exceptions. The Configure Exceptions dialog appears.
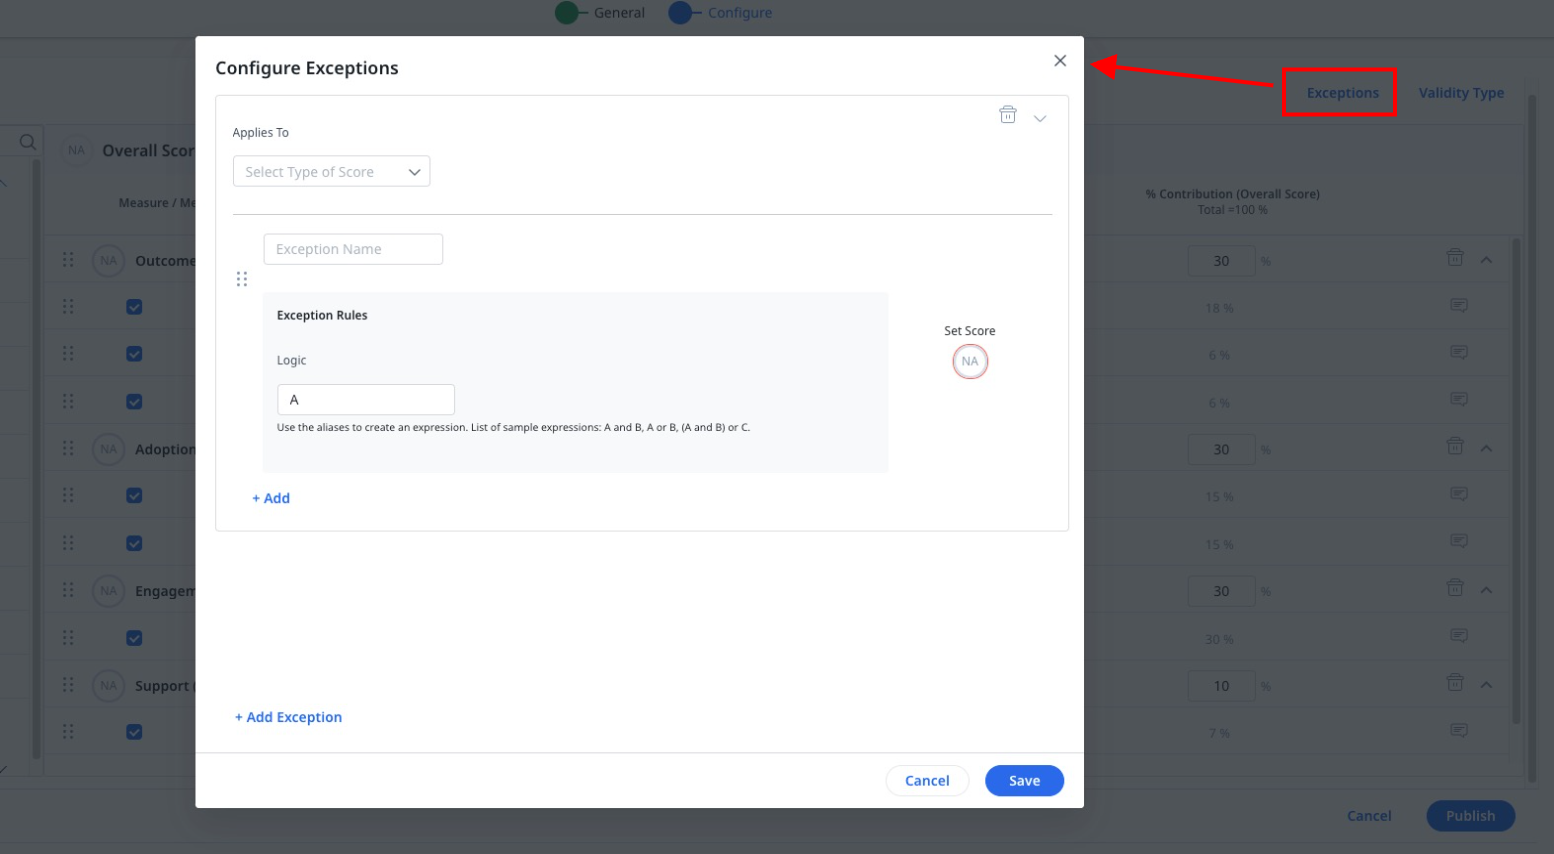
- Configure any required exceptions. For more information on Exceptions, refer to the Exceptions in Scorecards article.
- Click Publish.
Reorder Measures
You can reorder the Measures within a Measure Group on the Scorecard Configuration page. This changes the order of measures within the specific scorecard you are configuring. To do this, click and drag an active Measure to a new position within a Measure Group added to the Scorecard Configuration page.
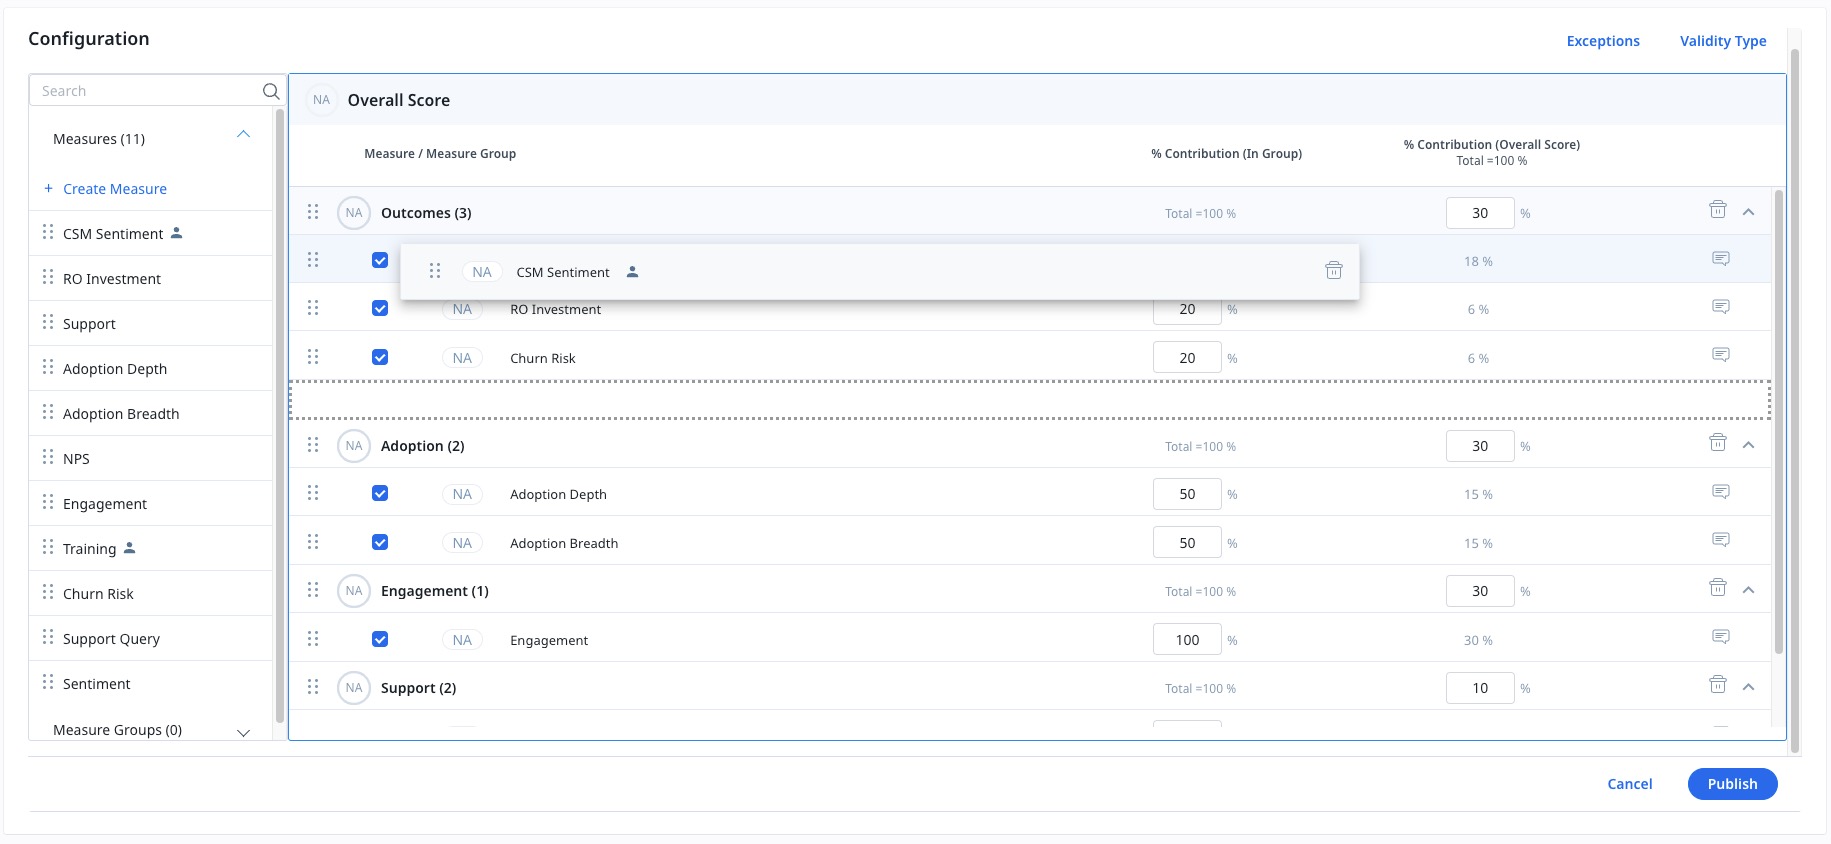
Notes:
- On the Scorecard Configuration page, active Measures are always displayed at the top of their Measure Group, while inactive Measure are always displayed at the bottom. If you save the Scorecard Configuration page with active Measures positioned below inactive Measures, or inactive Measures positioned above active Measures, it is expected behavior for the configuration page to change the Measure order, so that active Measures are displayed at the top of the Measure Group, and inactive Measures are displayed at the bottom. When this occurs, the position of active Measures relative to each other is still preserved.
- Reordering Measures on the Measure Group configuration page does not affect the order on the Scorecard Configuration page. Likewise, changing the order on the Scorecard Configuration page does not affect the order on the Measure Group configuration page. For more information on configuring Measure Groups, refer to Create Measures and Measure Groups.
Scorecard Resolver
The Scorecard Resolver executes at 23:59 hours UTC, by default. You can change the execution time. Any modifications made to the Scorecard Criteria are applied when the Resolver runs.
To configure Scorecard Resolver:
- Click the Calendar icon.
- Change the time, if required.
- Click Save.

Note:
- When a new company or relationship is created, scorecard is assigned during the next resolver run, not immediately.
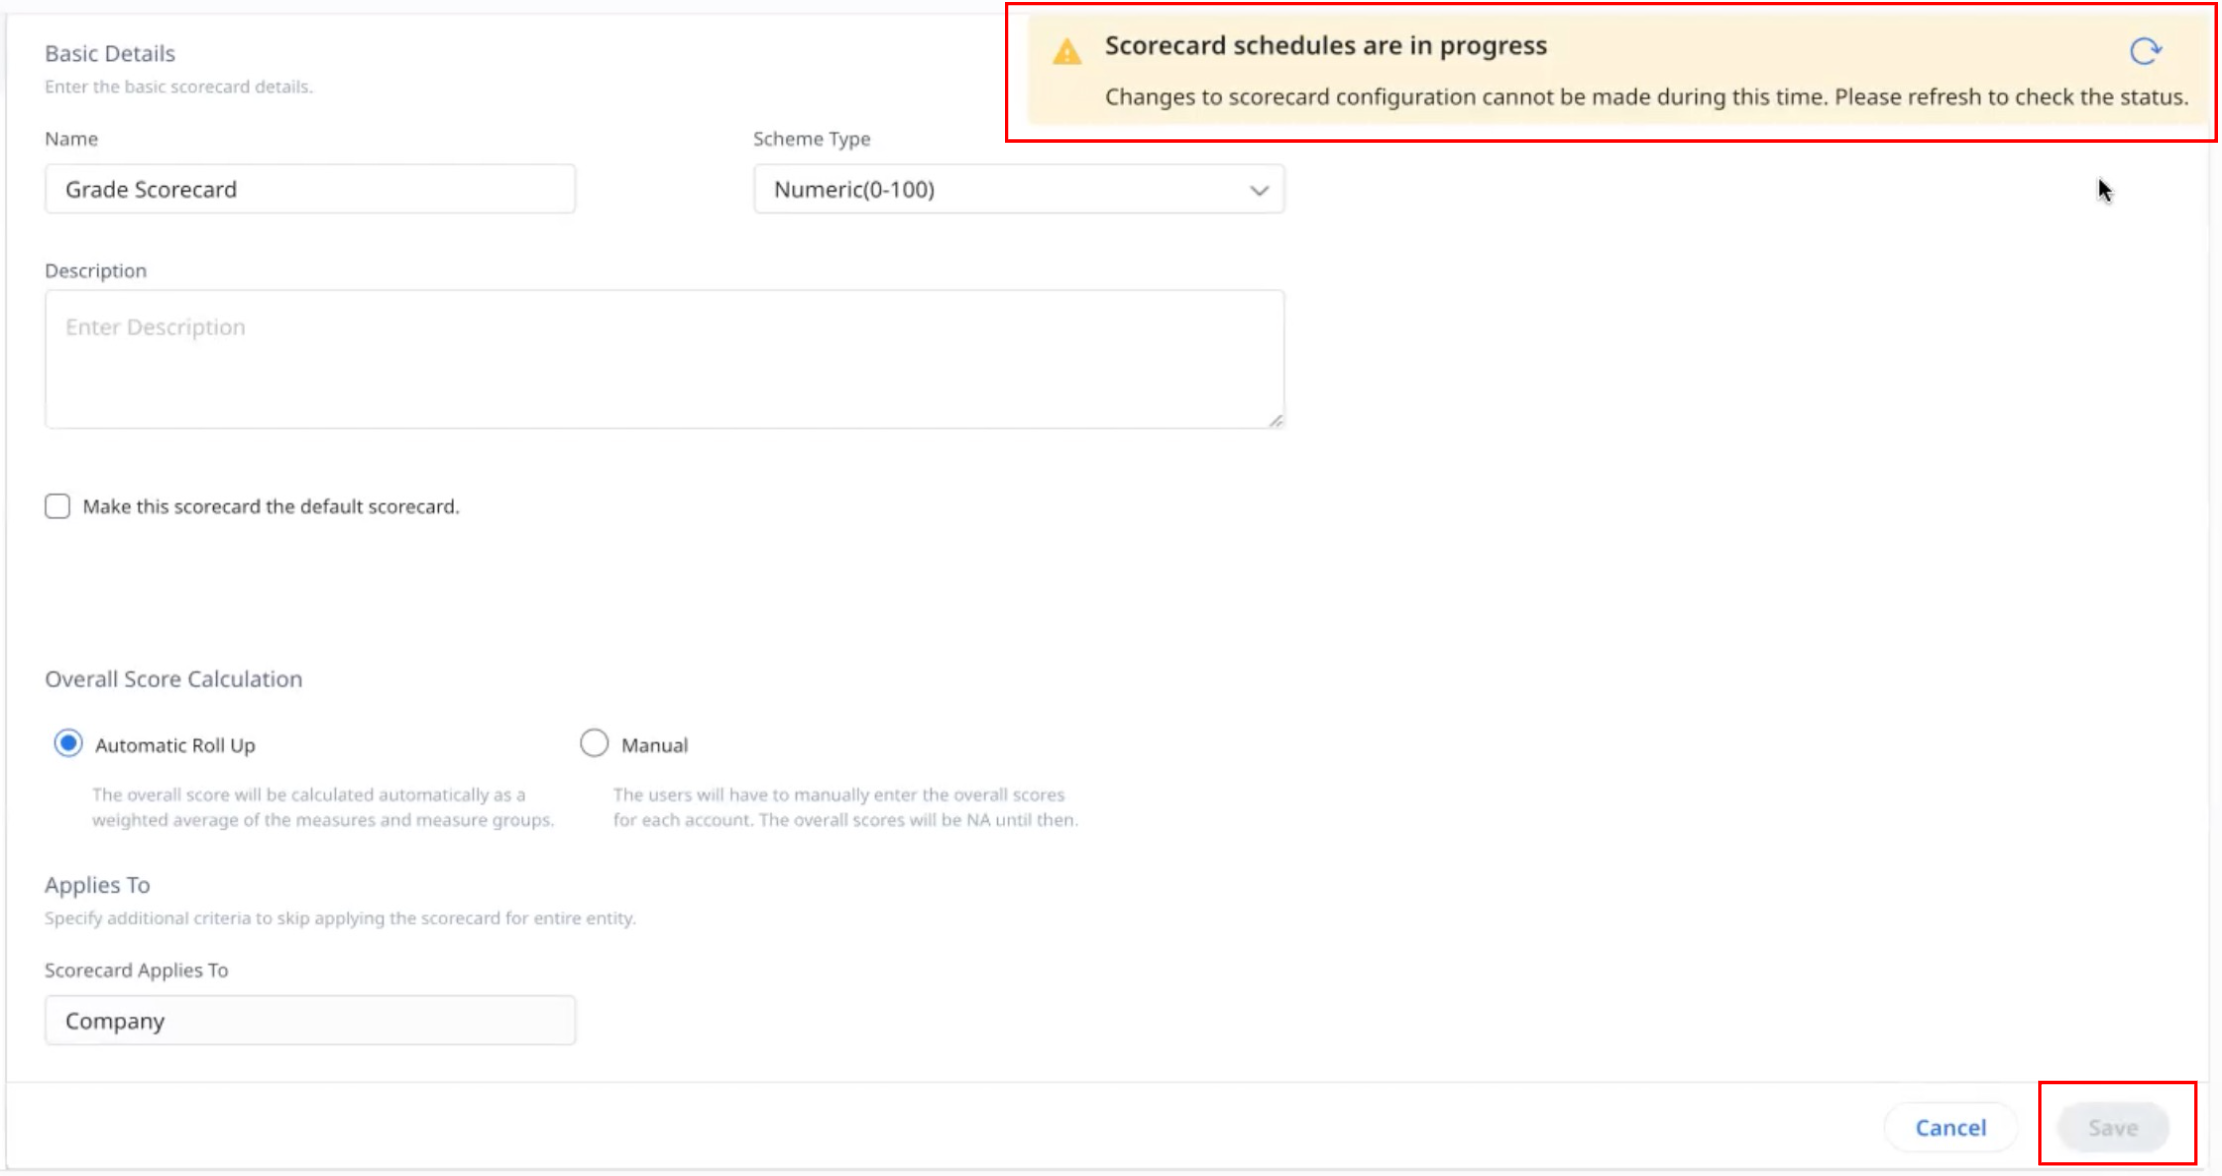
- You cannot make further modifications in a scorecard while the scorecard scheduler is running. The scorecard schedule status is visible as in progress and the Save button in the configuration screen remains inactive. You can click the refresh icon to check the scheduler status.
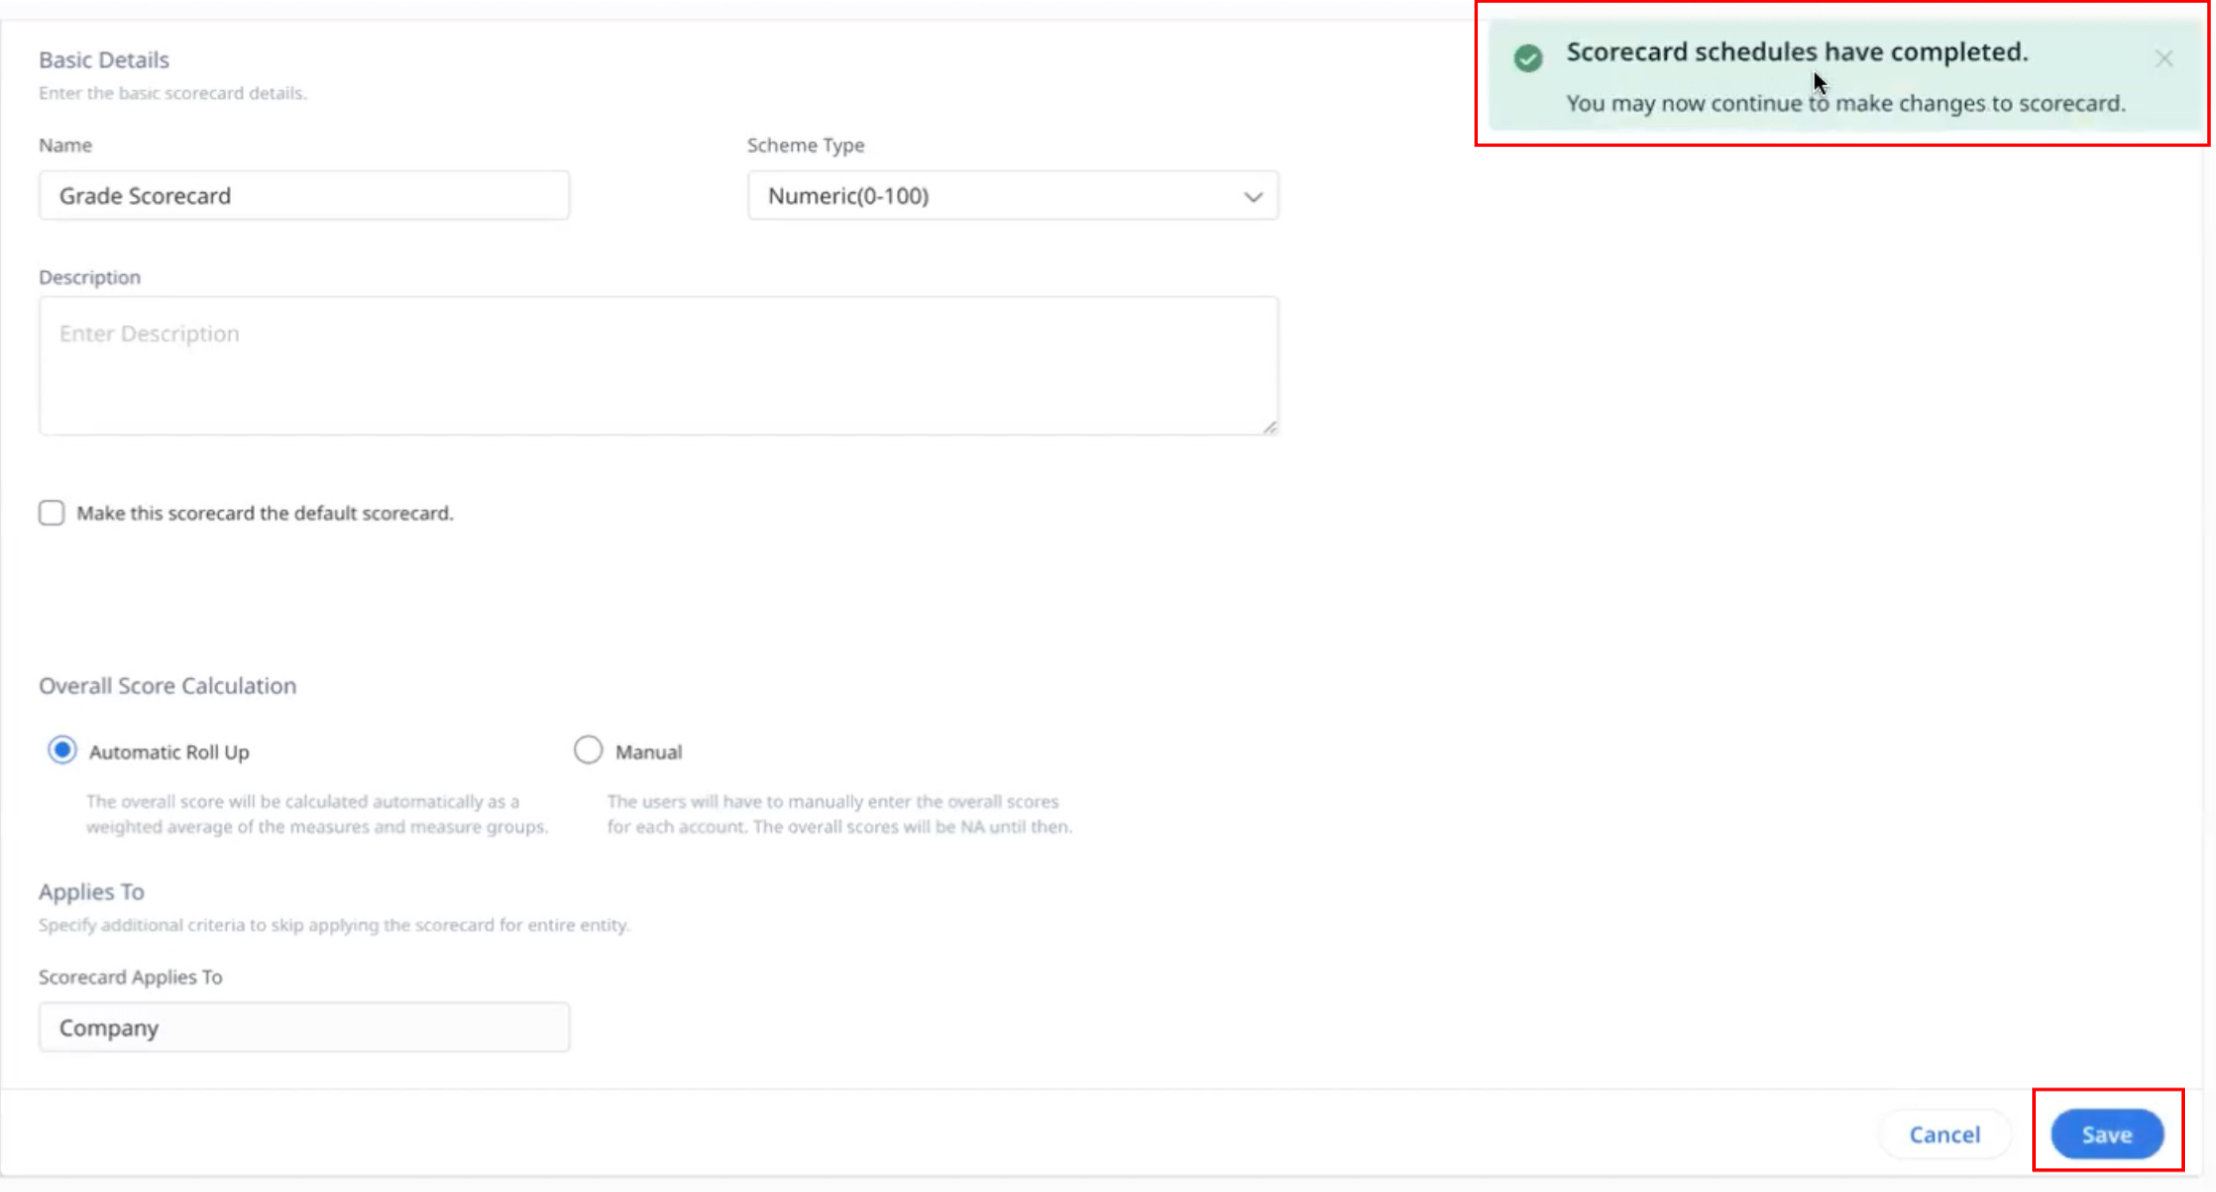
If completed, the scorecard schedule status changes to complete and the Save button in the configuration screen becomes active.
Scorecard Fact Object
The Scorecard Fact object creates new objects dynamically, whenever you create a new Scorecard. For instance, if your Scorecard name is Company Scorecard, a new object is created with the name Company Scorecard Fact. You can use this object to prepare scorecard reports.
Note: If the corresponding fact object of the scorecard contains any data, the fact object is not removed when the scorecard is deleted.