Spaces Widgets Configuration
This article includes certain sub-features that are not enabled by default and available on-demand, which are indicated within the article. To request early access, please submit a support ticket. If you choose not to access these features early, they will be available in your tenants automatically with the upcoming major release.
This article helps admins configure and manage the widgets available in Spaces layouts.
Overview
This article describes all the widgets available in Spaces. You can configure these widgets to enable CSMs to collaborate effectively with customers.
Banner Widget
The Banner widget creates a visually engaging header for each customer’s Space. It displays branding elements, welcome messages, and CSM contact details.
Logo Handling
The Banner widget displays two logos:
- Company logo (sourced from Community Control app branding or tenant settings)
- Customer logo (pulled from the Company object)
Both logos must be present. If either logo is missing, neither appears.

Background Customization
You can customize the banner background using one of the following options:
- Solid color
- Gradient
- Uploaded image
Uploaded images must meet the recommended dimensions shown in the UI.
Permissions
- Field Level Permissions are not applied in Spaces.
- Data visibility depends on general data access permissions.
Rename Field Labels and Customize Role Titles
You can rename field labels and select which collaborator’s information appears in the banner.
To rename a field label:
- Navigate to Administration > Spaces Configuration. The Spaces Configuration page opens in the Layouts tab.
- Click on the layout you want to edit. The layout opens in the Edit Layout tab.
- On the canvas, hover over the widget containing the field you want to rename.
- Click the gear icon in the top-right corner of the widget. The configuration panel appears.
- Enter the preferred label name in the editable field name area.
- Click Save. The renamed labels appear consistently wherever that field is used within the layout.
Select a Collaborator Role
The collaborator role determines which user's information is displayed on the banner. To assign a collaborator role and select the details to display:
- Navigate to Administration > Spaces Configuration. The Spaces Configuration page opens in the Layouts tab.
- Click on the layout you want to edit. The layout opens in the Edit Layout tab.
- On the canvas, hover over the Banner widget.
- Click the gear icon in the top-right corner of the widget. The Configure Banner Widget slide-out panel appears.
- Under Collaborator Information, select the desired user role from the Collaborator Role dropdown list, such as CSM or TAM.

- Under Collaborator Details to Show, select the information to display for the collaborator:
- Name
- User Title
- Timezone
- Click Save & Continue. The layout pulls relevant data based on the selected collaborator's profile.
Only admins can configure the collaborator role. This option is not visible or editable by CSMs or end users.
Control Banner Settings with Admin Lock Options
Admins can control whether collaborators can edit the banner layout and content using the Admin Lock options. To configure the Admin Lock settings:
- Navigate to Administration > Spaces Configuration. The Spaces Configuration page opens in the Layouts tab.
- Click on the layout you want to edit. The layout opens in the Edit Layout tab.
- On the canvas, hover over the Banner widget.
- Click the gear icon in the top-right corner of the widget. The Configure Banner Widget slide-out panel appears.
- Click the three-dots menu in the top-right corner of the panel. The Admin Lock settings appear.
- Under Layout Settings, configure the following options:
- Allow layout edits: When turned on, collaborators can edit the layout.
- Allow content edits: When turned on, collaborators can edit text or media.

- Under Collaborator Info Settings, configure the following option:
- Allow collaborator information edits: When turned on, collaborators can edit their own information.
- Click Save & Continue. The settings are applied to the layout.
Note: When a toggle is turned off, collaborators see a read-only view of that element. Admins can adjust these settings at any time without unpublishing the layout.
Example Business Use Case: To maintain consistency across layouts, use lock options to enforce standardized banner content and limit modifications to specific elements as needed.
Spaces Notes Widget
The Spaces Notes widget allows CSMs to capture and share key highlights, callouts, and supporting documents using rich text, images, and videos. The content entered in the Notes widget is saved in a field on the Company or Relationship object, depending on whether the layout is for a company or a relationship.
As an admin, your role with this widget is limited to the following:
- You can add the widget to a layout by dragging and dropping it. No additional configuration settings are available to admins.
- You cannot input or modify content within the widget.
- Only CSMs can create and format notes in this widget.
Summary Ribbon Widget
The Summary Ribbon widget displays key customer metrics at the top of the Space.
Configure Summary Ribbon
You can create up to six groups and add Standard Attributes, Custom Fields, or KPI Report Fields. You can rename groups, reorder items, toggle visibility, and delete fields.

The following field types can be added to each group:
| Field Type | Description |
|---|---|
| Standard Attributes | Includes CSM Name, Customer Since, Renewal Date, and Active Success Plans count. |
| Custom Fields | Any field from the Company object and its preconfigured lookup fields. |
| KPI Report Fields | Fields from reports built using the Gainsight Report Builder. Reports must be filtered to the individual company level by mapping a Company reference field such as GSID. |
You can also manage fields with the following options:
- Rename group titles to match organizational or customer-specific terminology.
- Reorder groups or fields using drag-and-drop to prioritize visibility.
- Toggle fields on or off to hide them temporarily without losing the configuration.
- Delete fields or entire groups if they are no longer relevant.

This provides a high degree of flexibility in how data is structured and maintained.
Key Considerations
- Calculated Fields: These are supported in the Summary Ribbon, allowing admins to display dynamic, formula-driven insights.
- Report-Based Fields: Require company-level filtering to ensure accurate and relevant data for each customer.
- Field Labels: At present, the display names for fields are pulled directly from the source object.
Display Behavior
The ribbon shows up to three groups without scrolling. Additional groups appear with horizontal scrolling.
Configure Widgets Per View in Summary Ribbon
Admins can configure the number of widgets displayed per view in the Summary Ribbon to ensure content is fully visible and the layout adjusts to the available space.
To configure widgets per view:
- Navigate to Administration > Spaces Configuration. The Spaces Configuration page opens in the Layouts tab.
- Click on the layout you want to edit. The layout opens in the Edit Layout tab.
- On the canvas, hover over the Summary Ribbon widget and click the gear icon. The Configure Summary Ribbon slide-out panel appears.
- Under Choose Ribbon Layout, select the number of widgets to display upfront, one, two, or three. The default is three. The remaining widgets appear in a carousel.
Cards automatically adjust to fill the available space, ensuring all content is fully visible. This configuration applies to both CSM and end-user views. End users and CSMs cannot change this setting.

Rename Field Labels in Summary Ribbon
You can rename field labels in the Summary Ribbon to make them more user-friendly without altering the underlying field names in the database.
- Navigate to the Summary Ribbon widget and click the Configure icon. The Configure Summary Ribbon slide-out panel appears.
- Locate and hover over the field label you want to rename. A pencil (edit) icon appears.

- Click the edit icon. The field becomes editable.
- Type your preferred display name in the text field.

- Click Save. The Summary Ribbon updates to reflect the new label.
The renamed label is visible only in the Summary Ribbon and has no impact on the underlying field name, reports, or backend data. To see the original field name, hover over the display name in the Summary Ribbon widget.

Attribute Widget
The Attributes widget displays grouped fields from the Company object and its lookups.
For a CSM to edit a field, it must be marked editable and the CSM must have Edit Widget Content permission. Spaces does not support field-level permissions. Admins cannot control field visibility per customer; only CSMs can hide or unhide the entire widget on a per-company basis.
As an admin, you can:
- Add the widget to layouts by dragging and dropping it.
- Select fields from the Company object and any lookup fields.
- Rename fields to match internal terminology or customer-friendly labels.
- Format fields based on type, such as currency symbols, decimal precision, or numeric summarization.
- Enable editing on individual fields and mark them as required if needed.
- Control widget visibility globally in the layout.
- This widget behaves similarly to the C360 layout editor which makes it intuitive for admins already familiar with that setup.
- For end users, all attribute fields are view-only. If CSMs want, they can hide the attributes widget.
Standard Widget
Standard widgets in Spaces provide structured views of customer-related fields, such as CSM, Renewal Date, and Text Fields. These widgets behave similarly to those found in 360 layouts.
As an admin, you can:
- Add widgets to layouts using drag-and-drop.
- Choose which standard or custom fields appear in the widget.
- Mark fields as editable or read-only for CSMs.
- Include all text fields from Company and Relationship objects and mark them editable or not.
- Add logo or image fields, with the option to choose which image field to display if multiple exist.
- Choose which date fields to use for the Customer Since widget.
- Rename widgets to match your organizational language.
Field Widget
Field widgets allow fine-grained control over individual field displays within a Space, making them useful when attribute grouping is too restrictive for your layout.
As an admin, you can:
- Add widgets individually, each tied to a single field from the Company object or lookups.
- Choose between standard or custom fields.
- Position each widget independently on the layout.
- Mark a field as editable or view-only for CSMs.
- Define if a field is required when editing is enabled.
- Use for specific layout scenarios where attribute grouping is too restrictive or not required.
Calculated fields are not currently supported in Field Widgets.
Use Field Widgets when you want to show specific fields to certain customers without affecting the whole group, unlike the Attribute widget which displays fields together.
Success Plans Widget
The Success Plans widget allows viewing and interaction with success plans inside Spaces.
Prerequisite: Enable the Share Success Plans to Spaces permission in the Permission Bundle. If this permission is not enabled, users cannot share success plans.
For more details, refer to the Configure Permissions for Spaces article.

As an admin, you can:
- Edit Label: You can rename the widget but cannot configure or manage its content.
- Preview Access: You have View-only access. You cannot add or remove success plans or CTAs.
Permissions
- View-only access to pre-configured success plans.
- No ability to manage underlying plans or tasks from the widget.
Customer Goals Widget
The Customer Goals widget enables goal visibility and collaboration between internal users and external participants.
Prerequisite: Enable the Share Customer Goals to Spaces permission. If this permission is not enabled, CSMs cannot share goals to Spaces.
End users can view goals and perform limited actions based on their permissions.
As an admin, you can:
- Add the Goals widget to Spaces layouts by dragging and dropping it from the layout editor.
- Control goal visibility, only goals explicitly shared in Spaces are visible. Within a shared goal, only the metrics, CTAs, and Success Plans selected during sharing are visible. Unselected metrics, CTAs, and Success Plans remain hidden.

Once the widget is enabled, CSMs can:
- Share goals to Spaces with or without associated metrics, CTAs, and Success Plans.
- Update goal values and progress.
- Search for specific goals and group them by fields such as Goal Name, Status, or Goal Type.
Reports Widget
The Reports section supports two main types of report widgets, each serving a different purpose for data sharing within Spaces.
The following table describes the two report widget types:
| Widget Type | Description |
|---|---|
| Direct (Regular) Reports | Admin-configured reports visible to all users tied to a layout. These reports are global and predefined from the Report Builder. |
| CSM Reports | A blank widget that allows CSMs to share reports with specific companies or relationships. Admins place the shell but cannot define the reports shown. |
As an admin, you can:
- Add predefined reports from the Report Builder as Direct Report Widgets.
- Add a blank CSM Reports Widget for CSMs to configure later.
- Control the number and type of report widgets visible to CSMs and end users.
You cannot modify what CSMs choose to display in the CSM Reports widget.
Manage Reports with Tabbed View in CSM Reports Widget
The CSM Reports widget displays reports in a tabbed layout, allowing CSMs to easily identify and navigate between reports shared for a specific company or relationship.
As a CSM, you can:
- View reports as tabs within the widget.
- Reorder report tabs by dragging them to prioritize the most relevant reports.
- Search across all available reports by removing or modifying the default filter, which is set to the logged-in CSM by default.
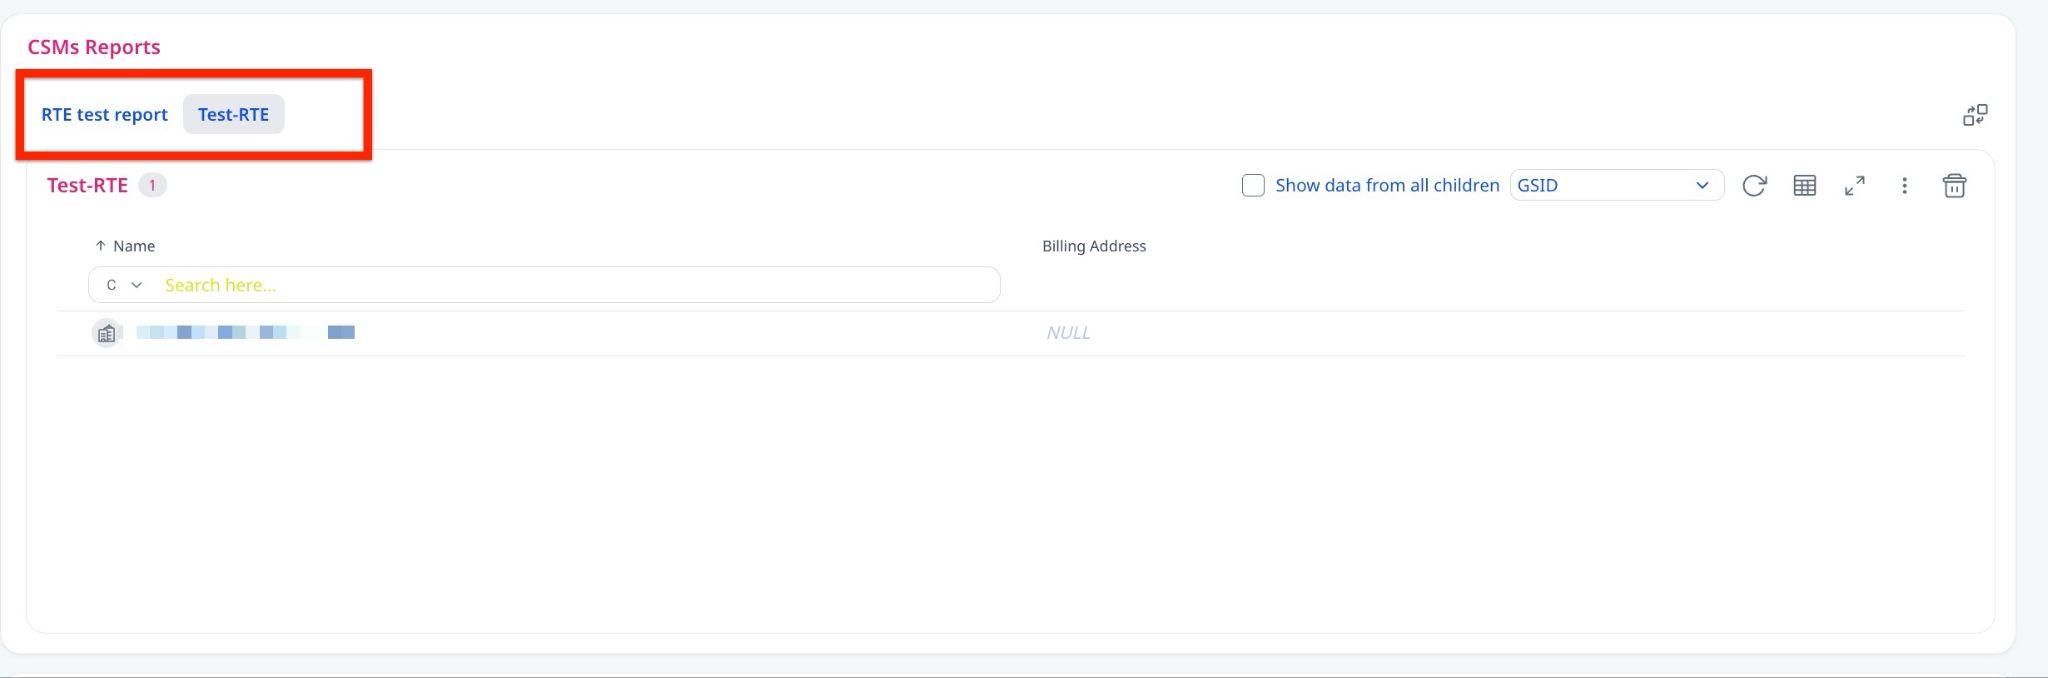
Filter selections are saved and restored the next time the widget is opened. To switch to the new tabbed view, click Switch to New Version. End users see the same view and tab order as configured by the CSM but cannot make changes.

This feature is available on-demand. To request early access, submit a support ticket.
Attachments Widget
The Attachments widget enables secure file sharing between CSMs and customers.
This widget supports:
- Uploading and sharing finalized documents with customers.
- Controlling what end users can see and do with shared files.
- Creating a consistent, branded file experience across customer spaces.
As an admin, you can perform the following using the Attachments widget:
- Add to Layout: Drag and drop the widget from the layout editor.
- Configure Defaults: Define end-user permissions and upload limits in Administration > Spaces Configuration > Click the three horizontal dots icon > General Settings > Attachments.
- Resize: Adjust the widget size and placement on the canvas.
- Publish: Apply and publish layouts so CSMs and end users can use the widget.
Add the Attachments Widget to a Layout
To add the Attachments widget to a layout:
- Navigate to Administration > Spaces Configuration > Layouts.
- Open an existing layout or click Create Layout.
- Go to the Edit Layout tab.
- Drag and drop the Attachments widget onto the layout canvas.
- Resize or reposition the widget as needed.

The widget appears blank until files are shared. Even if files exist in C360, they do not appear in Spaces until explicitly shared.
Configure Widget Options
Adjust visibility, permissions, and upload rules from the widget's configuration panel. The following options are available:
| Option | Description |
|---|---|
| Default Visibility | Show or hide the widget by default within the layout. |
| End-User Permissions | View Only: Users can only view and download shared files. View and Manage: Users can upload or delete their own files. |
| Collaborator Permissions | Select Allow collaborators to change end-user attachment permissions to let CSMs override default permissions. |
| Upload Rules | Files must be downloaded. Inline preview is not supported. |
The layout below reflects the available configuration options.

File Upload Limits by Persona
The following table defines upload limits based on user roles:
| Persona | Max File Size | Supported Types | Restricted Types |
|---|---|---|---|
| Admin or CSM | 30 MB | PDF, DOC, PPT, XLS, TXT, JPG, PNG | None |
| End User | 5 MB | PDF, DOC, PPT, XLS, TXT, JPG, PNG | Audio, video |
Permissions and Defaults
The following table describes the end-user access levels and override options:
| Setting | End-User Actions | Override Allowed |
|---|---|---|
| View only (default) | View or download files. | CSM can switch to View & Manage if allowed. |
| View & Manage | View, download, upload, edit, or delete their own files. | CSM can switch to View only if allowed. |
| Override disabled | Admin setting applies to all Spaces. | No overrides permitted. |
- Virus scanning is automatically enabled for all end user uploads. For global configuration, navigate to Spaces Configuration > Click the three horizontal dots icon > General Settings to apply default permissions and restrictions within your Gainsight instance.
- Branding such as colors and fonts applied to Spaces also applies to this widget.
Resize Widgets in Spaces Layout
As an admin, you can resize various widgets both vertically and horizontally in the Spaces layout to control how content appears for users. The flexibility in widget resizing allows for better content arrangement and a more effective use of screen real estate.
IMPORTANT: Only admins can resize widgets. Most widgets support horizontal and vertical resizing (measured in grid units, full canvas = 24 columns).
Widget Resize Behavior by Type
The following table describes the width and height resize limits for each widget type.
| Widget Type | Width (min–max) | Height (min–max) | Notes |
|---|---|---|---|
| CSM Reports | 12–24 | 11- 20 | Can accommodate one report (11 rows), and a maximum that can accommodate 2 reports (20 rows) |
| Spaces Notes | 12-24 | 6-16 | Useful for longer note content; customizable display area. |
| Text Widget | 12-24 | 6-16 | Follows the same behavior as Notes; good for custom messages or headings. |
| Field Widgets (Rich Text Editor) | 12-24 | 6-16 | Includes fields like Summary or Billing Address that use a text editor. |
| Standard Widgets(CSM, Renewal Data, Customer Since, Logo) | 4-24 | 3-5 | Initially limited to 6 columns wide; now allows full-width if required. |
| Report Widgets | 12-24 | 6-16 | Same behavior as text widgets for layout flexibility. |
Non-Resizable (Fixed) Widgets
The following widgets are fixed and cannot be resized manually:
- Summary Ribbon, Banner, and Success Plan widgets: Fixed and not resizable.
- Attributes Widget: Auto-resizes based on the number of attributes; dragging does not affect size.
- Field Widgets (Non-Text): Includes checkboxes, dropdowns, and similar fields. Fixed width: 4–24, height: 3–5.
Layout Behavior
The following behaviors apply when resizing widgets on the canvas:
- Dragging Horizontally (Width): Most widgets allow flexible resizing up to the full canvas width of 24 grid columns.
- Dragging Vertically (Height): Depending on the widget, heights can range between defined min-max limits, usually 3 to 16.
- Auto-Resizing: Some widgets like Attributes auto-adjust based on content and cannot be resized manually.
- Side-by-Side Widgets: If a report is resized to half-width (12 grids), another widget, such as another report, can be added beside it.
Admin and CSM and End-User Capabilities
Admins have full control over the layout, they can both resize widgets and edit their content. CSMs, while unable to resize widgets, can edit content in some widgets depending on their permissions. End users, on the other hand, do not have the ability to resize or edit any widget content.
Best Practices
- Use full-width only if the widget needs that much space (example: large reports).
- Group similar widgets (example, text and notes) to maintain consistent layouts.
- Make use of height flexibility to prevent unnecessary scrolling.
Next, read: Manage Spaces Users and Invitations