
Configure Relationships
Gainsight NXT
This article explains how to configure Relationships in the Relationships Administration page.
Overview
Relationship is a framework in Gainsight that provides you the flexibility to accurately model and manage your complex customer structures by creating Relationship types and Relationship. Relationship takes Customer Success beyond managing Accounts. They help CSMs manage each connection point (Relationship) with the customer.
To view the Relationships Administration page, navigate to Administration > Relationship. This page allows you to add fields, create Associated Objects, configure the Relationship Types and Type fields, Sections and Relationship Search Configuration.
You can see the following tabs in this page:
Configure Fields
Admins can configure the following:
- Relationship Fields
- Stage
- Status
Relationship Fields
The Relationship Fields section displays all the fields in the Relationship object. There are three types of fields in the object namely:
- Standard
- System
- Custom
In this page, you can just view standard and system fields but you can create, view, edit, and delete the custom fields. You can create custom fields and use the same in other configuration pages of Relationship.
For example:
- You can use custom fields in the configuration of Relationships.
- You can use custom fields in the configuration of Associated Objects.
- You can use custom fields in the Search configuration.
To create a custom field:
- Navigate to the FIELDS tab.
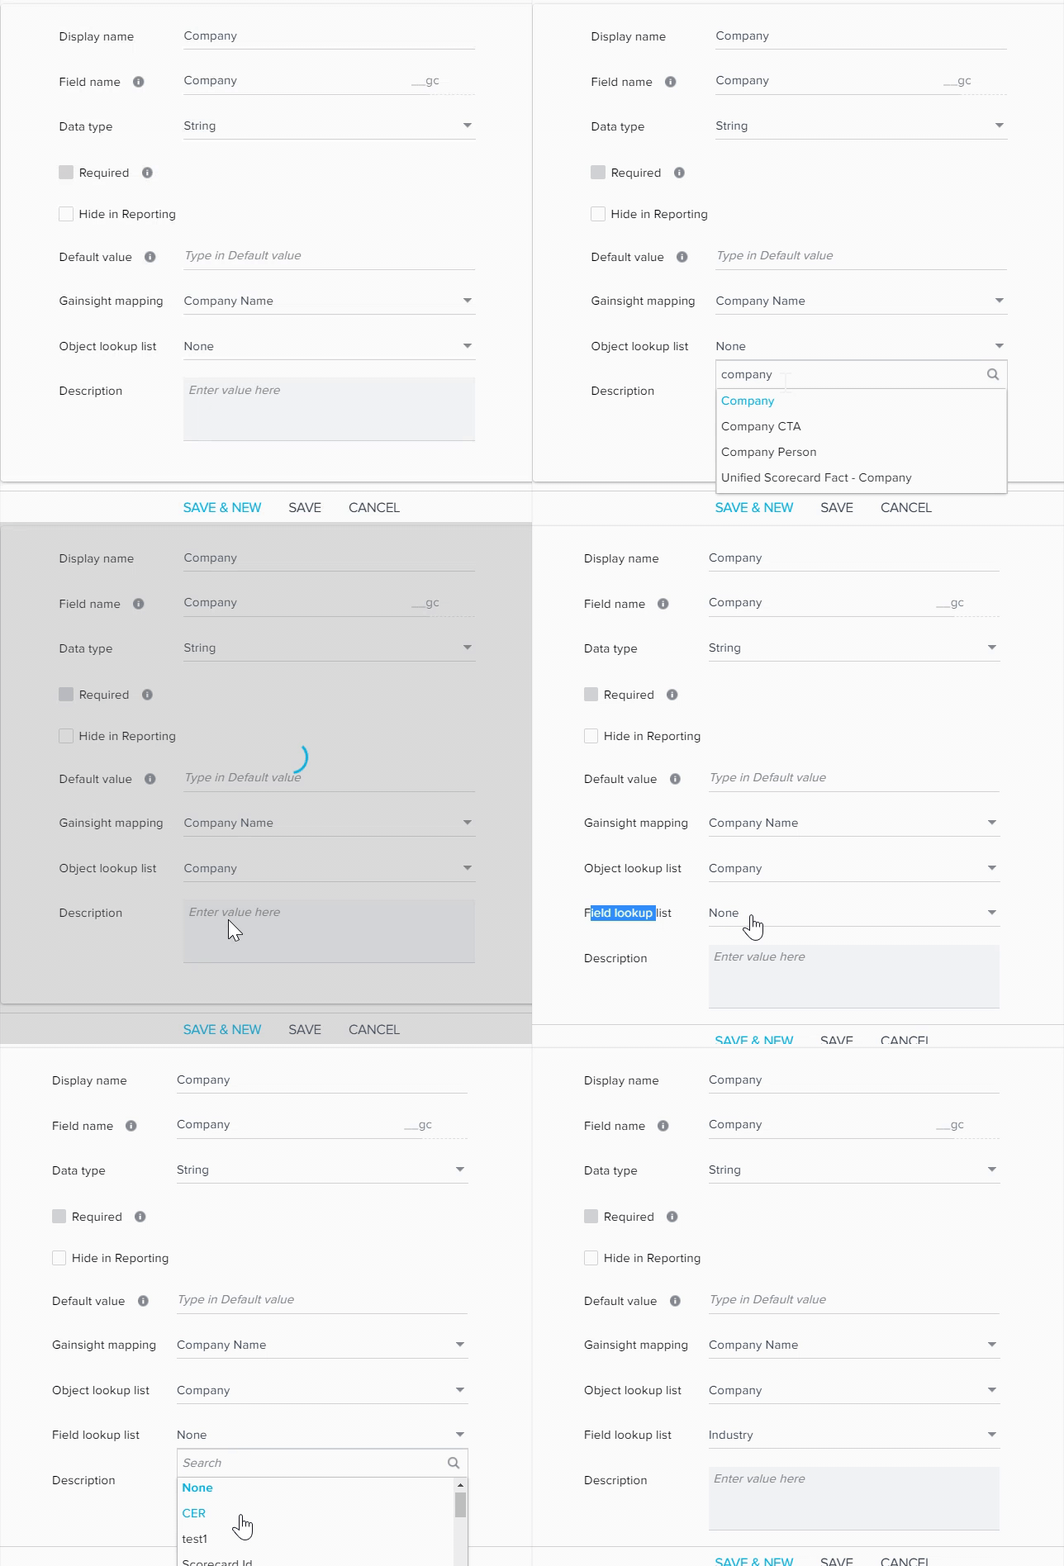
- Click + FIELD. Create Custom Field dialog appears.
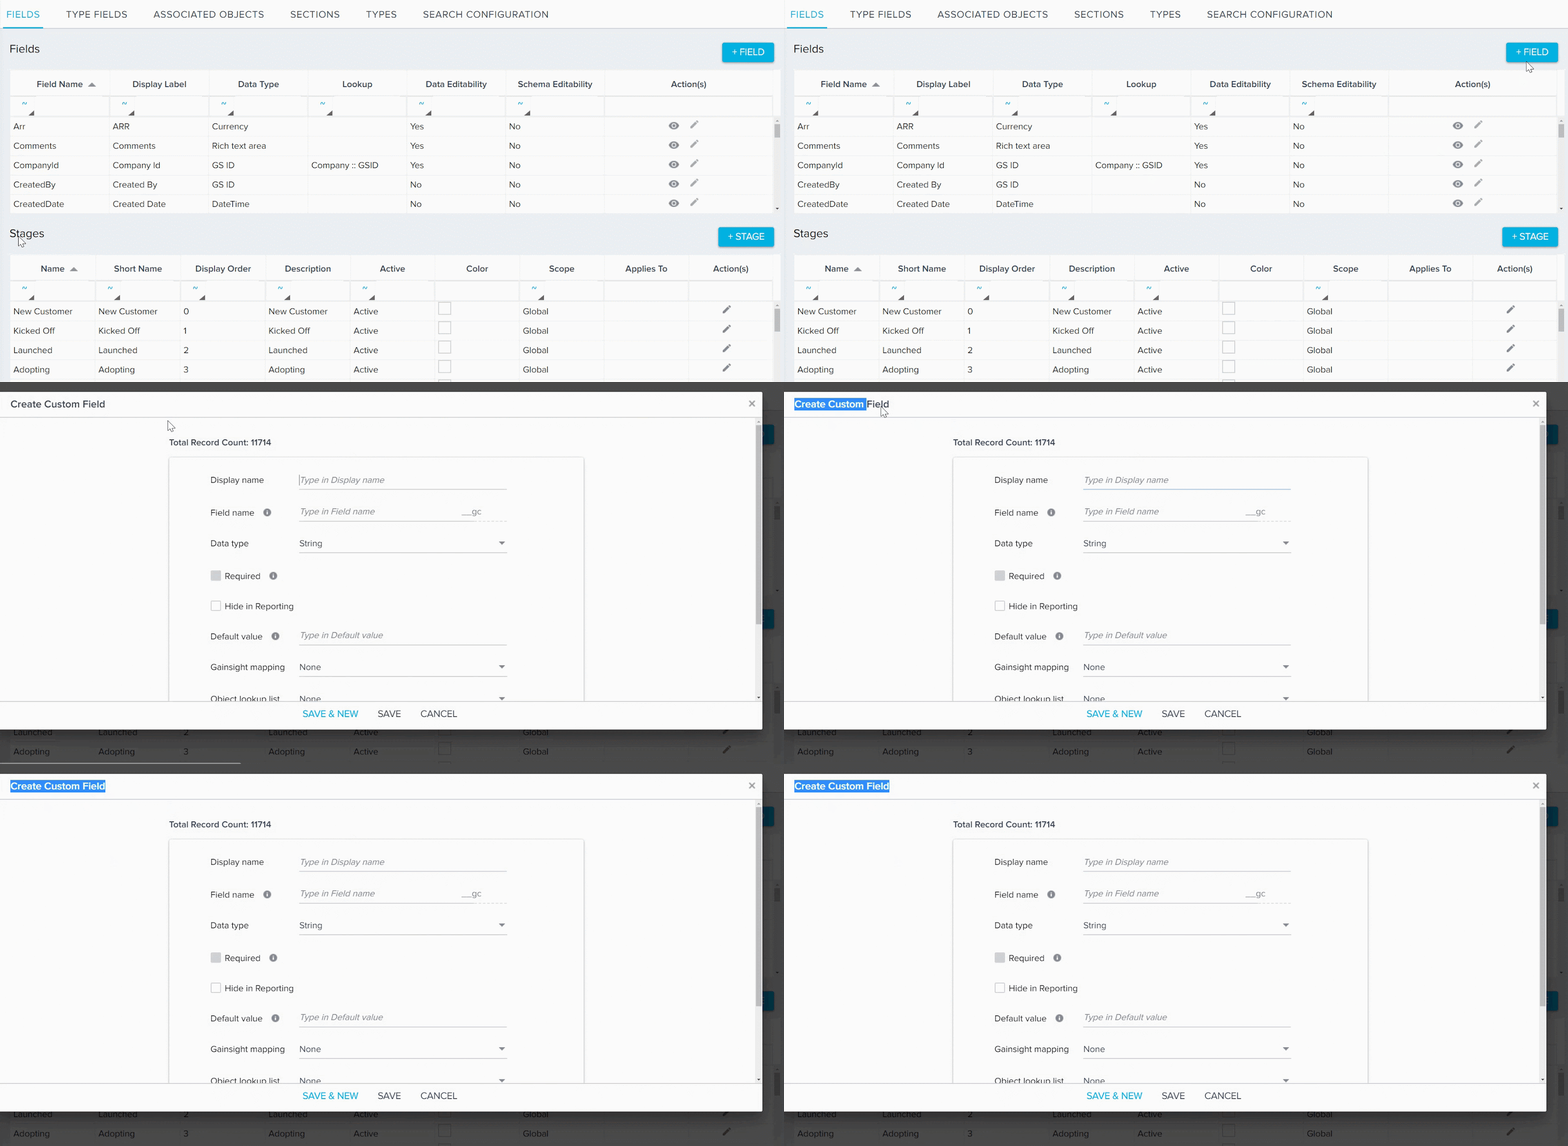
- Enter the following details in the Create Custom Field dialog :
- Display name: The display name of the custom field.
- Field name: System defined field name with a suffix of __gc. This is copied from display name by default but you can edit the same as required.
- Data type: The data type of the field being created.
- Currency Code: You can see this field when you select data type as Currency only. Select a currency code from the list.
- Default value: The default value that you would like to insert in the field.
- Decimal places: You can see this field when you select data type as Currency, Number, or Percentage only. Assign the number of decimal places on the values in the field. By default, assigned decimal places is 0.
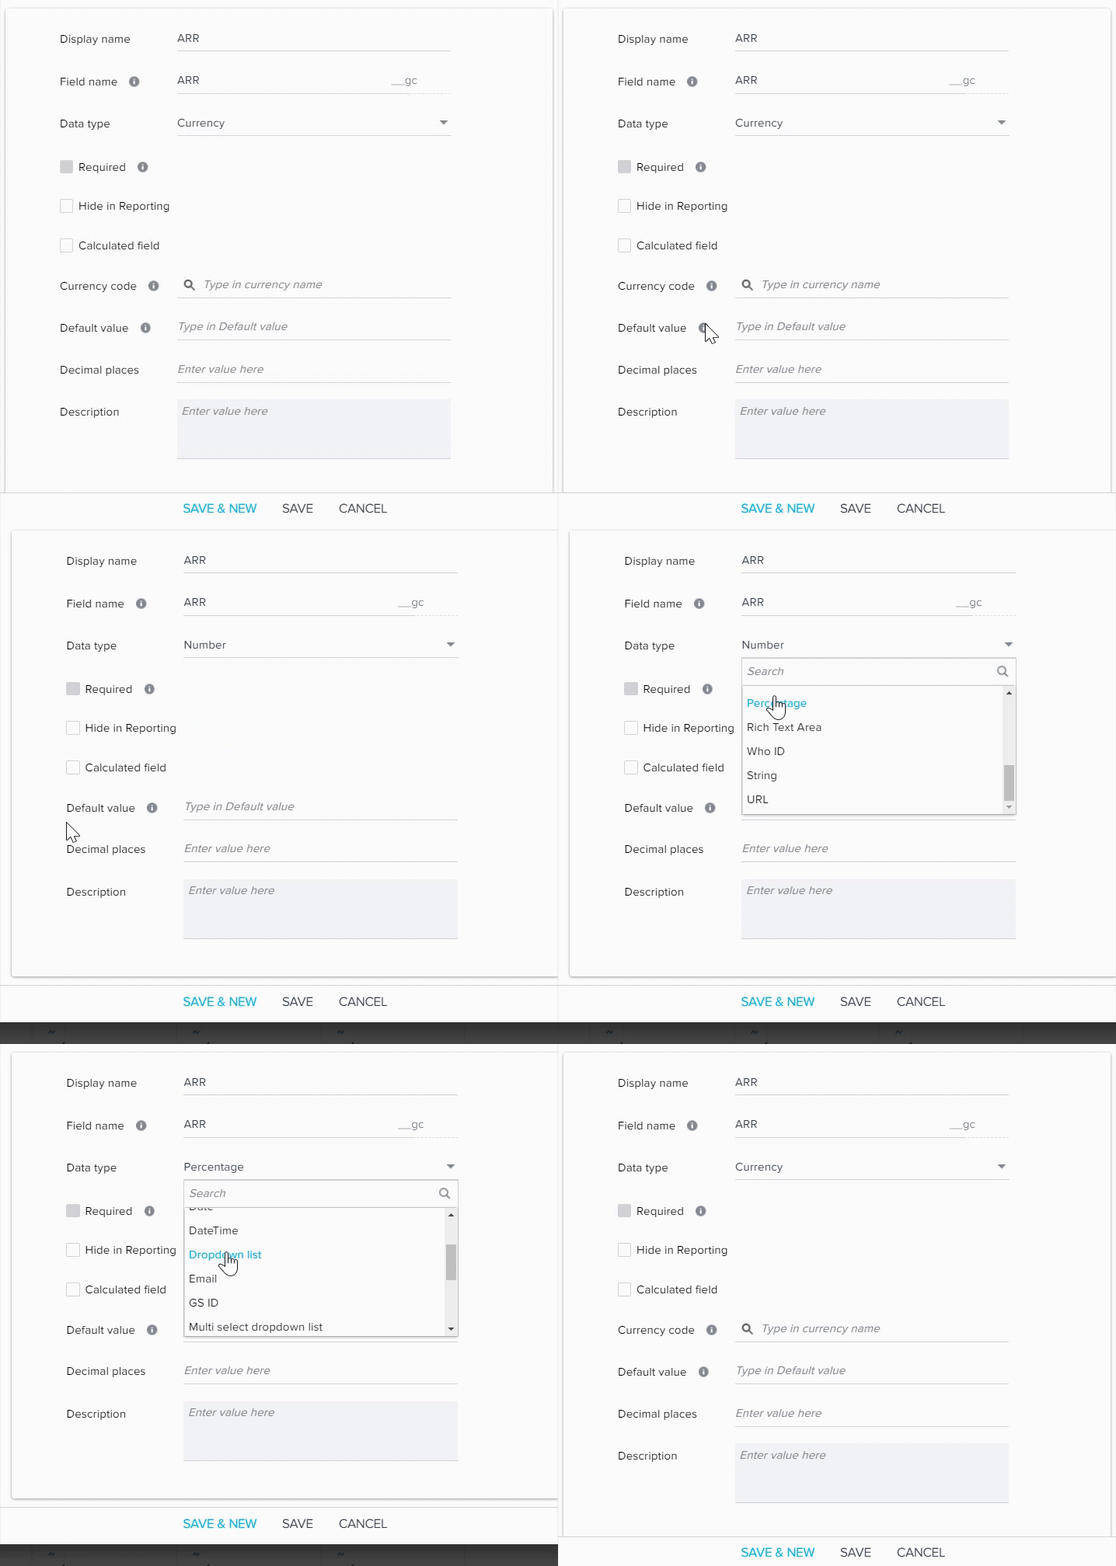
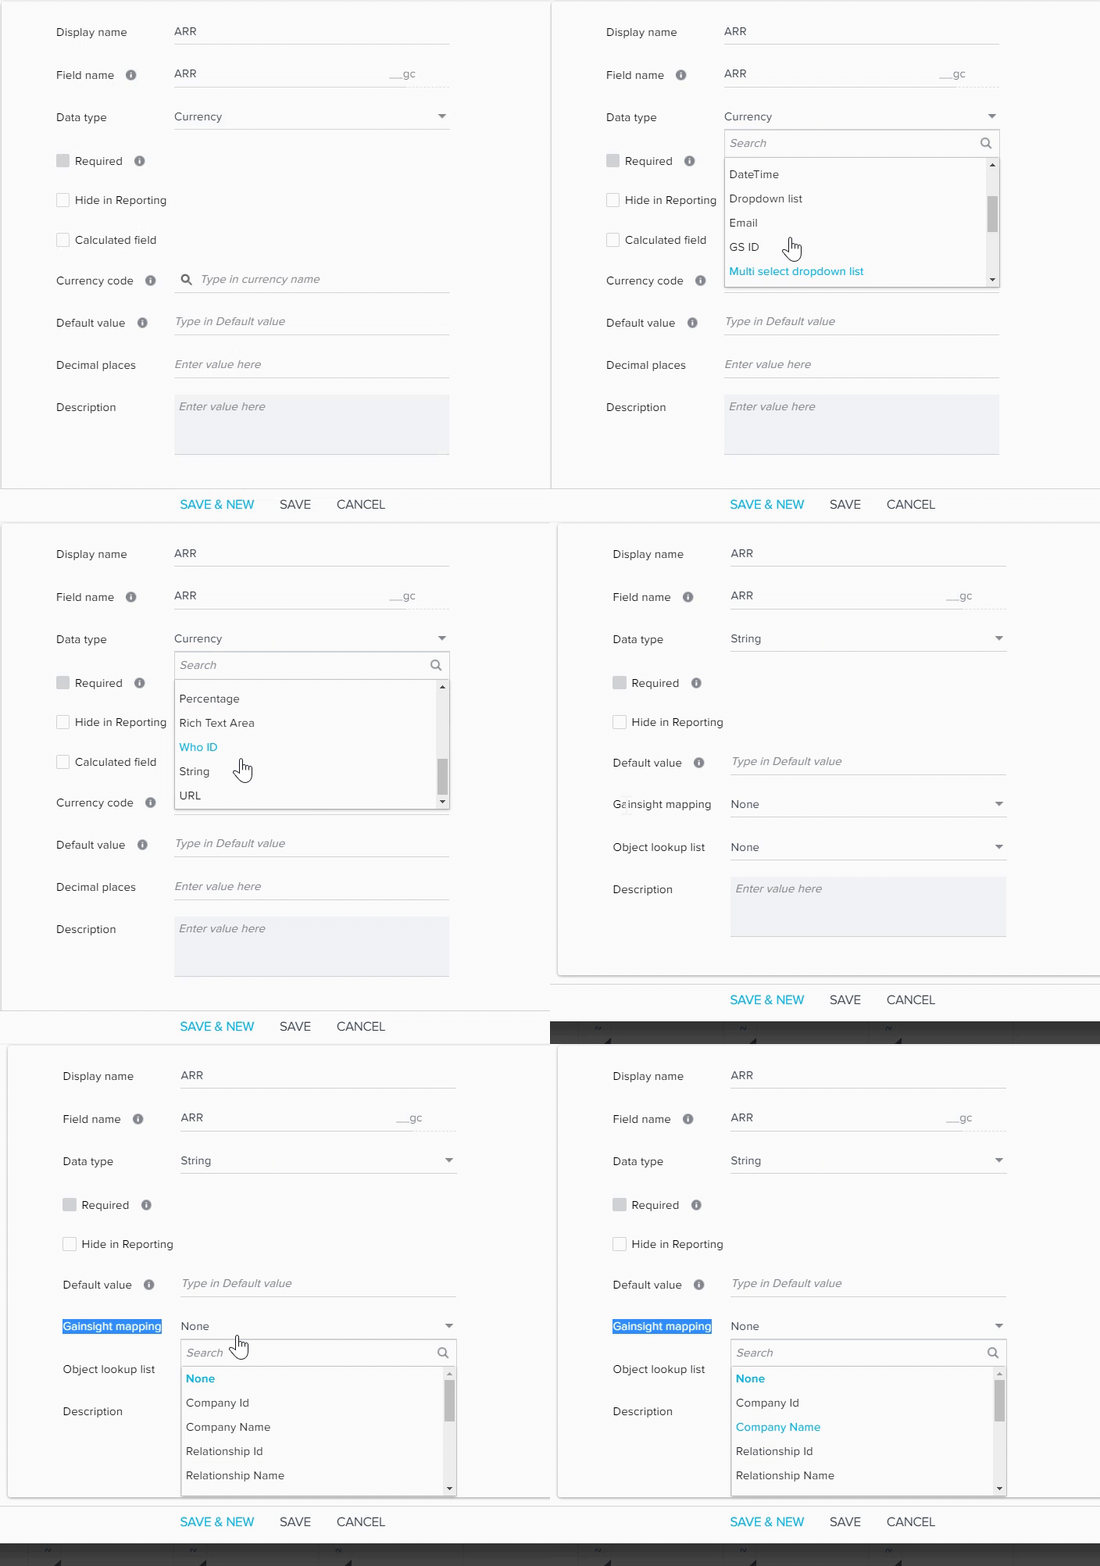
- Gainsight mapping: This field is displayed only when you select either GSID, Date, DateTime, Email, or String Data Type. You can map the field only to standard fields from Gainsight Objects. You can map the field being created with a suitable standard field so that values in the current field are enabled with hyperlinking.
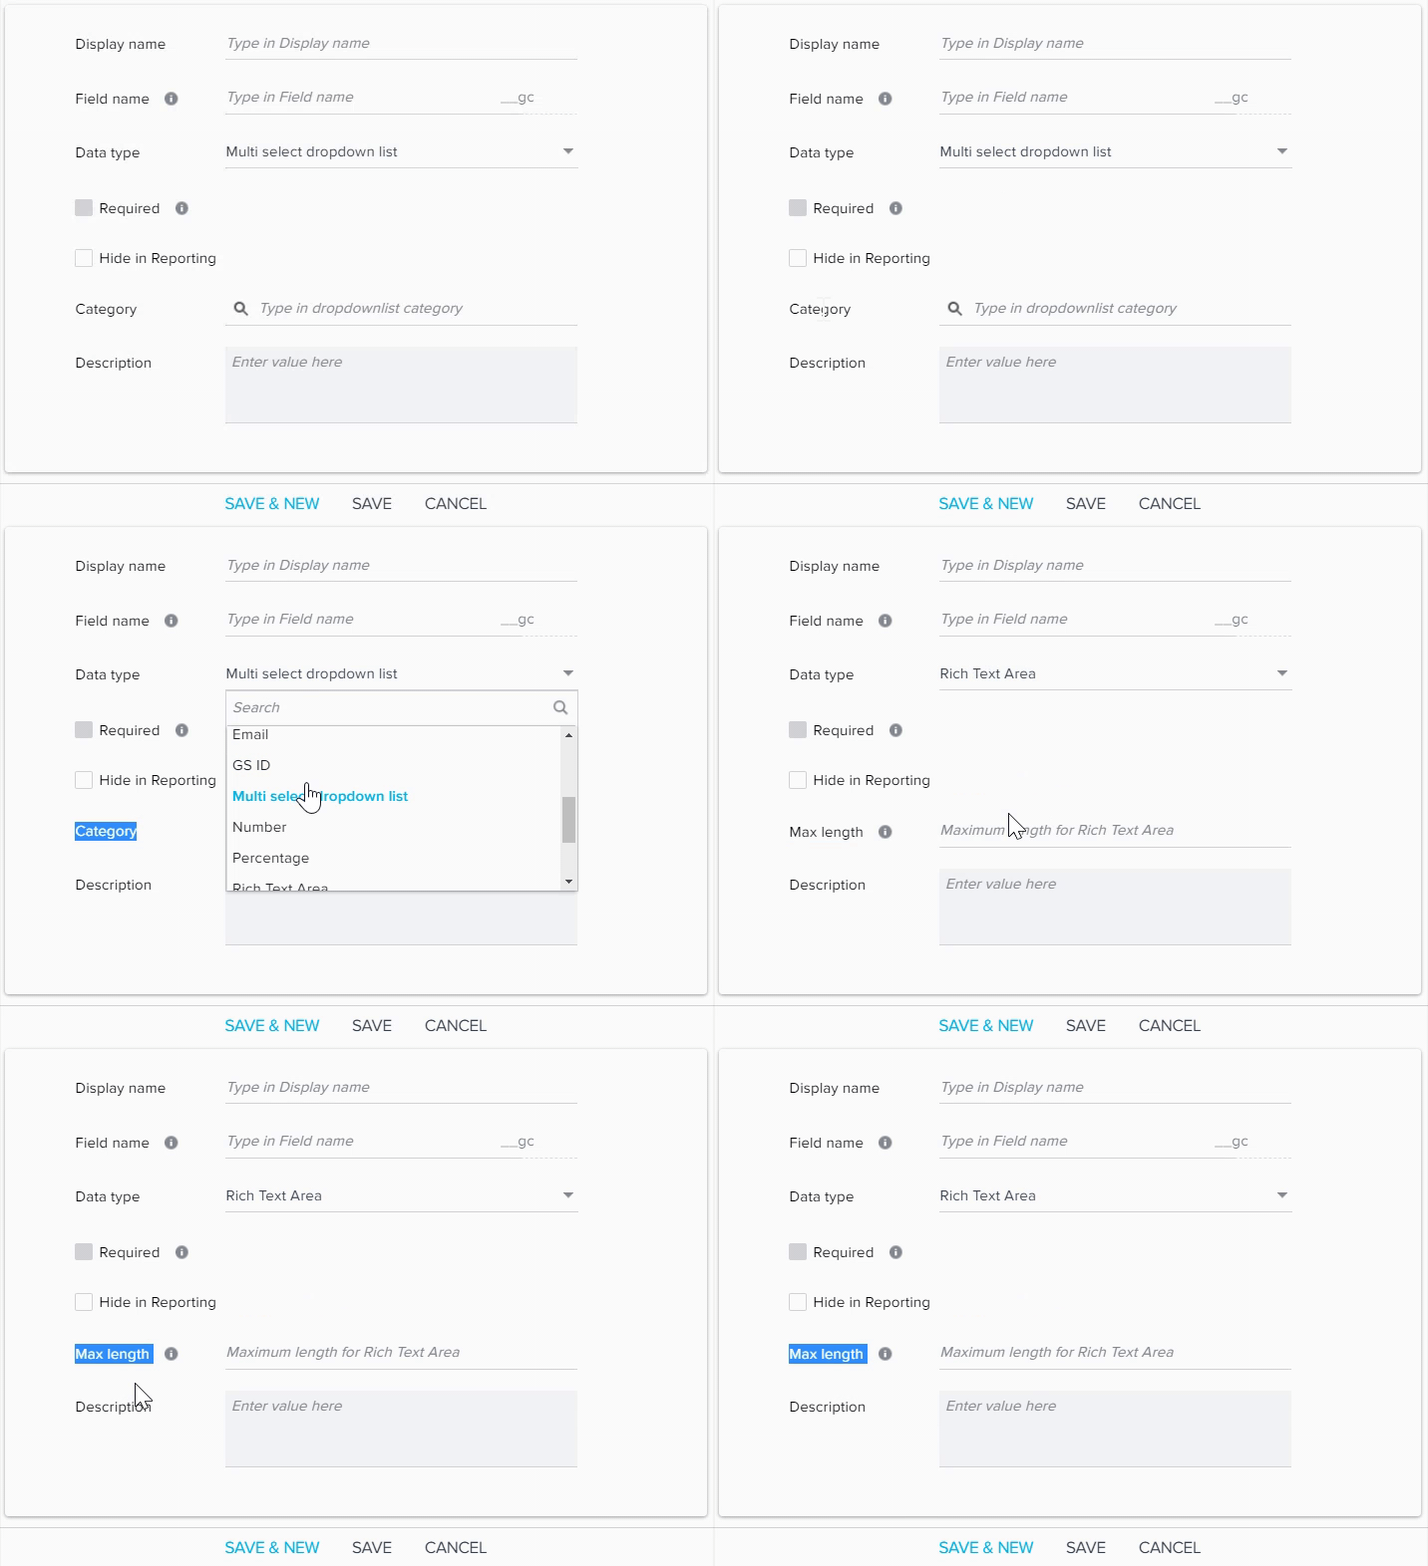
- Category: This field is displayed only when you select either Dropdown list or Multi-select dropdown list Data type. You must select a Category for the Dropdown list. For more information on Drop down lists, refer Dropdown List and Multi Select Dropdown List.
- Max length: This field is visible only when you select the Rich Text Area data type. You should specify the maximum length of words supported by this field.
- Description: The description of the field being created.
- Required: By setting this constraint, the field is not allowed to ingest a null value record while importing data. Required constraint cannot be set on a new field, if data already exists in the Relationship Type object.
- Hide in Reporting: If you select this, the field will be hidden in the Reporting functionality.
- Calculated field: This checkbox appears only if there are at least two fields with Number Data type. If you select this, you can create a formula using the existing fields.
- Object lookup list: This field is displayed only when you select either Email, String or GS ID Data type. Select the Source Object from which data will be ingested into this field.
- Field lookup list: Once you select an object in the Object lookup list, its corresponding fields are displayed here. select the source field to which lookup is enabled from the current field.
- Click SAVE & NEW, to save the current field and to create another new field. This helps to create multiple fields in a single instance.
- Click SAVE, to save the current field. Once the field is created, it populates in the Fields section.
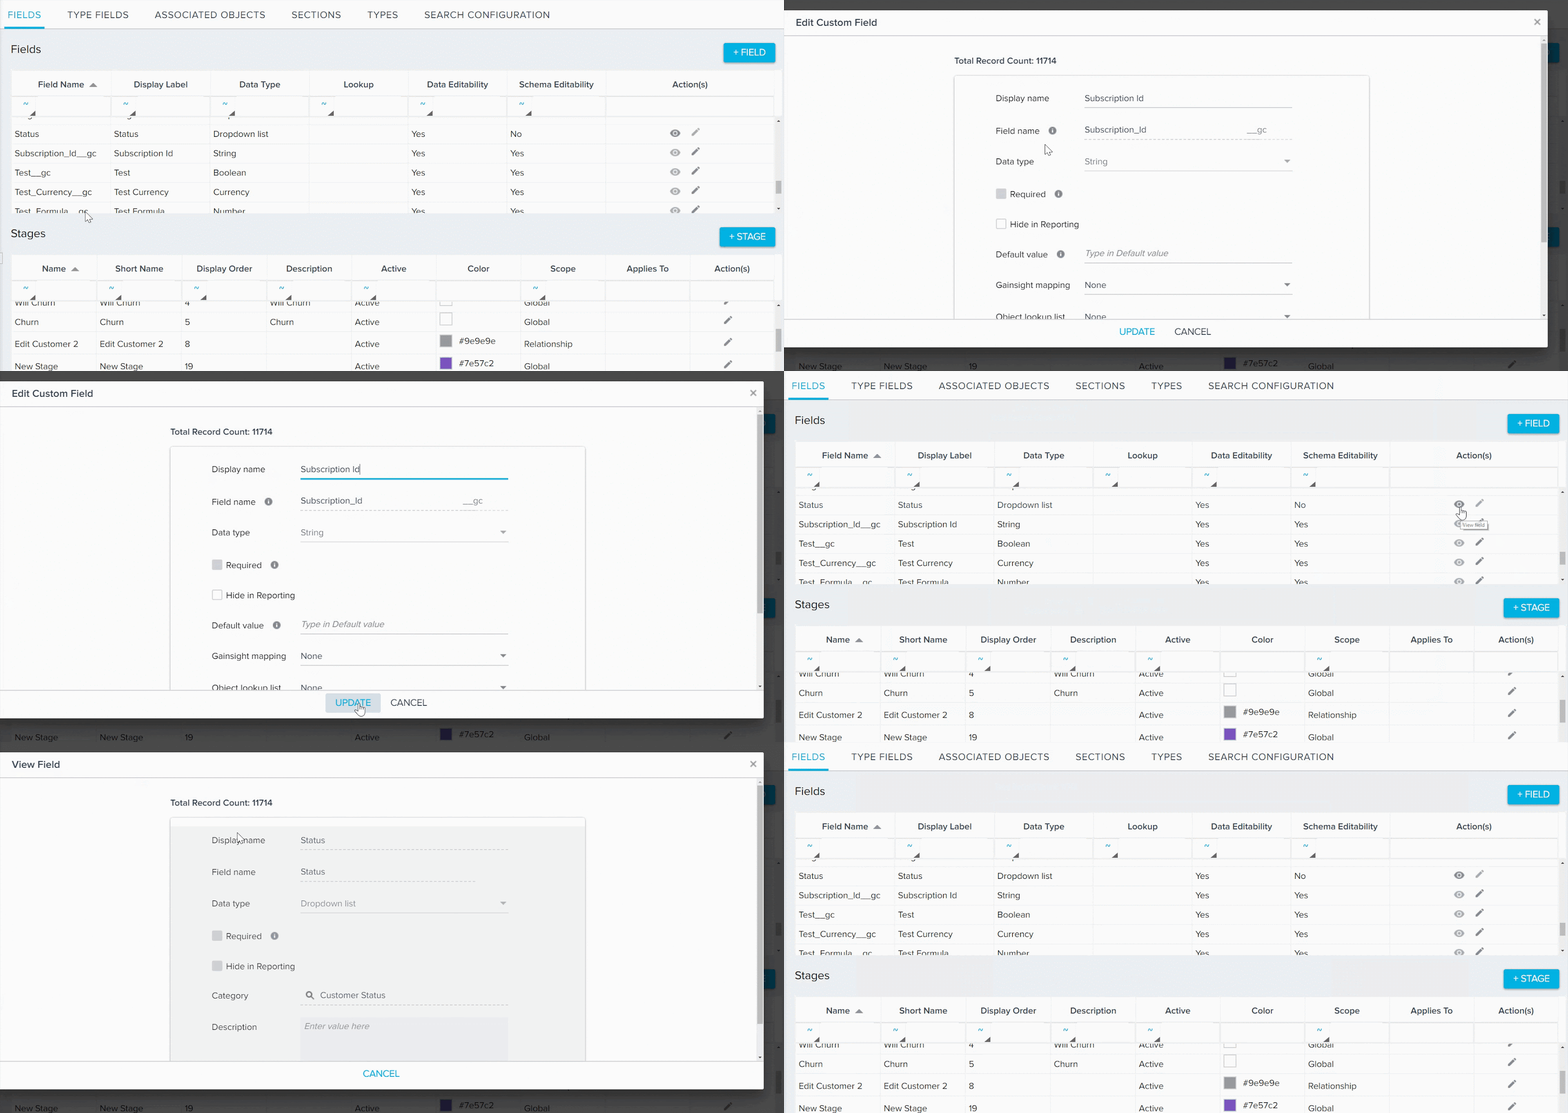
- Once the field is created, it populates in the Fields section. You can click Edit field to edit the field name and the number of decimal places. This option is available only for custom fields.
- Click View field to view the existing standard or system field.
For more information on creating a new field in an object, refer to the section Add Custom Fields in an Object.
Notes:
- If you do not assign the number of Decimal Places on the Number, Currency, or Percentage type fields, the values in the field will be rounded to simple numbers.
- While importing data into the field:
- If a user sets a default value for the field and the source record is empty/null, then that default value will be ingested.
- If the default value is not set and the source record is empty/null, then that record will be rejected provided if the field is marked as Required.
- Required constraint can only be applied on a field which does not have any null/empty values.
- It is recommended not to apply the Required constraint on a newly added field.
Stage
Stage is used to define on which lifecycle stage a customer is currently in. Gainsight offers the following standard stages by default in the stage field.
- New Customer
- Kicked Off
- Launched
- Adopting
- Will Churn
- Churn
You can just view the standard stages but you can create new custom stages and edit the existing stages depending on your business requirement. All these different stage items are associated to standard Stage field dropdown in the Relationship object. Users can select any of these stage items from the dropdown list, while creating a Relationship.
To create a custom stage:
- Navigate to the Stages section.
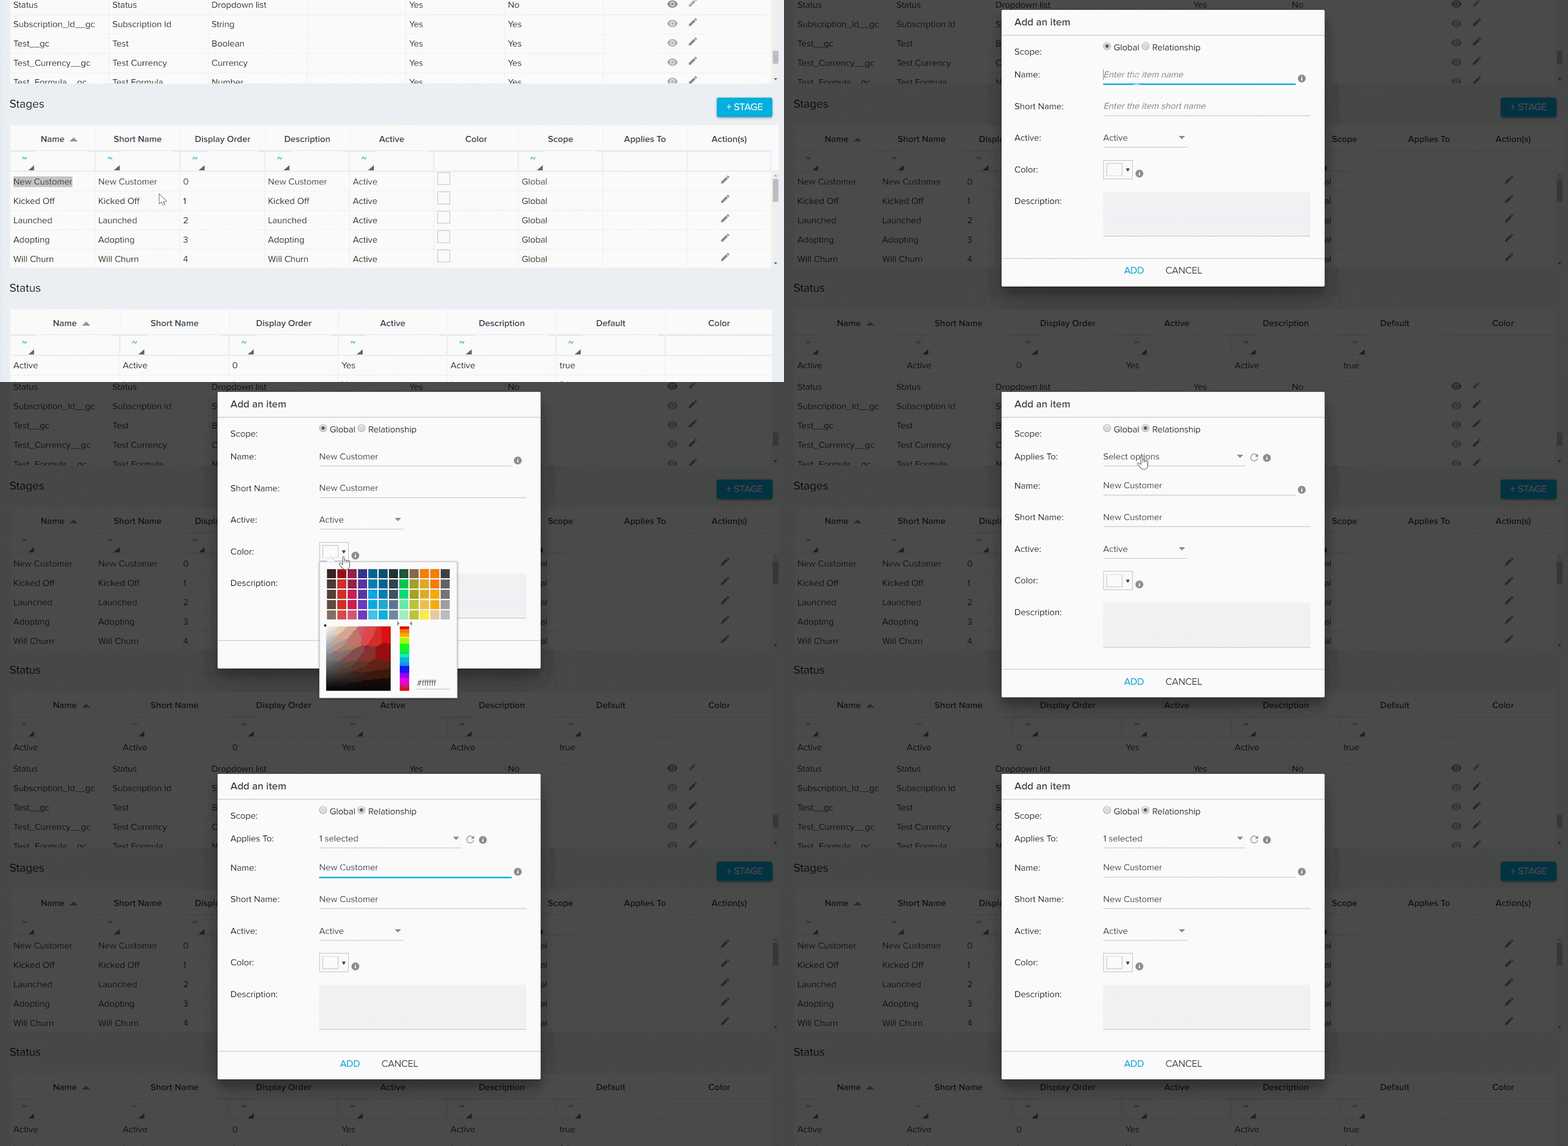
- Click + STAGE. Add an item dialog appears.
- Enter the following details in the Add an item dialog:
-
Scope: Select type of the scope from one of the following options:
- Global: If you select this option, the stage that you create, will be associated with all the Relationships types.
- Relationship: If you select this option, the stage that you create, will be associated with the selected Relationships type only.
- Applies To: This field is displayed only when you select Relationship in Scope. Select the Relationship types the stage item should apply to.
- Name: The display name of the stage field.
- Short Name: This is automatically populated based on the Display Name. You can also edit the short name.
- Active: Select status of the stage item (Active / Inactive). If you want to use this stage, select Active.
- Color: You can choose required color of your choice for stage.
- Description: The description of the stage being created.
- Click ADD, to add the stage item.
-
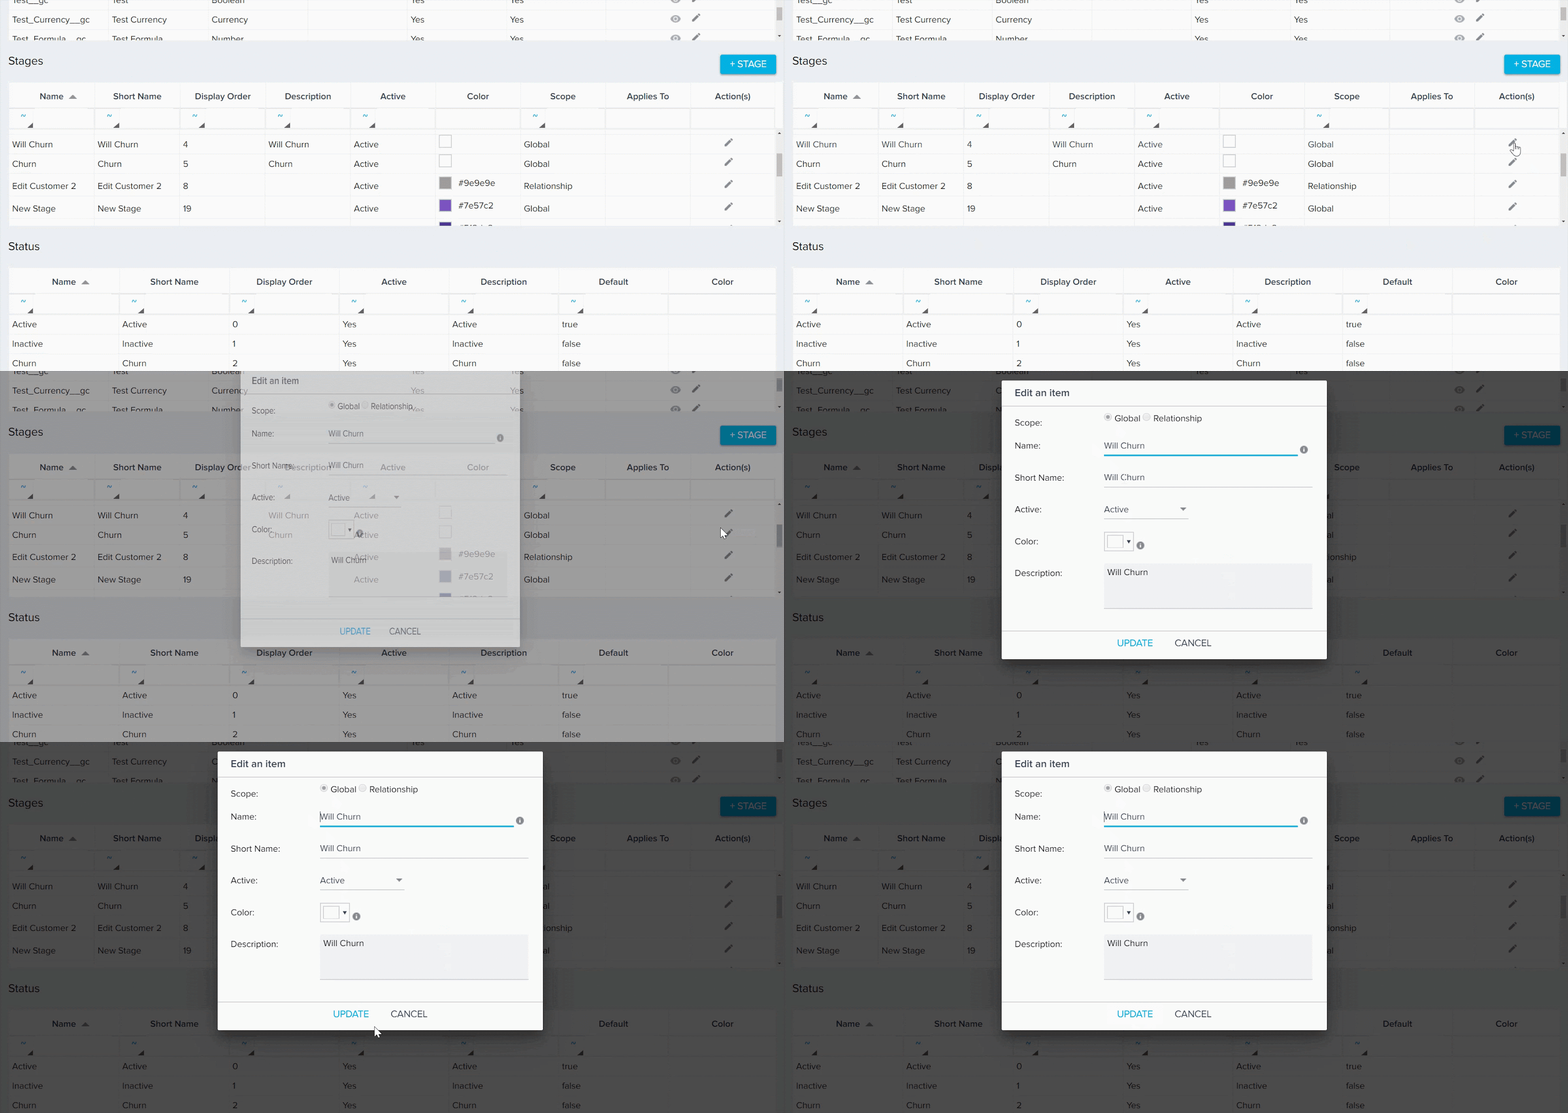
Once the stage item is created, it populates in the Stages section. You can click Edit field to edit the stage item and click UPDATE, if you made any changes.
Status
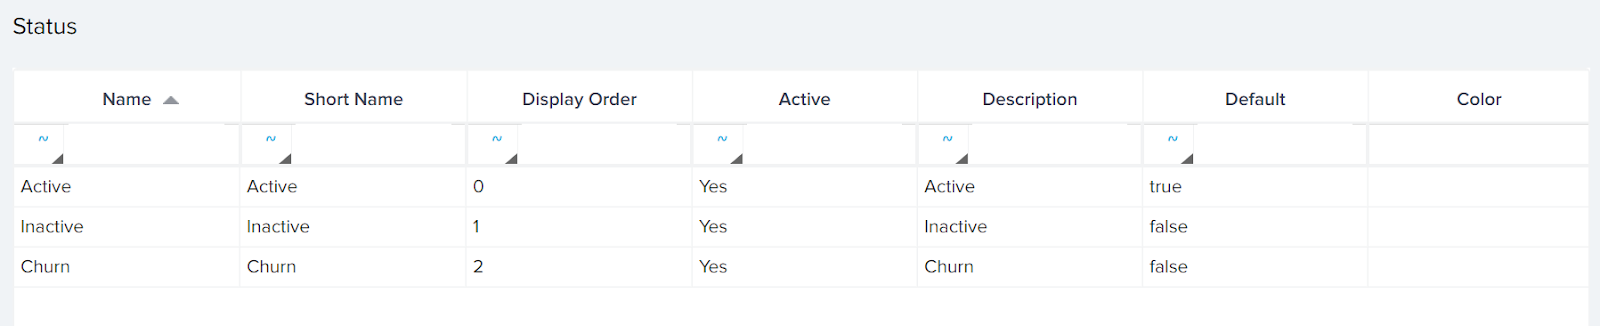
Customer Status is a system-defined field used to classify the status of the customer. You cannot add, remove, or edit selections in this list.
Gainsight offers the following standard Statuses by default in the Status field.
- Active
- Inactive
- Churn
All the different statuses in this section are associated to Status field in the Relationship object.
Configure Type Fields Section
The Relationships Type Fields section displays all the fields in the Relationships Type object. There are three types of fields in the object namely:
- Standard
- System
- Custom
In this page, you can just view standard and system fields but you can create, view, edit, delete the custom type fields. You can create a custom type field and you can use the same in other configuration pages of Relationship types. To configure custom type fields, navigate to the TYPE FIELDS tab.
You can create and edit a custom Relationship type category, depending on your business requirement. All these different categories are associated to standard Relationship type Category field in the Relationship Type object.
To create a custom relationship type field, refer Relationship Type Fields.
To create a custom relationship type category, refer Relationship Type Category.
For more information on the configuration of Relationship Type object and Relationship Type Category, refer Configure Relationship Types.
Configure Associated Objects
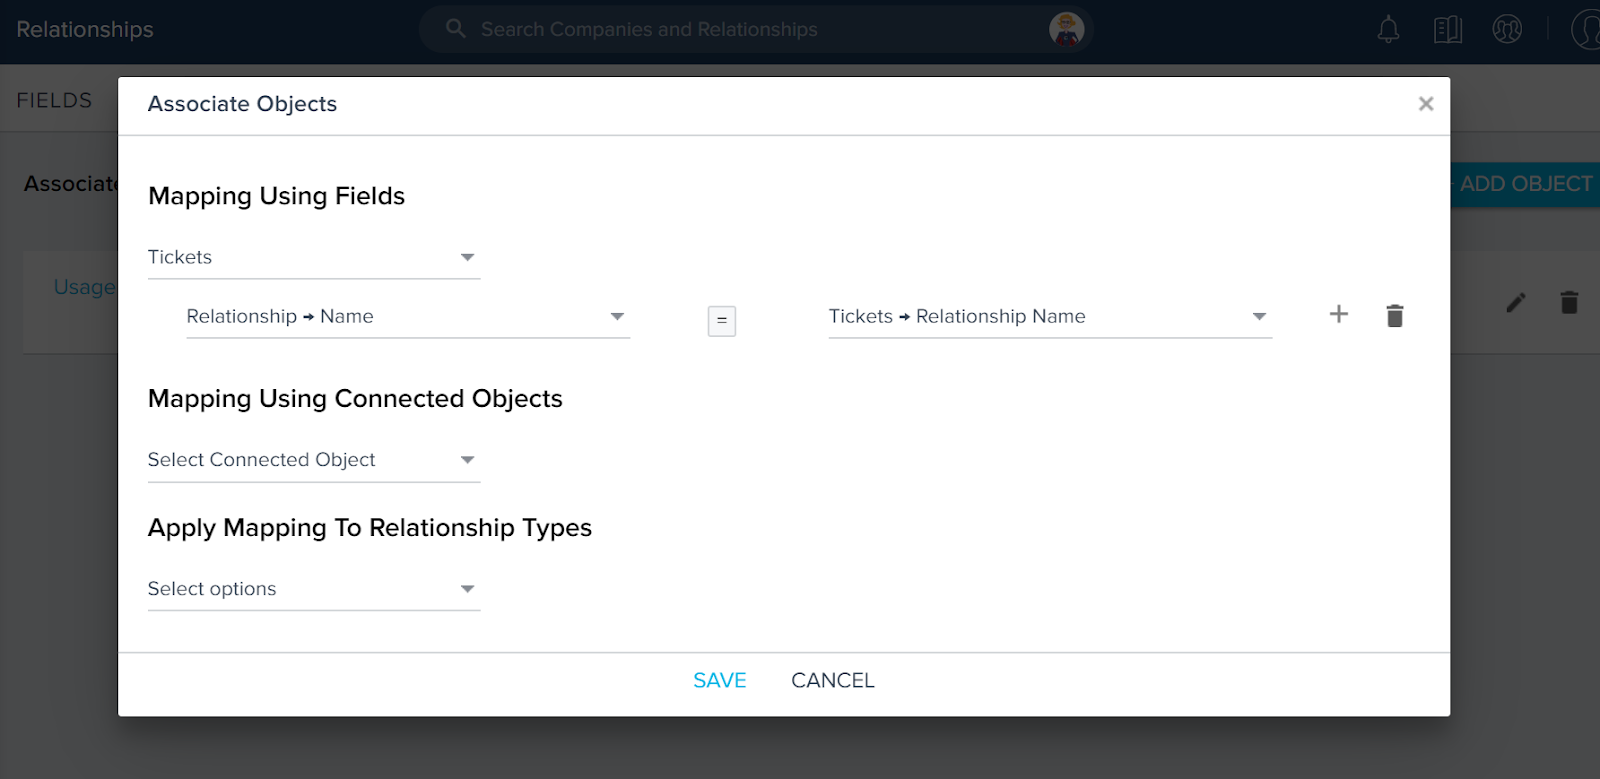
Associated objects help fetch relevant data from a different object, so that you can display associated reports in the R360 page, and can be used in the rules engine to create Relationship level CTA or to Set Score or to Create a Success Plan and all other Relationship level rules engine actions.
You can associate another Gainsight object to the Relationship object by mapping the Relationship field to the associated object’s field. Mapping is a prerequisite to adding associated objects and their associated reports to the R360 page.
For more information on how to add an associated object, refer Configure Associated Objects to Relationship.
Configure Sections
SECTIONS page lists all of the Global sections that can be added to any Relationship layout. Global Sections is a section library, which allows you to create the most commonly used sections with specific configurations and keep them readily available, for using them in multiple layouts. Sections that you create in the Global Sections appear in the GLOBAL pane in the Available sections of each layout configuration page. The primary purpose of Global Sections is to save admins time.
Advantages of using Global Sections:
- Once you add a section to the layout from Global Sections, changes made at Global level are reflected in the section added to each layout.
- You can add a Global section to any layout, decouple it, and customize it as per your business requirement.
For more information on the configuration of Global Sections, refer Configure the Relationship360 Details (R360) Page and Section Types.
Configure Relationship Types
A Relationship type defines which attributes and reports that your CSMs see in the Relationship section of the RCustomer 360, as well as in the Relationship 360. It also defines the layout of these pages. You can think of the Relationship type as the template to define a Relationship per customer. Relationship types could be based on different products that your organization sells and manages, or different business units or departments that your organization sells to and works with.
For more information on the configuration of Relationship types, refer Configure Relationship Types.
Configure Search Configuration
The Search Configuration tab allows you to configure the fields that appear in global search results for the Relationship object and control how search results are displayed to users. The Search Configurations tab has three panels:
- Available Fields
- Fields visible in search results
- Global search result priority

Gainsight recommends you to mark a maximum of two fields as Searchable (Toggle) to prevent degrading the Search performance but you can mark all four of them as searchable.
Once the Relationship fields are configured for Searchable, the changes are applied once in every 24 hours. If you want to apply the changes instantaneously, you can use Sync Object functionality. For more information, refer to the Sync Object section.
To configure Relationship Search settings:
- Navigate to Administration > Customer Data > Relationship > Search Configuration. By default, Relationship Name and Relationship’s Company Name are available in the searchable fields section on the right pane.
- Add one or more fields from the Available fields section in the left pane to the searchable fields section. These fields are added to the Visible fields section.
- Turn the toggle switch ON for the added fields to mark them as Searchable. You can mark only a few String type fields to make them searchable.
- Click the Settings/Gear icon to modify the field display name, to make it more contextual to your business purpose.
- It is recommended to include not more than 2 fields in search criteria, in order to preserve search performance. However, you can add a maximum of 4 fields.
- You can search the Relationship only with Name fields. If you add other than Name fields in the configuration, you can only view those fields, but cannot search Relationship with those fields.
In the following image, Relationship Name, Company Id Name, and CSM Name are added as searchable fields.

Once the search settings are configured, you can see the newly added searchable fields in the Search bar, below the Relationship Name as shown in the following image. You can now search by Company Name and CSM Name along with the Relationship Name.

The Global search result priority panel allows you to control the order and visibility of record types in global search results. By default, when all three record types are turned on, they appear in the following order:
- Company
- Relationship
- Person
You can reorder record types and turn individual record types on or off to ensure users see the most relevant records first. Record types that are turned on appear under the HIGHEST PRIORITY section. Record types that are turned off move to the HIDDEN FROM SEARCH section.
To configure the global search result priority:
- In the Global search result priority panel, drag the record types to reorder them based on your preference.

- Turn on or turn off the toggle next to each record type to show or hide it in global search results.
- Click Apply Changes. Updates take approximately 15 minutes to reflect in global search results.
Users see search results organized in a tab-based layout, with each tab representing a record type such as Company, Relationship, and Person. Users can click a tab to view results for that specific record type. The order of tabs reflects the priority order configured by the admin.

- At least one record type must remain enabled at all times.
- Person appears as a configurable option only when P360 is turned on. Turning off the Enable P360 for users in Administration toggle under P360 Configurations removes Person from global search entirely.
- Relationship appears as a configurable option only when it is purchased as an add-on. If Relationship is not purchased, it does not appear in the Global search result priority panel.
Sync Object
Any changes in the search field configuration are synced into the search index once in every 24 hours. If you want to sync the changes in search field configuration instantaneously, perform the following actions:
CAUTION: It adds extra load to your IT infrastructure to run Sync and apply latest configuration to the search index, If you want to sync the changes to search fields instantaneously.
- Click SYNC OBJECT after selecting the Relationship search fields. Sync Fields window appears.
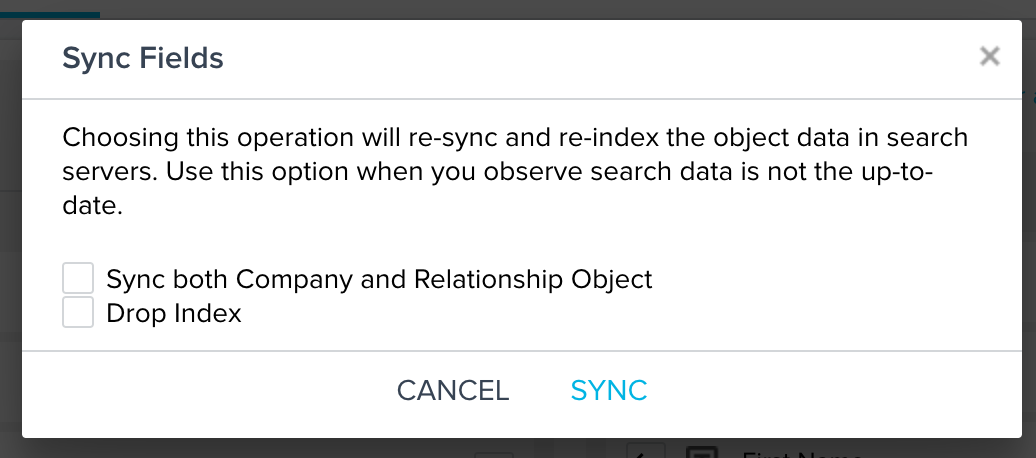
- Select the checkboxes, as required:
- Select the Sync both Company and Relationship Object checkbox, to apply changes in the search fields instantly, to both the Company and Relationship search from their respective search field configuration.
- Select the Drop Index checkbox, to drop the existing search index and apply re-index. This helps show the relevant Relationship records from the search box per the latest search fields.
- Click SYNC (without selecting checkboxes) to apply changes in the search fields instantaneously, only to the Relationship fields. You can also select the checkboxes as required, before clicking SYNC.