Define and Configure Relationship Types
Gainsight NXT
This article explains about the configuration of the Relationship Types.
Overview
A Relationship type defines which attributes and reports your CSMs see in the Relationship section of the Customer 360, as well as in the Relationship 360. It also defines the layout of these pages. Think of the Relationship type as the template to define a Relationship per customer. Relationship types could be based on different products that your organization sells and manages, or different business units or departments that your organization sells to and works with.
To view the Relationship Types Administration page, navigate to Administration > Relationship > TYPES tab. In this page, you can configure all of the Relationship Types.
How many Relationship Types do I need?
It is important to understand when you should be creating a brand new relationship type, and when you should be creating a relationship of an existing type. For example, if you have two products, should you create two relationship types, or just one product relationship type? The answer is, it depends.
Since the relationship type defines the layout and which attributes and reports show up on the Relationship 360, even though you can create different Scorecard and R360 Layouts under the same Relationship Type, it is recommended to use separate Relationship Types for different product lines or use cases. This helps keep data, views, and processes clearly separated, especially for use casses like Services versus CSM.
Before you configure the Relationship Types, you should configure the Relationship type Fields.
Relationship Type Fields
The Relationship Type Fields section displays all the fields in the Relationship Type object. In this page, you can create, view, edit, and delete custom field in the Relationship Type object. You can create a custom type field and you can use the type fields in other configuration pages of Relationship Type. Fields that you see in the Fields section appear in the Overview section of the Relationship Type configuration. To configure custom fields in the Relationship Type object, navigate to the TYPE FIELDS tab.
To create a custom type field in the Relationship Type object:
- Administration > Relationship > TYPE FIELDS
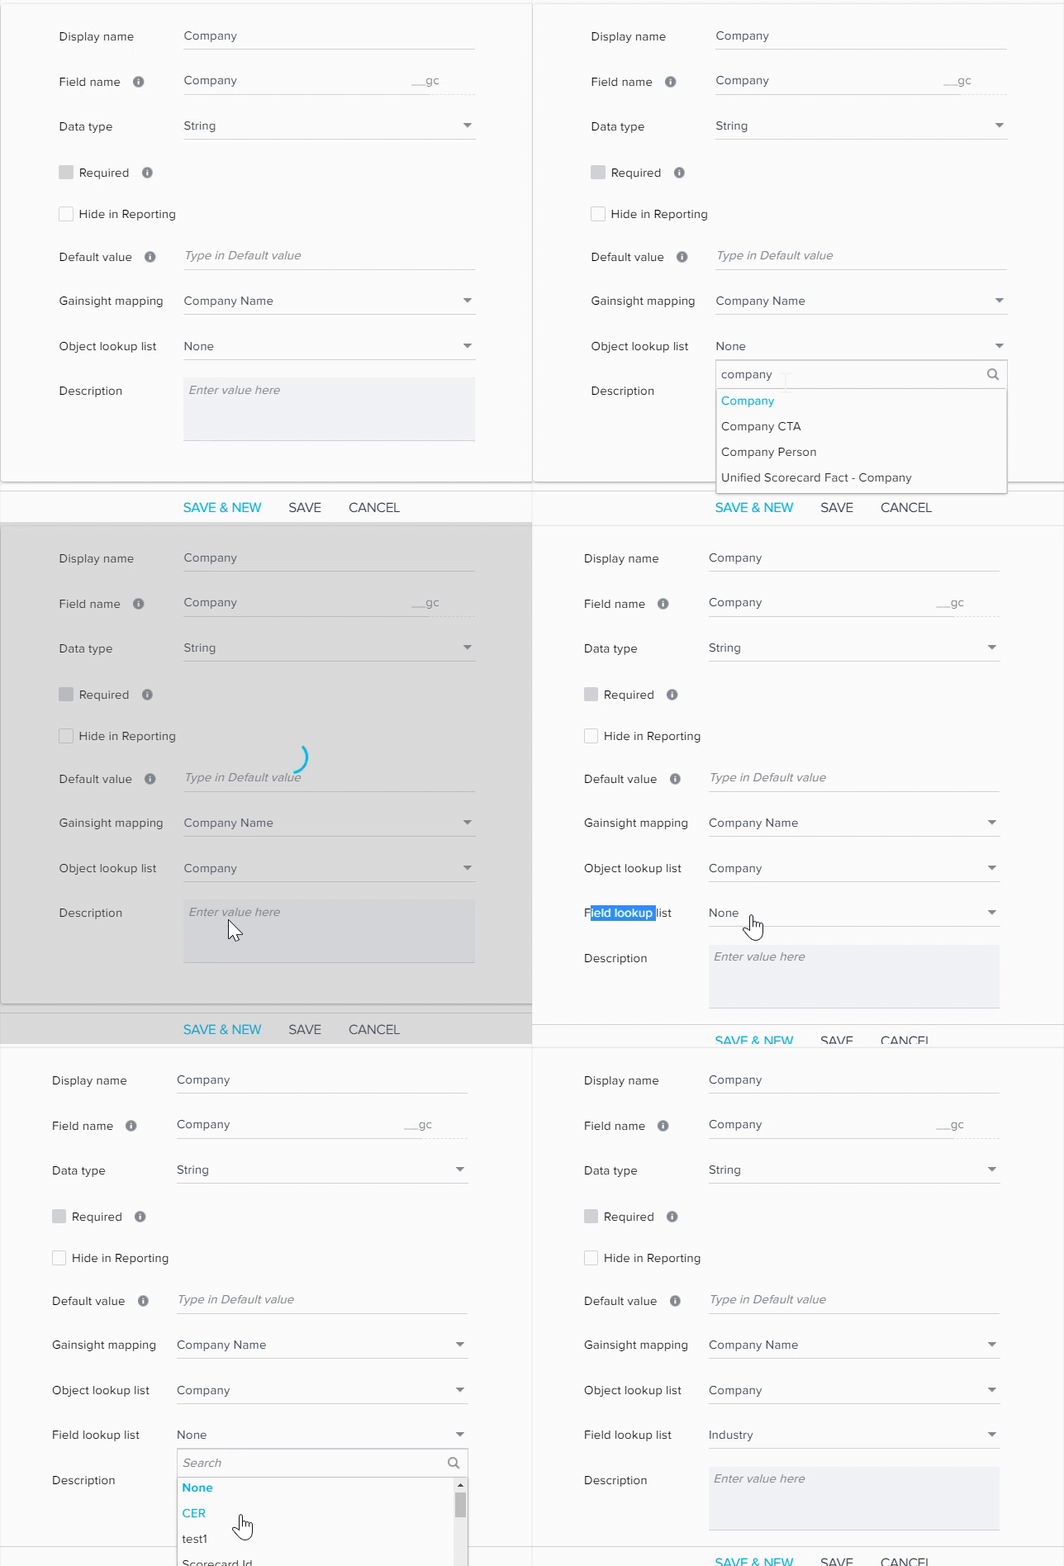
- Click +FIELD. Create Custom Field window appears.
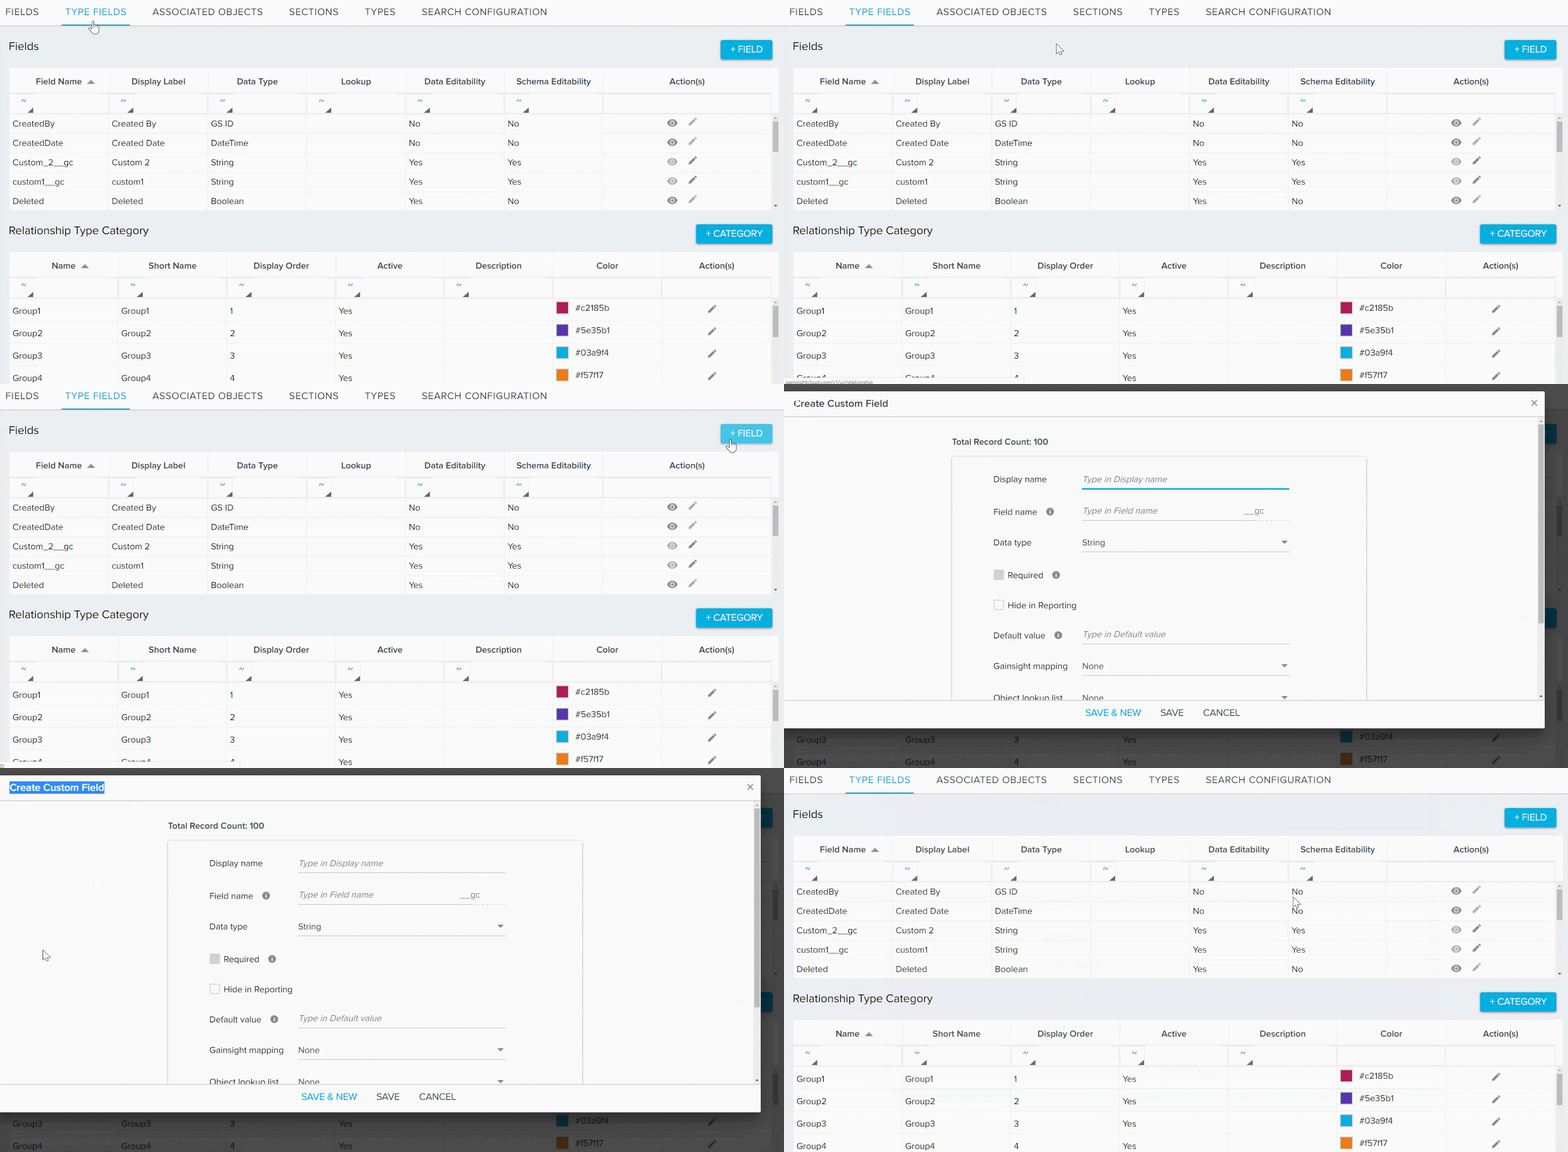
- Enter the following details in the Create Custom Field window :
- Display name: The display name of the custom field.
- Field name: The system defined field name with a suffix of __gc.
- Data type: The data type of the field being created.
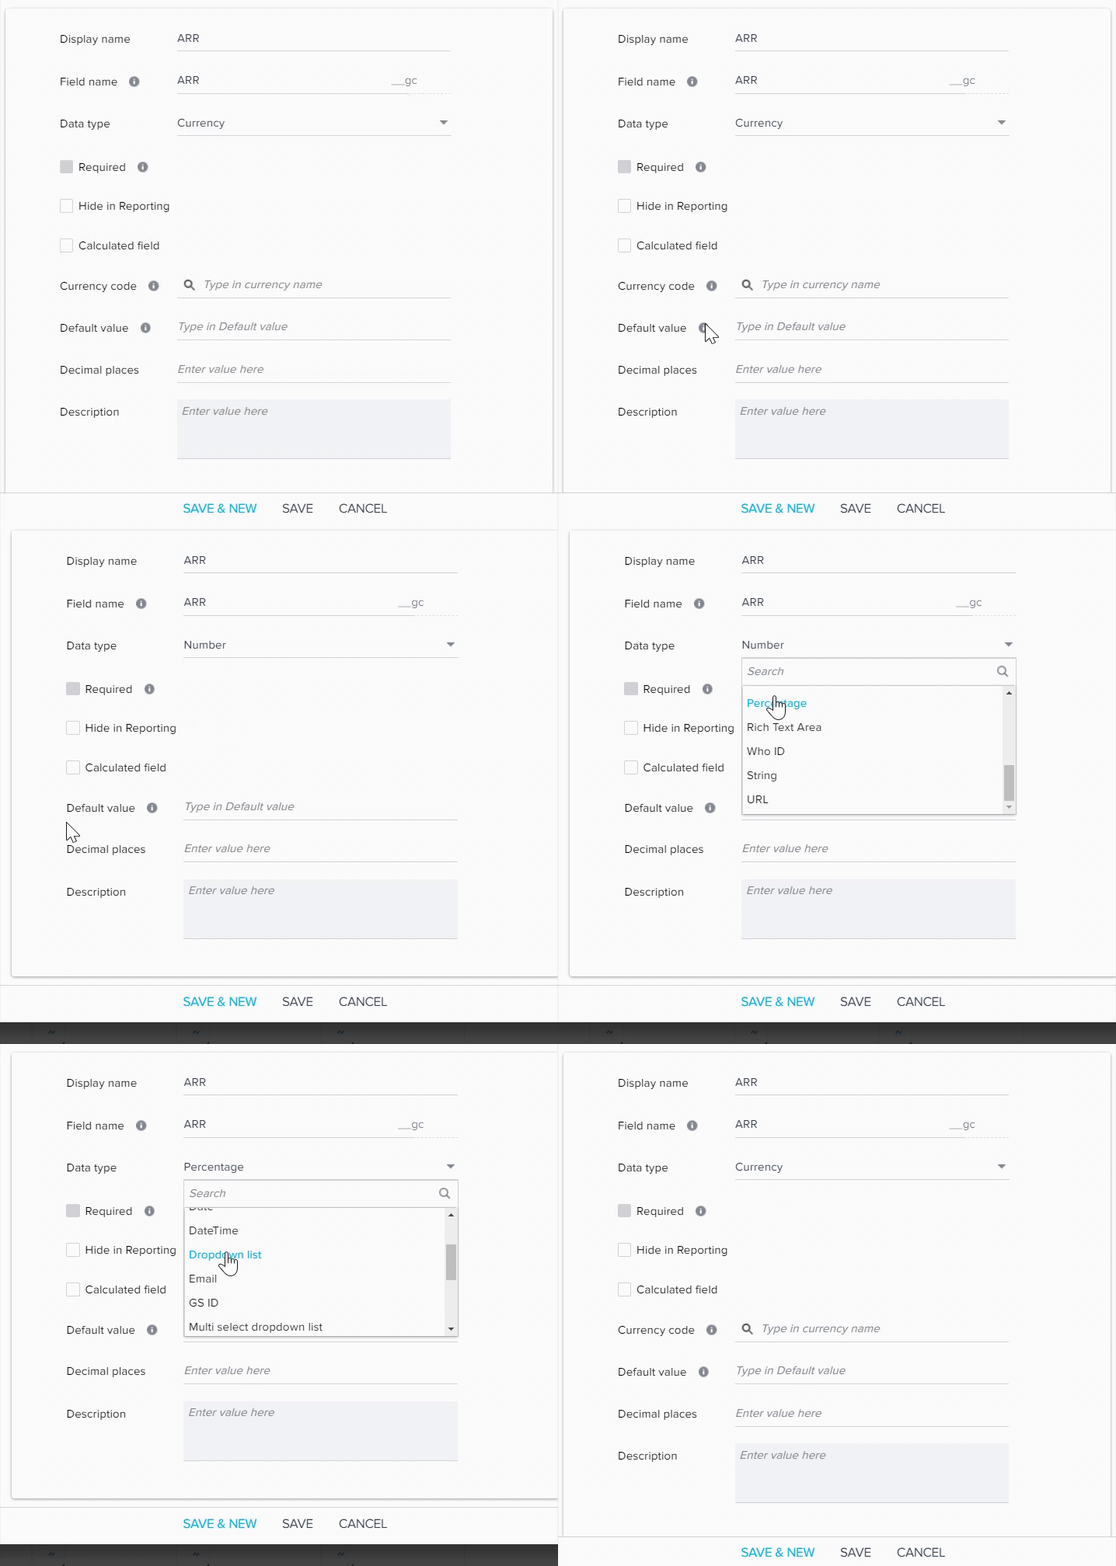
- Currency Code: You can see this field when you select data type as Currency only. Select a currency code from the list.
- Default value: The default value that you would like to insert in the object field.
- Decimal places: You can see this field when you select data type as Currency, Number, or Percentage only. Assign the number of decimal places on the values in the field. By default, assigned decimal places is 0.
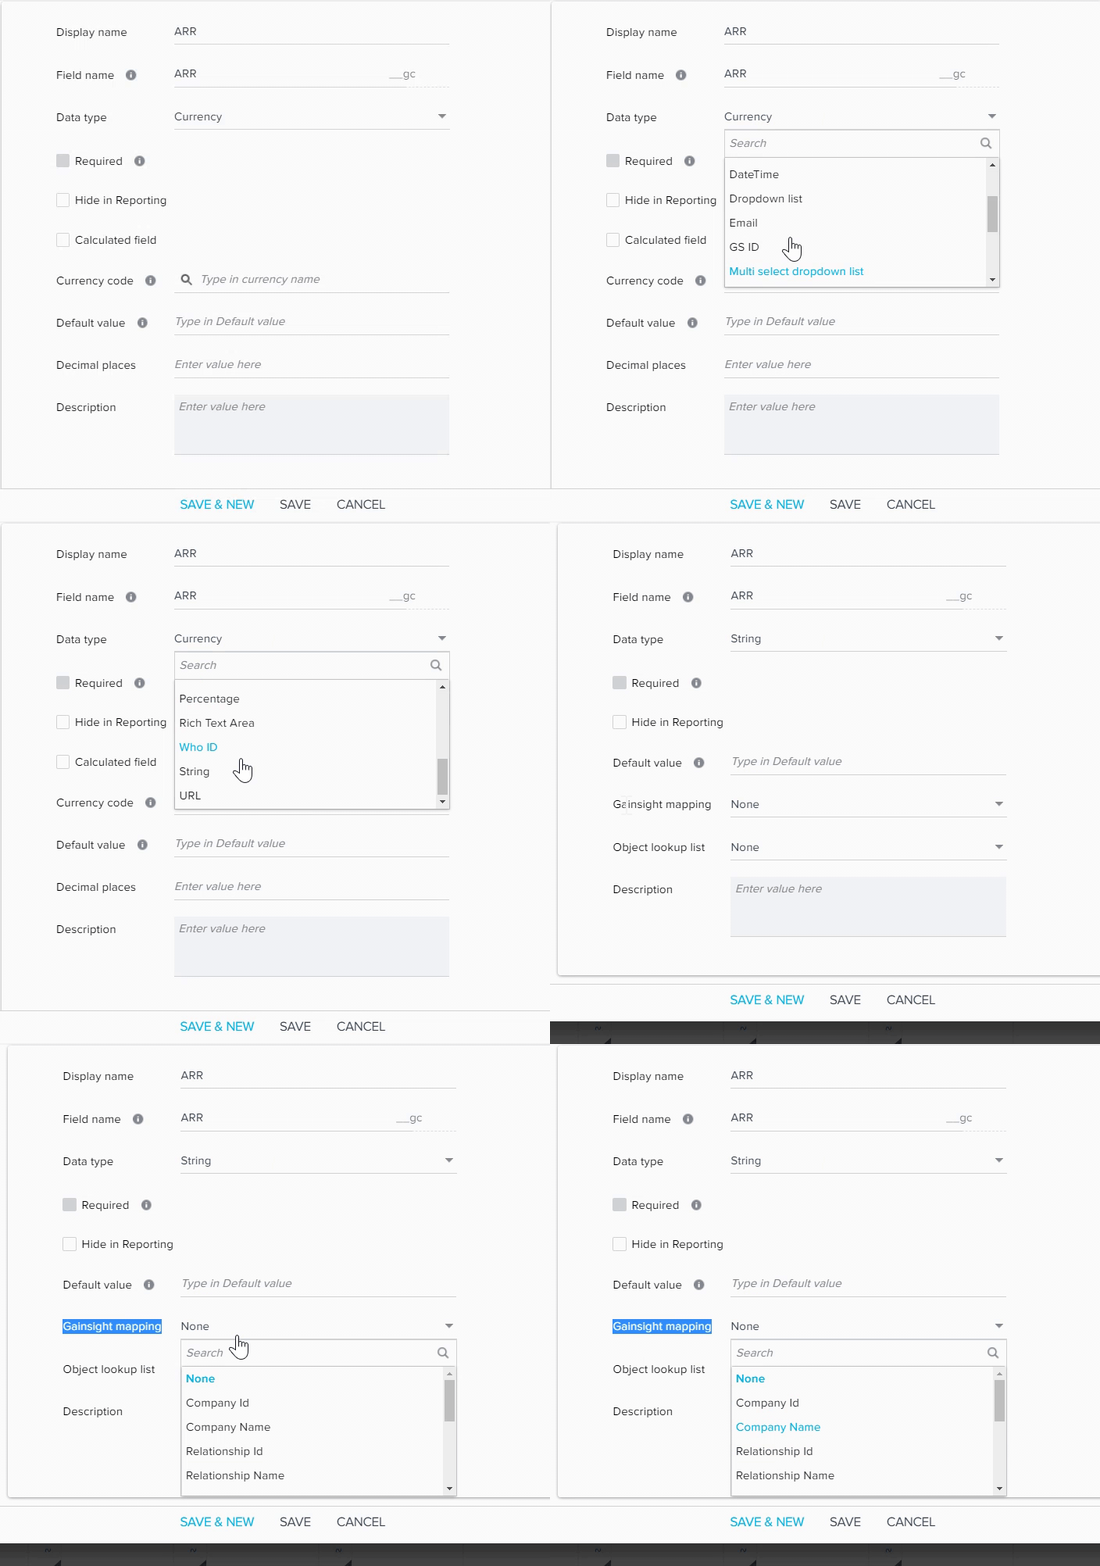
- Gainsight mapping: This field is displayed only when you select either GSID, Date, DateTime, Email or, String Data Type. You can map the current field only to standard fields from Gainsight Objects. You can map the field being created with a suitable standard field so that values in the current field are enabled with hyperlinking.
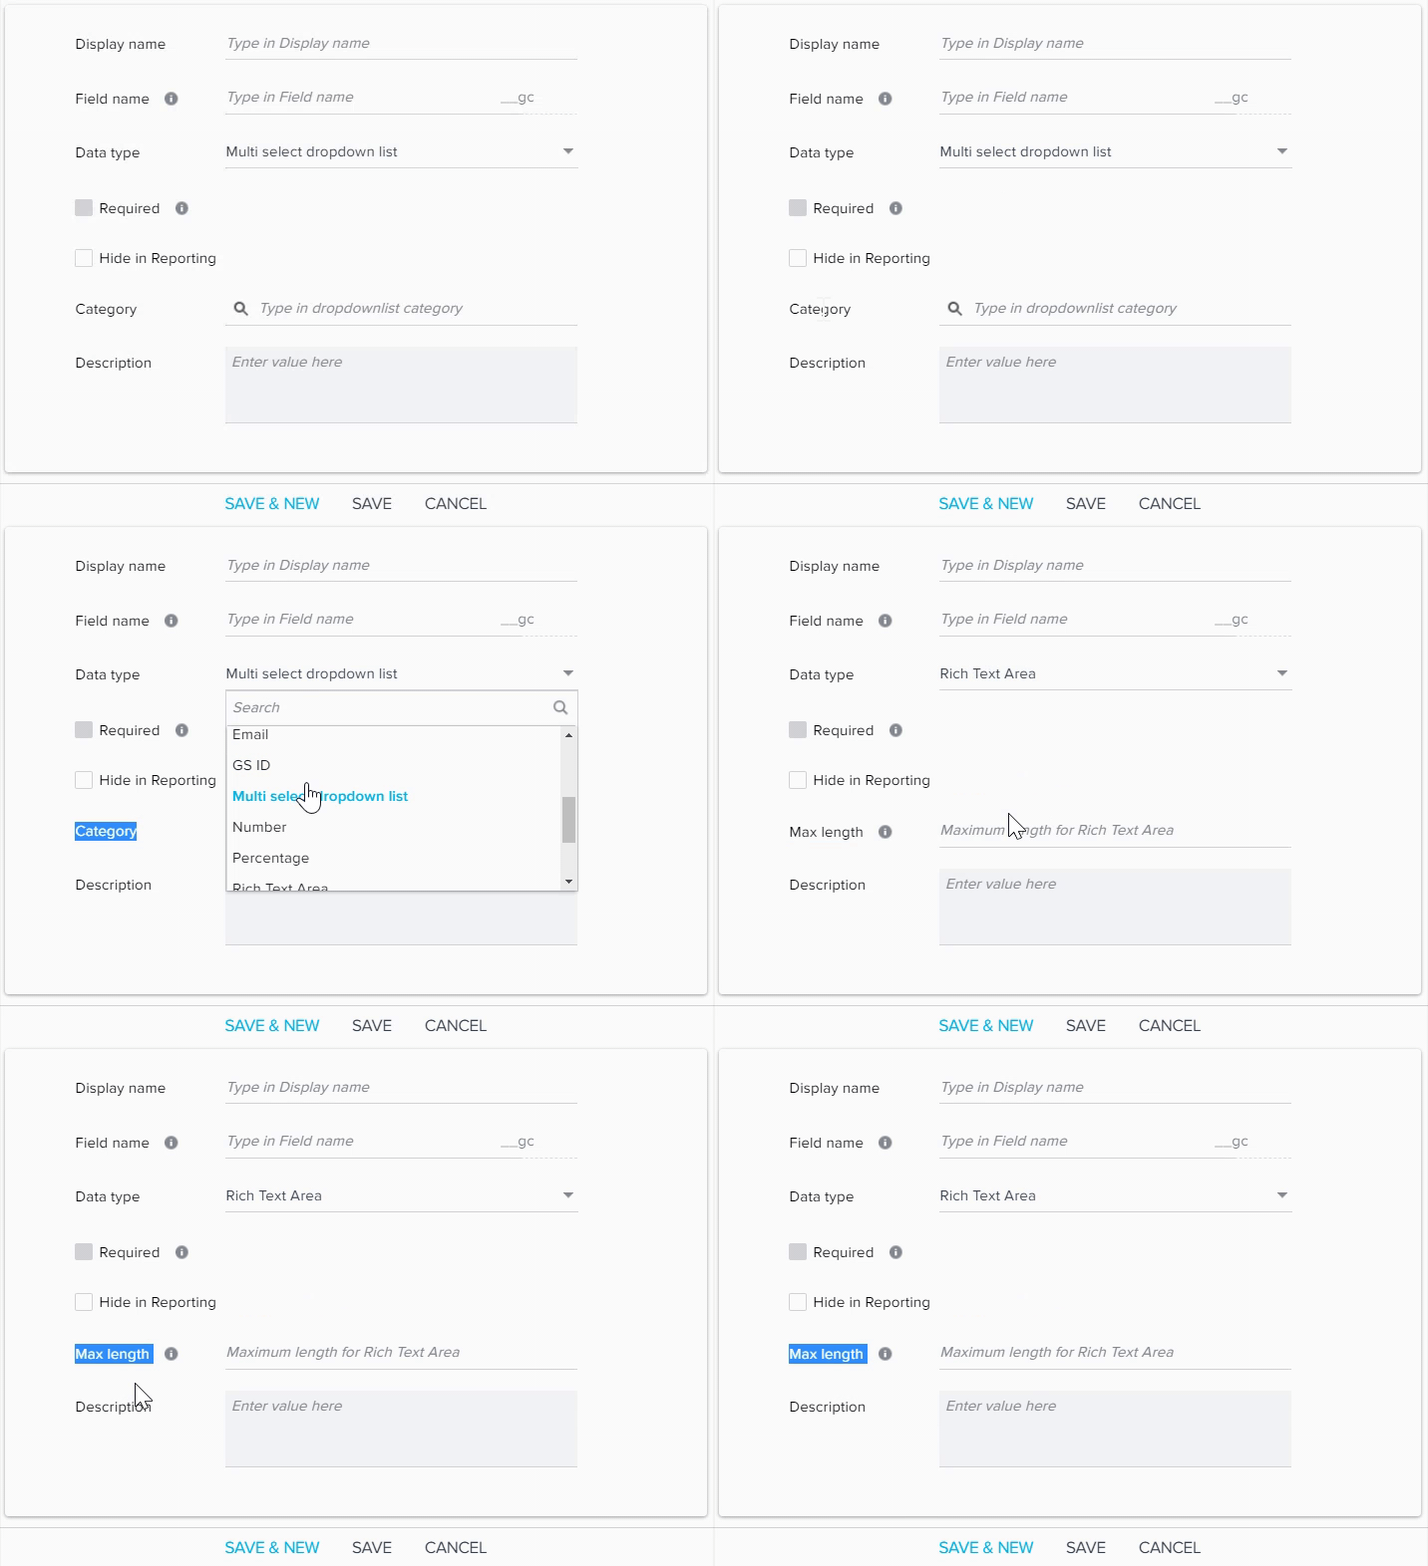
- Category: This field is displayed only when you select either Dropdown list or Multi select dropdown list Data type. You must select a Category for the Drop down list type field. For more information on Drop down lists, refer Dropdown List and Multi Select Dropdown List.
- Max length: This field is visible only when you select the Rich Text Area Data type. You should specify the maximum length of words supported by this field.
- Description: The description of the field being created.
- Required: By setting this constraint, the field is not allowed to ingest a null value record while importing data. Required constraint cannot be set on a new field, if data already exists in the Relationship Type object.
- Hide in Reporting: If you select this, the field will be hidden in the Reporting functionality.
- Calculated field: If you select this, you can create a formula using the existing fields.
- Object lookup list: This field is displayed only when you select either Email, String, or GS ID Data type. Select the Source Object from which data will be ingested into this field.
- Field lookup list: Once you select an object in the Object lookup list, its corresponding fields are displayed here. select the source field to which lookup is enabled from the current field.
- Click SAVE & NEW, to save the current field and to create another new field. This helps to create multiple fields in a single instance.
- Click SAVE, to save the current field. Once the field is created, it populates in the Fields section.
For more information on creating a new field in an object, refer to the section Add Custom Fields in an Object.
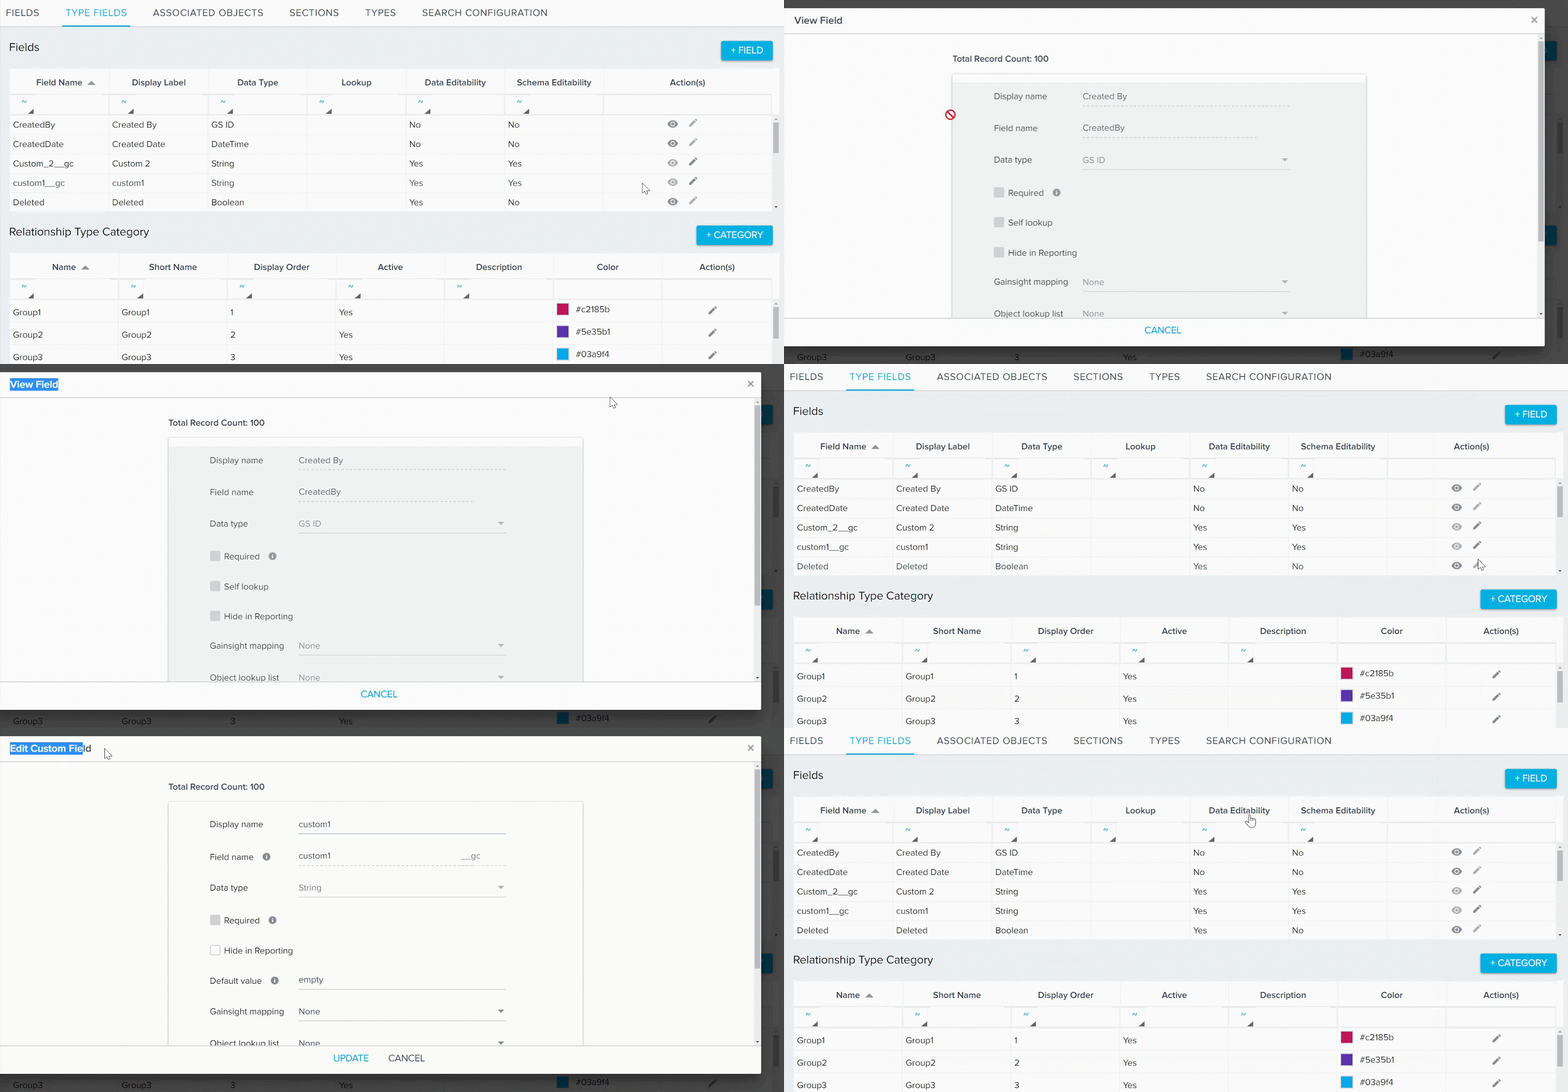
- Click the Edit field icon to edit the respective field name. This option is available only for the custom type fields.
- Click the View field icon to view details of the existing field.
Relationship Type Category
Category field is used to classify the customer business into multiple Type Categories. Depend on your business requirement, you can create a new custom category. For example, you have a business that needs to be managed separately and also has a different/separate set of associated data, you can create separate custom category to manage the business separately. Under each category, you can create multiple Relationship Types as per your requirement.
To create a custom Type Category:
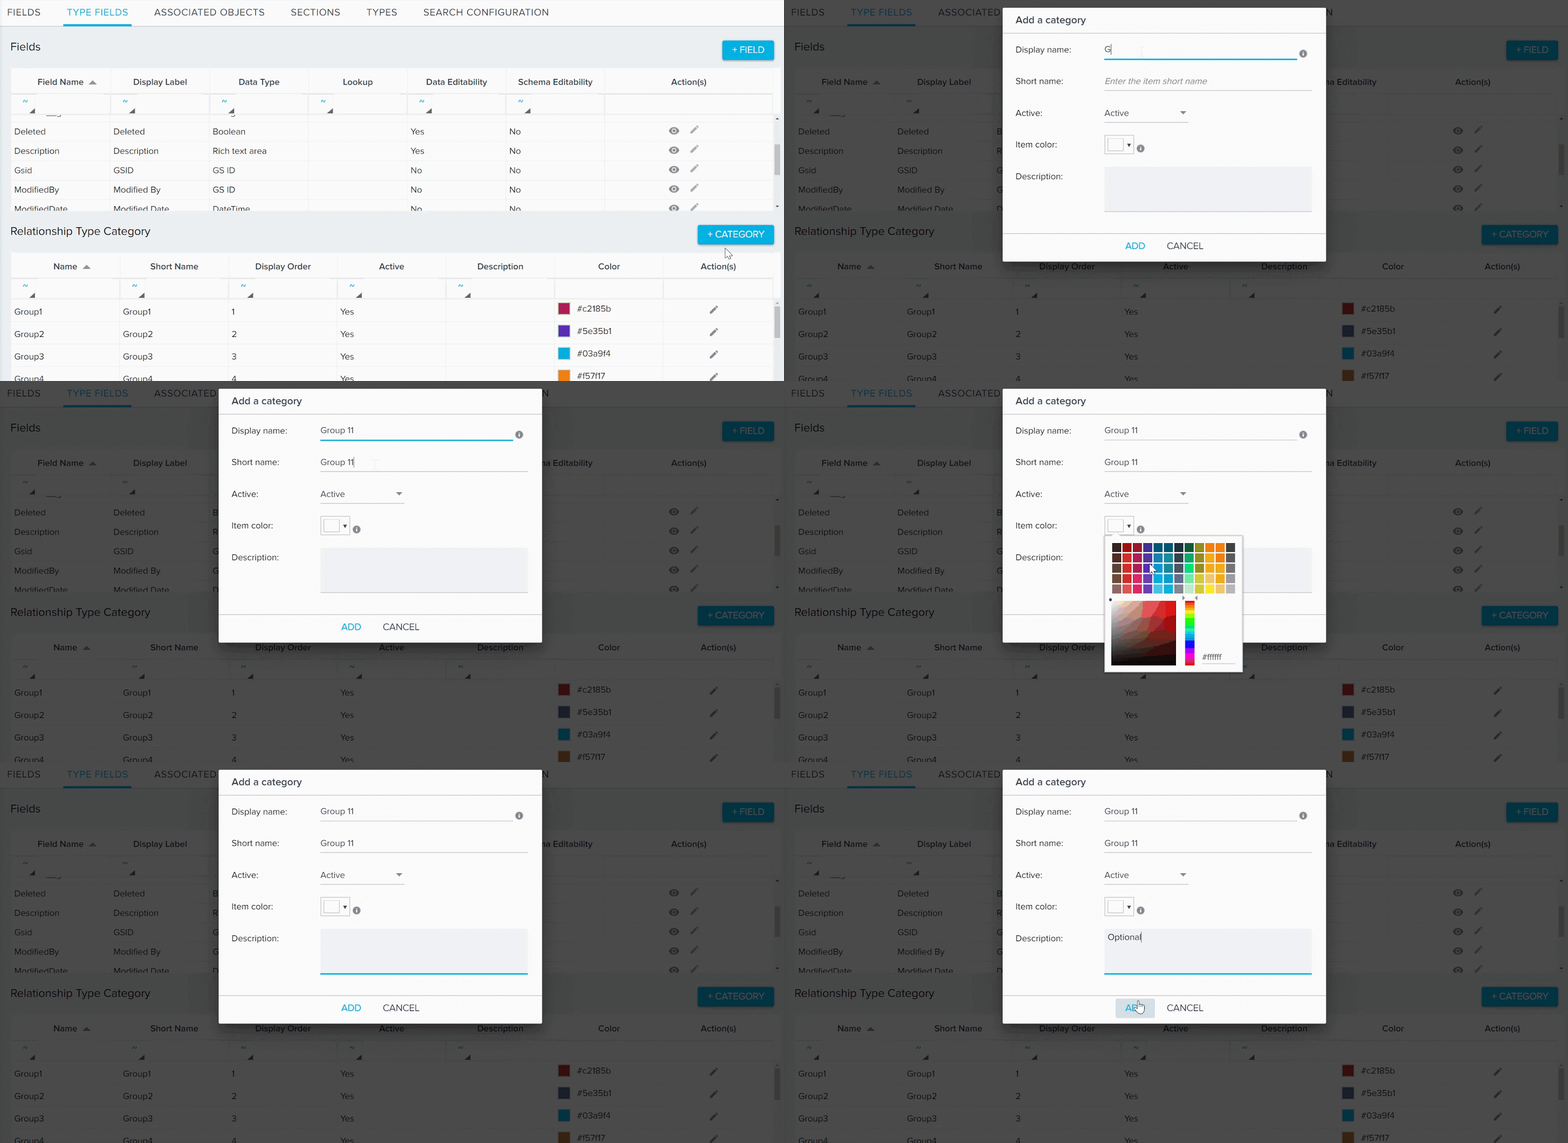
- Click +CATEGORY in the TYPE FIELDS page. Add a category window appears.
- Enter the following details in the Add a category window.:
- Display name: The display name of the category field.
- Short name: This is automatically populated based on the display name. You can also edit the short name.
- Active: Select status of the category item (Active / Inactive). If you want to use this category, select Active.
- Item color: You can choose required color of your choice for category.
- Description: The description of the category which is being created.
-
Click ADD, to add a new Type Category. Once the new category is created, it is populated in the Relationship Type Category section.
-
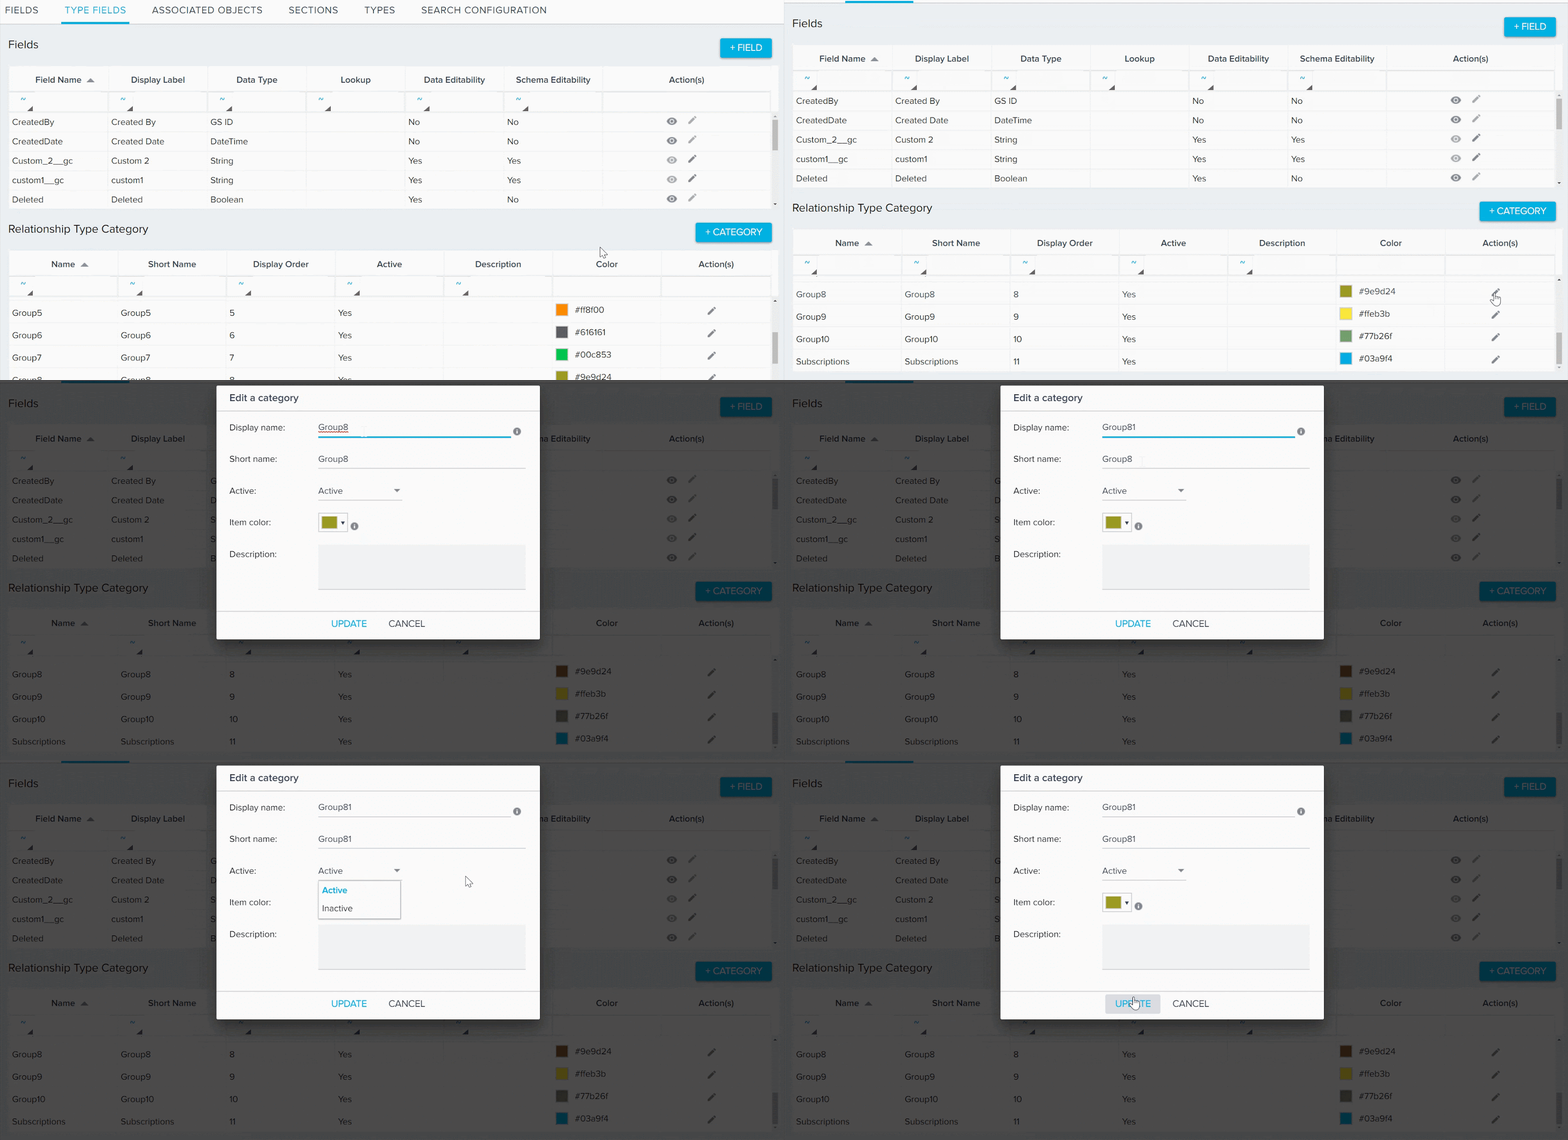
Click the Edit field icon to edit the category item and click UPDATE, after making changes.
For more information on creating dropdown list or multi-select dropdown list categories, refer Dropdown List and Multi Select Dropdown List.
Configure Relationship Types
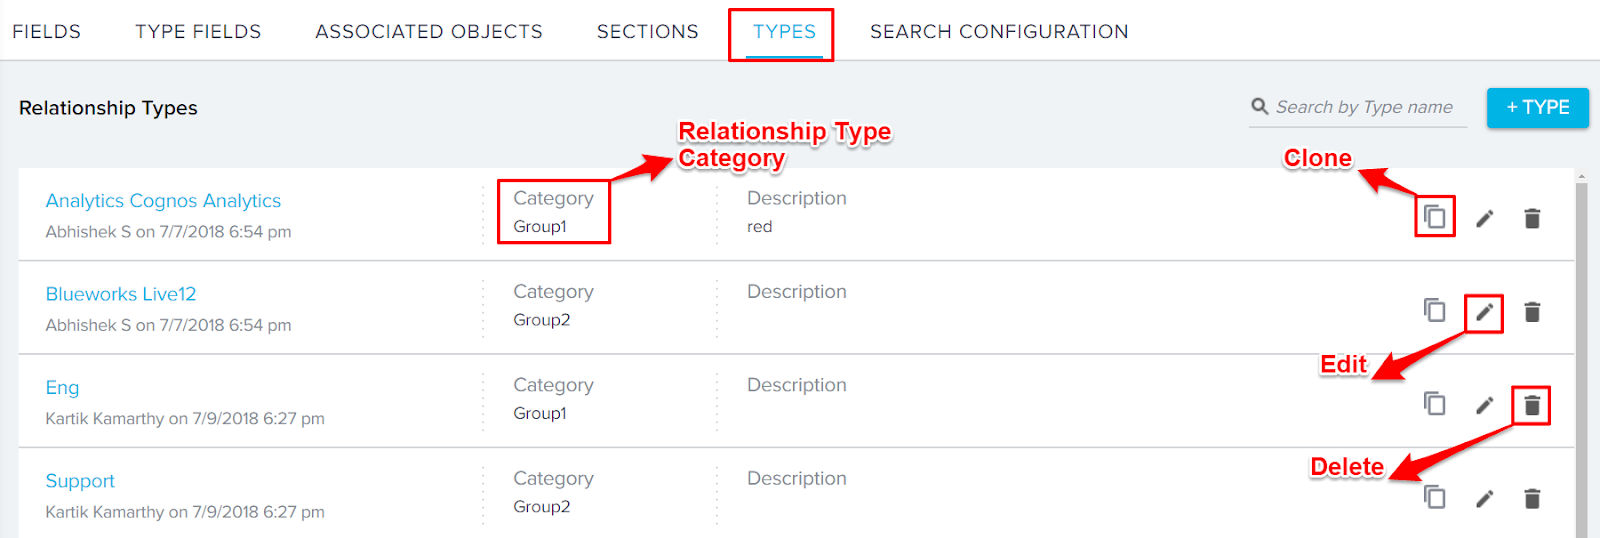
You can create and configure new or existing Relationship Types from the Administration > Relationship > TYPES page. You can see a list of Relationship Types and basic details of each Relationship Type in this page. You can use the search bar at the top right to search a Relationship Type with name. You can create a new Relationship Type or you can edit, clone or delete the existing Relationship Type.
Note: You can create a maximum of 100 Relationship types.
Create a new Relationship Type
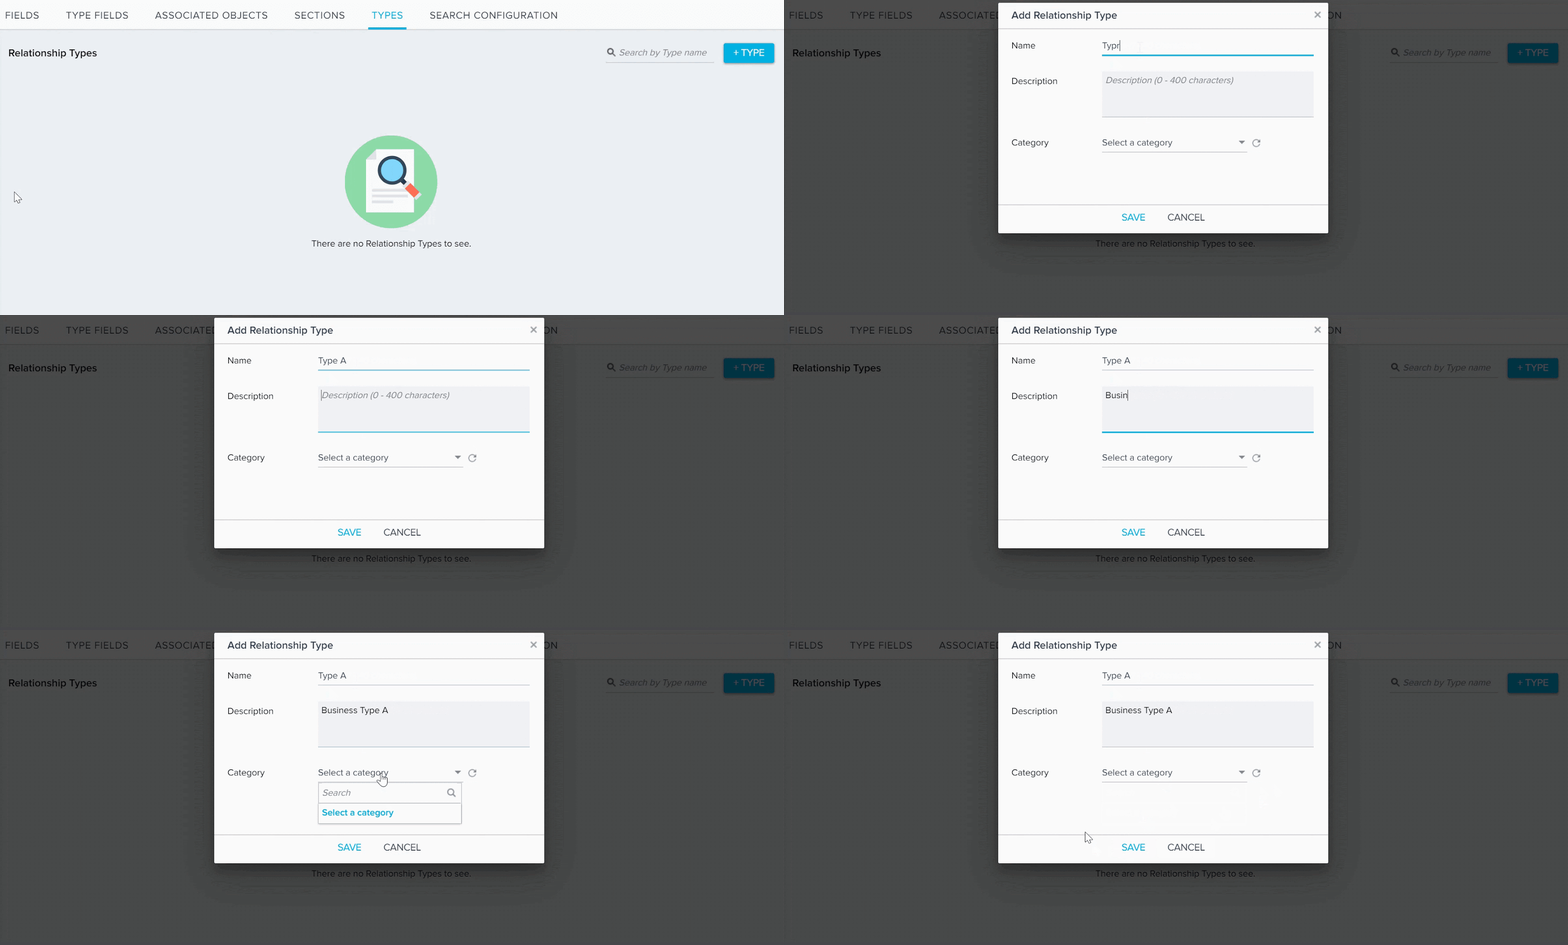
To create a new Relationship type:
- Navigate to the TYPES page.
- Click +TYPE. Add Relationship Type window appears.
- Enter the following details in the Add Relationship Type window:
- Name: The display name of the Relationship Type.
- Description: The description of the Relationship Type being created.
- Category: (Optional) You can select a category from the list, depending upon your business requirement.
Note: You can able to select a category only after you create a category in Relationship Type Category section in TYPE FIELDS tab. - Refresh: (Optional) You can click this logo to refresh the Relationship Type Categories.
- Click SAVE, to add the Relationship Type.
-
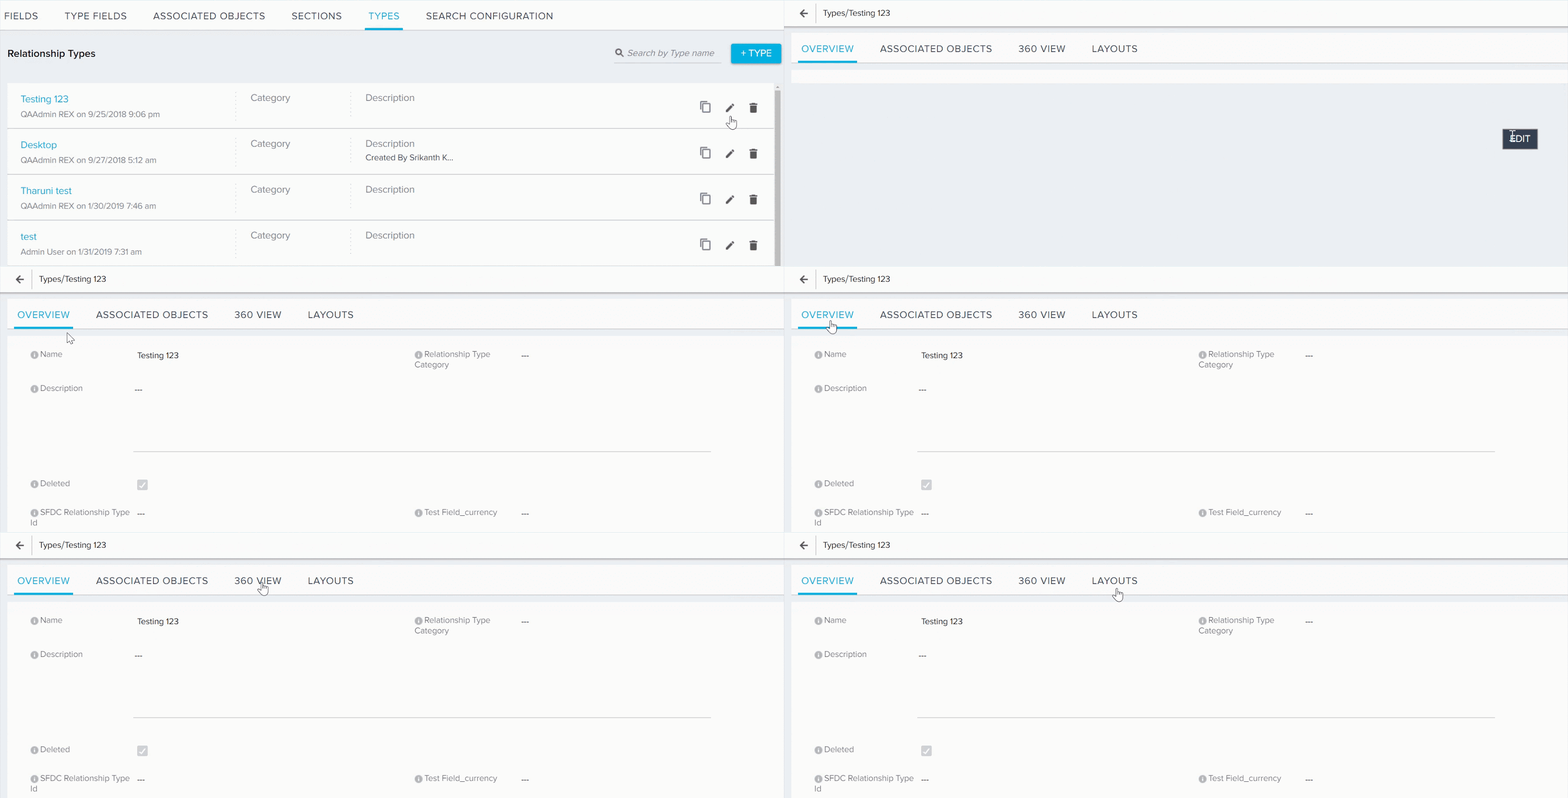
Click the EDIT icon of the specific Relationship Type. Relationship Type configuration page appears.
Configure Relationship Type
There are four sections to configure a Relationship Type.
Overview
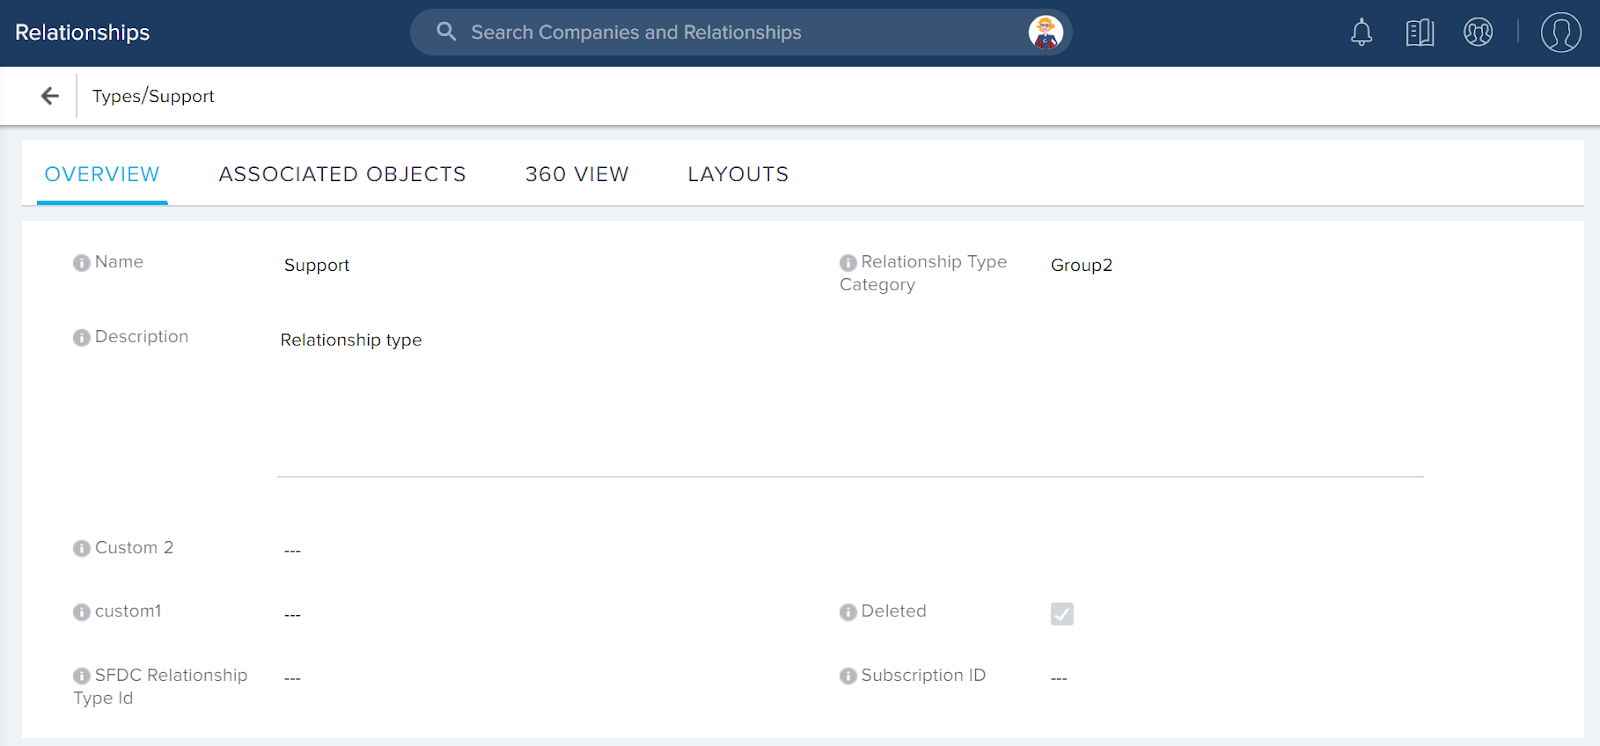
You can see fields from the Relationship Type object that have been added in the TYPE FIELDS section. To configure the Overview section:
- Navigate to OVERVIEW Section.
- Enter or modify the following details:
- Name: Display the name of the Relationship Type.
- Description: Description of the Relationship Type being created.
- (optional) Relationship Type Category: You can select category/categories from the list, depending upon your business requirement.
- (Optional) You can enter values in the remaining fields, if required.
Associated Objects
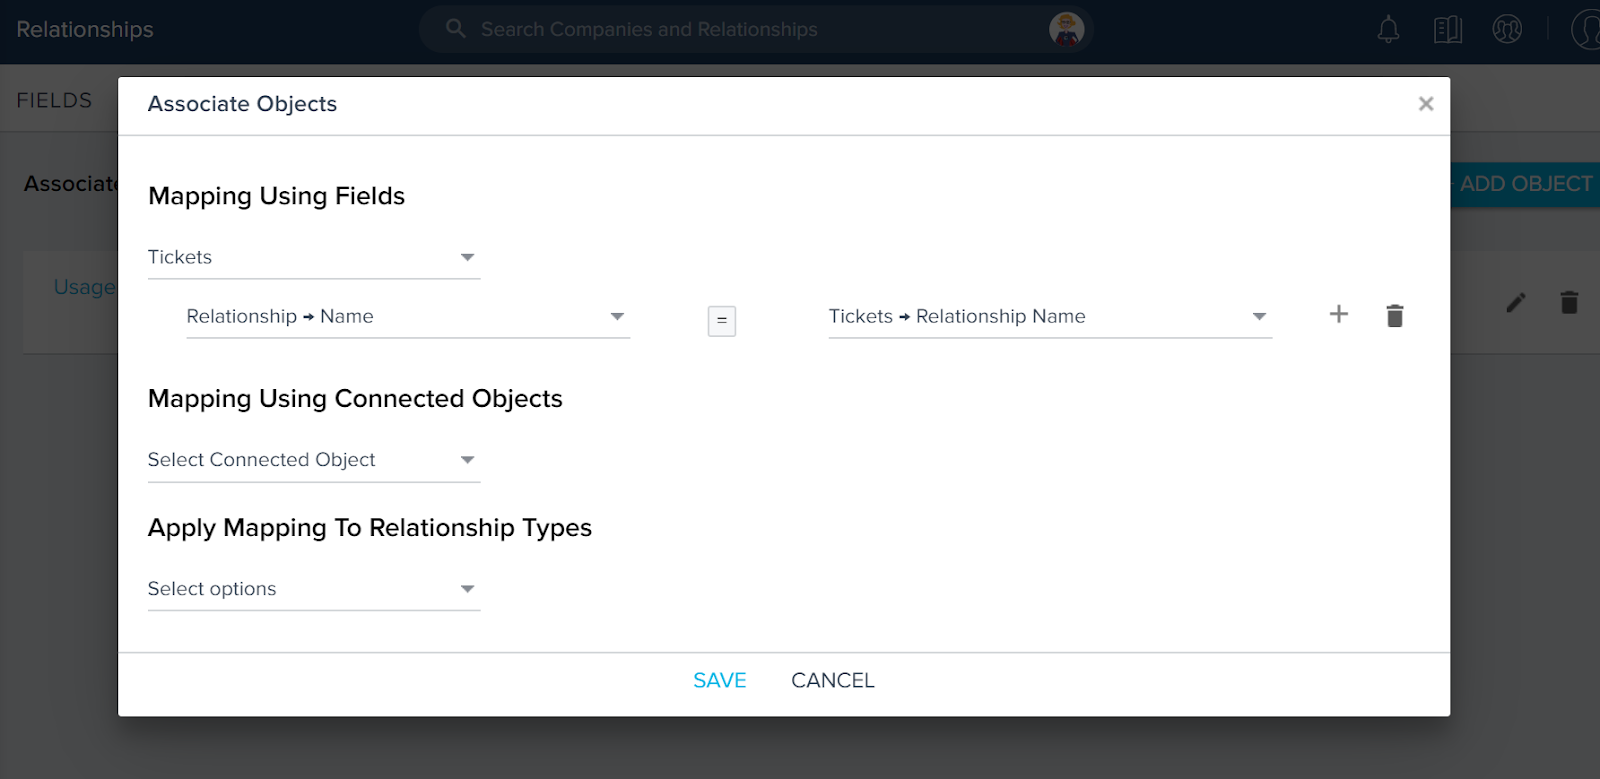
Associated objects help fetch relevant data from a different object, so that you can display associated reports in the R360 page, and can be used in the rules engine to create Relationship level CTA or to Set Score or to Create a Success Plan and all other Relationship level rules engine actions.
You can associate another Gainsight object to the Relationship object by mapping the Relationship field to the associated object’s field. Mapping is a prerequisite to adding associated objects and their associated reports to the R360 page.
For more information on how to add an associated object, refer Configure Associated Objects to Relationship.
360 View
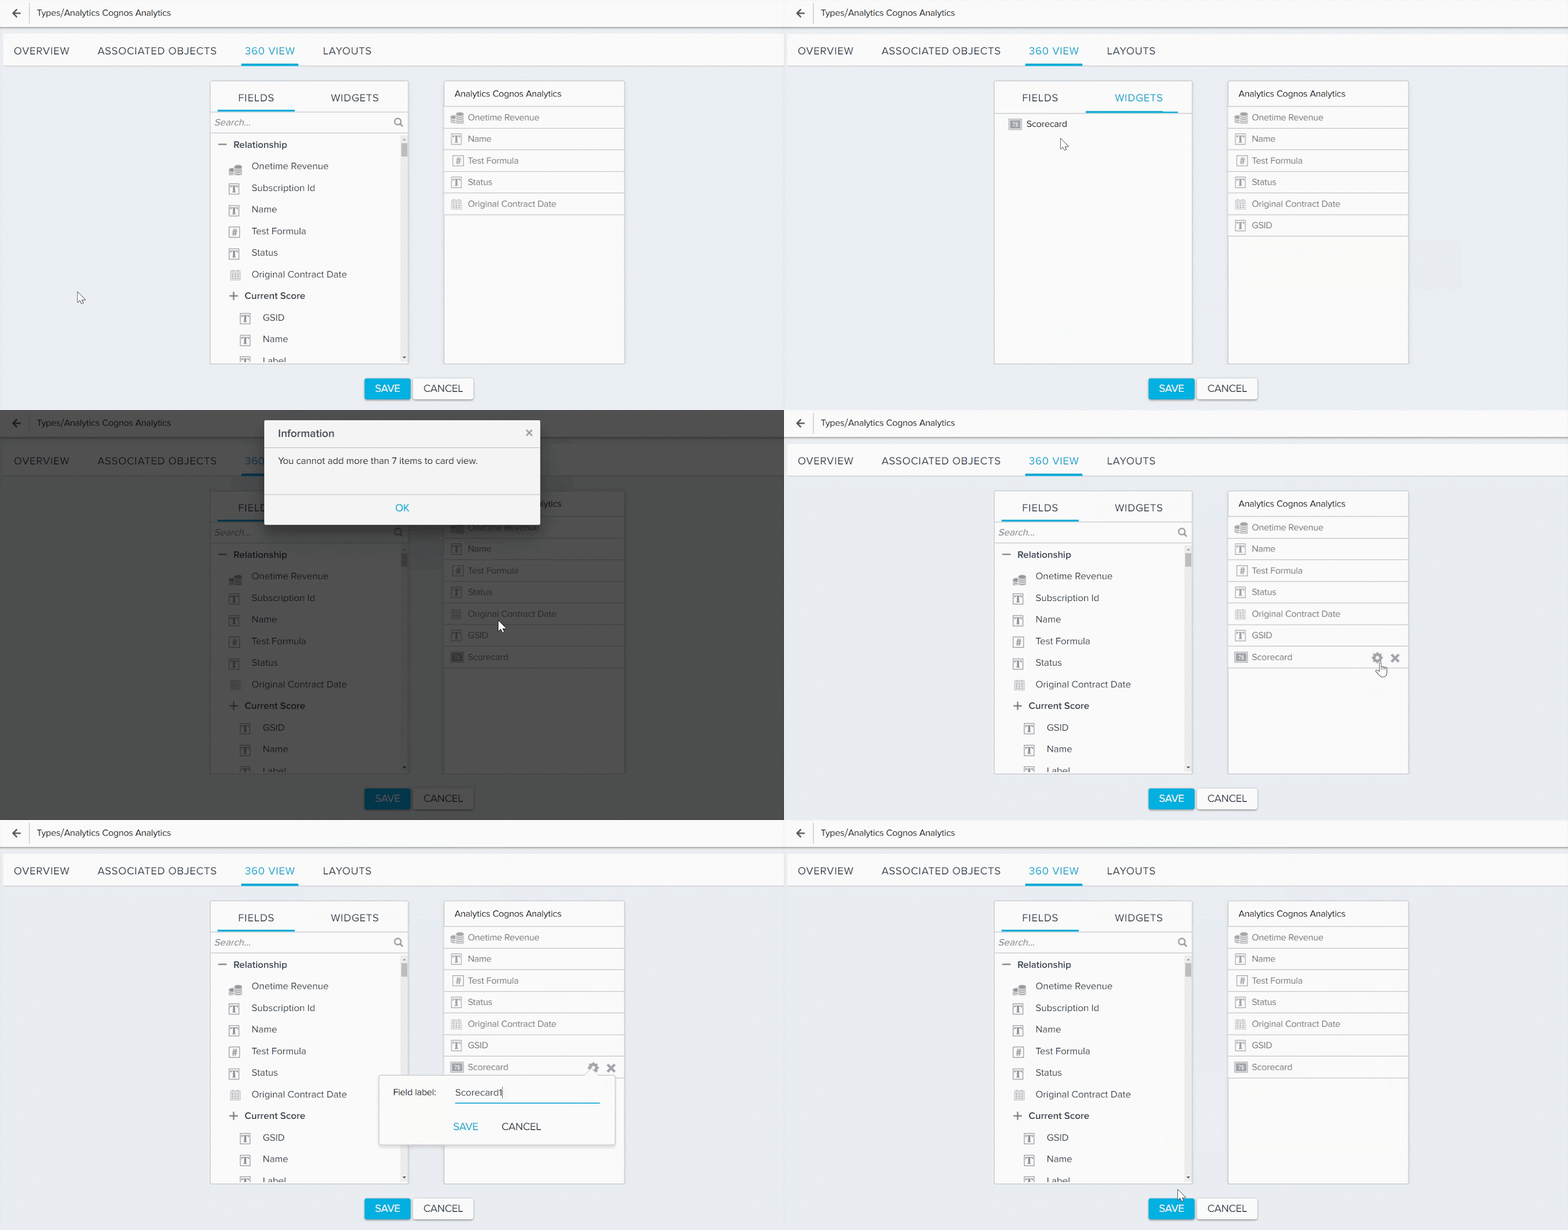
In the 360 view, you can select upto 7 fields to display on the Relationship card that displays in the Relationship section of the C360 page. Fields from the Relationship Object and the corresponding look up fields are available for selection.
To configure the 360 view:
- Navigate to 360 VIEW section.
- Drag and drop upto seven fields from FIELDS (left pane) into the Relationship Type (right pane).
- Click WIDGETS (left pane) and then drag and drop the Scorecard widget into the Relationship Type (right pane), if you wish to display overall score in your 360 view.
Note: If you add the Scorecard widget, you can add six fields only. - (Optional) Click the Settings/Gear icon next to the field label to change the field label and apply other configurations and click SAVE.
-
Click SAVE to save the 360 view configuration.
Relationship Layouts
R360 Layout is a framework in which Admins can configure different pieces of business information of the corresponding Relationship, as required for different Relationships or users. You can create up to 50 R360 layouts, and apply them to multiple Relationships and Users. Layouts can be applied to Relationships and users based on criteria such as Relationship Type or Industry, User Role, etc.
Each layout can contain different sections with their respective configurations. Gainsight offers one default layout out of the box which can be cloned or modified, but not be deleted. For more information on how to configure and assign Relationship layouts, refer Create and Assign Multiple R360 Layouts.
Migrate Relationship Types
Admins can migrate Relationship types implicitly along with a dependent asset, such as a rule, using Gainsight's migration feature. For more information, refer to Cross-Org Migration Overview. The relationship type on which the asset is dependent is migrated automatically along with the original asset being migrated.
When you migrate a Relationship type in NXT, all of the associated layouts and objects will be migrated automatically. It is not possible to explicitly migrate Relationship Types, along with any associated objects and rules, at this time.
Notes:
-
Relationship association will be migrated from a source org to a target org. If the source org contains a global association, then it will be recreated in the target org at the local level.
-
If a relationship is associated with a custom object, and that object is not present in the target org, then it will be recreated there as part of the migration.
For more information on migration, refer to Cross-Org Migration Overview.