Import Third Party NPS Responses to Surveys
Gainsight NXT
Overview
This article explains how Admins can import third party NPS® responses to Gainsight Surveys and analyze the NPS® responses in NPS® Analytics tab. Admins can upload CSV files to import the third party NPS® responses to Gainsight Surveys. Gainsight users can then derive more customer insights from these survey responses and transform them into actionable steps.
Note: If you are a SurveyMonkey user, you can integrate with Gainsight and you can import NPS® responses into Gainsight Surveys. For more information, refer to SurveyMonkey integration with Gainsight article.
Import Third Party NPS® responses
To import NPS® response:
- Navigate to Surveys > NPS® Analytics page. You can see the summary view of all NPS® responses received.
- Click Import NPS® on the upper right of the page.

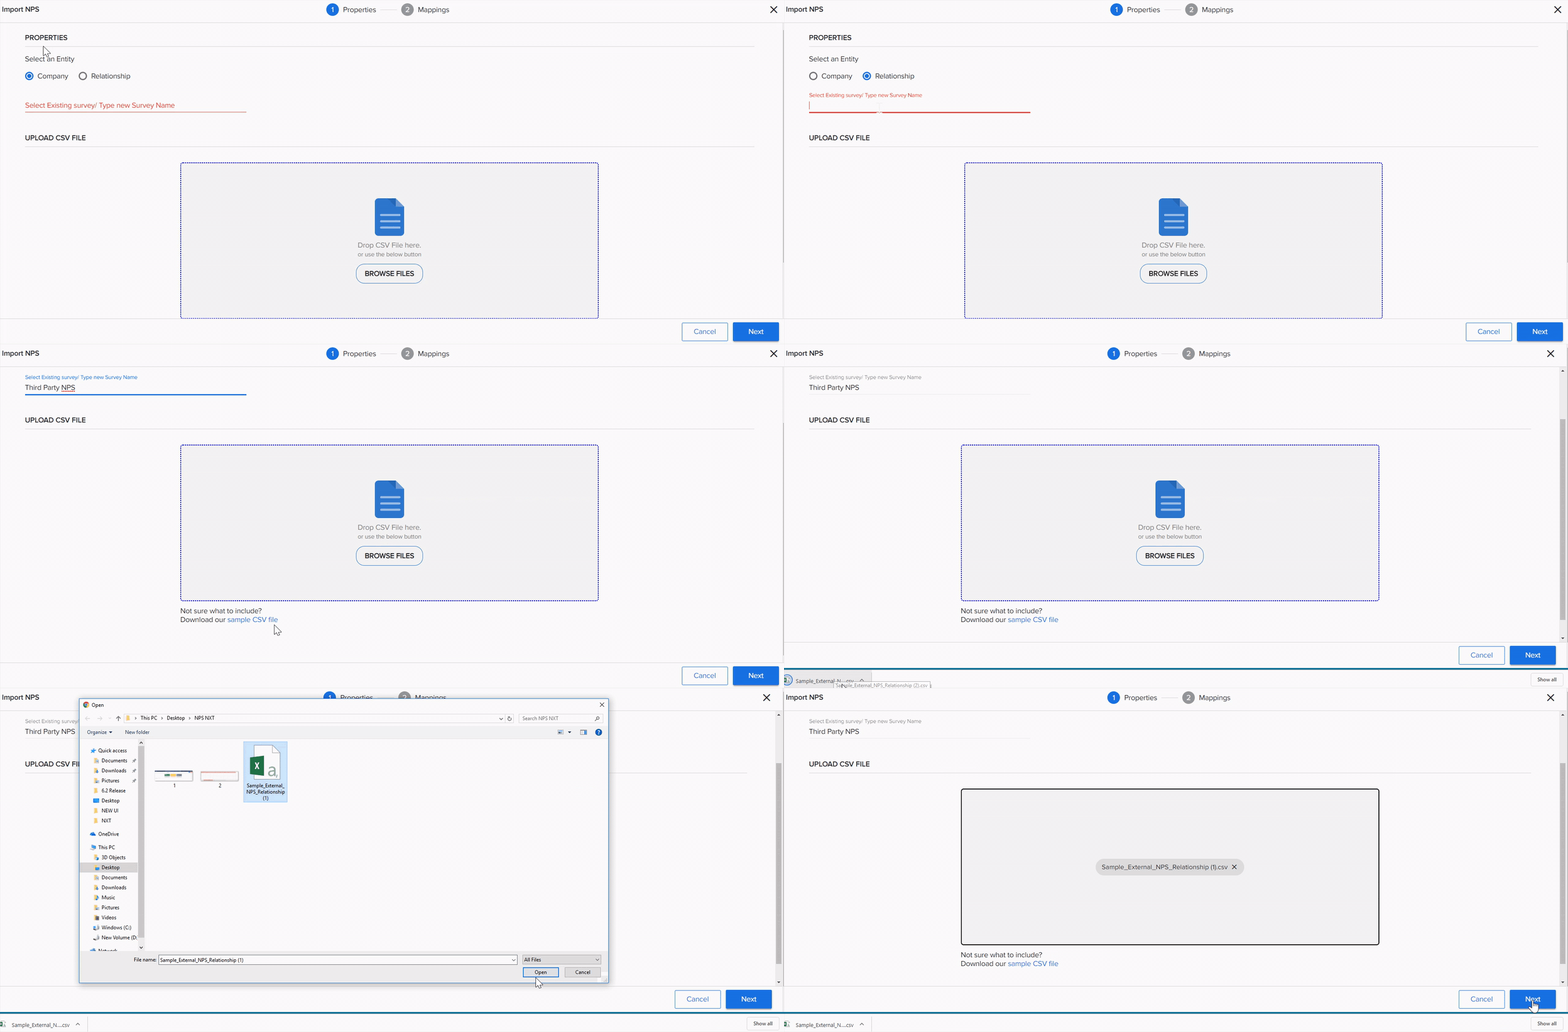
- Configure the following options in the Properties section:
- Select an Entity: Select an Entity type, either Company or Relationship.
- Select Existing Survey / Type new Survey Name: Select the required Survey from the dropdown list or enter the Survey Name of your choice.
Note: The Surveys you create here are specific to Third party NPS® and will not be shown in the Select Existing Survey dropdown list. - UPLOAD CSV FILE: Drag and Drop a CSV file or click Browse files and select the CSV file to upload.
Note: If you do not have a CSV file, you can download a sample CSV file using Download our Sample CSV file.- Download our Sample CSV file: Click the sample CSV file link to download a sample CSV. You can add additional custom fields in the CSV file. There is no limit to the number of custom columns the csv can contain. However, there exists a file size limit of 10MB.

- Click Next.

-
Configure the following options in the FIELD MAPPING section:
-
In the Field mappings section, select and map the required fields from External NPS® Response fields to Gainsight NPS® Response fields.
Notes:
-
- Below four are the mandatory field mappings to import NPS® responses.
- Company ID, NPS® Score, Responded Date and Email fields are mandatory for company type entity. Company ID field is an editable drop down field, in which you can select either Company ID or Company Person ID.
- Relationship ID, NPS® Score, Responded Date and Email fields are mandatory for relationship type entity. Relationship ID field is an editable drop down field, in which you can select either Relationship ID or Relationship Person ID.
- Mandatory mappings can not be deleted.
- You can select Lookup field mapping as well to resolve the target object. Example: If the csv file only contains the Company Name and not Company Id, then you can leverage the lookup variant of field mapping to resolve the Company object with the Company Name attribute.
- You can use the Default checkbox option to fill-in the default value. The default value will be applied only if the record contains a null or empty value.
- Below Unique identifiers are by-default applied while importing external NPS® responses into an existing NPS® object to avoid redundant records.
- Company ID / Company Person ID
- Relationship ID / Relationship Person ID
- Responded Date
- Click Add Field Mapping to select and map any additional fields.
Notes: If there is any CSV Field without a value, you can leverage default value.
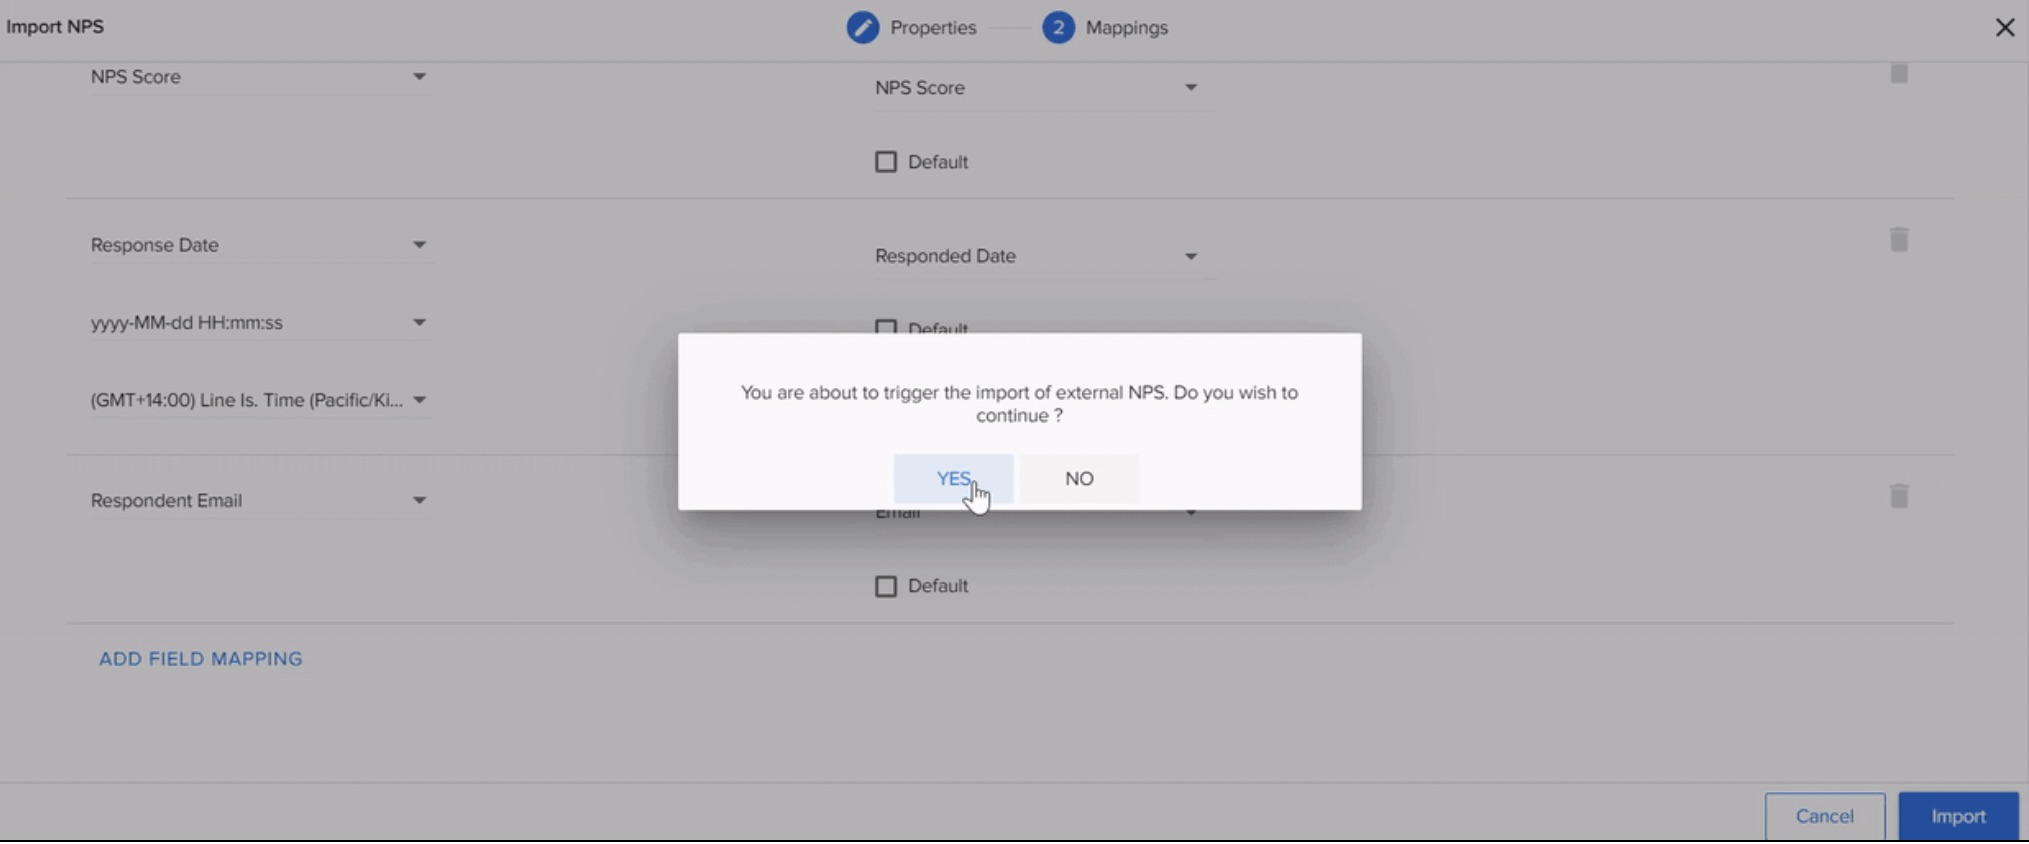
- Click Import at the bottom right of the page. Import NPS® dialog appears.
- Click YES to continue.

After NPS® responses are imported, you’ll receive an import summary email with an execution log Excel file attached with lists of the successful and failed records.
.png?revision=1)
You can fix or correct errors and re-upload a CSV file to import the failed responses. When you re-upload, make sure that you select an existing survey.
Note: While re-importing the data, make sure that you have selected the same Survey name as earlier, to avoid duplication of data.
| Net Promoter®, NPS®, NPS Prism®, and the NPS-related emoticons are registered trademarks of Bain & Company, Inc., NICE Systems, Inc., and Fred Reichheld. Net Promoter ScoreSM and Net Promoter SystemSM are service marks of Bain & Company, Inc., NICE Systems, Inc., and Fred Reichheld. |