Configure SAML SSO with Okta in Gainsight
This article helps Gainsight admins configure Single Sign-On (SSO) between Okta and Gainsight using SAML 2.0.
Overview
This document provides step-by-step guidance for admins to configure Single Sign-On (SSO) between Okta and Gainsight using the SAML 2.0 protocol. Enabling SSO helps ensure secure, centralized user authentication and simplifies access management across your organization.
The configuration setup consists of two stages:
Create an Application in Okta
To start the integration, set up an App integration in Okta. This provides the SSO URL and Audience URI (SP Entity ID) required to configure SAML in Gainsight.
To set up the Okta App integration:
- Log in to the Okta Admin console.
- Navigate to Applications > Create App Integration. The Create a new app integration dialog box appears.

- Select SAML 2.0.
- Click Next. The Create SAML Integration page appears.
- Under the General Settings tab, enter the app name.
- Click Next.

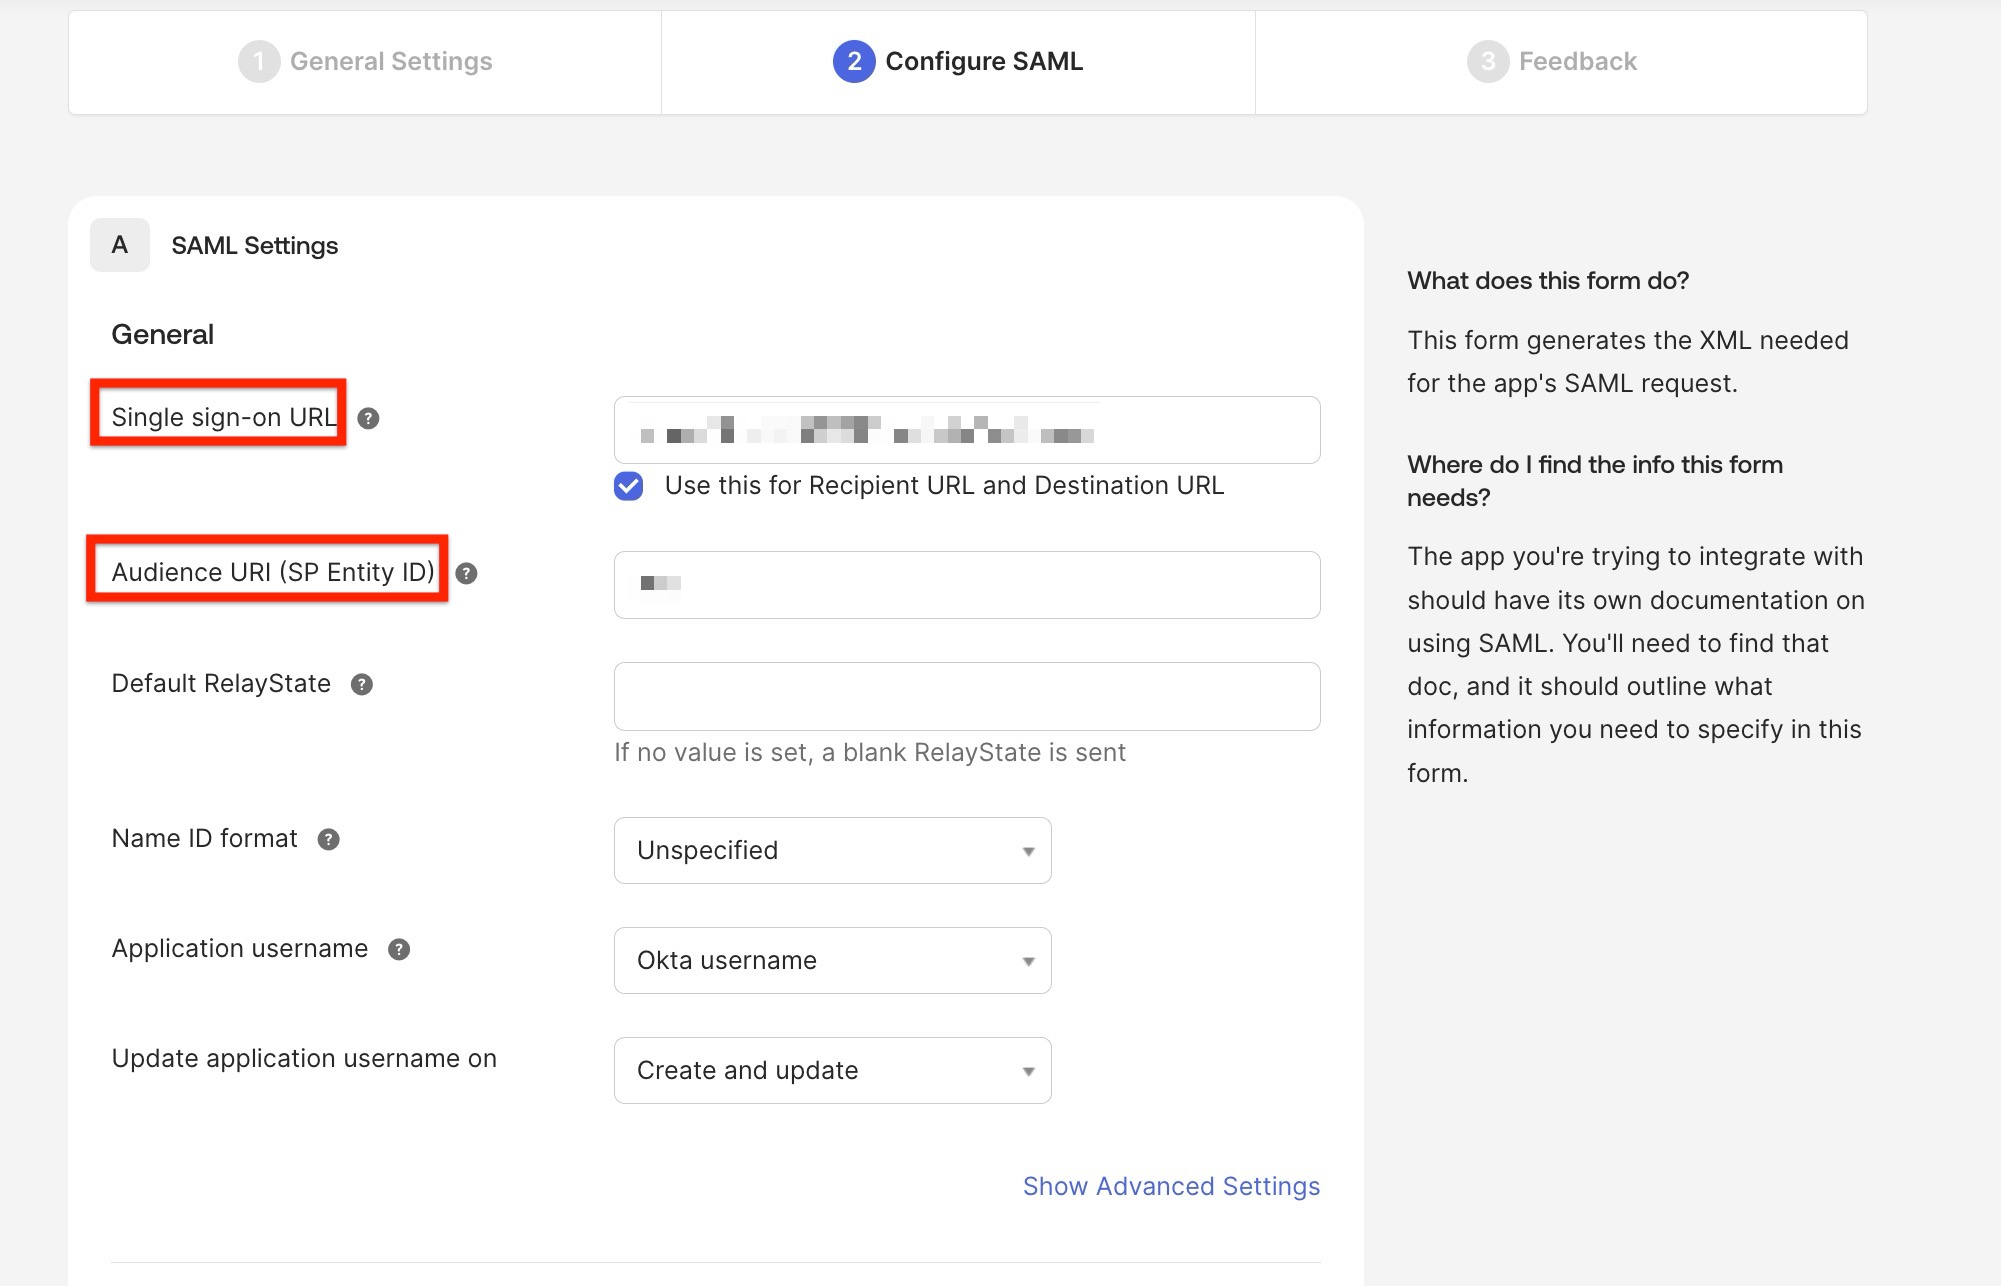
- Under the Configure SAML tab, configure the SAML Settings.
- Single sign-On URL: Enter the location where the SAML assertion is sent. This is a temporary placehold URL. The value is only required to proceed with creating the Okta app and downloading thecertificate. For example, https://placeholder-url.com/ (replace with any valid dummy URL).
- Audience URI (SP Entity ID): Enter the application-defined unique identifier, which is the intended audience of the SAML assertion. This is a temporary identifier, used only to complete the initial app setup so that you an download the certificate. For example, placeholder-entitiy-ID (Replace with your own value).

- Click Next. The Feedback tab appears.
- Click Finish to complete the configuration.
Download SHA-2 Certificate
Once the configuration is complete, you need to download the SHA-2 certificate, which is used to upload it to the Gainsight instance, to complete the Okta authentication.
To download the certificate:
- Navigate to Applications > Select [ Above configured application] and click the Sign-On tab.
- Under the SAML Signing Certificates, select Actions next to the SHA-2 certificate.
- Click Download certificate.

Configure SAML Authentication in Gainsight
In this step, use the Single Sign-On and the SHA-2 certificate downloaded from Okta to configure SAML authentication in Gainsight.
To set up the authentication:
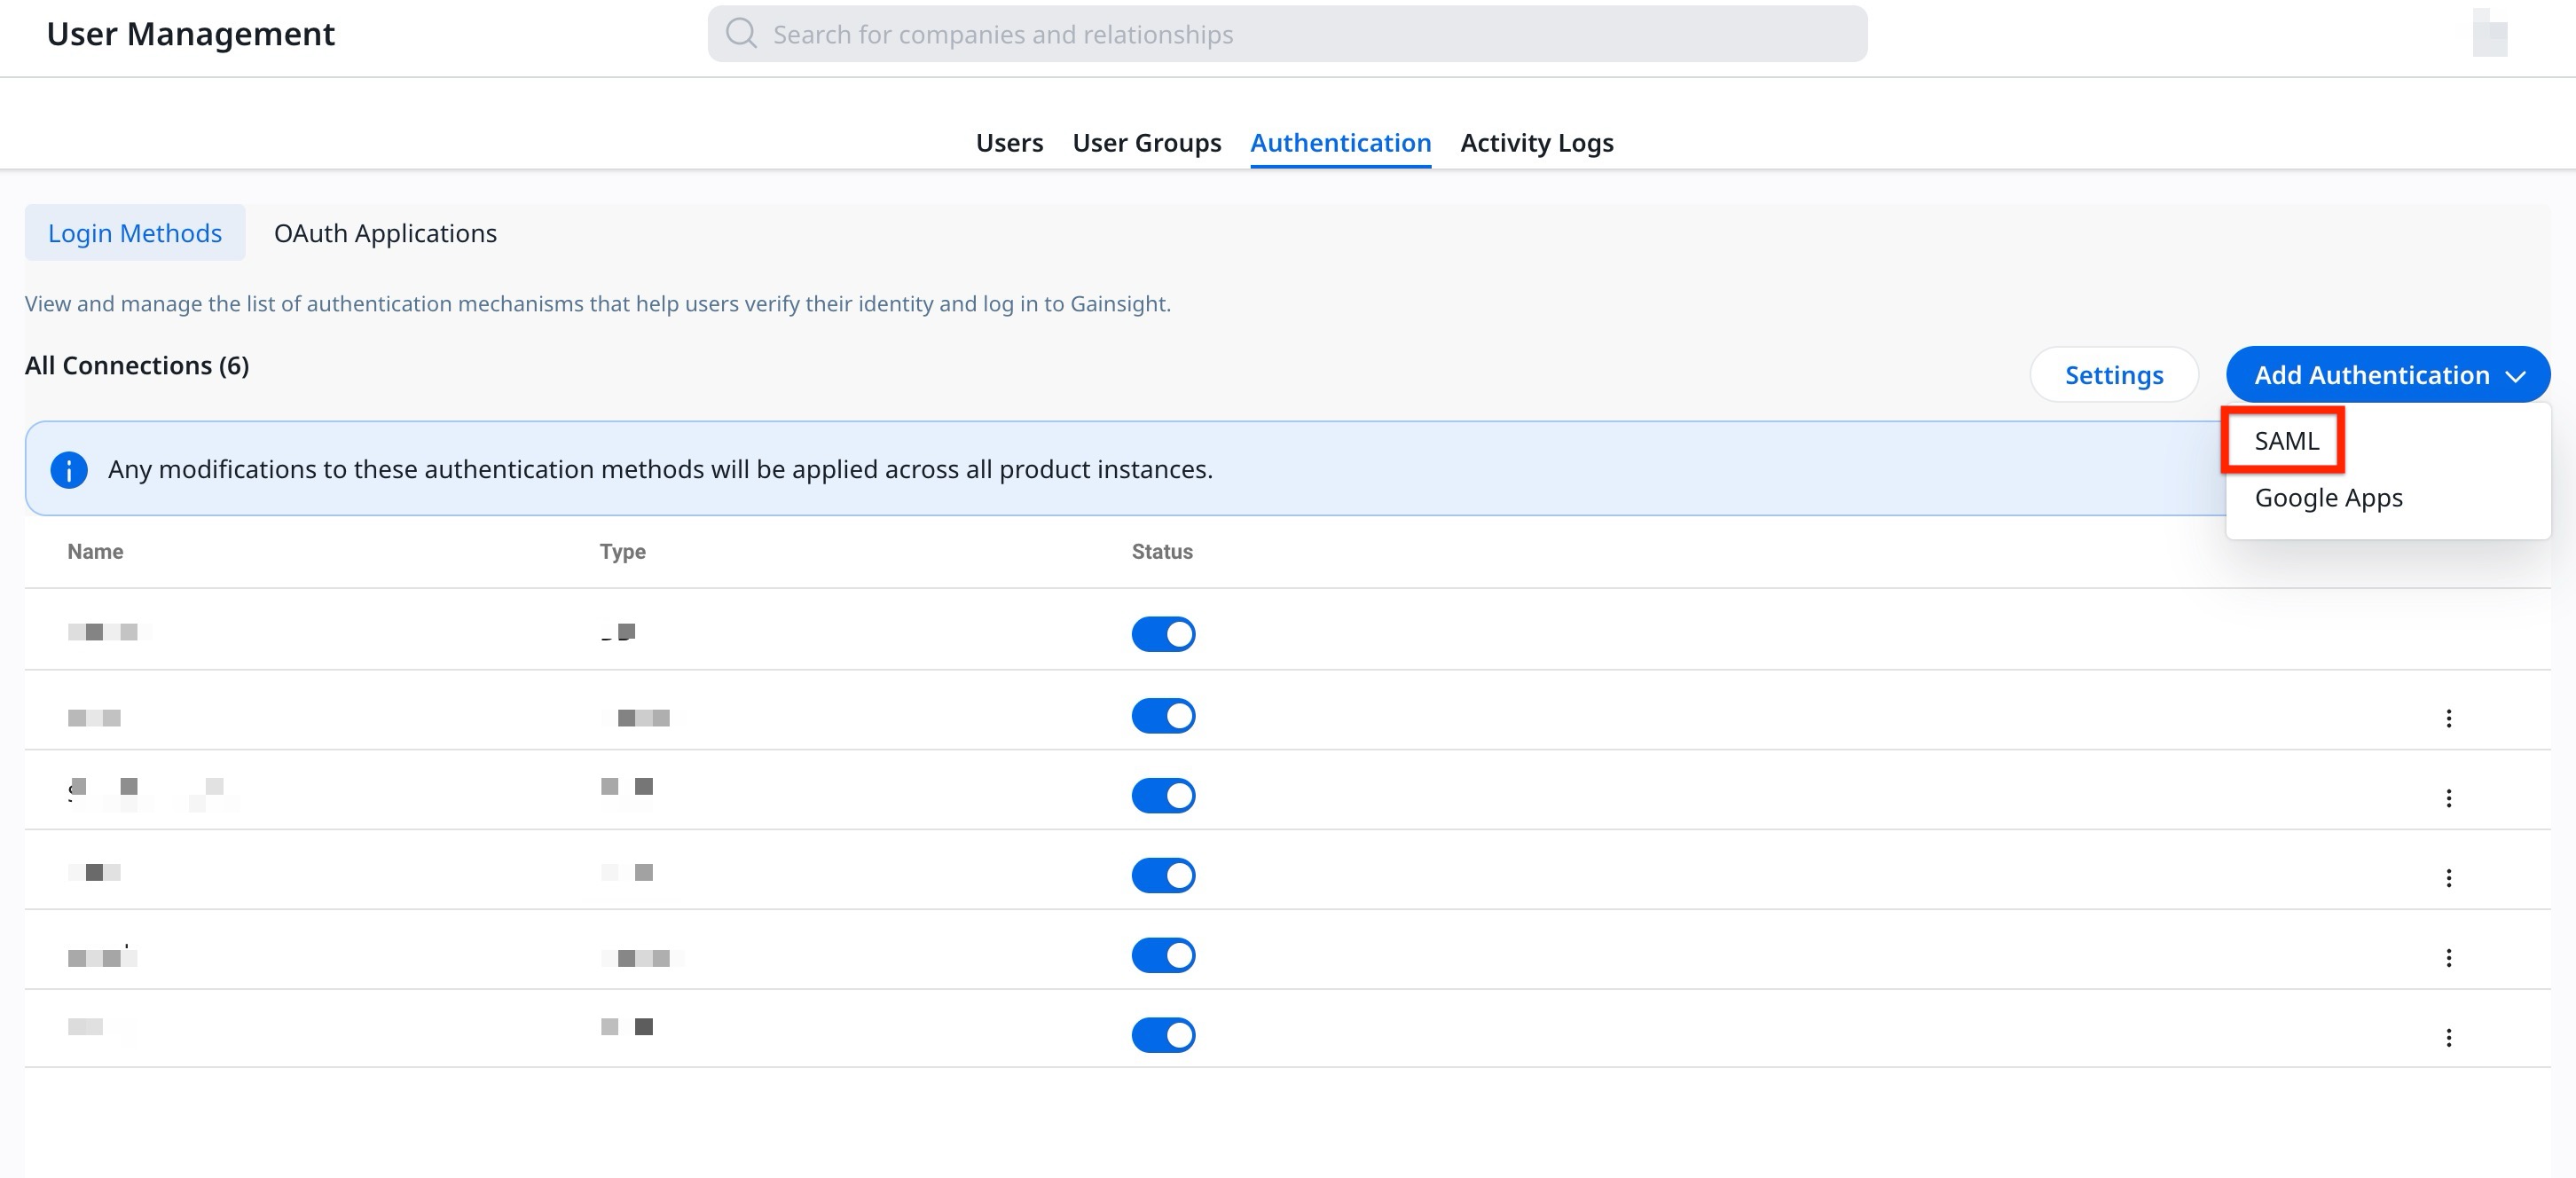
- Navigate to Administration > User Management and click the Authentication tab.
- From the Add Authentication dropdown menu, select SAML. The SAML Mechanism dialog box appears.
- Enter the following details to set up the SAML authentication:
a. Name: Unique connection name for authentication.
b. Email Domain: Domain name for SAML authentication.
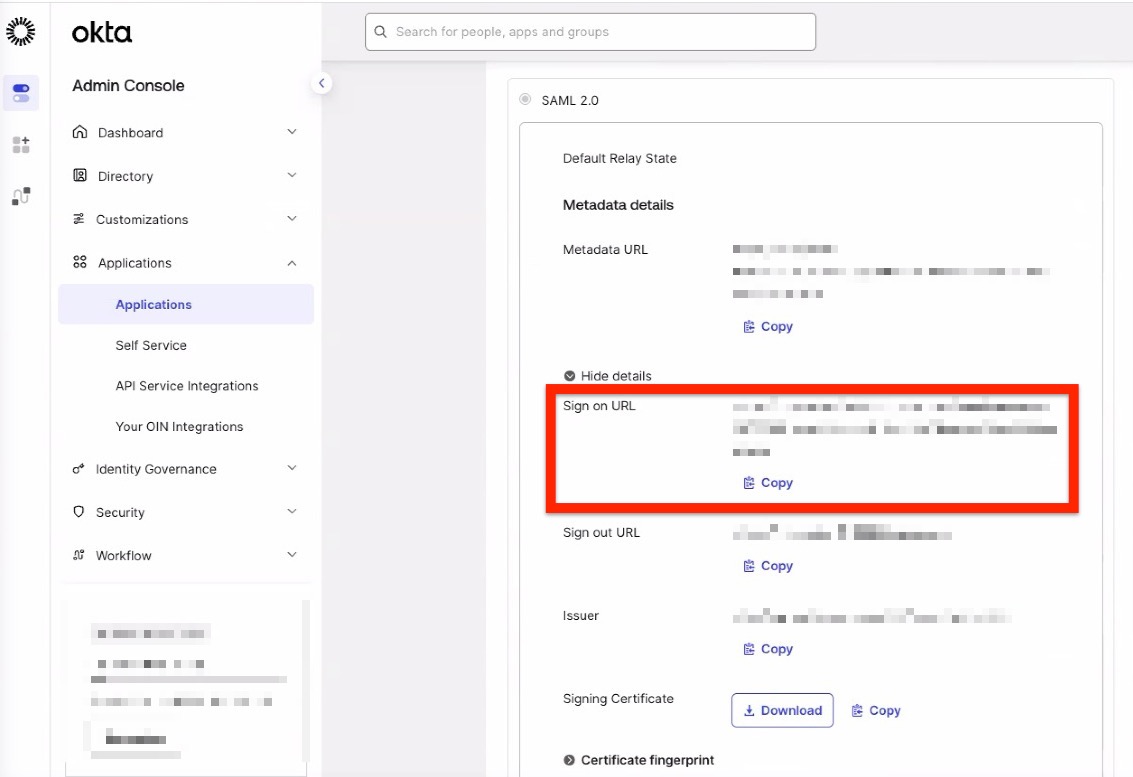
c. Sign-In URL: SAML login URL for authentication. Use the Sign on URL from your Okta application settings. To locate it, navigate to Applications > Select [Above configured application] > Sign On tab > Settings > Sign on methods > Sign on URL.
d. Certificate: Upload the SHA-2 certificate downloaded from Okta.
- Click Save.

Update the SSO URL and Entity ID
After saving the SAML configuration, download the XML file to get the new SSO URL and Audience URI and update the information in Okta.
To obtain the new SSO URL and Audience URI:
- Navigate to Administration > User Management and click the Authentication tab.
- Click Edit next to the SAML connection. The SAML Mechanism dialog box appears.

- To download the XML file metadata, click Download.

- Open the XML file and copy the following details:
- Single Sign-on URL found at the bottom of the file.

- Audience URI (SP Entity ID) found at the start of the file.

- Single Sign-on URL found at the bottom of the file.
- Paste the newly copied SSO URL in the Gainsight SAML Mechanism and click Save.
Update Okta with SSO Information
With the new SSO URl and Audience URI (SP Entity ID) obtained from the XML file, update the application details in Okta.
- In Okta, navigate to Applications > Select [ Above configured application] > General tab.
- In the SAML Settings section, click Edit. The General setting tab opens.

- Click Next. The Configure SAML page appears.
- Update the Single Sign-On URL and Audience URI (SP Entity ID) fields.
Create Attributes and Assign Users in Okta
You can create email attributes to assign users to Okta. To create attributes:
- Navigate to Applications > Select [ Above configured application] and click the General tab.
- In the SAML Settings section, click Edit. The General setting page appears.
- Click Next. The Configure SAML page appears.
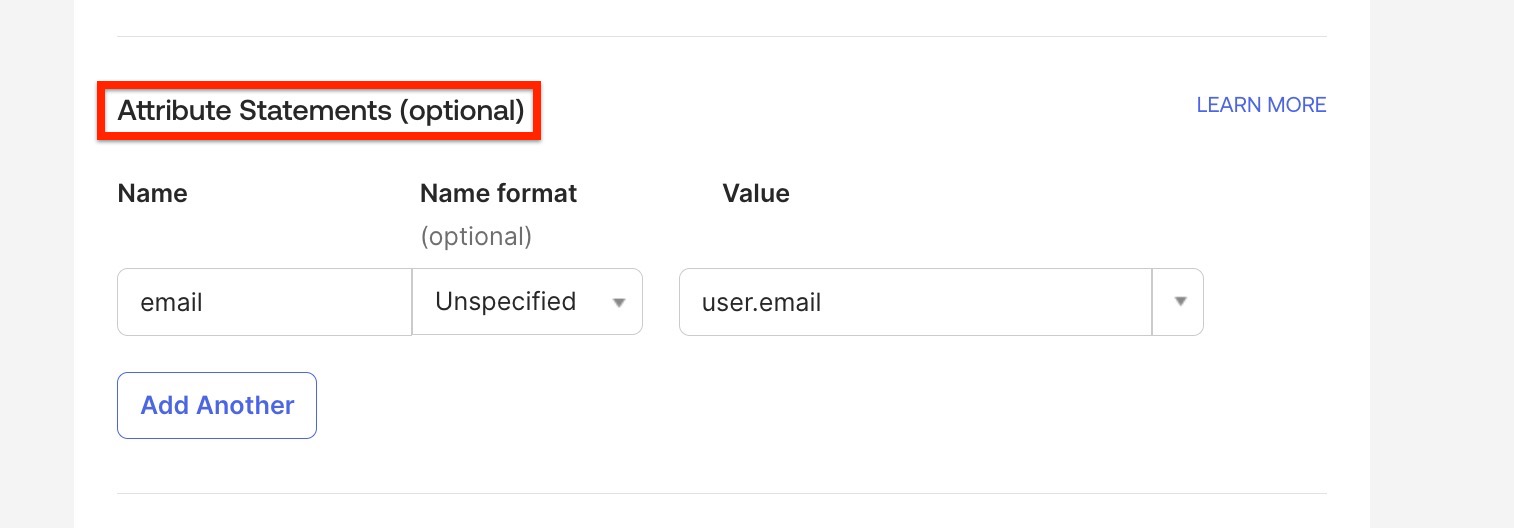
- Under the Attributes Statements, map the Email attribute to the corresponding Okta user value.
- Click Next. The Feedback tab appears.
- Click Finish to complete the configuration.
The Okta integration setup is complete. Assign the app to the required users or user groups to enable access to Gainsight.