Configure SAML SSO with Google Workspace in Gainsight
This article provides instructions to Google Workspace Admin and Gainsight Admins to configure custom SAML SSO integration between Google Workspace and Gainsight.
Overview
Configure custom SAML SSO to ensure secure, seamless, and compliance-friendly authentication, while using Google Workspace as the single source of identity for all Gainsight users.
The document shows you how to:
- Create a custom SAML app in Google Workspace
- Configure SAML authentication in Gainsight
- Download and use Gainsight metadata
- Extract ACS URL and Entity ID from the XML
- Assign users to the SAML app
- Test and finalize the setup
Prerequisite
To configure SAML setup, both your Google Workspace Admin and Gainsight Admin must create the SAML app in their respective platforms—Google Workspace and Gainsight.
Create a Custom SAML App in Google
To create a new custom SAML application:
- Sign in to the Google Admin Console at admin.google.com
- Navigate to Apps > Web and mobile apps. The Web and mobile app screen appears.

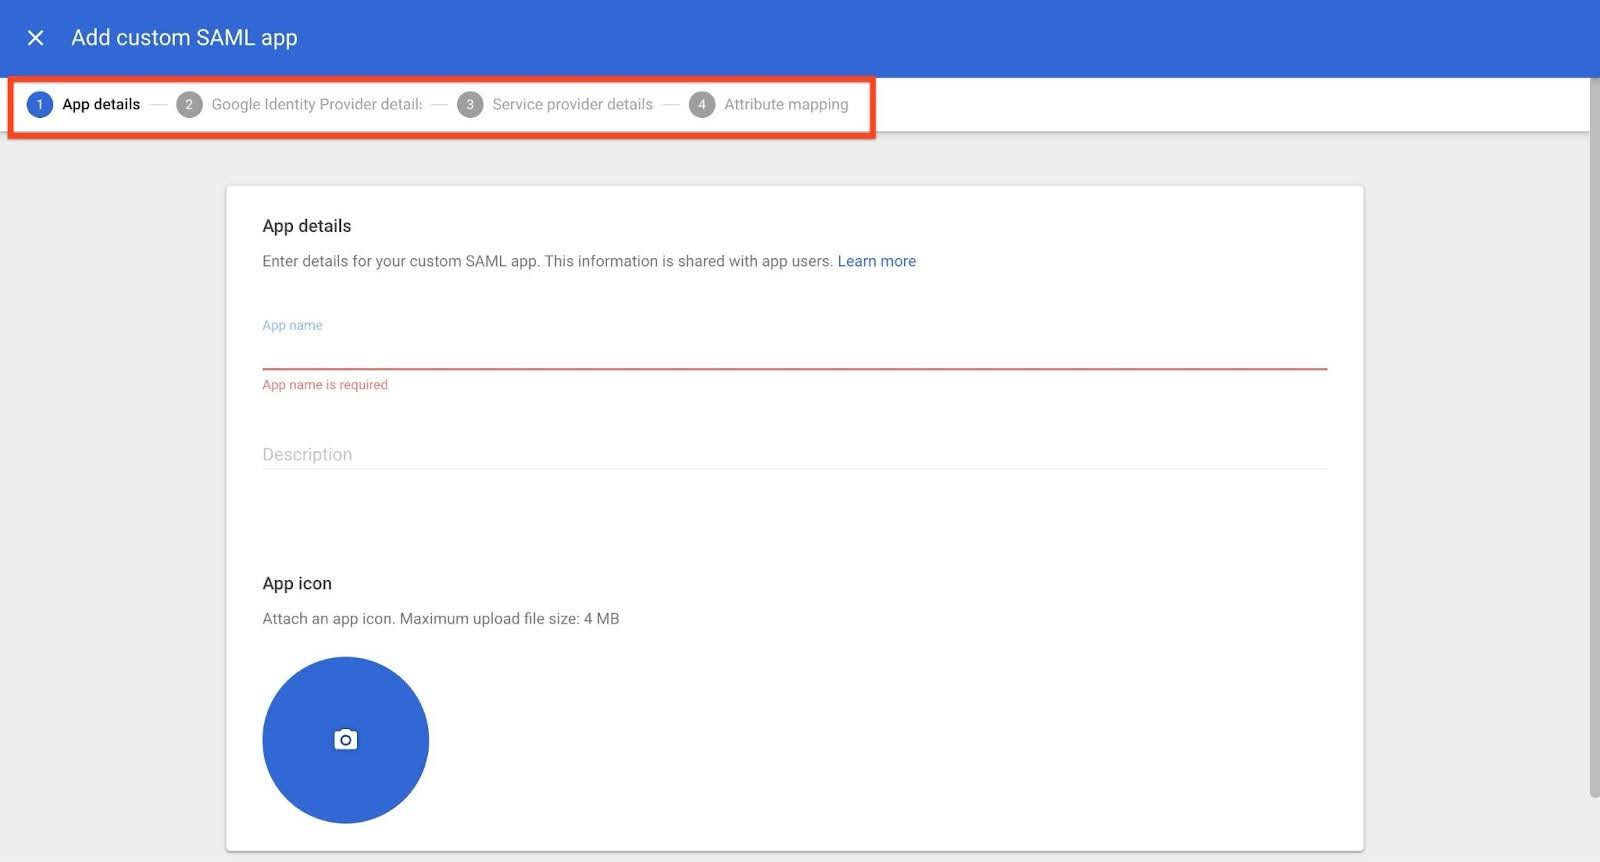
- From the Add app dropdown menu, select Add custom SAML app. The Add custom SAML app page appears.

- Google requires completing four configuration sections to set up the SAML app:
- App details
- Enter an App name and an optional Description.
- Upload an image in the App icon if preferred.
- Click CONTINUE.
- Google Identity Provider details
- (Recommended for SAML setup) Copy or download these three values:
- SSO URL
- Entity ID
- Certificate

- Click CONTINUE.
- (Recommended for SAML setup) Copy or download these three values:
- Service provider details: To get these details you must first perform these three steps below and then come back to enter the details in step d below:
- Enter the following information that you extracted from the XML file after Gainsight SAML setup [refer to step c (iii)]:
- ACS URL: Paste the value you copied from the AssertionConsumerService > Location attribute in the XML file.
- Entity ID: Paste the Entity ID value you copied from the XML file.
- Click CONTINUE.

- Attribute mapping: Define which user attributes, such as email or name, is sent from Google to the application.
- Click ADD MAPPING to map Google directory attributes to App attributes.

- Select a field from the Select field dropdown list. Example: Primary Email.
- Enter the corresponding App attribute. Example: Username.
- Click FINISH. The custom SAML app is added.
- Click ADD MAPPING to map Google directory attributes to App attributes.
- App details
Once the custom SAML app is added in Google, you must assign users or groups to the SAML app. For more information on how to assign users, refer to the Assign Users or Groups to the SAML App section.
Create the SAML Authentication in Gainsight
To configure SAML in Gainsight:
- Navigate to Administration > User Management and click the Authentication tab.
- Click Add Authentication and select SAML. The SAML Mechanism dialog box appears.
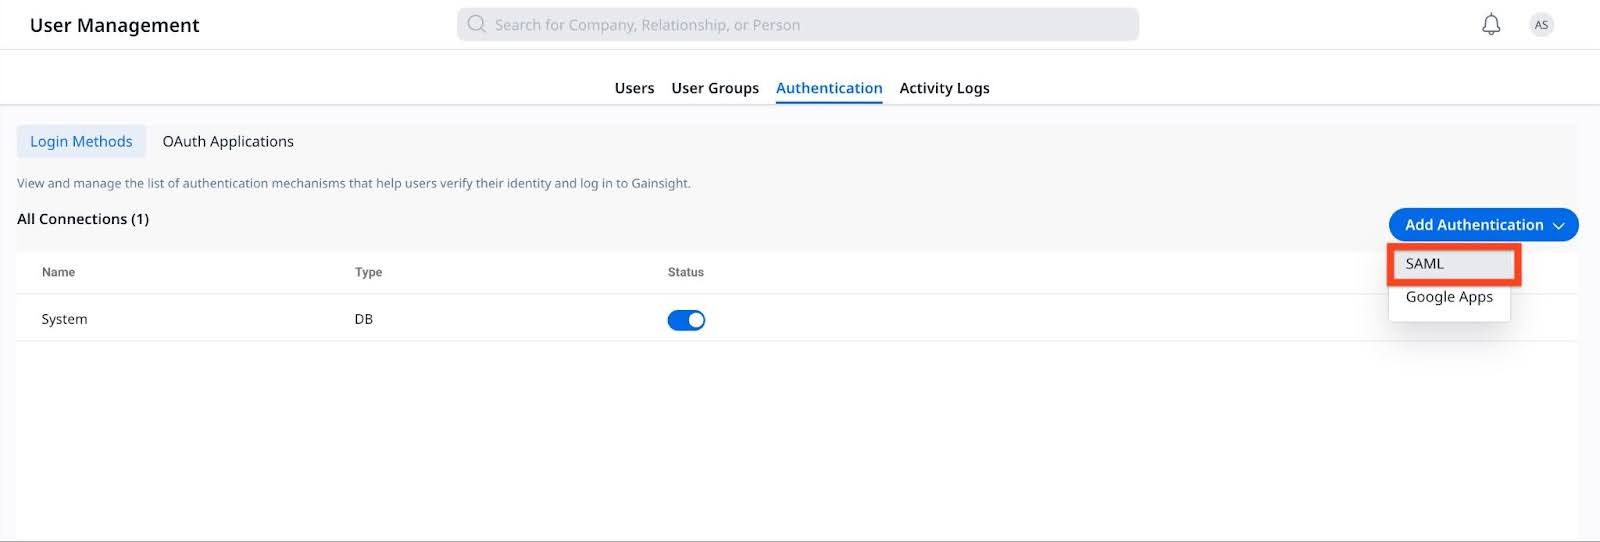
- Enter the following authentication details to create the authentication record:
- Name: Provide a name for the application (example, GoogleSSO).
- Email Domain: Enter your organization's domain.
- Sign In URL: Paste the SSO URL copied from the Google Identity Provider (IdP).
- Certificate: Upload the Certificate downloaded from the Google IdP.

- Click Save to save the connection.
Download Gainsight Metadata XML
Once the SAML authentication is created, you must download the Gainsight metadata XML.
To download the XML file:
- Navigate to Administration > User Management and click the Authentication tab.
- From the three-dots vertical menu, click Edit.

- In the SAML Mechanism dialog box, click Download to download the Gainsight metadata XML file.

Once the XML file is downloaded, extract the ACS URL and Entity ID.
Extract ACS URL and Entity ID from the XML
To complete the configuration, open the downloaded metadata XML file and copy the following values, which are required for Google to establish the SAML connection with Gainsight:
- AssertionConsumerService → Location: This value appears near the bottom of the XML file. Copy the full URL. It corresponds to the blurred section shown in the image below.

- Entity ID: This value appears near the top of the XML file. Copy the full Entity ID string. It corresponds to the blurred section in the image below.

These values must be entered in the Service Provider Details section (Step 4 (d) in Create a Custom SAML App in Google) in Google Workspace.
Assign Users or Groups to the SAML App
Once the SAML application setup is complete, you must assign users to a group to grant them access to the application. To assign users to SAML app:
- Navigate to Apps > Web and mobile apps.
- Click on the SAML app.
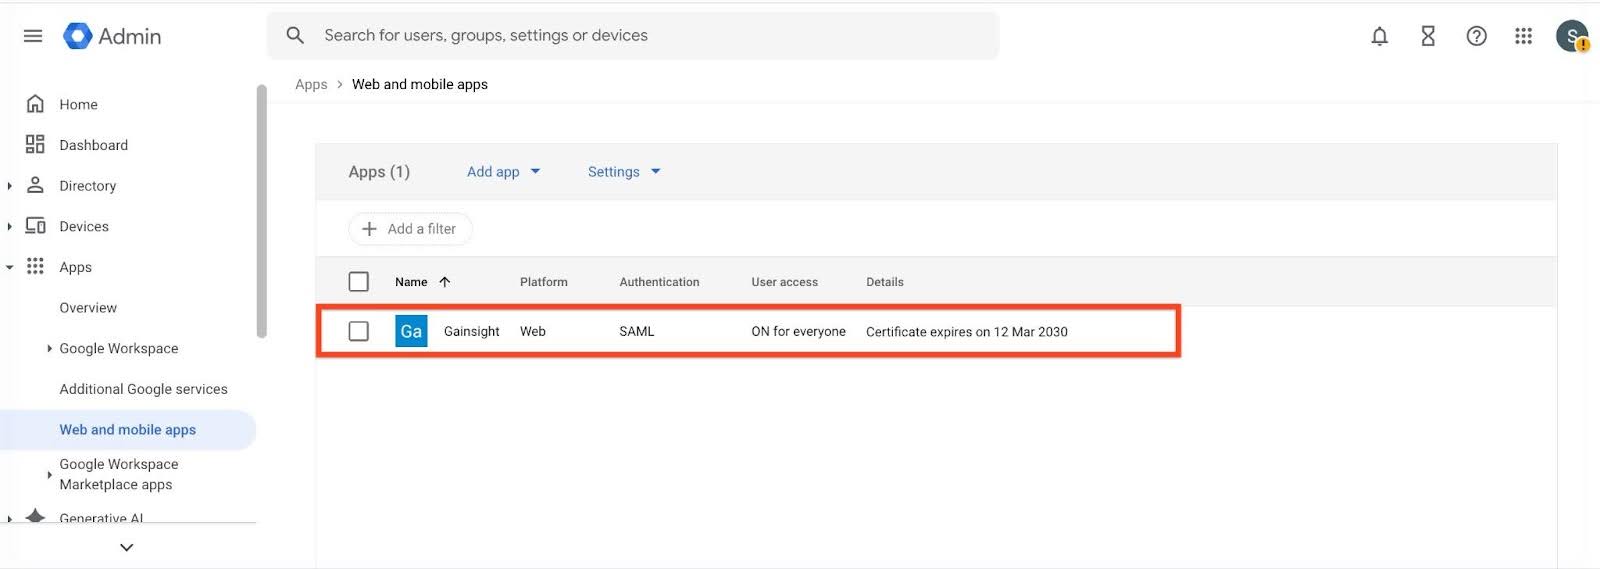
- Expand User access. The Service status screen appears.

- Select a desired service status from the available options:
- ON for everyone
- OFF for everyone

- Click SAVE.
Test and Finalize SAML SSO
Use this process to test, validate, and roll out SAML SSO access in Gainsight, and remove temporary authentication once confirmed.
- Test SAML Access
- Sign in as a test user who has been assigned the SAML app in Google Workspace.
- Verify that the user can successfully log in to Gainsight using SSO.
- Roll Out to Users: After successful testing, roll out SAML access to admins and then to end users, as appropriate for your organization.
- Disconnect Temporary DB Authentication: Once SAML is fully functional for all required users, Submit a ticket to Gainsight Support requesting removal of temporary DB authentication for your org or specific users.