Create and Send Multi-Version Emails
Gainsight NXT
Overview
Admins can create and send multiple variations of an email within one Program to scale personalized customer communications and simplify reporting. You can personalize Multi-Version emails based on customer segments using fields such as industry, role, location, language, and more.
This article provides an overview of how to add Versions to email templates and how to configure Programs to send Multi-Version emails.
Identify Multi-Version Use Case
It’s important to identify your use case for Multi-Version emails and the customer segments you want to target with each Version. This will help determine how to best configure any Multi-Version email templates and programs.
For Multi-version communications, customer segmentation should be based on a field with selections that align to segments you want to target. For example, if you want to send one version of an email to customers working in construction, and another version of an email to customers working in agriculture, then you will need to select a field that aligns with each customer segment, such as Industry.
You will select participant sources and configure program emails based on this field. For more information on this process, refer to Configure Participants and Configure Program Email.
Create Version Email Templates
Versions are separate versions of the same email, contained within a single email template. Each program is meant to be sent to a different segment of customers. You will not assign segments to each Version when creating your email template. Instead, you will complete this step as part of program configuration.
First, you must create multi-Version templates before you can configure a Multi-Version program. Complete the following steps to add Versions to an email template.
To add versions to an email template:
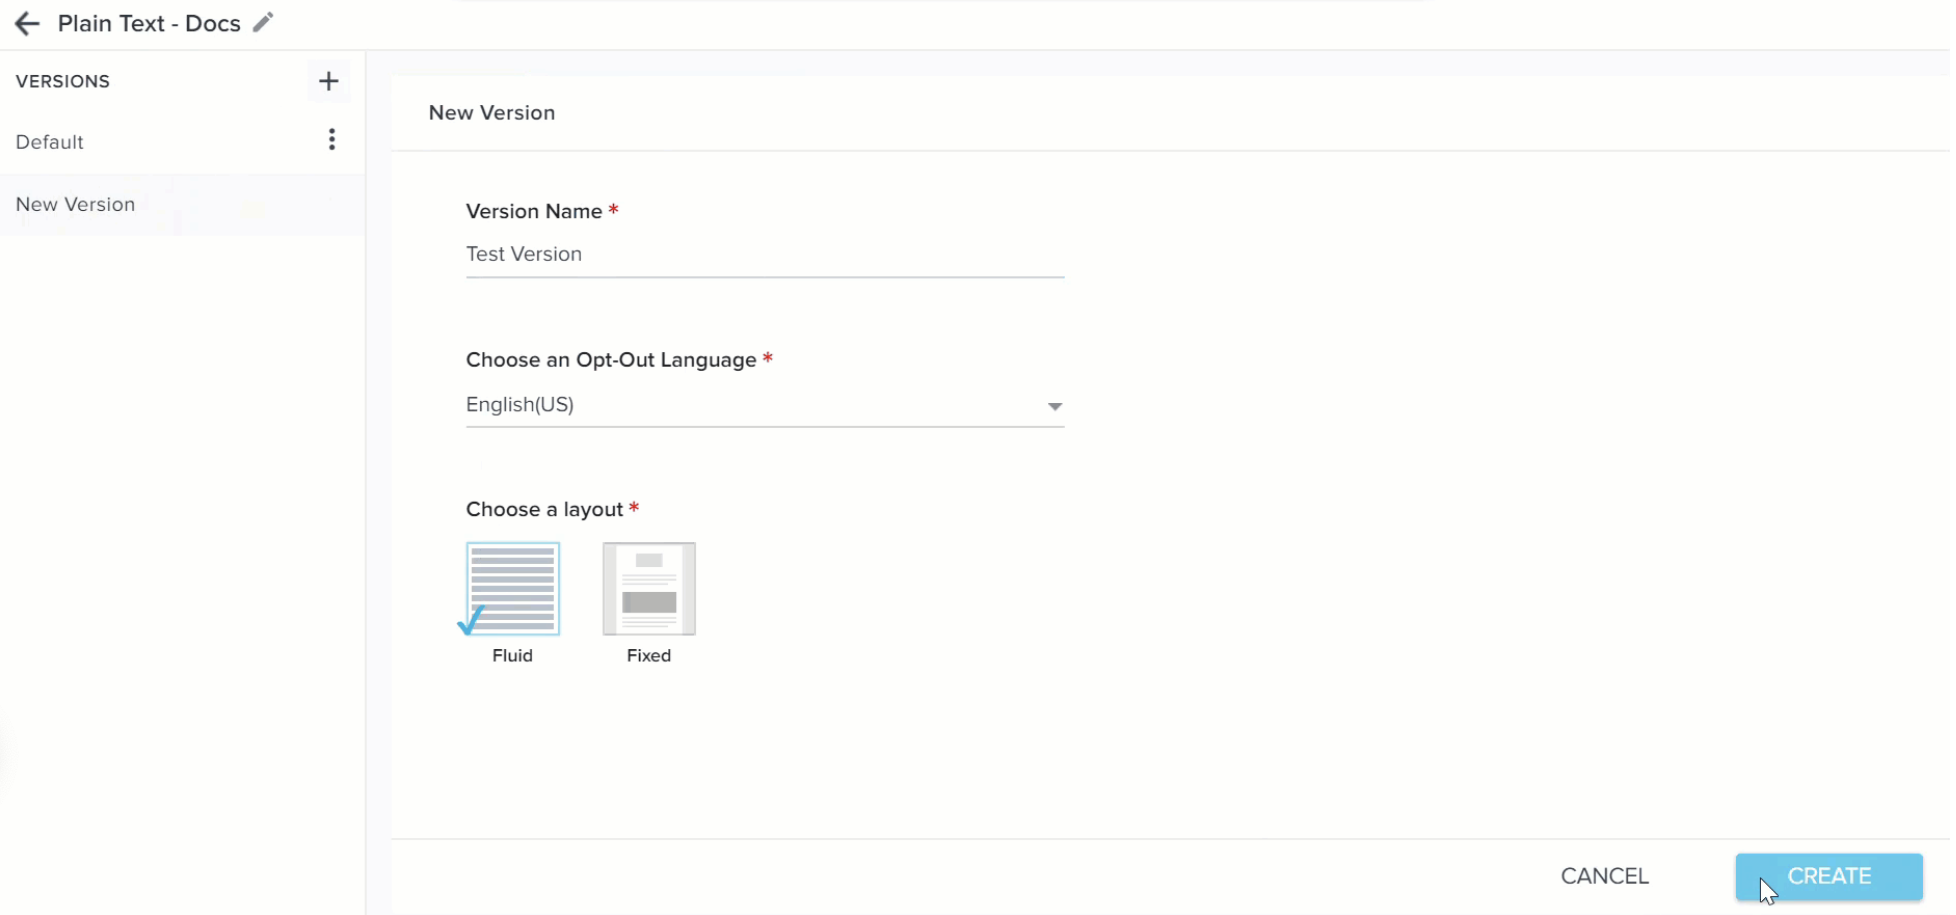
- Click + adjacent to VERSIONS. The New Version page appears.
Note: You can create a maximum of 15 versions. - In the Version Name field, enter the name of the version.
- Select an opt-out language in the Choose an Opt-Out Language dropdown menu.
- Select either Fluid or Fixed option in the Choose a Layout section.
- Click CREATE.
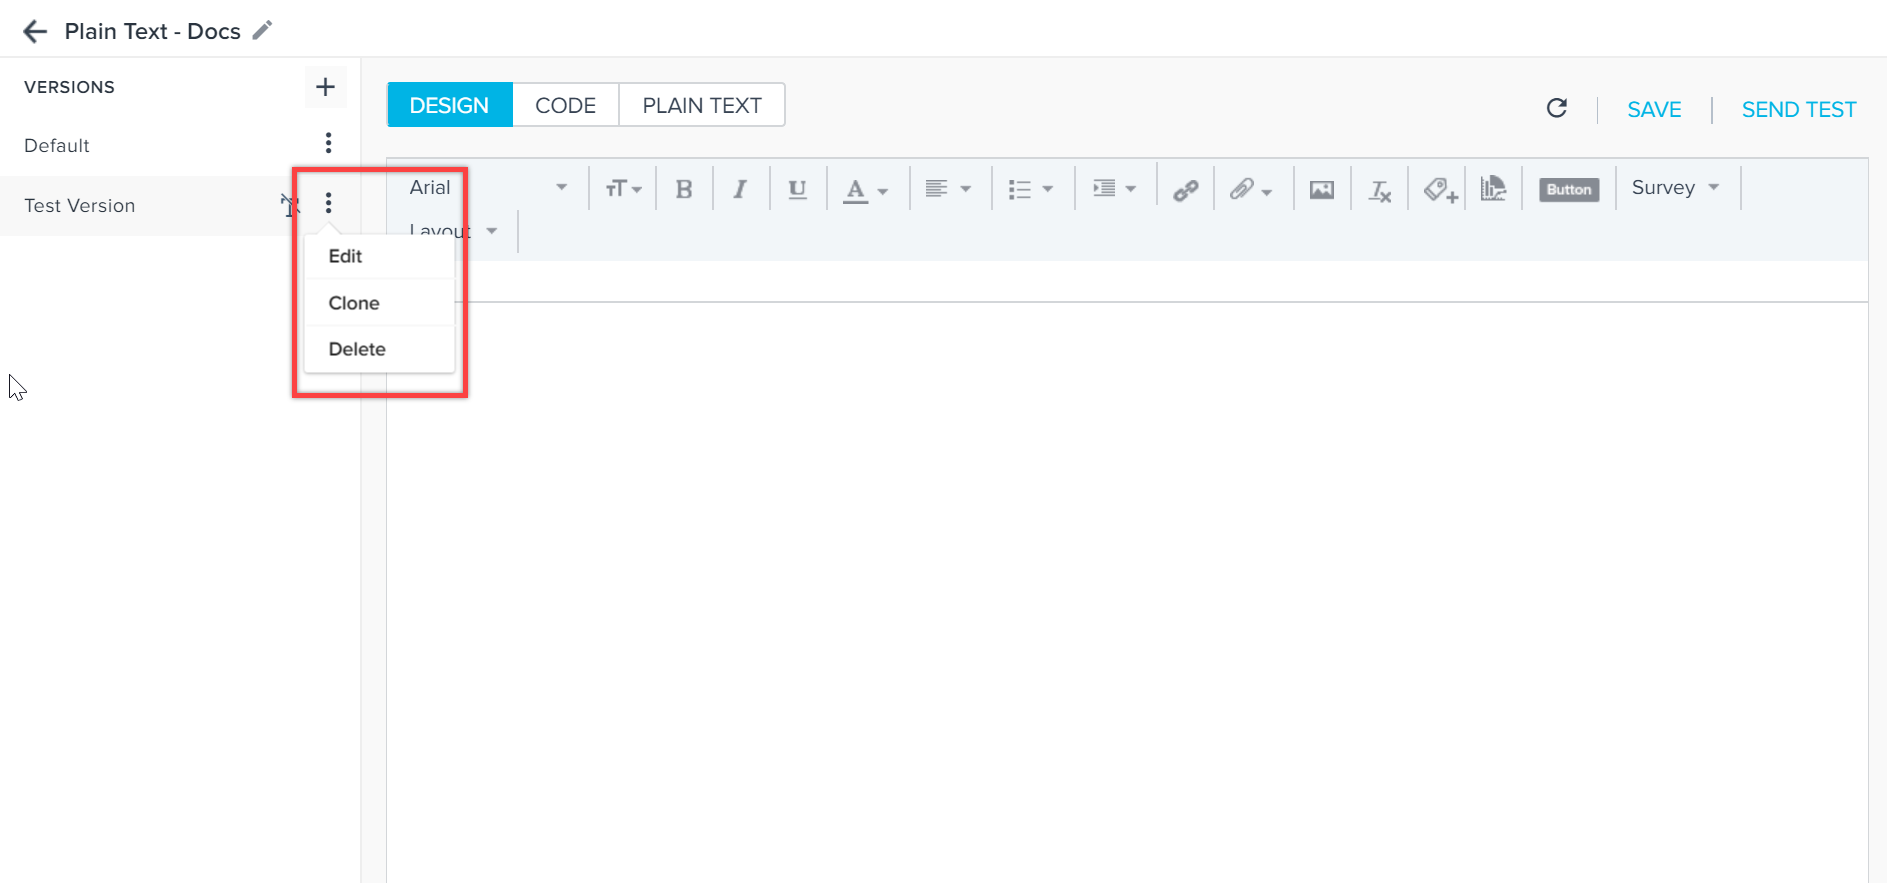
Note: Admins can also Edit, Clone, and Delete versions by clicking the three dots adjacent to the Version.
IMPORTANT:
- It is a requirement that if the default Version has a survey, then every Version MUST include that survey either as a link or button. If not, this can adversely affect reporting.
- Admins can add up to a maximum of 20 versions in an email template.
Configure Multi-Version Emails within Programs
To successfully send Multi-Version emails through a Program, you need to configure the Program’s participants and model. The example below will walk you through the typical configuration steps. For more information on configuring programs, refer to How to Configure Programs (Path).
Note: The specific configurations of your Multi-Version email will differ depending on your specific use case. In the example below, we’ve chosen to configure email variations based on different languages, since this is a common use case.
Configure Participants
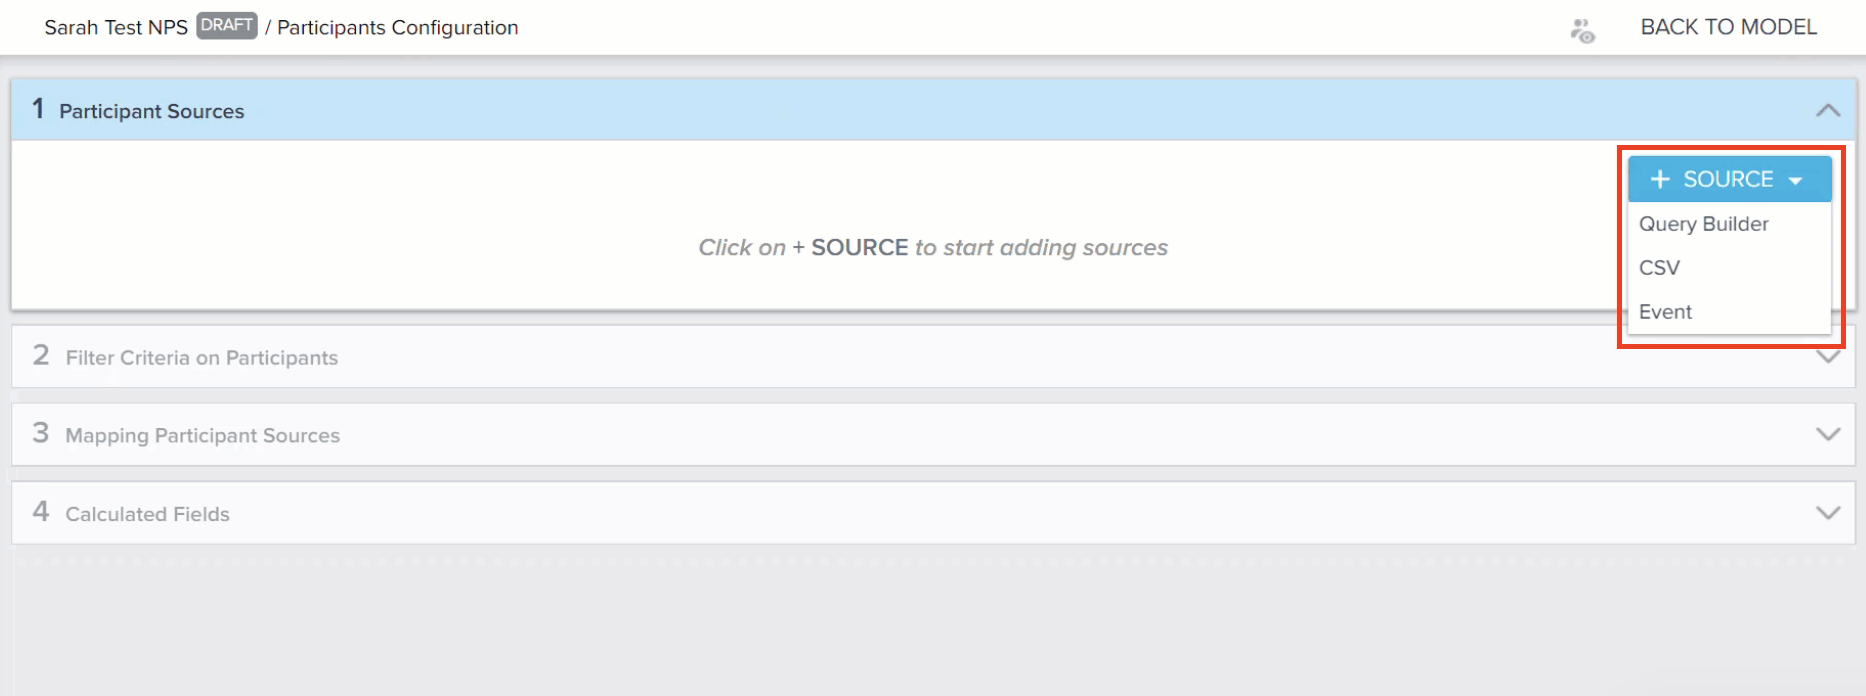
You can add participants to a program from three potential sources: Events, CSV files, and Query Builder. For Multi-Version communications, it is important to pick a source containing data that can align with your targeted customer segmentation. Pick sources that have a field you can use to target each email Version to the correct customer segment.
In this example, we want to send an English version of an email to customers in the United States, and a Spanish version of the same email to customers in Mexico. We will select a source that contains both a field that aligns with these customer segments (such as the Location field), as well as other participant data we need, such as the name and email address for the participant.
Perform the following steps to configure participant sources for Multi-Version emails:
- Navigate to Digital Journey > Programs.
- Select a program from the list view to configure, or click +CREATE to create a new one. For more information on the program list view, or creating a new program, refer to Program List View and Create New Program.
- Click the green participant icon at the beginning of the program model.
-
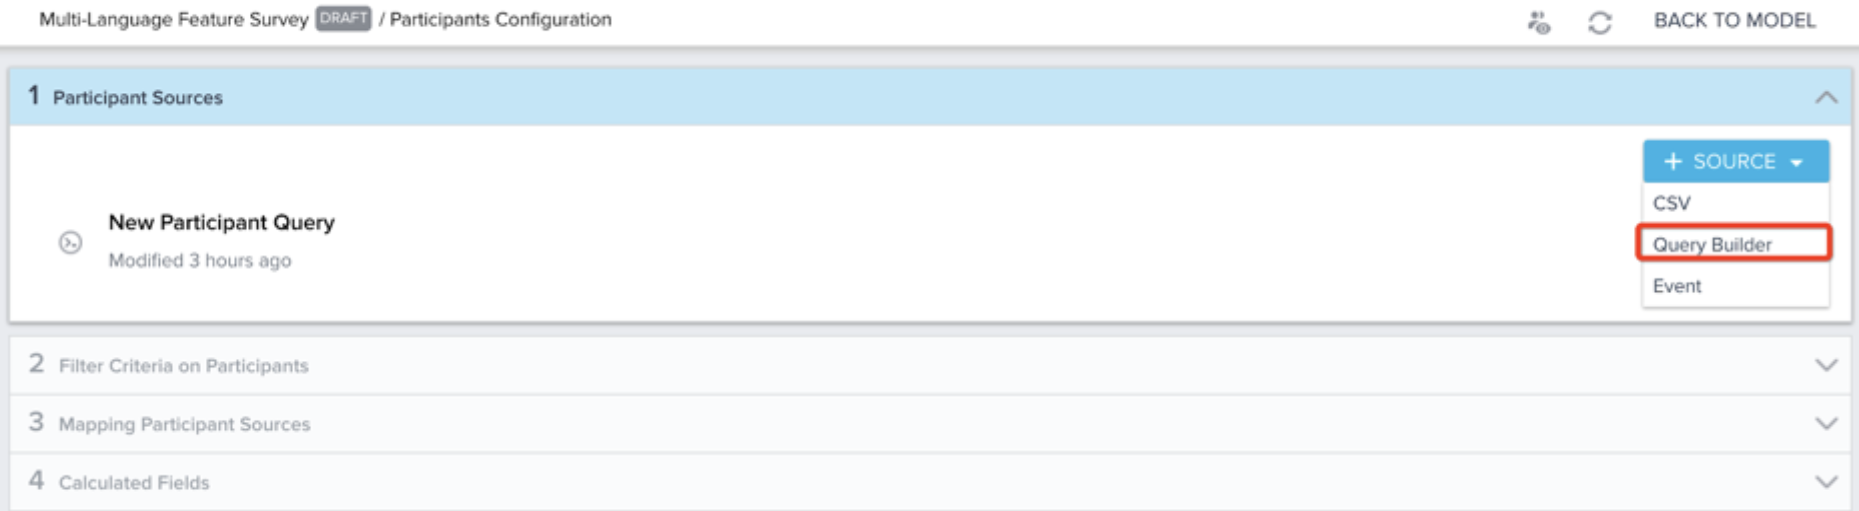
Click +SOURCE to select your participant sources. For more information on selecting and configuring participant sources, refer to Adding Participants to a Program. In our example, we have selected Query Builder as one of our participant sources. We can use it to query the Company Person object, which has both the general participant data we need for the program, and access to the Location field we need for our Multi-Version email.
-
Select participant fields for mapping within the program. For more information on selecting fields for your source, refer to Adding Participants to a Program. In our example, we are selecting the Location field, as well as the other fields we need to complete program configuration.

-
Complete the remaining participant configuration including adding any other participant sources, selecting uniqueness criteria, and mapping sources. For more information on completing participant configuration, refer to Adding Participants to a Program.
Configure Program Email
You can add a Multi-Version email template to any email step in a program model. For our example, we’ll select the Survey Email step. For more information on selecting email steps, refer to Configure Model and Emails for Programs.
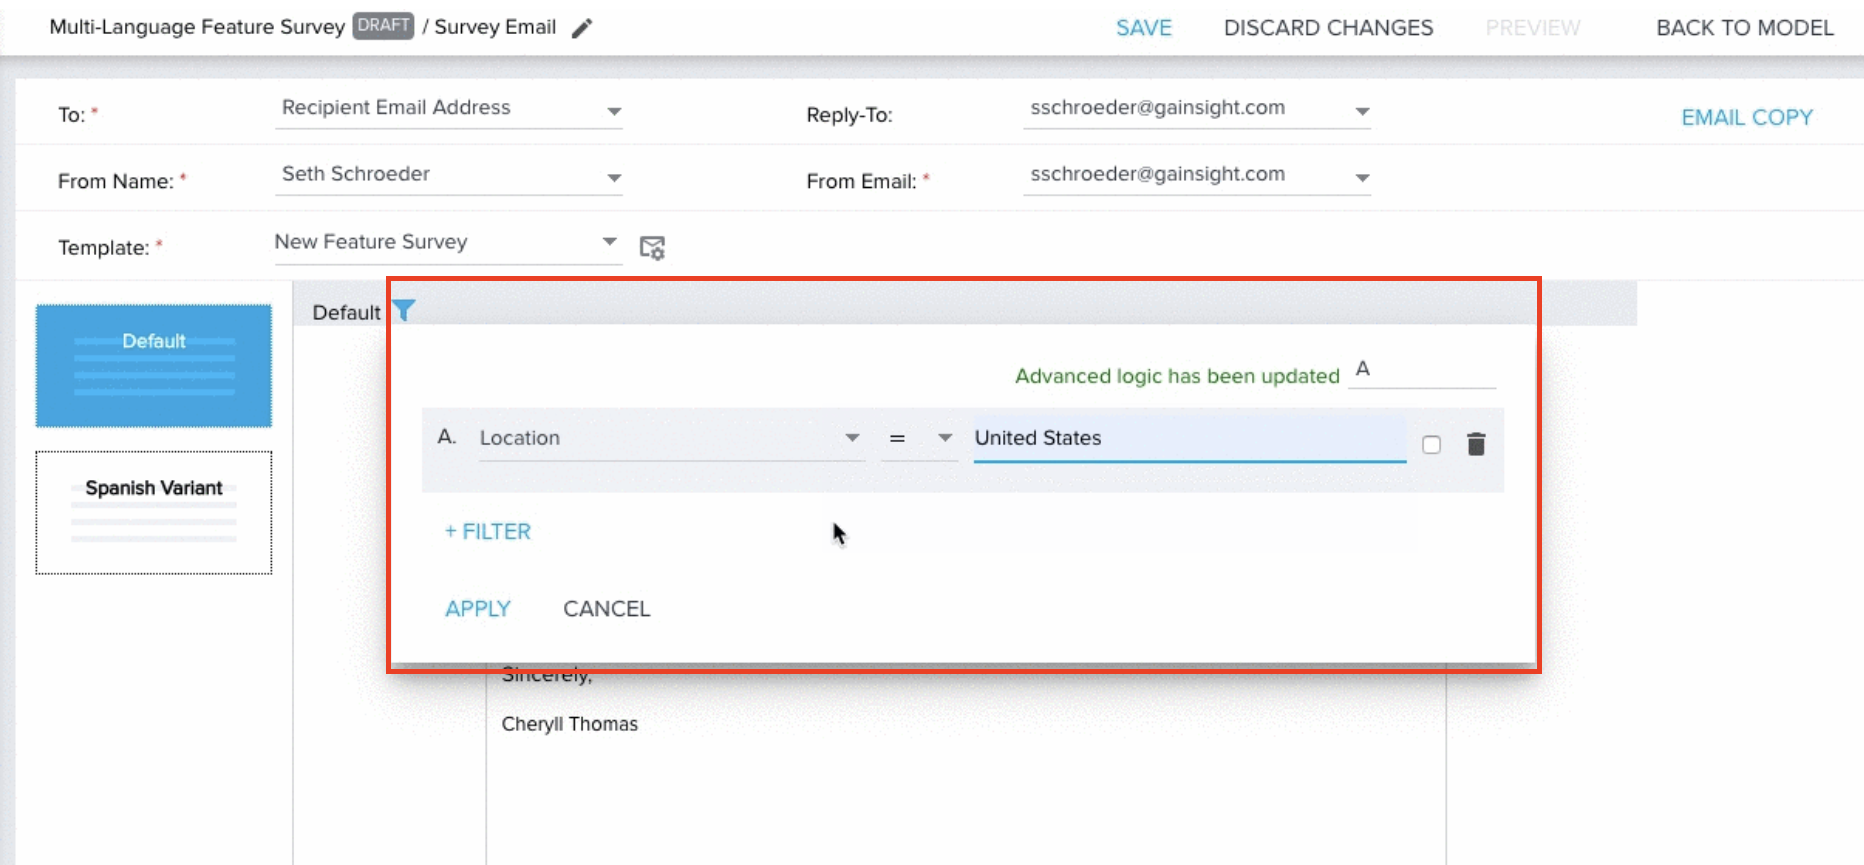
After you select a template, you need to set the filter condition for each email variation in your template. Filters are based on the mapped participant fields and match the email Version with the appropriate segment of customers.
In our example, we based our filters on the Location field and selected values for where we want to send each Version. The default Version in English is configured with the filter “Location = USA” to target customers in the United States, and the Spanish language version is configured with the filter “Location = Mexico” to target customers in Mexico.
Complete the following steps to configure program email steps for Multi-Version emails:
- Within the program model, select the email step you wish to configure with your Multi-Version template. For more information on selecting email steps, refer to Configure Model and Emails for Programs.
- Select your Multi-Version template from the template drop-down. For more information on creating Multi-Version templates, refer to Create Version Email Templates.
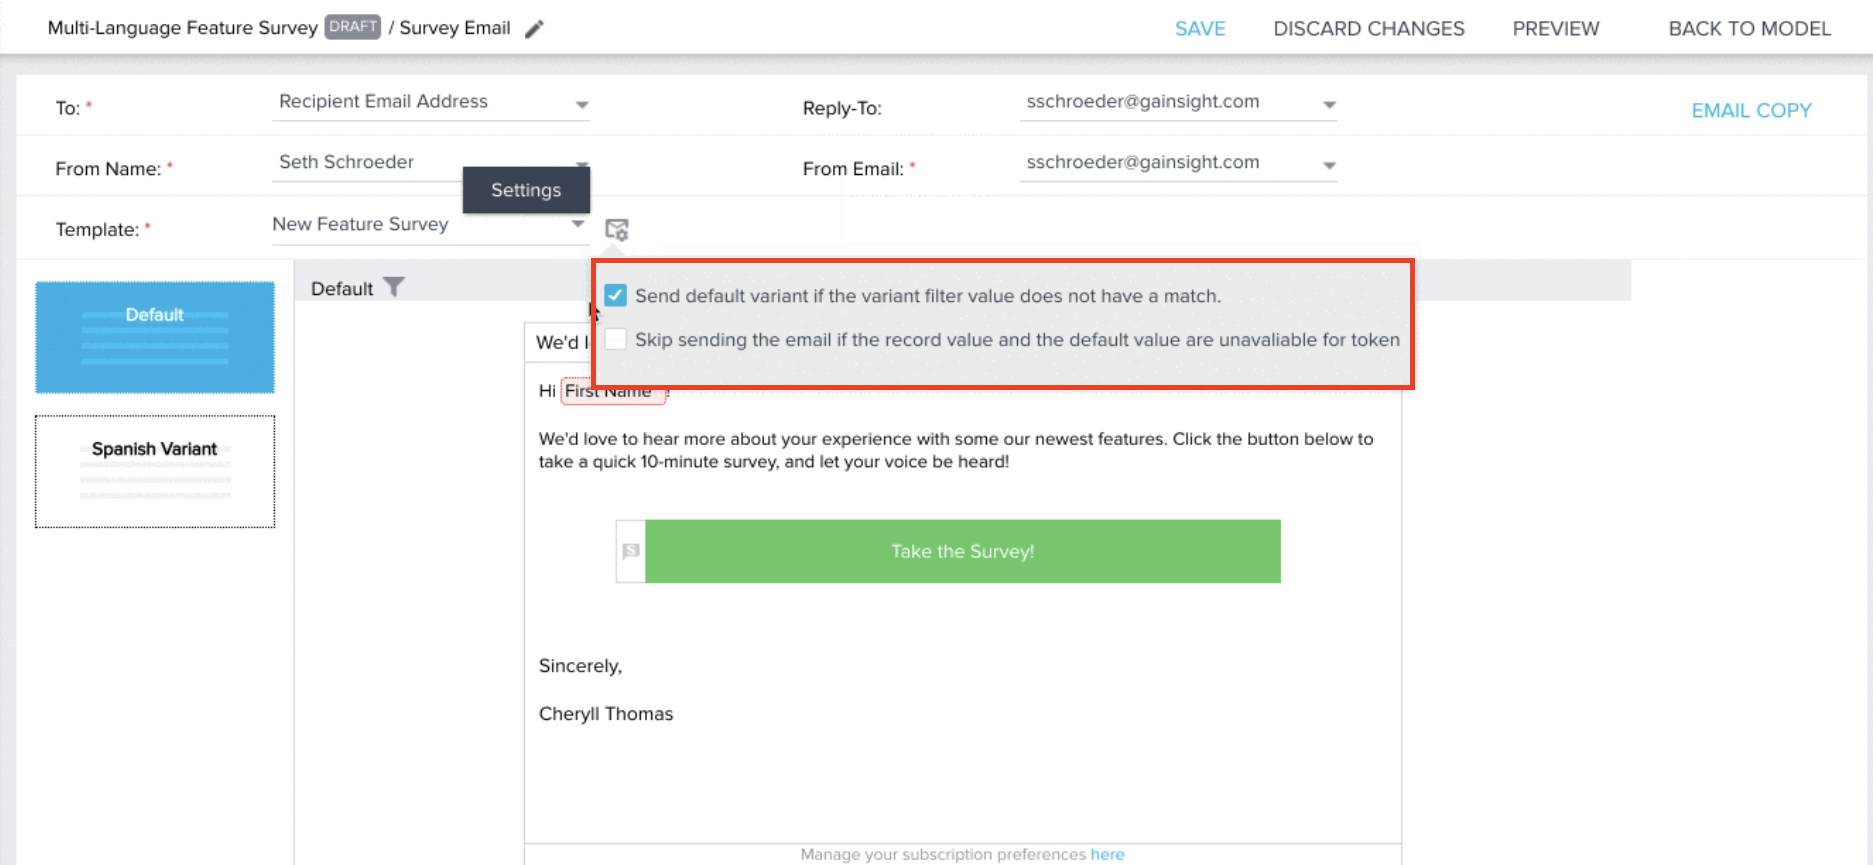
- Click the Email Settings icon.
- By default, the checkbox “Send default Version if the Version filter does not have a match.” will be checked. Uncheck this if it does not apply to your use case.
- By default, the checkbox “Skip sending the email if the record value and the default value are unavailable for token” will be unchecked. Check this if it does apply to your use case.
- Within the Default Version, click the filter icon at the top-left of the Version’s layout.
- Configure the filter condition to match the customer segment you wish to target with the Default Version.
Note: You can click the Null checkbox to select a value of Null as your filter value. For example, if you wanted to send a Version to participants who have a blank value listed for the Location field, you could select a filter of “Location = Null”. - (Optional) Click +FILTER to add filters to the Version.
- (Optional) Configure the Advanced Logic if more than one filter is applied to a Version.
- Click APPLY to save filter configurations.
- Complete remaining email configuration steps, such as mapping tokens.
- Add filters and complete other email configuration steps for all Versions.
- (Optional) Preview and test the email. For more information, refer to How to Test a Program.
- Click SAVE to save the email step.
Complete Remaining Configurations
- Complete any remaining configurations needed for your program model. For more information on configuring program models, refer to Create Version Email Templates.
- (Optional) Test the functionality of the Program. For more information on this process, refer to How to Test a Program.
- Click PUBLISH to publish the Program. You can choose to publish the program right away, or schedule it to be published at a later time. For more information on these options, refer to Configure Model and Emails for Programs.
Note: Once a Program is published, very few configurations can be made. The Program will move to an Active status and initial messages will be sent. For more information on editing active programs, refer to Program List View and Create New Programs.
Additional Example Uses
- Run A/B testing on your customer communications by creating alternate versions of an email and comparing response results.
- Reduce the number of emails and campaigns by tailoring the message according to recipient or customer attribute for the same email content. For example, send a Product Announcement that has varying messages for each role within one outreach and analyze response rates within one report.