PX Release Notes March 2020
Version 2.41.0, April 1, 2020
List of Features
| Features | Destination |
|---|---|
| Engagements | https://app.gainsightpx.com/engagement |
| Analytics | https://app.gainsightpx.com/analytics/ |
| Knowledge Center | https://app.gainsightpx.com/knowledge-center |
| Integrations | https://app.gainsightpx.com/settings/integrations |
![]() : This symbol indicates that an enhancement originated as a customer suggestion on the Gainsight Community.
: This symbol indicates that an enhancement originated as a customer suggestion on the Gainsight Community.
Enhancements
Engagements
Engagements are the communications that are executed through product (in-app) or emails for a specific audience at a specific time. These communications can be interactive in nature which helps you to share information, receive feedback, and engage customers with your product. The overall goal of using engagements is to increase your customer's product usage.
New Recurring Interval Qualification Scope
Gainsight PX has now improved the Interval Qualification Scope by introducing Recurring intervals. The main advantage of this Qualification Scope is that you can set a time gap between two views of an engagement.
Previous Setup: Previously, the Interval Scope allowed you to set an engagement to be displayed multiple times within a specific time period. For example, you could set an Interval Schedule to display the engagement five times every two weeks. With this setup, a qualified user would view the engagement on their subsequent first five sessions in the two week period. The engagement would not be displayed for the sixth session in the same two week period. When the third week starts, the engagement would be displayed again on their subsequent first five sessions in their third and fourth weeks. This process continues until the end of the Schedule.
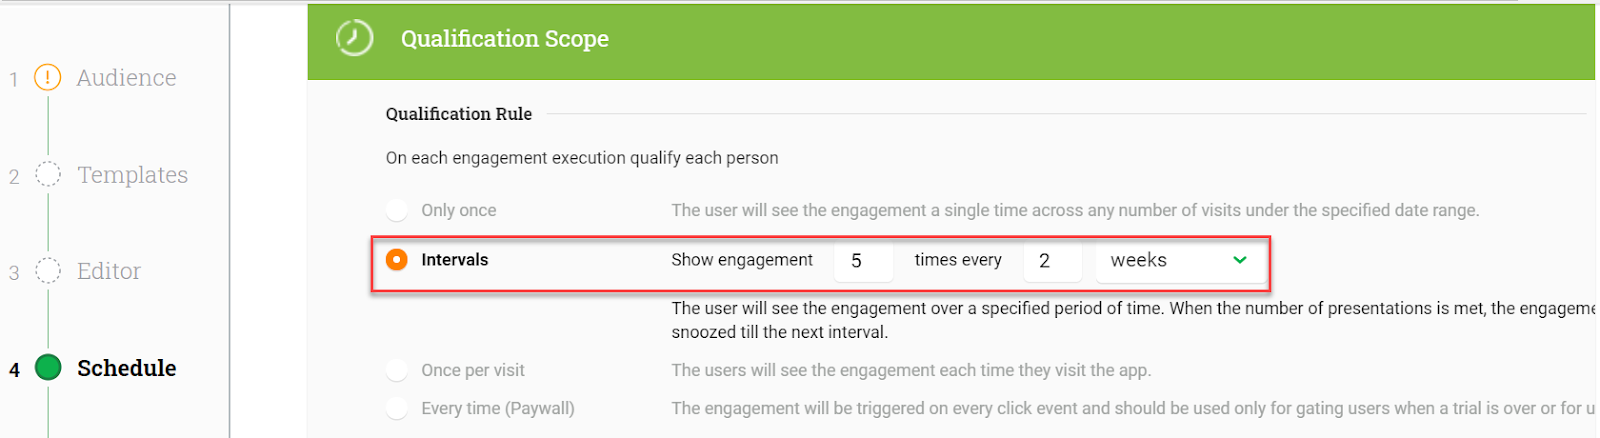
New Option in this Enhancement: With the previous setup, if a user established multiple sessions on the same day, they would end up viewing the engagement multiple times on the same day, which may be excessive. With this enhancement, you can now set a time gap between subsequent views of an engagement (eg., show engagement with at least 5 days between views).
Configuration: The new recurring Interval Scope is not applicable to Email engagements. This enhancement has few configurations for a dialog engagement. You have more options when using this enhancement for a Slider, Guide, or Survey engagements.
Configure Recurring Interval for Slider, Guide, and Surveys
To configure this enhancement for Slider, Guide, or Survey engagement:
- Create a Slider/Guide or a Survey engagement.
- Navigate to the Schedule section.
- Select Intervals under the Qualification Scope section.
Working Method: In the following image the engagement is displayed three times with a gap of three days between each display. PX considers a cycle to be completed if any one of the following events occur:
- If a user does not respond to the survey or complete the Guide or Slider engagement during this time period.
- If a user responds to the survey or completes the Guide/Slider during the time period.
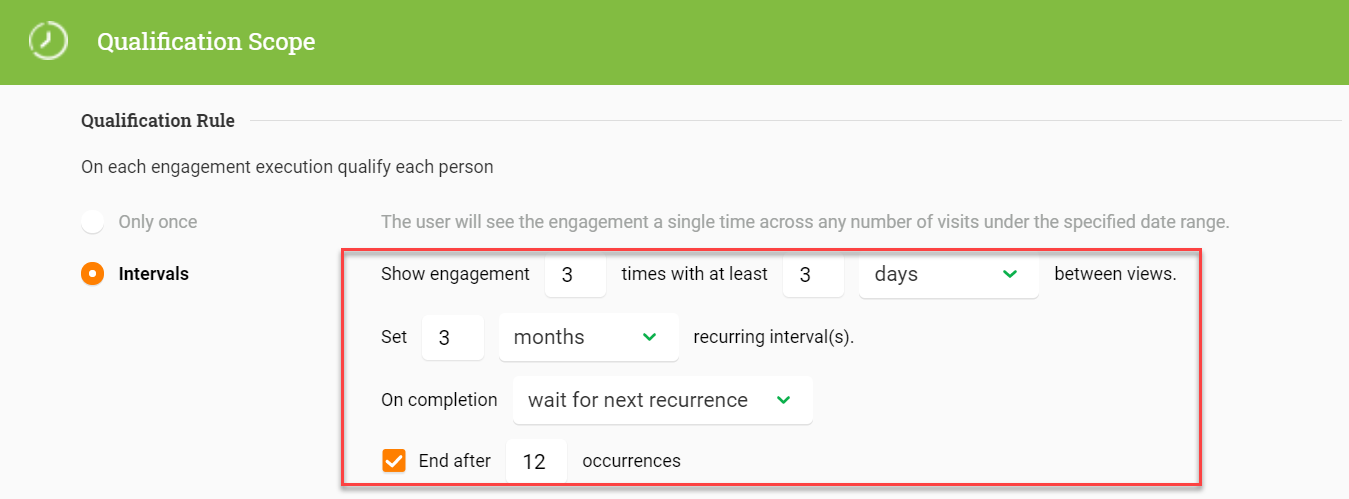
Once the cycle is completed, the engagement looks for the value set in the On completion field. In this case, the On completion field is set to wait for next recurrence. The recurring interval(s) is set to 3 months. So, the engagement is displayed to users again after 3 months and a new cycle begins. Once the cycle is completed, the engagement is displayed again after 3 months.
This engagement continues to display until 20 cycles are completed. This is because the End after field is set to 20 occurrences.
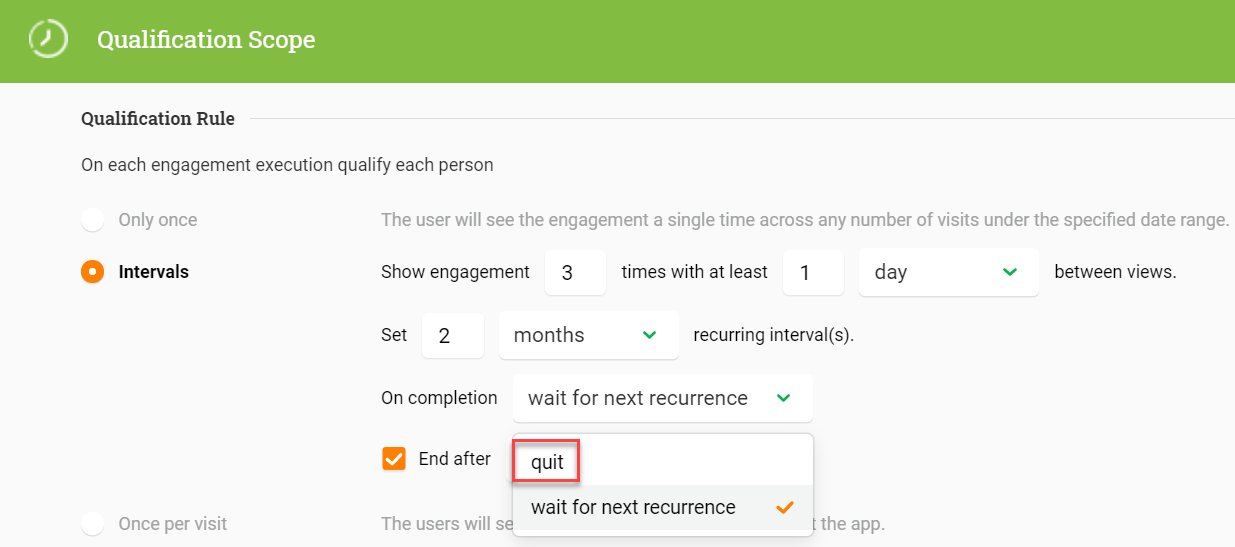
Note: If you set the On Completion field to quit, the engagement is never displayed after the completion of the first cycle.
Note: The recurring Interval schedule is applicable only if you set the number of Occurrences in the End after field to be more than one.
Business Use Cases:
-
Consider that you wish to receive responses for an NPS® Survey every6 months. You can use this feature to show the Survey three times with at least 7 days of gap between each of the three displays. You can set the recurring interval(s) to be six months. You can set the On completion field to wait for next recurrence. This ensures that your Survey is displayed in a cycle of six months. During a cycle, the survey is displayed with a gap of 7 days until the users respond to the survey, or the maximum number of display attempts are completed.
-
Consider that you wish to display a Slider or Guide engagement until a user views it. You can use this feature to set the engagement to display the required number of times with a suitable time gap. Once a User completes the Guide or Survey, the cycle is said to be completed. You can set the On completion field to quit to ensure that the engagement is not displayed again, once a user completes it.
Configure Recurring Interval for Dialog
A Dialog engagement does not have steps like a Guide or a Slider engagement. Therefore, when you view a Dialog, the Dialog analytics show that you have Viewed and also Completed the Dialog engagement.
Due to this behavior, the configuration of this feature is very simple in a Dialog engagement, as shown in the following image.
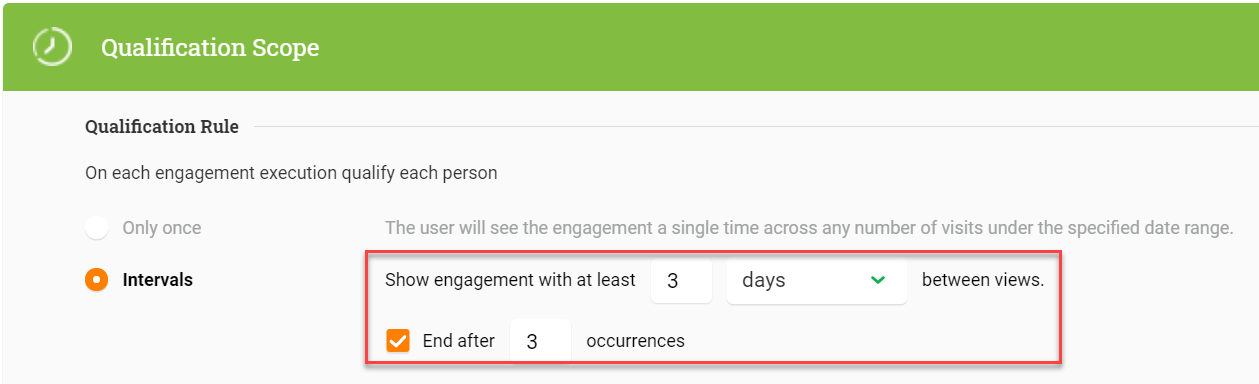
Working Method: The Dialog engagement is displayed with a gap of 3 days between each view. The Dialog engagement is displayed a maximum of three times because End after is set to 3 occurrences (depends on Schedule). If you do not select the End after check box, the Dialog is displayed only once.
Note: The recurring Interval schedule is applicable only if you set the number of Occurrences in the End after to be more than one.
New Mobile Engagements
Gainsight PX now supports engagements in all mobile SDKs. You can use this feature to launch engagements in your mobile application. You can create Survey engagements for your mobile app by using this feature. The Survey Engagements supported for Mobile are NPS®, CES, and Rating survey.
This enhancement allows you to collect feedback from your users about how easy or difficult it is to use your product. Gainsight recommends that you refer to the Anatomy of Engagements article and then proceed with this enhancement.
Note: The Mobile engagements for iOS apps will work only on iOS version 10.3 and above.
Create Mobile Engagements
When you click the Create button, in the Engagement list view, you can now select the channel from the newly introduced drop-down. This drop-down menu has two options; Web App and Mobile. Once you select the Mobile option, you can see the list of survey engagements.
For a detailed description of all the options available in the Mobile engagements, refer to the Create Engagements for Mobile App article.
Analytics
PX Analytics enables you to keep your finger on the pulse of product adoption and user satisfaction. You can monitor the metrics that matter to you with custom dashboards, discover which features drive retention within each customer segment and user cohort, map and track customer adoption goals, analyze trends by customer segment, and more.
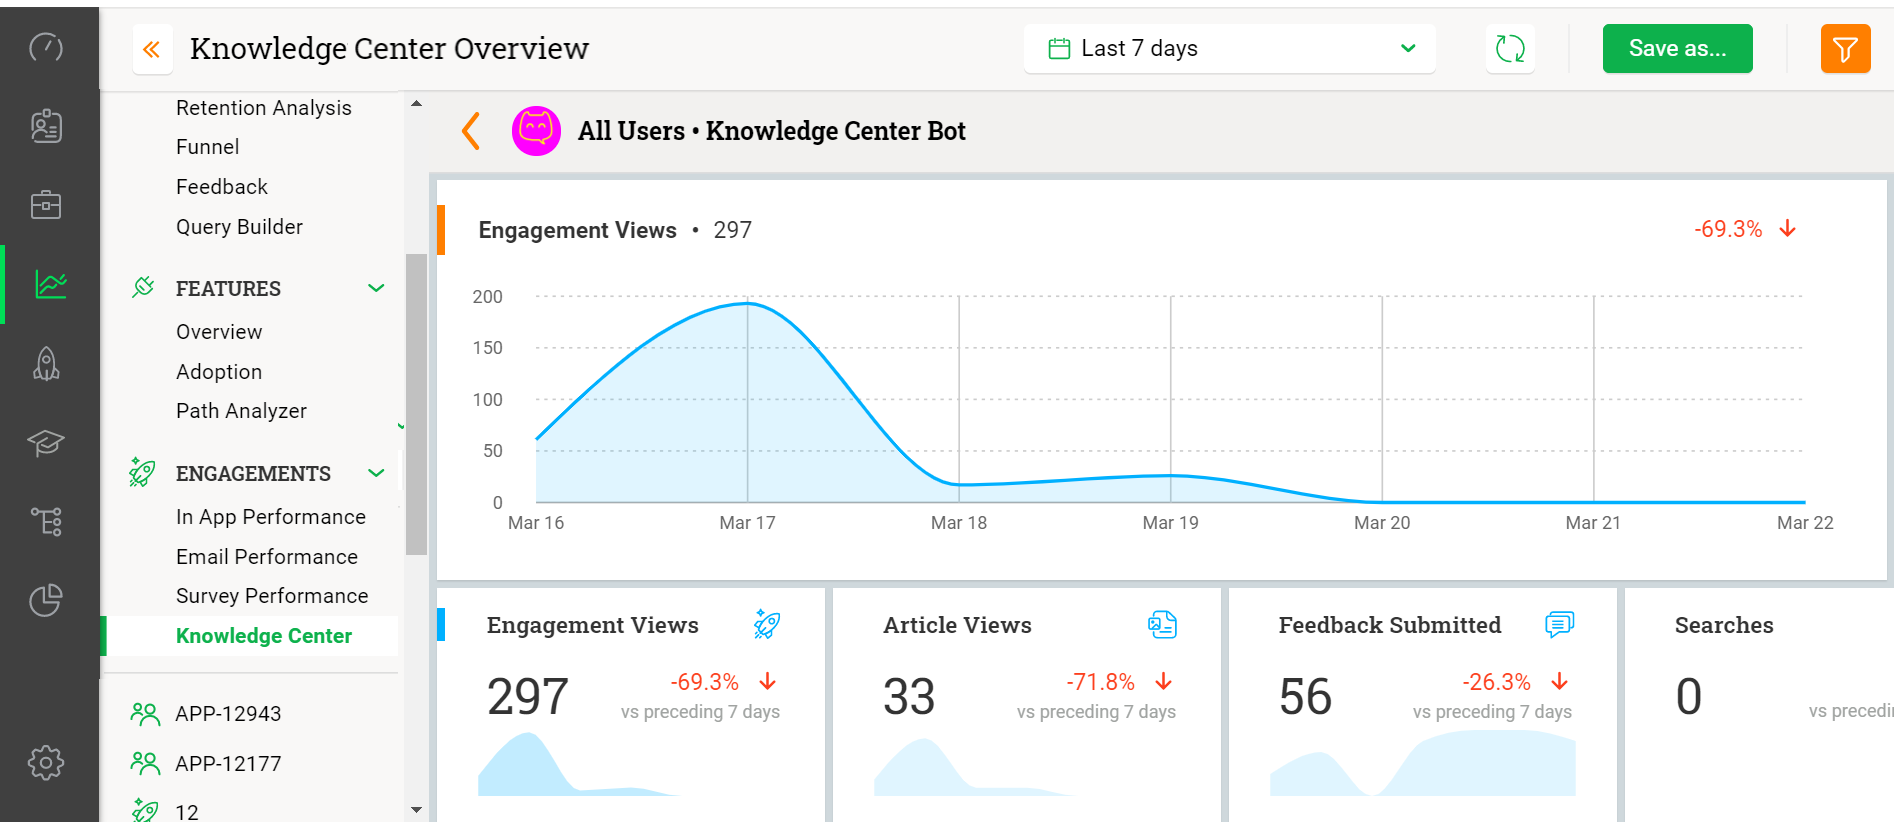
View Knowledge Center Bot Analytics
You can now view the analytics of Knowledge Center Bots. KC Bot Analytics helps you understand how often the Bot is used, or how many user views there are on Bot Engagements/articles, or if the search terms are returning the desired results.
To view KC Bot Analytics:
- Click the Analytics menu from the left pane.
- Click Knowledge Center from the Engagements section. The list view of KC Bots is displayed.
- Click on the Bot name to view the detailed analytics of the selected Bot.
Note: The date filter on top of the page allows you to select the date range of Bot Analytics.
Bot Analytics has four components that are represented by their respective widgets:
- Engagement Views: Displays the analytics of the user views of Engagements configured for the Bot.
- Article Views: Displays the analytics of the user views of the Knowledge Center articles added in the Bot.
- Feedback Submitted: Shows the analytics of the user feedback provided in the Feedback tab of the Bot.
- Searches: Shows the analytics of the searches that users perform from Bot.
The widgets for each component display the time series view of the analytics during the selected time frame. When you click each widget, the details of the component are shown in the table view below the widgets.
Knowledge Center Bot
Knowledge Center Bot is an on-boarding assistant that guides users in learning your product. The Bot contains links to engagements, articles and external URLs in order to effectively onboard new users as well as educate existing users. The KC bot also allows users to send feedback directly to your team.
Create Multiple Knowledge Center Bots
You can now create multiple Knowledge Center Bots and add audience segmentation for each Bot to facilitate a unique Knowledge Center experience for each Audience. The KC Bot Audience can be defined based on User or Account Segment or Global Context. You can create multiple KC Bots within the same product (or clone from an existing Bot) for each Audience.
Few advantages of this enhancement are:
- Audience exposure to the relevant Bot
- Customized onboarding checklist for selected Audience
- Customized Knowledge Center documents for the Audience
- Ability to track feedback and feature requests from a specific Audience
To create a new KC Bot:
- Click the Knowledge Center Bot icon on the left pane. The list view of KC Bots is displayed.
Note: To clone an existing Bot, click the Clone icon for the corresponding Bot. - Click the Create button in the Knowledge Center page.
- In the pop-up window, provide the name and description of the Bot and select the product for which you need to launch the Bot. Click Create.
- Configure the Audience for the Bot by setting the following rules:
- Users: Select the users by using different filters (email, role, status and so on).
- Accounts: Select the required account from your list of accounts using the filters ( paid, version and so on)
- Global Context: Select the Global Context based on the data you need to collect. You need to set Global Contexts prior to creating Bots. Example for Global Context: User Interface Version, Product Version
For more information on Global context, read Use Global Context article.
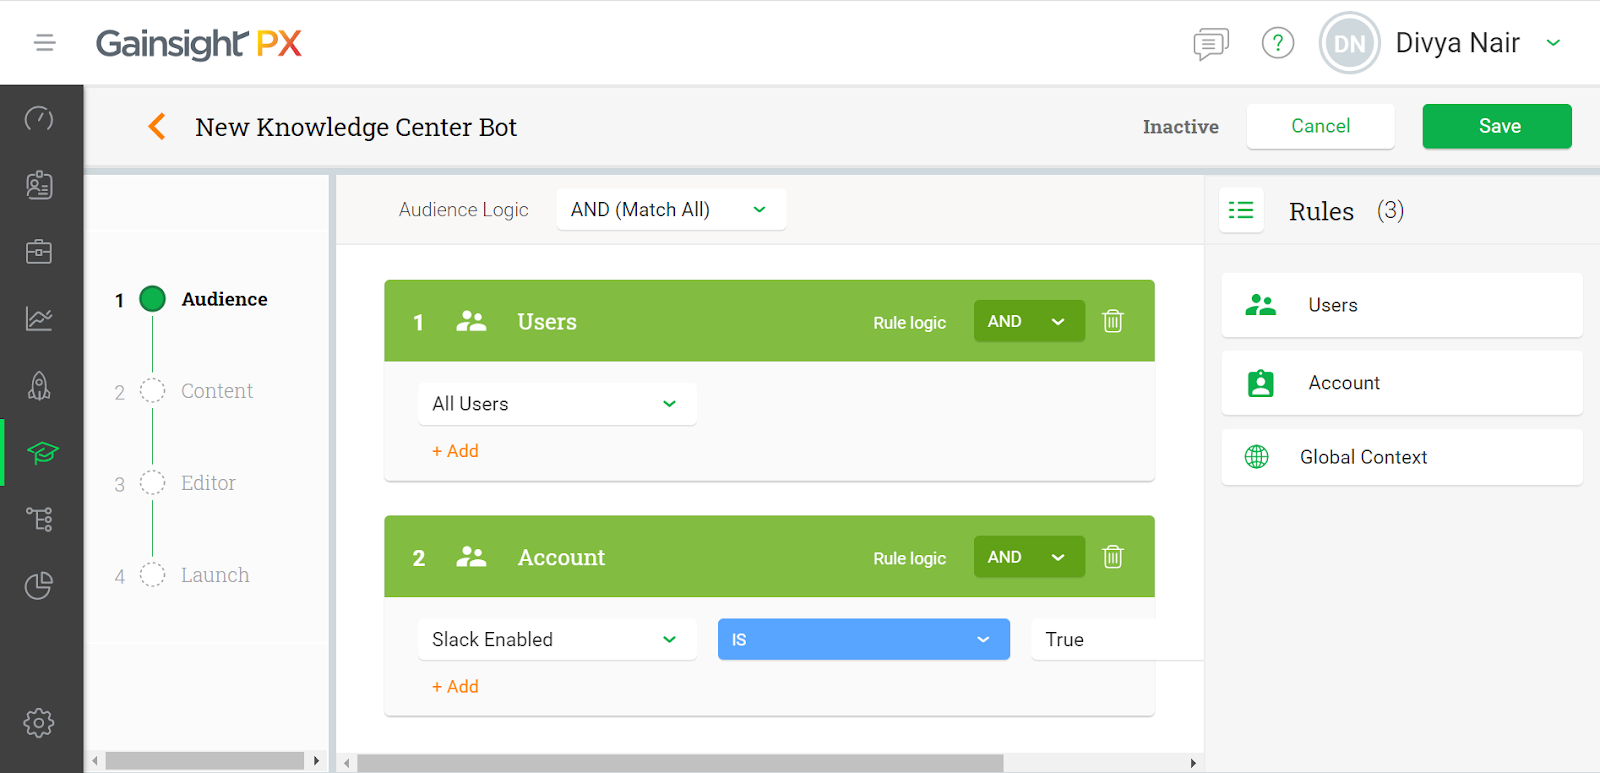
The overall Audience logic can be AND or OR. You can also select the rule logic between each filter criteria of Users, Accounts, and Global Context.
Create the Bot by configuring the Content, Editor, and Launch steps. For more information about these steps, read the Knowledge Center Bot article.
IMPORTANT
If an audience is qualified to view multiple KC Bots, then only the Bot with the highest priority (P1) is visible. If you wish to change the priority of the Bots, you can click the Priority field of the Bot, rearrange the order of Bots in the list, and click Apply. The Bot on top of the list has the highest priority (P1) within the chosen product.
Business Use Cases:
-
You have onboarded a new customer to one of your products. You want the end users to view only the configuration guides and the onboarding checklist to begin with, instead of overwhelming them with all of your product documentation. You can create a new KC Bot and add all the configuration guides sequentially to facilitate product adoption.
-
You have a set of admin guides that you want only the admin users to access. With this enhancement, you can define the Audience as admin users, and then create a Bot with only admin guides.
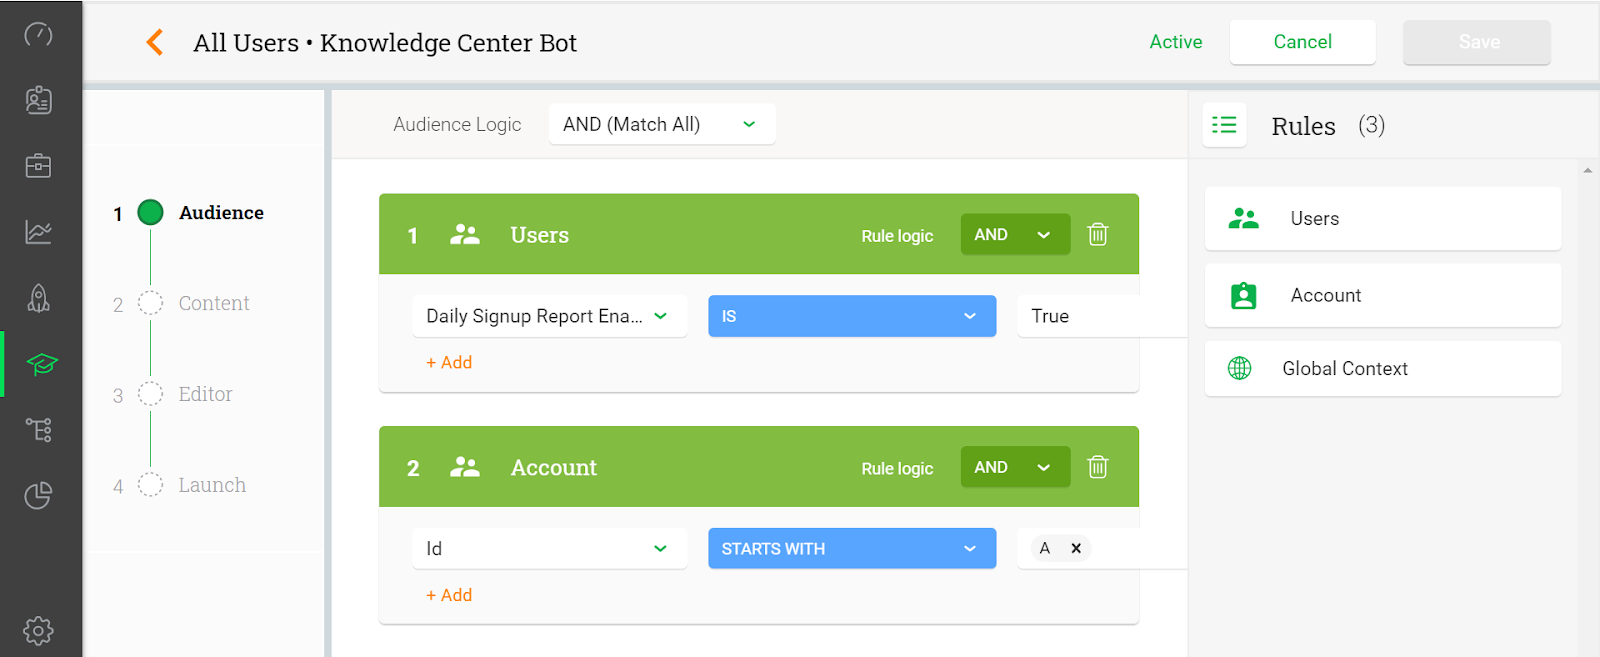
Define Target Users of Bots Using the New Audience Section
You can choose the target users of the Bots for the existing KC Bots or new Bots. Previously, all the users within a product could view the KC Bots. Now, a new Audience section allows you to select the required user group by configuring the following rules:
- Users
- Account
- Global Context
Integrations
PX offers a variety of integration options, for the purposes of enhancing productivity (Slack or Zendesk), as well as for data integration (S3, Segment, Gainsight CS, etc.), and to connect your documentation sources with the PX knowledge center bot (Mindtouch, Zendesk, HelpDocs, Salesforce).
New JS Event Listener
Gainsight PX has introduced a new Javascript-based listener. You can configure this Listener to send analytics data to any third-party applications. Currently, PX has a few integrations and a public API that allow you to send data to third-party applications.
With this enhancement, you now have a Javascript-based API that can be used to send data to any third-party applications or to your internal server.
The Javascript API name is addListener and has the following syntax.
aptrinsic('addListener', [eventType], [callback])
The eventType describes an event and the callback refers to a Function that must be performed when the event occurs. Since this API is designed to send engagement data to third party applications, the event generally refers to an instance of the engagement Analytics data being recorded. The callback function describes how this event data (latest Engagement Analytics data) must be sent to the required third party application. Currently, the Multi Question survey is not supported.
Engagement analytics data that are currently supported as Events are as follows:
-
engagementView: This event occurs when a user views an engagement.
-
engagementCompleted: This event occurs when a user completes an engagement.
-
engagementViewedStep: This event occurs when a user views a step in an engagement.
-
surveyResponded: This event occurs when a user responds to a survey.
When any of the following events occur, the callback function is executed. The syntax for the callback function is as follows:
function(eventData)
{
  console.log(JSON.stringify(eventData));
}
The Callback function gets an object as a parameter. This object has a few common fields for each event type and these fields are listed below.
Common Fields
| Name | Type | Description |
|---|---|---|
| engagementId | string | |
| engagementName | string | |
| executionId | string | |
| executionDate | long | |
| engagementType | string | Can be one of: Dialog Slider Guide NPS® CES Rating Boolean |
| activation | string | can be one of: Auto Bot Badge Journey Orchestration |
| interaction | string | can be one of: Viewed Completed Responded (for survey) Viewed Step |
| identifyId | string | user identifier |
The engagementViewedStep event has a separate field as shown below:
| Name | Type | Description |
|---|---|---|
| stepNumber | integer | step sequence number |
The surveyResponded event has two separate fields as shown below:
| Name | Type | Description |
|---|---|---|
| score | integer | score the user inserted depends on the type of the survey |
| scoreType | string | for NPS® have naming based on the score: Promoter 9-10 Passive 7-8 Detractor 0-6 |
| comment | string | if the user left a comment it is added to the event |
New FullStory Integration
Gainsight PX is now integrated with Fullstory. Fullstory is a digital experience session replay tool that records (in video format) all the details of a user session. You can view a video of your user’s actual behavior in your product, including the pages that your customers viewed during a session.
With Fullstory integrated with Gainsight PX, you can now view video recordings of each user’s session including the PX engagements launched to them in the Audience Explorer section. After signing up for FullStory and adding it to your product, you can enable the integration.
Business Use Case: If a user has provided a bad NPS® score, you can now view the replay of the user and the possible issues they faced that led them to rate you poorly in the survey.
To use this enhancement:
- Navigate to Settings > Integrations.
- Click the settings icon for the FullStory widget.
- Turn the toggle switch on.
- Click on checkboxes next to the product names for all the products you wish to enable.
- Click Apply.
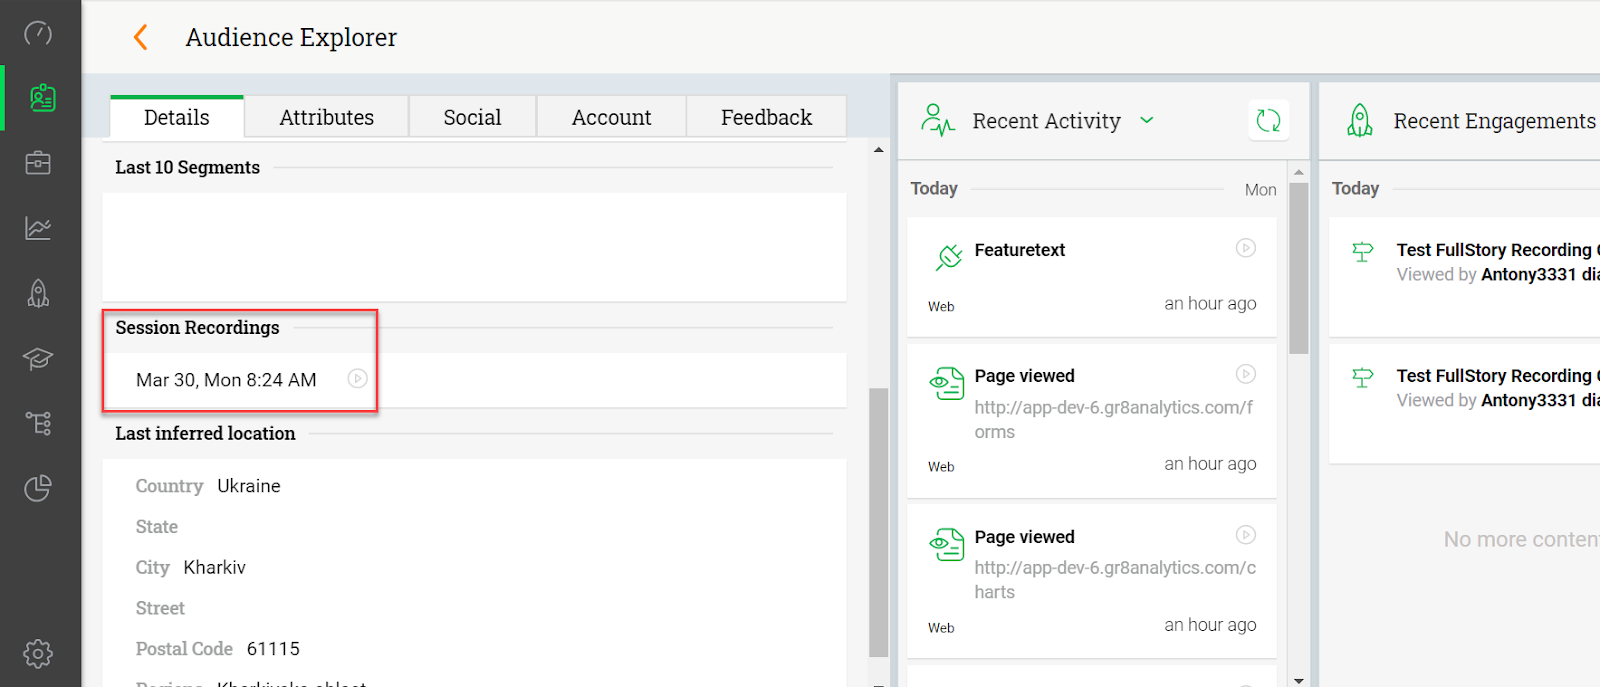
When you navigate to the Audience Explorer section, you can view the video recording of the pages the user viewed during a session.
To view the video recordings of the session:
- Navigate to Audience Explorer.
- Select the required user and click Full Profile.
The Recent Activity section displays recently viewed sessions and the Recent Engagements section displays the user activities performed during an engagement.
-
Click the Play session recording icon to play the video recording of the session.
Similarly, to view the actions performed after viewing an engagement, click the Play session recording icon for an engagement.

A new Session Recordings section is included in the Details tab of the Full Profile view. This section displays the recent recordings of the User.
| Net Promoter®, NPS®, NPS Prism®, and the NPS-related emoticons are registered trademarks of Bain & Company, Inc., NICE Systems, Inc., and Fred Reichheld. Net Promoter ScoreSM and Net Promoter SystemSM are service marks of Bain & Company, Inc., NICE Systems, Inc., and Fred Reichheld. |