PX Release Notes June 2020
Version 2.43.0, June 09, 2020
List of Features
| Features | Destination |
|---|---|
| Engagements | https://app.aptrinsic.com/engagement |
| Knowledge Center | https://app.gainsightpx.com/knowledge-center |
| Integrations | https://app.gainsightpx.com/settings/integrations |
Enhancements
Engagements
Engagements are the communications that are executed through the product (in-app) or emails for a specific audience at a specific time. These communications can be interactive in nature which helps you to share information, receive feedback, and engage customers with your product. The overall goal of using engagements is to increase your customer's product usage.
User preferences for Tracking and Engagement
Gainsight PX sends user engagements, tracks and analyzes user activities, and stores user data. With this release, the Gainsight PX public API supports an opt-in/out option for users who do not want to be tracked (GDPR) and can also be used to manage user in-app experience preferences.
For more information on the full list of preferences and their API endpoints, refer to the User Preferences for Tracking and Engagement article.
Engagement Labels and Groups
Gainsight PX now offers the ability to organize your engagements using dynamic labels and group them into different categories. This allows you to scale your product plays by organizing your engagements based on the product area, product teams, releases, customer adoption stage, etc.
Create and Customize Groups
Before you can create labels, you need to create groups to nest the labels.
To create a group:
- Navigate to Engagements.
- From the left pane click the LABELS tab, and then click the New Group icon.
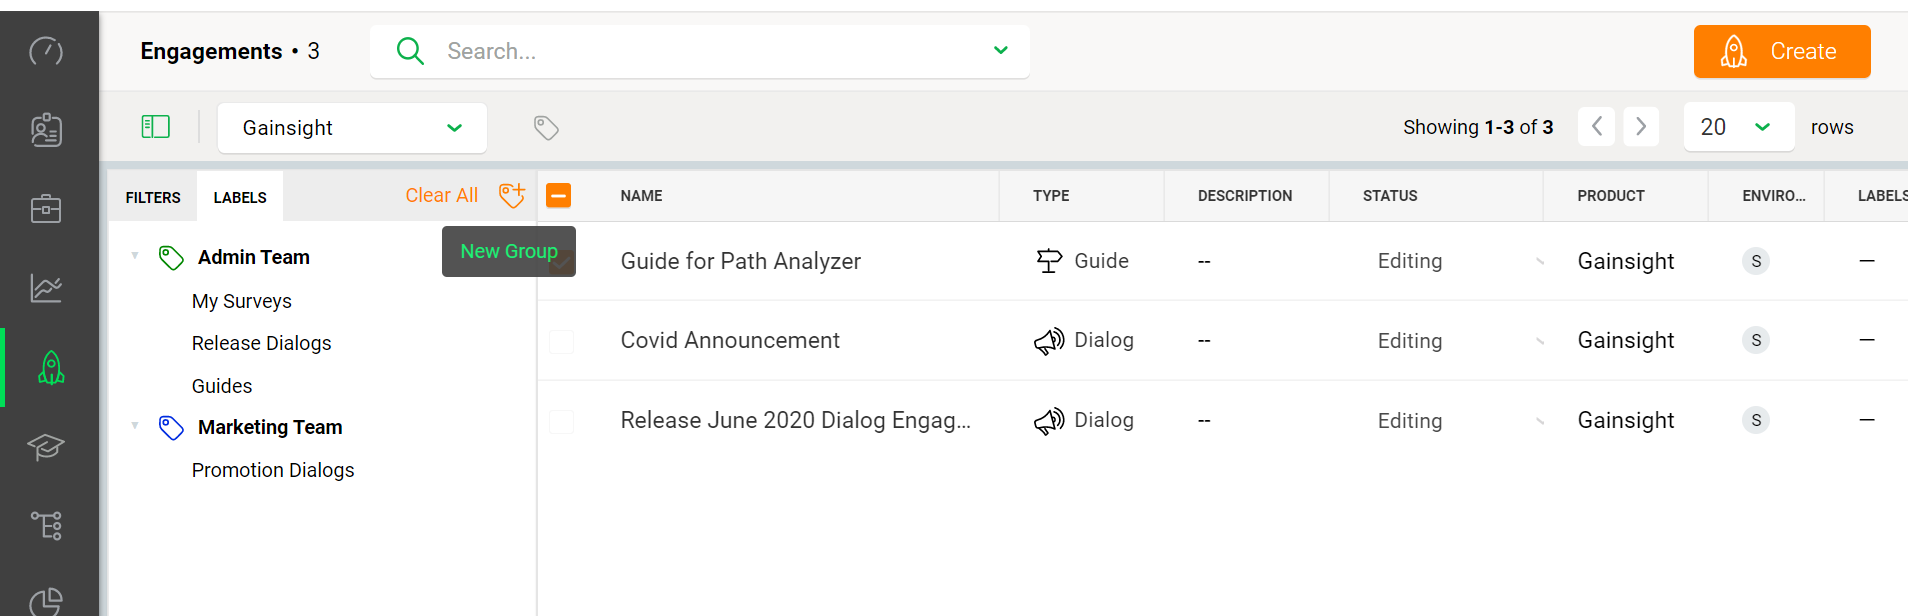
- Provide a name to the group and press Enter. A new group is now created.
- You can now customize the group by using the options from the menu.
- New Labels: Create a new label under the selected group.
- Color: Customize the color of the label
- Rename: Change the name of the group
- Delete: Delete the Group. Note: You cannot delete a Group that contains Labels
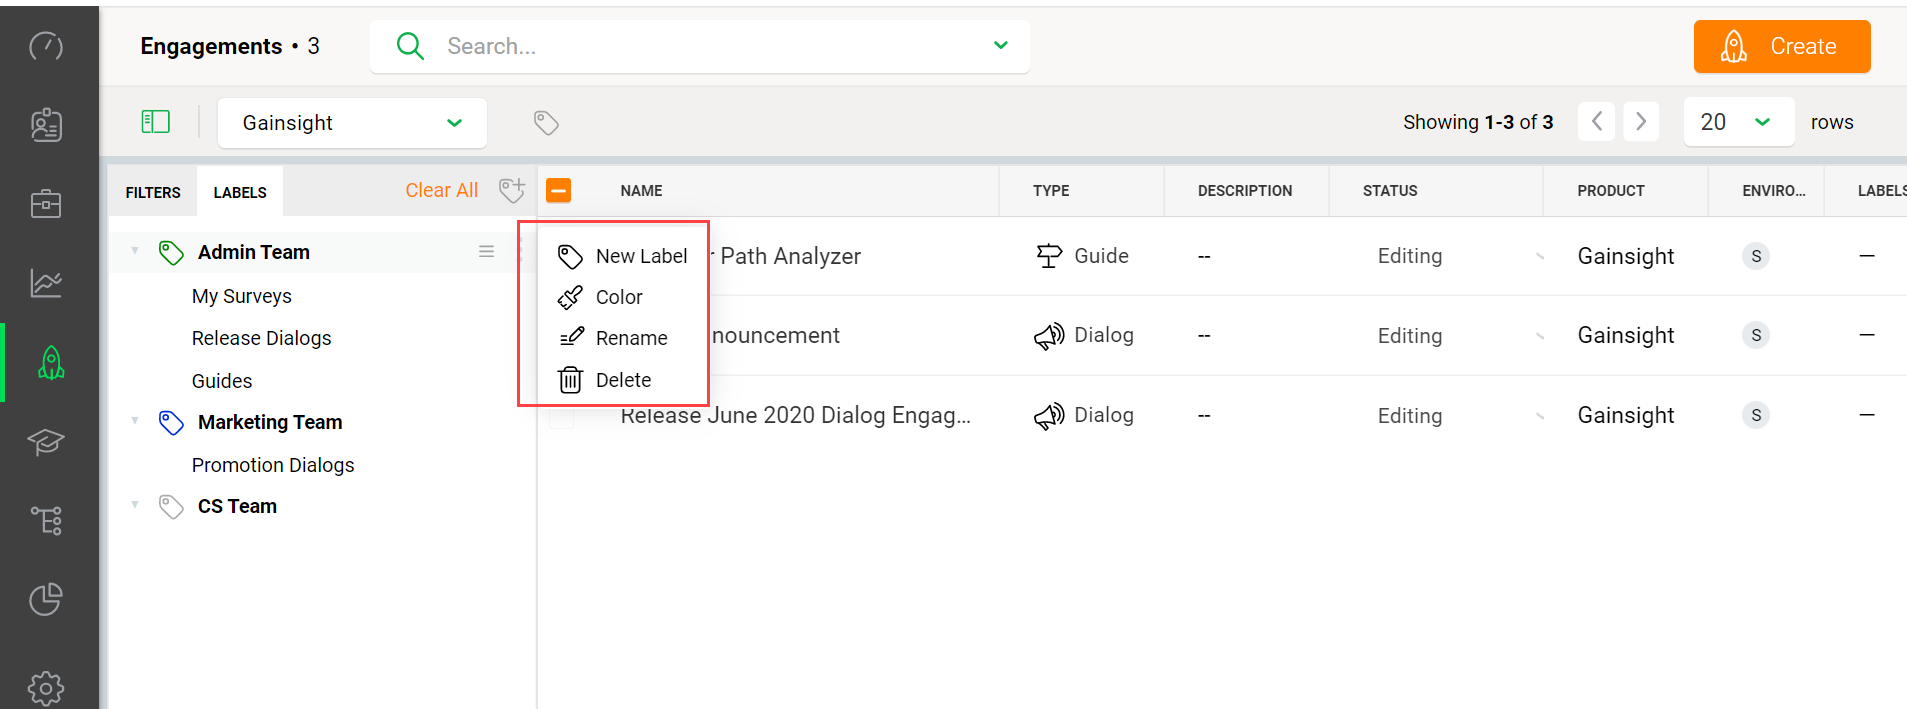
Note: Sort the groups by dragging the Hamburger menu button.
Create Labels
Now you need to create labels within the groups.
To create a label:
- Select a group that you created already and click the menu button.
- Click the New Labels option.
- Provide a name for the label and press Enter. A new label is now created.
Organize Engagements using Labels
You can now organize your engagements using the groups and labels that you created.
To add engagement to a group/category:
- Select the engagement(s). Click the Add Labels button.
- Enter the name of the label and select or create the label.
Notes:
- If the label is already created, then you can select the existing label. If you are entering a new label name, then PX allows you to create a new one instantly.
- You can also select multiple labels for an engagement.
- If you do not select any group while creating a label, a Default category will be automatically created to nest the new label.
- Click the new label to view the engagements associated with the label.
IMPORTANT: Labels are specific to each product.
Watch this video for a quick look at labels and groups:
XLIFF v1.2 Support in Engagement Localization
Gainsight PX now supports XLIFF - version 1.2 for Engagement Localization. The Localization feature in Gainsight PX allows you to set a default language and translate the Engagement content into multiple languages, from the default language. To translate content, you need to draft the content and then export it as an XLIFF file. You can perform the translation in the XLIFF file and then upload the translated XLIFF file back to the Engagement.
With this enhancement, you can now export Engagement content as an XLIFF file - version 1.2 when you translate the content of your Engagement into other languages.
To use this enhancement:
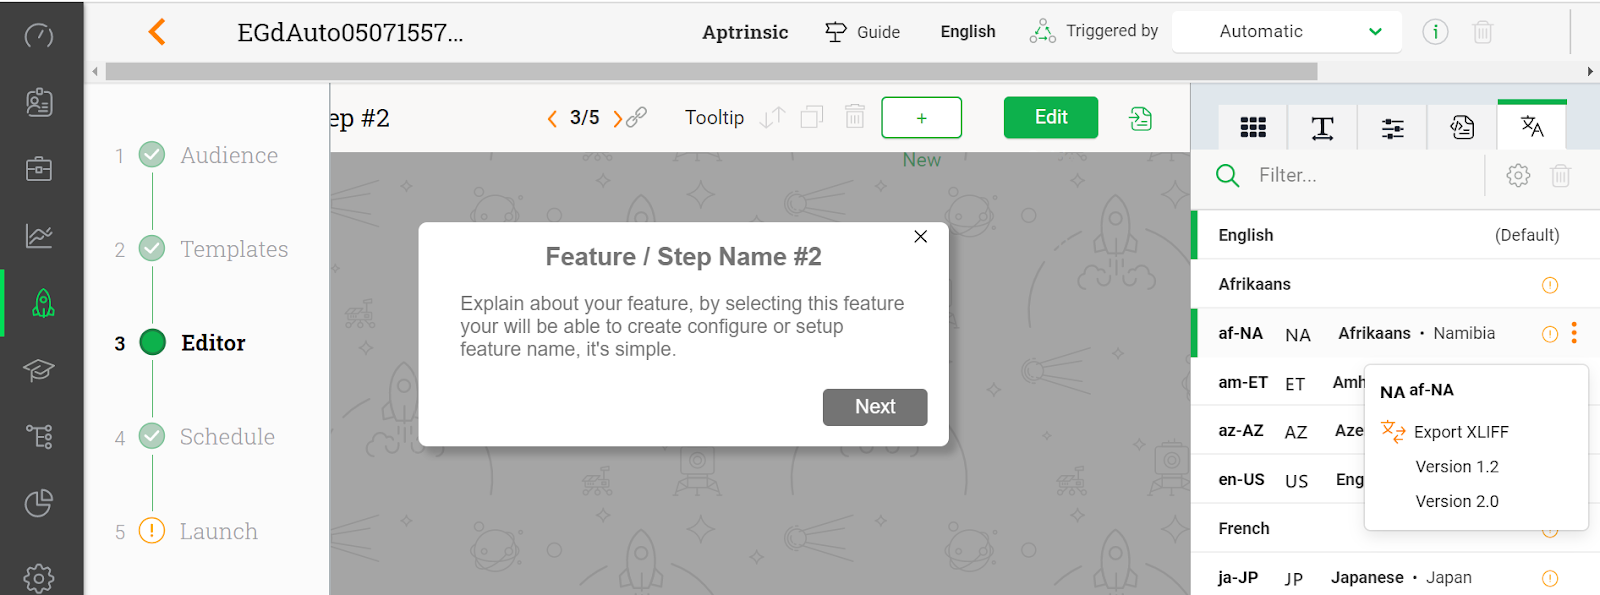
- Navigate to Engagements > Editor.
- Click the Languages tab.
- Select the language of the content available on your Engagement and click the Options button.
- Select the Version 1.2 option from the dropdown menu to export the content as an XLIFF file (version 1.2).
For more information, refer to the Translate Content section in the Engagement Localization article.
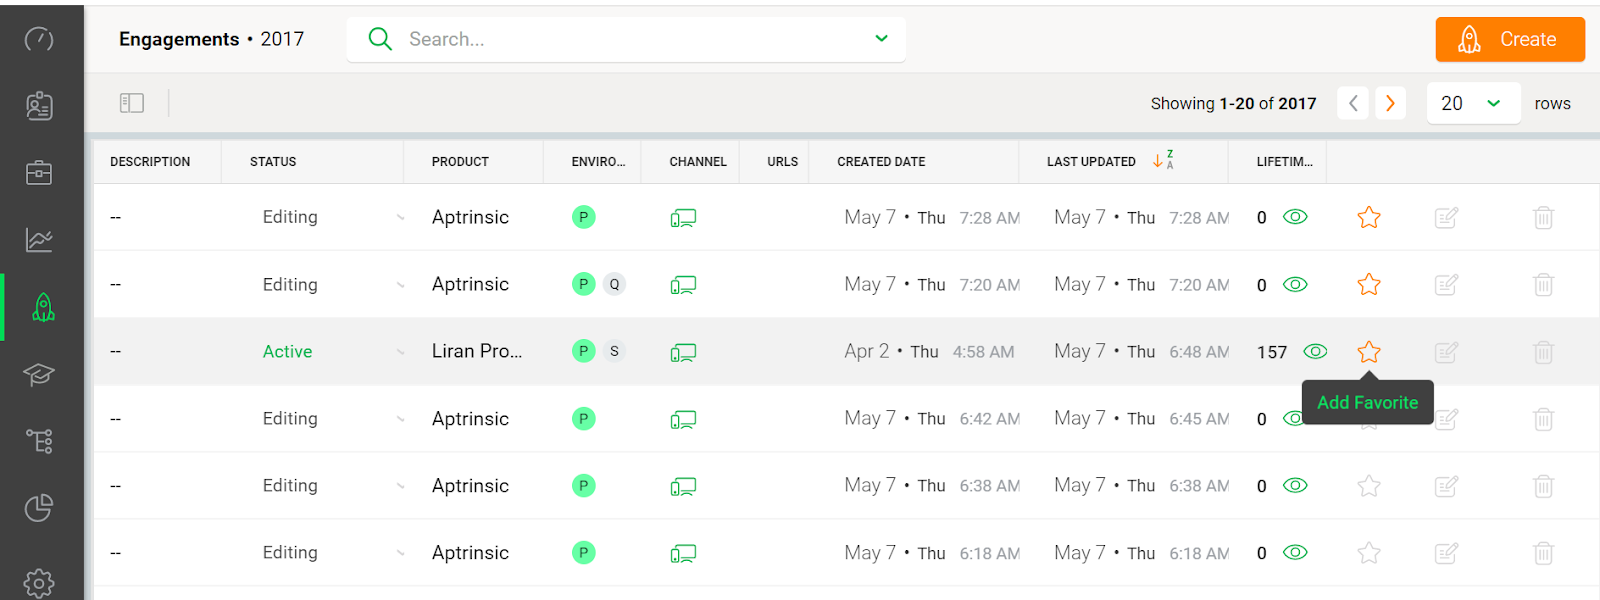
Engagement Quick Filters
Gainsight PX has improved the usability and searchability of engagements by introducing a set of filter(s) to limit the list of engagements shown.
Gainsight PX has introduced a new Filters tab for Engagements, that expands into a left pane with various filter options. In addition to the filters that were available earlier, there is also a new My Engagements filter option that allows you to filter by your favorite engagements or by the engagements you created or modified. You can also view the count of Engagements in each filter category.
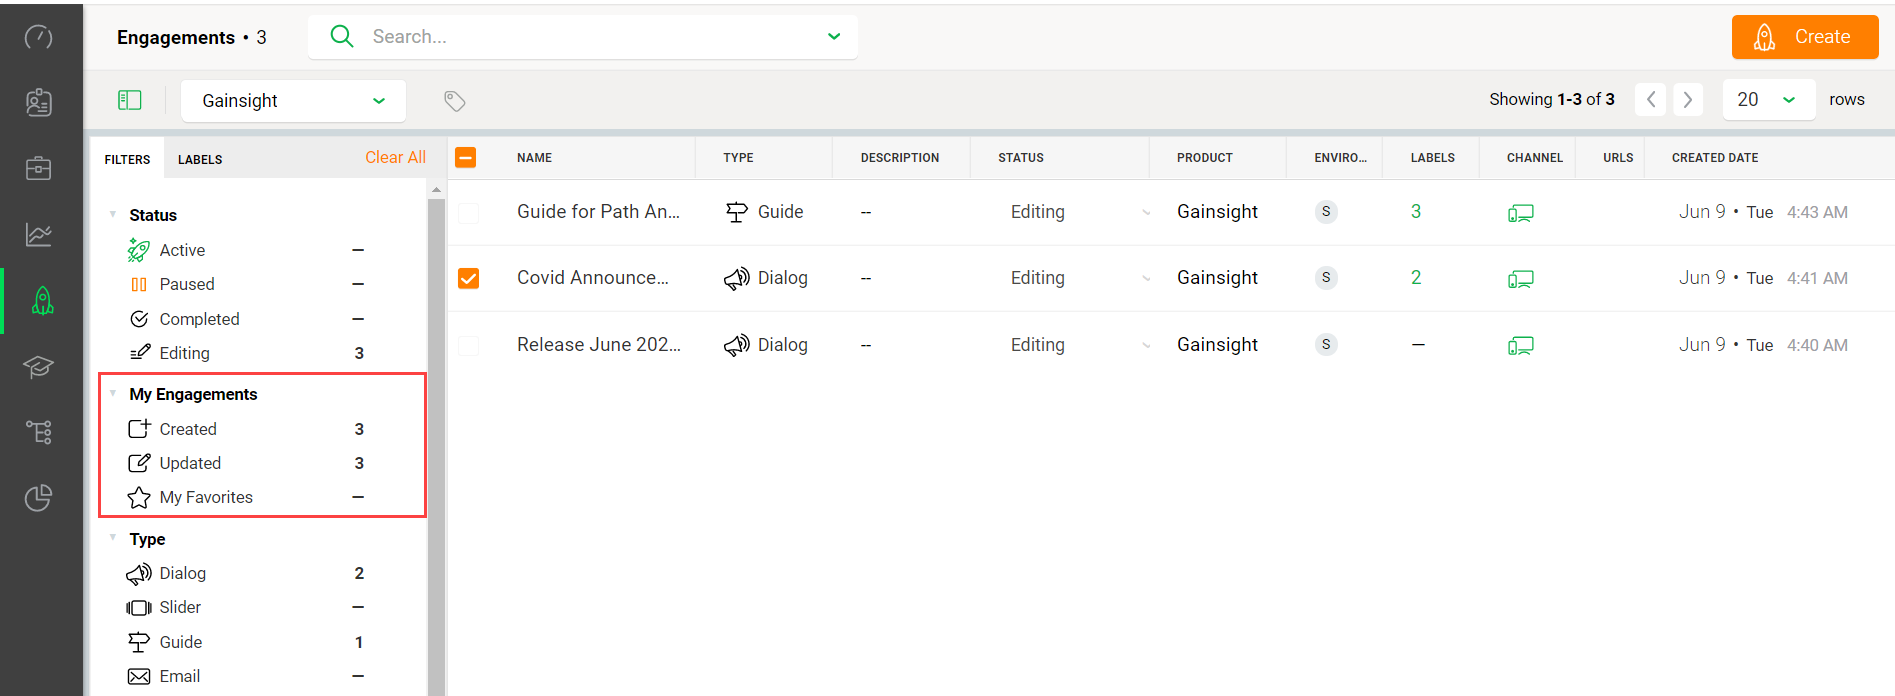
Note: To add an Engagement to My Favorites list, click the Add Favorite button in the Engagement list view
Knowledge Center Bot
Knowledge Center Bot is an onboarding assistant that guides users in learning your product. The Bot contains links to engagements, articles, and external URLs in order to effectively onboard new users as well as educate existing users. The KC bot also allows users to send feedback directly to your team.
Embedded KC Bot [Beta]
Gainsight PX introduces the ability to embed the KC bot on any UI element in your application. Prior to this release, the KC Bot appeared in the bottom right corner of your application with limited position modification options. Now you can better customize the KC Bot to integrate with your brand, including programmatically launch the Bot on the required UI element and then access and control the Bot via APIs.
Note: This is a Beta feature. Contact your Client Outcome Manager to try out the feature.
Integrations
Salesforce Integrations
The Gainsight PX Salesforce Integration allows for copying data from Salesforce to Gainsight PX on the Account and User records. If a matching SFDC record is found for a given Gainsight PX record, then the chosen fields on the field mapping screen are copied from the Salesforce object to the matched Gainsight PX record.
Add SFDC Custom Objects Support to the PX - SFDC Native Integration
You can now select a custom object as the Salesforce object for sync operations. If you do not use the standard SFDC Account Contact objects, and instead have your Accounts and Contacts defined in an SFDC Custom Object, this integration also allows you to specify any SFDC Custom Object as the SFDC Source object. If you select a custom object, that object type is used for all sync operations (pull and push).
The dropdown on the right-hand side of the mapping screen allows you to select a target for your sync operation for either accounts or users.
To use this enhancement:
- Navigate to Settings > Integrations. If Salesforce is enabled for your account, you will see the Salesforce Integration on the right-hand side.
- Select the → data pulled option.
- From the drop-down menu for Salesforce objects, select a custom object.
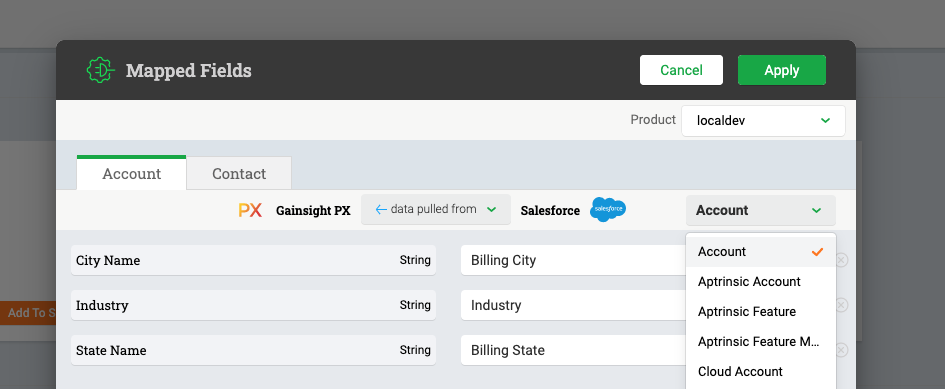.png?revision=1)
- Click the Map Fields icon on the Salesforce card.
- Select the fields that you want to map.
- Click Apply.
Read the following articles to learn more about this enhancement: