Dialog Engagement
This article explains how to create a dialog engagement.
Overview
A Dialog engagement is an in-app message that consists of a single pop-up window as a lightbox in the middle of an application page. The engagement can also be set as a Dialog-Bar that appears at the top or the bottom of the screen. Launching a Dialog engagement helps to share important information and engage customers thereby increasing customer adoption and advocacy for your product.
Example Business Use Cases
- Notify Admin or Power users about the application maintenance activities or other announcements.
- Show a custom message to users whose account renewal date is less than 30 days away.
- Share information about upcoming webinars.
- Announce a new feature or enhancement on a given page.
Create a Dialog Engagement using Guide's New Editor
To create a dialog engagement in Editor V2, use the Guide engagements feature. Dialog engagements are essentially one-step guides, so you can create them by adding a single step within a Guide engagement.
To create a Dialog engagement in Editor V2:
- From the left menu, navigate to Engagements.
- Click Create. The Create Engagement window displays.
- Click the Guide icon.
- Enter the name for the guide engagement.
- Select your product (applicable only if you are using multiple products).
- (Optional) Enter a description.
- Click Create. A new guide engagement is created.
- From the Audience section, select your target audience. You can add Rules to match your requirements.
- Select a template that is suitable for creating a dialog engagement from the default or available saved templates.
- Note: Remove the footer section with the navigation buttons in the step. For more information on how to configure the Footer, refer to the Configure Footer Configuration section.
- Schedule and launch the dialog engagement. For more information on scheduling and launching the dialog, refer to the Schedule section and the Launch section respectively.
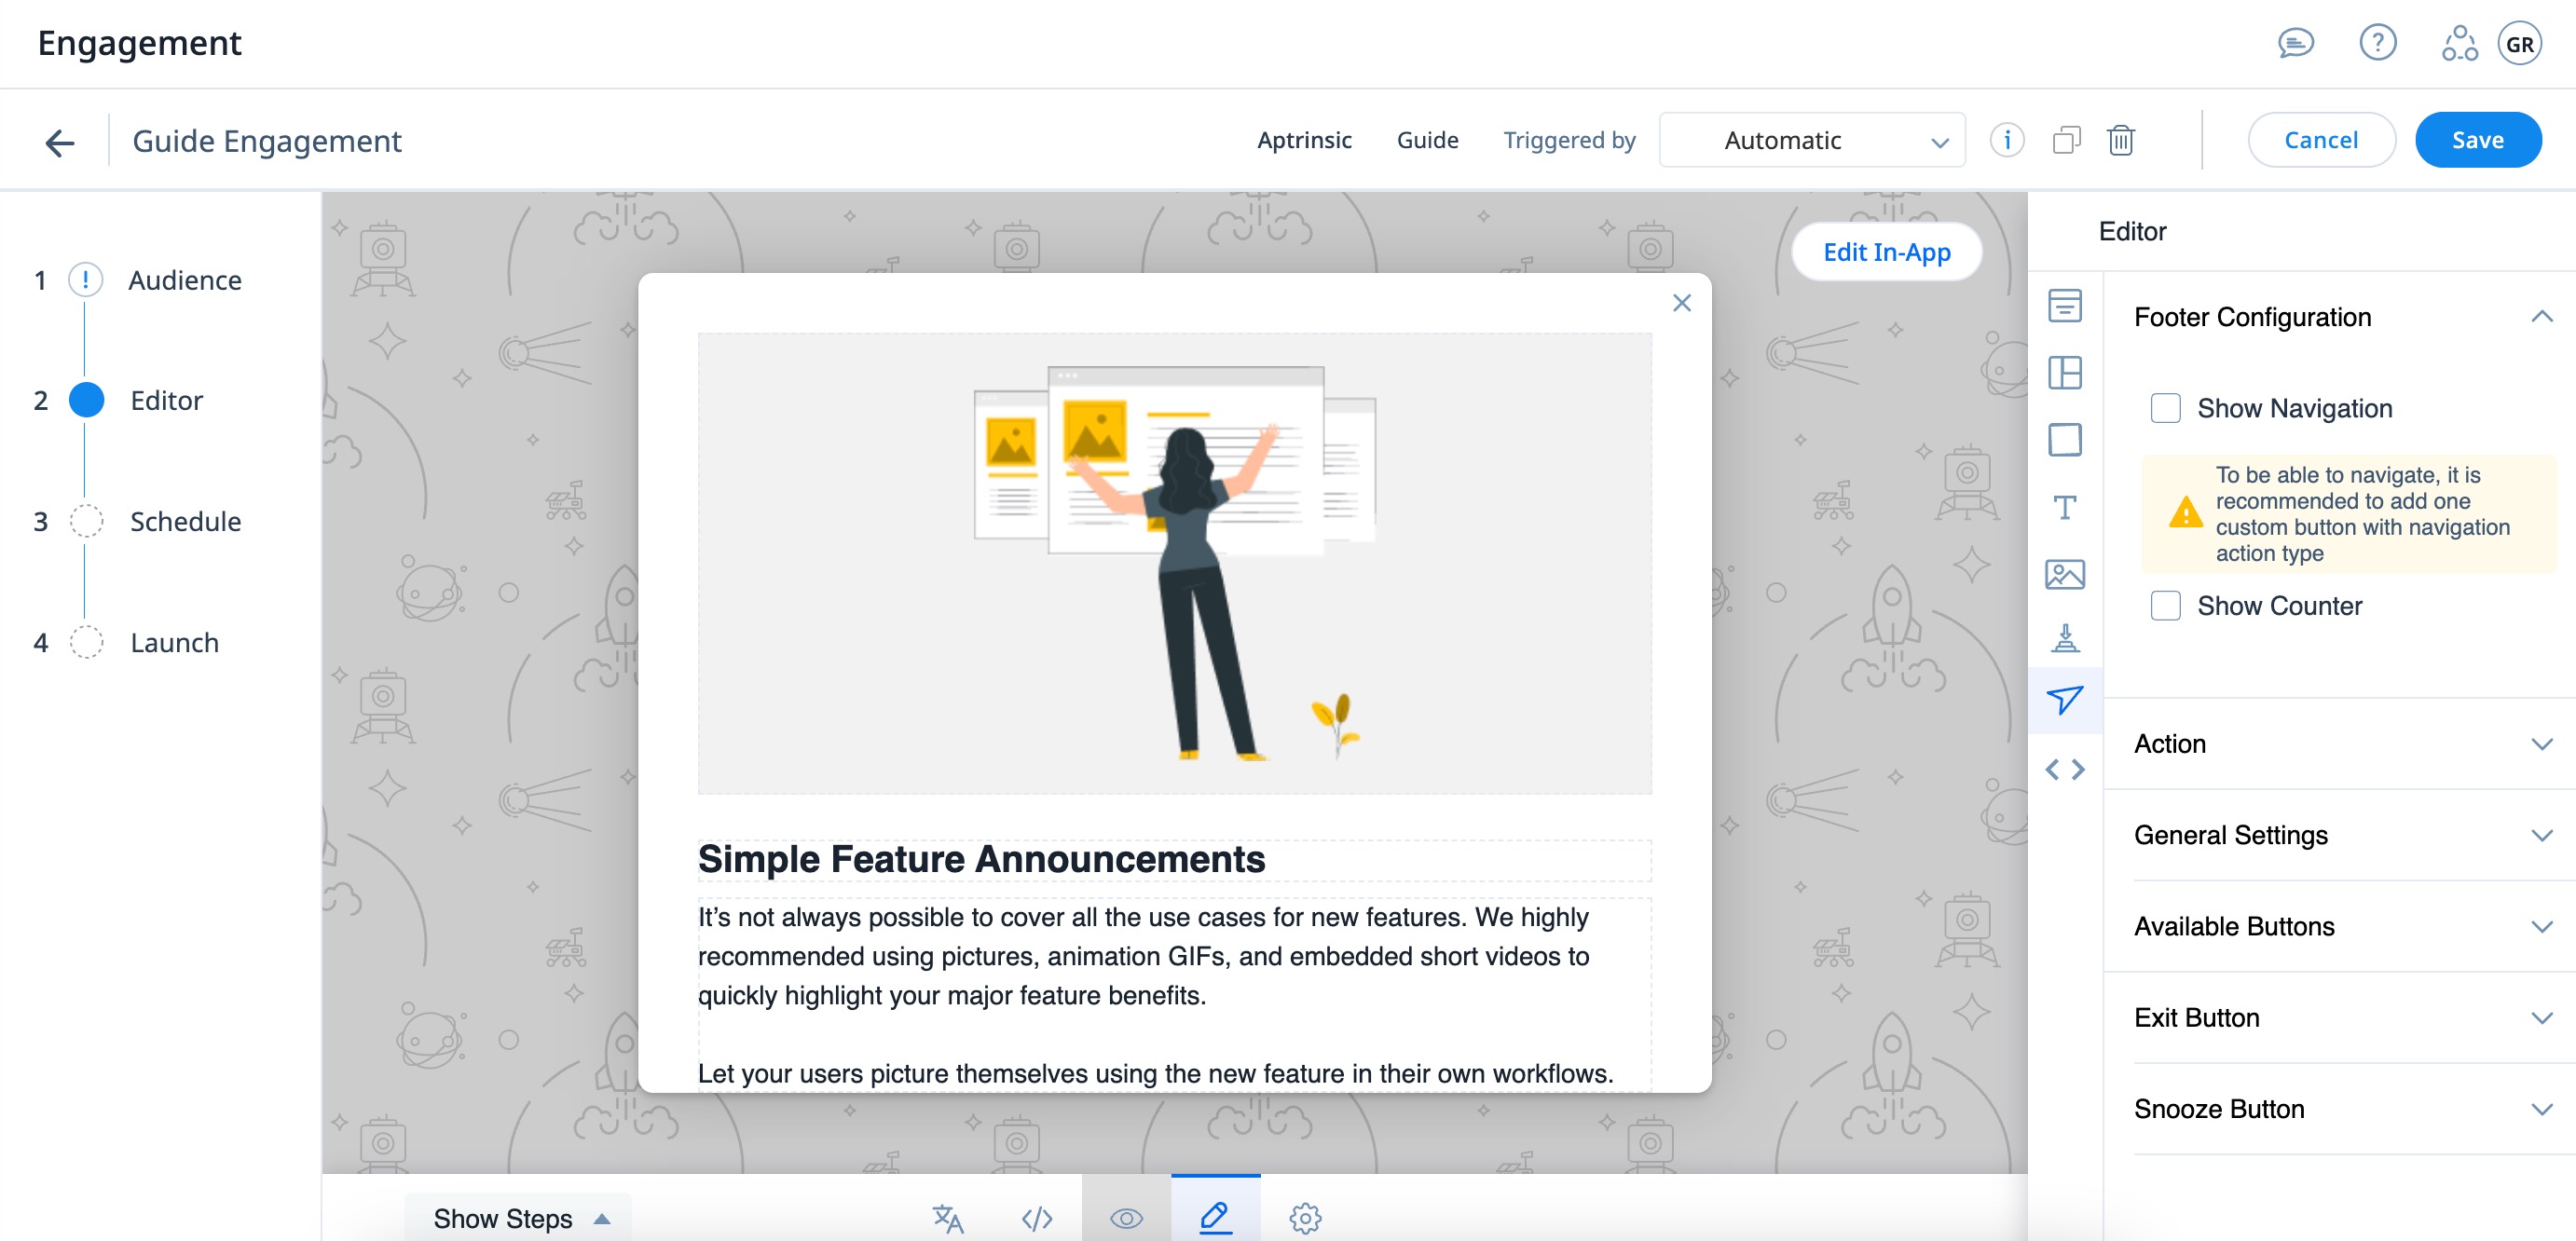
Configure Footer Configuration
Remove the footer part of the step, as dialog is a one-step guide and the users do not require any additional navigation or steps to navigate.
To remove footer configuration:
- In the floating editor, click the Navigation icon.
- Clear the Show Navigation and Step Count checkboxes.
Create Dialog Engagement
This section explains the procedure to create a dialog engagement.
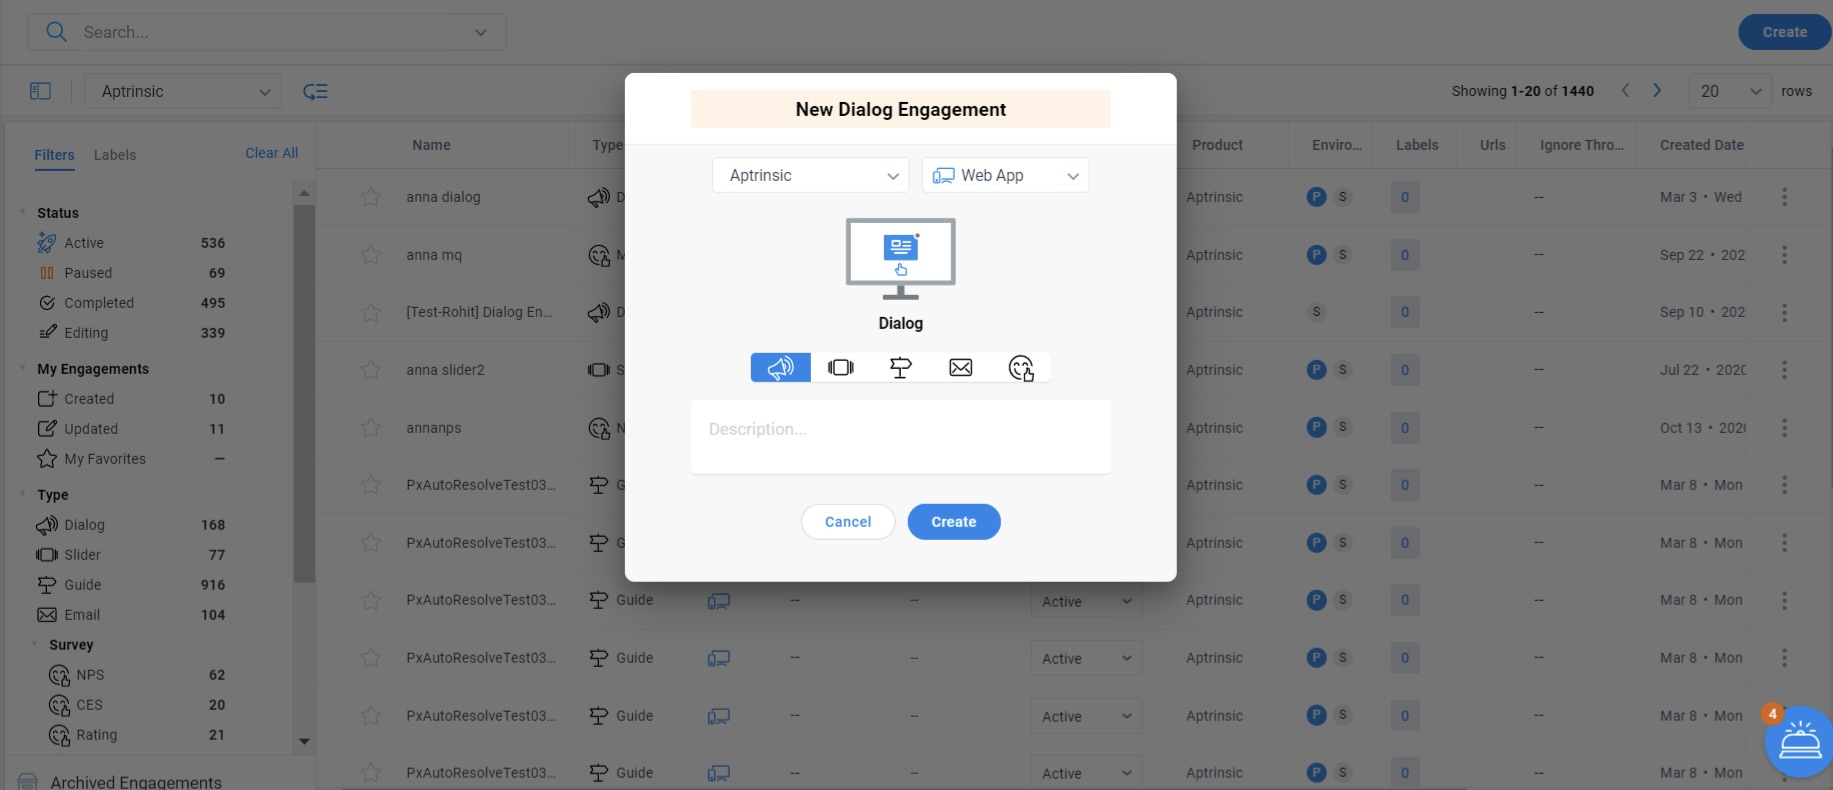
To create a Dialog engagement:
- Navigate to Engagements.
- Click Create. New Dialog Engagement window displays.
- Click the Dialog icon.
- Enter the name for the dialog engagement.
- Select your product (Applicable only if you are using multiple products).
- (Optional) Enter a description.
- Click Create. A new dialog engagement is created.
You can configure and launch your dialog engagement in the following phases:
Audience
The Audience section allows you to select your target audience, or who can view the engagement. You can create Rules to match your requirements.
For example, the below rule ensures that the engagement is displayed only to the users who Signed up on 1st January 2020, and whose Location is India OR United States. The Audience Logic is set as AND. You can use the AND or OR logic within a rule, to configure multiple parameters. Click + Add to add multiple parameters.
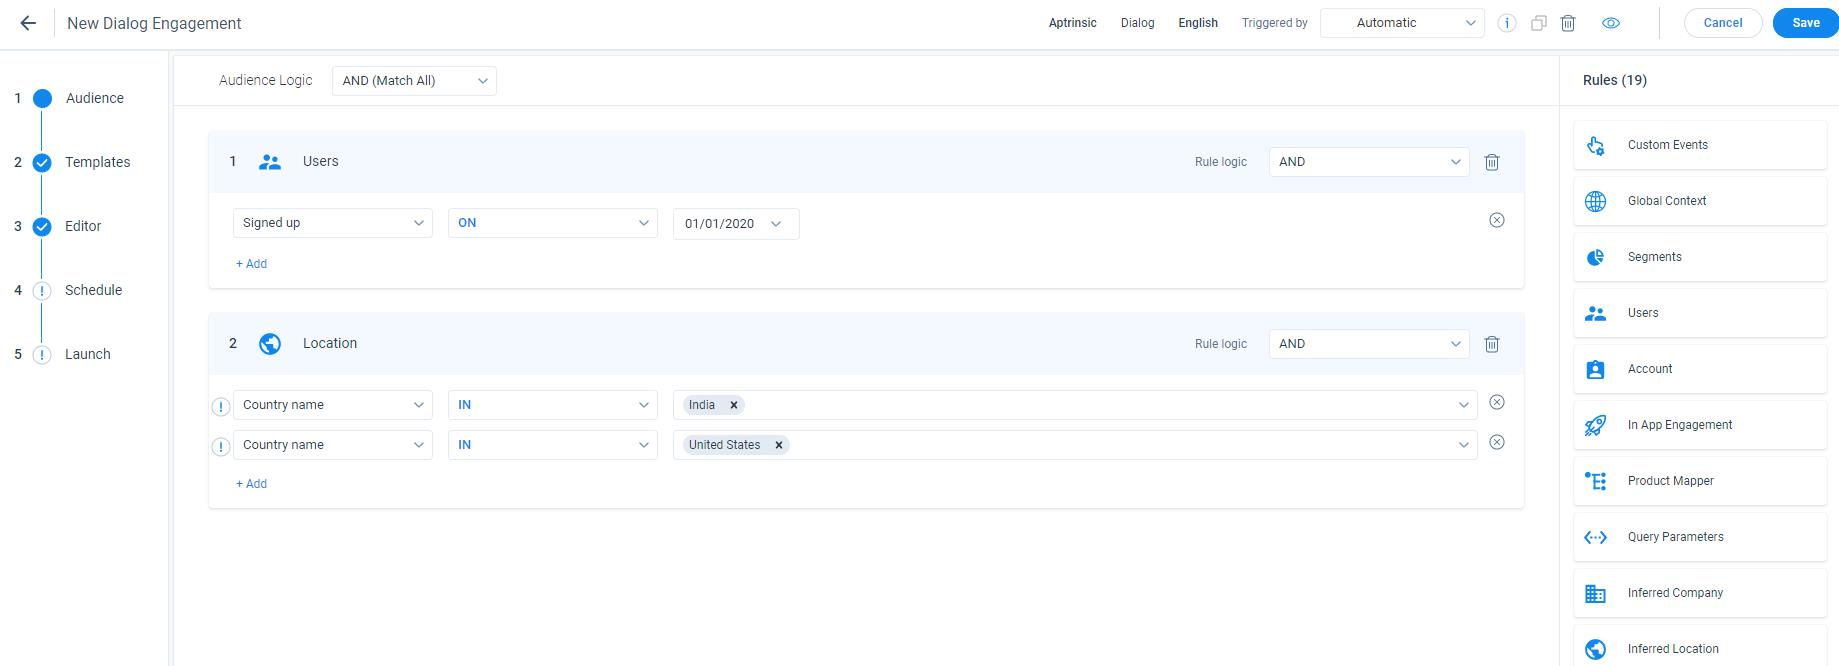
For more information on how to create Audience rules, refer to the Anatomy of Engagements article from the Additional Resources section.
Templates
Gainsight PX offers templates that are categorized into the following :
- Saved Templates: Displays your saved templates.
- Default Templates: Displays default templates, provided by Gainsight PX.
- Recently Used: Displays your recently used templates.
Choose the template of your choice from the default or existing templates for the engagement.
To use the default or existing template:
- Navigate to the Templates section.
- Hover on the template and click Preview.
- Click Use. You are navigated to the Editor section.
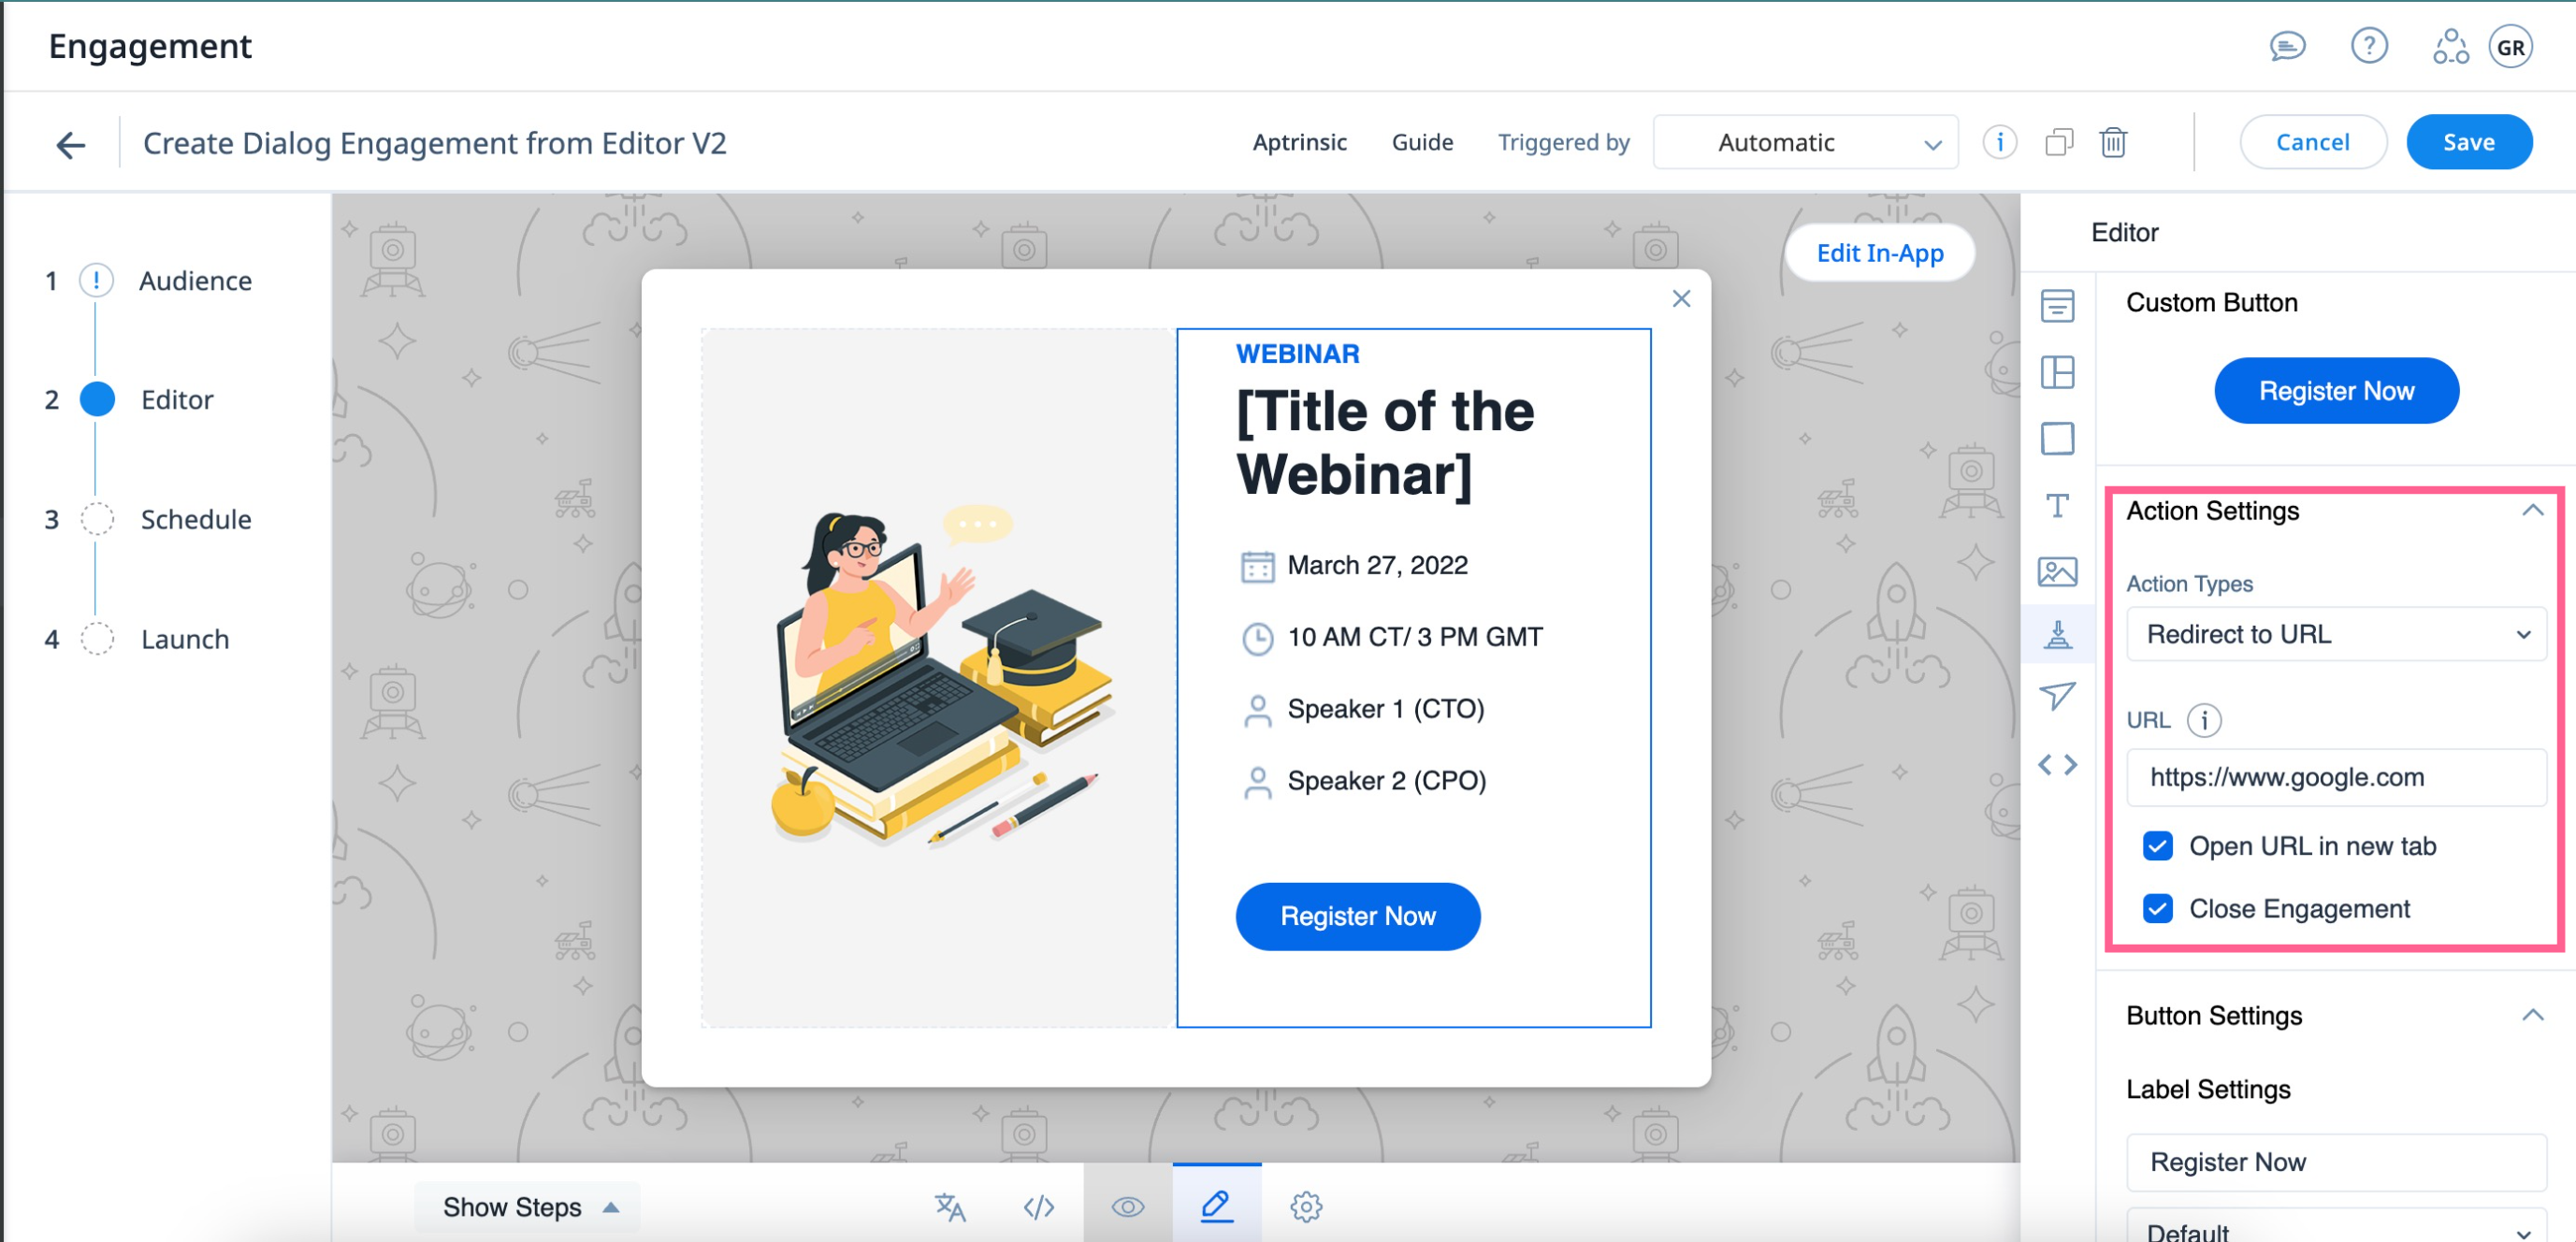
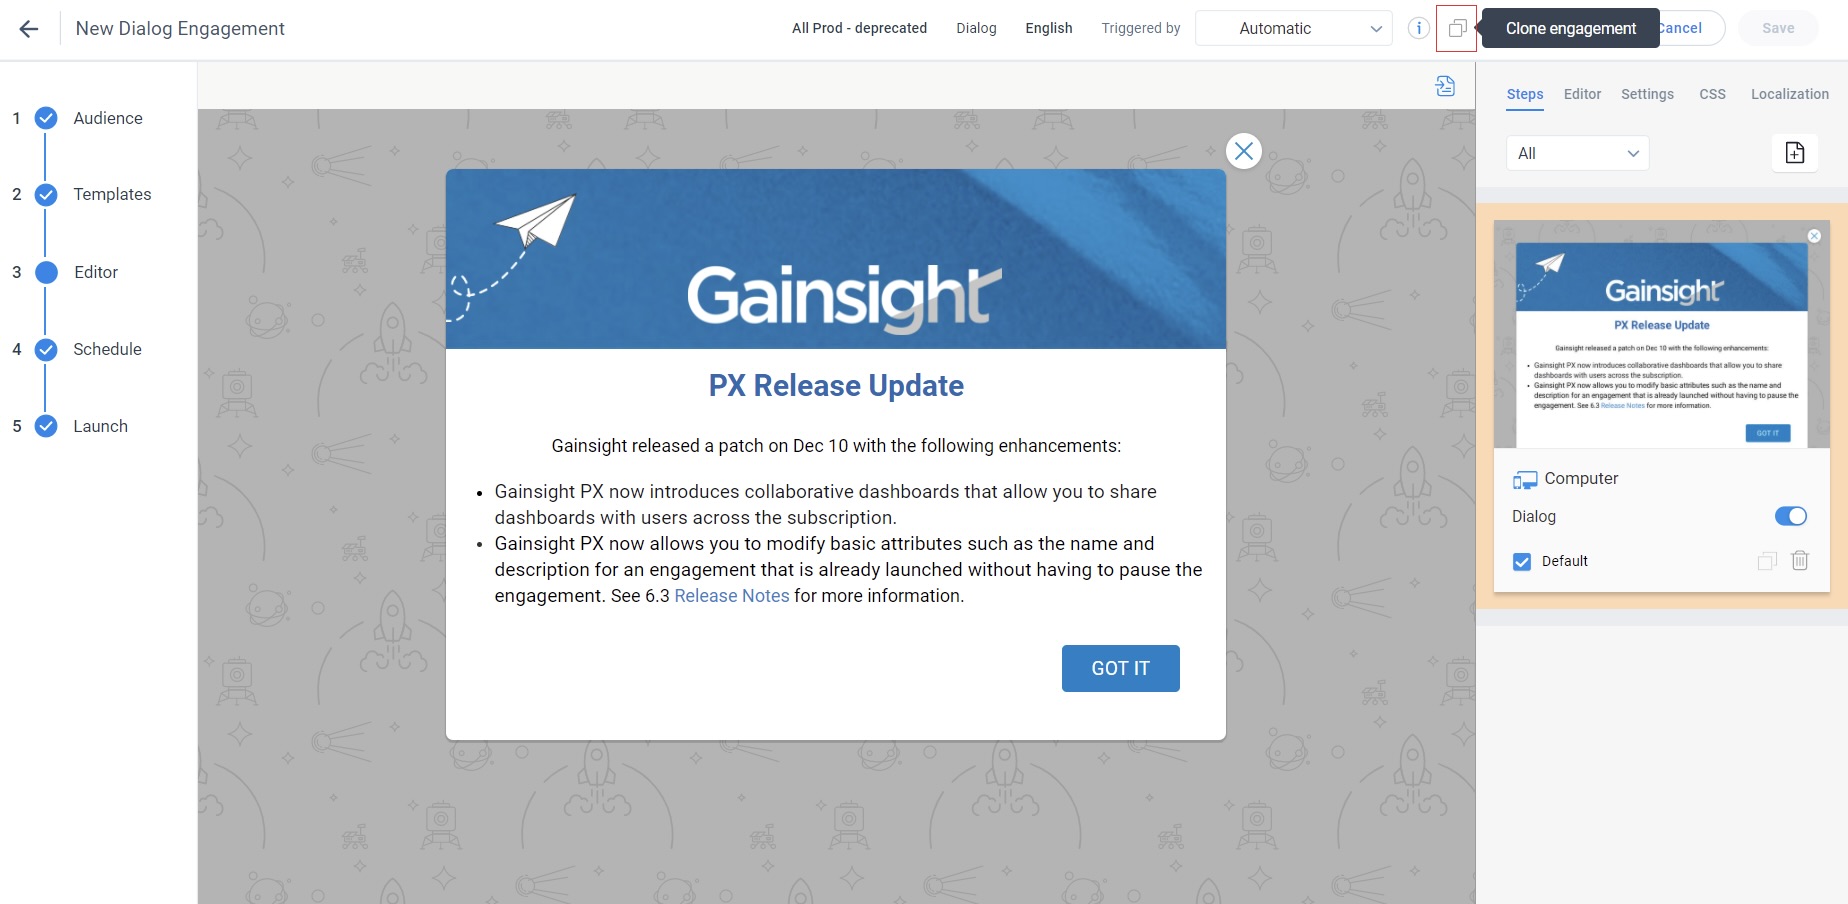
Editor
The Editor section allows you to create and edit engagement content, add images, add videos, tokens, and hyperlinks. You can also edit the size, background, overlay color, and view type of your engagement. For more information on the actions that can be performed using the Editor, refer to the Editor section of the Anatomy of Engagements article from the Additional Resources section.
Display Dialog Engagement as Bar
Gainsight PX allows you to set your engagement as a Dialog-Bar, that appears at the top or bottom of the screen, using the View Type option available on the Settings tab.
To set the view type of your engagement as bar:
- Navigate to Editor > Settings.
- Select Bar from the View Type option.
- Set the Position of your Dialog-Bar engagement as Top or Bottom.

The following example shows that the Dialog-Bar engagement.
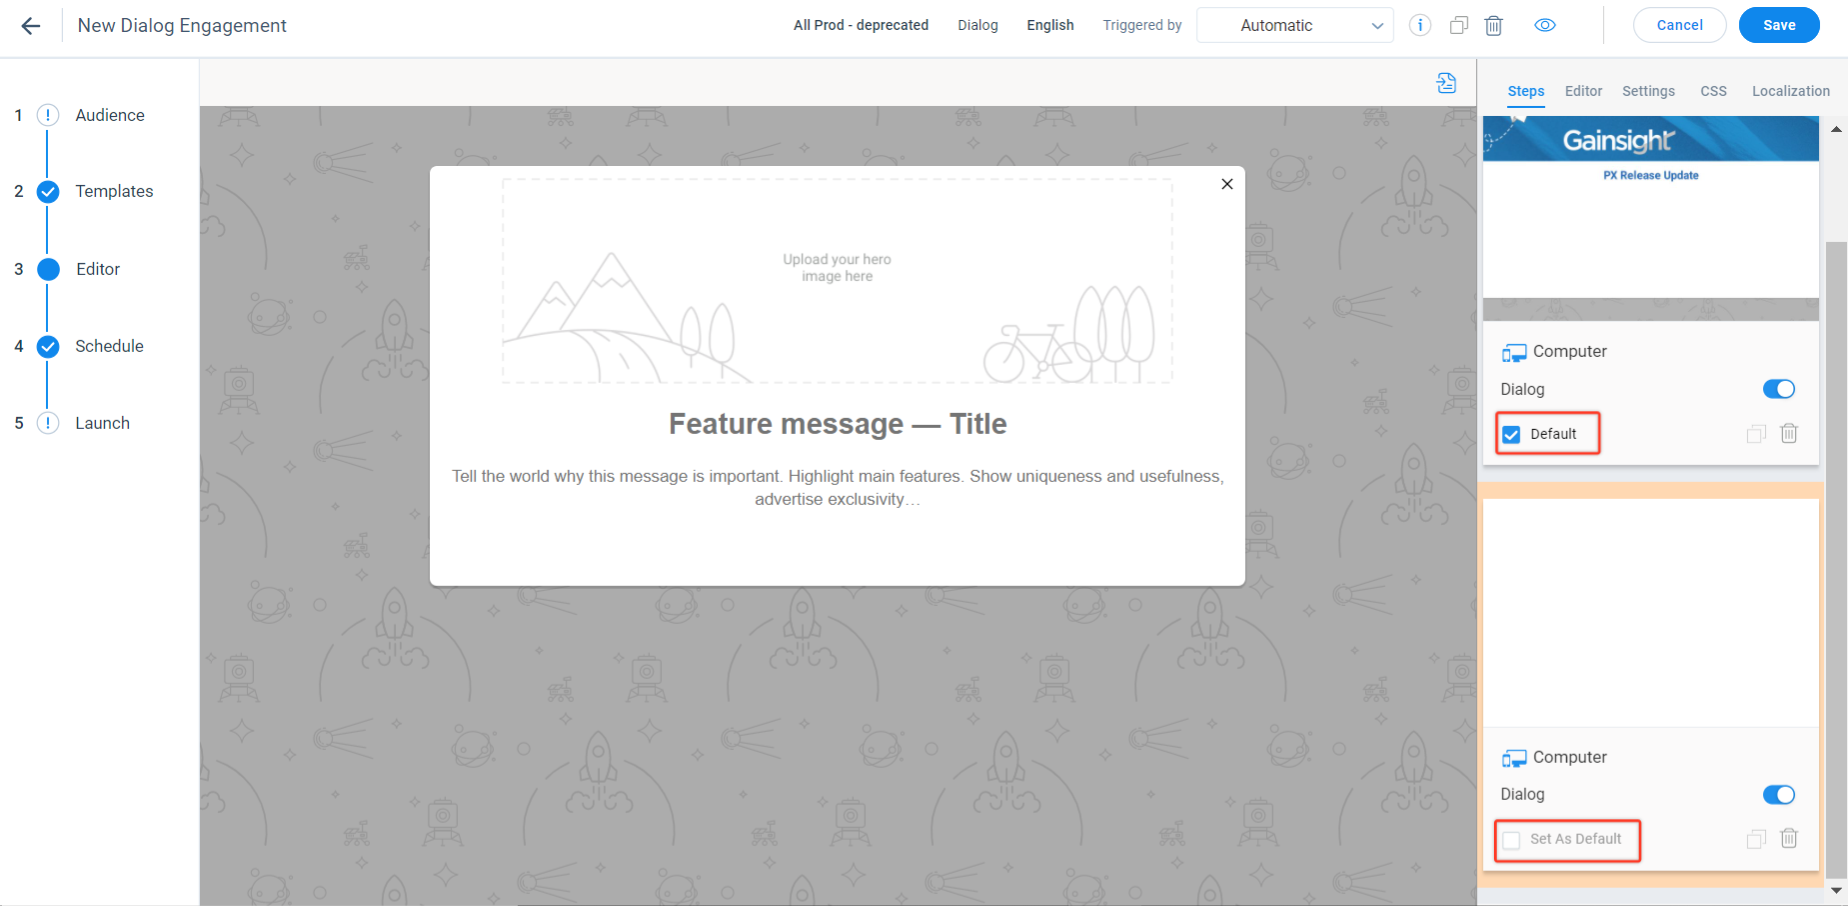
Create Additional Templates for a Dialog Engagement
You can create more than one template, for a single dialog engagement, with different settings. This will allow you to select the most desired template and set it as default before launching the engagement.
To create additional blank templates:
- Navigate to Editor > Steps tab.
- Click the + button.
- From the Device Type dropdown, select Computer/Mobile/Tablet.
- (Optional) Select the Set As Default checkbox to set the new template as the default template for the dialog engagement. This template is displayed in the engagement when it is launched.
- Click Create. An additional dialog template is created.
Note: After you create multiple additional templates with different customizations, you can always change the default template by selecting the checkbox Set As Default.
-
(Optional) To clone a template, click the clone template icon.
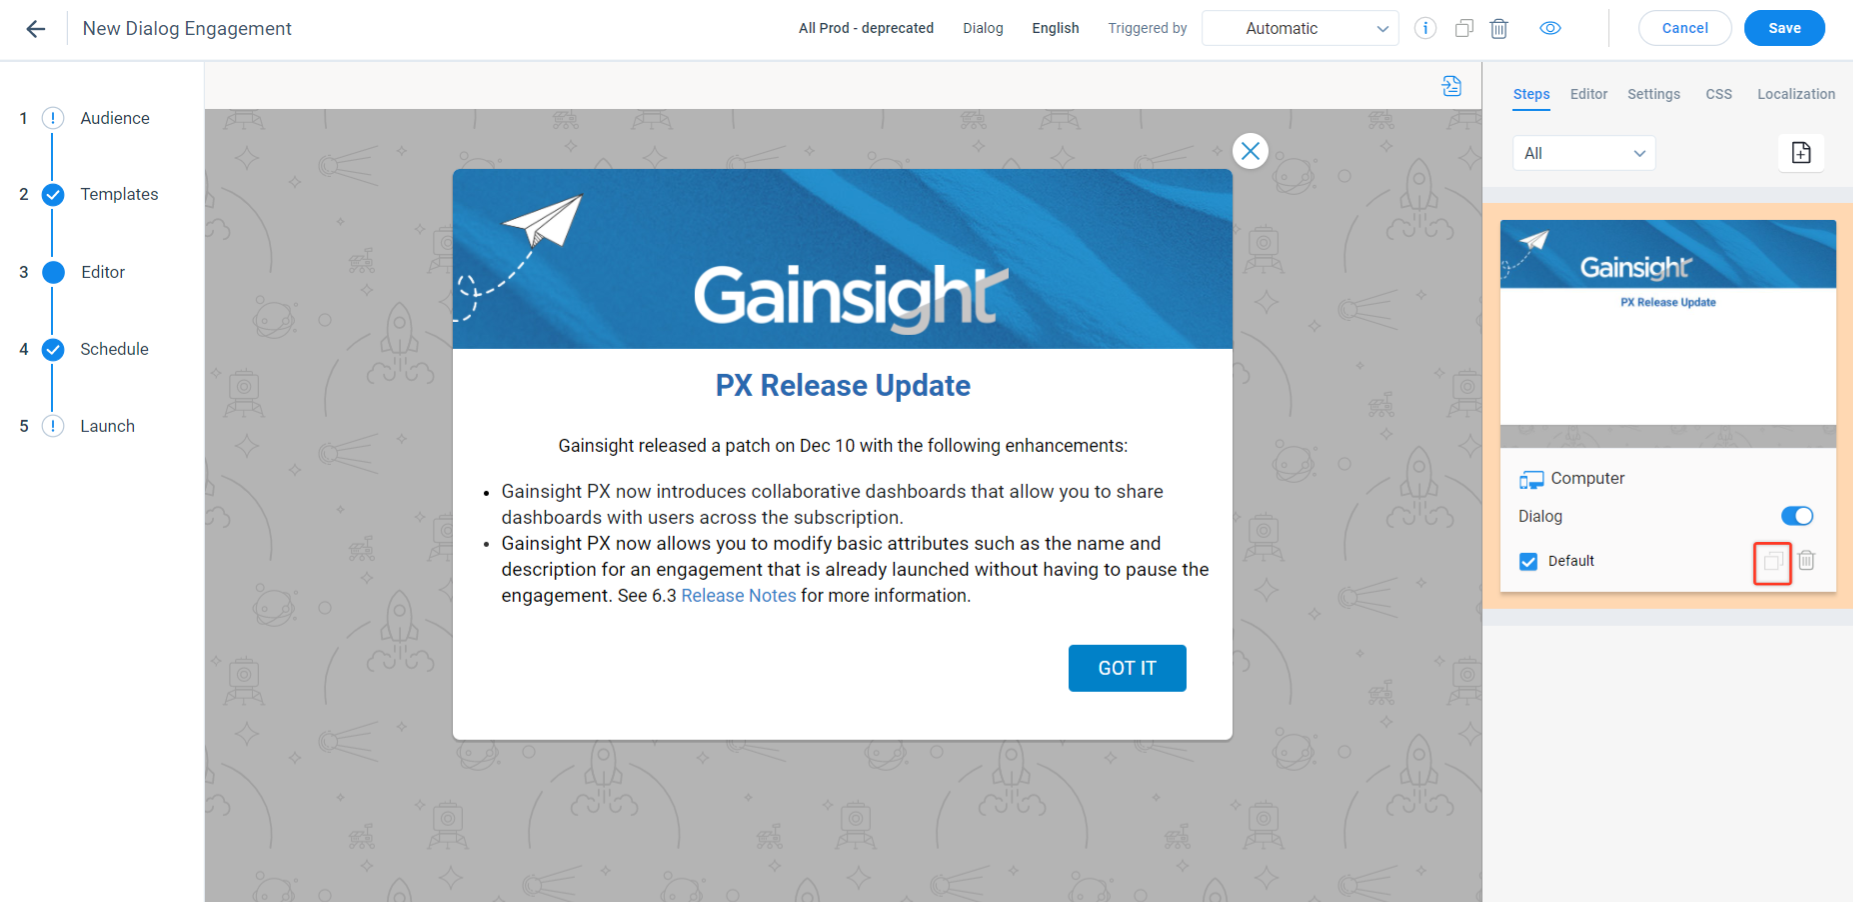
-
(Optional) To delete the template, click the delete template icon.
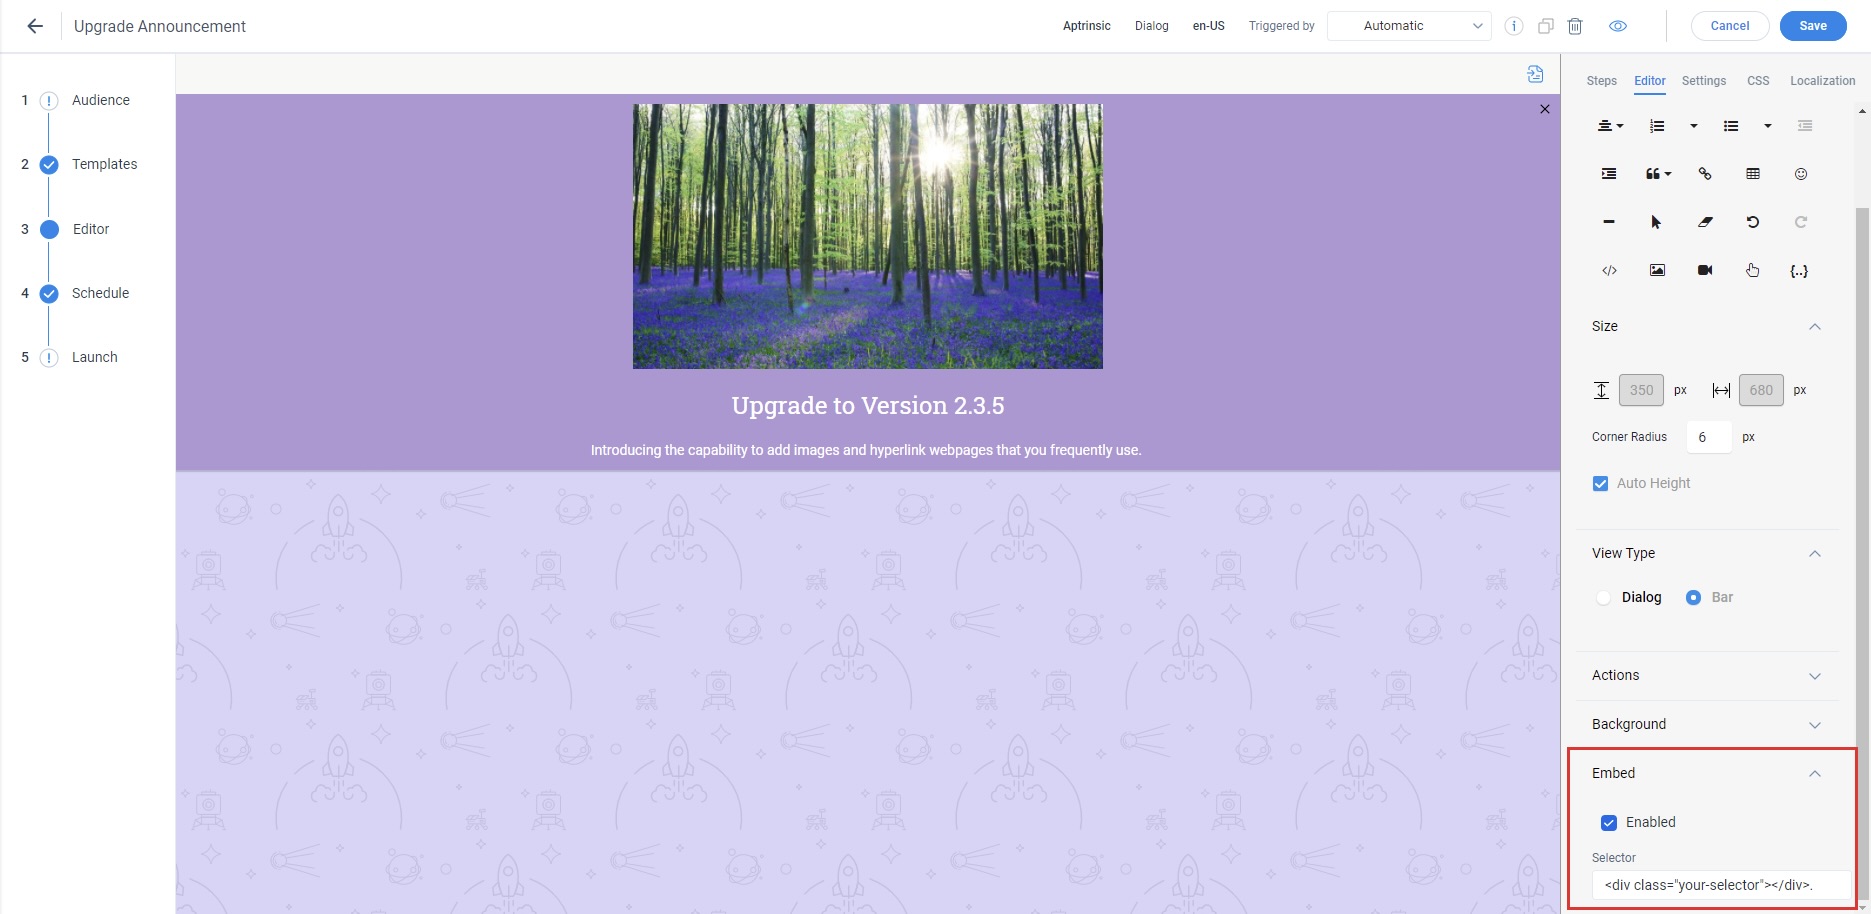
Embed Dialog Engagements Using CSS Selector
Embed Dialog engagement within your application without overlaying on other user interface components. To use this feature, select the check box in the Embed section of the Editor tab and specify the CSS selector in the Selector field.
Note: The 'div' element on the target page must be configured without any styling as <div class="<your-selector>"></div>.
Launch Device-Specific Web App Dialog Engagement
Launch device-specific web app Dialog engagement based on the preferred devices, including computers, mobiles, or tablets.
To select the device type:
- Click Steps in the Editor section
- Select the device type on which you want to display the Engagement.
_-_Zoom_2023-06-30_at_2.16.38_PM.jpg?revision=1)
This helps you run more effective campaigns by specifying the device on which the engagement should appear and increase feature adoption.
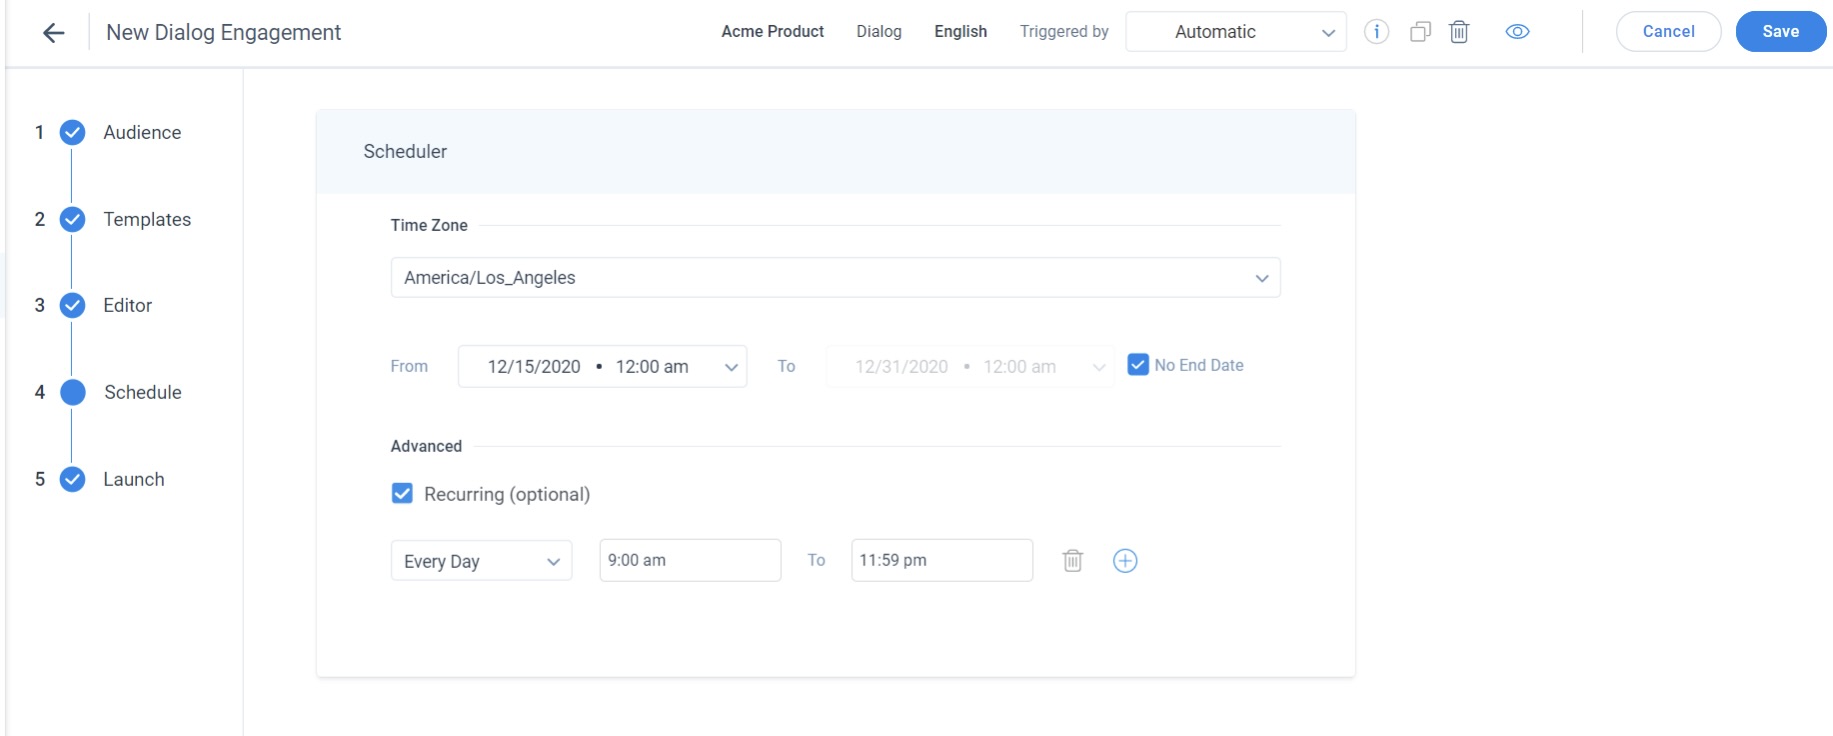
Schedule
Schedule your dialog engagement to control when the engagement should be active and the threshold of how many times it must be shown to the users. Specify the number of times and additional intervals in which you would like to automatically re-engage your users (for example, display the engagement).
In the Schedule step, set the From and To Date for the engagement. You can also set the engagement to appear on the target application at recurring intervals such as daily or on a specific day of the week.
For more information about Engagement Scheduling and qualification scope, refer to the In-app Engagement Qualification Scope article from the Additional Resources section.
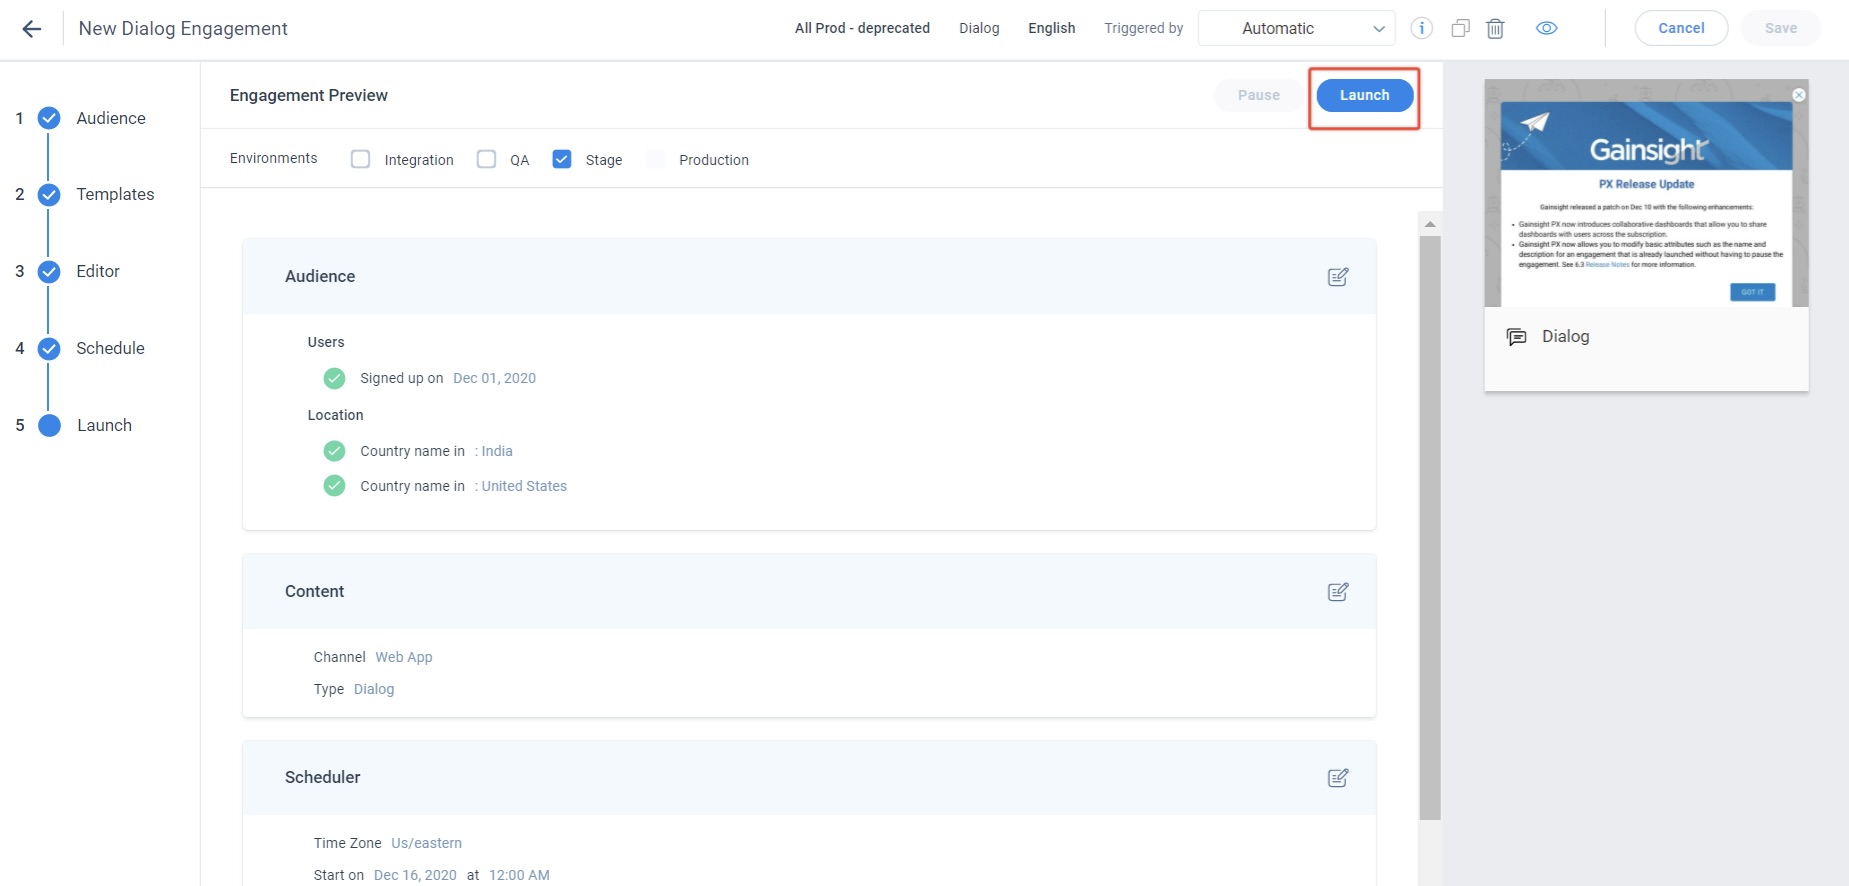
Launch
The Launch section displays a summary of all the configurations for your engagement. You can launch an engagement or pause a launched engagement from this section.
In case of a configuration error in the engagement section, an exclamation (!) is displayed next to the respective section and the Launch section. You can launch an engagement only if all the sections have a checkmark next to them.
Click Launch to deploy the engagement on the selected product environment
Actions on Engagement
After you finalize the appearance and content of your engagement, save and preview the engagement on any page of your application. You can also save the engagement as a template.
Save an engagement as a template
To save an engagement as a template:
- Click the save as template icon.
- Enter a name for the template.
- Click Apply. The engagement template is saved.
Navigate to the Saved Templates tab of the Templates section to view your template. Hover on the template and click the delete icon to delete the template.
Preview an Engagement
To preview your engagement:
- Click the preview icon. The Preview window is displayed.
- Enter the required target URL.
- Click Launch. The engagement is launched on the target URL.
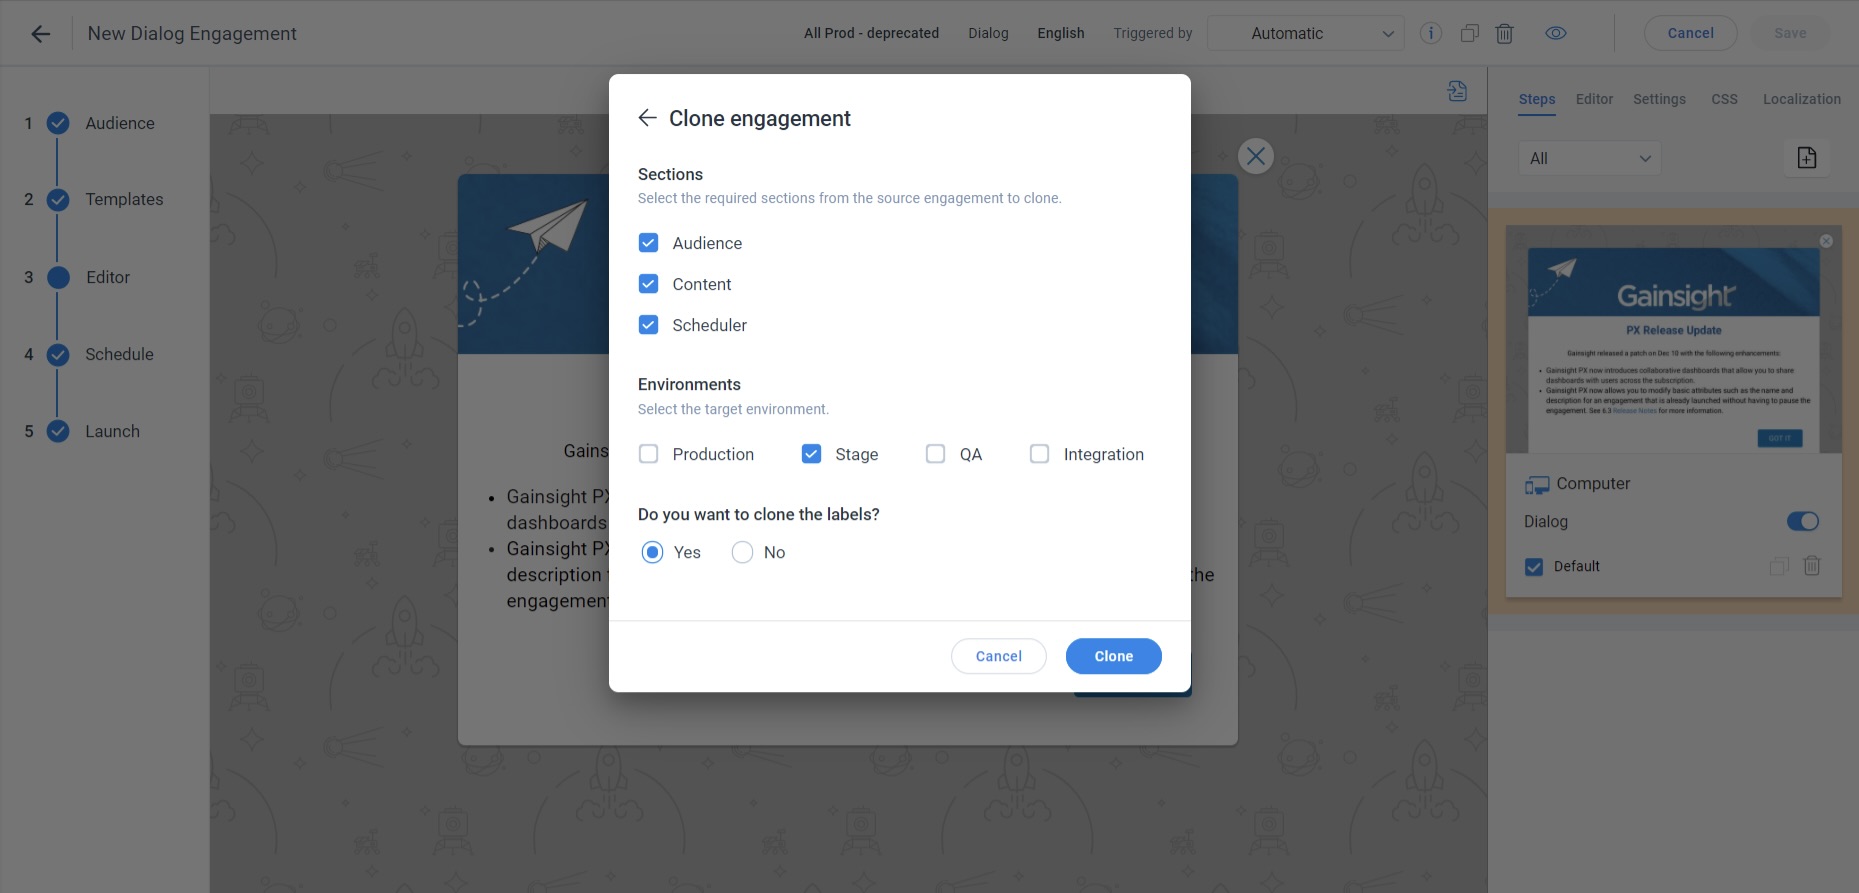
Clone an Engagement
To clone your dialog engagement:
- Click on the clone icon.
The Clone engagement window appears.

- Enter the name for the dialog engagement.
- Select your product (Applicable only if you are using multiple products).
- (Optional) Enter a description.
- Click View Configuration Options
- Perform the following steps:
- From the given options in the Sections area, select the appropriate ones that you want to clone.
- Under the Environments section, select the target environment.
- Select Yes if you want to clone the labels.
- Click Clone. The new cloned engagement is displayed.