Add Partner Users
Gainsight NXT
This article explains how admins can add the data of Partner Users to the Through-Partner Customer Success feature.
Overview
Through-Partner Customer Success allows organizations to efficiently manage their internal customers and through-partner customers. This is achieved by granting controlled access of their Gainsight production instance to their Partners. With this access, Partners can independently manage through-partner customers. Simultaneously, the organization can manage and collaborate with all its Partners through a single software application. It also helps organizations to manage upcoming renewals, predict churn and take necessary actions for prevention.
For more information on the business use case, benefits, information flowchart, different user personas, refer to the Through-Partner Customer Success Overview article.
Prerequisites
The organization must purchase additional licenses for every Partner User they want to add.
Add Partner Users
Partner Users login to your organization’s Gainsight production instance to manage the through-partner customers they are responsible for. Only the Partners Users authenticated by admins can log in and access the assigned Company and Relationship records.
Once the initial process of adding Partners is complete, as an admin, you need to import and add the Partner Users data to the Partner. The following options to are available to add data:
For more information on how to add the Partner data, refer to the Add Partners articles.
Add Using CSV
You can use this option to add data of multiple Partner Users at once. To add the data:
- Navigate to Administration > Partner Success > Through-Partner CS. The Through-Partner Customer Success page appears.
- From the Partners list view, select the partner for which you want to add Partner Users. A slide-out panel appears.
- Click Partner Users.
- In the Partner Users tab , click Add Partner Users.
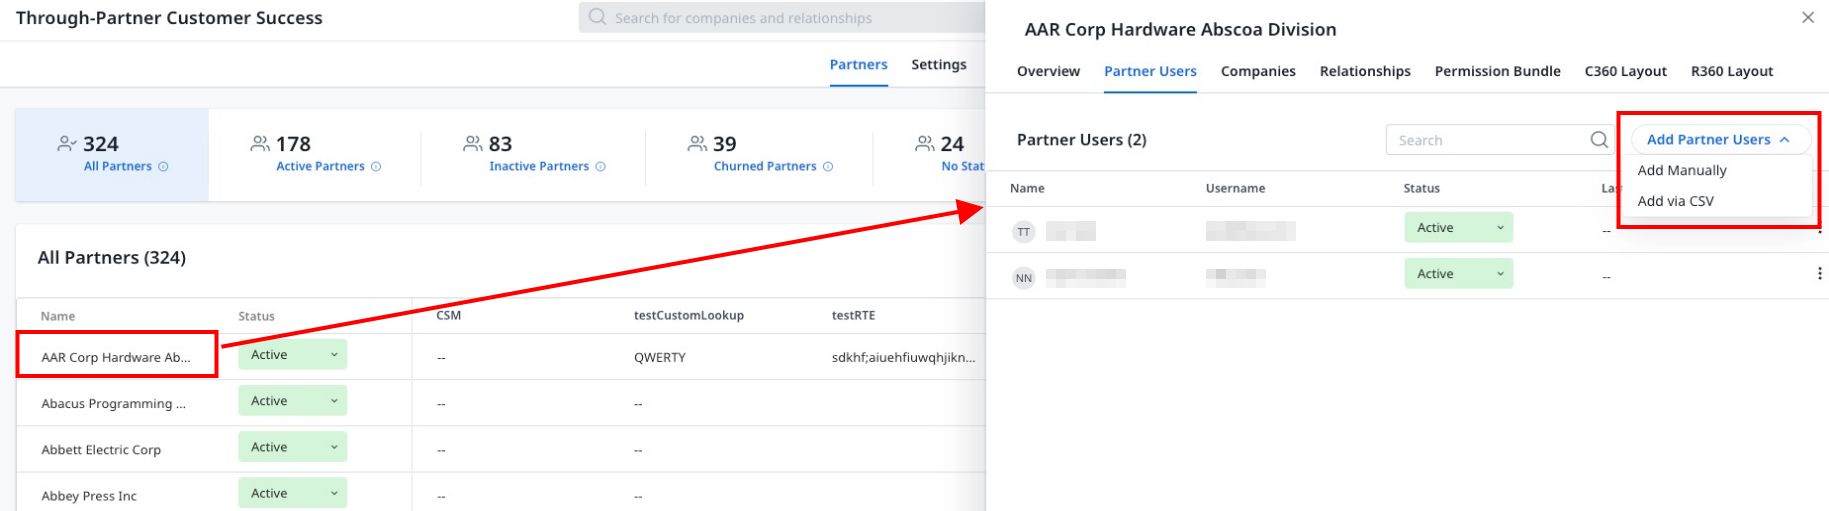
- From the drop-down menu options, select Add via CSV. The Upload CSV screen appears.
- In the Upload CSV screen, upload the CSV file.
- (Optional) Click Download a sample CSV to view the recommended sample format of the CSV file.
- (Optional) In the CSV Properties section, the properties get auto-populated. Verify and edit the properties, if required.
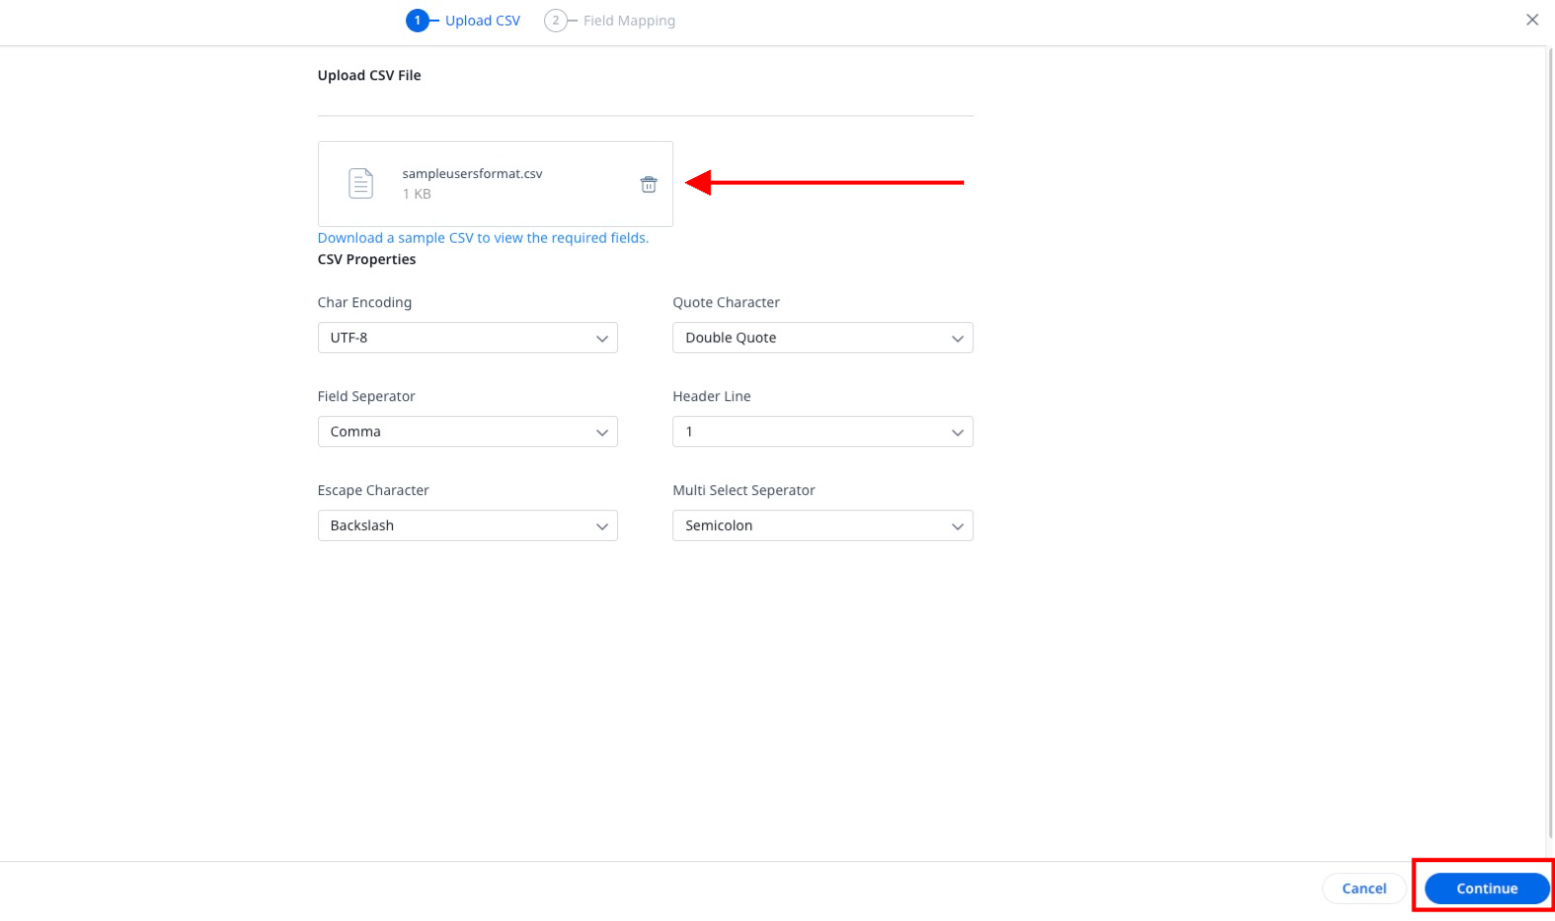
- Click Continue. The Map Fields screen appears.
- In the Map Fields screen, map the target fields with the source fields.
IMPORTANT: Mapping the First Name, Last Name, User Name, and Email ID fields are mandatory. These fields cannot be deleted.
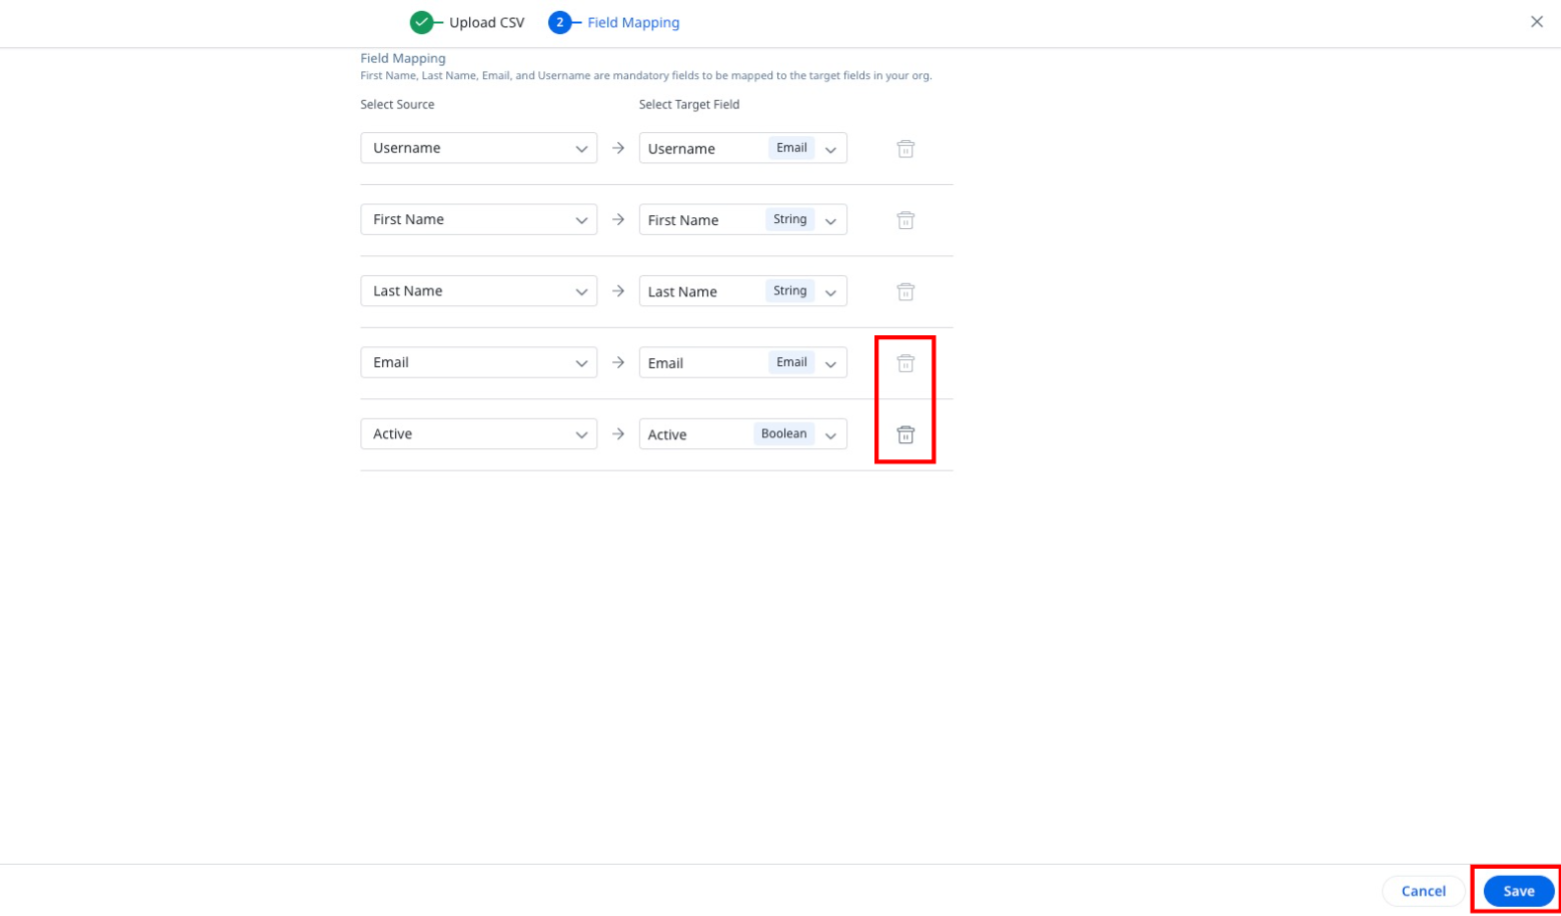
- Click Save. Partner Users are added to the selected Partner.
Add Manually
You can use this option to add data of a single Partner User using a form. To add the data:
- Navigate to Administration > Partner Success > Through-Partner CS. The Through-Partner Customer Success page appears.
- From the Partners list view, select the partner for which you want to add Partner Users. A slide-out panel appears.
- Click Partner Users.
- In the Partner Users tab , click Add Partner Users.
- From the drop-down menu options, select Add Manually. The Add User Manually screen appears.
- In the Add User Manually screen, enter the following mandatory information:
- Basic Information - First Name, Last Name, User Name, and Email ID are mandatory form fields.
- Send Welcome Email - Select this check box to send a welcome email to the Partner User through which they can login to their Partner’s Gainsight production org.
- Partner Company Name - This field is auto populated with the Partner name to which the Partner User is being added.
- License Type - This field is auto populated with the license type assigned to the Partner.
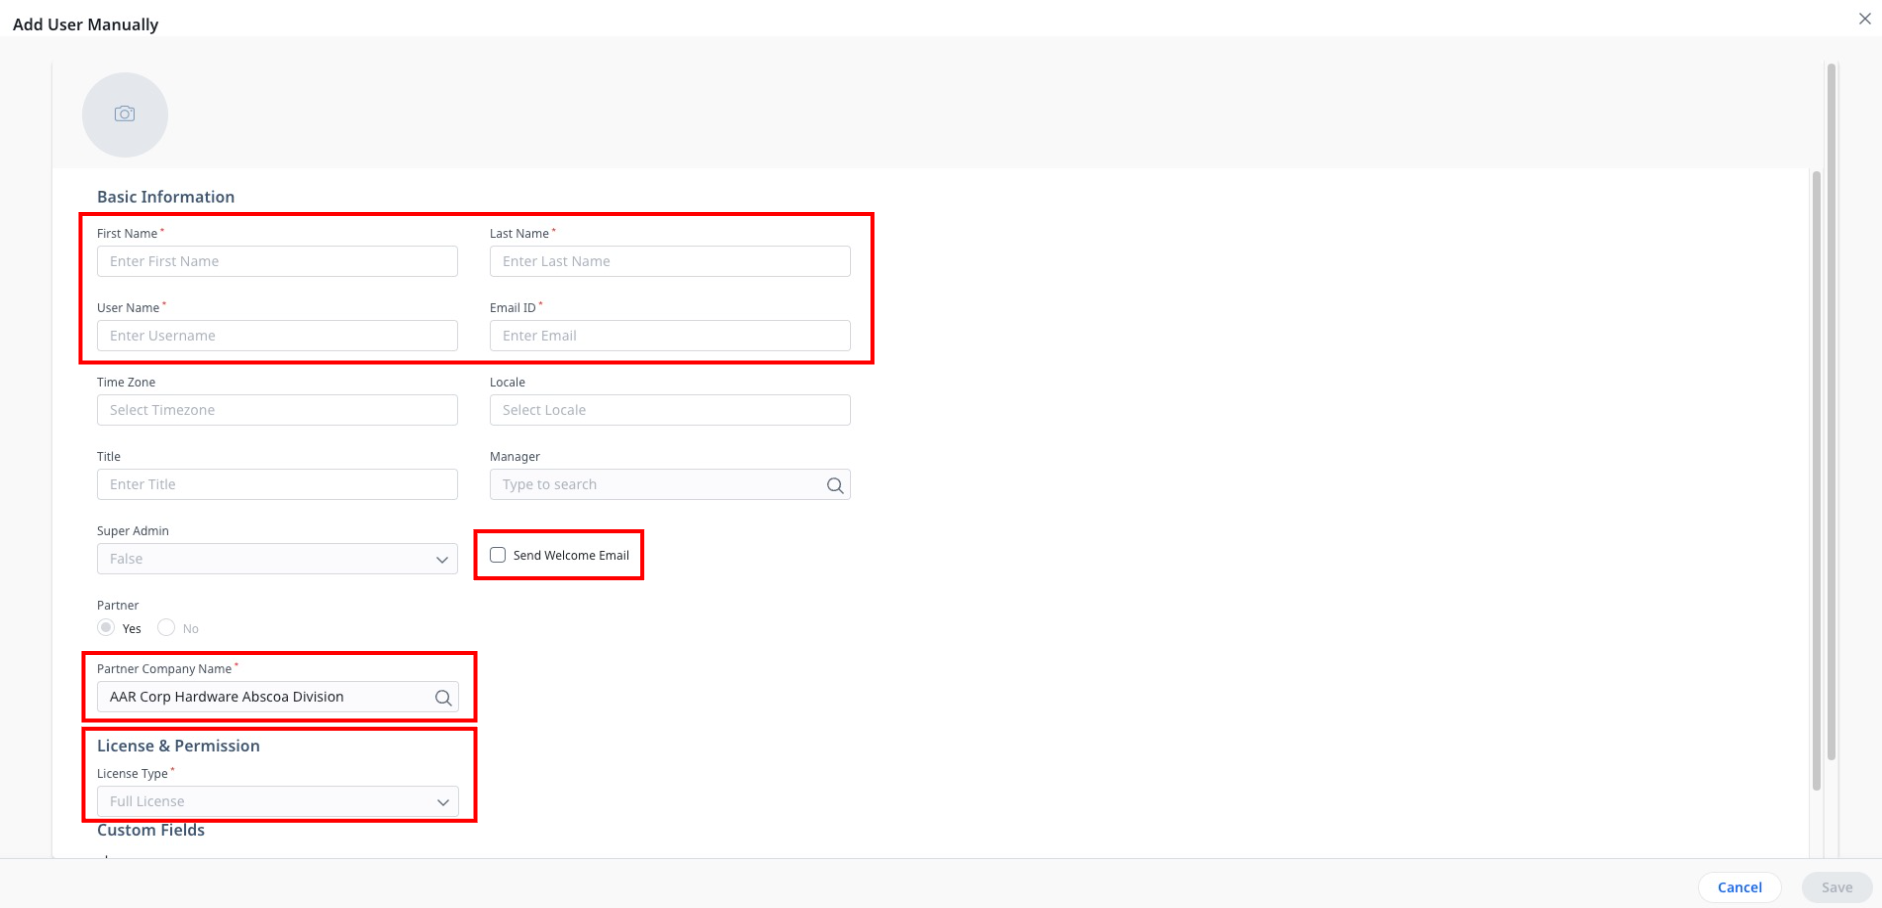
- Click Save. The Partner User is added to the selected Partner.
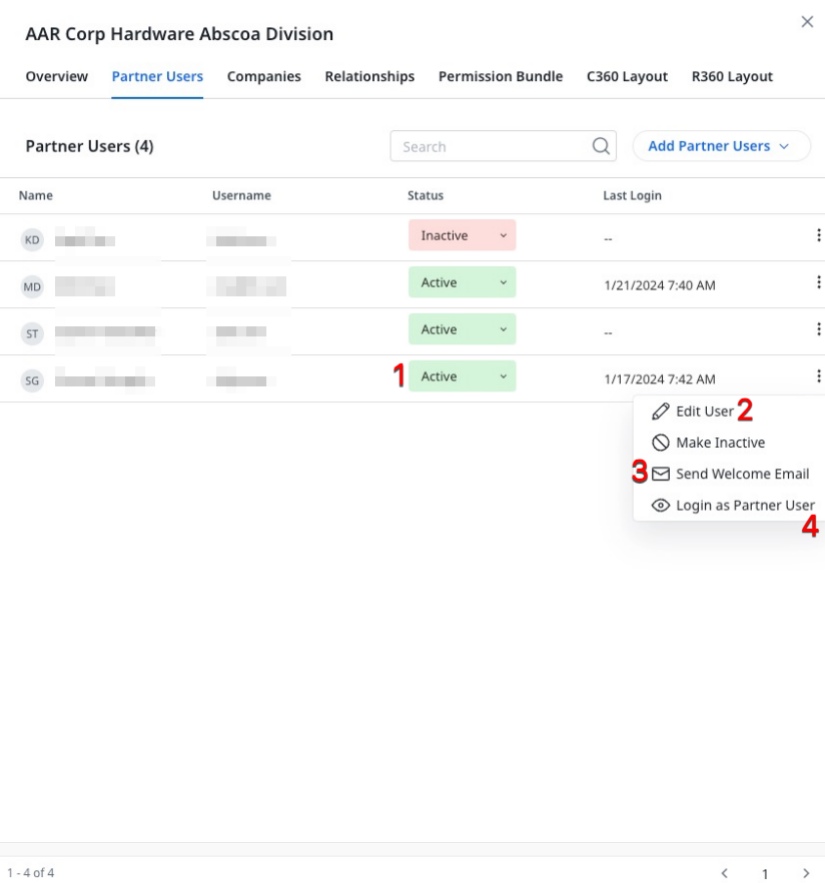
Partner Users List View
Partner Users that are added successfully are listed in the Partner Users section of the Partner slide-out panel. From this list view, you can make changes in the Partner Users details, make them active or inactive, and so on. The following options are available:
- Change Partner User Status - Allows you to make one or more users active or inactive. Inactive users cannot login to the organization’s production org.
- Edit Partner User Details - Allows you to make changes in user details like Name, User Name, Email ID, and similar information that you provided while manually adding the Partner User.
- Send Welcome Email - Allows you to send an email to users through which they can login to the organization’s production org. While changing the user status from inactive to active, it is mandatory to send the welcome email.
- Login as Partner User - Allows you to login as the Partner User and view the accesses enabled to ensure compliance with assigned Permission Bundle and Data Permissions.
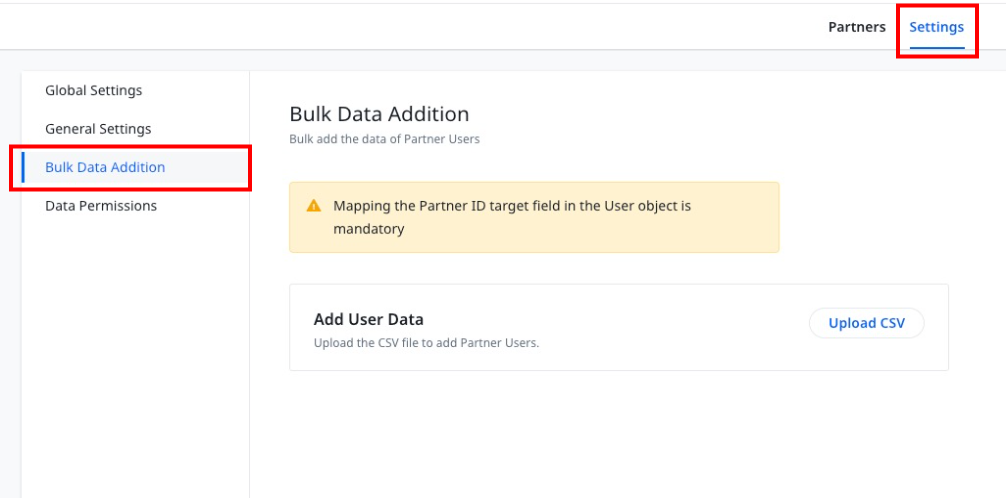
Add Bulk Partner User Data
You can use this option to add data of Partner Users in bulk and categorize them under different Partners. You can access this option from the Settings page. For more information on how to add the Partner User data in bulk, refer to the Bulk Data Addition section of the Overview of Partners and Settings article.