Mobile 360
This article walks you through how to access C360 and R360 in Gainsight Mobile application, and also explains all the sections under C/R360. The 360 view in Mobile is available for both Companies as well as Relationships (provided your org has been configured with Relationships in Gainsight).
Customer 360
Customer 360 (C360) is a central hub of your customer’s business information in Gainsight. It synthesizes business data from various sources and provides you with a holistic view of your customers. This minimizes the preparation time for your customer meetings.
Relationship 360
Relationships are an object in Gainsight that provides you with the flexibility to accurately model and manage your complex customer structures by creating relationship types and relationships.
Access C/R360 in Gainsight Mobile
Gainsight Mobile allows you to search and access C360 and R360 pages.
To access C/R360 page:
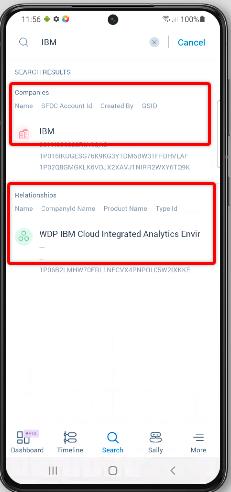
- Tap the Search icon.
- Type-in the required Customer or Relationship name.
- From the Search Results, tap the required Customer/Relationship name. You will be landed on the respective C/R360 page.
Notes:
- Company and Relationship search configuration from the Web App is automatically applied here.
- In the Search Results and Recently Viewed, you can see the list of 6 recently accessed Companies and Relationships each.
- Mobile App displays the Company/Relationship status (Active/Inactive/Churned), at the top of the C/R360 page.
On the C/R360 page, you can see the following tabs:
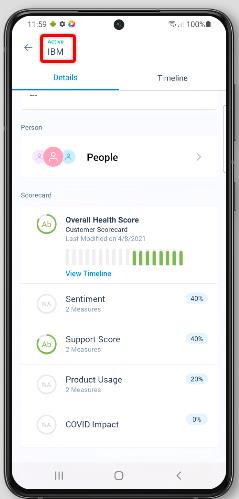
Details Tab
In this tab, you can view all the details of the following sections, in the same order as configured in the Gainsight Web App.
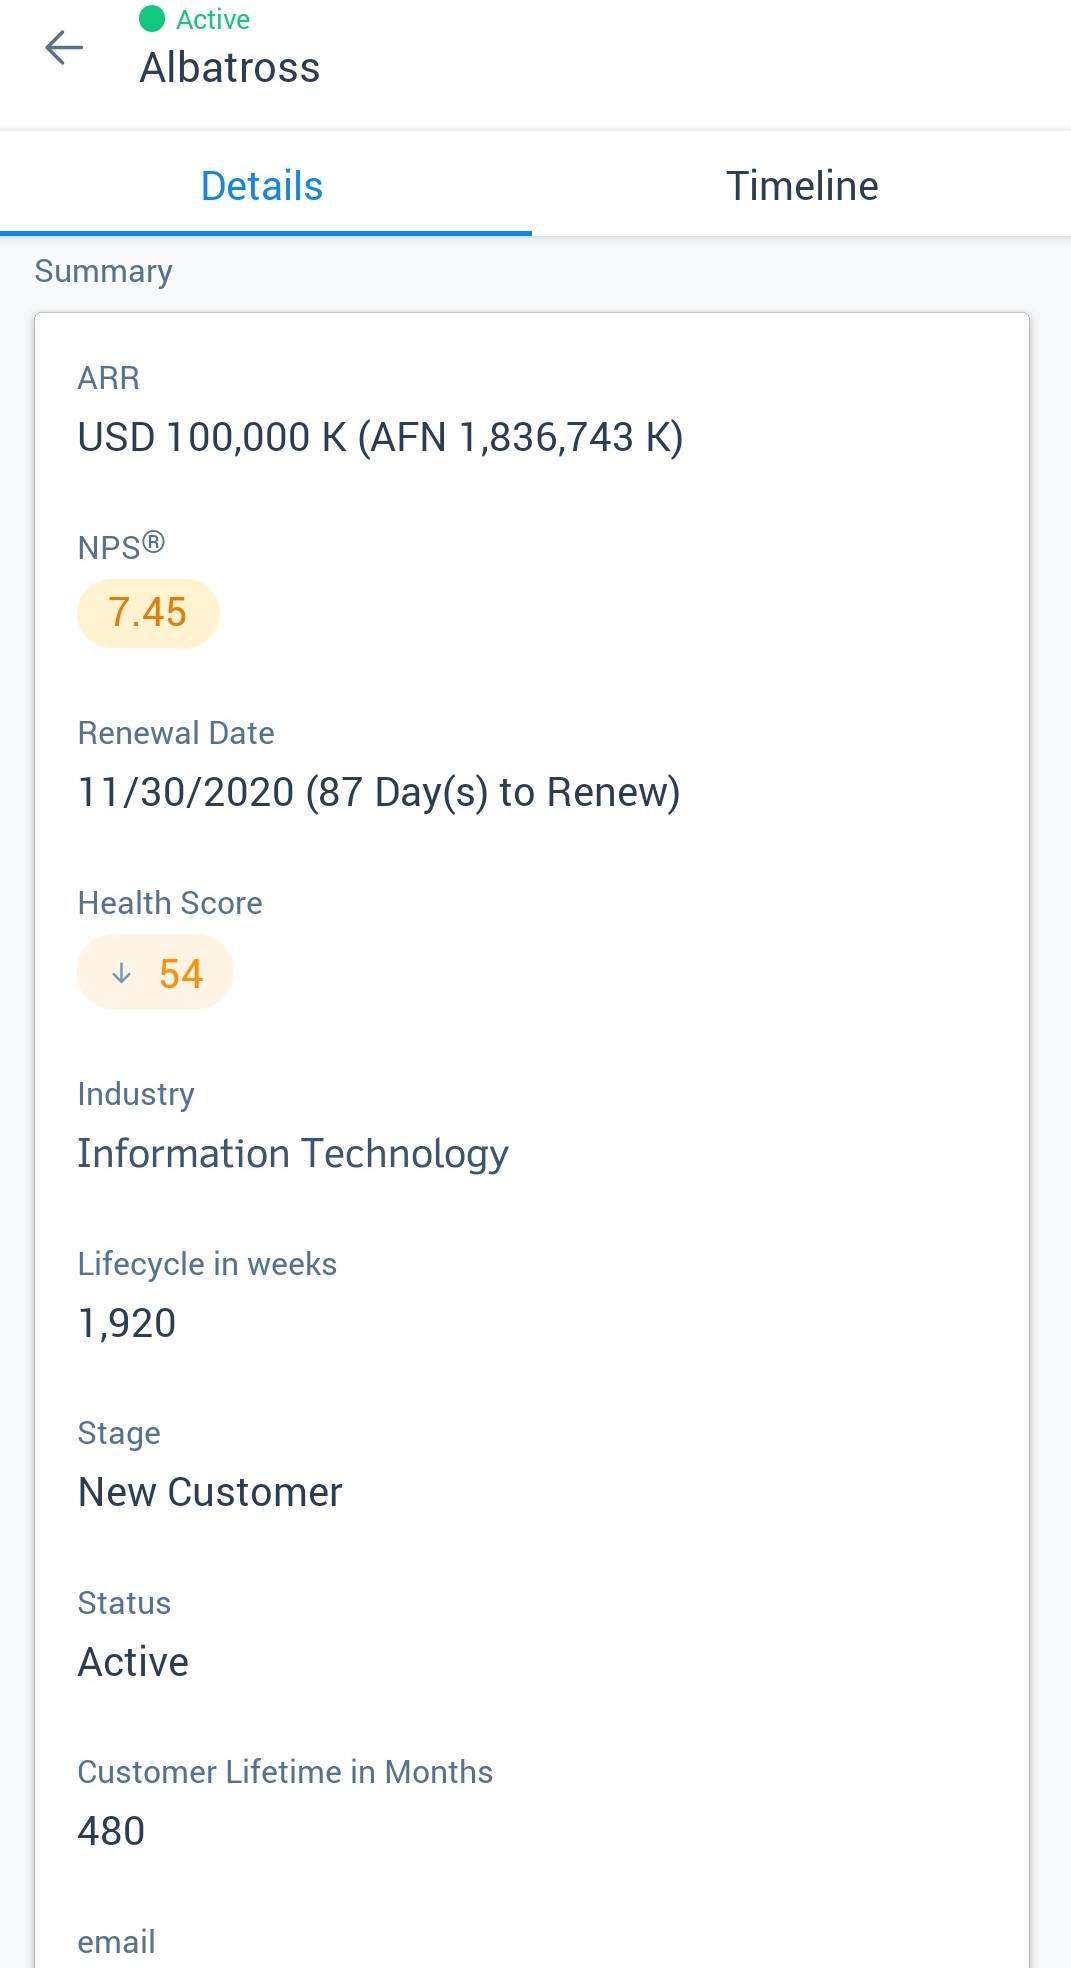
Summary
In this section, you can see the NPS and Health Score widgets and all the fields such as Renewal Date, Industry, ARR, etc. that are added to the summary section.
Notes:
- Gainsight Mobile App honors the Multi-Currency settings that are configured in the Web App.
- You can see NPS and Health Score widgets only.
- NPS widget in Mobile App honors Average/True NPS as configured in the Web App
- Renewal Date field here displays the number of days left for renewal or overdue.
- Health Score widget honors the Colors and the Schema that are configured in the Web App.
Limitation:
-
Currently, the Mobile App doesn’t support the Custom Widgets configured in the Web App.
Attributes
In this section, you can view fields from the Company/Relationship object, and also the lookup fields from the dependent objects that are added to the Attribute section.
On the Attributes card, you can view the first 3 attribute fields as defined in the Attributes section of the Web App. Tap the card to view detailed information of all the attribute fields.
Notes:
- Mobile App supports/displays as many Attributes sections as configured in the Web App.
- If there is an URL field, tapping the URL navigates you to the URL page.
- Mobile App honors the field names as configured in the Web App.
People
The People card on the C/R360 displays the list of associated people for the Company or Relationship. You can add new people from this section.
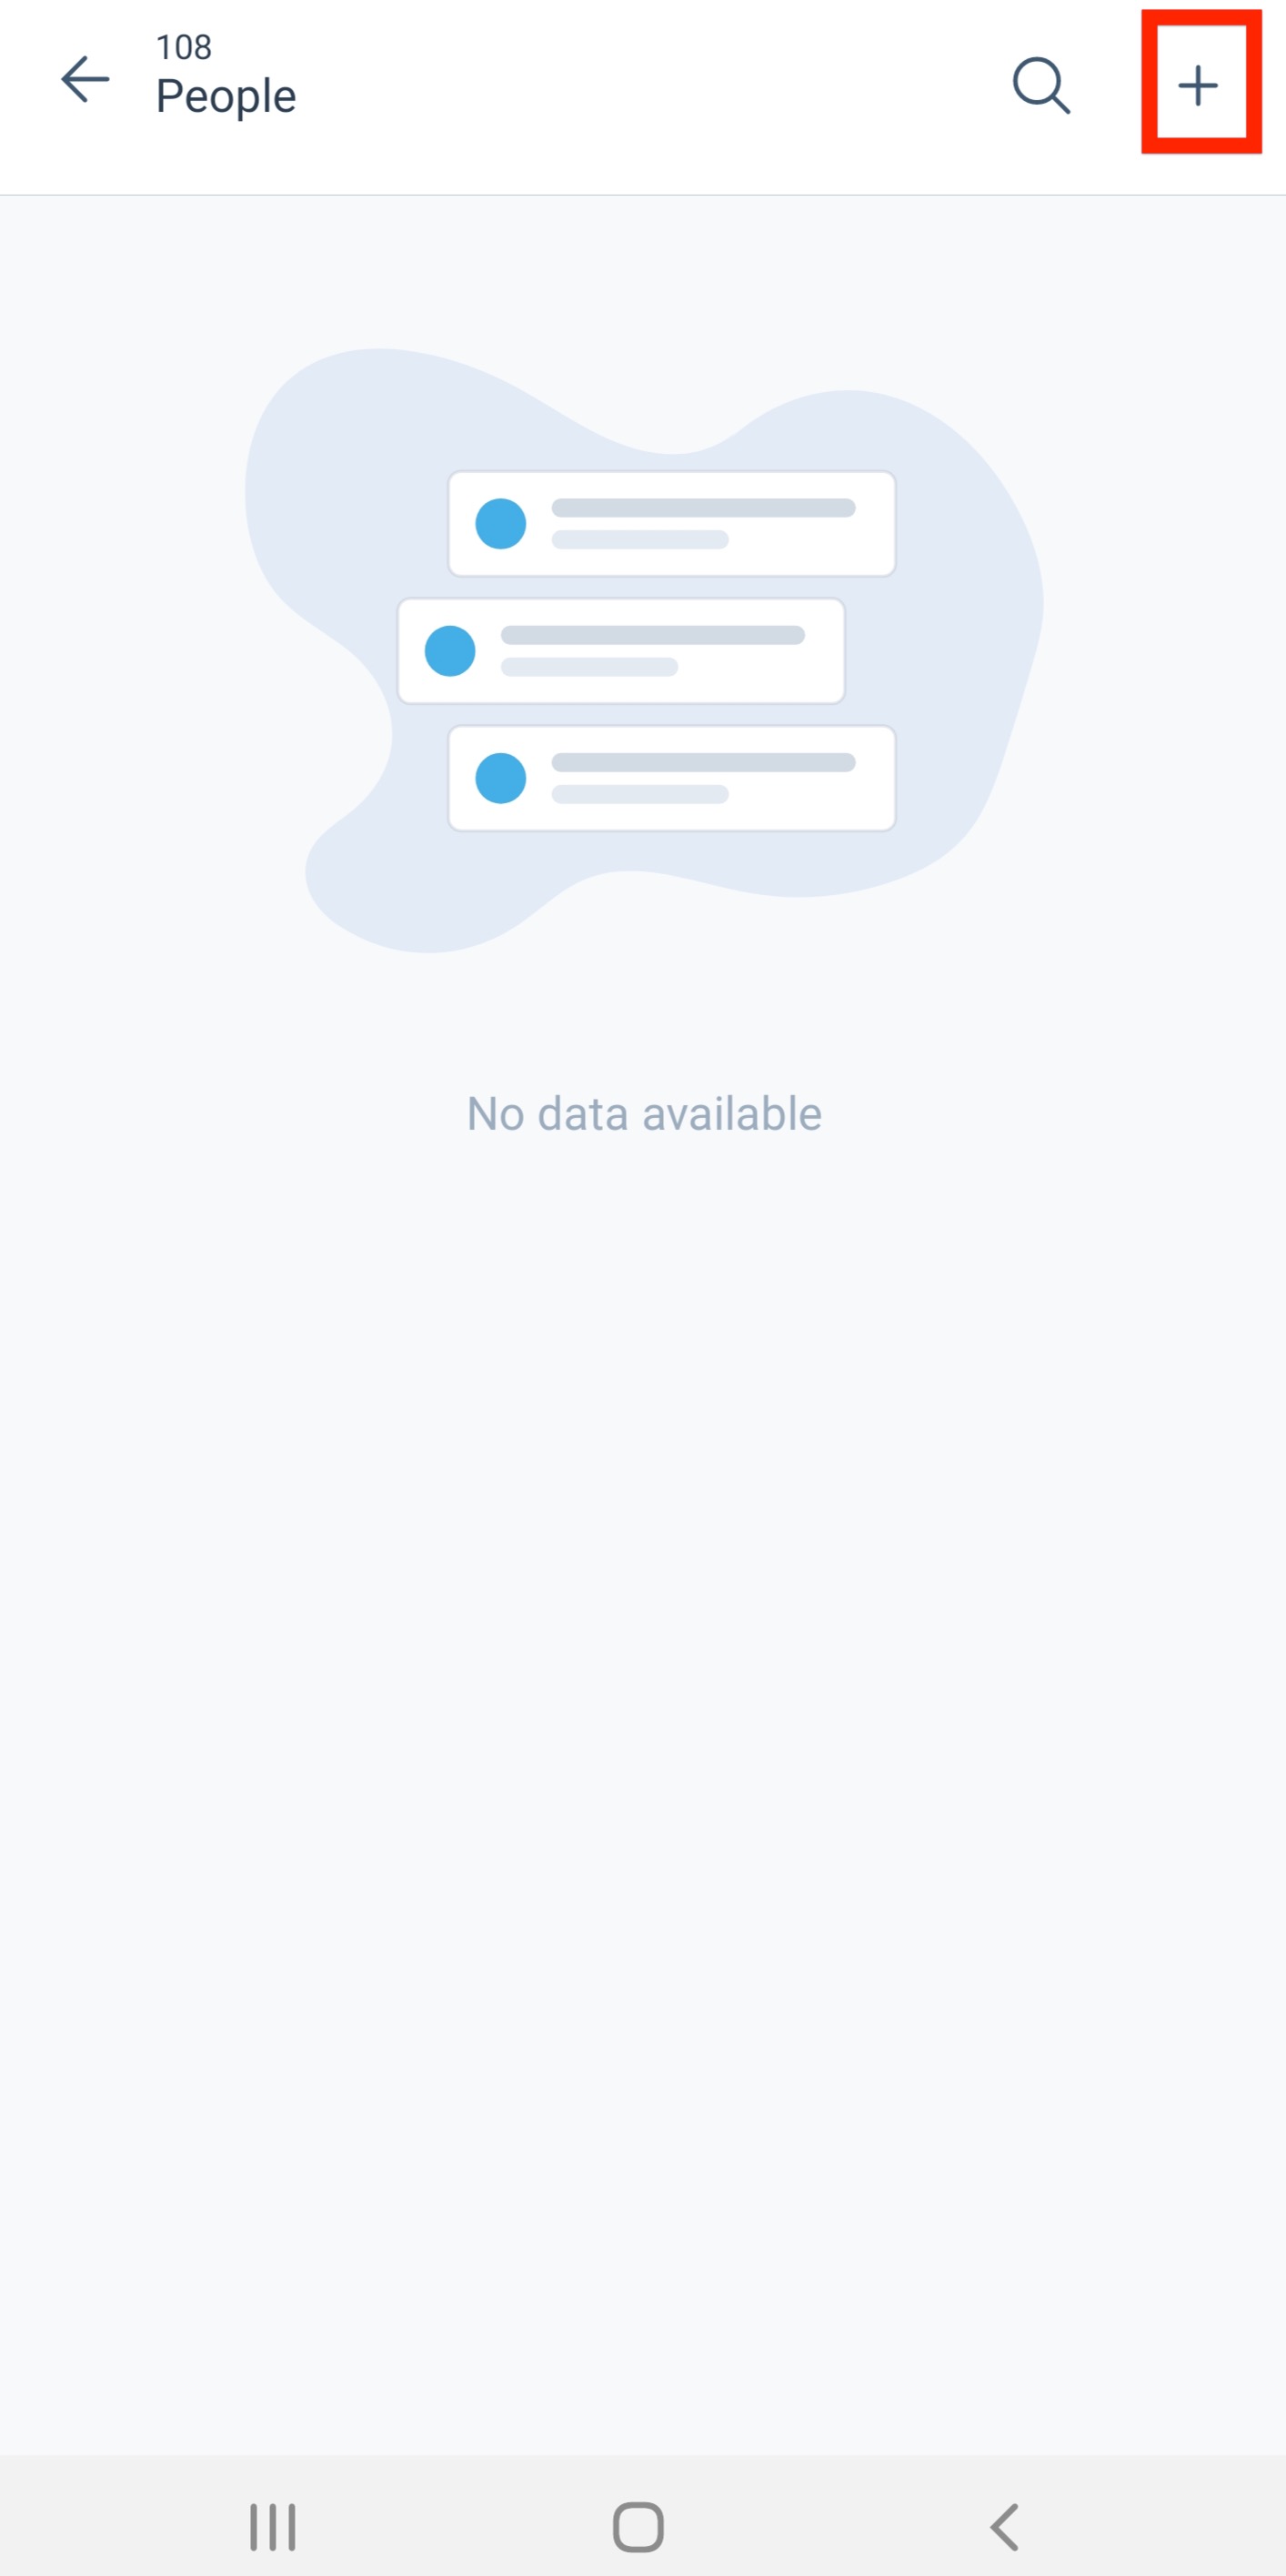
To add people:
- Navigate to the Company / Relationship page.
- Scroll and select People. The People page appears.
- Click the ‘+’ icon to add new people.
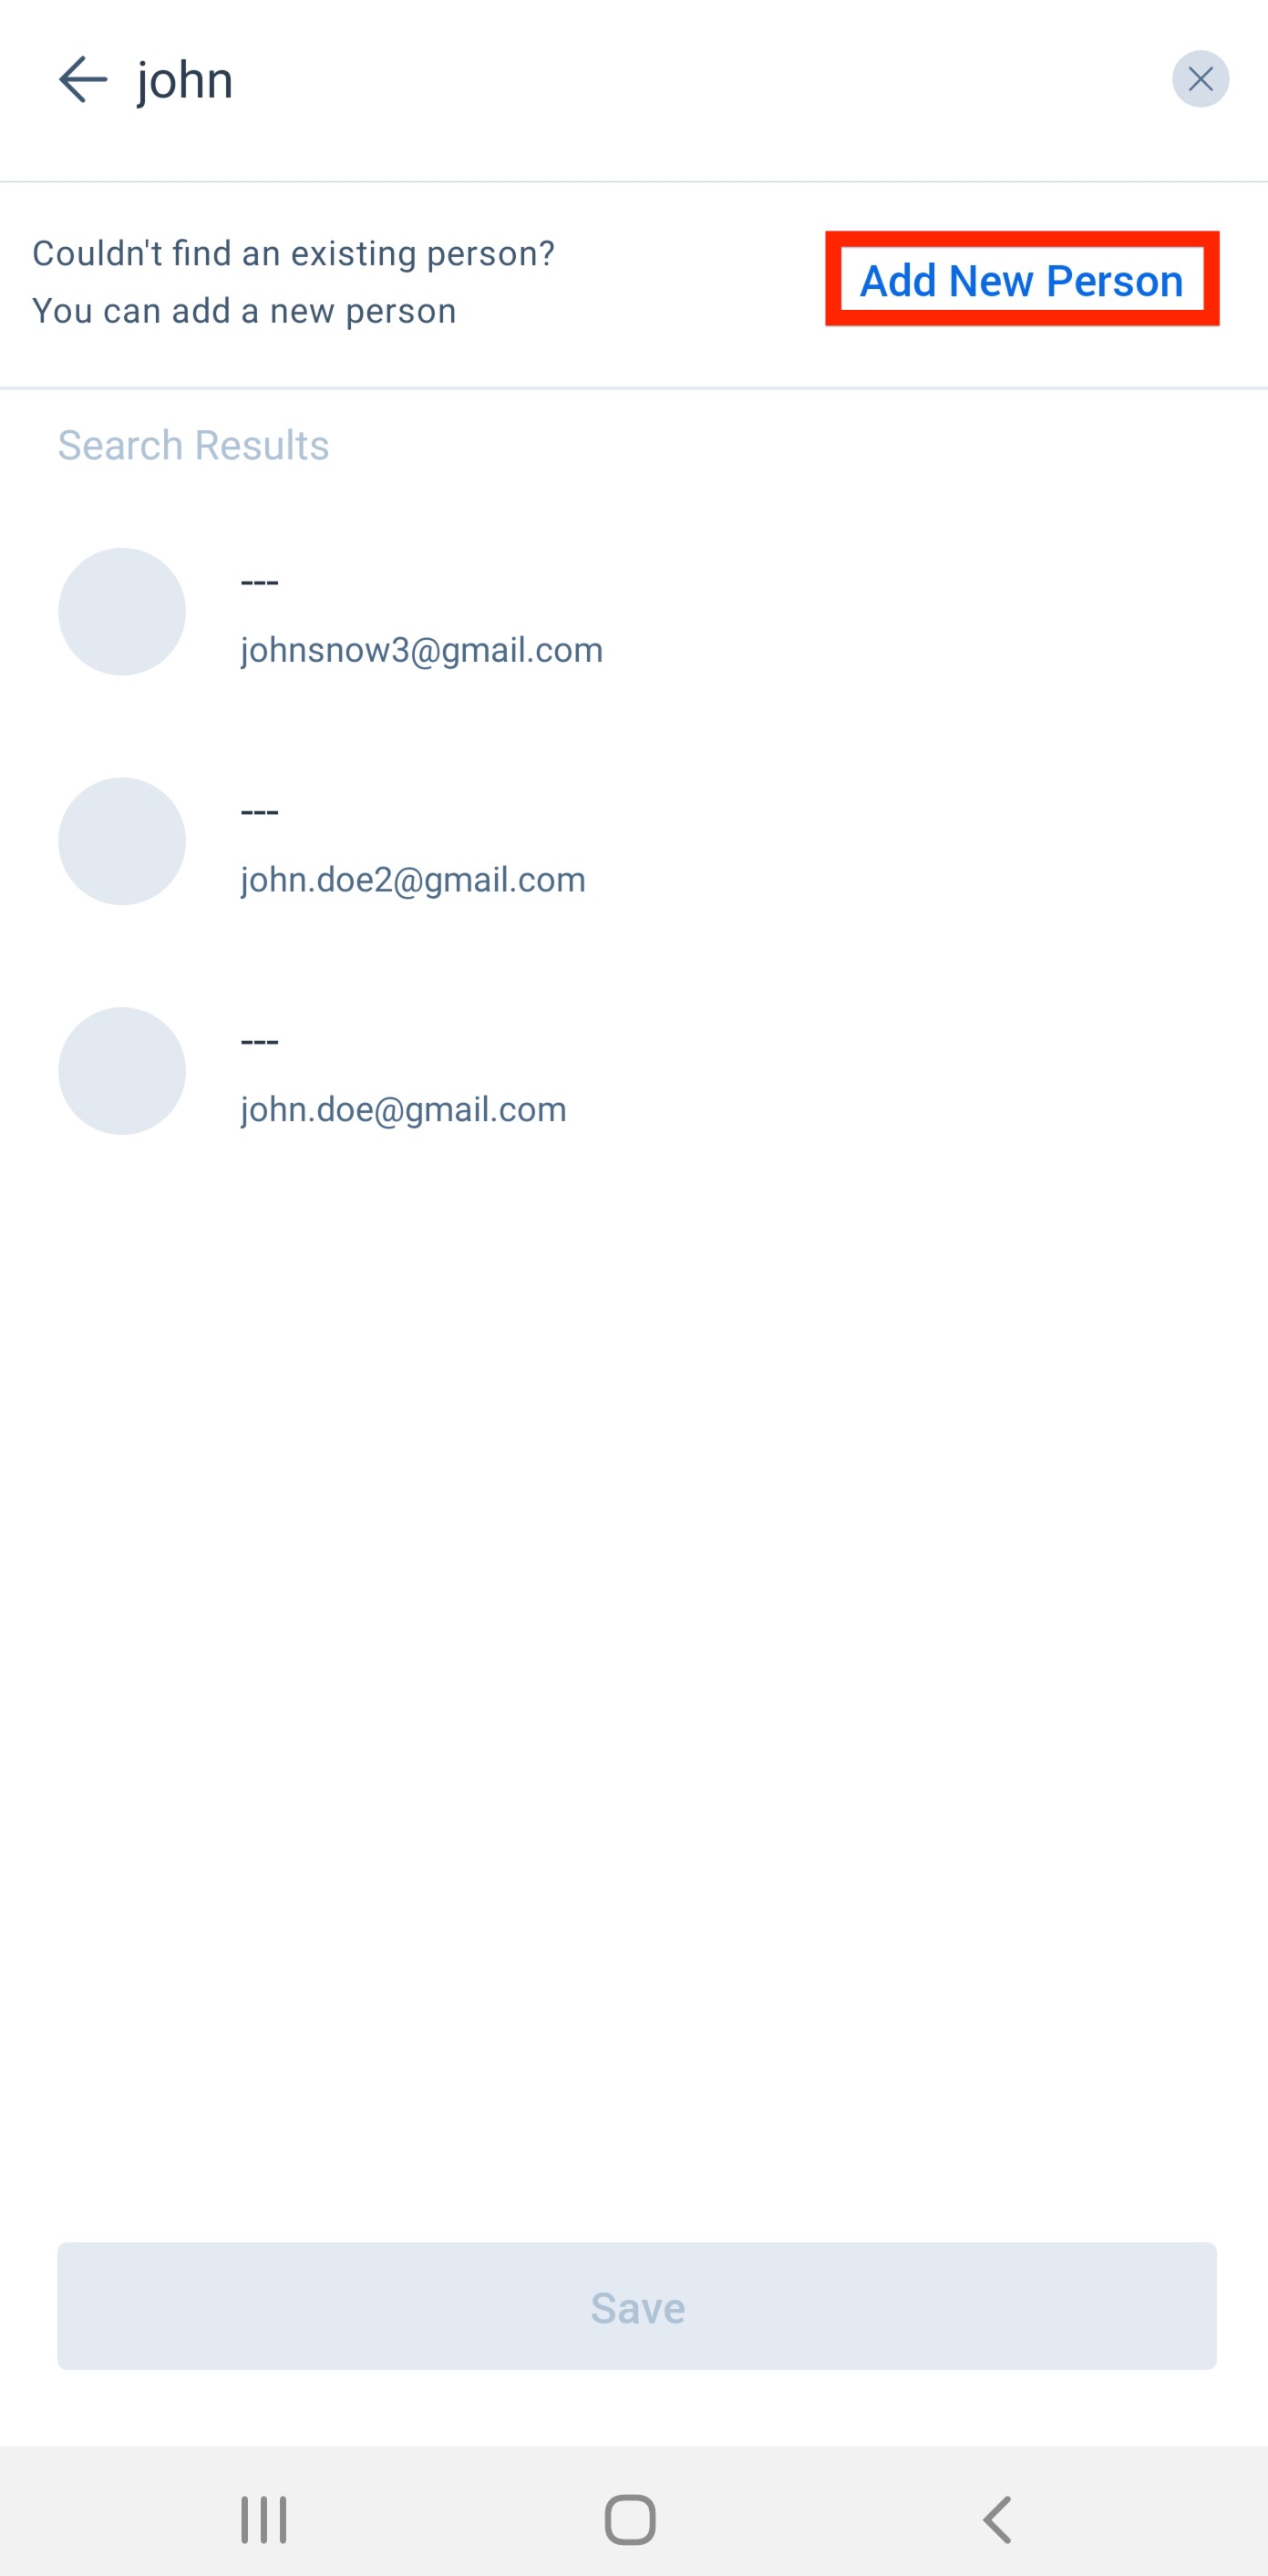
- Enter the name in the Search textbox.
- Click Search. The list of existing persons is displayed.
- Select from the available list or click Add New Person, to add a new person.
- Enter the details to map the target fields.
- Click Save.

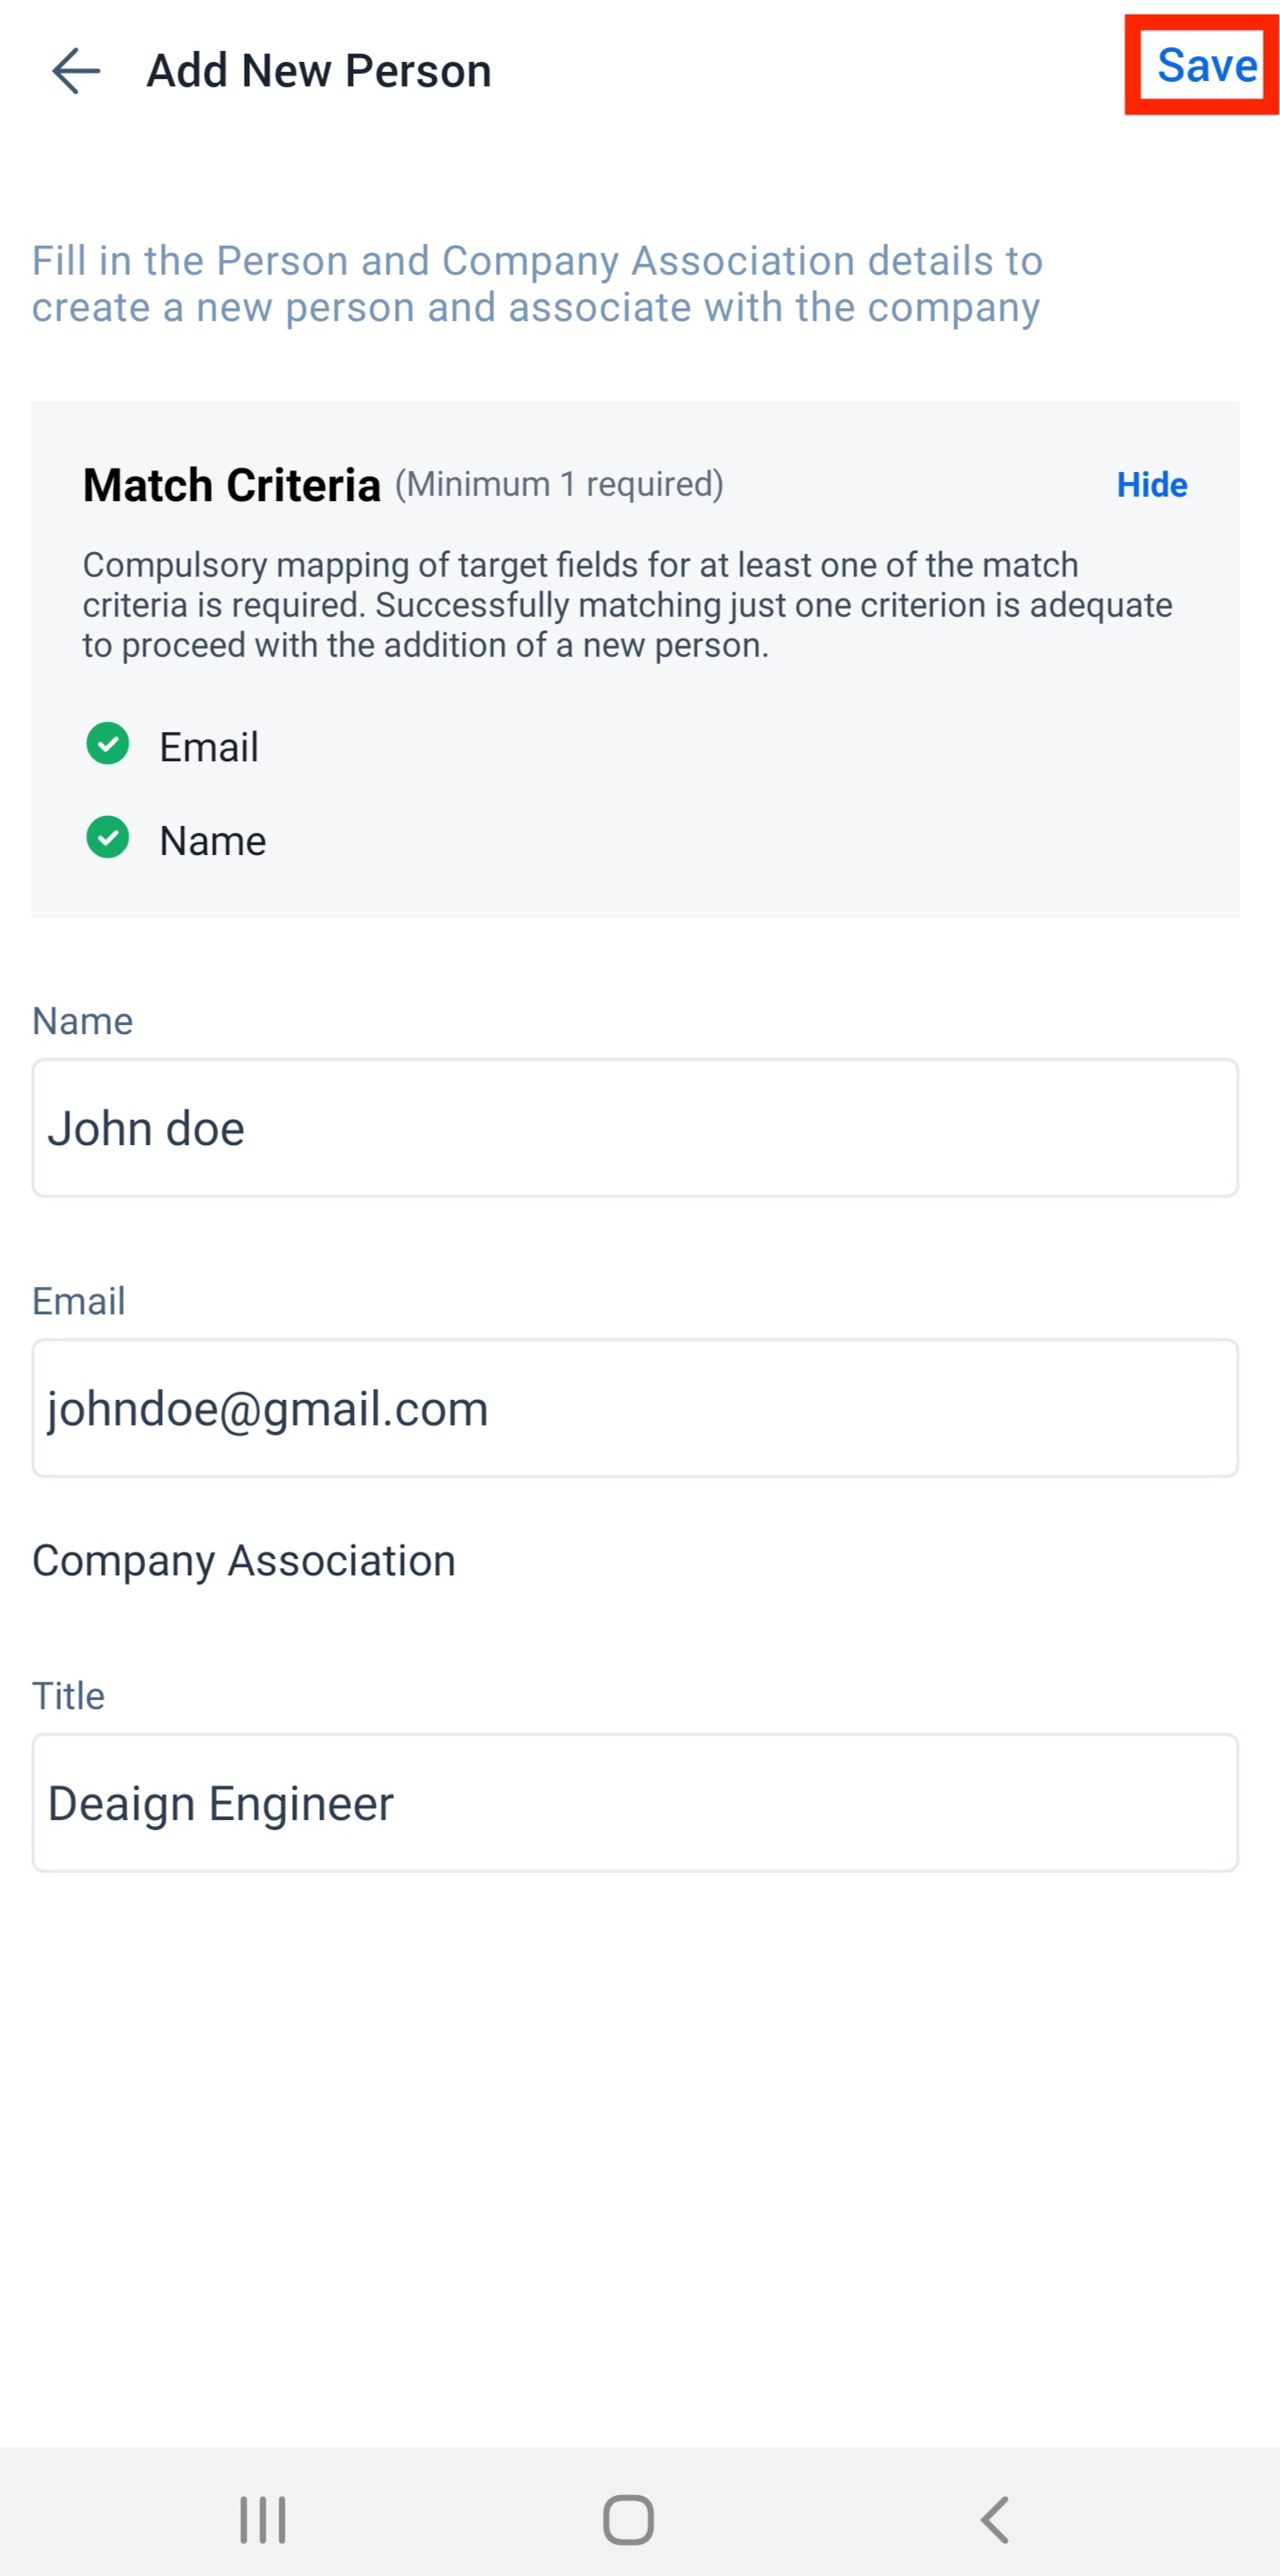
A new person can be added based on the match criteria defined by the admin in the Web App. You can enter the details to map target fields for at least one of the match criteria.
The Match Criteria is a vital feature for maintaining data accuracy in your system. It significantly reduces the creation of duplicate person records when importing data into Gainsight using the Rules Engine, Connectors, People Admin section, or People section.
For more information on how to define the Match Criteria refer to the People Management article.
Scorecard 2.0
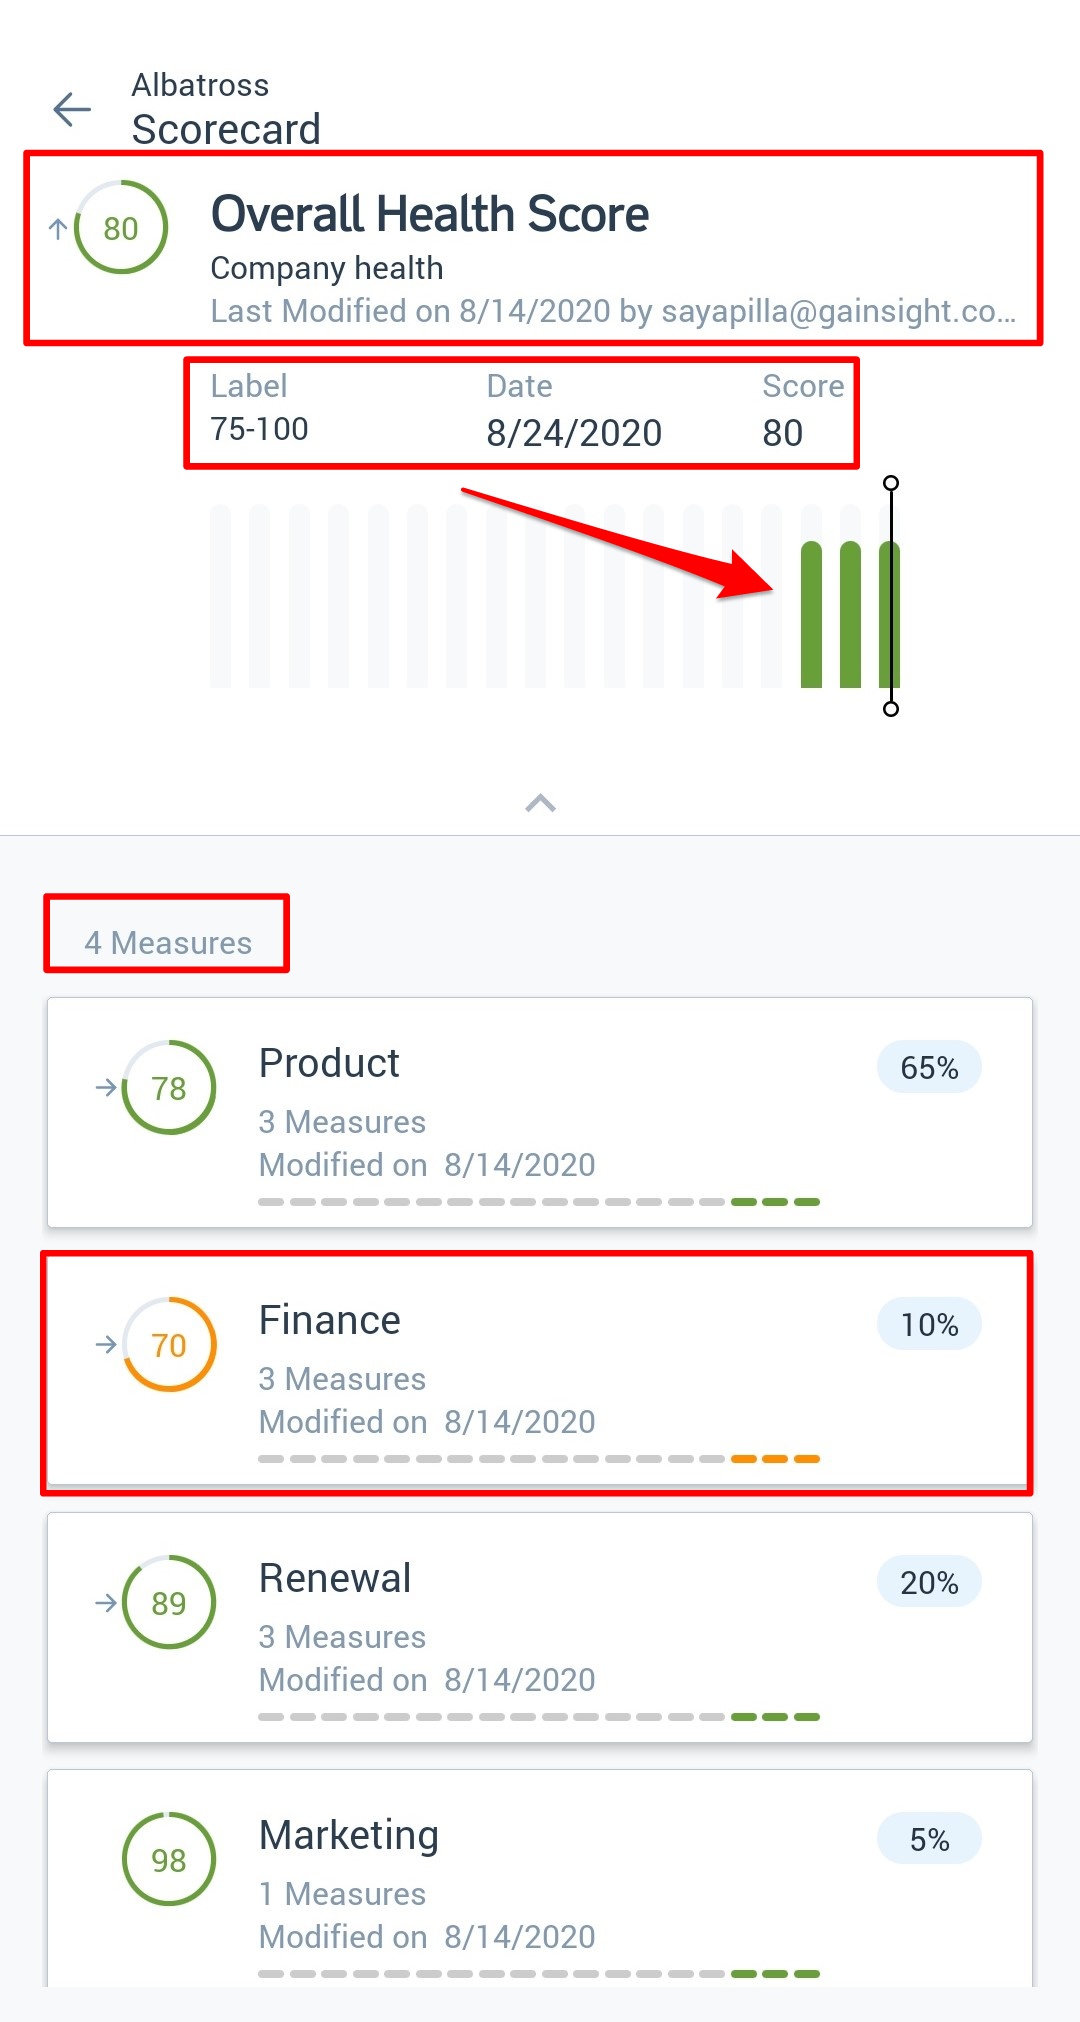
The Scorecard card on the C/R360 page displays various Scorecard parameters for the Company or Relationship. You can view the Overall Health Score of the Company/Relationship along with the Trend Indicator and the Scorecard History (for 18 data points) - versus the 24 data points in Web App. In the card view, you can view 3 Measures and/or Measure Groups.
-
Tap View All to view the high-level overview of the customer/relationship scorecard. It displays the date on which the score was last modified, modified by, the contribution percentage of each Measure to the Measure Group, and the contribution percentage of each Measure Group to the Overall Score.
Note: In the detail view, you can view all the Measure Groups along with the History of a specific Measure/Measure Group (for 18 data points). If there are no Measure Groups, Mobile App directly displays the Measures. Tap the required Measure Group/Measure to view the scorecard of that specific Measure Group/Measure.
-
Tap View Timeline to see the overall Scorecard Timeline or Scorecard Comments. Also, when you tap on each Measure, you can see the individual Measure comments in the form of an Activity Timeline. In the detail view, you can view the following options:
- Created Activities: You can view the list of activities created for that specific scorecard. Tap the activity to view the details and comments along with the snapshot of the Score when it was originally added.
- New Activity: Tap the + icon to create a new activity.
- Draft: Tap the Draft icon to view all the activity drafts.
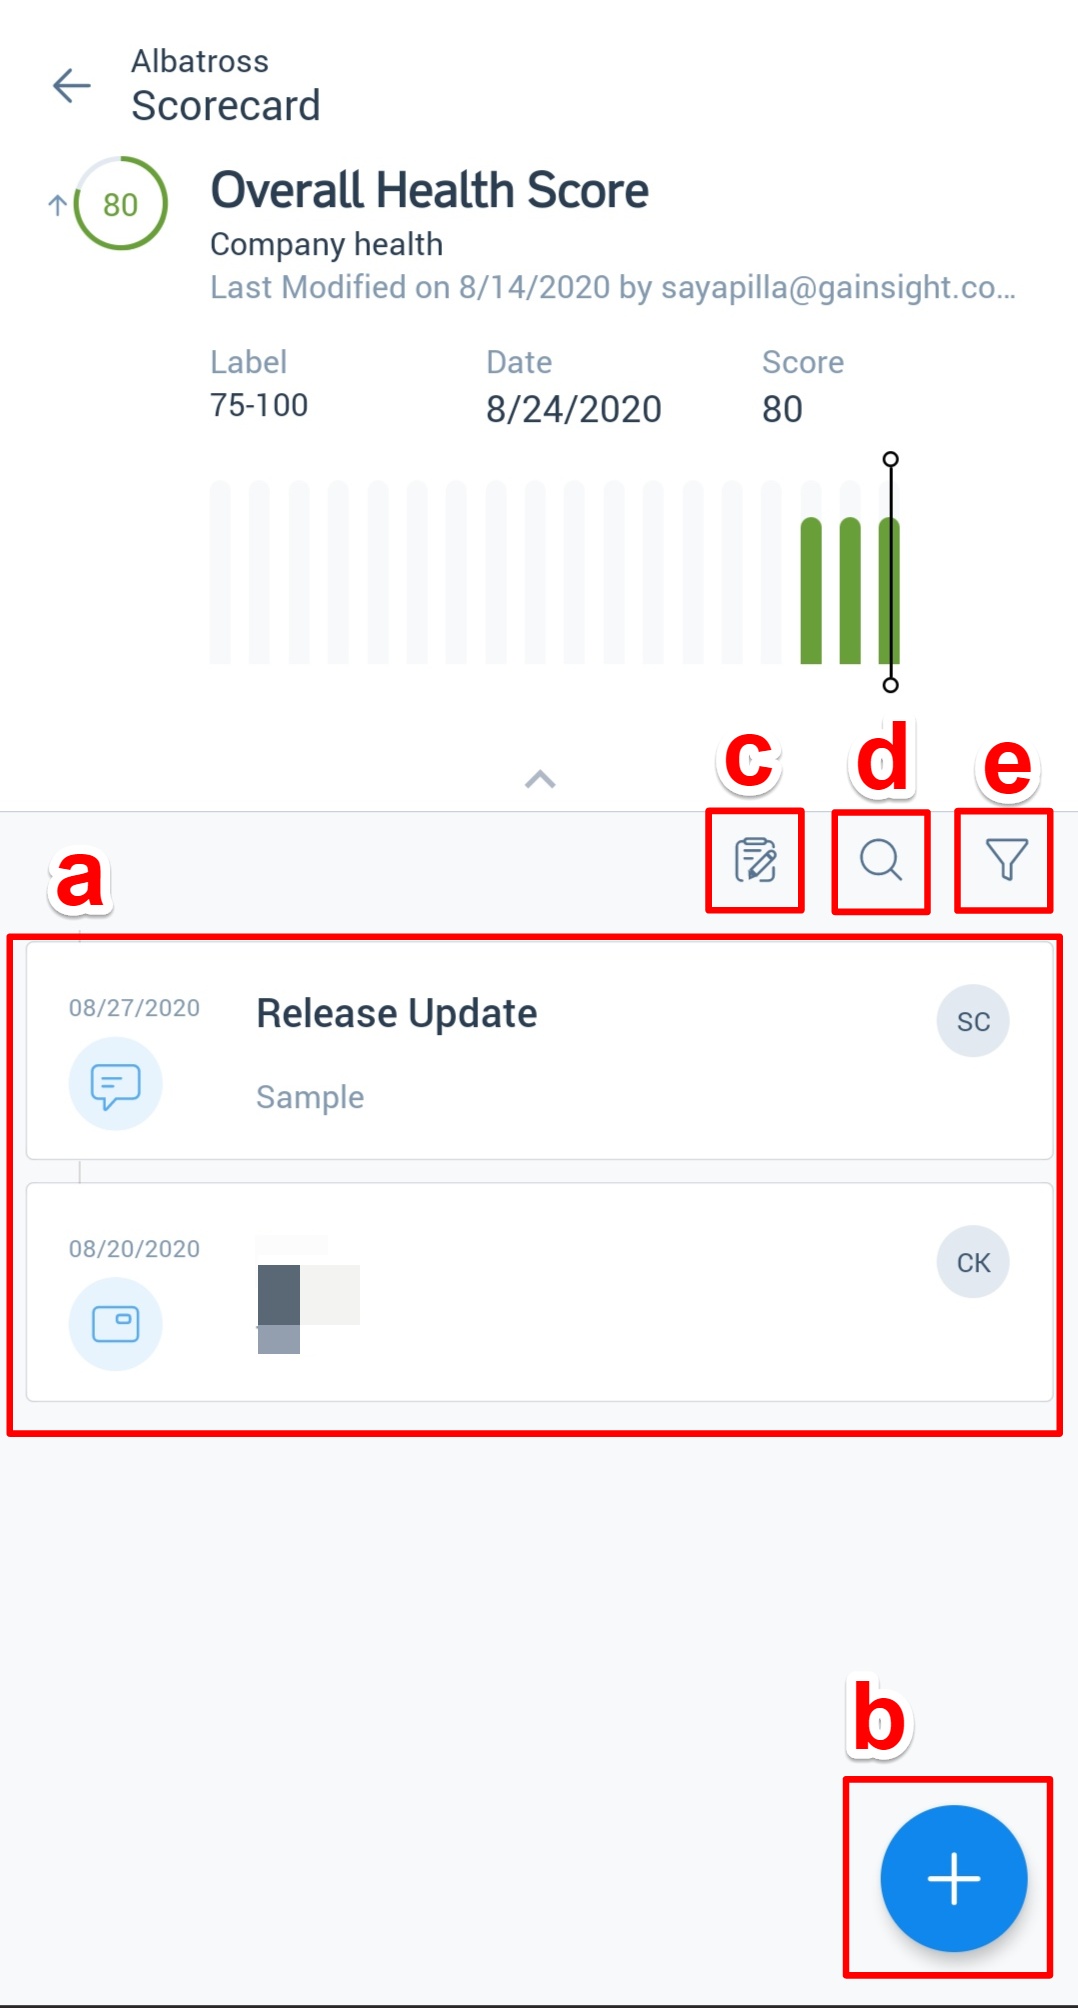
- Search: Tap the Search icon and type in the required activity name to see the search results.
- Filter: Tap the Filter icon to filter the activity by Type and Author.
Note: The applied filter persists across all of the Measures in the Scorecard section.
Notes:
- Mobile App honors all the three Scorecard schemes (Numeric, Color, and Grade) that are configured in the Web App.
- You can expand or collapse the scorecard, based on your need for a better view of the Scorecard Timeline.
- Mobile App honors the exceptions but it doesn’t explicitly state that the exceptions have been applied, as shown in the Web Application with an Information Message.
- Mobile App doesn’t display if the measure score is Automatic or Manual.
Company Intelligence (Not applicable for R360)
Company Intelligence allows users to view the Company Intelligence posts regarding companies and signals in which they are interested and helps them stay informed about their customers and competitors.
You can view the Signal Type, News Article Name, Description, and Published Date. You can view the latest 3 Company Intelligence posts on the C360-Details page.
- Tap View All to view all the posts and signals in a list view.
- You can select All or the required specific signal type to view the articles related to it.
- Tap the required post to view the article within the App!
Sponsor Tracking
This tab allows you to track the contacts associated with a specific Company/Relationship.
On the Sponsor Tracking card, you can view the Name of the Contact, Photo, Designation, and the three fields as configured in the Web App. You can also view the top three contacts on the C/R360 page.
- Tap View All to view all the contacts in a list view.
- Tap the required contact to view the details.
Notes:
- Currently, we are supporting Linkedin URLs only. Tapping the URL navigates you to the Linkedin page.
- You can see the Update Available option if there are any updates available for that specific contact. Tap the Update Available option to view the updates and to Accept or Ignore the updates. Updates can be identified either with a Red Dot on the card layout or at the bottom of the details page.
Surveys
The survey section includes two tabs that display the data collected from the surveys.
In the Surveys section, you can see View NPS Responses and View Survey Responses cards.
- View NPS Responses: On this card, you can view the name of the latest NPS survey, score gauge and either True NPS or Average NPS scores as configured in the Web App.
Tap View NPS Responses to view all the list of NPS survey names and information in detail. You can view the NPS, Score Gauge, Name of the NPS survey, Survey Source (logo), number of Responses, Last Responded Date and Published Date. Tap > on the required card to view the scores and comments in detail. - View Survey Responses: Tap View Survey Responses to view all the Survey response information.
Survey Responses tab: Here, the list of all Surveys are displayed. On each specific card, you can view the Survey Name, Survey Source, Last Responded By, Date, and Time. Tap > on the required card to view the user responses in detail.
Notes:
- In the NPS Responses tab detail view, you can view the NPS responses and their details. When you scroll down the page, all the earlier NPS responses are loaded.
- If Allow Internal Submission is enabled in the Survey, you can internally submit the responses through Mobile App. These responses will also get recorded in the Web App.
Relationships
This section displays the Relationships information (if your org has configured Relationships in Gainsight) of the specific Company.
You can view three Relationship cards. Tap View All, to view the list of relationships. On each card, you can see the Relationship Name and Type, tap > to view the detailed information of the Relationship in the R360 page.
Timeline Tab
C/R360 Timeline offers a complete view of all activities of a specific Company or Relationship. And, users can log Activities, such as Updates, Calls, Meetings, and Emails, along with notes from their customer interaction.
Tap the Timeline tab, to view the Timeline Activity Feed in detail. You can perform the following actions from the Timeline tab:
- Created Activities: You can view the list of activities created for that specific Company/Relationship. Tap the activity to view the Details and Comments.
- New Activity: Tap the + icon to create a new activity.
- Draft: Tap the Draft icon to view all the activity drafts.
- Search: Tap the Search icon and type-in the required activity name to see the search results.
- Filter: Tap the Filter icon to filter the activity by Type and Author.
Multi-Select Dropdown in Timeline
CSMs can leverage the multi-select dropdown in Timeline to add multiple values.
For example: While logging an Activity, related to a risk, the CSMs can select multiple reasons for the Risk. This would only be possible if the admin has set the Field type to Multi Select Dropdown while creating the field.
Additional Resources
- For more information on how to configure the C360 sections in the Gainsight Web application, refer to the Configure the Customer360 Sections article.
- For more information on how to configure the R360 page and sections in Gainsight Web application, refer to the Configure R360 Page and Section Types article.
- For detailed information on how to configure the Attributes section in the Web App, refer to the Configure 360 Attributes Section article.
- For more information on Timeline tab in the Mobile App, refer to the Timeline section in the Gainsight Mobile Overview article.
- For more information about C/R360 Details, refer to the 360 Overview article.
- For more information on Timeline Activity Feed, refer to the Scorecard Timeline Activity Feed article.
| Net Promoter®, NPS®, NPS Prism®, and the NPS-related emoticons are registered trademarks of Bain & Company, Inc., NICE Systems, Inc., and Fred Reichheld. Net Promoter ScoreSM and Net Promoter SystemSM are service marks of Bain & Company, Inc., NICE Systems, Inc., and Fred Reichheld. |