Designs and Template Listing Page
Gainsight NXT
Introduction
This article will walk you through the options available on the Designs listing page and Template listing page.
To access Data Designer, navigate to Administration > Data Designer.
The Data Designer page displays two tabs:
- Design listing page
- Template listing page.

Design Listing Page
The options on the Designs Listing page are categorized into 3 sections, namely:
- All Designs and Settings
- FOLDERS
- Pagination
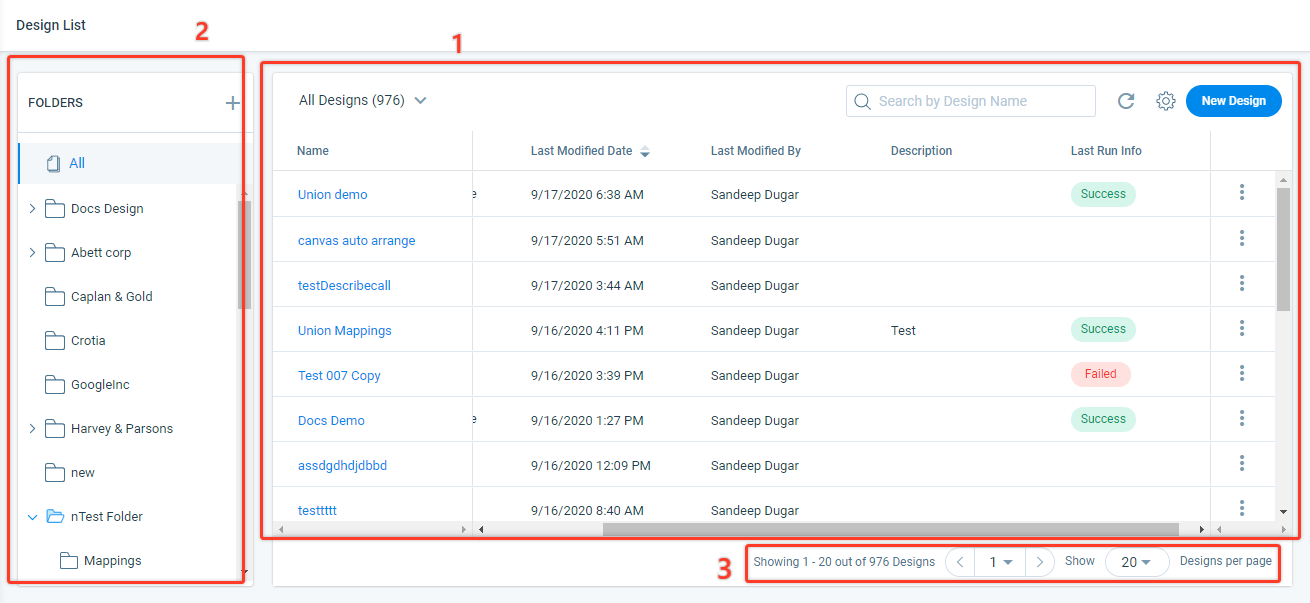
All Designs and Settings
When you land on the Data Designer page, by default All Designs is selected and displays the designs available in all of the folders. Click the All Designs dropdown to select Active/Inactive Designs options.
You can also view the total number of designs available under All Designs/Active/Inactive categories.
The options available under All Designs are:
- Name: Displays the list of existing designs. Click the Design Name of your choice to view/edit the design.
- Settings: Click the Settings/Gear icon next to the Refresh icon to customize the view of the Designs listing page. You can Search, Select a single or multiple options, and click Apply to add them to the designs list view.
Following are the fields available under Settings, you can select the required fields to view them in the Designs List View:
- Name: The display name of the Design. This field is selected by default and you cannot deselect it.
- Status Info: You can view the status information of the design. The status info is categorized into:
- Dataspace: This status is displayed only when you make the dataset permanent and available across Gainsight.
- Ready to explore: This status is displayed once the dataset is prepared and is ready to explore.
- Preparing Dataset: This status is displayed when the dataset preparation is in process.
- Expired: This status is displayed when the dataset is expired.
Note: If you don't make the dataset permanent and universal, the dataset will expire in 15 days.
- Active: Displays whether the design is Active or Inactive
- Last Modified Date: Displays the Last modified date of the design.
- Created Date: Displays the Created date of the design.
- Last Modified By: Displays the name of the last user who modified the design.
- Created By: Displays the name of the user who created the design.
- Description: details of the design that you have entered while creating the design.
- Next Schedule Run: Displays the upcoming schedule of the Data Design
- Last Run Info: You can see the status here, only when you complete the Preparation step. Click the status to view the execution log details. The following are the statuses you can see in the Last Run Info:
- Success: This status is displayed when the design is successfully executed.
- Failed: This status is displayed when the design fails to execute.
- Aborted: This status is displayed when you stop the execution of the design.
- Search By Design Name: Type in the Design Name to display the search results.
- Refresh: Click Refresh to refresh the Last Run Info, Status Info, etc. of the designs.
-
Context Menu: Click the Context Menu icon to view the following actions:
- Details: Clicking Details will navigate you to the Details screen.
- Prepare: Clicking Prepare will navigate you to Preparation screen.
- Explore: Clicking Explore will navigate you to the Explore screen
- Configure: Clicking Configure will navigate you to the Configure screen.
- Inactive/Active: will allow you to set the design schedule to Active/Inactive.
- Clone: allows you to clone the selected design.
- Run Now: Clicking Run Now will execute the job for this particular dataset.
- Delete: Clicking this button will delete the selected design.
Note: If you try deleting a design (dataspace), Data Designer displays a notification that informs you to Check Dependencies. This prevents you from accidentally deleting dataspace that is already used across Gainsight in a Rule or a Report.
Folders
Folders manage and organize all the designs that are created. By default, you can see All and Uncategorized folders; you can also create a new folder and subfolders under it.
All: displays the list of designs available under all the folders and subfolders.
Uncategorized: All of the designs that are not categorized under a separate folder fall under this category.
To create Folders:
- Click + to create a folder or a sub-folder.
- Enter the name in the Folder Name text box.
- Select the Parent Folder from the displayed list of folders. For example, you can select Home to create a Folder (or) Select an existing folder, if you want to create a Sub-folder.
- Click SAVE.
Edit/Delete Folders
To Edit or Delete folders:
- Click the Folder Name you wish to edit/delete.
- Click the pencil icon to edit the folder name, and click ✓ to save.
- Click the delete/trash icon, if you want to delete a folder.
Notes:
- You cannot create a folder under Uncategorized.
- You can create only two levels of subfolders under Home.
- You can also drag and drop a folder (that has no subfolders) into another folder.
Pagination
If you have too many designs, you can use the pagination tool to navigate through different pages and view multiple designs, in a set of 20, 40 or 60 on a single page, based on your selection.
Create or Edit Designs
Click New Design to create a new design. To edit an existing design, click the design name of your choice from the designs list, and you will be navigated to the editing screen. For information on how to configure/edit an existing design, refer Create Datasets in Data Designer.
Template Listing Page
The options in the Template page are categorized into two sections, namely:
- All Templates
- Pagination
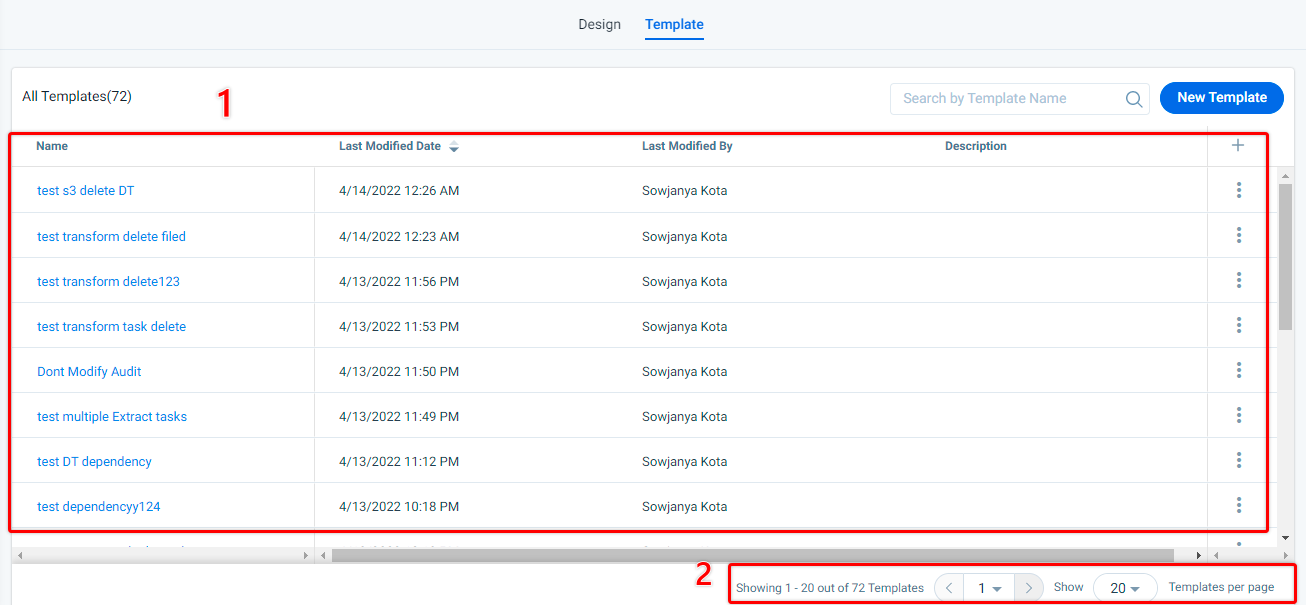
All Templates
The Template page displays the list of all saved templates in Data Designer. Following are the fields available under Settings, you can select the required fields to view them in the template list:
- Name: The display name of the Design Template. This field is selected by default and you cannot deselect it.
- Last Modified Date: Displays the Last modified date of the Design Template.
- Last Modified By: Displays the name of the last user who modified the design.
- Created Date: Displays the Created date of the design.
- Created By: Displays the name of the user who created the design.
- Description: Details of the design template that you have entered while creating the template.
Pagination
If you have too many designs, you can use the pagination tool to navigate through different pages and view multiple designs, in a set of 20, 40 or 60 on a single page, based on your selection.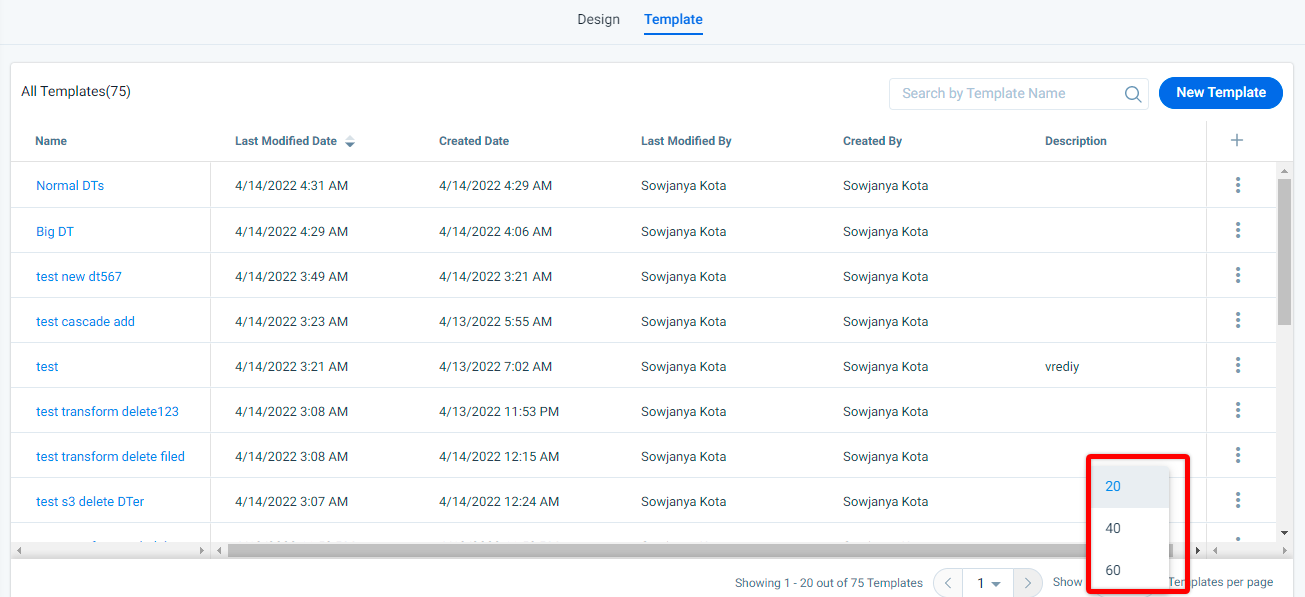
Create or Edit Design Templates
Users can Create or Edit an already existing Design Template from the Template page.
- To create a Design Template. Click New Template.
- To edit a Design Template, click on the context menu of the template to be edited. You will be navigated to the Preparation stage.
- Modify the dataset as required.
- Click Save.
For more information on how to create new Design Templates and use Design Templates as source, refer to the Use Design Templates in Data Designer article.