Mixpanel Connector
Gainsight NXT
| IMPORTANT: Gainsight is upgrading Connectors 2.0 with Horizon Experience. This article applies to tenants which have been upgraded to the Horizon Experience for Connectors 2.0. If you are using Connectors 2.0 with the previous version, you can find the documentation here. |
This article guides you through how to integrate Mixpanel with Gainsight to access all Mixpanel event data in Gainsight.
Note: This document provides general guidance on creating a Connection. Since the use case of each job is different and needs a unique configuration, for detailed information on creating any Job, refer to the Configuration of Connectors in the Additional Resources section at the end of this article.
Overview
Mixpanel is a customer data platform that captures customer usage data from your website and transmits the data to any system that is integrated with Mixpanel. Integrate Mixpanel with Gainsight to import customer usage data into the custom Gainsight objects. Mixpanel integration pulls usage data to Gainsight as and when events are captured by Mixpanel, hence configuration is not required for Schedule of the data jobs.
For example, usage data includes the pageviews on a product in an ecommerce site or tracking of the customer activities in your website over a period of time.
Benefits of Gainsight integration with Mixpanel: Analyze the usage data stored in Gainsight to design a better product, provide amazing customer service, grow your audience, etc.
Configure Mixpanel Integration with Gainsight
Recommendations
Gainsight supports Events, People, and the associated properties from Mixpanel to track the page loads on your website. For more information, refer to the Track Usage Data in the Additional Resources section at the end of this article. .
Prerequisites
- Integrate Mixpanel with your application by installing web tracking code. For detailed information, refer to the Integration of Mixpanel with your Application section in this article.
- Create or ensure that you have the Gainsight custom objects as required for storing Event and People data. For more information on how to create custom objects, refer to the Gainsight Data Management in the Additional Resources section at the end of this article.
- While creating an object, you must ensure that the following fields are included:
- Account Identifier
- Event Identifier
- Time Identifier
- User Identifier
- User First Name
- User Last Name
- User Email
In addition, add any field which is required for mapping in the Mixpanel project.
- Copy API Secret Key from the Mixpanel Project from which you want to import data into the Gainsight objects. For more information, refer to the Viewing Project Token, API Key, and API Secret in the Mixpanel: Personal Settings article.
Integration of Mixpanel with your Application
Integrate Mixpanel with your application by installing the Mixpanel web tracking code into your website.
Note: If the Mixpanel web tracking code is already installed on your website, you can skip this step.
If Mixpanel is not installed on your website, follow the instructions in the Guide to Mixpanel Implementation article to add the Mixpanel Javascript library directly to your site. The following image displays an example of the web tracking code.
Important: You must use your project's tokens.
![]()
Track Usage Data
Gainsight supports Events, People, and the associated properties from Mixpanel to track the page loads on your Mixpanel website. The following code snippet contains three properties that are recommended to use for the Mixpanel integrations.
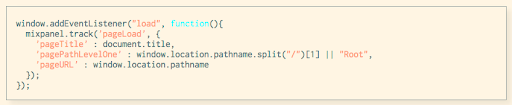
Following are the properties of the webpage tracked using Mixpanel:
- You should add a track API call to track page loads with Mixpanel. This call is invoked when the page is loaded.
- Details related to the page are passed as properties with the event.
-
Mixpanel links users to their actions on the UI and records traits about them. It includes a unique User ID and any optional traits like their email, name, etc.
-
Following are three properties recommended to use for the Mixpanel integrations along with the pageLoad event, as shown in the code snippet above:
-
pageTitle: This property tracks the name assigned to the page, ignoring URL structure. This is best suited for websites where almost every URL is unique or where the URLs do not follow a folder structure.
-
pagePathLevelOne: This property groups URLs into a folder hierarchy and aggregates metrics for all pages under the top level folder. This is best suited for websites with a large number of URLs organized hierarchically.
-
pageURL: This property tracks every page individually. This is best suited for websites with a small number of distinct URLs.
Note: Events and the associated properties are used throughout this documentation.
-
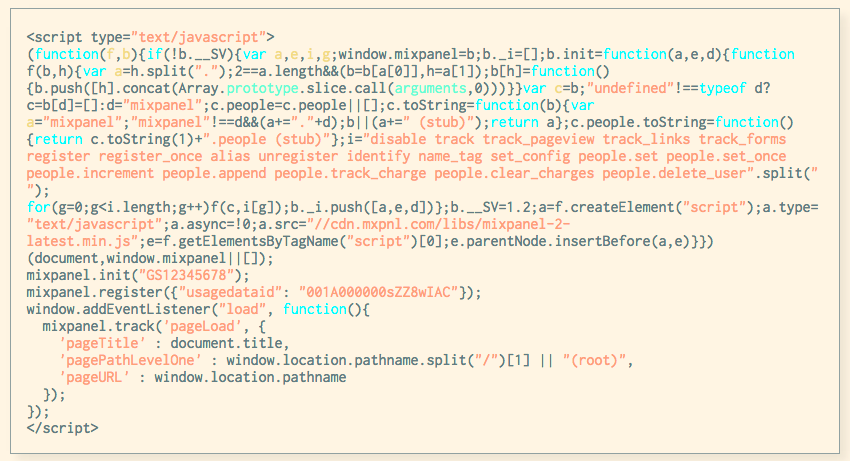
If you pull all the Mixpanel code outlined together, your code on all the webpages looks similar to the following example.
Get API Secret Key of the Mixpanel Project
You can obtain the API Secret Key of the Project in the Mixpanel website from which you want to import data into the Gainsight objects. To collect the API secret key:
- Login to the Mixpanel website with your credentials. Navigate to Profile > Account as shown below:

- Navigate to the Projects tab. Copy the API Secret Key in the project from which you want to import data into the Gainsight objects.

Create a Mixpanel Connection
This section explains how to create a connection with Mixpanel. Once a connection is created, data jobs are configured to ingest usage data into the Gainsight custom objects.
Note: Create more than one Mixpanel Connection in the Administration > Connectors 2.0 > Connections page.
To create a connection with Mixpanel:
- Navigate to Administration > Connectors 2.0 > Connections.
- Click Create Connection. The Create Connection dialog appears.
- Select Mixpanel from the Connector dropdown list.
- Enter Name of the Connection.
-
Select the Time Zone from the dropdown list. You should select a timezone which is configured in your Mixpanel project.
Note: If you select a timezone different than the one configured in your Mixpanel project, the data is likely to contain errors. -
Enter the API Secret Key copied from your project on the Mixpanel website.
-
(Optional) Click Test Connection to test the connection.
-
Click Save to create the connection.
Create a Data Job
Note: Create one data job for each Mixpanel connection in the Administration > Connectors 2.0 > Connections page.
To create a data job:
-
Navigate to the Jobs page.
-
Click Create Job. The Create Job dialog appears.
-
Enter the Job Name in the Name of the Job textbox.
- Click Next. The Job Preparation page appears.
-
Select Mixpanel in the Data Source. Preparation tab is displayed which contains the following four sections:
-
Job Details
-
Get MetaData
-
Map MetaData
-
Import Data
-
Job Details
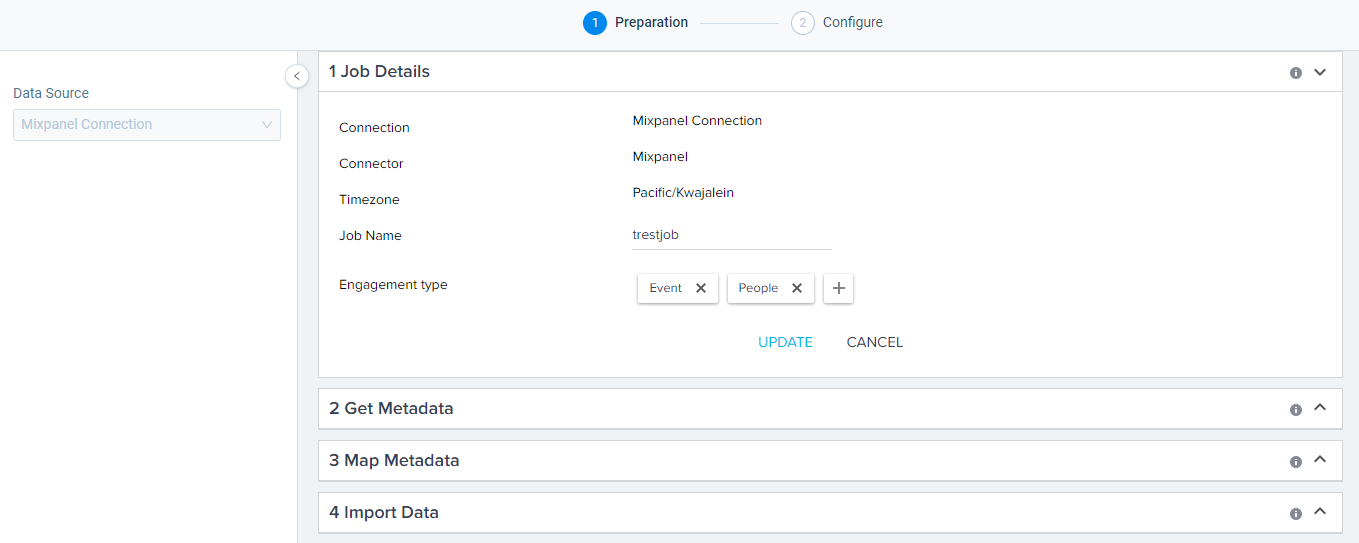
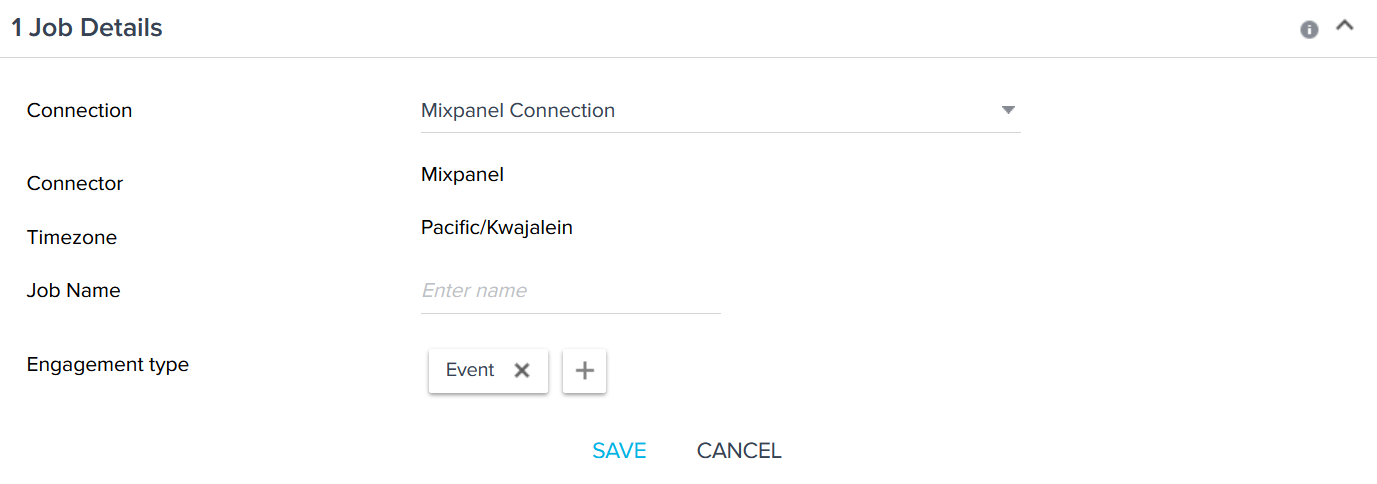
In the Job Details section, perform the following actions:
- Connection: By default, Mixpanel Connection is selected the connection type cannot be changed.
- Connector: Displays the Connector Name.
- Timezone: Displays the timezone.
- Engagement type: Click the + icon and select Event and/or People from the dropdown. Gainsight supports two engagement types: Event and People to track the customer usage data.
- Click SAVE.
Get Metadata
In the Get Metadata section, perform the following actions:
- Select the date range from which you want to fetch usage metadata. This will pull all events in the date range selected. By default, the date range is pre-populated for the last 5 days.
Note: You can select a maximum of 7 days (1 week) in the date range.
- In the Send Email Notification, enter the email address of recipients for the following cases:
- Email on Success: If metadata import is successful, a success notification email is sent to the email addresses entered here.
- Email on Failure: If metadata import is failed, a failure notification email is sent to the email addresses entered here.
Note: By Default, 'Success' and 'Failure' fields are populated with the logged-in user email address.
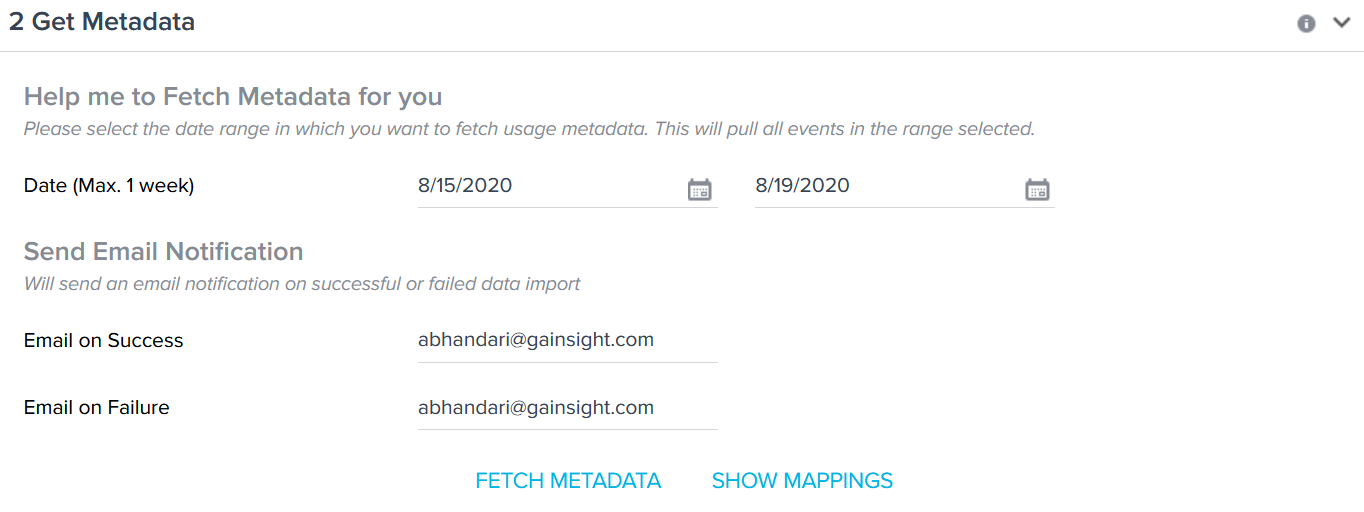
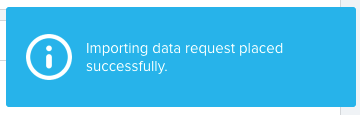
- Click FETCH METADATA. You can see the following UI notification:

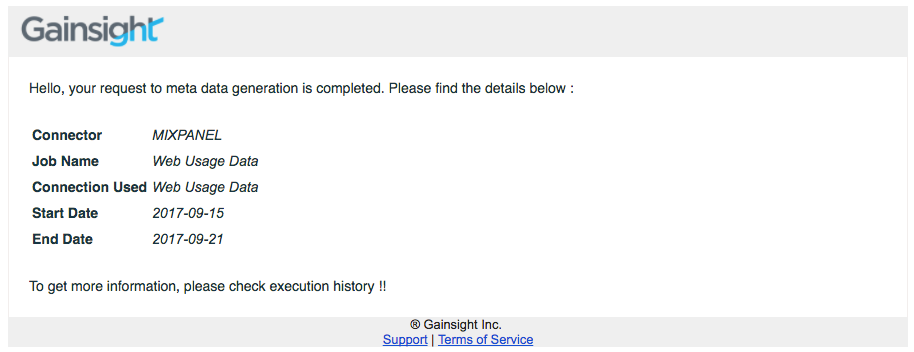
You will receive a success notification of the metadata generation via email as shown below. If the metadata generation fails, you will see a failure notification accordingly.
- Click SHOW MAPPINGS to navigate to the Map Metadata section. UI message Mappings Fetched Successfully appears.
Map Metadata
Events Mapping
In the Events Mapping section, perform the following actions:
- Select a Gainsight custom object to load events data from Mixpanel. For example, MixpanelObject is selected as shown below.
- In the Required tab, map Mixpanel metadata to the fields in the target Gainsight object for the Account, Event, and Time Identifiers as shown below:
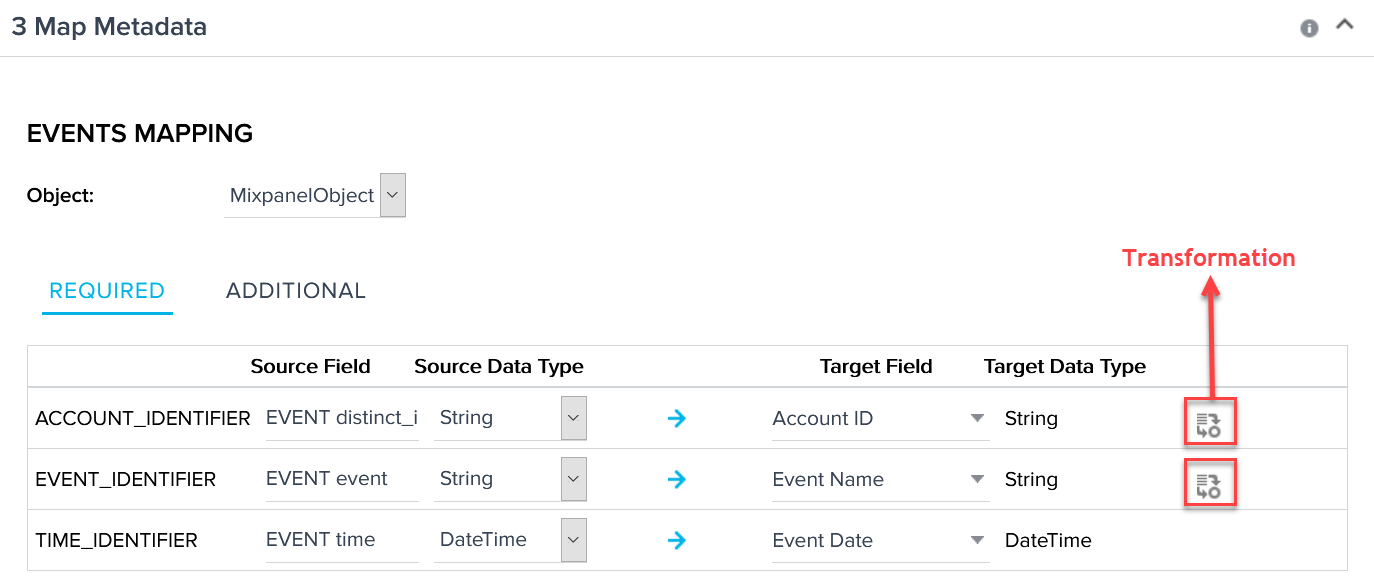
- (Optional) Perform the following actions for Events data Transformation:
- Click the Transformation icon for the Account and Event Identifiers to transform the event records. Transformation dialog appears.
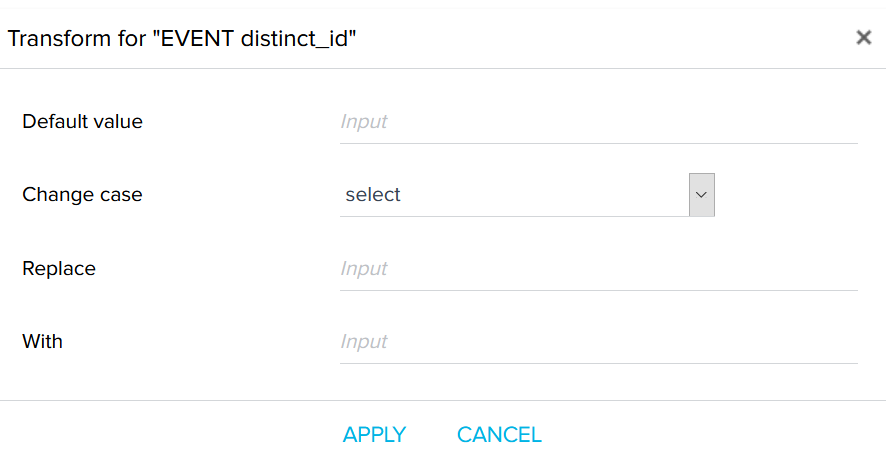
Note: Transformation cannot be performed on the Time Identifier records. - In the Transformation dialog:
- Default value: Assign a default value for the null records.
- Change case: Change the letter case of the records to lower or upper.
- Replace: Enter the name of source record with the given value.
- With: Enter value for the source record to be replaced with this value.
-
Click Apply.
- Click the Transformation icon for the Account and Event Identifiers to transform the event records. Transformation dialog appears.
-
In the Additional tab, click ADD to map additional Mixpanel metadata to the fields in the target Gainsight object.
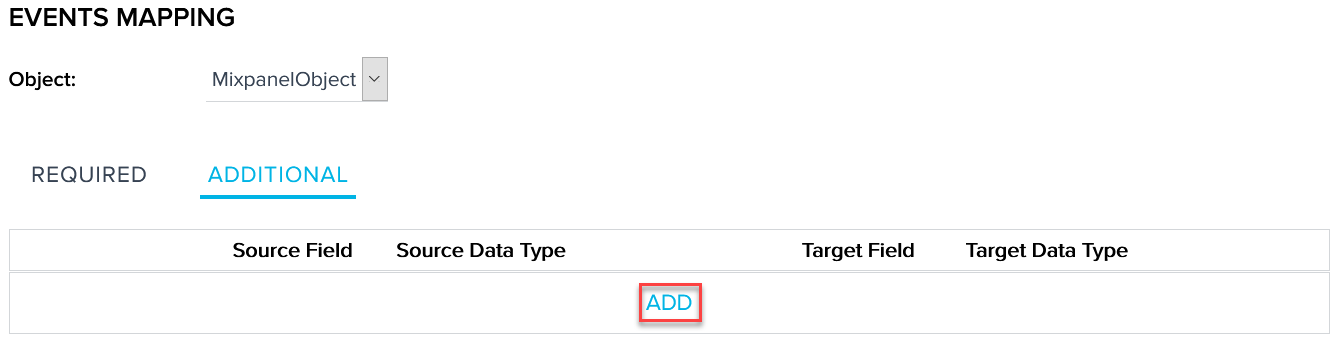
Note: The Required mapping provides the list of standard fields available for mapping. Any other fields necessary for mapping are included in the Additional mapping.
People Mapping
Perform the following actions in the People Mapping section:
- Select a Gainsight custom object to load People data from Mixpanel. For example, Mixpanel People is selected as shown below.
- In the Required tab, map Mixpanel metadata to the fields in the Gainsight object, Mixpanel People for User Identifier, First Name, Last Name, and Email as shown below:
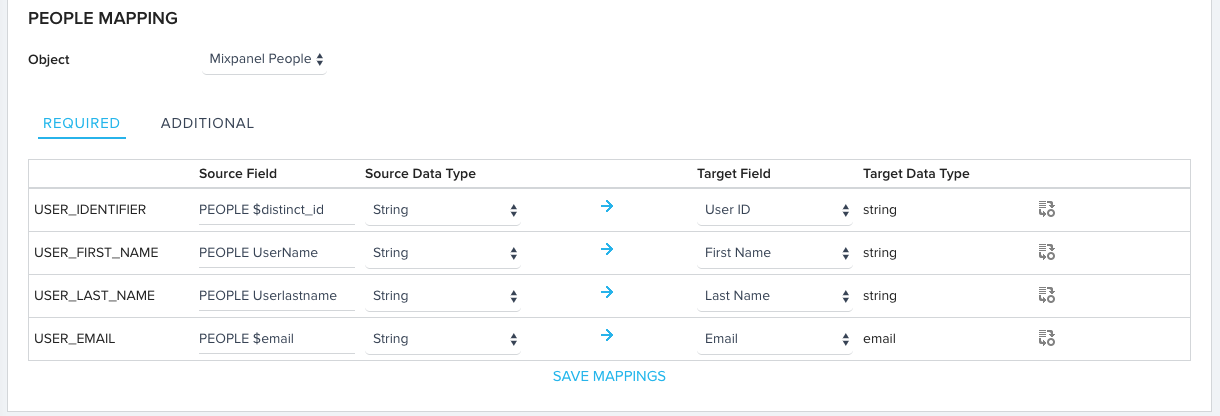
- Apply transformation on the Identifier, First Name, Last Name, and Email values as required. For more information, refer to the transformation step in the Events Mapping section.
- In the Additional tab, click ADD to map additional Mixpanel metadata to the fields in the target Gainsight object.

Import Data
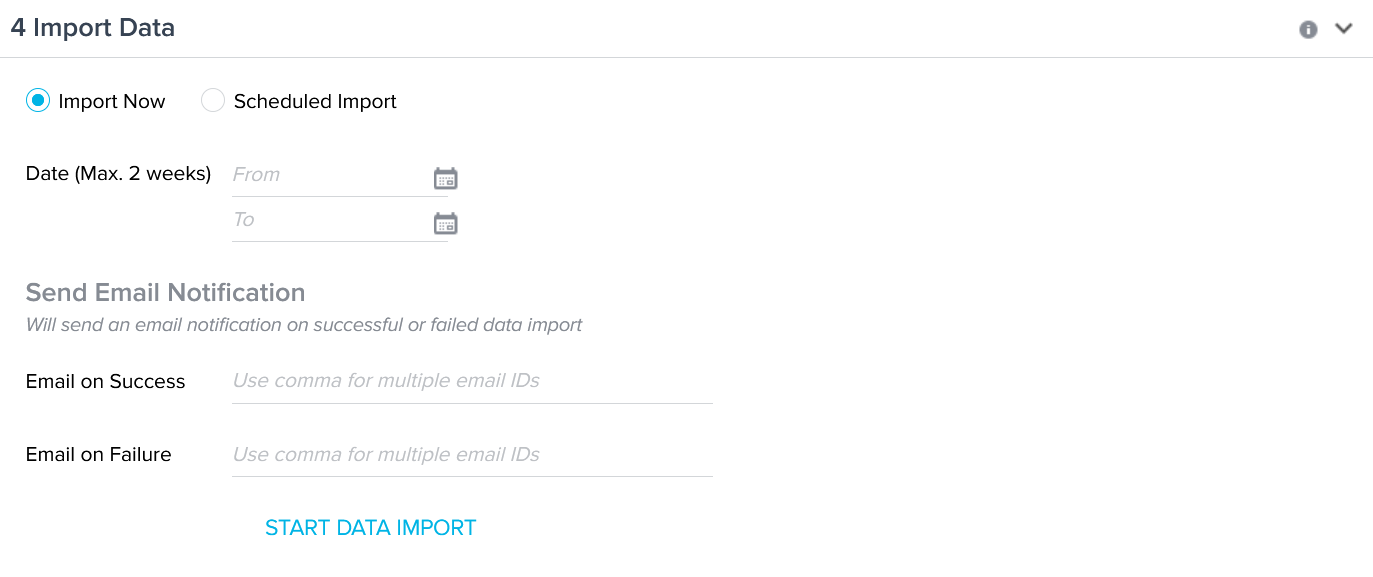
Perform the following actions in the Import Data section:
- Import data from Mixpanel using one of the following options:
- Import Now: Use this option to import data now from Mixpanel into the Gainsight objects. Select a date range of maximum of two weeks and import data available in that period.
Note: If you want to import data for more than two weeks, you can use the import option multiple times with the corresponding date ranges.
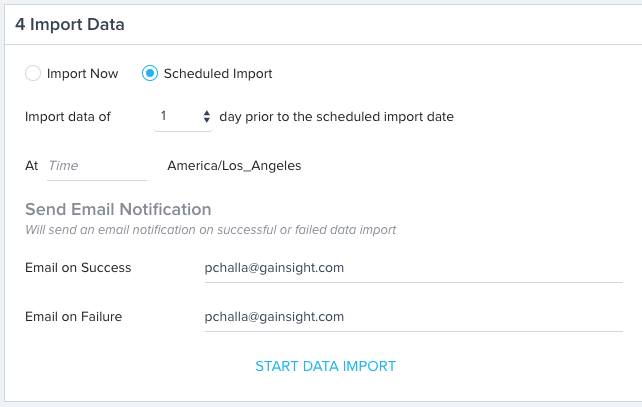
- Scheduled Import: Use this option to import data from Mixpanel on a daily schedule. The scheduler runs everyday at the Time specified by the user, and fetches the data of N days prior to the scheduled run date.
Note: For example, to import Yesterday's data, N days should be set to 1. Similarly to import data of the last two days, N days should be set to 2. The timezone of the Mixpanel Connection is shown here.
- Import Now: Use this option to import data now from Mixpanel into the Gainsight objects. Select a date range of maximum of two weeks and import data available in that period.
- In the Send Email Notifications, enter the email address of recipients for the following cases:
- Email on Success: If data import is successful, a success notification email is sent to the email addresses entered here.
- Email on Failure: If data import is failed, a failure notification email is sent to the email addresses entered here.
Note: By Default, 'Success' and 'Failure' fields are populated with the logged-in user email address.
- Click START DATA IMPORT. The following UI notification is displayed.
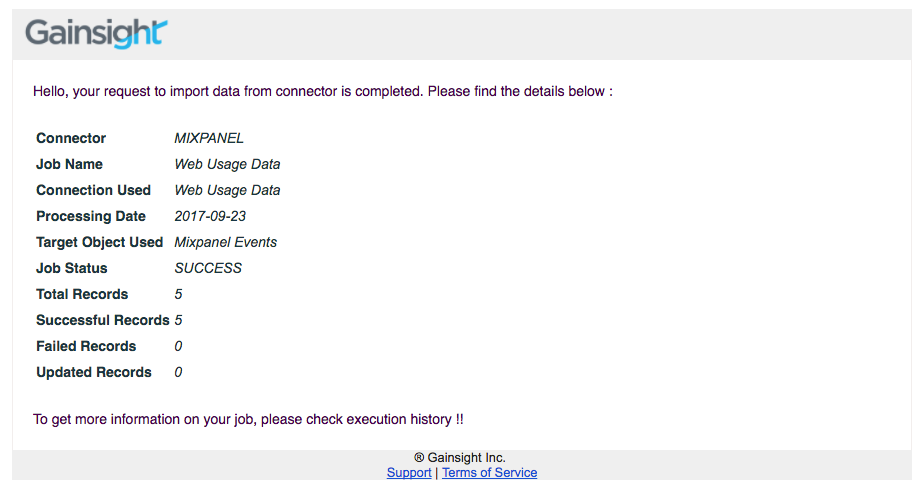
You will receive success notifications for data import of Events and/or People via emails separately. If the data import is failed for Events and/or People, you will receive a failure notification accordingly. Success notification for data import of Events is shown below:
Success notification for data import of People is shown below:

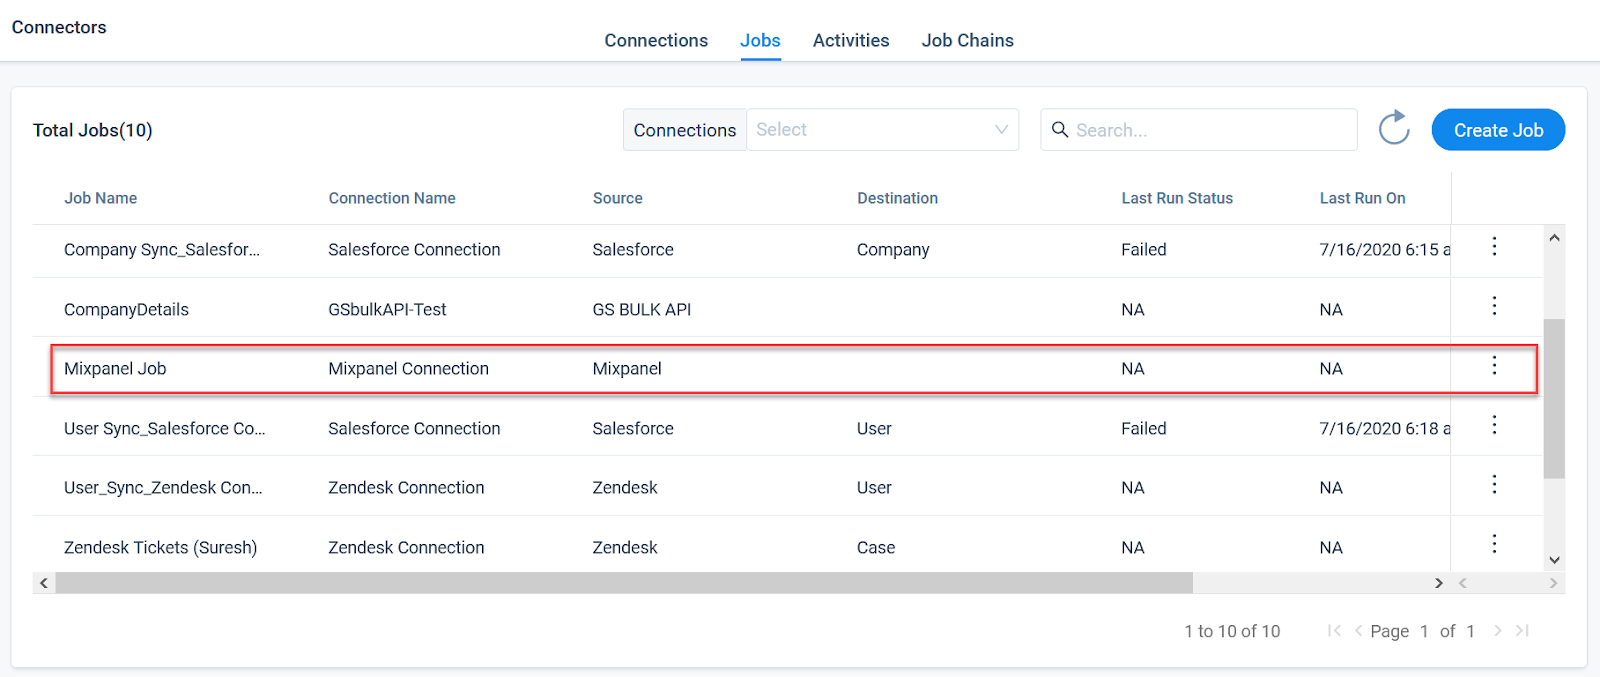
Jobs List
In the Jobs List page, you can see the data job for each Mixpanel Connection. Edit or delete the existing data job in the Jobs List page. You can create one data job for each Mixpanel connection in the Administration > Connectors 2.0 > Connections page. For more information, refer to the Job List Page in the Additional Resources section at the end of this article.
Activities
View the Execution and Update Activities of all the data jobs in the Activity page. Download the logs of the jobs execution from this page to help troubleshoot the configuration issues. For more information, refer to the Activity Page in the Additional Resources section at the end of this article.
Usage Data Aggregations
Perform aggregations of the customer usage data using Rules. To perform the usage data aggregations and to schedule them, refer to the Aggregate Usage Data with Rules Engine in the Additional Resources section at the end of this article.
If you have questions or feedback about the feature explained in this article, please share them on community.gainsight.com
Additional Resources
For more information about Connectors, refer to the following articles: