Configure Cockpit Tasks
Overview
Tasks are associated to Call To Actions (CTA) and represent the CSM's to-do's which are necessary to address a customer issue. Tasks have slightly different options from CTAs and Admins can customize the task view which displays in the Cockpit List View and 360 > Cockpit sections. To configure Tasks within CTAs, navigate to Administration > Task.
General Settings: Task Display Order
In this section, you can configure the order in which tasks are displayed in a CTA. Select either Playbook Order or Due Date from the Task Display Order field, to display tasks in either order of their playbook or due date, respectively.
![Task [2].png](https://support.gainsight.com/@api/deki/files/13741/Task_%255B2%255D.png?revision=1)
Detail View Layout Configuration
In this section, you can configure the fields which are visible to CSMs in the Task detail view. You can create a Group and add the required fields to the group.
By default, one group known as the Default Group is already available. The Default Group has four fields viz, Priority, Status, Description, and Playbook. CSMs can see these fields on the Task Detail view. The image below depicts the Admin page settings and shows the Default Group and four fields in it.
![DV LC [2].png](https://support.gainsight.com/@api/deki/files/13742/DV_LC_%255B2%255D.png?revision=1)
To add additional fields to the Task Detail view, drag and drop fields from the left pane to the default group section. Fields added under the Default group section can be viewed by the CSMs along with the four default fields.
To create a new group, drag and drop fields to the drag here to create new group section. When you drag and drop a field to this section, a new section is created with name Group. You can change the name of this Group. The fields added under this group, display in a separate section in the Task detail view.
A new custom field is created in the CS Task object. You can now drag and drop the new field to the default/existing group or create a new group for the field as required.
Task Status
In this section, you can configure the Status field for the tasks. The Status you configure here can be viewed by the CSMs in the Task’s Status drop-down menu.
There are three Status reporting categories shipped out of the box as listed below:
- Open
- Closed Won
- Closed Lost
Click REPORTING CATEGORIES to see these status but you cannot add a new reporting categories. While adding a new Status, you can map new status to one of these three reporting categories.
There is two status shipped out of the box: Open and Closed. You can either delete these statuses or add new. To add a new Status value:
- Click + STATUS. The Add Task Status window is displayed.
- Enter the following details:
- Name: Enter a status name.
Note: The maximum character limit allowed while creating and updating the Task Status is 40. - Color: Select a color from the color menu.
Note: Gainsight has updated the color palette options in the Task Admin page based on the new Horizon Experience guidelines. The new colors defined are also reflected in Reporting if no custom colors have been defined in Reporting. - Category: Select one of the three Reporting categories.
- Name: Enter a status name.
- Click SAVE.
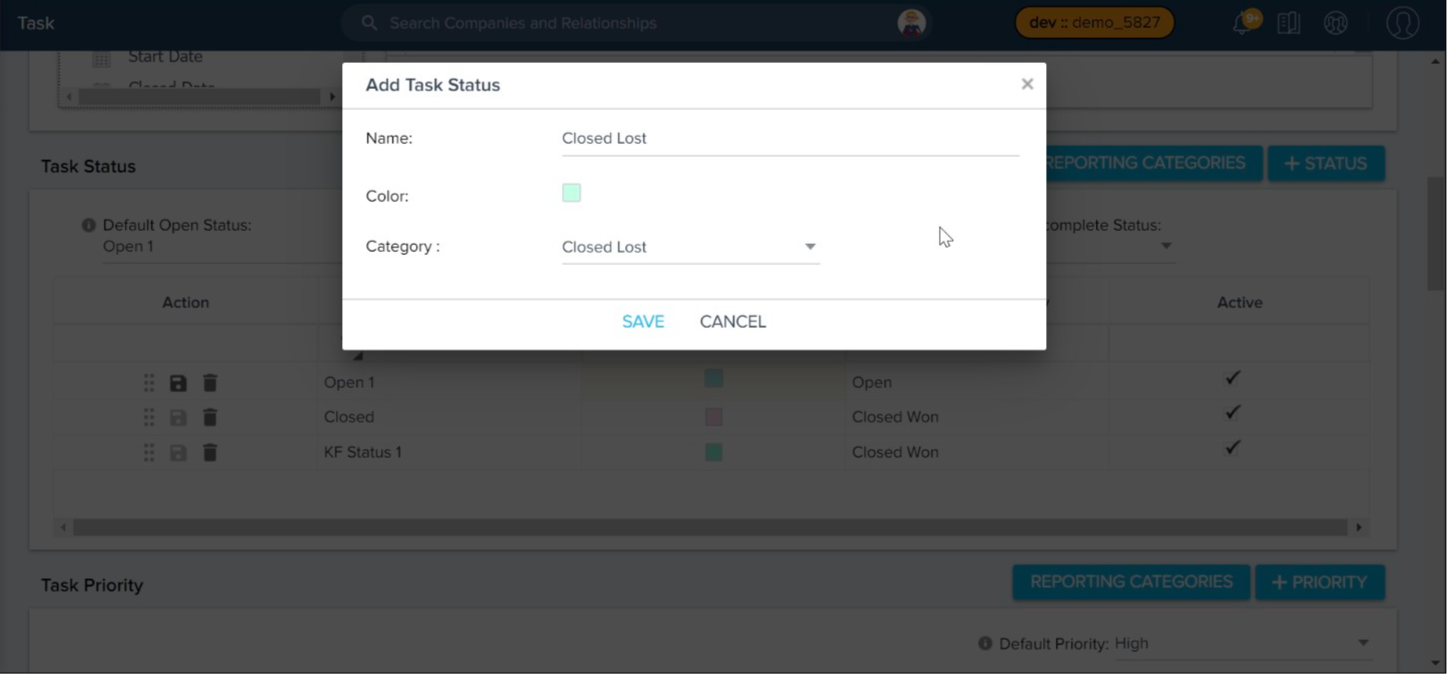
CSMs can now view a new value “Closed Lost” in Task’s Status field.
Note: Admins can also search value for the Dropdown List type fields in the Task Status section. Search Operation is allowed only on the String fields.
Task Priority
In this section you can configure the Priority field for the tasks. The priorities you configure here can be viewed by the CSMs in the Task’s Priority drop-down menu.
There are three Priority reporting categories shipped out of the box as listed below:
- High
- Medium
- Low
Click REPORTING CATEGORIES to see these priorities. Apart from the default Priority reporting categories, you can also add new Priority reporting categories from the Reporting Categories window. To add a new priority reporting category:
- Click +CATEGORY.
- Enter Name of the new Category.
Note: The maximum character limit allowed while creating and updating the Task Priority is 40. - Click the Save icon.
Add New Priority
There are three Priorities shipped out of the box: High, Medium, and Low. You can either delete these priorities or add new. While adding a new Priority, you can map new priority to one of the reporting categories.
To add a new Priority:
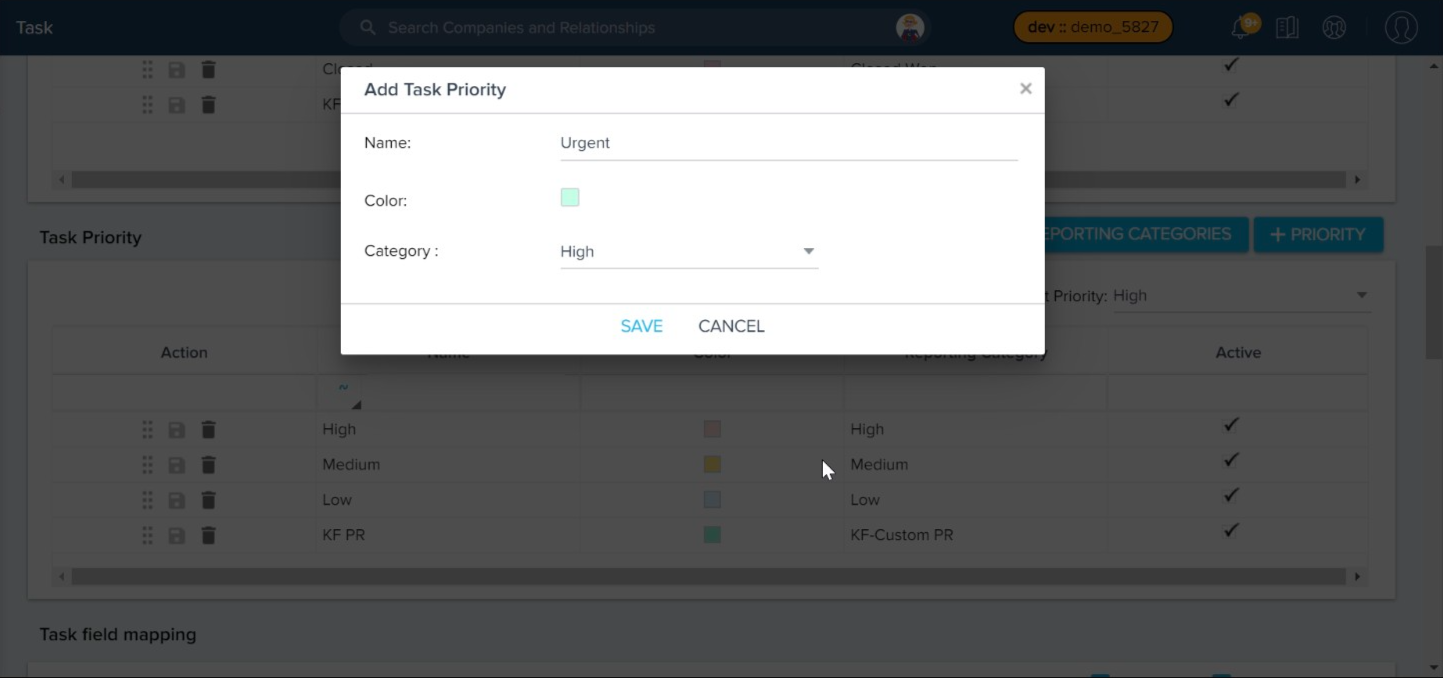
- Click + PRIORITY. The Add Task Priority window is displayed.
- Enter the following details:
- Name: Enter a priority name.
- Color: Select a color from the color menu.
Note: Gainsight has updated the color palette options in the Task Admin page based on the new Horizon Experience guidelines. The new colors defined are also reflected in Reporting if no custom colors have been defined in Reporting. - Category: Select one of the reporting categories.
- Click SAVE.
Note: Admins can also search a value for the Dropdown List type fields in the Task Priority section.
Gainsight NXT in Salesforce CRMContent in this section supports Gainsight NXT accessing through Salesforce Login. To learn more about Gainsight NXT in Salesforce, click here.
Configure and Sync Tasks from Gainsight to Salesforce
- Click here to expand for more information on how to configure and Sync Tasks from Gainsight to Salesforce
- For more information on how admins can sync tasks from Gainsight to Salesforce and vice versa, Task field mapping configuration, and Task Picklist options mapping, refer to the Configure and Sync Tasks from Gainsight to Salesforce article.
Fields on Task
Admins can directly create custom fields on Task object from the Fields on Task section. This section also displays the existing fields used in the Task Objects, in a tabular format.
Create Custom Fields on Task
To create custom fields:
- Click + CUSTOM FIELD.
- Enter the following details in the Create Custom Field screen:
- Display Name: The easily understandable display name.
- Field Name: The system defined field name with a suffix of __gc.
- Data type: The data type of the field being created.
- Required: By setting this constraint, the field is not allowed to ingest a null value record while importing data. You can select this option only when you are adding a custom field into an object that does not have any existing data.
- Hide in reporting: If you select this, the field is hidden in the Reporting functionality.
- Calculated field: Enabling Calculated field checkbox allows you to instantly create a formula field on CTA, Task and Success Plan objects, based on your business requirements. For detailed instructions on how to create Formula Fields, refer to the Create Formula Fields in CTA, Task and Success Plan Objects article.
- Default Value: Set a default value that you would like to insert in the field when the source field is NULL or Empty.
- Gainsight Mapping: Map the field being created with a Gainsight object, if required.
- Object lookup list: Select the object to which lookup is required from the current field.
- Field lookup list: Once you select an object, its corresponding fields are displayed in this drop down list. Select the field to which lookup is required from the current field.
- Description: (Optional) A description for the object being created.
- Click SAVE & NEW to add a custom field to the Task object and create another field or click SAVE; then a custom field is created and added to the Task object.
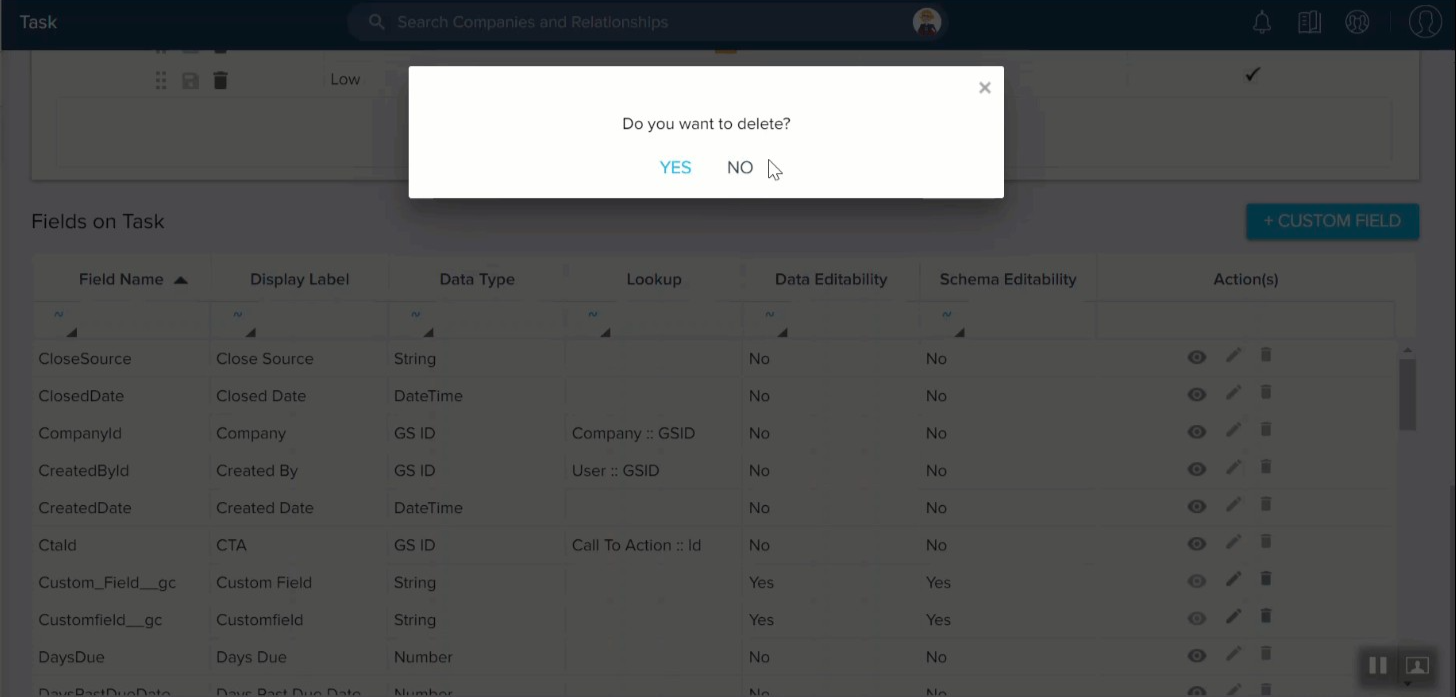
Admins can review, modify, and delete the existing fields used in the Task Object by using these options:
- View field: To view the information of the existing fields.
- Edit field: To update the existing fields information.
Note: Admins cannot update the Field name and Data type fields for the existing fields. - Delete field: To delete the existing fields used in Task Object.
Note: Admins cannot delete the fields that are already used in any layouts, reports, or rules. - You can create and edit Custom Fields on Call To Action/Success Plan/Task objects, only from the CTA/Success Plan/Task admin pages respectively. You cannot create/edit the these fields from Data Management page.
Mass Edit CTAs and Tasks
Admins can perform mass edits to CTAs and Tasks, if required. For more information about how to use Mass Edit, refer to the Mass Edit CTAs and Tasks article.