Create and Configure Custom Fields in Renewal Center
Gainsight NXT
This article explains how admins can create a custom field in Renewal Center’s GS Opportunity object, map it in Salesforce Connector, and configure it in the Opportunity detail view.
Overview
As an admin, Renewal Center allows you to create custom fields which can be mapped to your custom fields in Salesforce. You can also create custom fields to be used exclusively in Renewal Center. To use custom fields, you must first create the fields in the Gainsight data management section, map it in Salesforce Connector (with respective field from Salesforce), and configure it in the Opportunity list view or detail view.
In this article, an example custom field called Competitors is created in the GS Opportunity object. This field is used to track the competitors who can interfere with your renewal opportunity. It is assumed that this field is already configured in Salesforce. This field will be mapped with Salesforce’s Competitor field by using the Salesforce Connector and then this field will be configured on the detail view.
Create Custom Field
This section explains how to create a custom field in the Data Management section for the GS Opportunity object. Gainsight recommends referring to the Data Management article in the Additional Resources section and then proceeding with this section.
To create a custom field:
- Navigate to Administration > Customer Data > Data Management. The Objects tab appears.
- Select or search the GS Opportunity object. The Fields tab appears.
- Click Add or Edit Field. The Edit Object screen appears.
- Hover on the data type and click the + icon.
- Enter Competitors in the Enter field display name field.
- Click Save to create a custom field.

Map Fields in Salesforce Connector
This section explains how to map the field created in the previous section to its respective field in Salesforce.
To map in Salesforce Connector:
- Navigate to Administration > Integrations > Connectors 2.0.
- Click the Jobs tab.
- Select Edit from the three vertical dots menu of the Opportunity Sync job.
- Select Edit from the three vertical dots menu of Add to Destination.
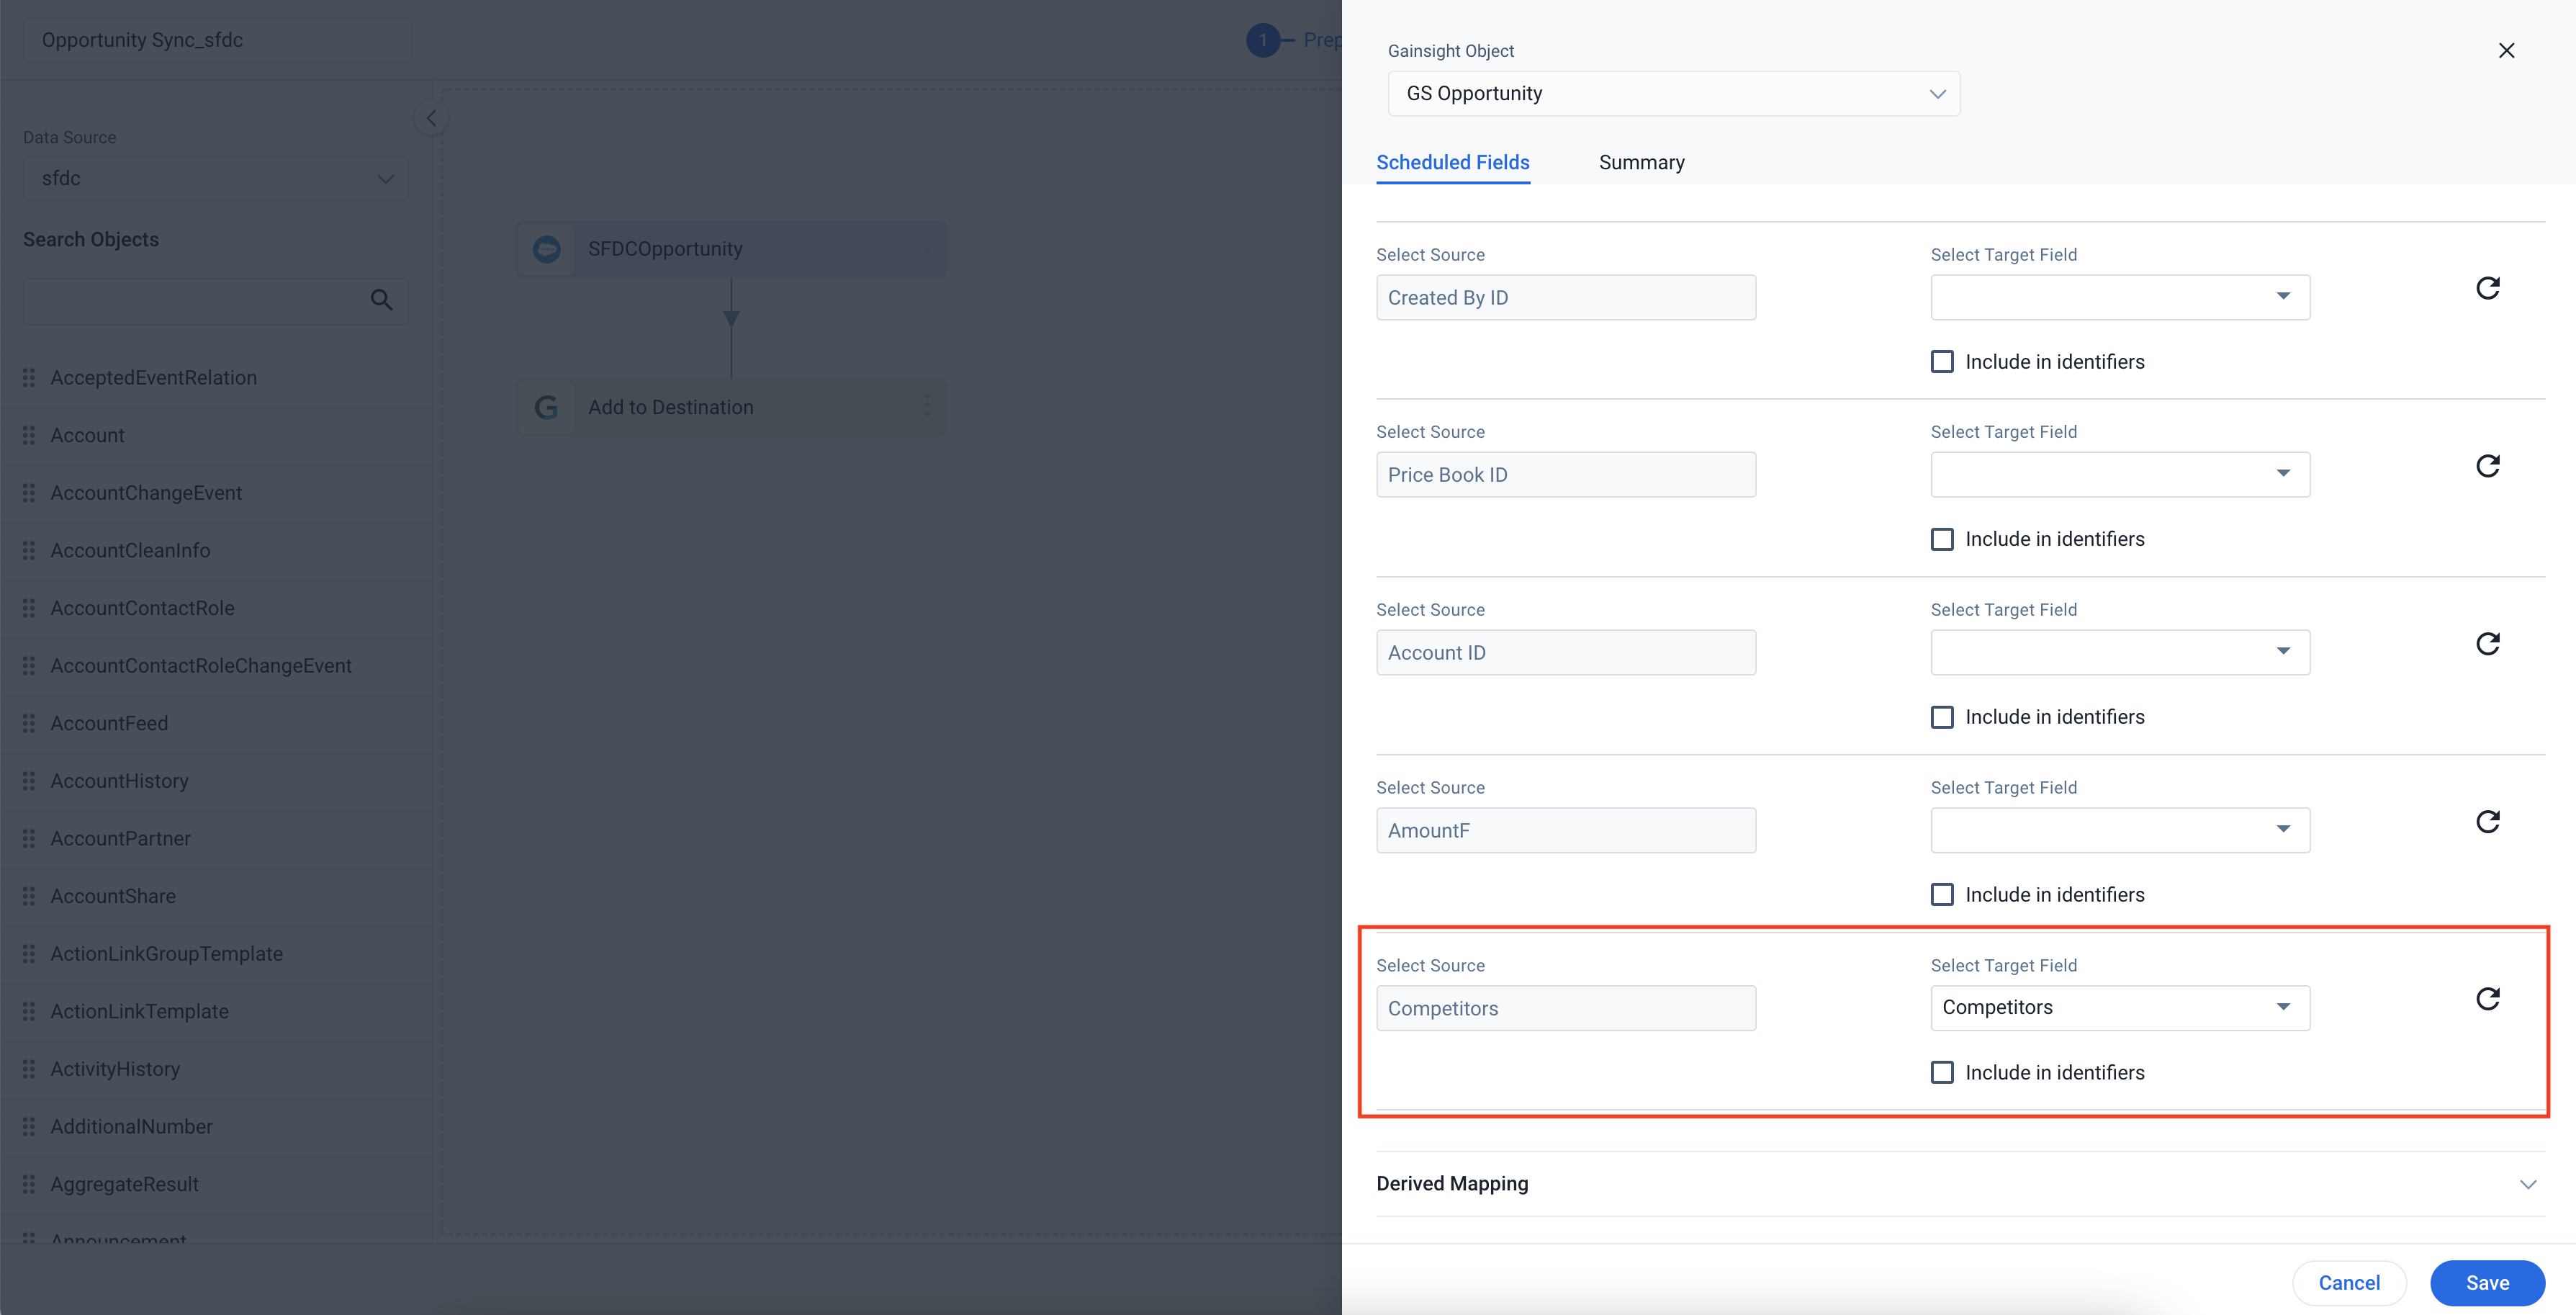
- Expand Direct Mapping under the Scheduled Fields tab.
- Map the Competitors field from Salesforce with the Competitors field from Gainsight.
- Click Save. You need to configure other fields and sections of the Job.
You need to configure other fields and sections of the job. For more information on how to configure jobs, refer to the Configure Salesforce Connector Jobs article available in the Additional Resources section.
Configure Field in List View and Detail View
This section explains how to configure the newly created Competitors field in the opportunity list view and detail view.
To configure the field in detail view:
- Navigate to Administration > Revenue Optimization > Renewal Center.
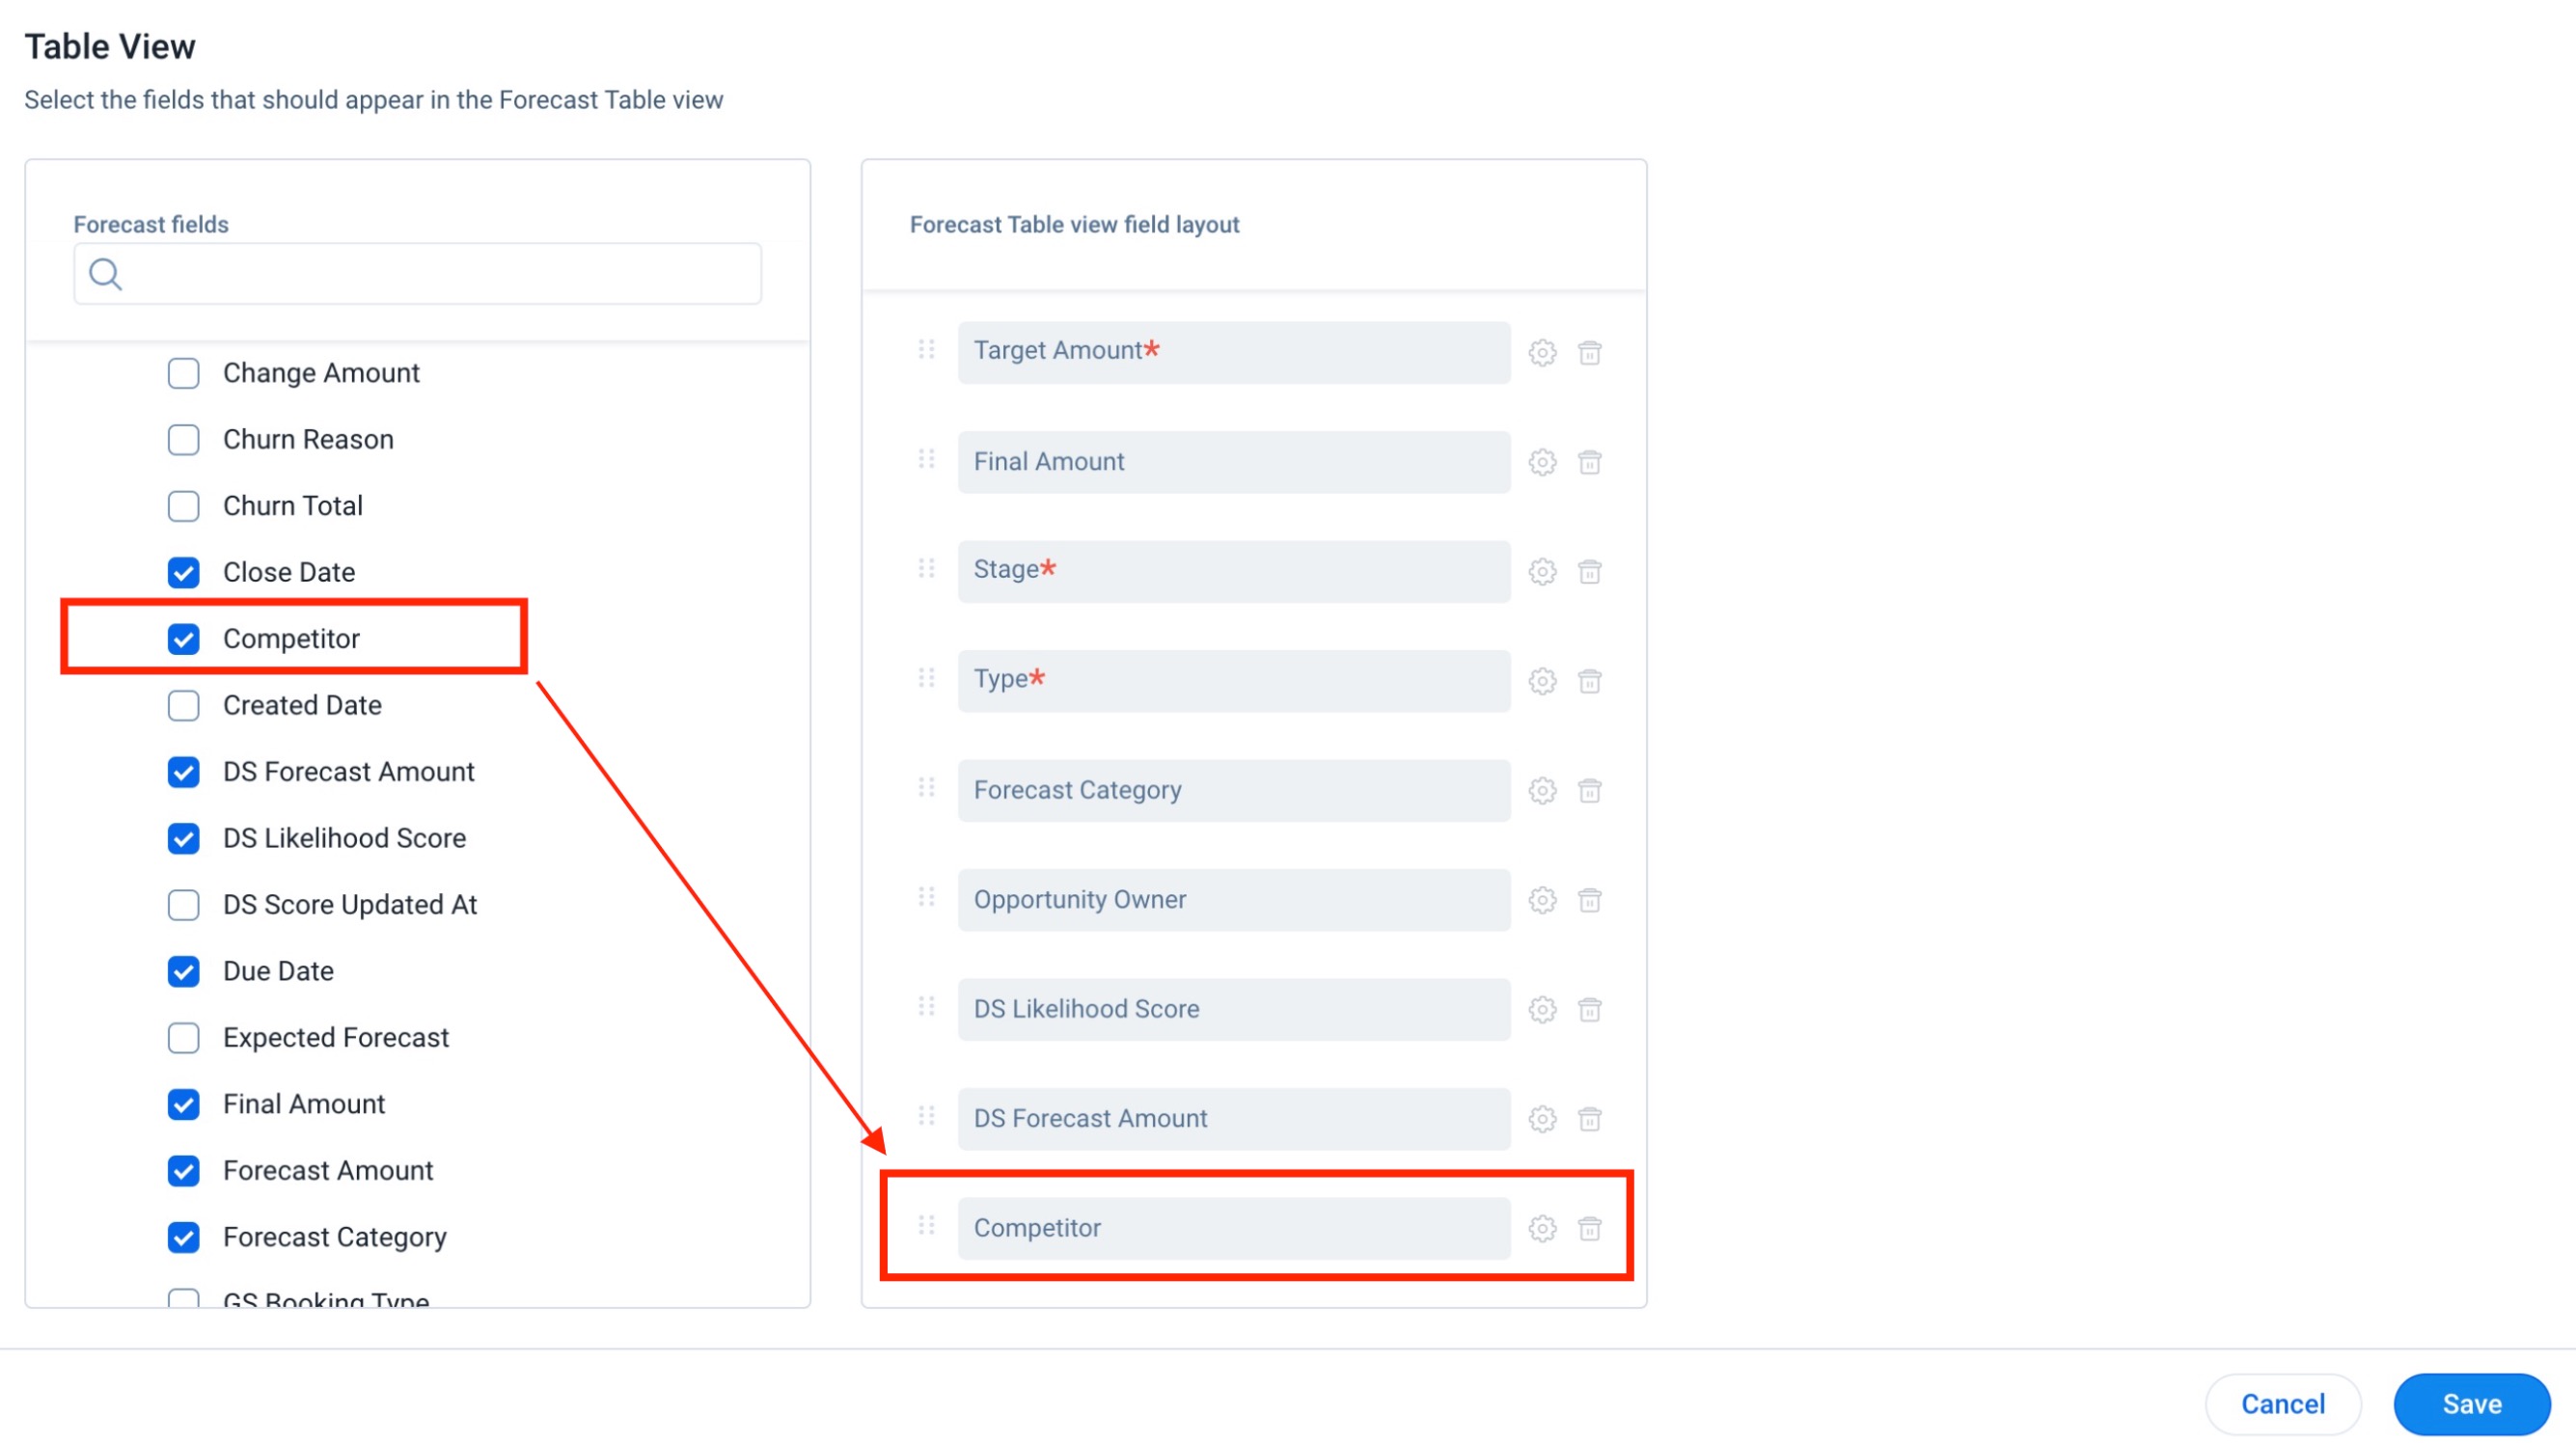
- From the Forecast Section drop-down, select Opportunity View.
- Check the Competitor checkbox from the Forecast fields column. Competitors field is now available in the Forecast Table view field layout column.
- Click Save.The new configuration is saved.
End users can now view this field on the Opportunity List view.

Similarly, you can also add this field to the detail view. This can be configured from the Forecast Detail View pane. The steps remain the same.