Create Success Plan
Gainsight NXT
This article explains CSMs how to create and manage Success Plan details such as Plan Info, CTAs, Gantt Chart, and Timeline.
Overview
Success Plans enable you to define and manage customer goals through structured plans that include key actions, task assignments, due dates, and progress tracking. You can build plans directly from the Success Plans page or from a customer's C360 view.
Each plan provides a centralized workspace where you can:
- Capture the plan’s purpose, timeline, and owner details.
- Add tasks manually or apply a predefined template.
- Monitor progress through Gantt Chart and Timeline views.
- Collaborate with internal teams and external stakeholders using comments and sharing controls.
Note: Admins configure plan types, templates, sharing settings, and automation rules. Your available options may vary based on admin-defined settings.
Access Success Plans
You can access success plans from a specific customer record or from the global view.
- Navigate to C360 > Success Plan, or
- From the left navigation pane, click Success Plans to view all plans.
Create a Success Plan
You can create a Success Plan from the Success Plans page or the C360/R360 page. After a Success Plan is created, You can apply templates and add CTAs to the Success Plan.
- Navigate to Success Plans page from the left navigation bar or C360/R360 > Success Plan section. The Success Plans page is displayed.
- Click Create Success Plan.
- In the Name field, enter a unique name of the success plan.
- In the Company field, enter the company name and select the required Company from the search results.
- (Optional) In the Relationship field, enter the relationship name and select the required Relationship from the search results.
- In the Type field, select the type of success plan.
- In the Status field, select the appropriate plan status.
- In the Due Date field, select the due date of success plan.
- In the Owner field, enter the name of the owner and select the required owner from the search results.
Note: Internal Collaborators cannot be assigned as plan owners. - (Optional) Click Select Template at the bottom of the form to apply a predefined task structure.
- Click Save.
Note: Similarly, CSMs can follow step 2 to 11 to create Success Plans from the C/R 360 page.

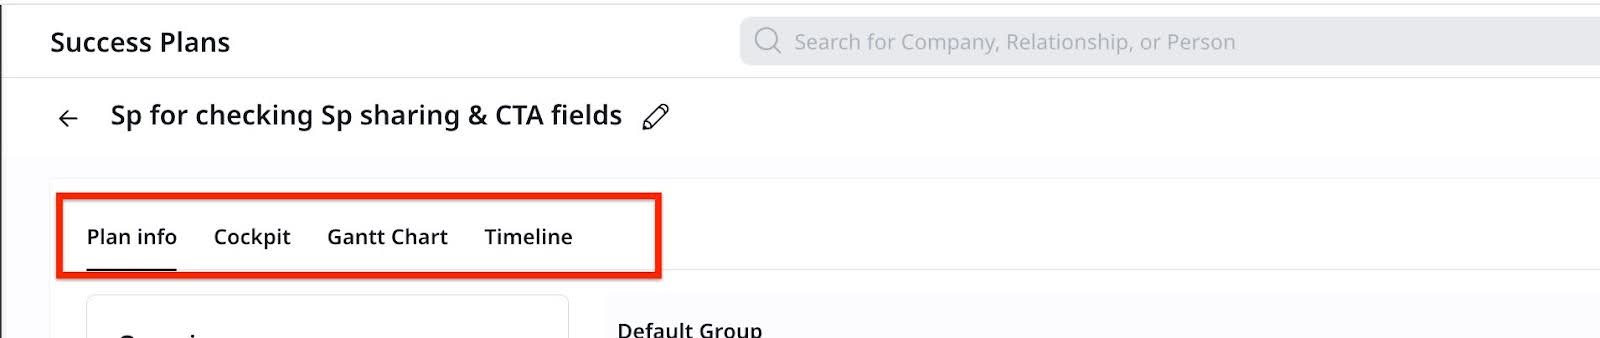
Success Plan Tabs
Each success plan includes four key tabs that help you organize, track, and take action:
- Plan Info: View and update plan-level information, including name, type, owner, status, due date, and additional fields configured by your admin.
- Cockpit: Manage CTAs (Calls to Action) related to the plan. You can add CTAs manually, apply templates, or associate existing CTAs. You can also view CTA status, due dates, and owners.
- Gantt Chart: View CTAs and tasks on a timeline. Use this tab to monitor task durations, adjust dates, and manage dependencies.
- Timeline: Log customer activities or updates related to the Success Plan. Each plan and CTA has its own timeline for activity tracking.
Note: Tab order and default landing tab may vary based on admin-defined configuration. For example, Cockpit, Timeline, or Gantt Chart can appear as the first tab depending on workflow priority. Also, tab names cannot be renamed.
Plan Info Tab
The Plan Info tab displays high level information about the Success Plan. You can share the success plan from this tab. It contains the following two sections:
Overview
This section contains the following information:
- Customer Name: Displays the company name. Click the company name to open the C360 page of the company.
- Type: Displays the type of the Success Plan.
- Due Date: Displays the due date of the Success Plan.
- Status: Displays the status of the Success Plan. The following are the types of status:
- Draft: The default plan status. CTAs are not visible in the Cockpit.
- Closed: All CTAs and tasks are automatically closed.
- Active: Changing the plan to Active causes the CTAs to become visible in Cockpit.
Note: Admins can create custom status types in Administration > Success Plan.
- Owner: Displays the name of the Success Plan’s owner.
- CTAs: Displays the number of total, completed, open and overdue CTAs. Click any CTAs number to view all the CTAs in the Cockpit tab.
Note: Admins may configure certain Overview fields to be editable only during plan creation. Once the plan is saved, those fields become read-only to ensure data consistency.
Default Group
In the Default Group section, you can enter information in the following fields:
- Description: Enter a description of the Success Plan.
- Highlights: Enter a description about the goals or CTAs of the Success Plan.
- Action Plan: Enter a description of the action plan for the Success Plan.

Note
- Users can close the Draft Success Plan only after setting the Success Plan to Active status.
- It is important to make the Success Plan Active, to see the CTAs and any associated tasks in Cockpit.
- You can add reasons to CTAs, providing clearer guidance and context for customer interactions.
Cockpit Tab
The Cockpit tab in a Success Plan is where you manage and track all Calls to Action (CTAs). CTAs represent specific activities or milestones that help drive the customer's success.
You can add CTAs using the Create menu in one of the following ways:
- Add Manually: Create a new CTA.
- Apply Template: Use a predefined template to add multiple CTAs and tasks.
- Associate CTAs: Link existing CTAs to the current plan.
Note: CTA types, statuses, Playbooks, and other options may vary based on admin configuration.
For details on how to add CTAs using the Cockpit tab, refer to Add CTAs to a Success Plan section.
Add Manually
You can create a new CTA and configure all necessary details:
- Click the name of the Success Plan in the dedicated Success Plans or C360/R360 > Success Plan section. The Plan info page is displayed.
- Click the Cockpit tab.
- Click Create, then select Add Manually.
- In the Create CTA window, complete the following fields:
- Name: Enter the CTA name.
- Company: Auto-filled if accessed from the plan.
- (Optional) Relationship: Enter the relationship name if applicable.
- Due Date: Select the expected completion date.
- Owner: Assign the CTA to a Gainsight user or external Person.
- Type: Select the CTA type such as Risk, Expansion.
- Reason: Select the reason for the CTA, based on admin-defined values.
- Priority: Set the urgency level.
- Status: Choose the current CTA status.
- (Optional) Comments: Add supporting notes.
- (Optional) Playbook: Select a playbook to auto-populate tasks.
- (Optional) Click Add More Details to associate a Person with the CTA, search and select People to link with the CTA.
- Click Save to create the CTA.

Note: Available CTA types, categories, and Playbooks are configured by your admin.
Apply Template
You can use a predefined template to quickly populate the plan with CTAs and tasks.
-
Click the name of the Success Plan in the dedicated Success Plans or C360/R360 > Success Plan section. The Plan info page is displayed.

- Click the Cockpit tab.
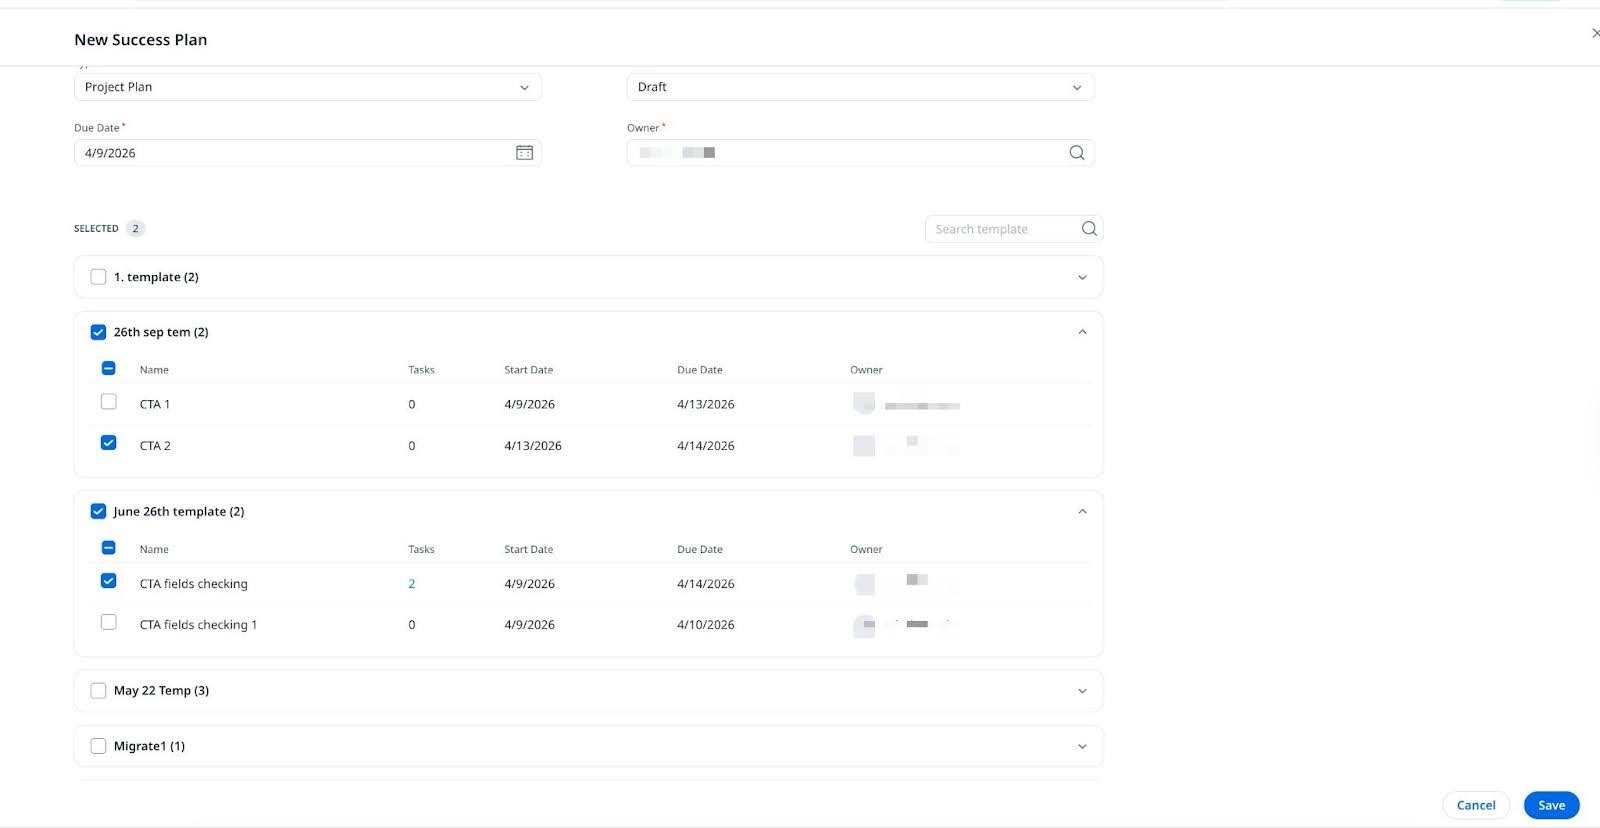
- Click Create and select Apply Template. The Apply Template window is displayed.

- In the Apply Template window, select the template you want to use.
- Select the CTAs you want to include from the template. By default, all CTAs are selected. Clear any CTAs that are not relevant to your customer.
- Click Apply.
- You can select specific CTAs to include when applying a template. It is recommended to select only the ones relevant to your customer, to avoid unnecessary additions.
- If any CTA or task from the template has a due date later than the plan’s due date, you see a warning message and the plan due date automatically updates to match the latest item.
Associate CTAs
You can associate existing CTAs originally created outside the Success Plan, such as from the Cockpit into a Success Plan to streamline planning and avoid duplication. This allows you to integrate related work items into a single plan without recreating or modifying them.
Note
- Associating a CTA with a Success Plan does not duplicate the CTA, reset status, or change its history. The CTA is linked to the plan for alignment and tracking purposes.
- Relationship-level CTA can be associated with a Success Plan created at the Company level.
To associate existing CTAs with a Success Plan:
- Navigate to Success Plans from the left navigation bar or go to C360/R360 > Success Plan.
- Click the name of the relevant Success Plan to open its Plan Info page.
- Click the Cockpit tab.
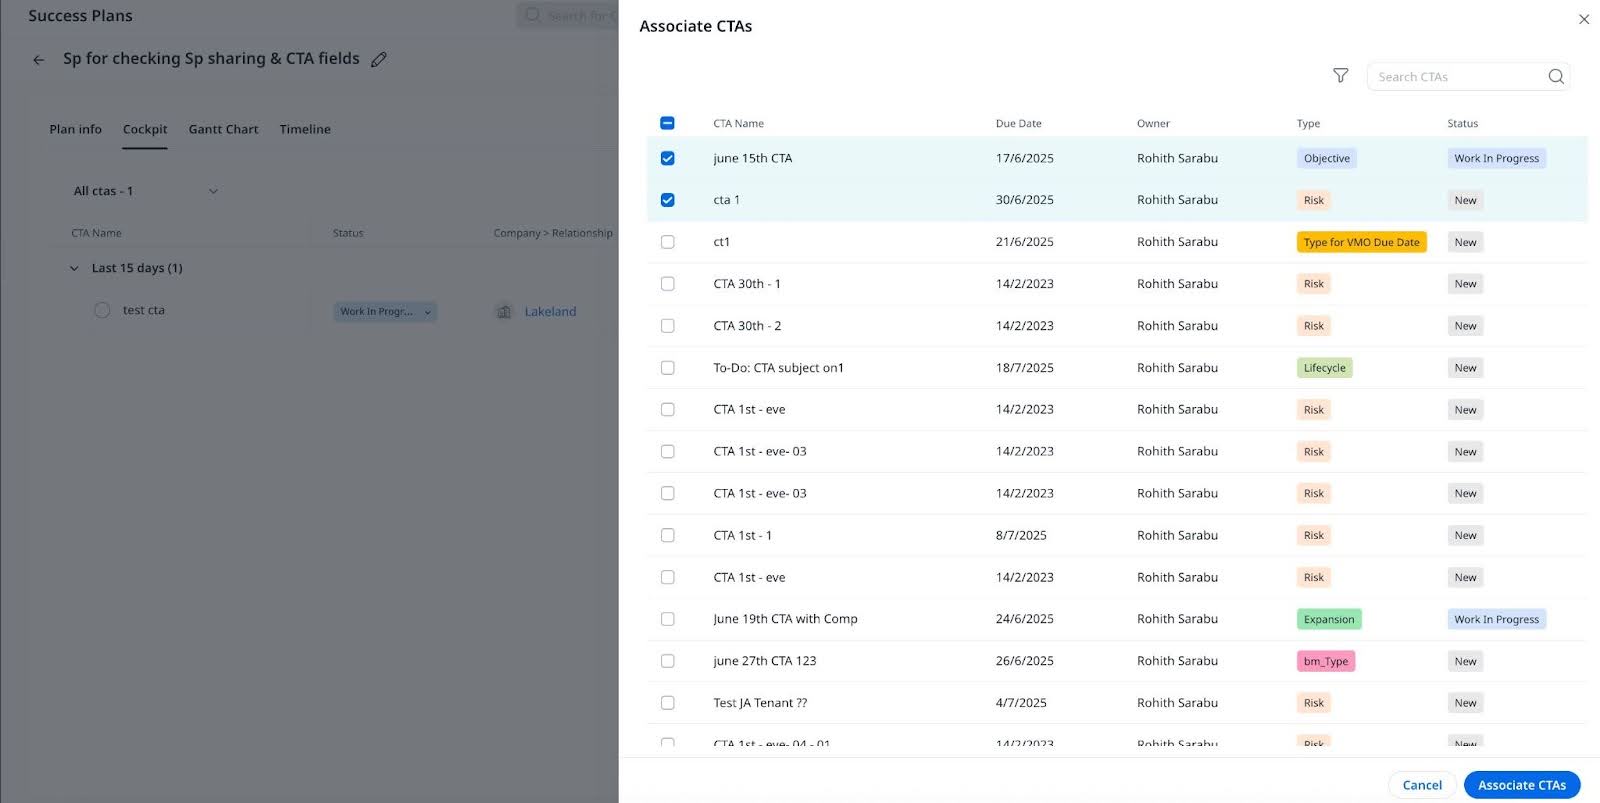
- Click Create, then select Associate CTAs.
- In the Associate CTAs window, search for and select one or more CTAs to associate.
- Click Associate CTAs to link the selected CTAs to the current plan.
Note
- Only CTAs that match the Success Plan’s Company and/or Relationship context are available for selection.
- Only CTAs of CTA types that are mapped to the current Success Plan type can be associated.
Add CTAs to a Success Plan
Admins can create Success Plan templates for specific plan types from Administration > Success Plan. Templates can be made configured for all plan types or limited to specific ones. After applying a template, you can review manually edit or add CTAs and tasks as needed.
For configuration details, refer to the Configure Success Plans for C360/R360 article.
Add Tasks to a CTA
Each CTA can contain one or more tasks. Tasks help break down the CTA into actionable steps that can be assigned, tracked, and completed independently.
To add a task to a CTA:
- Click the name of the Success Plan in the dedicated Success Plans or C360/R360 > Success Plan section. The Plan info page is displayed.
- Click the Cockpit tab.
- Click the name of the CTA you want to update.
- In the CTA detail view, click the Tasks tab.

-
Click Add Task, and choose one of the following:
- Add Manually: To add a task individually.
- Replace Playbook: To replace all current tasks with tasks from a Playbook.

-
If you selected Add Manually, complete the following fields:
- Task Name: Enter a clear, descriptive title.
- Due Date: Set the task’s expected completion date.
- Owner: Assign the task to a user or Person.
- Priority: Select Low, Medium, or High.
- Status: Select the task status such as Open, Closed.
- (Optional) Comments: Add any relevant notes.
- If you selected Replace Playbook, choose a Playbook from the list and click Replace.
- Click Save to add the task to the CTA.
Note: If a Playbook was applied to the CTA, tasks may already be populated. You can modify, remove, or add to these tasks as needed.
Manage CTAs
After a CTA is created, you can update its details, manage tasks, apply or change Playbooks, and perform other actions from the Cockpit tab or the CTA detail view.
CTA Detail Tabs
Each CTA includes the following tabs:
- Detail: Shows fields such as owner, due date, priority, status, category, type, company, relationship, created date, and associated People.
- Tasks: Displays all tasks added to the CTA. You can create new tasks manually or via Playbook.
- Timeline: Allows you to log activities specific to the CTA.
- Company: Shows company-level information like stage, status, CSM, ARR, and renewal date.
- (If configured) Custom Tabs: Display additional tabs. These allow you to link or create related records directly from the CTA.

Note: The fields and layout may vary based on admin configuration.
Detail
Displays the following information:
| Fields | Description |
|---|---|
| Default Group |
The sharing type of the Success Plan. It uses one of the following icons:
|
| Owner | Owner of the CTA. |
|
Due Date |
End date of the CTA. |
|
Reason |
Select the reason for the CTA, based on admin-defined values |
|
Priority |
Priority of the CTA. |
|
Status |
Status of the CTA. |
|
Type |
Type of the CTA. |
|
Company |
Associated company of the CTA. |
|
Relationship |
Associated relationship of the CTA. |
|
Created Date |
Date when the CTA was created. |
|
Age |
Displays how long the CTA has been open (Closed Date - Created Date) or (Today - Created Date). |
|
Comments |
Comments by the user. |
|
Associated People |
Name of the associated person. |
Tasks
Displays all tasks associated with the CTA. You can manually add tasks or apply a Playbook.
Timeline
Each CTA includes its own timeline. Activities logged here are not visible in the Success Plan timeline.
For more information on how to log activities in timeline, refer to the Log Activities in Timeline article.
Company
Displays high-level company data related to the CTA.
| Fields | Description |
|---|---|
|
Stage |
Stage of the associated company. |
|
Status |
Status of the associated company. |
|
CSM |
Customer Success Manager (CSM) of the associated company. |
|
Renewal Date |
Date of renewal of the associated company. |
|
Industry |
Industry type of the associated company. |
|
ARR |
Annual revenue of the associated company. |
Custom Tabs
Displays any additional sections linked to the CTA through a lookup field or admin configuration.
Note
- Playbooks must be set to work with All CTA types in order to be available to CTAs.
- You can create CTAs only from Success Plans, but not directly from Cockpit.
- If you close a Success Plan, all of the associated CTAs and Tasks are closed. To make changes to the Success Plan, you must change the plan's status back to Active.
- Admins can configure the CTA detail view for CTA types. For more information, refer to the Federated Customer Management article.
Replace a Playbook
You can replace a Playbook after CTA creation.
- Click the name of the CTA from the Cockpit tab
- Click the Tasks tab.
- Click the Add Task button and select Replace Playbook.
- Select a Playbook from the list.
- Click Apply.
Note: If tasks already exist, a prompt appears to confirm the replacement.
Gantt Chart Tab
Gantt Chart is integrated with Success Plans. It provides a graphical view of how CTAs and associated tasks are progressing compared to the schedule.
Note: By default, the start date of CTAs and tasks is the respective created date. CSMs have the ability to modify the Start Date or Due Date of CTAs from the Gantt Chart tab, based on their requirements.

For more information on Gantt Chart integration, refer to the Success Plans: Gantt Chart View article.
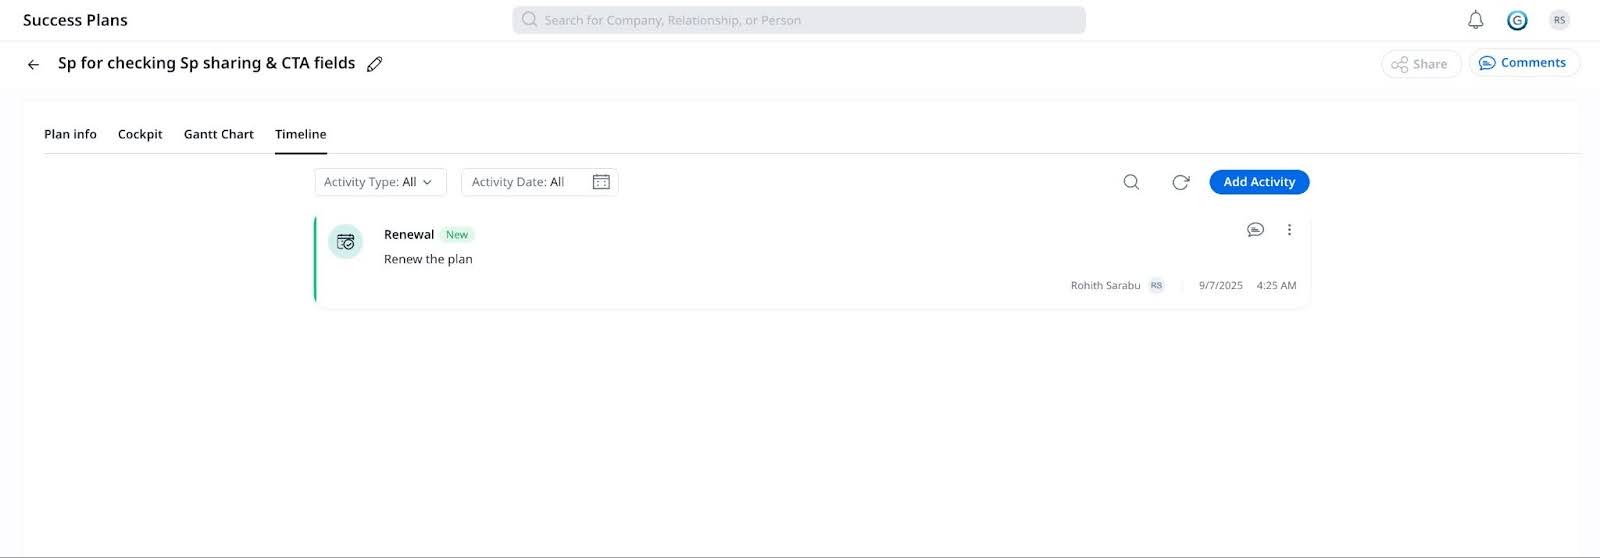
Timeline Tab
CSMs can log activities, save drafts, and view all activities related to the Success Plan or CTAs. Each Success Plan and CTA has its own Timeline tab, but this tab is not available to external users with whom the Success Plan is shared. For more information on how to log a Timeline activity, refer to the Log Activities to Timeline article.
Business Use Case: For instance, CSMs may handle their customer onboarding tasks using Success Plans, and post the progress of the onboarding task to Timeline. Managers can see the full update at the Success Plan level, instead of going through the individual activities of the CTAs.
Note
- A timeline entry at the Success Plan level does not appear in the CTA’s Timeline but displays in the C360 > Timeline tab of the company.
- A timeline entry at the CTA level does not appear in the Success Plan’s Timeline but displays in the C360 > Timeline tab of the company.
- A timeline entry in C360 > Timeline tab displays either in the Success Plan’s Timeline or at the CTA’s Timeline.
IMPORTANT:
- A draft created in the CTA’s timeline is not displayed in the Success Plan’s timeline. Similarly, drafts created in the Success Plan’s timeline are not displayed in the CTA’s timeline. Drafts created in the Success Plan’s timeline and the CTA’s timeline are displayed in the C360 timeline.
- All Success Plans and CTA activities can be seen on the 360 > Timeline tab.
- On the 360 > Timeline tab, the label “SP” is used for all activities created at the Success Plan level. You can share the link of the activities created at the Success Plan level with other Gainsight users.
- When an in-line task is created from Timeline at the Success Plan level, it creates a new CTA in the success plan, under which the newly created in-line task can be seen. The newly created CTA in the Success Plan has a Default CTA Category, as set on Administration > Success Plan.
The Timeline tab allows you to log meetings, updates, and customer interactions. Timeline entries can be added at the Success Plan level or at the CTA level.
Visibility Across Tabs
| Entry Logged In | Visible In |
|---|---|
|
Success Plan Timeline |
C360 Timeline only |
|
CTA Timeline |
C360 Timeline only |
|
C360 Timeline |
Not visible in Plan/CTA |
Note: Timeline visibility is scoped. Entries do not sync between Plan and CTA timelines.
Draft Behavior
- Drafts saved in the Plan Timeline are not visible in the CTA Timeline and vice versa.
- Both are visible from the C360 Timeline.
In-line Tasks
If you create an in-line task from the Timeline tab at the plan level:
- A new CTA is automatically created under the plan.
- The new CTA uses the default CTA category as configured by the admin.
Timeline Labeling
In the C360 Timeline:
- Entries logged from Success Plans display with the label “SP”.
- You can share links to these activities with other Gainsight users.
CTA Context Menu Actions
In the CTA detail view, click the vertical three-dot menu to access additional CTA-level actions:
- Replace Playbook: Remove all existing tasks and apply a Playbook to add new tasks.
- Copy Link: Copy a direct link to the CTA to share with internal users.
- Snooze: Temporarily pause the CTA until a selected date.
- Send Email: Compose and send an email directly from the CTA, which also creates a task.
- Add to Calendar: Add a task from the CTA to your connected calendar (if integration is enabled).
- Enable or Disable Sharing with People: Control whether the CTA is visible to external collaborators.
- Delete: Permanently remove the CTA.

Note: Visibility and sharing options depend on admin configuration.
Send Email from a CTA
You can send an email directly from a CTA. This creates an associated email task, which helps track the interaction.
To send an email from a CTA:
- Click the name of the CTA from the Cockpit tab
- Click the Tasks tab.
- Click the vertical three-dot menu and select Send Email.
- Compose the message.
- Click Send to deliver the email and create a task with the same subject line.
If you choose not to send the email immediately:
- Click Save as Draft.
- A task with the subject line is still created.
- Open the task later and click Validate Email to review and send the draft.
Note: Email drafts do not trigger notifications until sent.
Clone Success Plans
You can clone Success Plans for same or different Company or Relationship with the following restrictions:
- Cloning is allowed only for the same Plan Type.
- Company-level plans can be cloned for another Company, but not for a Relationship.
- Relationship-level plans can be cloned across companies if the Relationship Type matches.
To clone a Success Plan:
- Navigate to Success Plans or C/R 360 > Success Plan.
- In the Search bar, type and search for the plan you wish to clone.
- Click the three vertical dots of the respective plan and select Clone.

- In the Company field, select the company for the cloned plan. You can choose the same or a different company.
- In the Name field, modify the plan name for the new plan. By default, the plan would be labelled as ‘Copy of <existing plan name>’.
- From the Status dropdown menu, select the status of the plan.
- In the Owner field, type and search for the respective name.
Note: Users with Internal Collaborator license type cannot be added as owners of Success Plans. - In the Due Date field, set the due date for the plan.
Note: The due date of the Success plan is automatically updated to the due date of the CTA with the furthermost due date. - (Optional) Select Copy Plan Information to copy the entire plan information.
- (Optional) Select Copy CTAs to include all or selected Objectives, as follows:
- In the Select objectives by status field, you can select All to copy all objectives or select Status(s) from the dropdown menu to copy only the objectives with the selected status.
- In the Copy or update owner field, you can assign a new owner by selecting Update owner to option and entering the name of the new owner. To retain the previous owner, select the Copy owner option.
Note: Users with Internal Collaborator license type cannot be added as owners of Objectives.
- (Optional) Select Copy Tasks to include tasks associated with the selected Objectives, as follows:
- In the Select tasks by status field, you can select All to copy all tasks from the selected objectives or select Status(s) from the dropdown menu.
- In the Copy or update owner field, you can assign a new owner by selecting Update owner to option and entering the name of the new owner. To retain the previous owner, select the Copy owner option.
- Click Clone.
Note
- The Plan Type remains fixed and cannot be changed during cloning.
- CTA/task statuses default to the open state as configured by your admin.
- The start and due dates of Objectives and Tasks along with dependencies are copied while cloning.
- Timeline activities added on Success Plan or Objectives are not copied.
- CTAs and Tasks are copied as it is without reapplying Template or Playbook. However, the email template is applied when copying email tasks created through Playbook. The email is reset to validate state.
- Adhoc email tasks are not copied.
- Users with whom the Success Plan was shared are not copied. The cloned Success Plan can be re-shared with internal/external users.
- If the original owner is inactive or unlicensed, the current user is assigned as the owner.
- When cloning a Success Plan for a different Company or Relationship:
- If the owner of an CTA or Task is an external user, the owner of the cloned Success Plan becomes the owner of such Objectives and Tasks.
- Associated persons are not copied.
- In objective CTA, the association with the record on the linked object is not copied.
Notifications
Notifications are triggered based on your subscription settings and specific Success Plan or CTA activities.You receive notifications in the following cases if the corresponding subscription is enabled:
- A Success Plan is assigned to you: Triggered when the A Success Plan is assigned to me option is selected.
- The due date of a Success Plan you own is changed: Triggered when the My Success Plan due date is changed option is selected and the plan is in Active status. The owner is notified if the due date changes due to updates to CTAs, tasks, or Playbooks.
- A CTA is assigned to you: Triggered when the A CTA is assigned to me option is selected.
To customize or enable notifications:
- Navigate to Administration > Notification Settings.
- Use the Event Subscriptions section to enable or disable notifications based on your preferences.
For detailed instructions, refer to the Subscribe to Notifications article.
Share Success Plans
You can share a Success Plan as a link with internal users (Full, Viewer, or Viewer + Analytics license types) or with external contacts through email. Use the Share Plan option to share individual Success Plans.
Note: Sharing must be enabled by the admin, and may include optional security settings.
The Share Plan button is available in the C360 > Success Plan section for each plan.
- For more information on how an admin can configure a Success Plan for sharing, refer to the Configure Success Plan for Sharing article
- For more information on how CSMs/Users can share a Success Plan, refer to the Share Success Plan article
Create Reports on Success Plans
You can create reports on Success Plans using Report Builder. When building a report on the Success Plan object, you can add standard, custom, and system fields from the Success Plan object, as well as fields from Company and Relationship objects using the column picker.
