Introduction to Cockpit and CTA Configuration
Cockpit is the CSM/AM team's home base for viewing and managing key customer activities. The backbone of Cockpit are Gainsight system alerts called Calls to Action (CTA). Call to action types, their associated tasks, and the Cockpit view can be customized by Admins to suit your business needs. This article provides an introduction to CTA configuration and links to additional Cockpit configuration options.
What is a Call to Action (CTA)?
A CTA is an alert which can be added manually by a user or automatically using business rules. There are five types of CTA types available by default: Risks, Expansions, Lifecycle, Activities (from Timeline), and Objectives (for Success Plans). Admins can also create custom CTA types. Playbooks, a collection of pre-defined tasks, can be used in conjunction with CTAs to standardize the process a user follows when addressing a Call to Action. CTAs can be used to effectively manage milestones and events such as:
- Renewal Prep
- Low Survey Scores
- High Survey Scores
- Upsell Opportunities
- Executive Business Review Prep
- Possible Churn Based on Low Usage
- Executive Sponsor Change
Administration > Calls to Action (CTA)
To configure Calls to Action, navigate to Administration > Calls to Action (CTA).
The Cockpit configurations in this document generally apply to Account level CTAs. To configure Relationship level CTAs, refer to Federated Customer Management.
Common CTA options
For each CTA element (type, status, priority) the following options are available:

- Reorder: This option is available in the CTA type, reason, status, priority and snooze reason sections. While adding or editing a CTA in the Cockpit, end users see the display order of the CTA elements as configured here.
- Save: After editing, click the disk button to save changes on each item.
- Delete: Click the trash button to delete a CTA element. You cannot delete items that are currently in use.
- Edit: Inline editing is available to update Name, Color, Plural label, and Active checkbox (not only for Objective CTA type). You can also double-click on Reporting Category to change option from the drop-down menu.
- Plural Label: This option is available in the CTA type section. It is the label you assign to a CTA type that appears in the Cockpit as a list view header when the CTAs are sorted by type.
- Active/Inactive: Active option is available in all the Call to action element sections. When you select the checkbox, the specific CTA element will be available in the Cockpit while adding a CTA. This option is disabled for the Risk and Objective CTA types in the CTA type section for which you cannot disable it.
- Color: When you add a CTA element, you can assign a color. The selected color will be assigned to the new CTA element for ease of identification in reports.

- Reporting categories: You can add or delete the specific CTA element reporting categories using this option. Reporting category enables reporting on the CTA elements across the organisation. CTA type, priority, reason, status, or snooze reason each have different reporting categories. When Admins create a new CTA element, it can be mapped to a common CTA element category. For example, if you have multiple Risk CTA types across the organisation, you can create a report with just 1 condition CTA Type reporting category = 'Risk.'
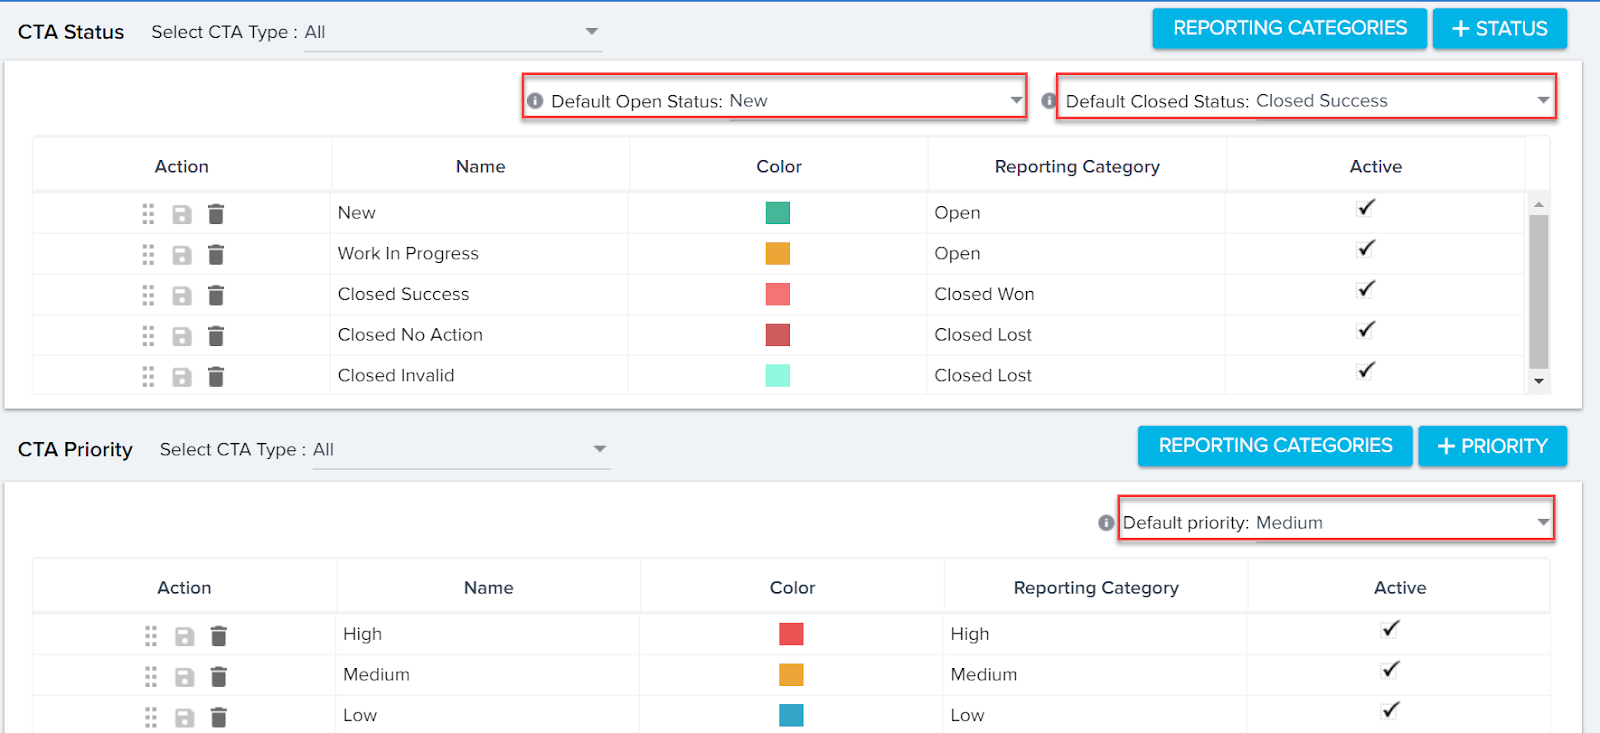
- Default Open Status: This option is available in the CTA status section. When adding a new CTA in the Cockpit, this will be the default.
- Default Closed Status: This option is available in the CTA status section. It is used for the quick-close (checkbox) feature in Cockpit. This is also the status of a CTA when it is marked as closed in the main interface.
- Select CTA Type: This list is available in the CTA reason, priority, status, and snooze reason sections. Select the CTA type (All, or a specific CTA type) to configure the associated CTA element.
Some other common elements which are present in different sections of Call to Action page are:
- Default Reason: This field is present in the CTA Reason section. You can select a default Reason for CTA. The selected reason is shown as default CTA Type for end users. However, users can select a different CTA Type. Click here to learn more about CTA Reason.
- Default Priority: This field is present in the CTA Priority section. You can select a default Priority for CTA. The selected priority is shown as default CTA Priority for end users. However, users can select a different CTA Priority. Click here to learn more about CTA Priority.

- Default Snooze: This field is present in the Snooze Reason section. The value you select in this field is displayed as the default Snooze Reason for end users, trying to snooze a CTA. End users can modify the default Snooze reason and select some other reason. Click here to learn more about CTA Snooze reason.

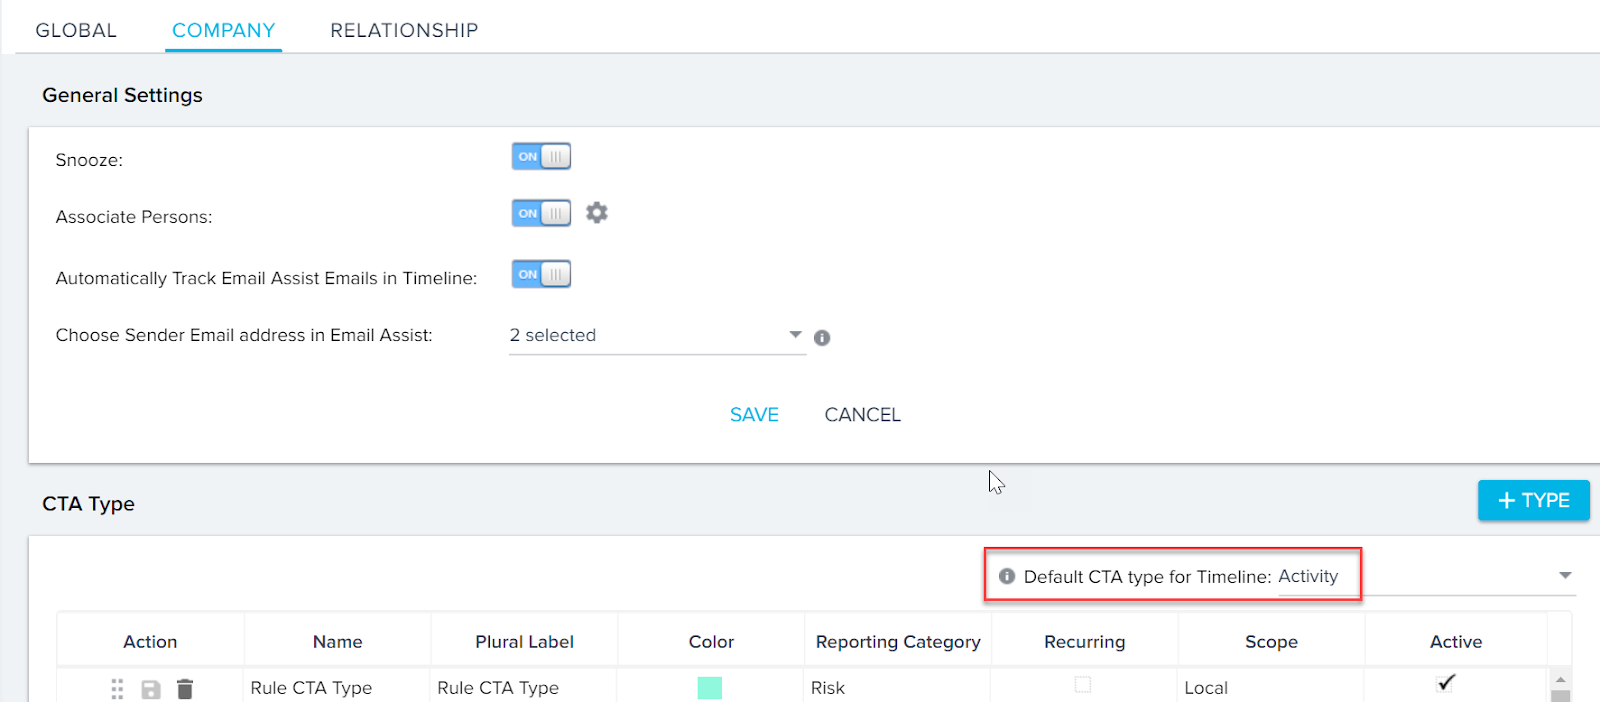
- Default CTA Type for Timeline: This field is present only in the Company tab. Company tab is displayed only when you have enable relationships. A CTA can also be created from Timeline. The value you select in this field is displayed as Default CTA type for CTAs created from a Timeline.
