Install Gainsight CS Data Connector Package
This article explains how to install the Gainsight CS Data Connector package from Salesforce AppExchange to authorize the Salesforce Connector and enable data synchronization between Salesforce and Gainsight.
Overview
The Gainsight CS Data Connector package installs the Connected App required to authorize and configure the Salesforce Connector between Salesforce and Gainsight. Once installed, you can authorize the Salesforce Connector and continue with configuring additional integrations as needed.
Gainsight provides separate packages based on the data center where your Gainsight tenant is hosted:
- Gainsight CS Data Connector EU
- Gainsight CS Data Connector US (for US1 and US2 tenants)
Install the package that matches your tenant’s region.
Prerequisites
Before installing the package, ensure that the user installing the package has permission to install AppExchange packages in Salesforce.
Install the Gainsight CS Data Connector Package
You can install the Gainsight CS Data Connector package either by searching in Salesforce AppExchange or by using the direct installation links below.
Option 1: Install Using Direct Installation Links (Recommended)
Using the installation link takes you directly to the installation page in Salesforce.
- Installation link for EU Region Tenants: Gainsight CS Data Connector EU
- Installation link for US1 and US2 Tenants: Gainsight CS Data Connector US
After selecting the appropriate link, continue with the installation steps below.
Option 2: Install via Salesforce AppExchange
- Log in to your Salesforce org with administrator credentials.
- From the App Launcher, search for AppExchange Marketplace and select it.

- In the AppExchange search bar, search for Gainsight CS Data Connector EU or Gainsight CS Data Connector US, depending on your tenant region. The Salesforce AppExchange opens.

- Select the package published by Gainsight and select Get It Now.

After choosing one of the installation methods above, follow the steps below to complete the installation.
Complete the Installation
- On the Installation page:
a. Verify that the correct Salesforce org appears in the Connected Salesforce Accounts field.
b. If multiple accounts are listed, select the org in which you want to install the package.
c. Click Install in Production. - Review the installation details, select the I have read and agree to the terms and conditions checkbox, and click Confirm and Install.

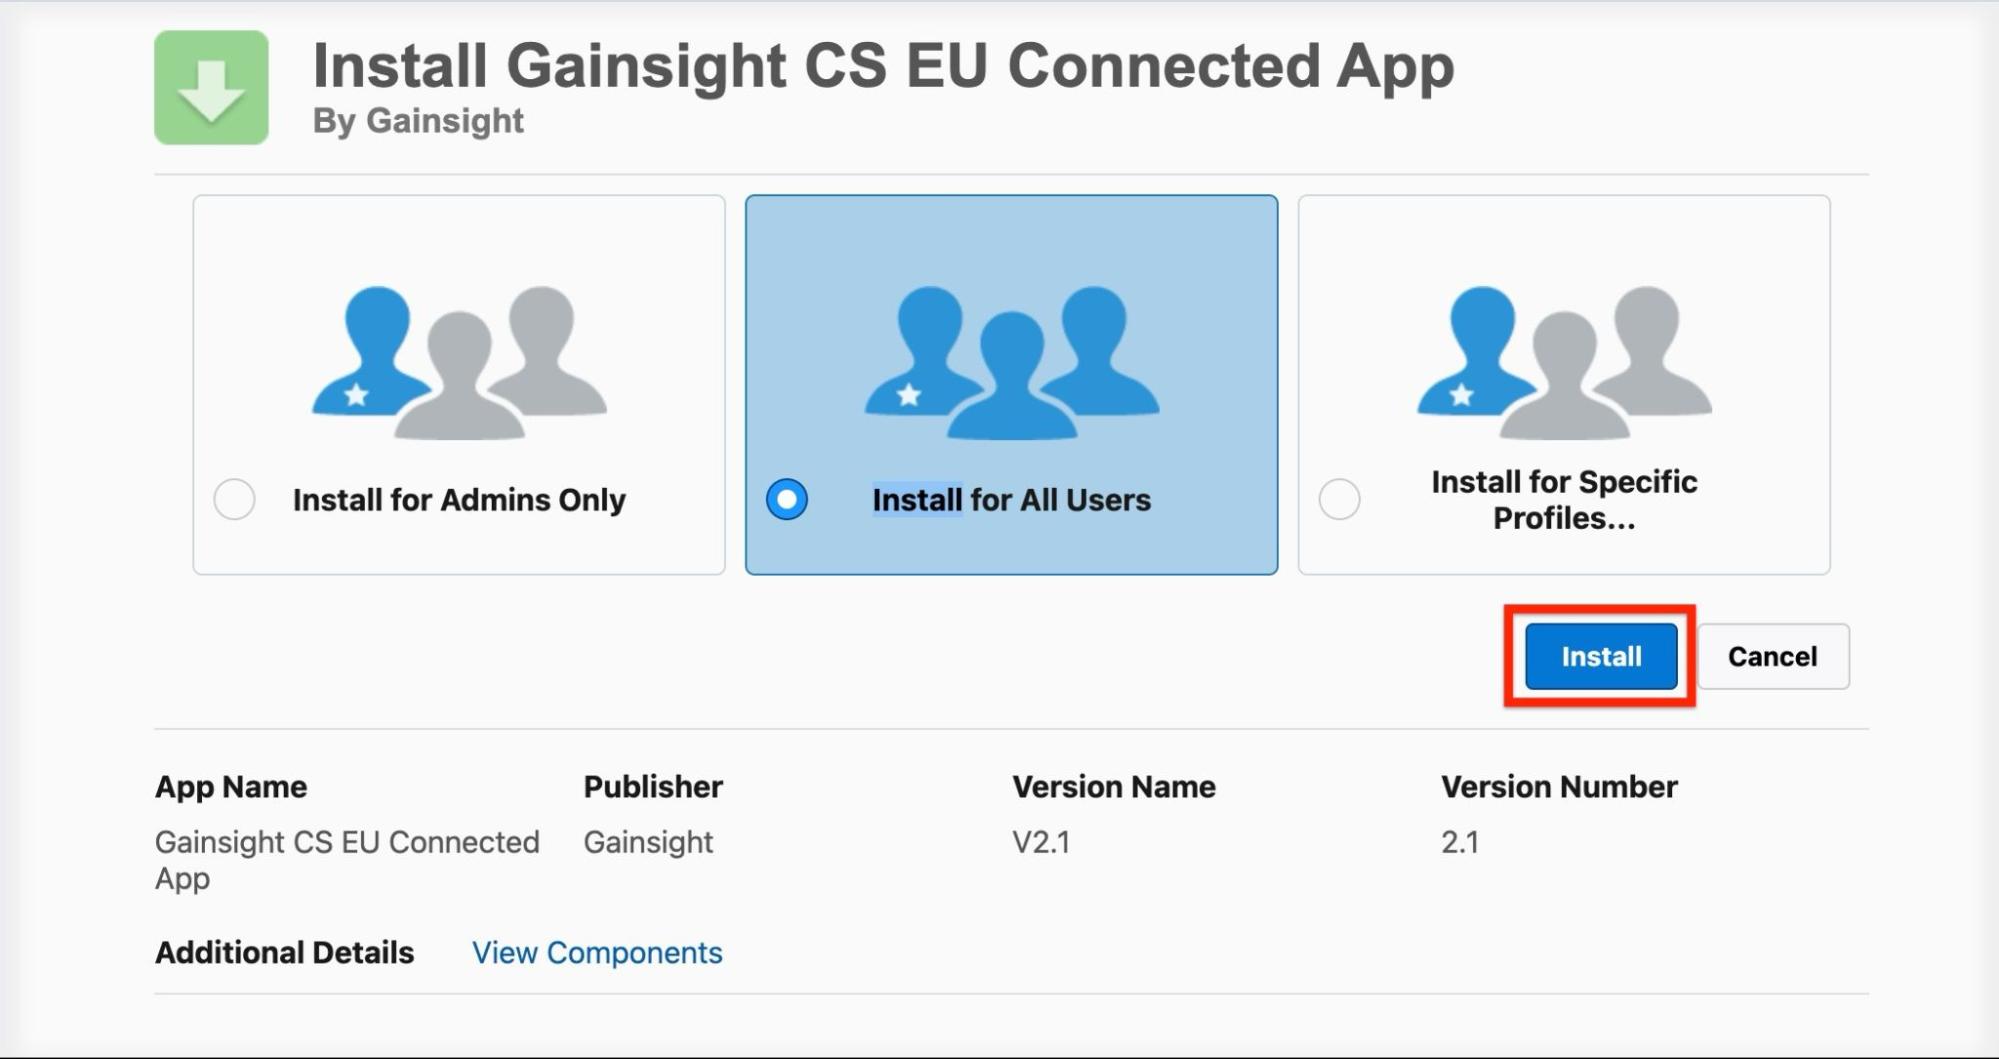
- Select one of the following installation access levels:
- Install for Admins Only: Grants access only to Salesforce Administrators.
- Install for All Users: Grants access to all users.
- Install for Specific Profiles: Grants access only to selected profiles.
- Review the package details and click Install.
- Complete the installation.


After installation completes, confirm that the package appears under Setup > Installed Packages in your Salesforce org.

- The installation process is the same for both EU and US packages. The screenshots in this article are based on the EU package installation.
- If you select Install for Specific Profiles, ensure that the appropriate Salesforce users or profiles are later granted access to the Connected App within Salesforce.
- Failure to grant access to the required users may prevent successful authorization of the Salesforce Connector.