Reassign Gainsight License to other Salesforce User
Gainsight NXT
Overview
This article helps Salesforce Admins reassign a Salesforce user’s existing Gainsight license to another user, to grant access to Gainsight NXT in Salesforce.
Business Use Case: If an existing employee with a Gainsight license in Salesforce leaves the organization or moves to another role in the same organization, Salesforce Admins need to reassign the existing license to another user.
Follow these high level steps to reassign an existing Gainsight license:
- Deactivate existing user in Gainsight from the User Management page.
- Remove existing user’s Gainsight License in Salesforce.
- Assign Gainsight License to New Salesforce User.
- Assign Gainsight NXT Permission Set in Salesforce.
- Sync new Salesforce user to Gainsight.
- Assign Permission Group in Gainsight.
Deactivate Existing User in Gainsight
This step revokes the Gainsight NXT access and removes the existing user from Gainsight. To mark the old user inactive in Gainsight:
- Navigate to Administration > Operations > User Management.
- Click the ellipsis menu of the respective User.
- Click Make Inactive. Confirmation dialog is displayed.

- Click Yes to mark the old user inactive in Gainsight.

For more information, refer to the User Management article.
Remove Existing User’s Gainsight License in Salesforce
To remove Gainsight User’s license:
- Navigate to Salesforce Setup > App Setup > Installed packages.
- Click Manage Licenses.

- Click Remove to remove the respective old user’s license.

Assign Gainsight License to New Salesforce User
To assign licenses to the new Salesforce User:
- Navigate to Salesforce Setup > App Setup > Installed packages. You can find the number of available licenses from the page.
For example, in the following image, you can see that five licenses are granted for the Gainsight CSM package. Out of the five licenses, one is currently in use, and you can grant licenses to four more users. - Click Manage Licenses.
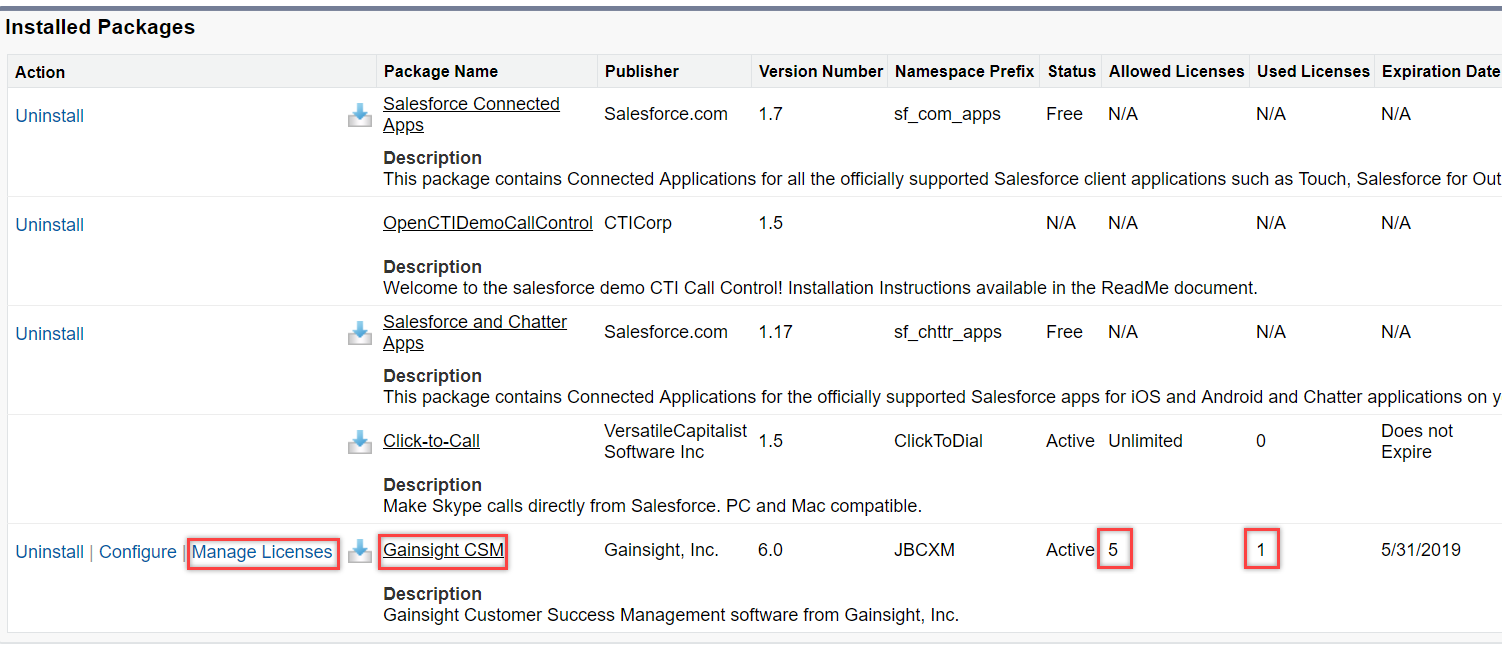
- Click Add Users.

- Select the check box for the required user(s) and click Add.
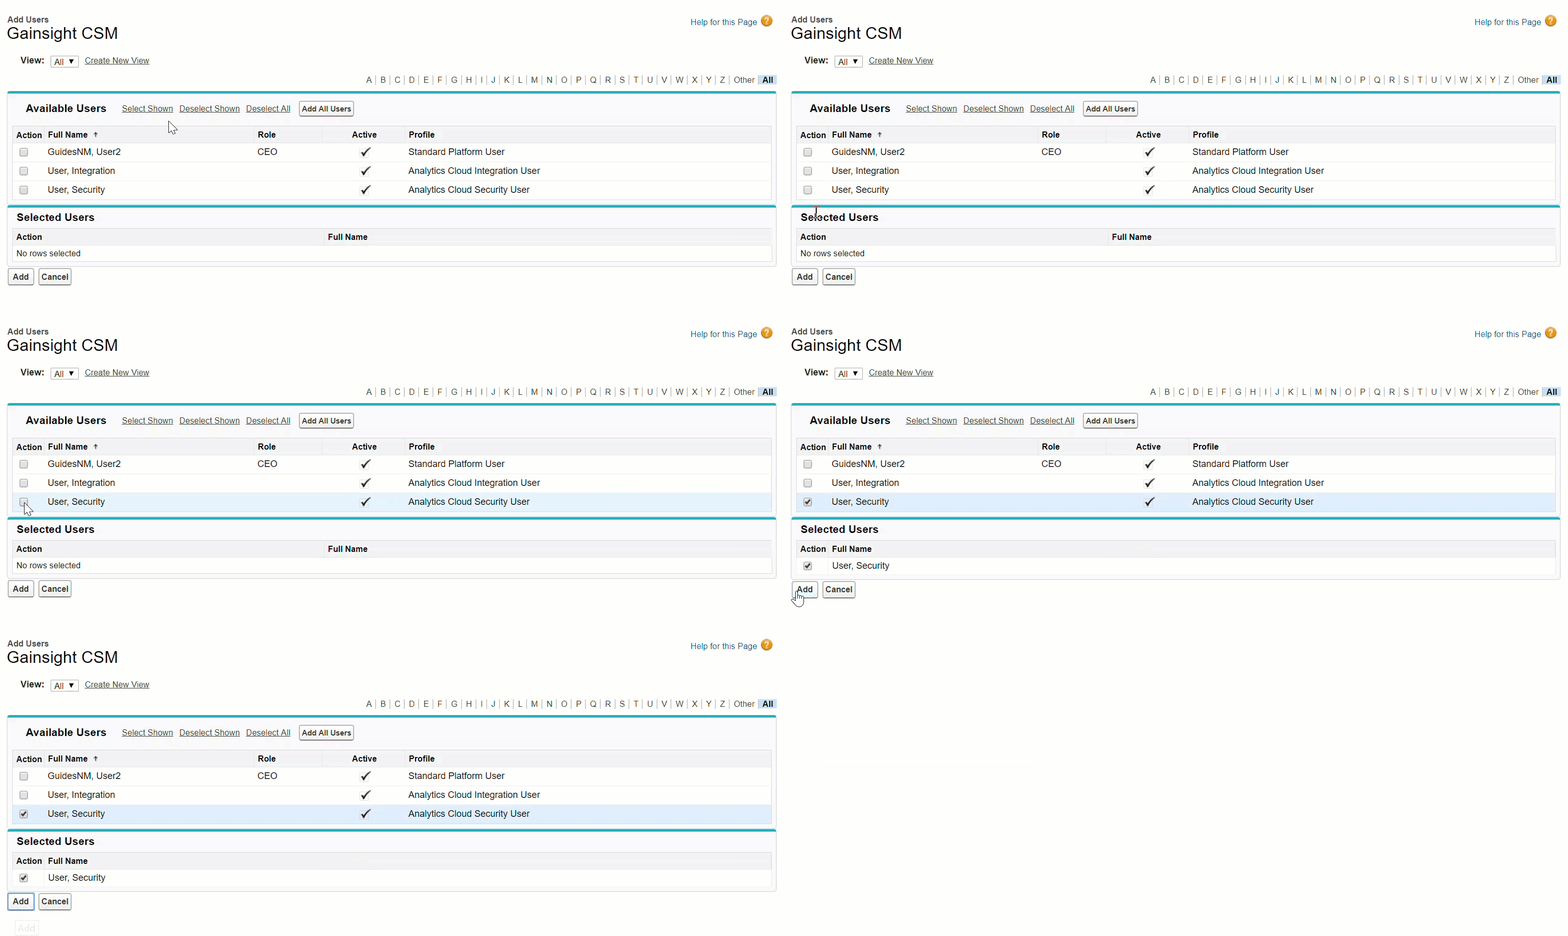
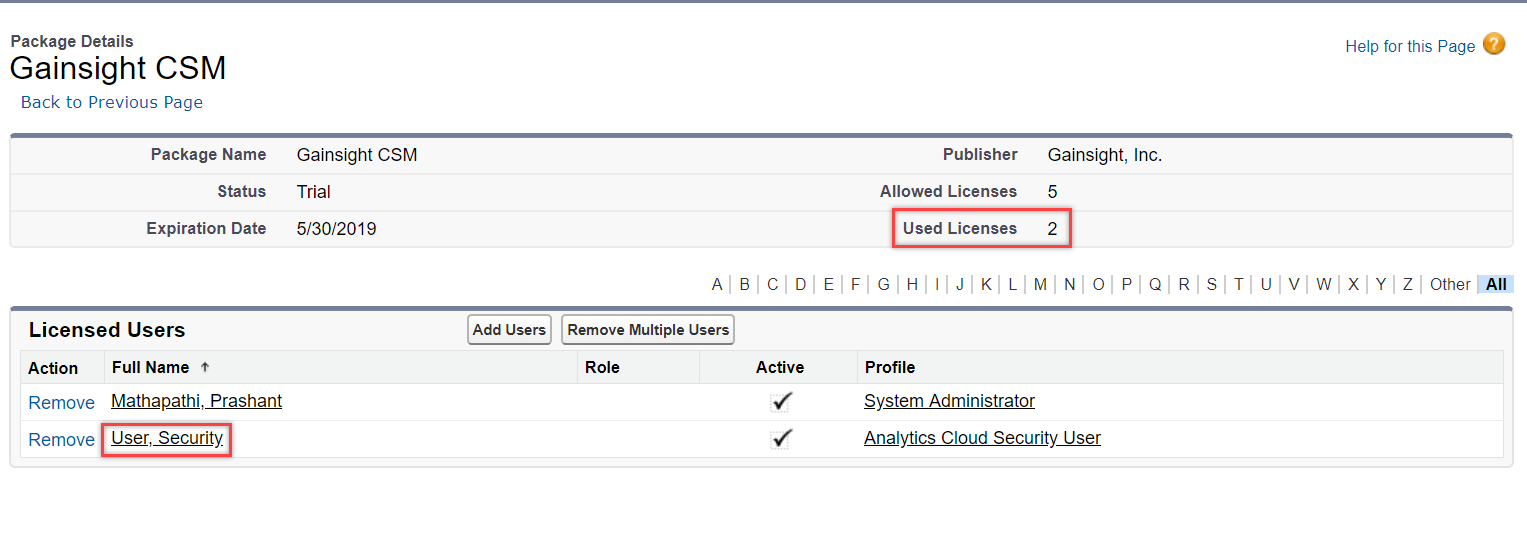
You can see that a license is assigned to the selected user. You can also see that the number of Used Licenses is increased for your org as shown below:
Assign Gainsight NXT Permission Set in Salesforce
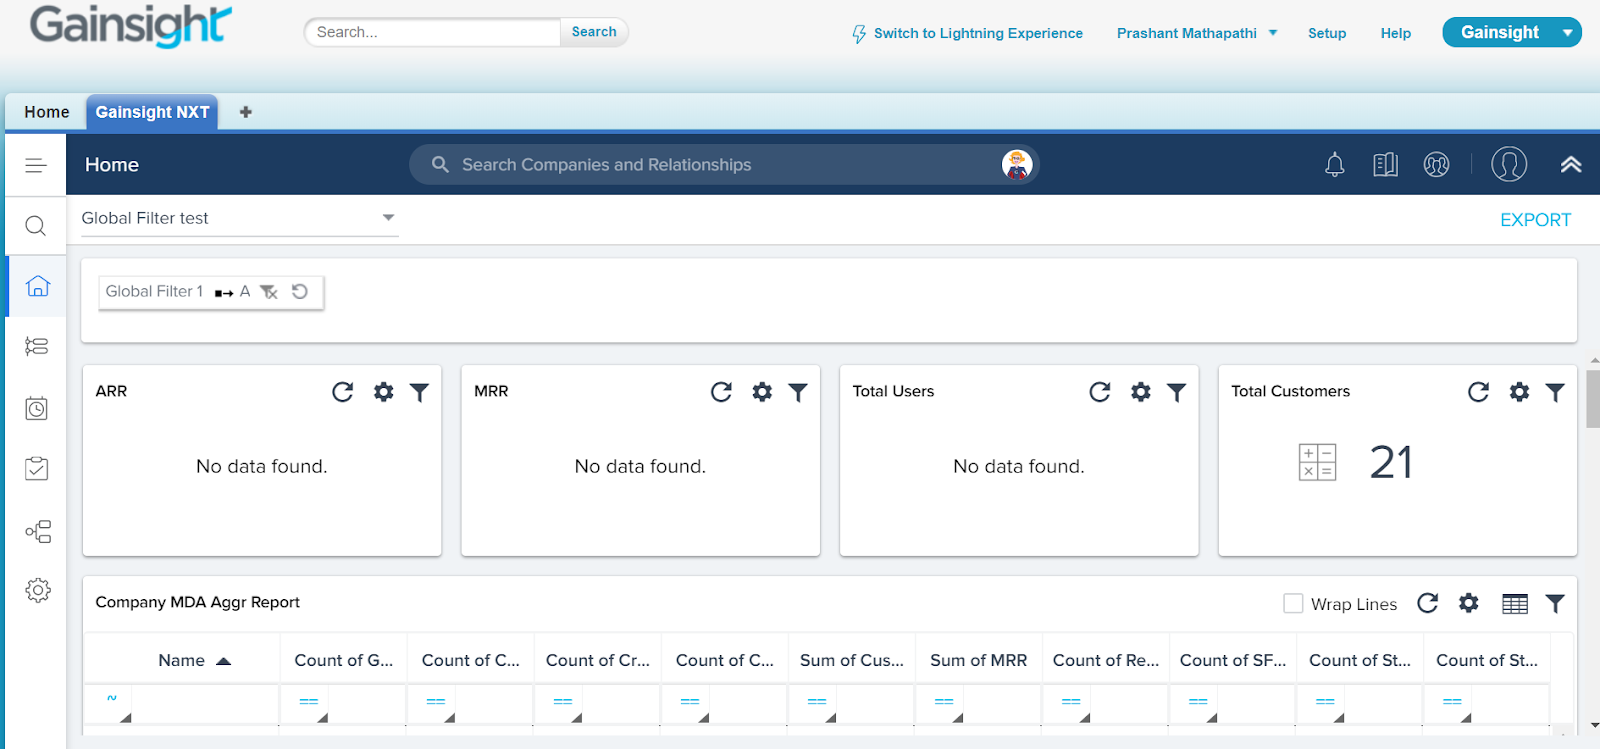
This section describes the process of assigning the Gainsight NXT permission set to users. Once you assign Gainsight Licenses to users, you must assign the Gainsight NXT permission set to the required users. Users who have the NXT permission set can view Gainsight NXT as a new tab in their Salesforce org.
To assign the Gainsight NXT permission set:
- Navigate to Salesforce Setup > Manage Users > Permission Sets.
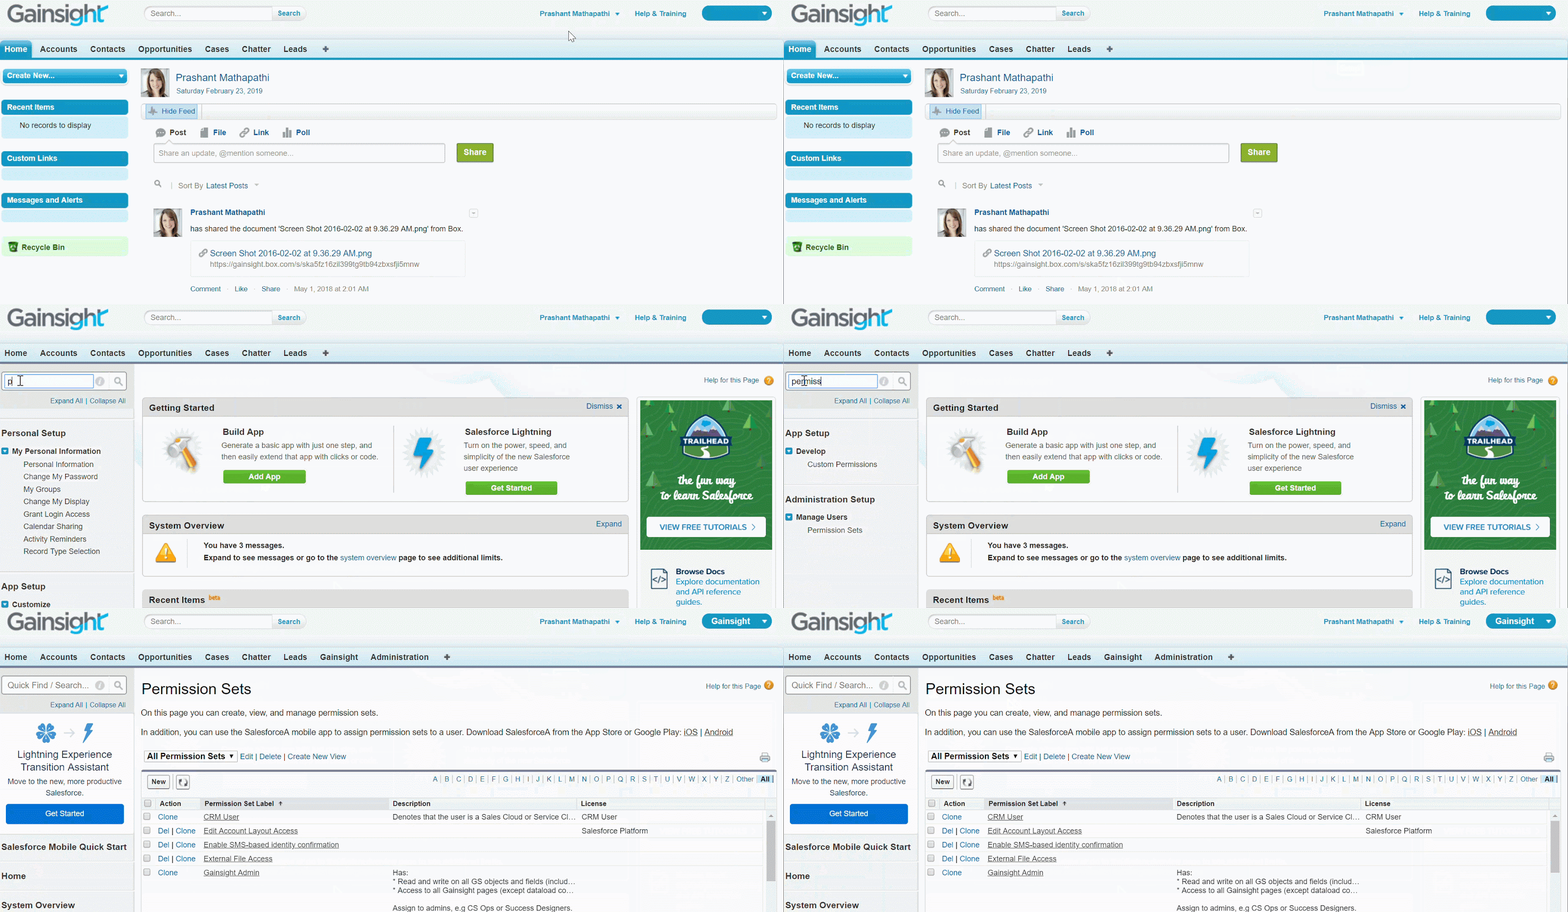
- Click the Gainsight NXT permission set.
- Click Manage Assignments.
- Click Add Assignments.
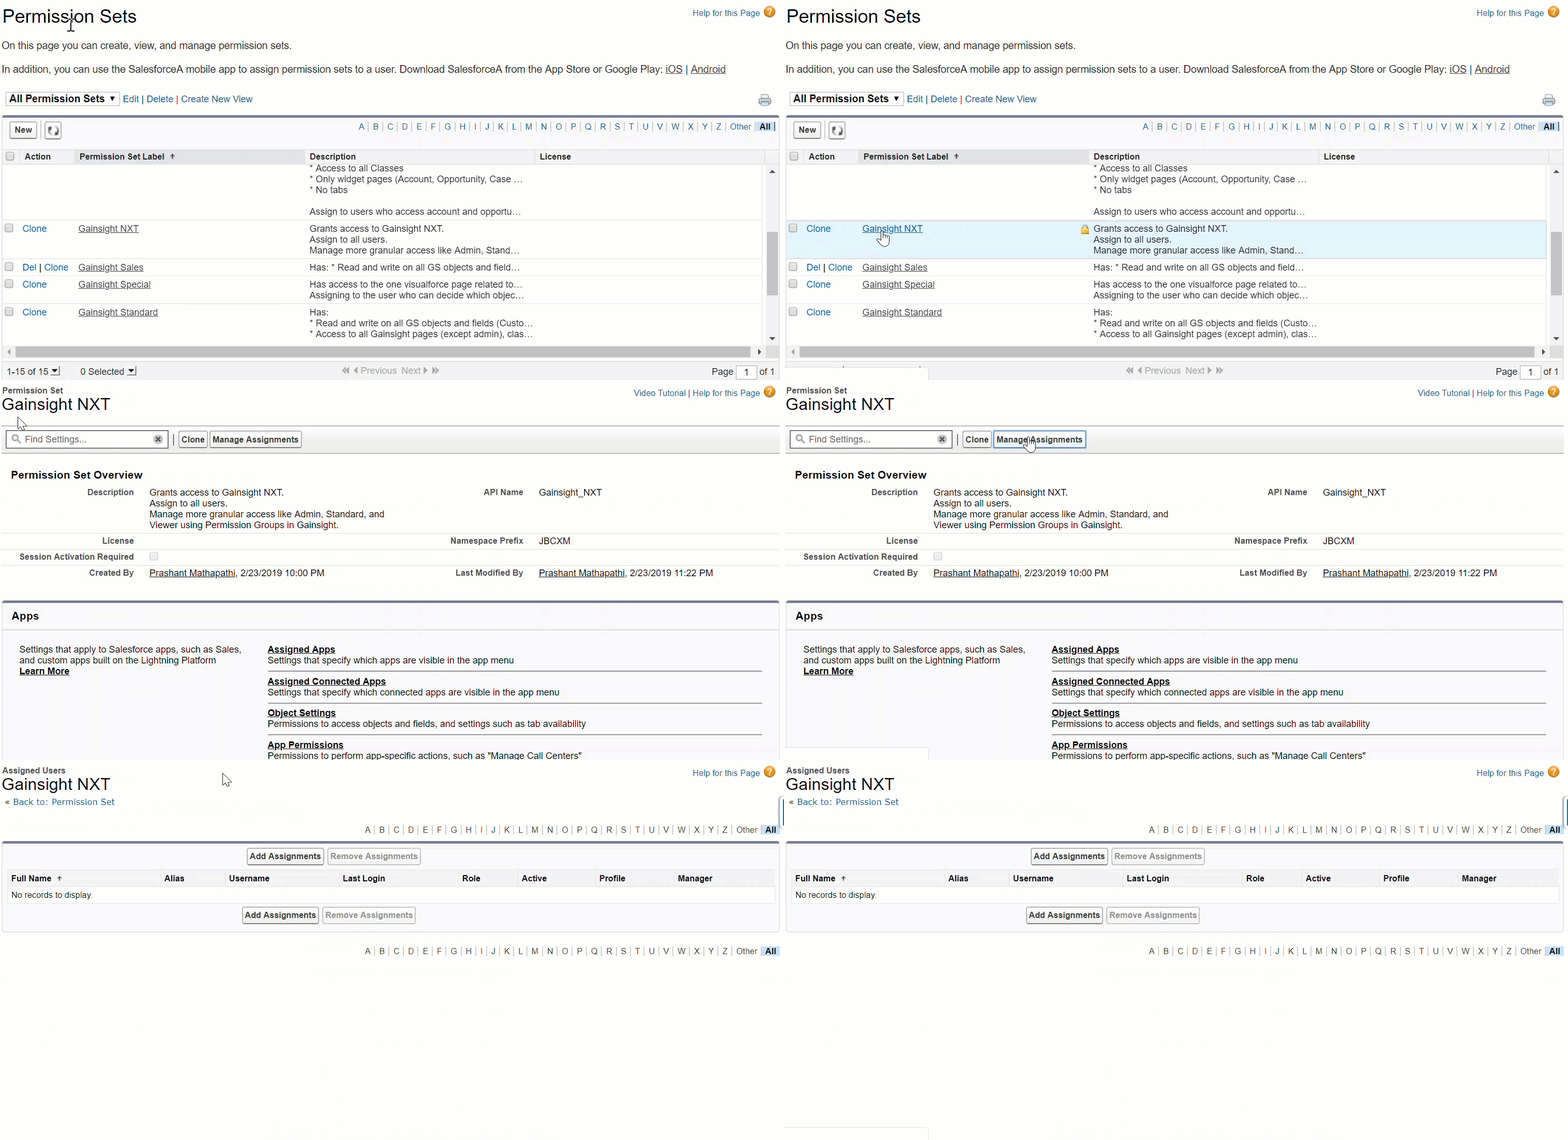
- Select the check box for the required user(s) and click Assign.
- Click Done.
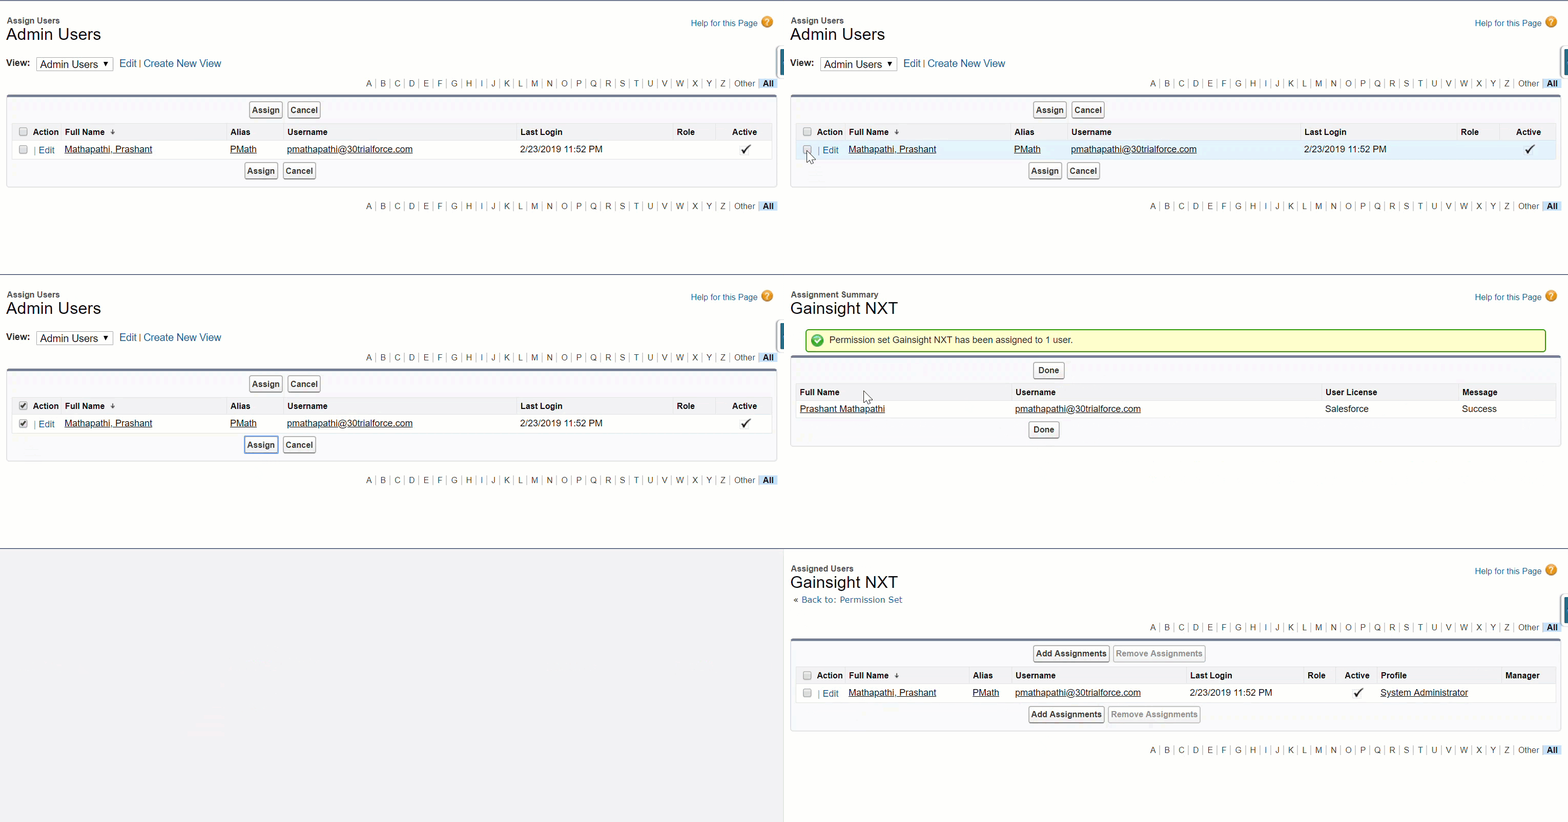
Users who have the NXT permission set can access Gainsight NXT as the separate tab in the Salesforce org, as shown below:
Sync New Salesforce User to Gainsight
This step explains how Gainsight Admins sync Salesforce users to Gainsight through Salesforce Connector.
To sync new Salesforce user to Gainsight through Salesforce Connector:
- Navigate to Administration > Connectors 2.0 > DATA JOBS.
- Navigate to SFDC > User Sync job.
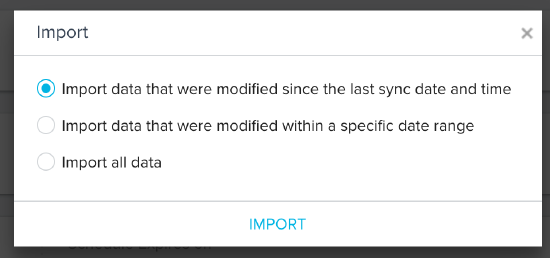
- Click the Import icon for the SFDC User Sync data job. Import dialog appears.
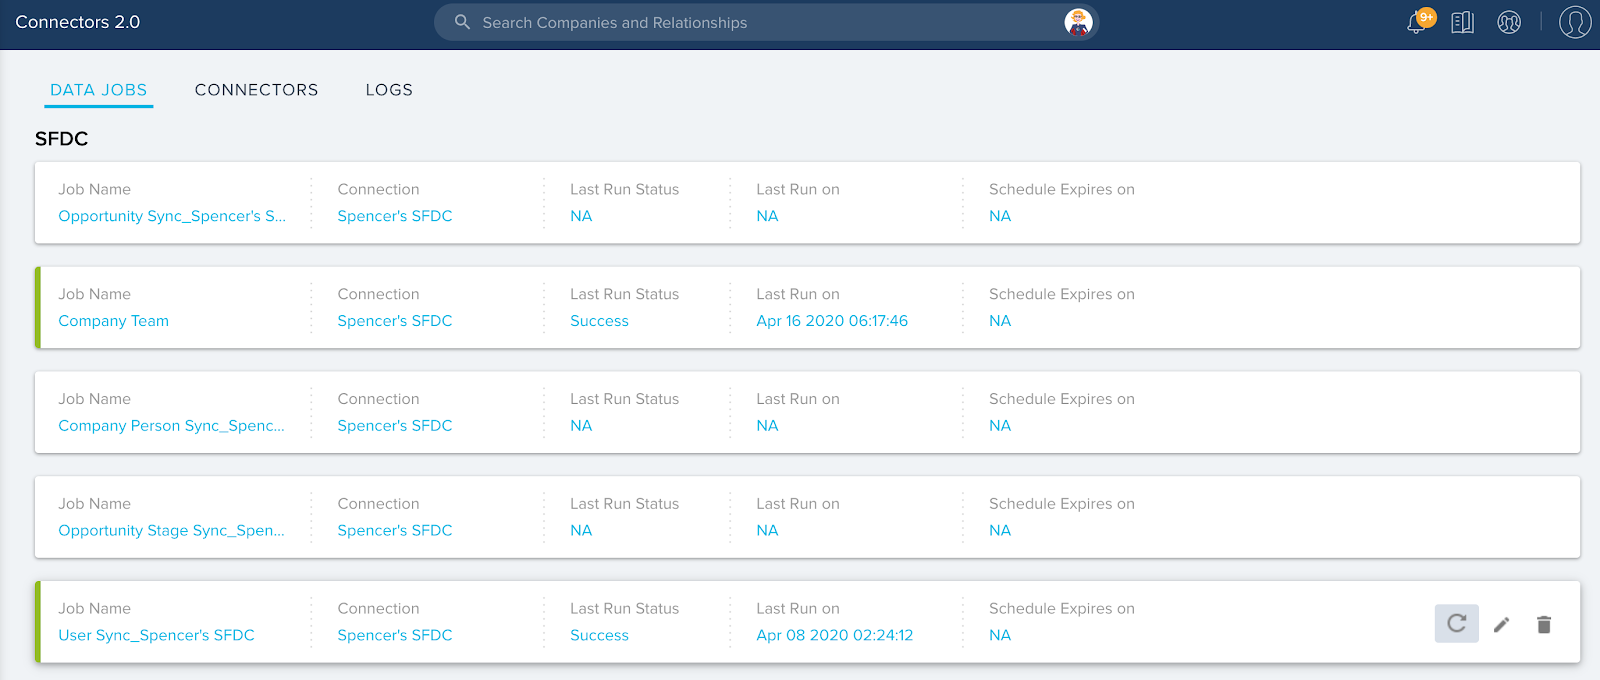
- Select the required option from the Import dialog.
For more information, refer to the Job Schedule of Salesforce Connector.
Assign Permission Group in Gainsight
This section explains how Gainsight Admins can add the required Permission Bundles to the new user.
To assign Permission group in Gainsight:
- Navigate to the Administration > User Management page and select the required Salesforce connection.
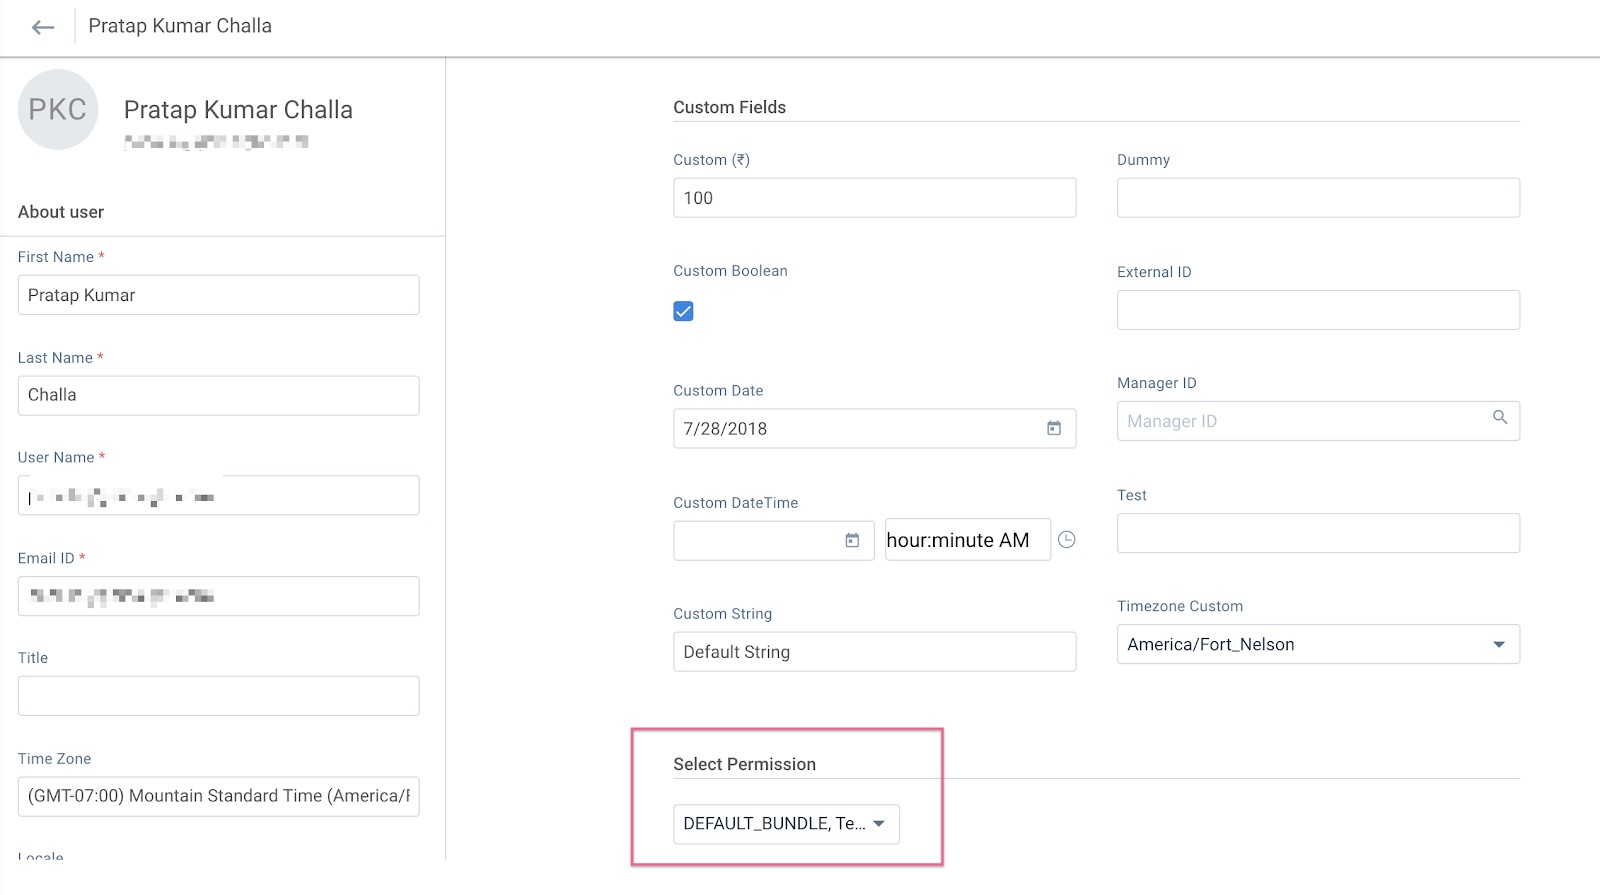
- Navigate to the Edit User page of the newly added user by selecting the Edit User option of the selected user.
- Assign the required Permission Bundles as per the user’s role in the organization. If you do not assign any Permission Bundle to the user, the Default Bundle is assigned.
For more information, refer to the User Management page.