Create User Group
Gainsight NXT
This article explains how admins can create and edit user groups in User Management.
Overview
The User Group feature in Gainsight enables admins to create new user groups and manage the existing ones. Admins can create a user group and add users using a filter criteria, or select each user manually.
Note: Admins can edit only those user groups that are created using the Static membership.
Example Business Use Case:
For instance, if a user group contains three members and there are five tasks, each member receives tasks in a cyclical manner.
-
User Group Members: A, B, C
-
Tasks: Task 1, Task 2, Task 3, Task 4, Task 5
Assignment:
- Member A → Task 1
- Member B → Task 2
- Member C → Task 3
- Member A → Task 4 (cycle restarts)
- Member B → Task 5
When the number of tasks exceeds the number of group members, the algorithm cycles back to the first member after assigning a task to the last member.
IMPORTANT: User groups in the User Management module are designed exclusively for pooled work assignments.
Prerequisites
- Ensure that the users exist in Gainsight, to add users to a user group.
- Contact Gainsight Support to enable the User Group feature.
Create User Group
To create a User Group:
- Navigate to Administration > Users and Permissions > User Management.
- Click User Groups tab.
- Click Create User Group.
- In the Create User Group page, complete the following steps to create the group:
- Basic Information: Define the group name, description, and configuration type (User Pool or SCIM).
- Select User Group Members: Add or review group members based on the selected configuration.
- 5. Click Create. The user group is created.
Basic Information
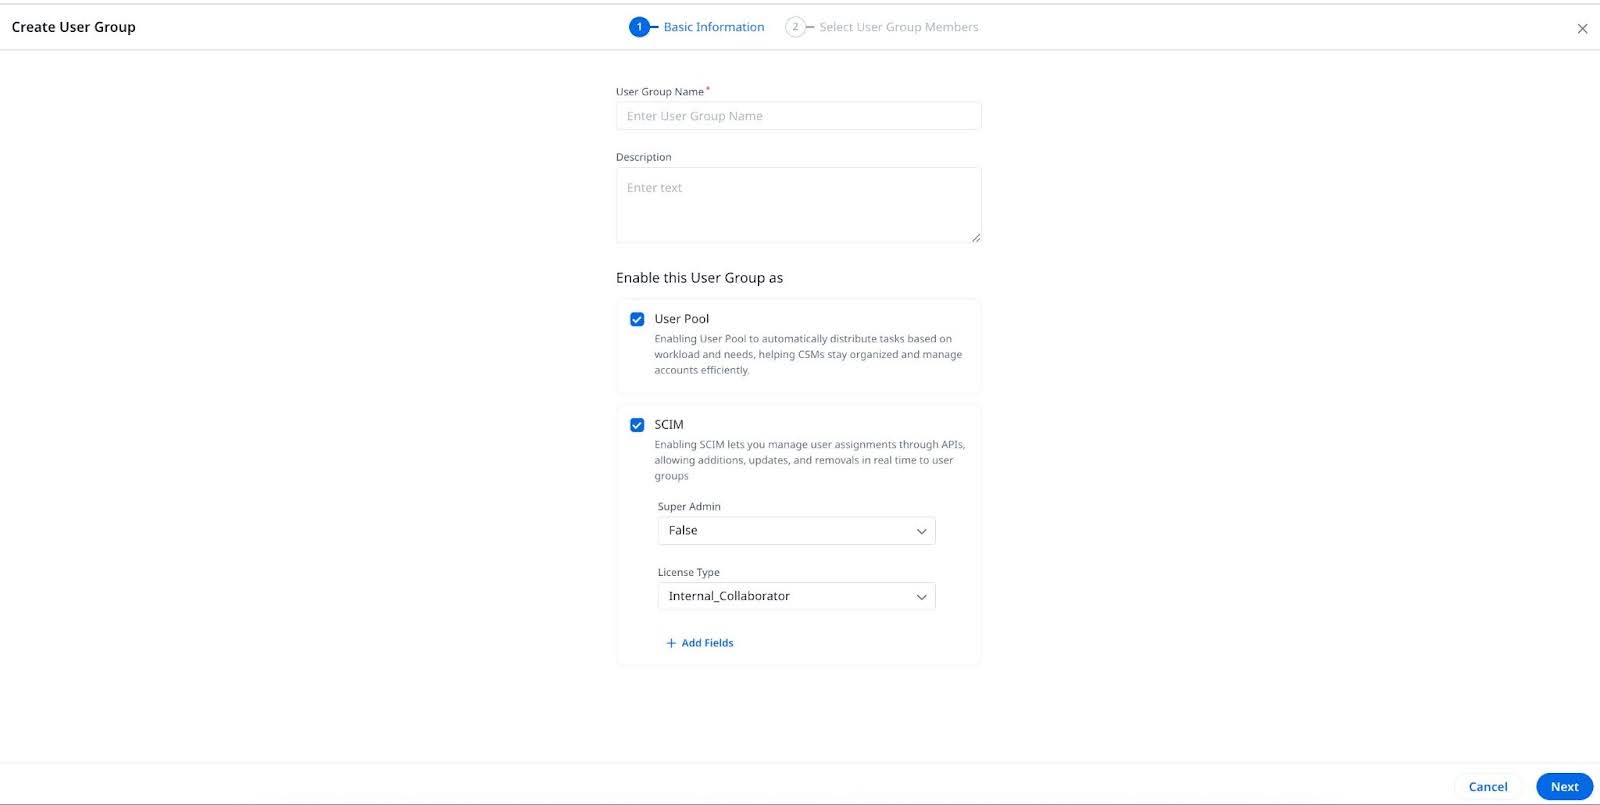
In the Basic Information tab, provide the following details:
- In the User Group Name field, enter the name of the group.
- (Optional) In the Description field, provide a brief description.
- Under Enable this User Group as, select one or both of the following options:
- User Pool: Automatically distributes tasks based on workload and needs, helping Customer Success Managers (CSMs) stay organized and manage accounts efficiently.
IMPORTANT: This is a permanent action and cannot be undone. - SCIM: Enables real-time user assignment management through SCIM APIs, including additions, updates, and removals of users from user groups.
Note: When SCIM is enabled, manual user assignment is not allowed in user group. All user assignments must be performed through APIs. For more information on SCIM API, refer to the SCIM APIs article.
Use Case: Customers who manage user groups in both Gainsight and their Identity Provider (IDP) can use SCIM-based group assignment to simplify user provisioning. In many cases, specific user attributes such as Super Admin, License Type, Role, or custom fields may not be manageable directly within the IDP. In such scenarios, Gainsight allows these attributes to be configured at the SCIM user group level. Any user assigned to the group through SCIM will automatically inherit the defined attributes.
Once selected, additional SCIM configuration options appear:- Super Admin: Select True or False to define whether SCIM-assigned users have Super Admin privileges.
- License Type: Choose from available license types such as Internal Collaborator to apply the correct access level to the user group.
- (Optional) Add Fields: Click to add additional SCIM attributes as needed.
Note: These are not standard SCIM fields. Custom fields are supported and can be used for advanced configurations, such as permissioning or group-based controls. Supported field types include Boolean, Single Picklist, Multi Picklist, and String.
Use Case: This option is particularly useful when customers manage user groups both within Gainsight and their Identity Provider (IDP). If a customer prefers not to assign Gainsight-specific attributes such as Super Admin status or License Type through user APIs, these mandatory attributes can instead be assigned using group assignments.
- User Pool: Automatically distributes tasks based on workload and needs, helping Customer Success Managers (CSMs) stay organized and manage accounts efficiently.
- Click Next. The Select User Group Members page appears.
Select User Group Members
In the Select User Group Members tab, the available options depend on the configuration selected in the previous step:
- User Pool: Add users manually or by applying filters using Static or Dynamic membership types.
- SCIM: Users are managed through SCIM APIs. Manual addition is disabled, members appear automatically when synced from your Identity Provider (IDP).
Add Members When User Pool Is Selected
You can add members using either Dynamic or Static assignment methods.
- Dynamic: Admins can configure a Group Criteria to fetch a cohort of users.
- Select the Membership Type as Dynamic.
- In the Group Criteria section, click Add Filter.
- Configure the filter conditions.
- Click Fetch Members to view the list of users in the Preview Members section.
Note: The fetched cohort of the user list cannot be edited.

- Static: Admins can add users manually, or configure a Group Criteria to fetch a cohort of users.
- Select the Membership Type as Static.
- In the Add Members section, search for the users by typing in at-least three characters of the username.
- Select the required users from the suggestions. The user is added to the Preview Members section.
- (Optional) Add users in bulk using Group Criteria.
Add Members When SCIM Is Selected
User assignment is managed externally through SCIM APIs from your Identity Provider (IDP). Manual addition is disabled. The member list will automatically display users once they are assigned through SCIM.

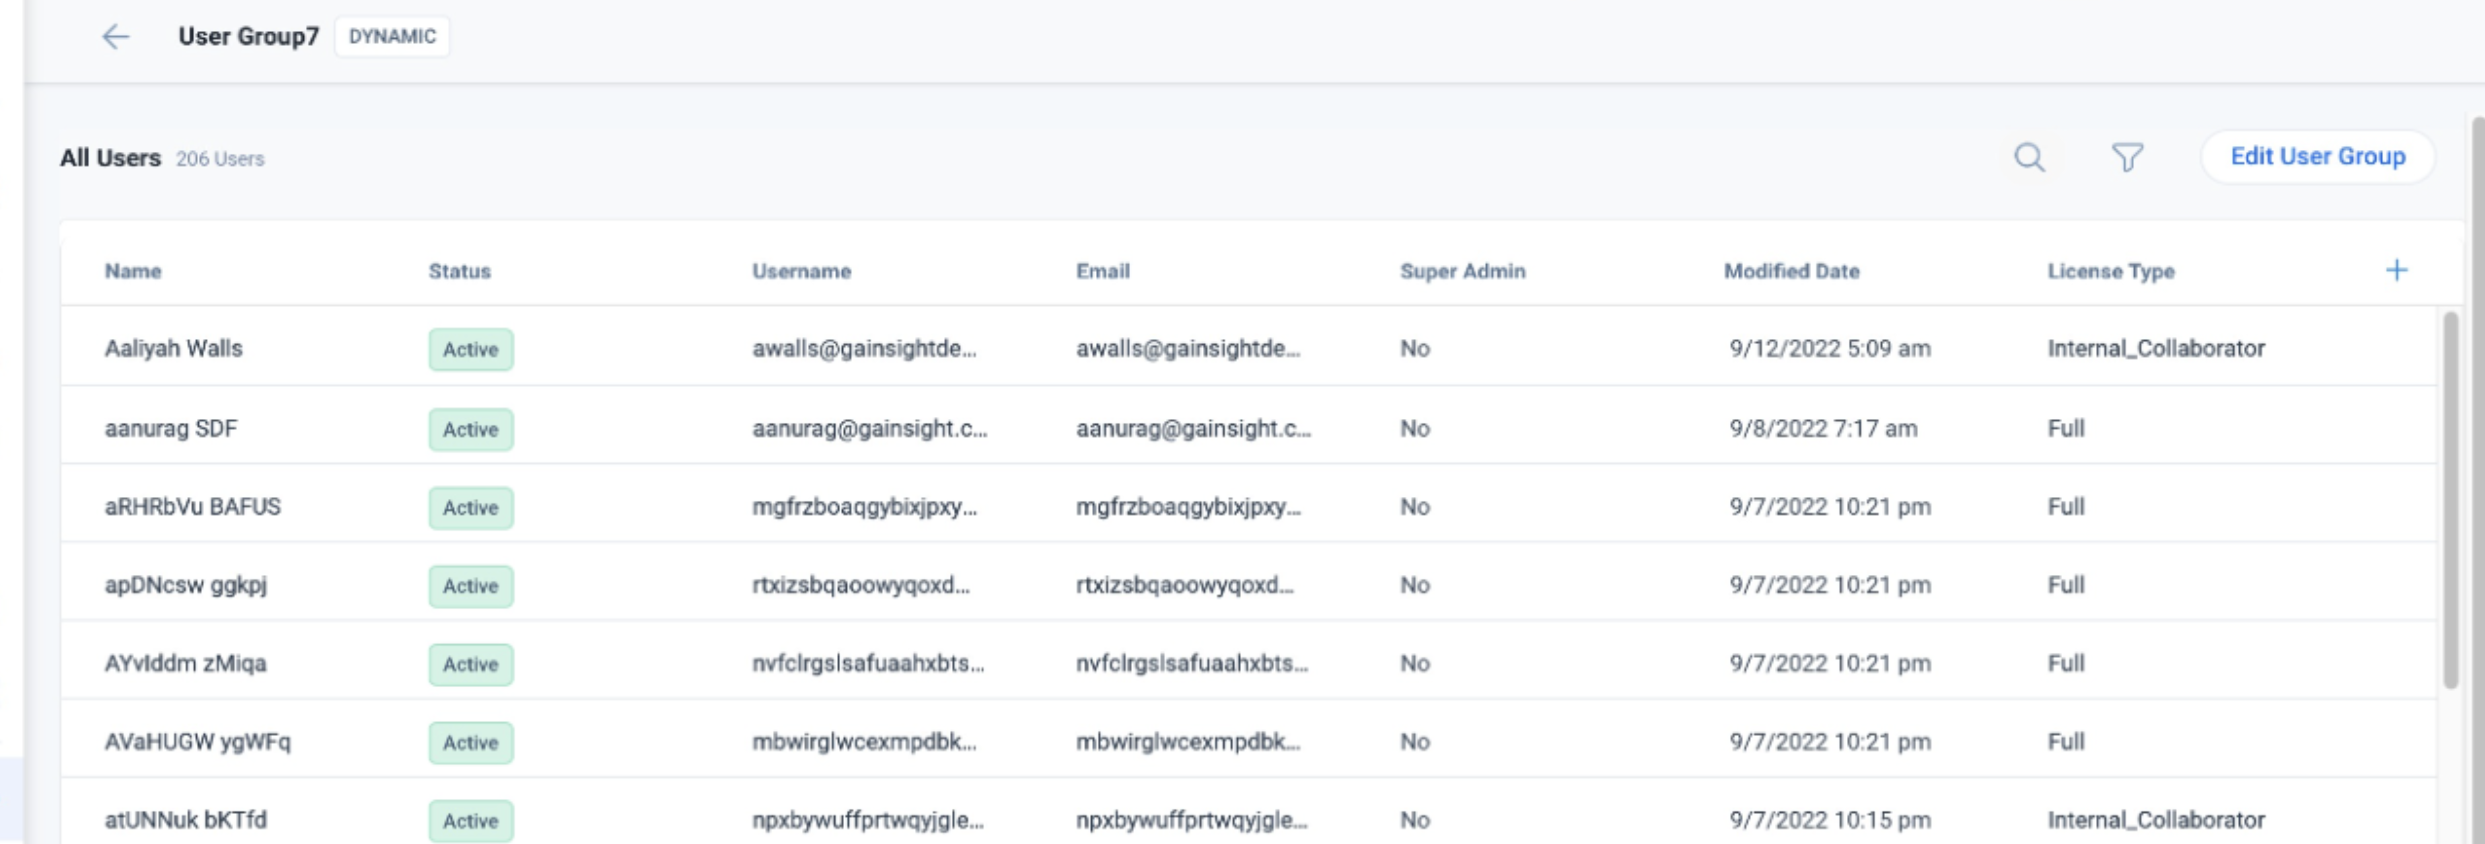
View User Group
To view user groups:
- Navigate to Administration > Users and Permissions > User Management
- Click the User Group tab.
- Click the three-vertical dots menu icon of the user group. The View Group and Edit Group options appear.
- Select View Group.
Note: Click Edit User Group to navigate to the user group edit page.
Edit User Group
You can edit the following details using the Edit User Group options:
- Modify Basic Information: Modify the basic information of a user group.
- User Group Name and Description: Update as needed.
- User Pool and SCIM: Enable or disable configuration.
Note: Enabling User Pool is permanent and cannot be undone.
If SCIM is enabled, you can configure or update the following fields:
- Super Admin (Boolean): Set to True or False to grant or restrict admin privileges to users in this group.
- License Type (Dropdown): Assign the appropriate license type for all users in the group.
- Role (Multi Picklist): Define one or more roles to be applied to users in the group.
- Custom Fields (Supported types: Dropdown, Multi Picklist, Boolean, String): Configure additional SCIM-mapped fields for advanced scenarios like permissioning, navigation access, or data visibility.
Note: For String and Dropdown fields, conflicting values across multiple group assignments may cause user assignment to fail.
SCIM Assignment Logic and Constraints
- User Assignment through Groups: When a user is assigned to a SCIM-enabled group, their SCIM-mapped attributes such as License Type, Role, Super Admin are automatically inherited from the group’s configuration.
- Multiple Group Memberships: If a user belongs to multiple SCIM-enabled groups, attribute resolution follows a defined precedence logic:
| Field Type | Resolution Logic | Example |
|---|---|---|
| Boolean | True takes precedence over False | If Group A sets “IsPartner” to True and Group B sets it to False Result: True |
| License Type | Highest priority License is assigned | Group A = Viewer, Group B = Full Result: Full (Full has higher priority) |
| Super Admin | If any group assigns True, user is assigned True | Group A = True, Group B = False Result: True |
| Role | All role values from assigned groups are combined | Group A = Admin, Group B = Manager Result: Admin, Manager |
| Multi Picklist | The user gets all values assigned by their groups | Group A = US, EU, Group B = APAC Result: US, EU, APAC |
| Dropdown | Not supported for resolution across multiple groups | Group A = East, Group B = West (A is higher) Conflict: User assignment fails |
| String/Custom Fields | Not supported for resolution, must be unique across groups | Group A = Region: NA, Group B = Region: EMEA Conflict: Assignment Fails |
- Unique Configuration Requirement: No two SCIM-enabled groups can have identical SCIM attribute configurations.
Note: An error message is displayed if a new or updated group has a conflicting configuration with an existing group. - Irreversible SCIM Activation: Once SCIM is enabled for a group, it cannot be reverted to a non-SCIM group.
- SCIM Configuration Restrictions: The following SCIM attribute types can be configured and updated:
- Boolean
- License
- Role
- Multi Picklist
The following cannot be added or modified once the group is SCIM-enabled: - Custom Picklist Fields
- String Fields
Note:- Attempting to configure unsupported field types in a SCIM-enabled group will result in an error.
- If a SCIM group contains a high number of user records, attribute updates are processed asynchronously. Changes may take some time to reflect across all users.
- Modify Group Criteria: Modify group criteria of a user group with Dynamic Membership Type.
-
Remove Members: Remove members from a user group with Static Membership Type.
For more information, refer to the Remove Users from a User Group section.
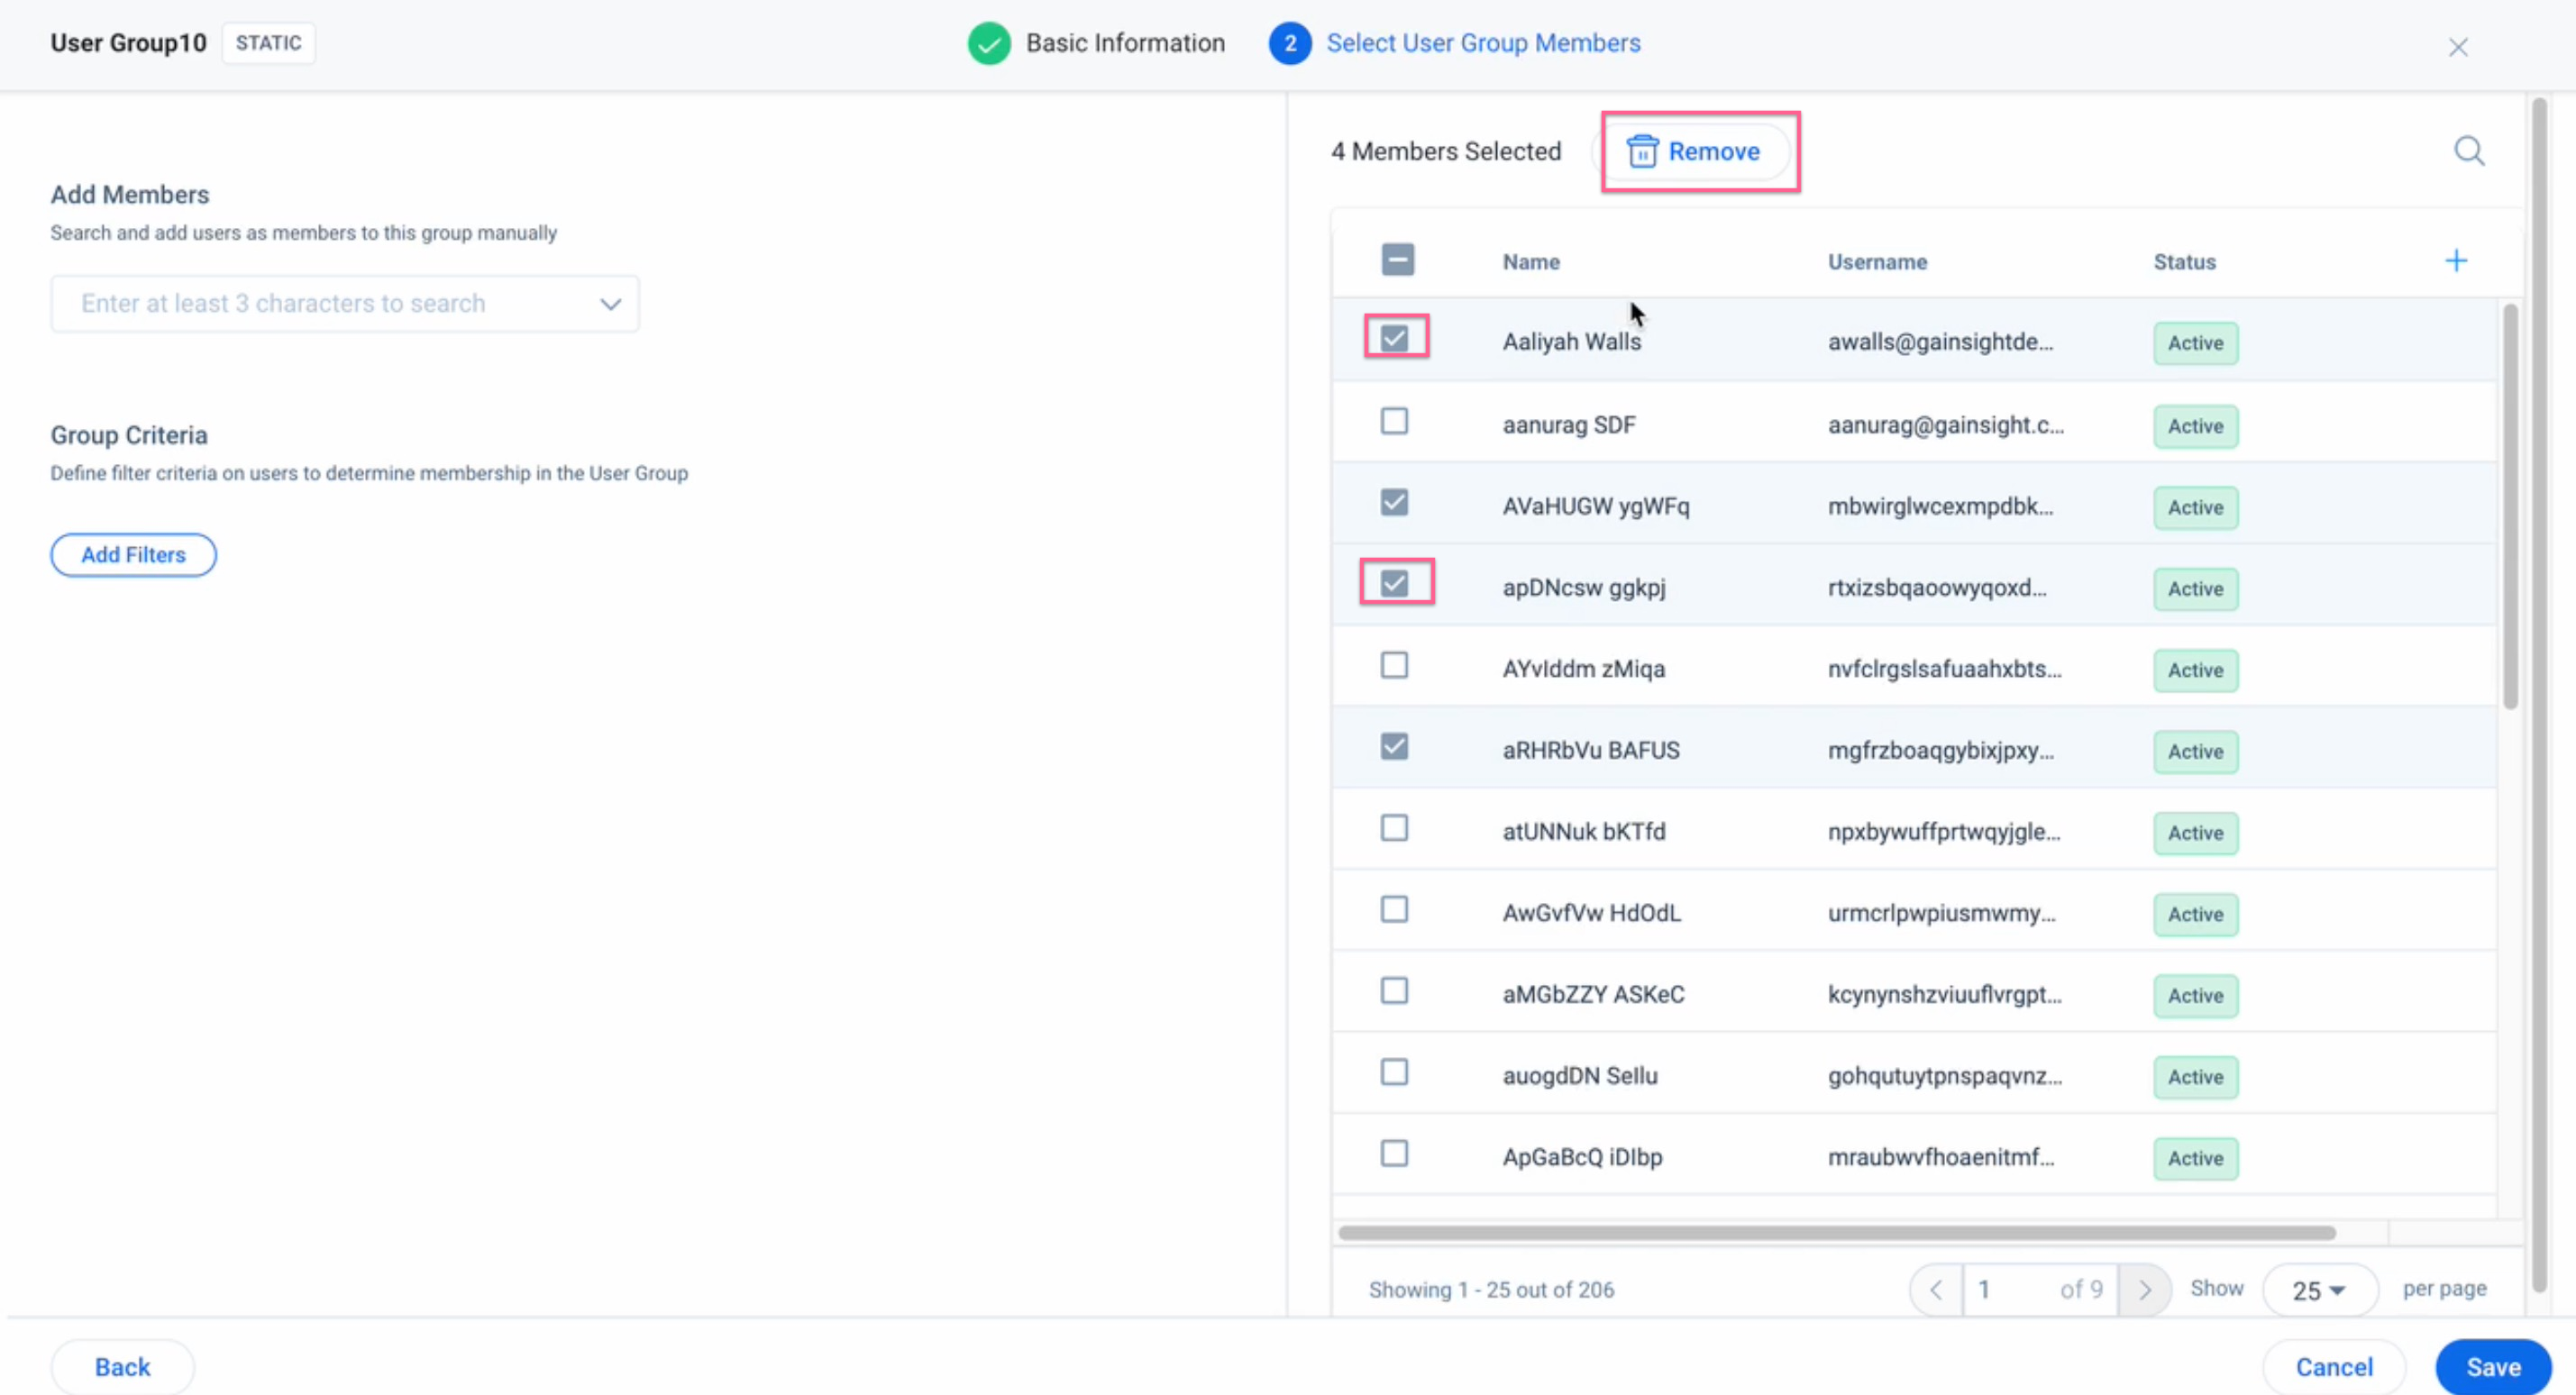
Remove Users from a User Group
Admins can remove users from a static user group.
To remove members from the user group:
- Navigate to Administration > Users and Permissions > User Management
- Click the User Groups tab.
- Click the three vertical dots menu icon of a user group with Static Membership Type.
- Click Edit Group. The Basic Information page appears.
- Click Next. The Select User Group Members page appears.
- From the Preview Members section.
- Select the checkbox beside each user that is to be removed from the user group.
- Click Remove. The Remove Members confirmation dialog box appears.
- Click Confirm. The selected members are removed from the Preview Members list.
- Click Save. The selected members are removed from the user group.
Assign CTAs to User Groups
The CTAs can be assigned to user groups using the Mass Edit feature. The CTAs are distributed equally among the CSMs that are part of the selected user group.
To reassign ownership to user groups:
- Navigate to Administration > Mass Edit.
- Select Call To Action from the source object dropdown list.
- Filter the CTAs to edit as follows:
- In the Show Me section, click the plus icon to add appropriate show fields. For example, Call to Action Name and Assignee Name.
- In the By field section, click the plus icon to add appropriate by fields, if required.
- Click the Filter icon to add the appropriate filters. For example, select Assignee and assign it a value.
- Click RUN. The list of CTAs appears.
- Click +ACTION in the Apply Actions section.
- Select Reassign ownership.
- In the Reassign ownership to field, search for the User Pool and select from the list of suggestions.
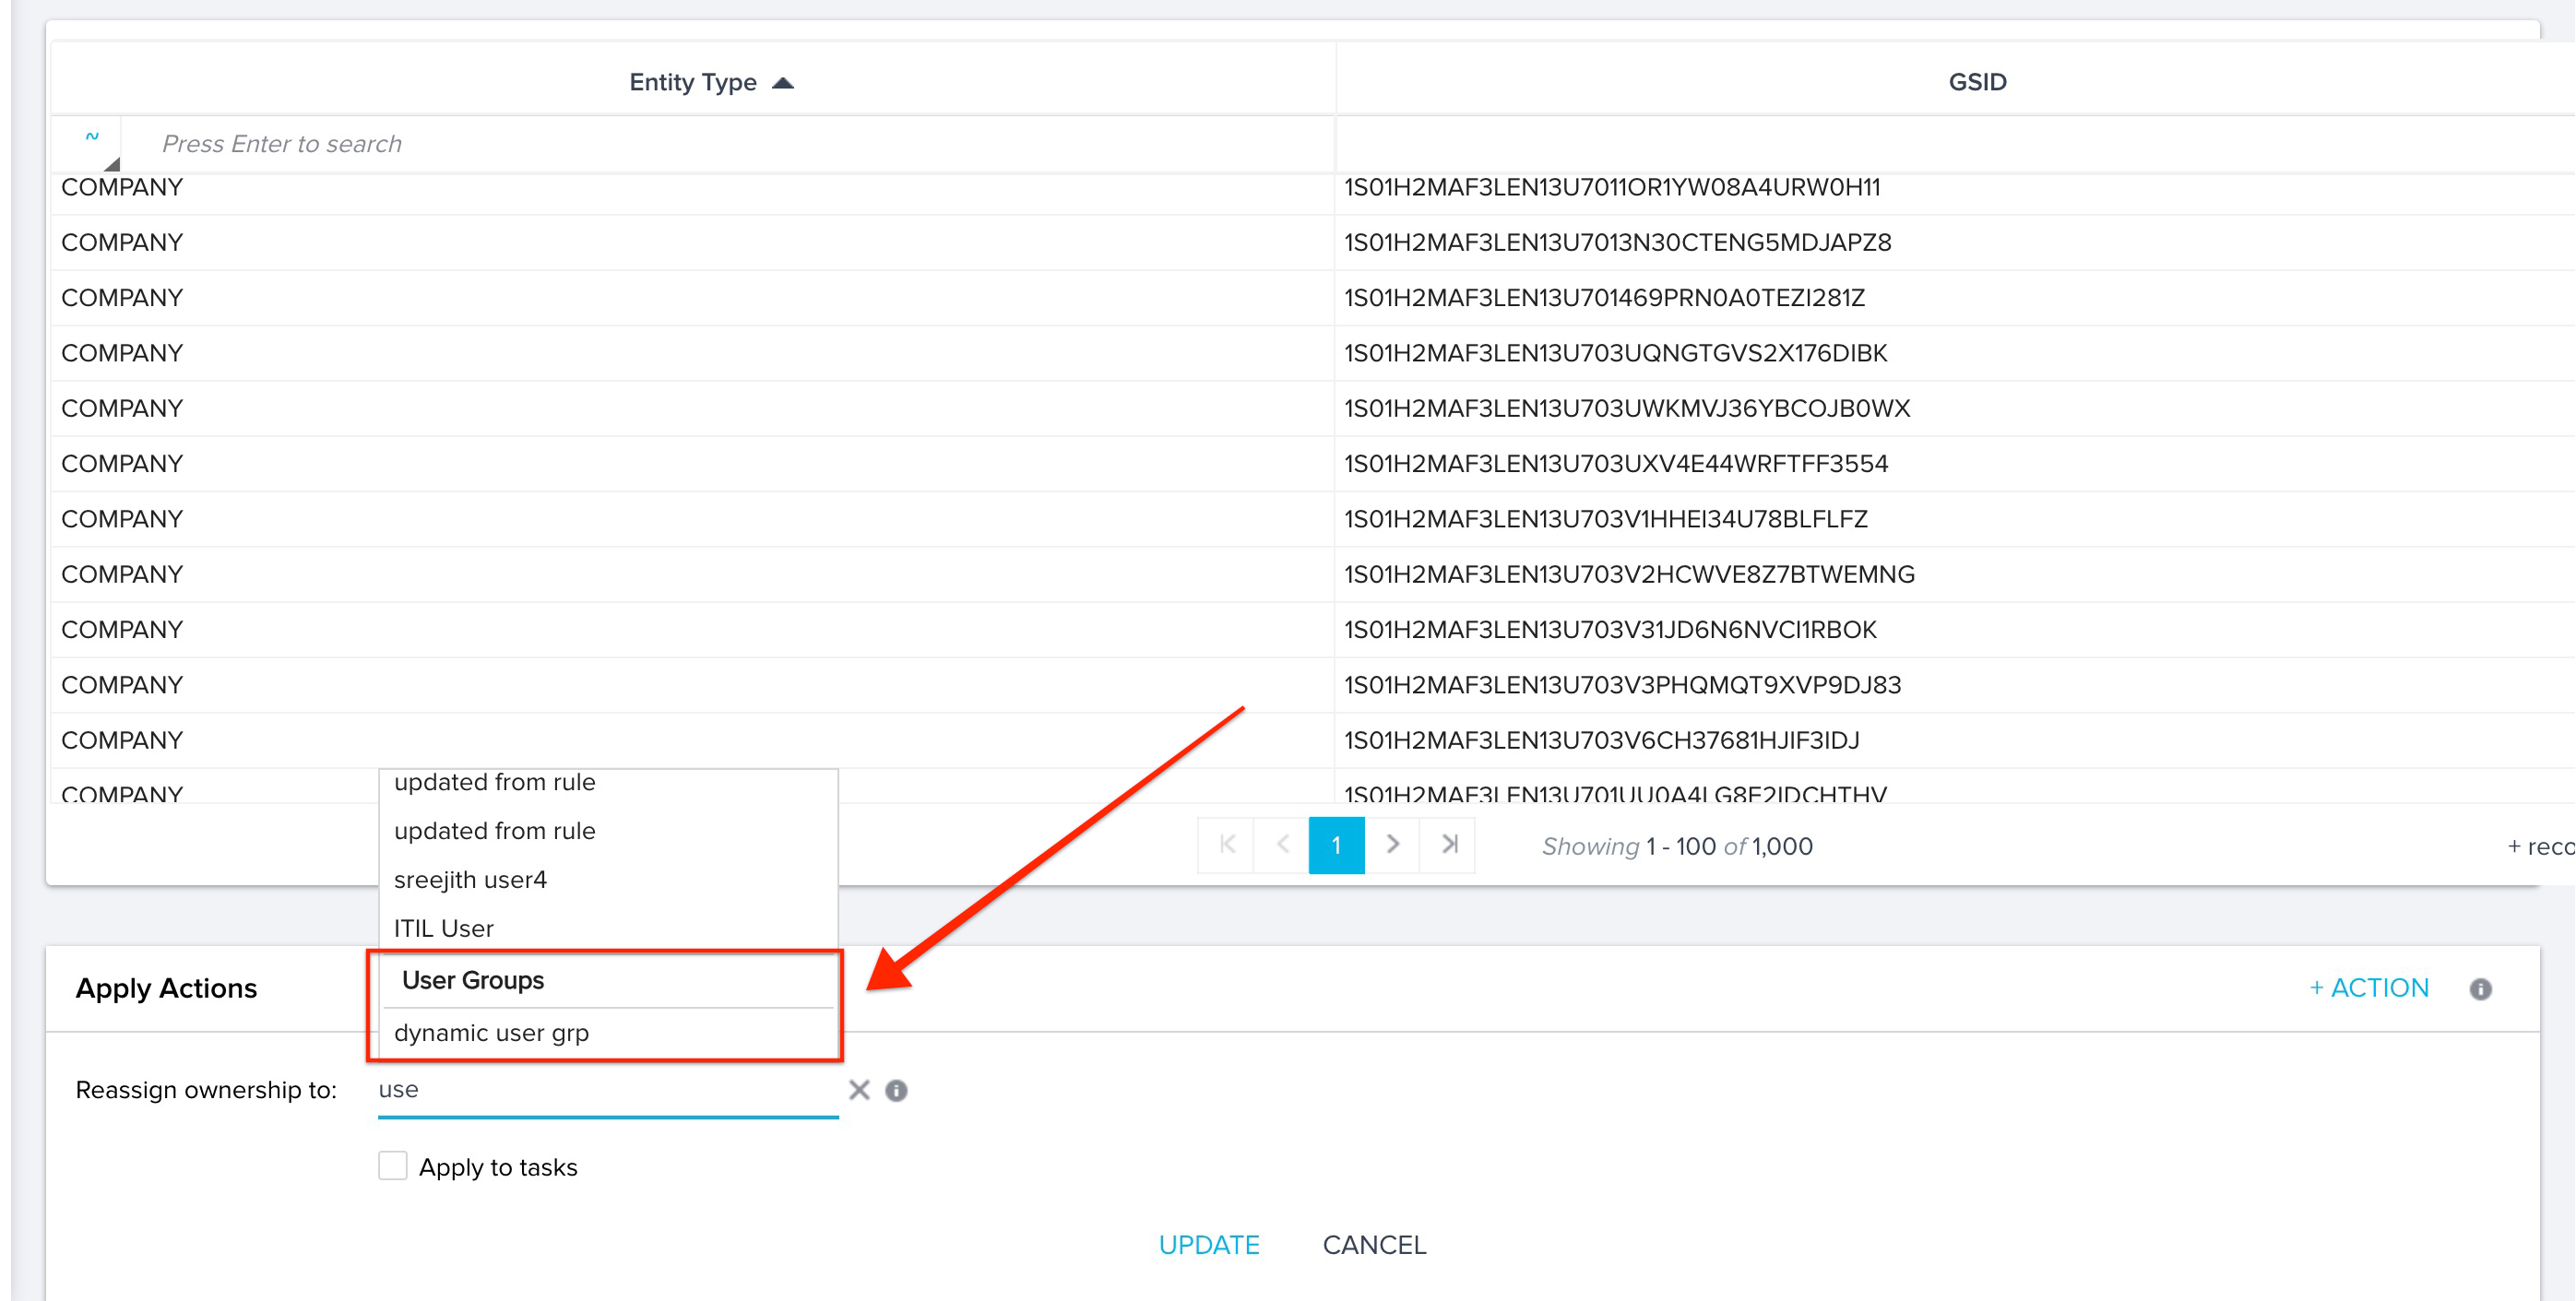
- (Optional) Select the Apply to tasks checkbox to change the ownership of all tasks under the CTA.
- Click UPDATE.
- Select YES in the confirmation box. The ownership is reassigned to the selected User Pool.
User Groups in Rules Engine
You can assign the ownership of CTA to user groups while setting up a new rule or editing an existing Rule from Rules Engine. Once the rule is executed, the CTAs are distributed equally amongst the CSMs that are part of the selected user group.
IMPORTANT: Admins cannot assign Default Owners for CTAs whose ownership has been assigned to a user group.

User Groups in Journey Orchestrator and Email Templates
You can automate the distribution of CTAs by assigning their ownership to predefined User Groups in Journey Orchestrator. Once it is executed, the CTAs are distributed equally among the CSMs within the selected user group, using the Round Robin algorithm.
IMPORTANT: Admins cannot assign Default Owners for CTAs whose ownership is assigned to a user group.
