Gainsight NXT Release Notes 6.2 April 2019
Gainsight Release Notes Version 6.2 contains the following subsections:
- Notifications section describes important changes to the application that are implemented now or will be in the near future.
-
Enhancements (per module) describe improvements made in the existing product capabilities.
-
New Features in Gainsight which may require the Admin to setup new processes or re-think existing processes.
-
Issues Addressed section contains issues which are fixed in this release and also issues reported by customers.
Announcements
V6.2 Release: V6.1 was used for a one-off customer release, and there are no 6.1 release notes.
New Features
Surveys
SurveyMonkey integration with Gainsight Surveys
With this release, Admins can now integrate SurveyMonkey with Gainsight to import and analyze survey responses. Gainsight users can then derive more customer insights from these survey responses and transform them into actionable steps.
After you configure the integration from Administration > Operations > Connectors 2.0 > CONNECTORS tab, navigate to the Surveys > Survey List page to access this feature.
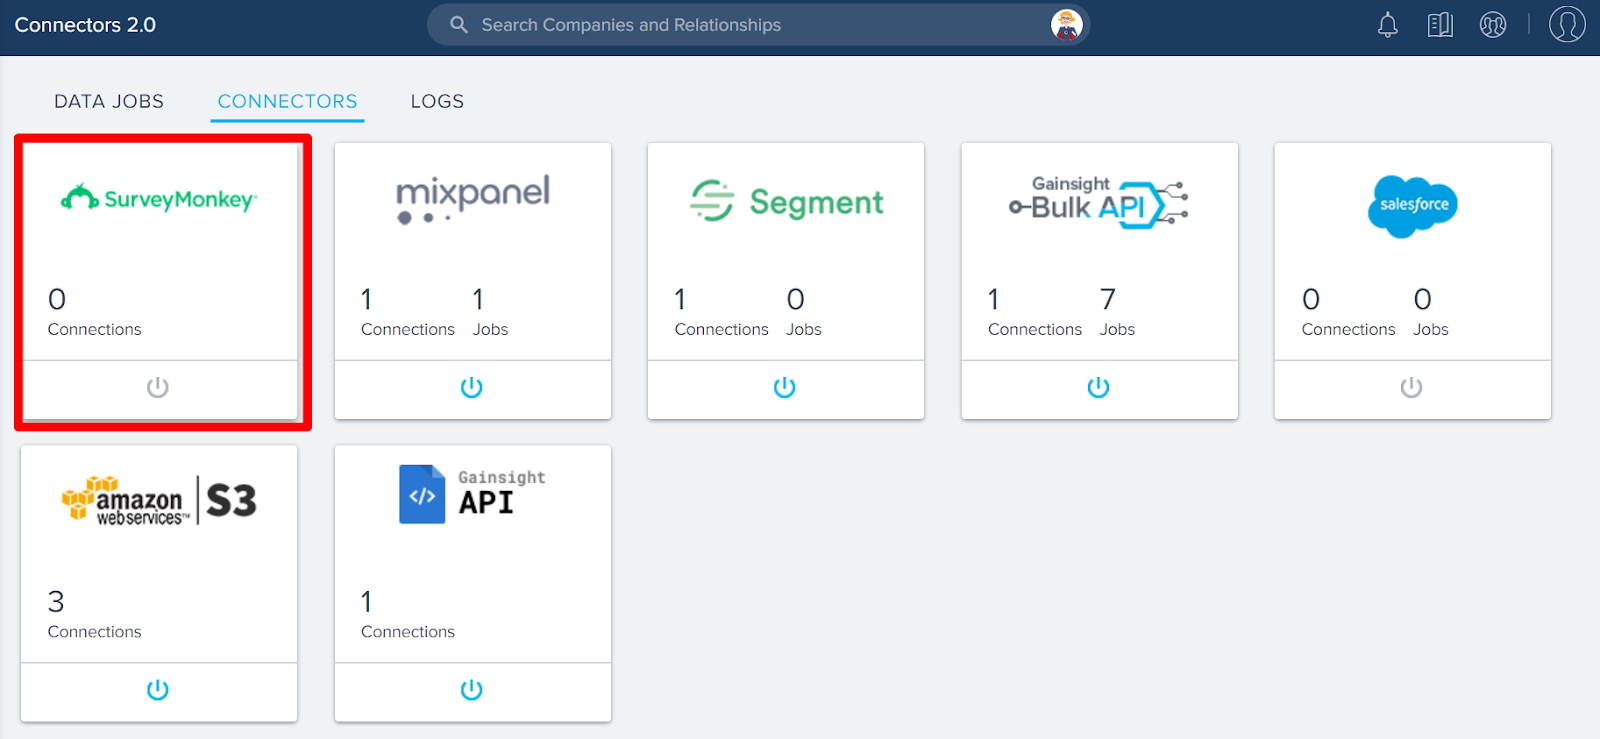
For more information on how to integrate SurveyMonkey with Gainsight, refer to SurveyMonkey Integration article.
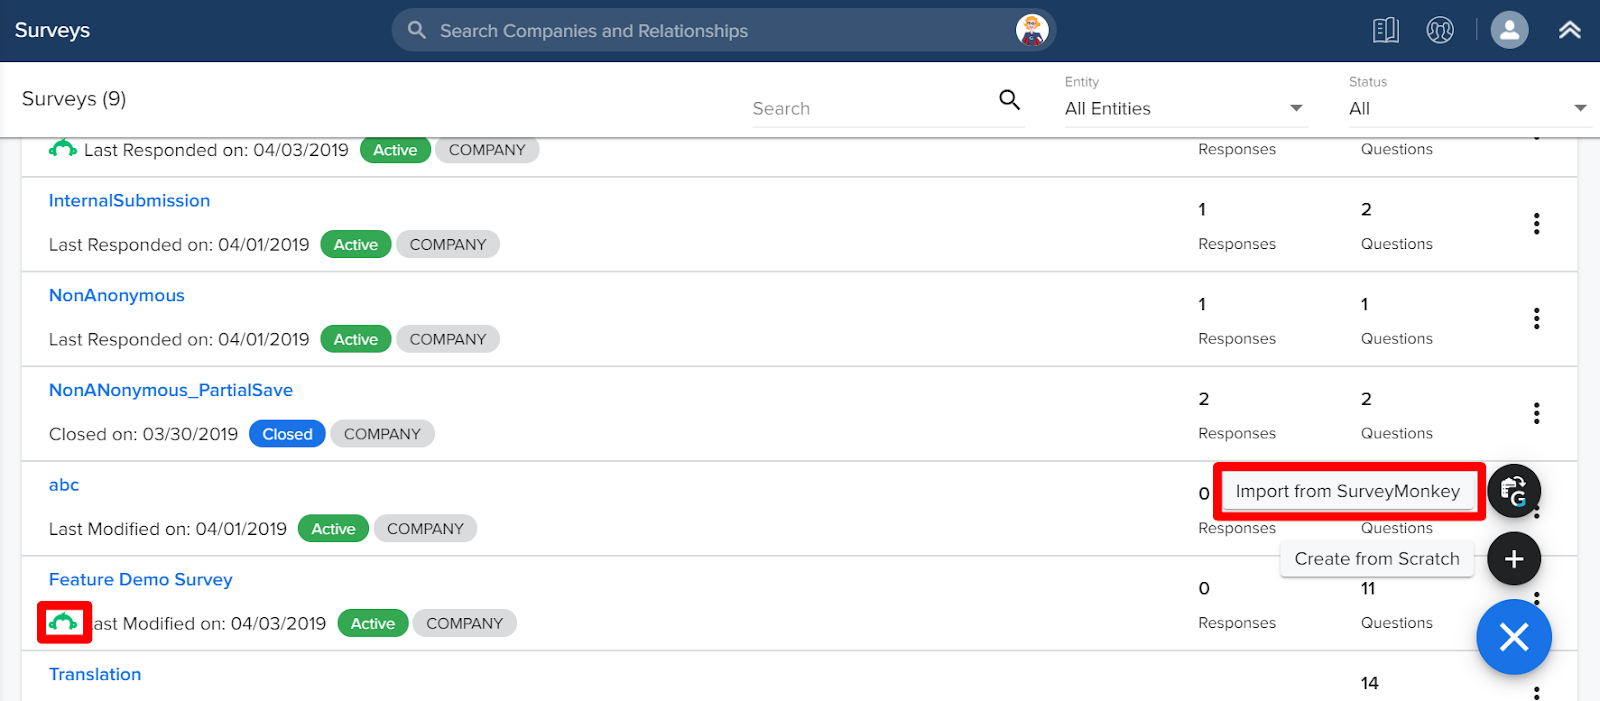
In the following image, you can see the Import from SurveyMonkey option when you click +. The SurveyMonkey logo below the Survey Name identifies the surveys which are imported from SurveyMonkey.
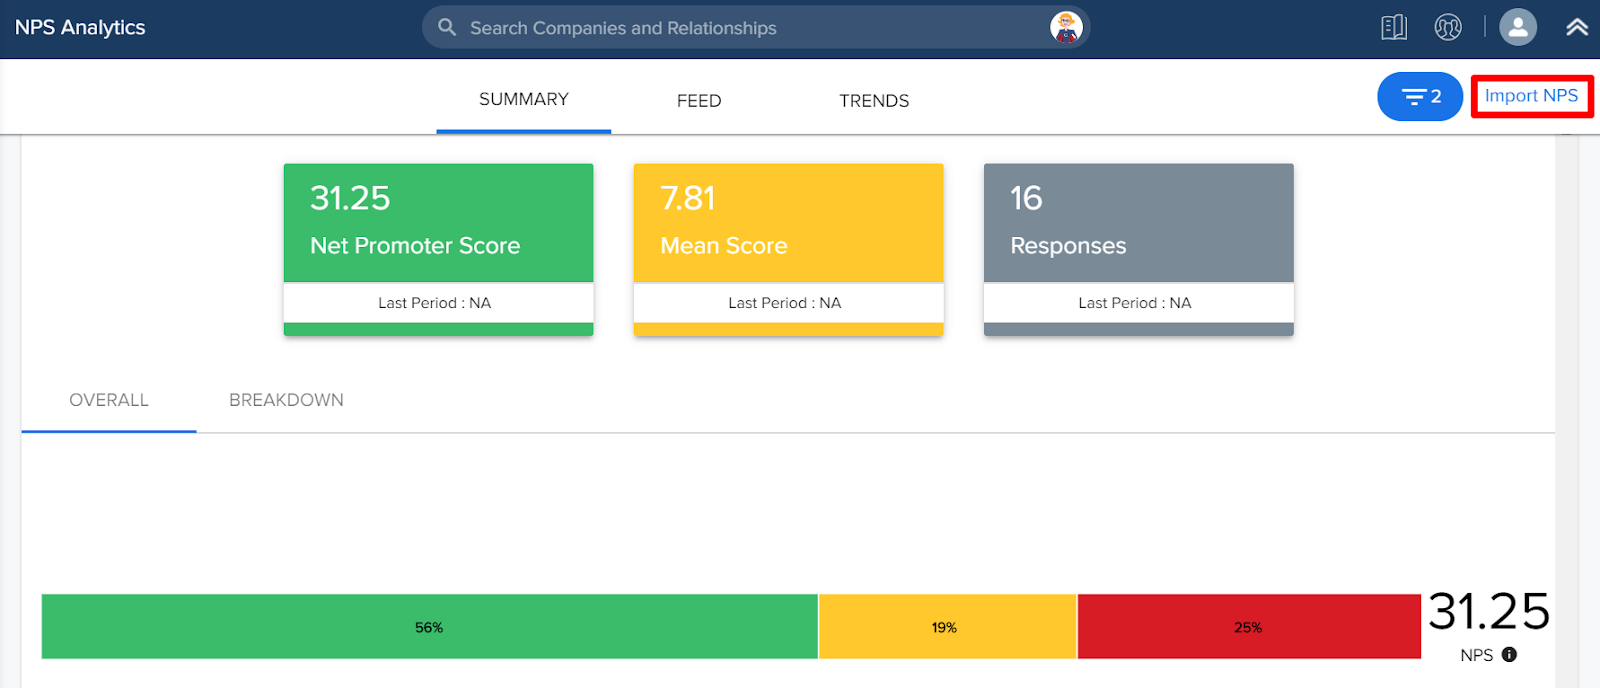
 Import Third Party NPS® Responses to Surveys
With this release, Admins can now upload CSV files to import Third Party NPS® responses to Gainsight Surveys, and analyze the NPS® responses in the NPS® Analytics tab. Gainsight users can then derive more customer insights from these NPS® responses and transform them into actionable steps, like Create Rules and trigger CTAs.
Navigate to Surveys > NPS® Analytics page to access this feature. For more information on the NPS® Analytics page, refer to NPS® Analytics Overview. For more information on how to import the Third Party NPS® responses to Gainsight Surveys, refer to Import Third Party NPS® Response to Surveys article.
Enhancements
Surveys
With Surveys, you can create highly customized surveys that capture customer insights and transform them into actionable next steps for your organization. You can easily create multi-page surveys with a variety of question types, including multiple choice, matrix, and a standard NPS® question type. Surveys gives admins the ability to design and distribute surveys in Gainsight without a dependency on sites or features.
-
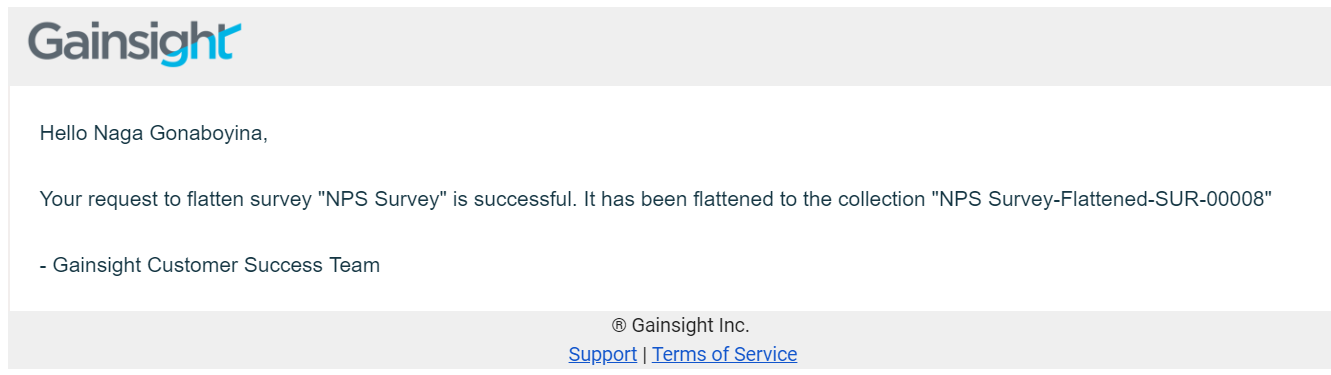
Ability to Reset Survey Flattening in Surveys Analyze page: Survey response data is spread across several objects. Survey Flattening places this information into a single Gainsight object formatted with survey respondents in rows and each question in its own column to allow for easy reporting and insights into survey data. For more information, refer to Survey Flattening Overview. Post 6.2 April Release upgrade, you can reset the survey flattening data on the Surveys Analyze page. Once you click Reset Flattening, the survey flattened data will be re-populated for that specific survey. This is an async operation and user will be notified about its completion via mail.
Once the data is reloaded, you will receive an email notification.
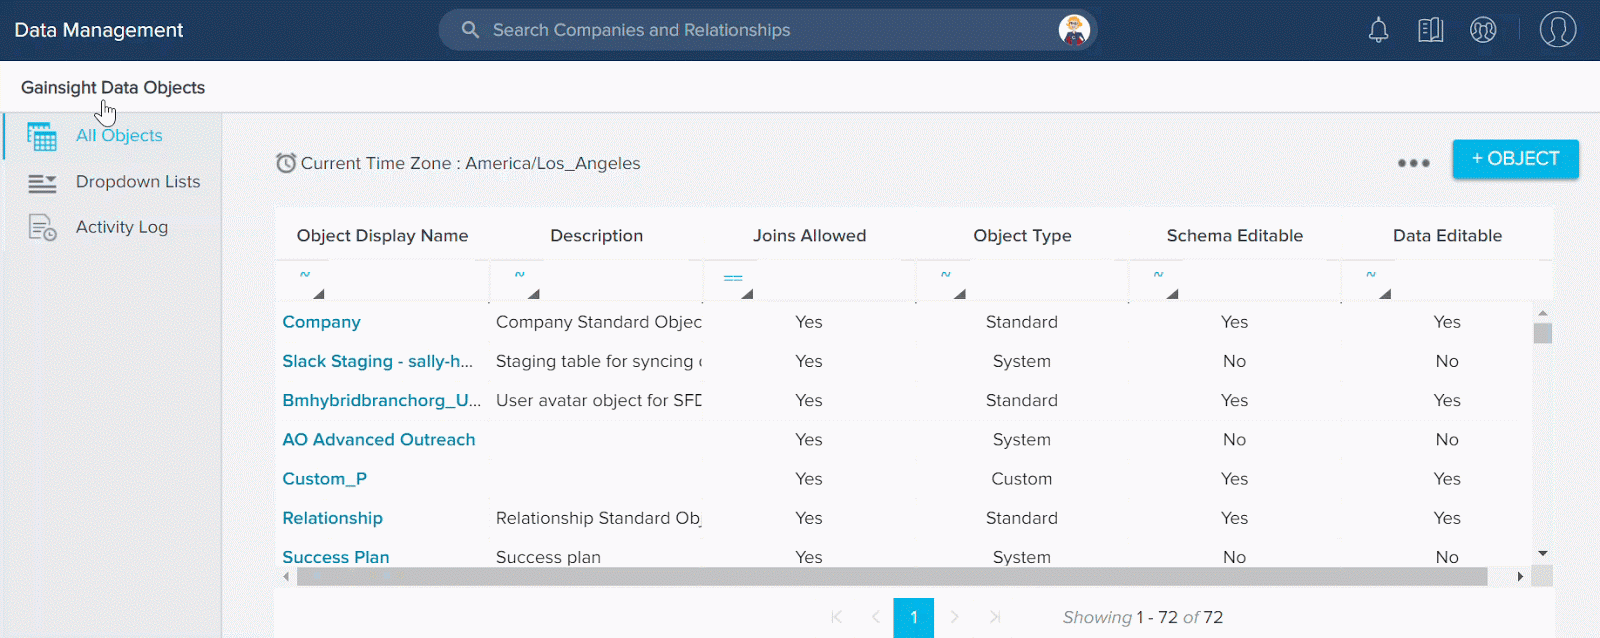
Gainsight Data Management
Gainsight administrators can create and manage the Gainsight Objects in the Data Management page. As an analogy, a Gainsight Object and its field(s) can be thought of as a database table and its columns.
-
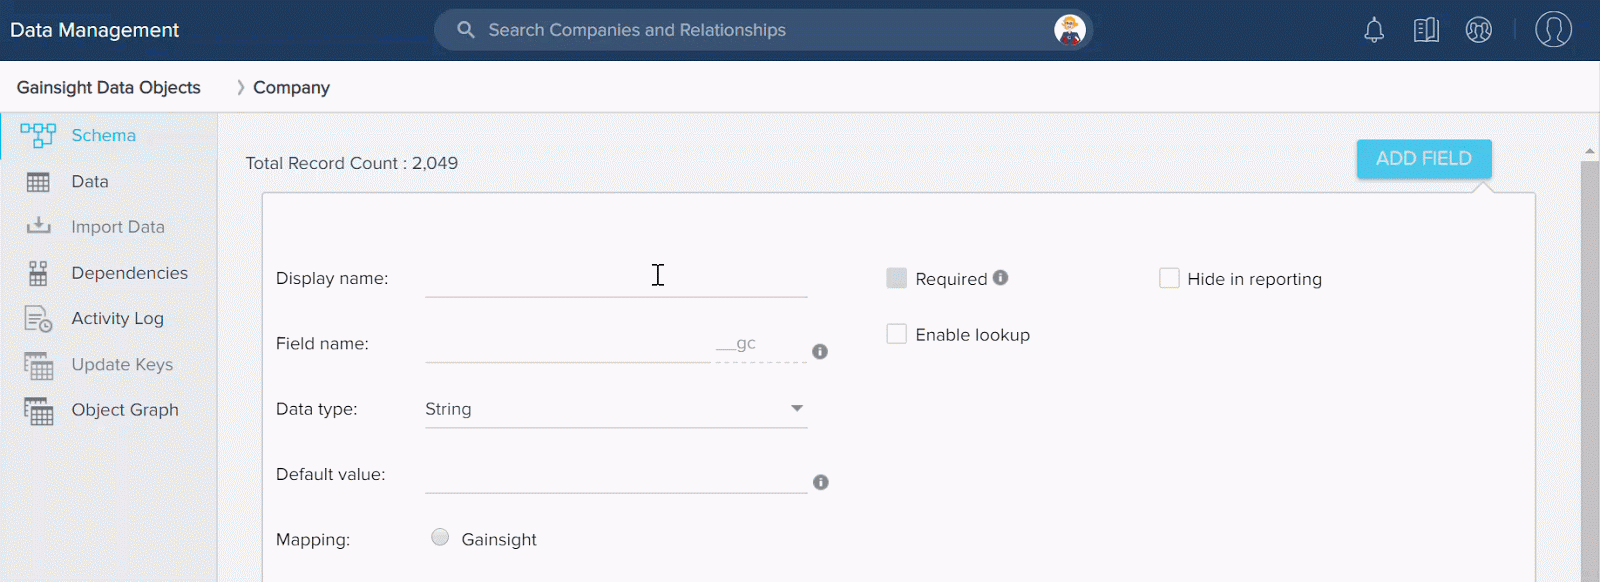
Ability to Auto validate and Test Formula fields: Previously, when you created a formula field, you had to manually click the VALIDATE button each time you made a change to the syntax. There was no provision for verifying the results of formula fields within GDM.
However, with this release the VALIDATE button is removed from the UI. Formulas are now auto validated. If you enter a formula with the wrong syntax, you cannot save it. A TEST FORMULA button is introduced to verify the results of the formula by providing values.
To use this enhancement:
-
Navigate to Administration > Operations > Data Management.
-
Select the object on which you want to create formula field.
-
Click ADD FIELD.
-
From the Data Type drop-down menu, select Number.
-
Select the Calculated Field check box.
-
Click CREATE FORMULA.
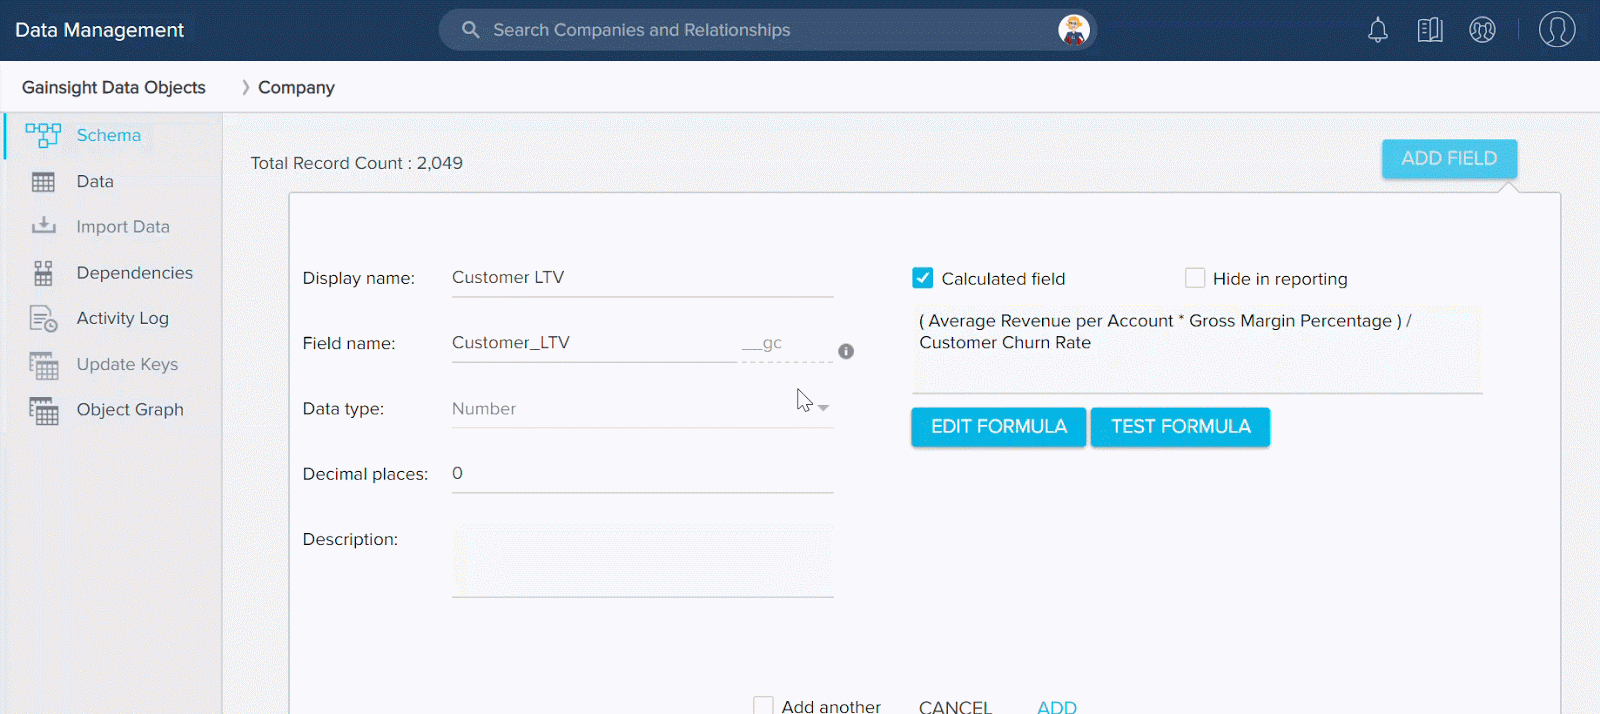
You will receive an error message while trying to auto save a formula with incorrect syntax.
Use Test Formula function
-
Select the operators, operands, and braces as shown in the below image to form a formula field and click SAVE. The following formula is used to calculate Lifetime value (LTV) of a customer.

-
Click TEST FORMULA to verify if the expression is evaluated correctly.
-
Enter sample values in the fields and click TEST.
User Management
User Management allows an Admin to manage users in Gainsight added from different channels.
Gainsight NXT in Salesforce or Microsoft Dynamics
-
Mapping Salesforce Users with Gainsight Users using Upsert Keys: You can now select an alternate Upsert key aside in place of the default Salesforce Username Upsert key in the Salesforce Connector User Sync job. This upsert key is used to resolve incoming Salesforce users with existing Gainsight users. Based on the Upsert key selection, either new Gainsight users are created from the incoming Salesforce users, or associated with the existing users.
This configuration is useful if new users that you are trying to sync through the Salesforce connector may have already been added to Gainsight either through Slack or User Management. If a matching record already exists in Gainsight, the incoming Salesforce user will automatically be associated to that user. If there are multiple matching records found for the Upsert Key criteria, navigate to User Management > Avatars > Salesforce Avatar Type to manually associate to one user record. After user records are synced, if multiple records are found matching the upsert key criteria, an error file is generated that directs you to the User Management page to manually resolve to one record.
Earlier, only default Username Upsert key could be selected in the User Sync job configuration. You can now select one or multiple Upsert keys to resolve incoming Salesforce users with existing Gainsight users.
Notes:
-
It is mandatory to configure at least one field as Upsert key.
-
Operator between multiple Upsert keys is AND.
Following are few use cases to apply configuration for Upsert Key, but you can always configure Upsert Keys as required:
-
If a user is already added through Slack to Gainsight, you can sync Salesforce Users through Salesforce Connector with Email as Upsert key.
-
If a user is already added through the User Management page (Manual or CSV), you can sync Salesforce Users through Salesforce Connector with Name or Email as Upsert key.
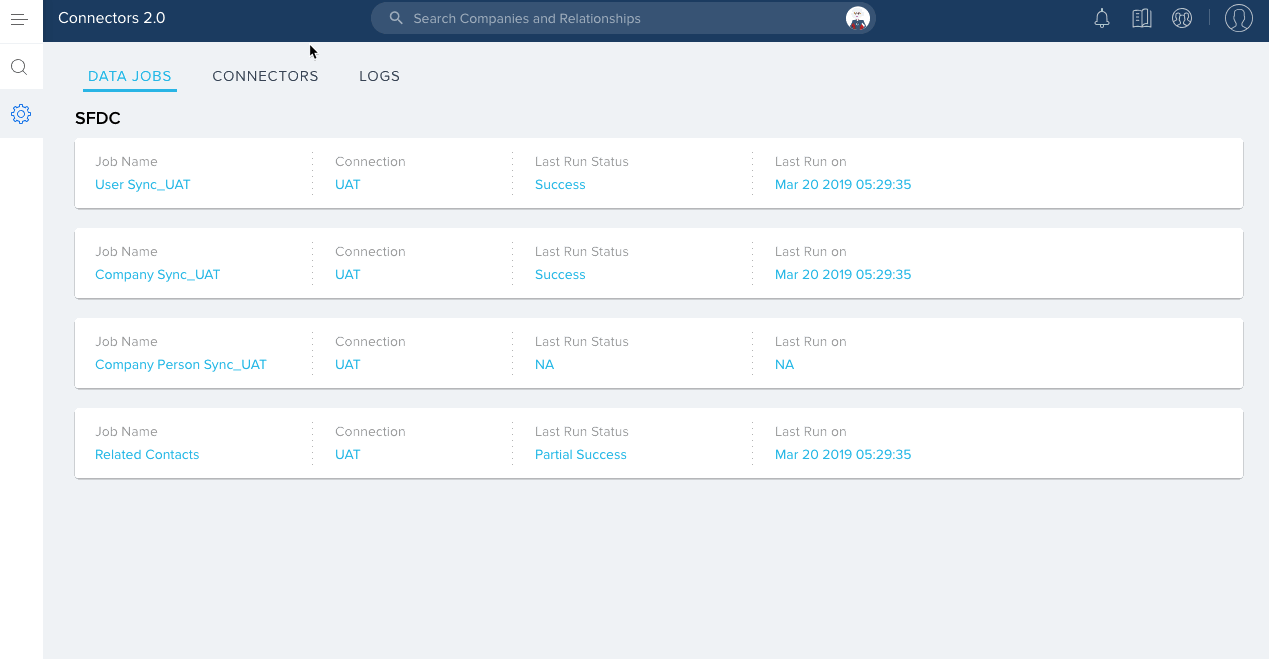
To see this enhancement in Salesforce Connector:
-
Navigate to Administration > Connectors 2.0 > DATA JOBS tab.
-
Click the Edit Job icon of the User Sync job from the list of SFDC data jobs.
-
Navigate to the Data Source and Field Mapping section.
-
Select one or multiple Upsert Keys as per your data job configuration.
For more information on the User Sync job configuration, refer Configure Out of the Box Jobs.
Upsert Key Configuration in the Dynamics Connector is same as explained in the Salesforce connector. For more information on the data job configurations, refer Dynamics Connector.
Cockpit
Cockpit is the day-to-day workspace for CSMs. As a turbocharged “to-do list” that integrates with the rest of your system, it turns customer insights into tangible action items for your team. Calls-to-action, or CTAs, are tied to customers and are the backbone of Cockpit. CTAs can be created manually, but more often are triggered by business rules that analyze usage data. For each CTA that appears in the CSM's Cockpit, a prescribed playbook of best practice tasks can help guide the CSM through the right steps.
-
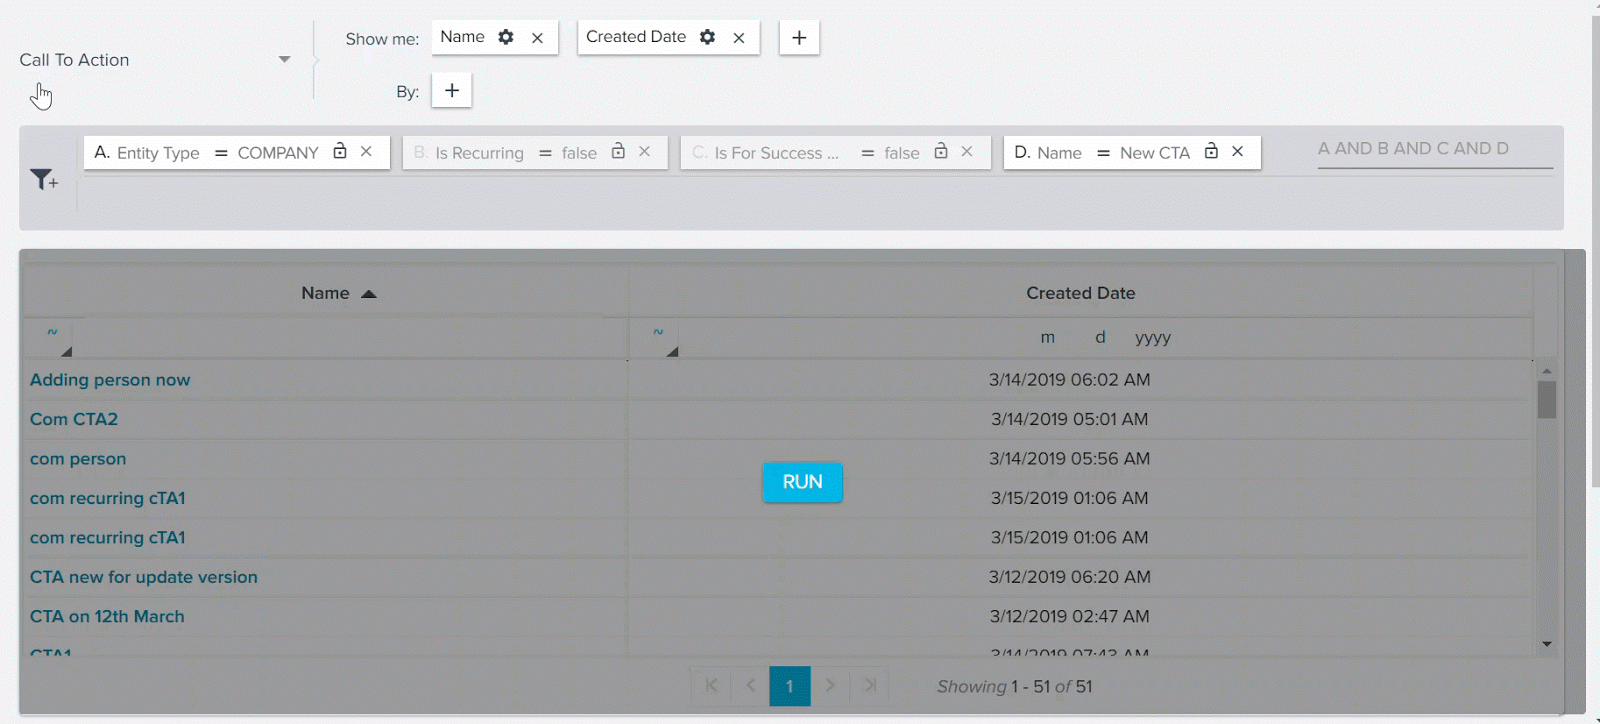
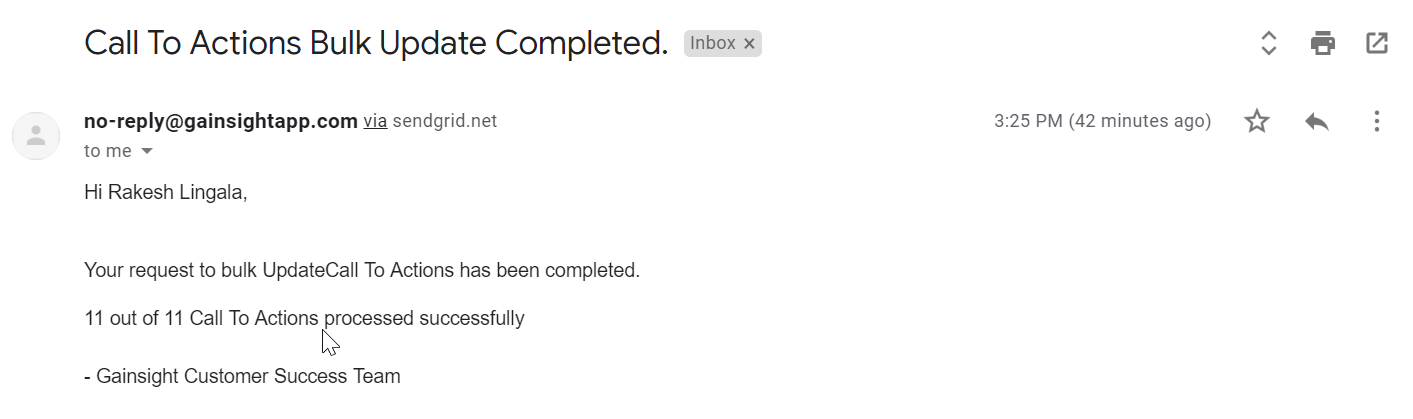
Receive Email Notification for CTAs or Tasks Modified Post Mass Edit: Previously, admins did not receive any Email notifications when they successfully executed mass edits on Calls to Actions (CTAs) or Tasks, using CTA Mass Edit feature. With this release, the admins who execute any action to CTAs or Tasks using CTA Mass Edit feature will receive an Email notification after successfully completing the process.
Snapshot of a sample email notification post mass edit is shown below:
Reports
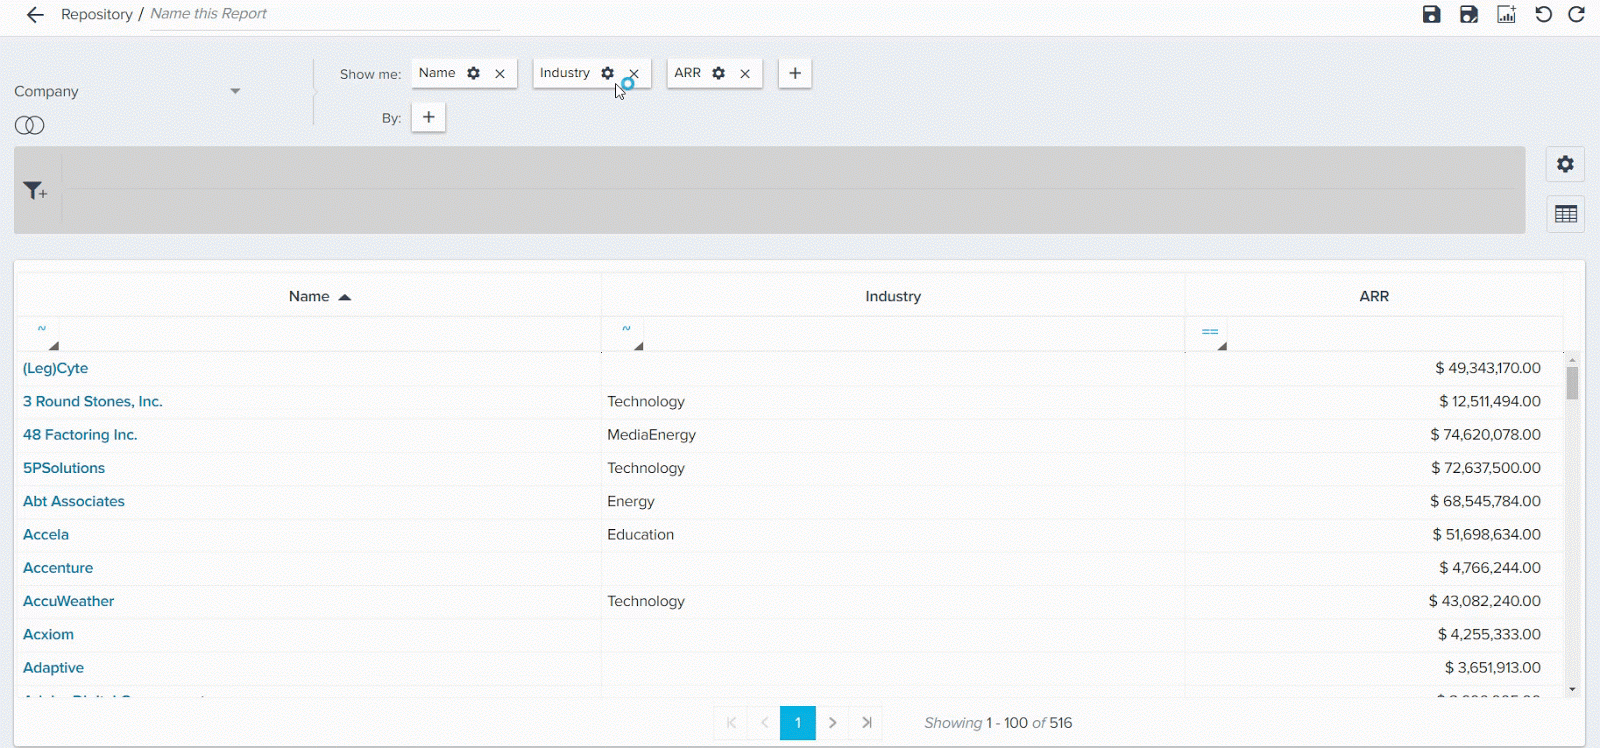
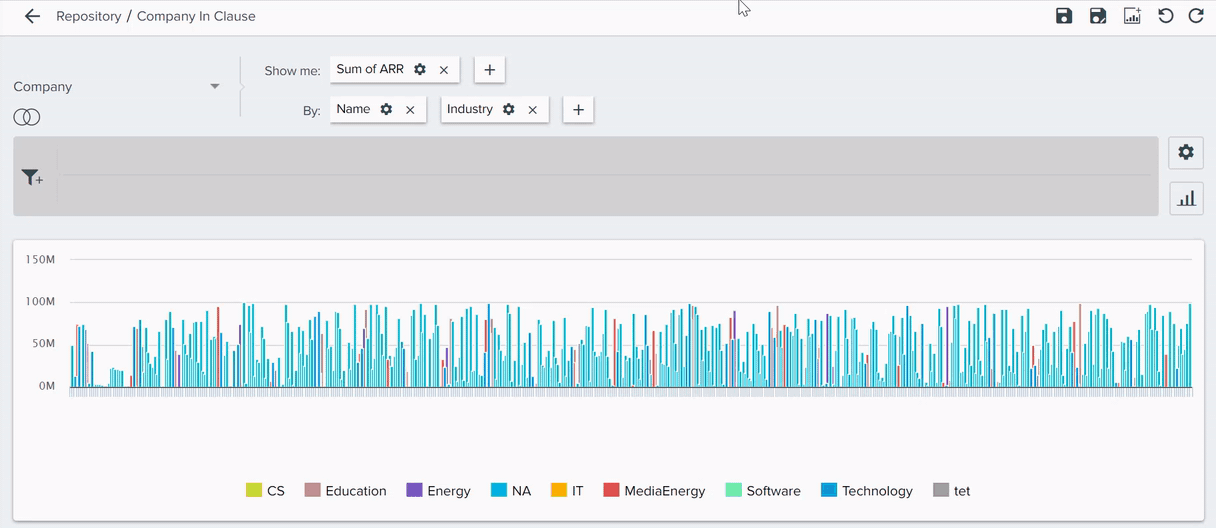
Report Builder enables admins to build powerful table, bar, bubble and other chart types on any Gainsight standard or custom objects. Report Builder allows you to visualize your data from Gainsight, any Salesforce Object and Matrix Data Analyzer (MDA), in charts as well as in tables.
-
Introducing “Includes” Operator in Filters: Previously, in Report Builder, you may have had to apply multiple filters and use advanced logic to filter a report with multiple values for a single field. But, with this release, the filter component is enhanced with an “Includes” operator, which allows you to filter the report with multiple values on a single field, in one filter condition. The multiple values selected are treated as an “OR” condition.
You can apply “Includes” operator on the following data types:
- String
- GSID
If you want to apply Includes operator on a String data type, type/add the required value, and then press Tab to add the next value to the filter.
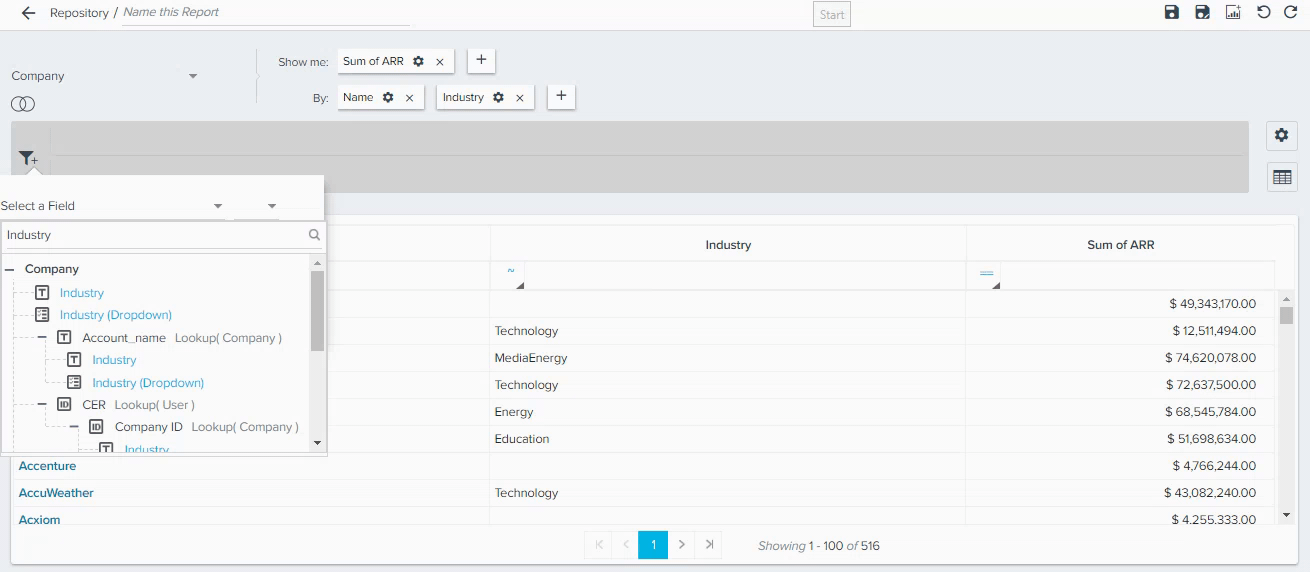
Limitation: You can add a maximum of 10 values per filter.
Use Cases:
-
As a CSM, you may have to filter a report on your dashboard for companies like "Starbucks, Walmart and Disney", you can achieve this by using a single filter called INCLUDES, without having to use multiple filters and advanced logic.
-
As a CSM Manager, you may have to filter a report for all CSMs you are interested in, you can achieve this by using a single filter in report builder.
Once you apply the “Includes” operator on a report, and add this report to a dashboard, CSMs can now be able to see the “Includes” operator on Gainsight Home as well. The “Includes” operator enables the CSMs to add new values or remove the existing values for a field in single filter.
-
Server Side Sorting in Tabular Reports: Previously, when you sorted the records in a report, it only applied the sort to the records in the browser. With this enhancement, Sorting is moved to the Server side, so that sorting occurs on the entire dataset, not just on the data in the browser. Server side sorting is available for all Tabular reports.
Notes:
-
Server Side Sorting is also applicable for Drill Down reports.
-
Server Side Sorting is applicable in all the consumption areas. Example: Home, C360, etc.
Limitation: Server Side Sorting happens on the resultant data displayed after pivoting the reports.
-
Server Side Column Search for Row Grouped Reports: Previously, for the row grouped reports, column search was limited to the records available on the browser (based on the report read limit configured in your org). With this enhancement, Row grouped tabular reports are now enabled with Server side search, where you can search for the records on the entire dataset in the Server side.
Note: Server Side Column Search on Row Grouped Reports is applicable in all the consumption areas. Example: Home, C360, etc.
Limitation: Pivoted tabular reports will search for the records only from the browser, and other tabular reports will have server side.
-
Persist Column width for Tables and Drill Down Reports: Previously, in the report page and drill down page, when you modified the column width in tabular reports, the column width reverted to the original state after saving the report. With this enhancement, the column width persists in tabular reports, both in the report page and drill down page.
Limitation: For pivoted reports, column width persistence is allowed only on the non-pivoted columns.
Below are sample snapshots from Report and Drill Down pages:
Report Page View

Drill Down View
-
Persist Column Order in Drill Down Reports: Previously, in the drill down page, when you changed the column order, the column order reverted to the original state, after saving the report. With this enhancement, the column order persists in drill down pages.
-
Persist Renamed field value in Drill Down reports: Previously, in the Report Builder page, when you renamed/changed the field name in the Show me/By section, the renamed field values were not shown in Drill Down reports. With this release, the renamed field values are available in Drill Down reports as well.
Dashboards
The Gainsight Home dashboards are customized to display sets of reports for stakeholders, including individual CSMs, managers, executives, and boards of directors. Admins must configure dashboards within Administration > Dashboard Builder. For more information about the setup process, refer to the Configure Gainsight Home Dashboards article.
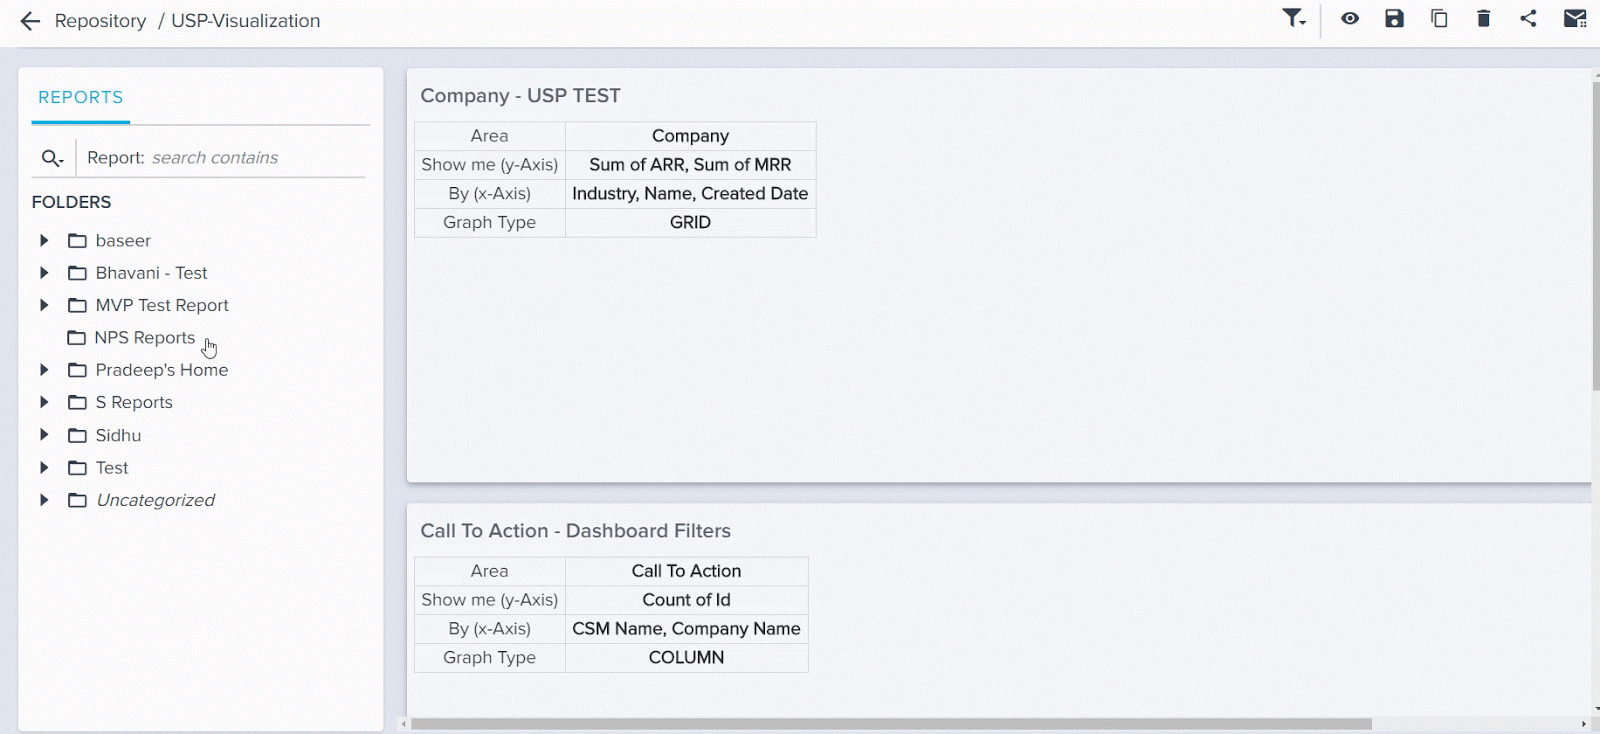
- Ability to select all reports to include them in a Global Filter: Previously, Global Filters in the Dashboard Builder page did not allow admins to select all of the reports at once. With this release, you can select all of the reports with a single click, using the checkbox in the search bar.
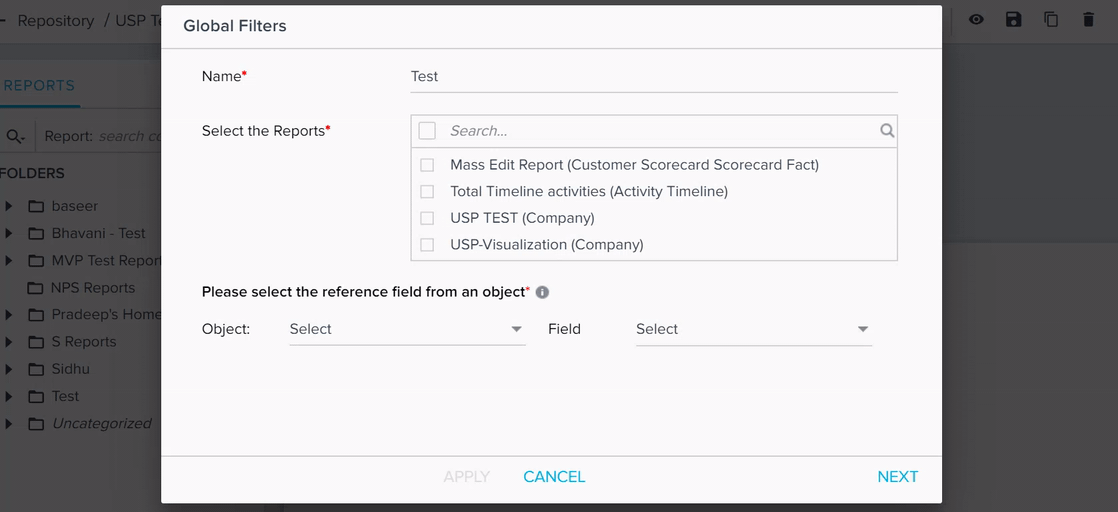
You can also search for the report name or object name, and select the checkbox to select all of the reports that match your search results. In the example below, when you search for the keyword USP, and then select the checkbox, all the reports containing USP in the report names are selected.
-
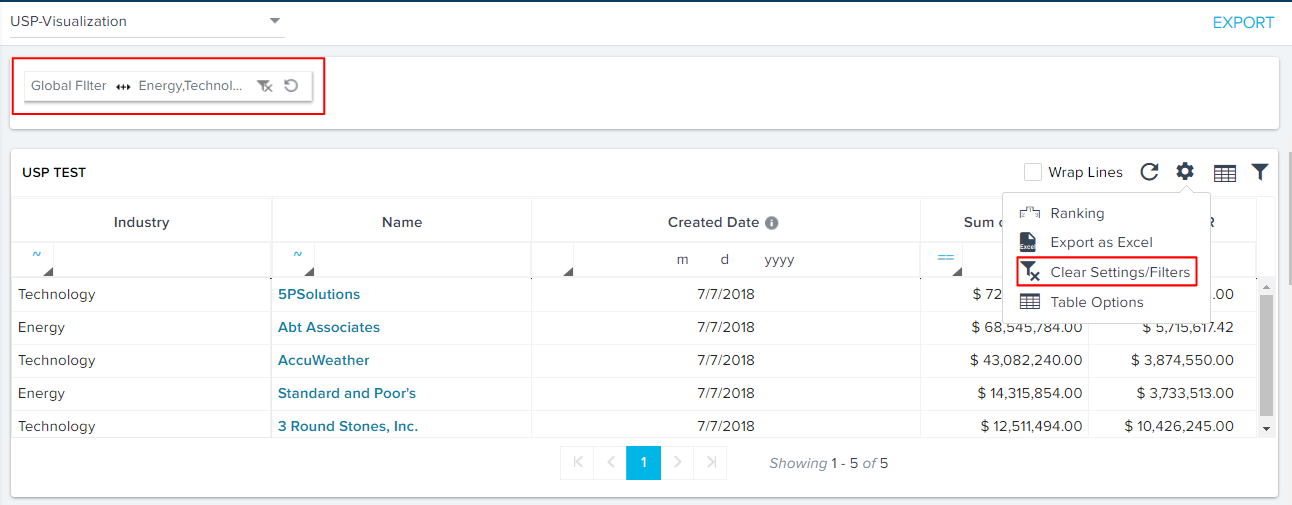
Ability to Clear Settings/Filters when Global Filters are applied: Previously, when a Dashboard contained a Global Filter, the option to Clear Settings/Filters was not available on the Gainsight Home page. With this enhancement, users can now Clear Settings/Filters on the dashboard on the Gainsight Home page. Clicking the Clear Settings/Filters will restore the report to the original state (as admin created).
-
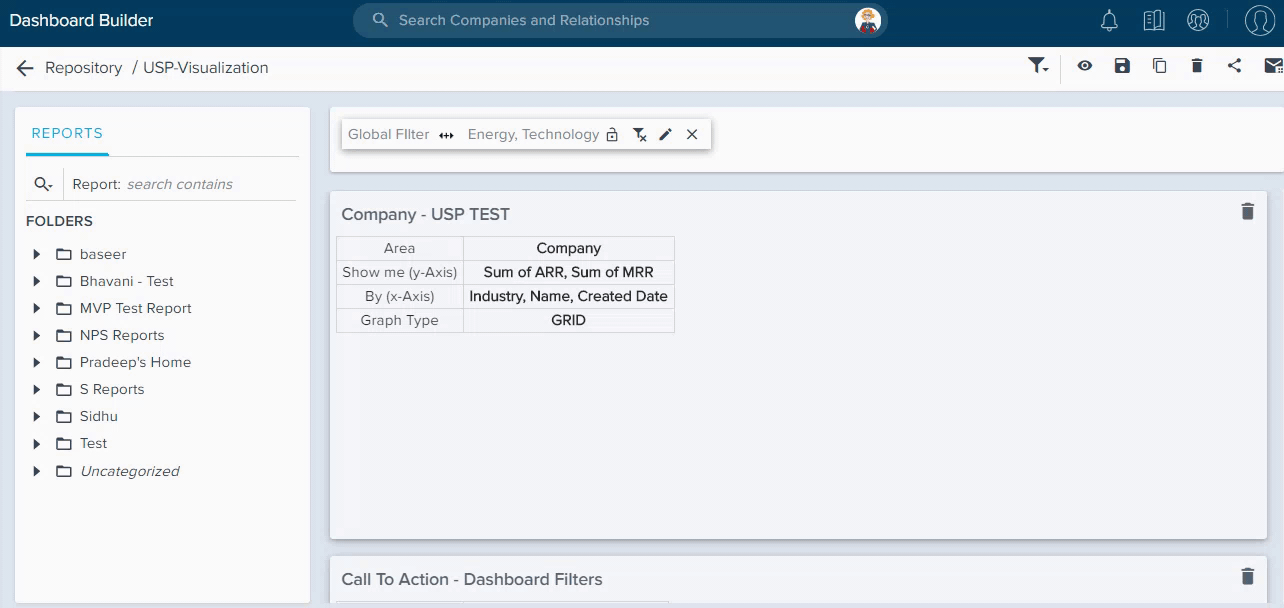
Ability to Clone a Dashboard with Global Filters: Previously, in Dashboard Builder, when you Duplicated a dashboard containing a global filter, you could not clone the global filter. With this enhancement, when you Duplicate a dashboard, you will now see all the global filters are also cloned to the new dashboard.
Gainsight Analyzer
Business results are directly tied to application performance. But how do you quickly identify the root cause of performance issues in the face of overwhelming complexity? The Gainsight Analyzer monitors various causes of failures or inefficiencies in performance of the application, so you can quickly identify, isolate, and remediate any performance issue that impacts the user experience by following the recommended actions to improve performance.
Rules Analyzer
Rules Analyzer enables Gainsight Admins to identify the rules which cause failures or inefficiencies in performance. It also includes recommended actions to improve performance. This helps Gainsight Admins to analyze which Rules are broken and need debugging.
Bulk Scan
Bulk Scan in Rules Analyzer on assets to get error information: This feature now enables Admins to perform a quick scan across the instance to assess the health of the instance by checking for critical errors, and to fix issues of one kind all at once. In the future, you will also be able to schedule the scan at regular intervals to notify Admins about critical errors.
To perform the Bulk scan,
-
Navigate to Administration > Operations > Analyzer > Rules Analyzer > Scan tab.
-
Click Bulk Scan to what are the scan points under data quality or under performance/manageability.
-
Select the scan points that you want to run.
-
Click Bulk Scan. This runs all your active and scheduled rules.
-
Provide one or more valid email addresses whom you want to send a copy of the results.
-
Click CONFIRM. The result will be sent to the email. The same result can also be viewed in the Scan History tab.
Note: Scan will be completed and Admin will be notified via inputted email along with a spreadsheet of scan results. You can also access the history of bulk scans to re-download the report.
Optimizer(Beta)
Initially, the preliminary version of the Optimizer feature helped Gainsight Admins to analyze and optimize the active rules in their Org. This feature is now enhanced. The enhanced version of this feature enables admins to convert Custom Rules automatically into a single Bionic Rule. Upgrade the existing configuration to use this features to optimize where you can convert Custom Rules (single task) to Bionic Rules (single task).
Key Benefits
The Optimizer feature evaluates how your company uses the Rules Engine feature, then identifies ways that you can improve your implementation. It is the fastest and most effective way to get insights about rules coupled with recommendations on converting them into a single rule. Following are some of the key benefits:
- Helps customers convert/migrate Custom Rule to Bionic Rules
- Increases productivity of admins
- Drives Gainsight usage
- Improves User Experience
OPTIMIZER is divided into three different tabs/sections:
- Consolidate
- Custom to Bionic
- Other Recommendation
Object Analyzer
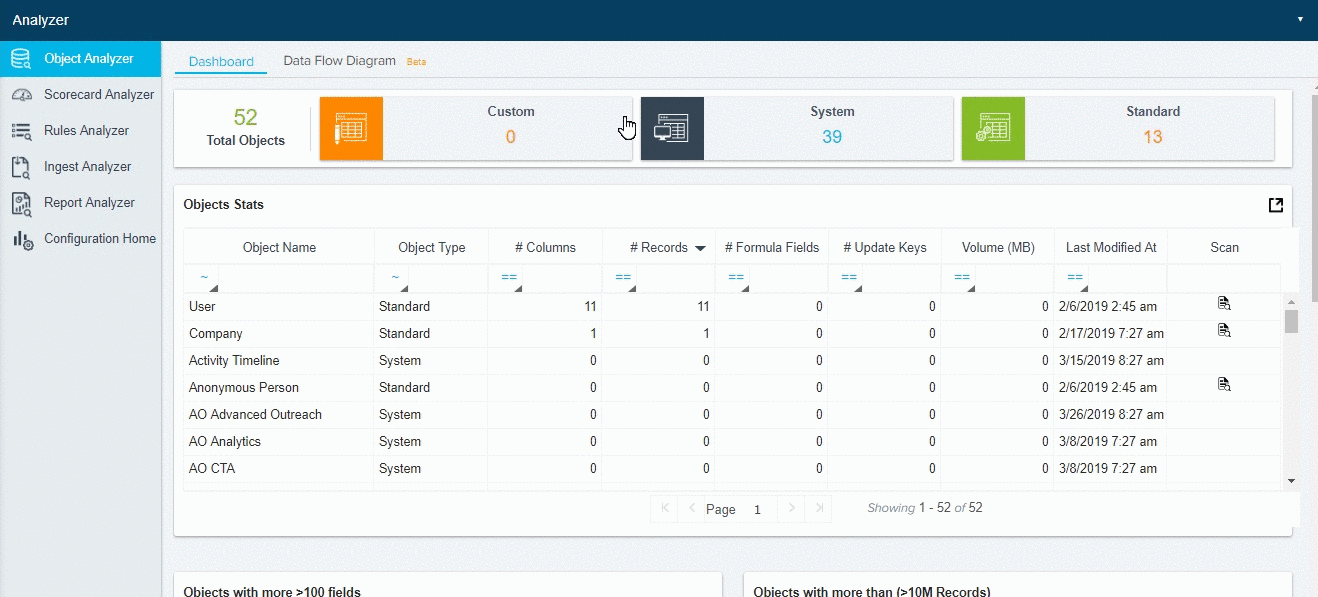
Object Analyzer scans all of the Objects in the instance and provides insights to improve performance.
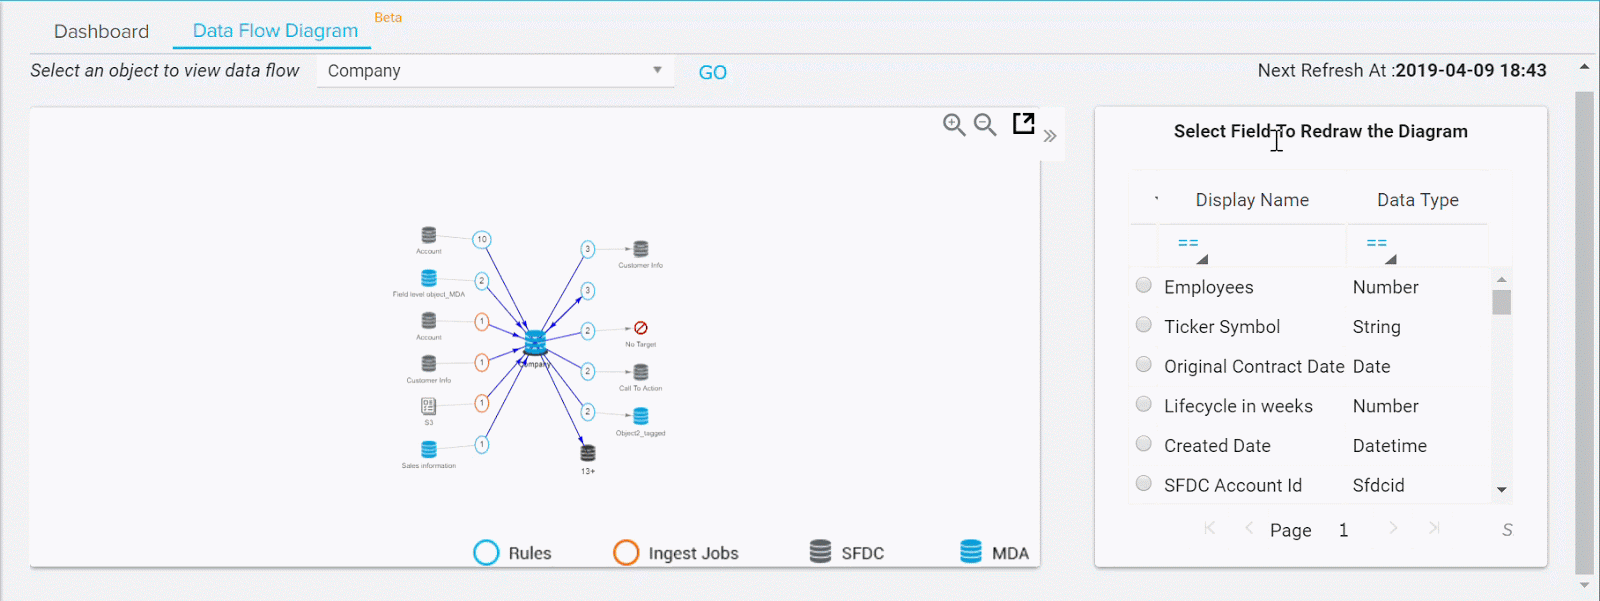
Data Flow Diagram (DFD)
This feature enables admins to perform an instance review or diagnose a data quality issue and finally create configuration documentation quickly. In this release, DFD has been enhanced at field level. Perform the following steps to use this enhancement:
-
Navigate to Object Analyzer > Data Flow Diagram.
-
Select an object.
-
Click GO.
-
Double click on the object to view the list of fields.
-
Select any field to redraw the diagram as shown in the following image.
-
Click on details to learn more about the field.
Configuration Home
This is the place where you can understand what was configured in the org. For example, how many MDA objects are present, how many reports/dataspaces are available, if the Scorecards feature is configured and so on. This feature can be used as a snapshot to understand what all features a customer is using and what are the features that the customer is not using at all. This feature is extremely helpful for all the admins, especially for the new admins to understand what features are there in the org.
This feature can also be used as a validation for migration. After you migrate, you can navigate to this page in the org to ensure that the counts are same as they were before migration, which means the migration was done successfully and there are no gaps.
-
Navigate to Configuration Home (Beta) where you see the Index List that covers all the features of Gainsight.
-
Click on the feature listed under the Index list section to see the counts.
Rules Engine
Rules Engine is the control room for business automation. The Rules Engine is where Admins can build business rules to trigger CTAs, update scorecard measures, send emails and pull data into the Gainsight objects. Rules can only reference one object at a time, along with the Company object.
-
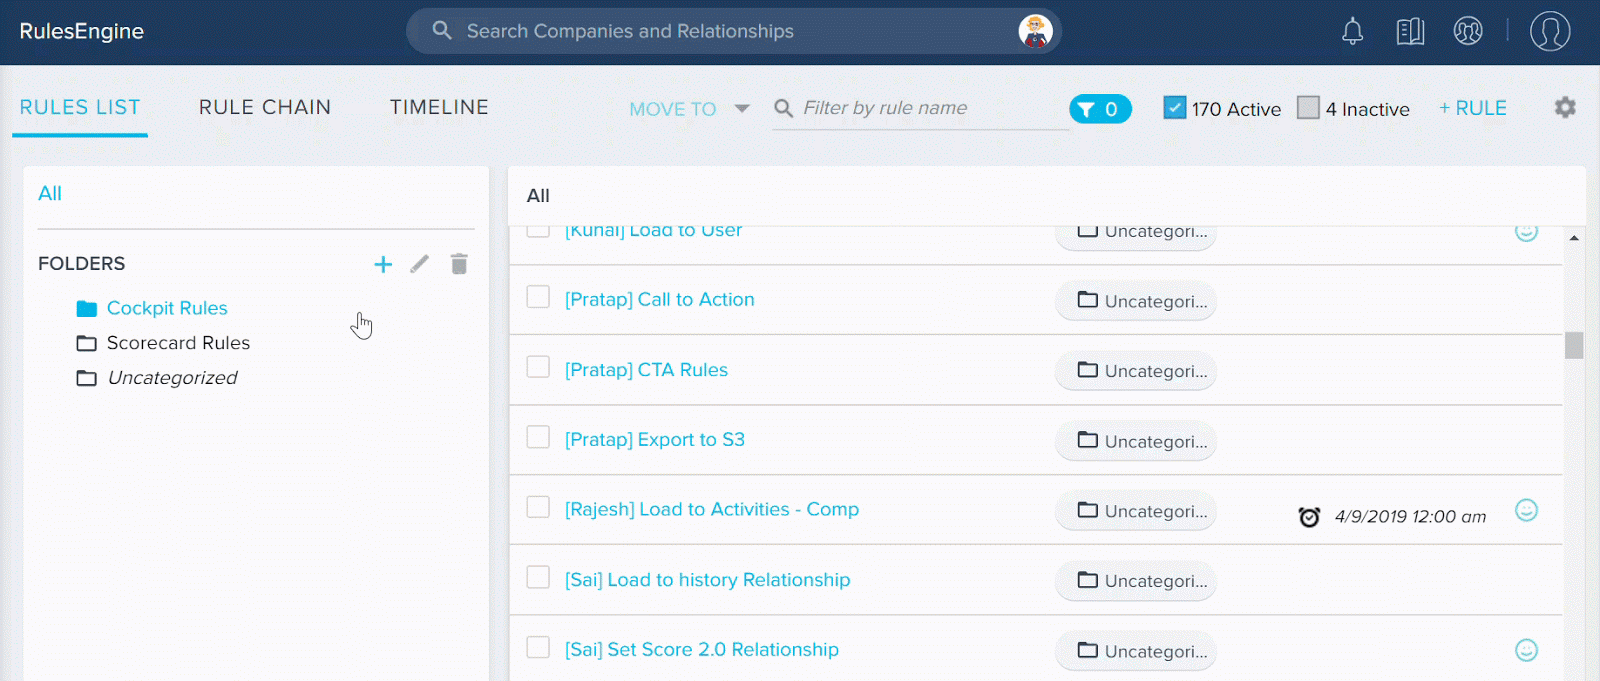
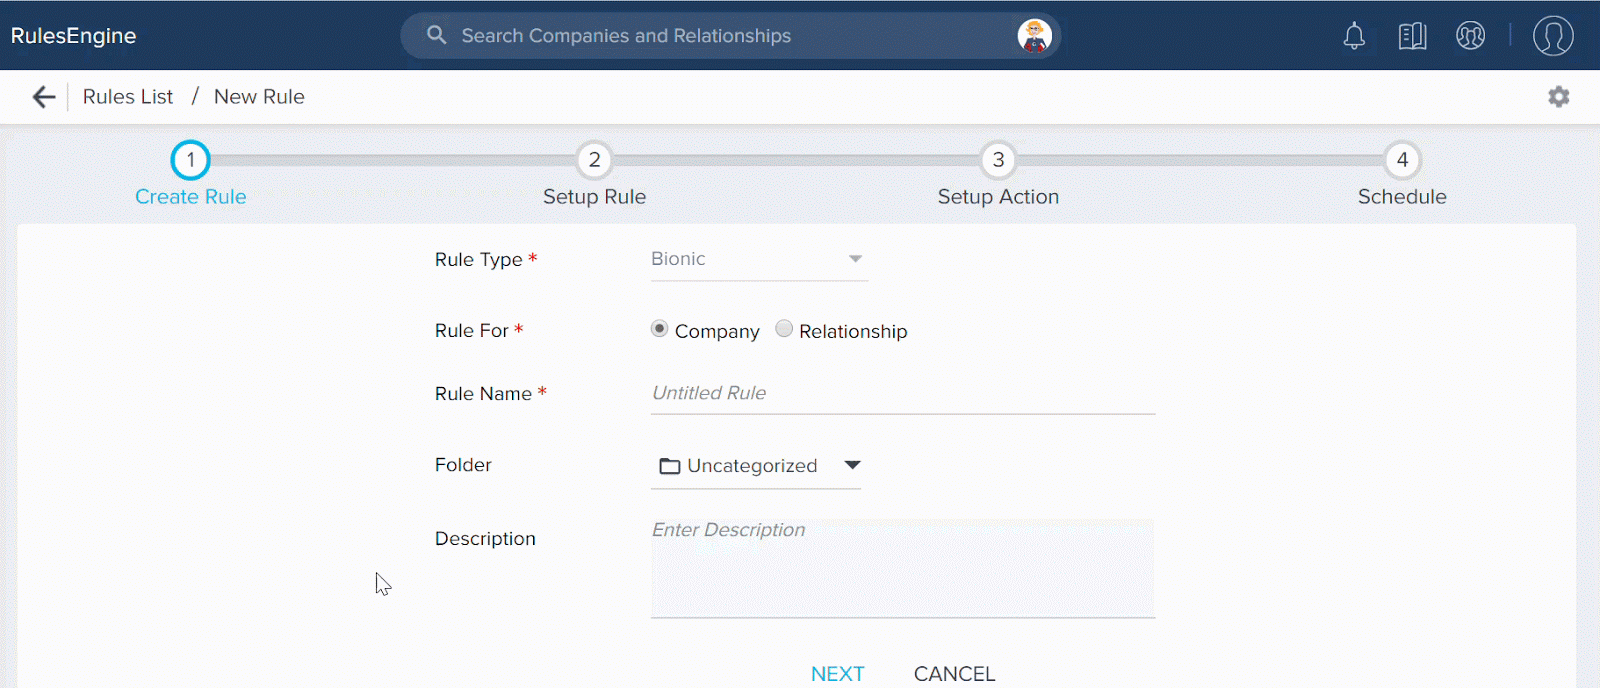
 Ability to Create Folders in Rules Engine: With this release, you can create folders in Rules Engine to organize your Rules. All the folders are displayed in the left pane on the Rules List page. The folder to which a Rule belongs to is displayed against the Rule Name. By default, Gainsight provides you a folder known as Uncategorized. All the existing Rules are part of this folder, by default. You can neither modify the name of this folder nor delete it.
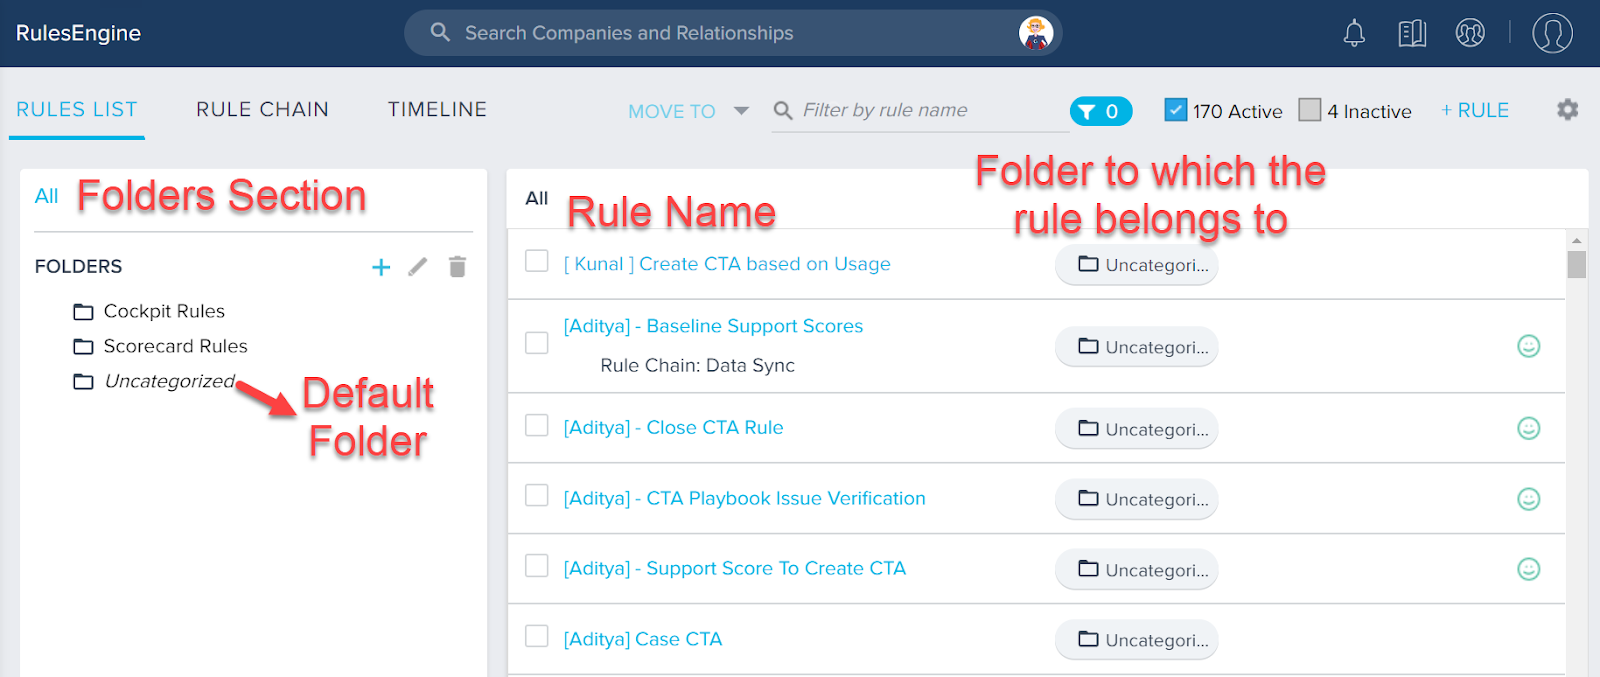
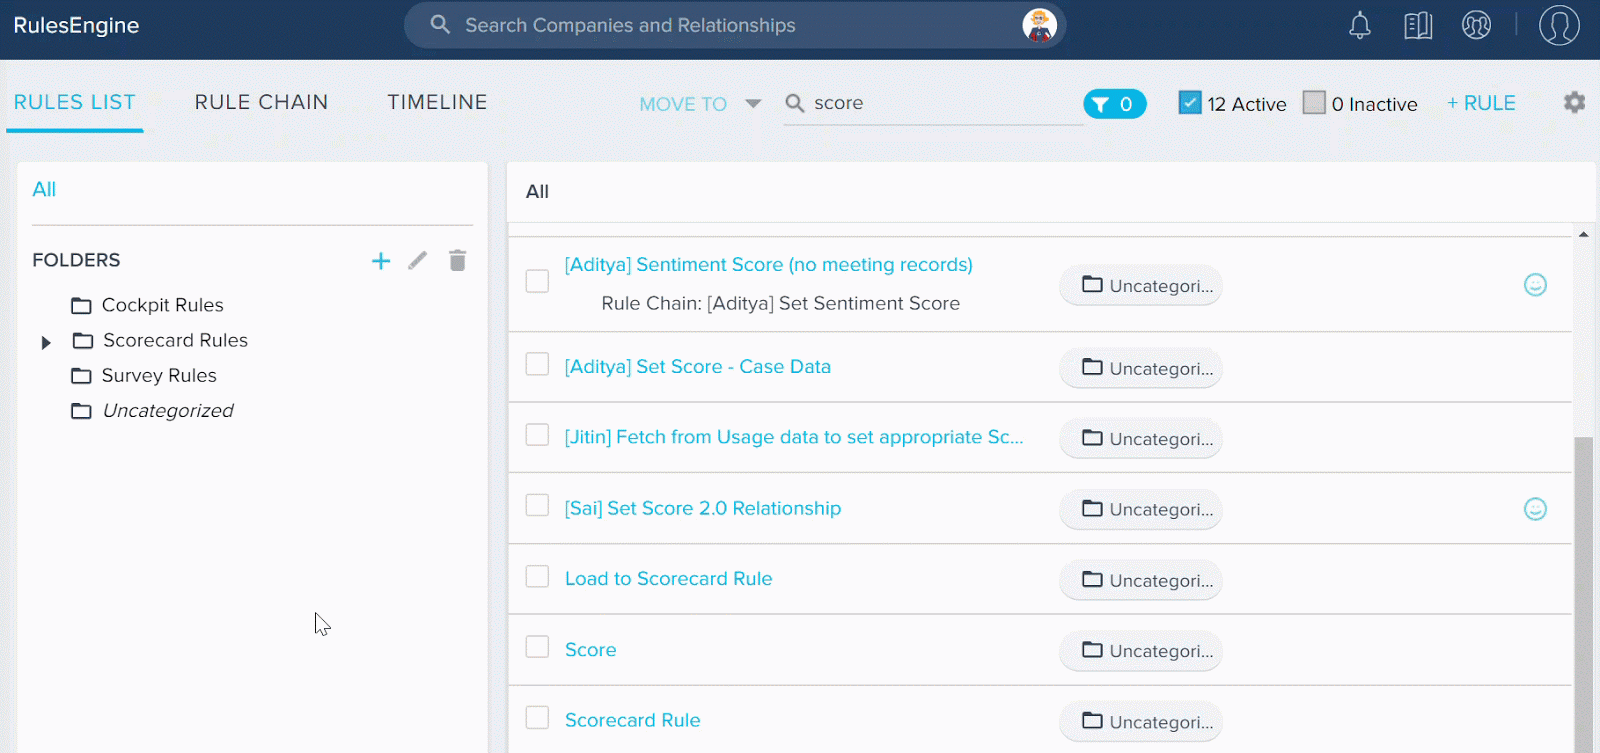
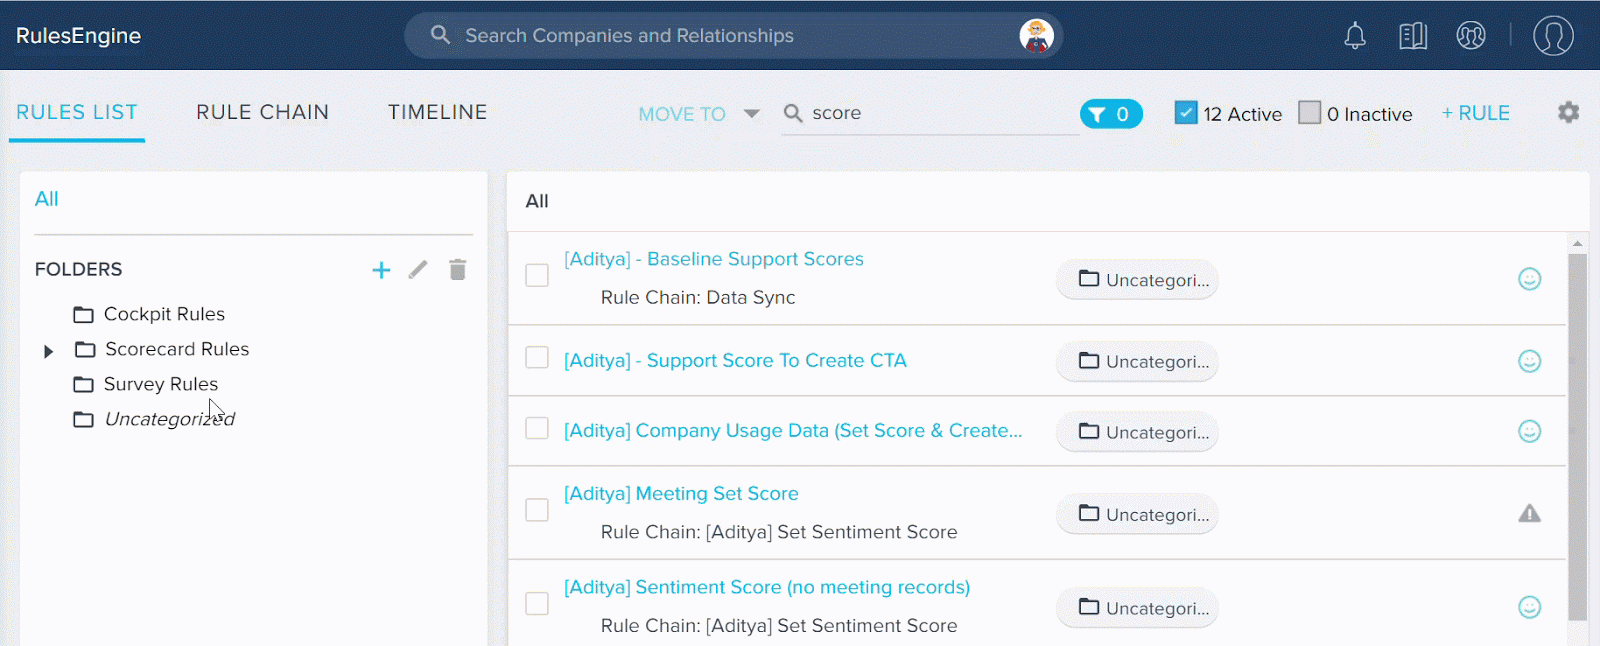
You can create new folders and move the existing rules into the new folder. You can nest a folder in another folder; up to a single level of nesting is allowed. You cannot create folders in the default Uncategorized folder. You can perform the following tasks with folders.
-
Create Folder
To create a new folder:
-
Click the + icon.
-
(Optional) Select the folder under which you want to nest this folder.
-
In the Folder Name field, enter a name for the folder.
-
Click ADD.
You can nest a maximum of one folder inside the newly created folder. However, you cannot nest any folders in the Uncategorized folder.
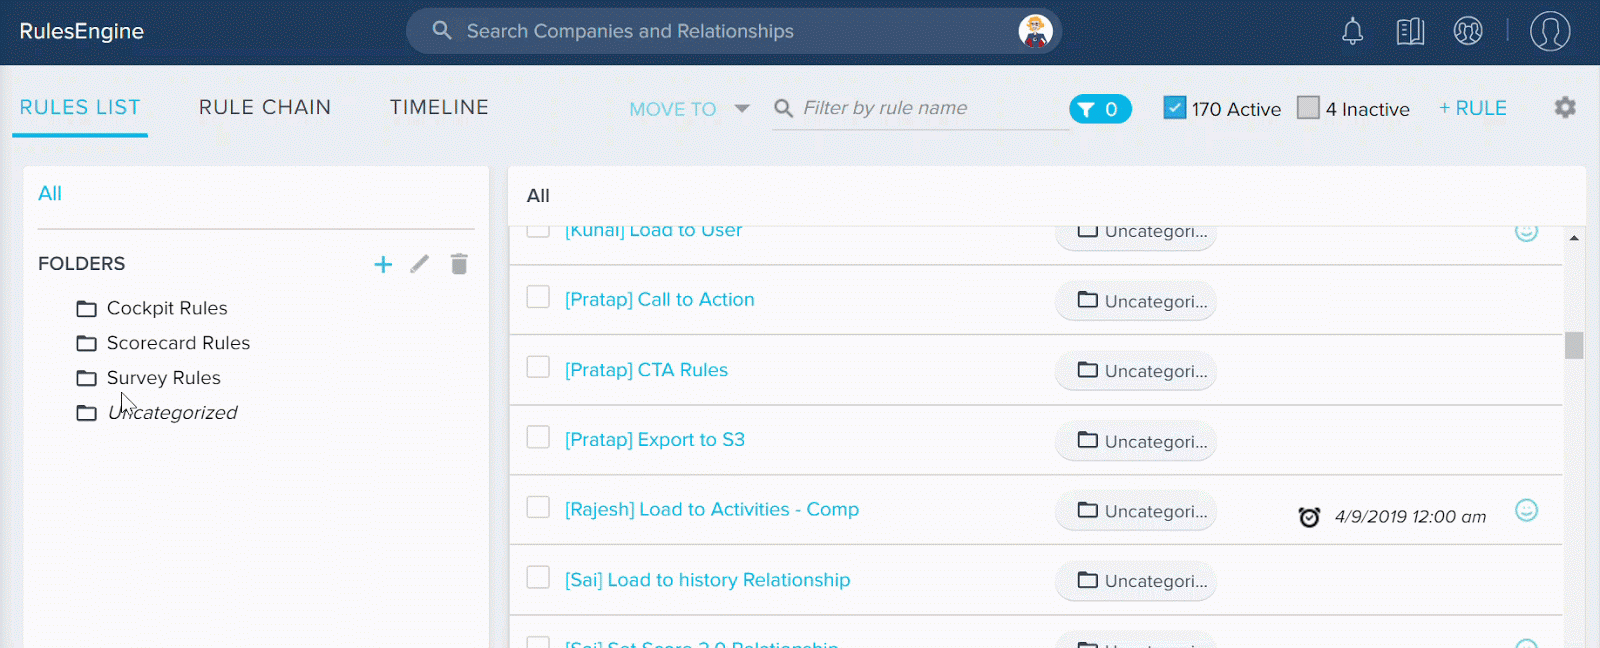
The above image illustrates the maximum level of folder nesting. A folder nested under another folder (and not directly under the Home folder), can have the same name as its parent folder. However, two custom folders which exist at the same level under the Home folder cannot have the same name.
-
Move Rules to Folder
Once you create a folder, you can move the Rules into the newly created folder. A rule cannot be part of multiple folders. To move the rules to a folder:-
Select the check box for the required rule(s).
-
From the MOVE TO folder, select the required folder.
-
Click OK.
-
-
Delete Folders
You can delete a folder if it has no other sub folders under it or does not hold any Rules. You cannot delete the Uncategorized folder. To delete a folder, select the required folder and click the delete icon.
-
Folder for new Rules
The New Rule page is now updated with the Folder field. You can now select a folder for the new rule. If no folder is selected, the Rule is moved to the Uncategorized folder.
- Ability to Archive files in S3 Bucket
Previously, a file stored in the S3 bucket remained there even after it was used in a rule execution. You had to either manually delete it or replace it before the next execution.
However, with this release Gainsight provides you the option to archive the used files. A Do Not Archive check box has been introduced. When you do not select this check box, used files are automatically moved to an archive folder. The Archived File Path field is also introduced as a part of this enhancement. You must specify a path for the archived folder. A new folder is created in the specified path.
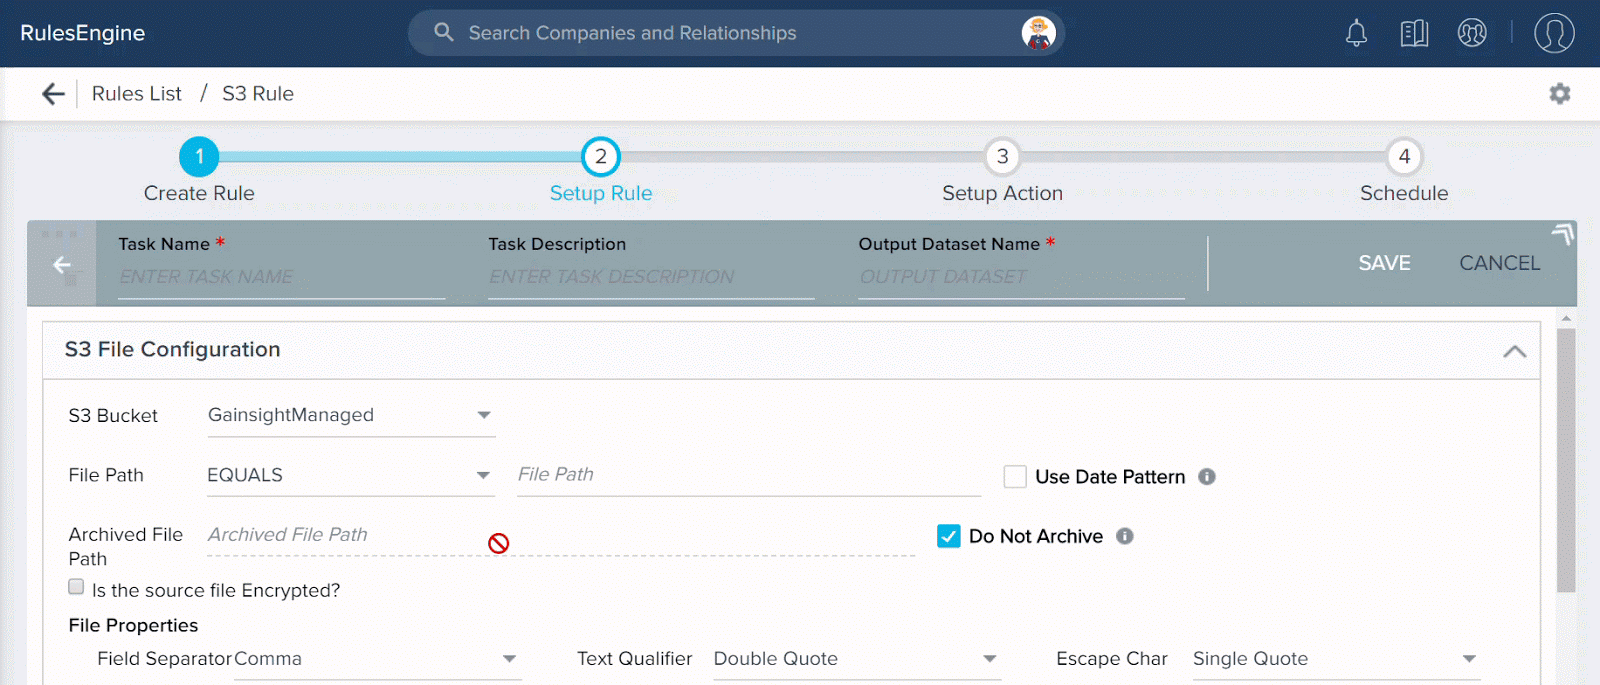
By default, the archived folder is created at the same level at which the source file is located. For example, if your source CSV file is located immediately in the S3 bucket and not nested in any folder, the archived folder is created at the immediate level in S3 bucket. If your source CSV file is nested in a folder, the archived folder is also created at the nested level. You can modify the default path, if required.
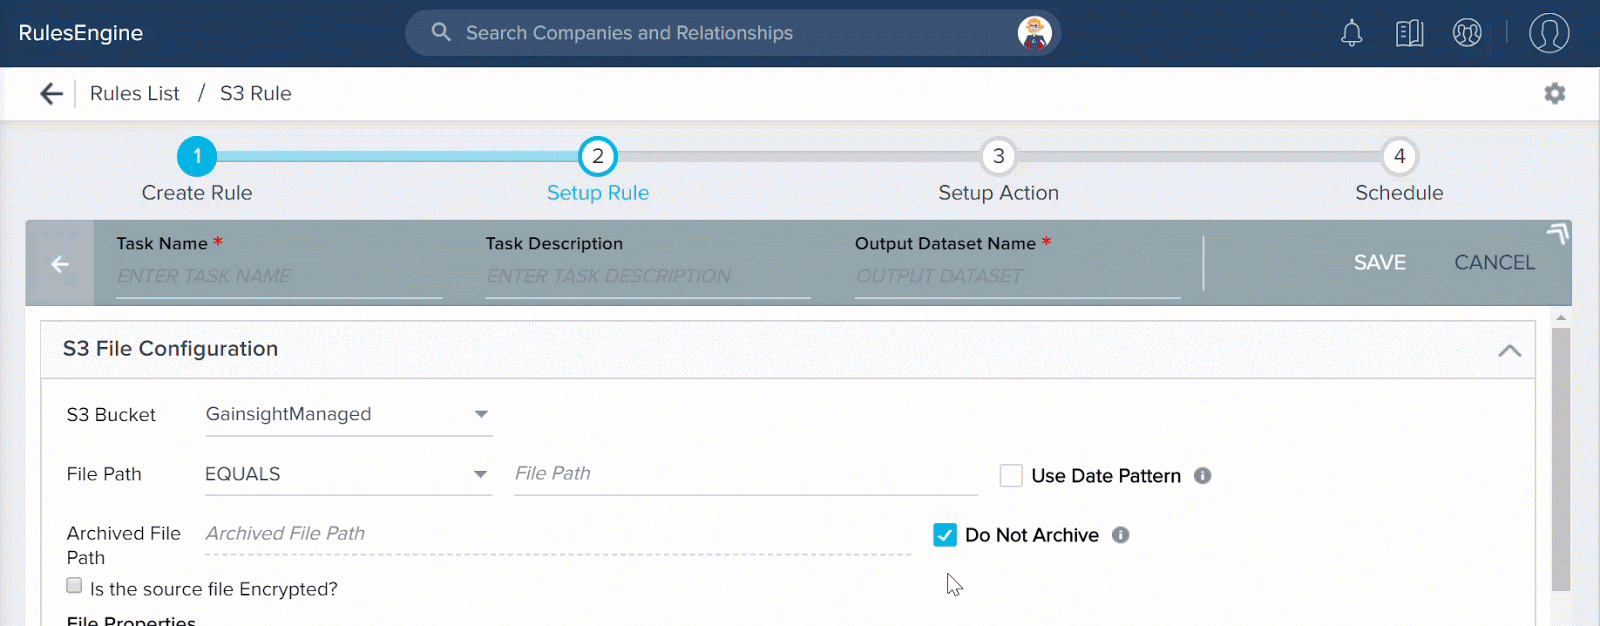
IMPORTANT:
-
By default, the Do Not Archive check box is selected. You must clear the check box to archive files.
-
For a custom bucket, Gainsight must have the required permissions to create a folder in your S3 bucket. If Gainsight does not have the required permissions, the rule is executed but the archive folder is not created.
-
Ability to use “Includes” operator for String fields
Previously, you could not use the Includes operator on String fields, while applying filters in a Dataset. As a result, you had to include the required string field multiple times in the filter section for each option to be filtered. For example, in the Name field of the Company object, if you wanted to filter data for three names, you had to add the Name field thrice to the filters section.
However, with this release Gainsight has introduced the Includes operator for filtering. You can use this operator to include multiple filter values in a single of the field.

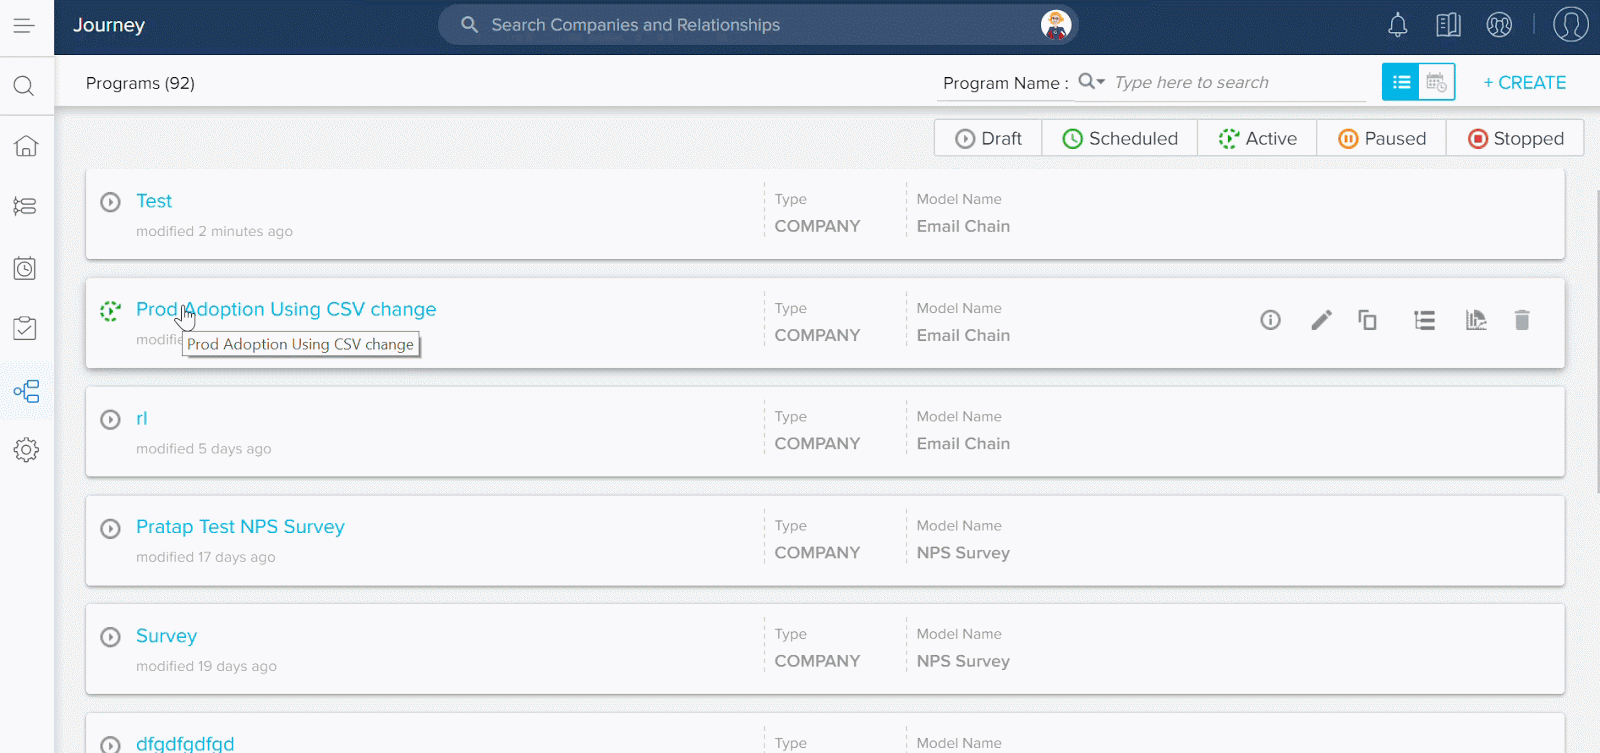
Journey Orchestrator
Journey Orchestrator is your center for automated communications. It leverages the power of automation to make your job easier as you communicate with customers at scale. For more information, refer to the Journey Orchestrator & Automated Email Overview article.
-
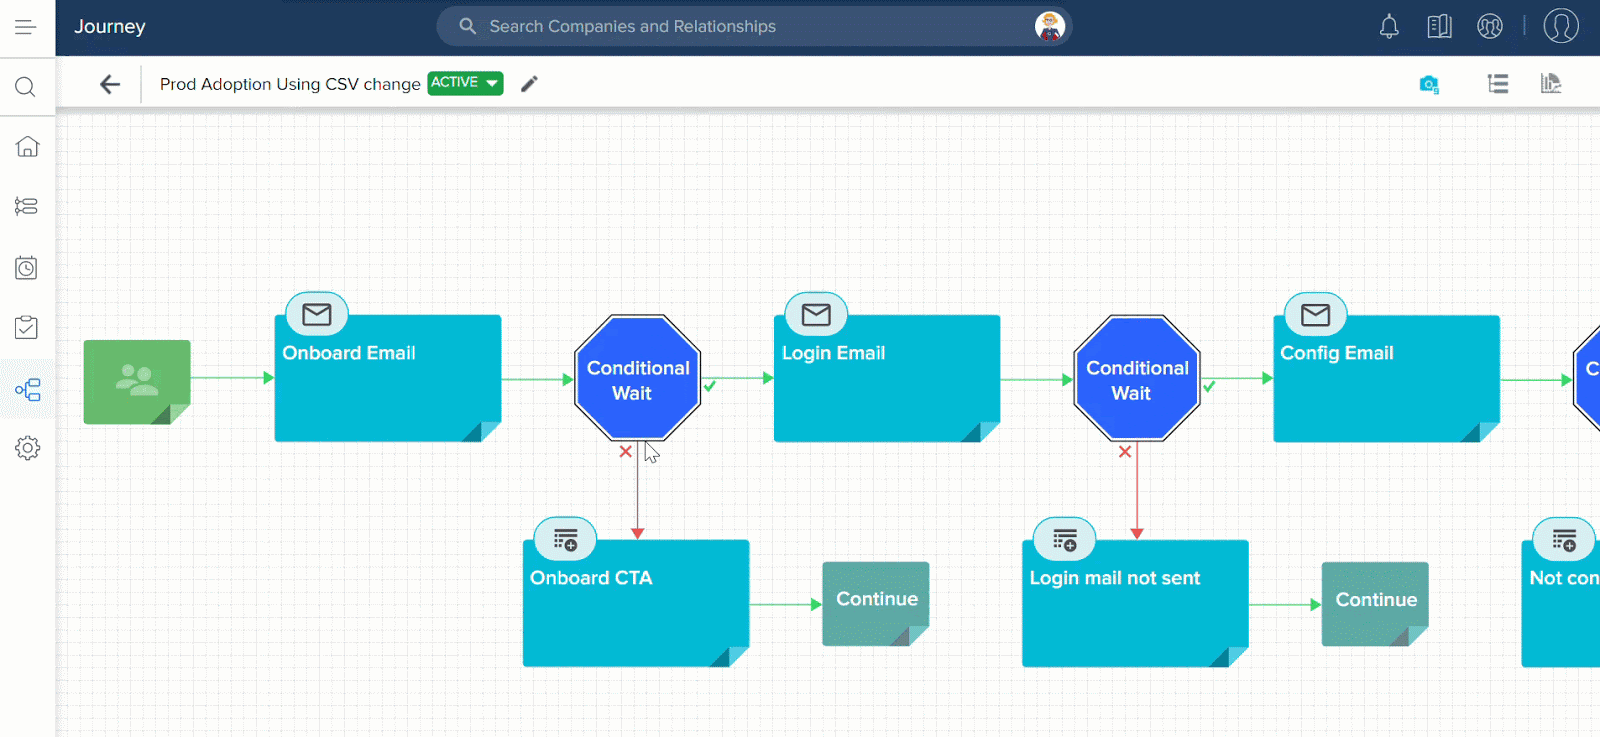
Ability to Modify Conditional Wait Conditions Post Publish: Previously, you could not modify the conditions of the Conditional Wait once the Program was published. With this release, you can now edit, add, and delete the conditions of the Conditional Wait, even after the Program is published. However, you cannot modify the Events and Time Limit sections in the Conditional Wait. If any new conditions are added, then you can apply or modify the Advanced Logic.
-
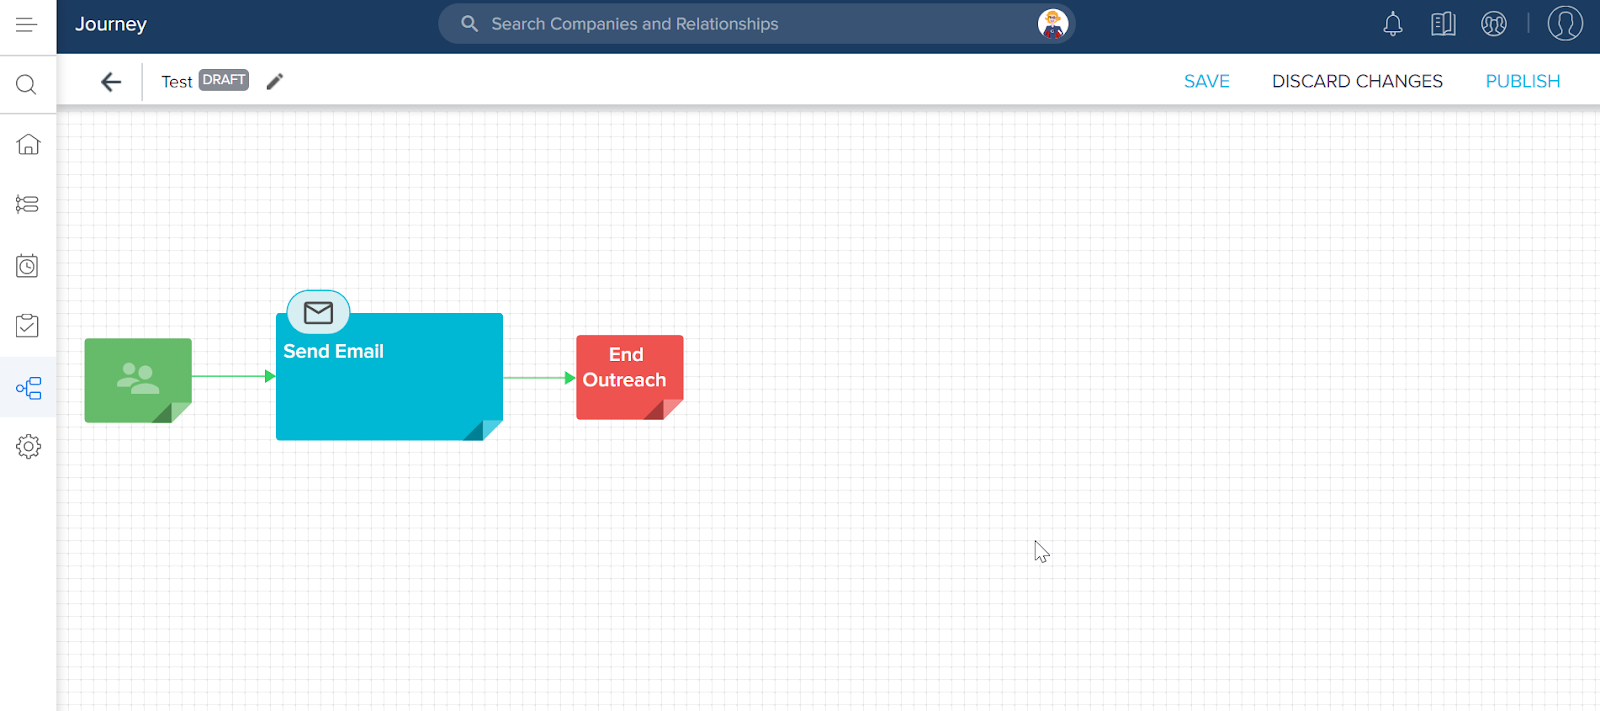
Ability to Execute Single Step Journey at once rather than through Orchestration Engine: With this release, the execution of the Single Step journey in a program is enhanced on the backend and is faster as a result. The single step execution is only applicable for the Email Chain model and the email step (Not applicable for create CTA).
Note: There is no change in the UI perspective for this enhancement.
The snapshot of a single step journey is shown below:
-
Addition of User Type in Programs in Parity with Outreaches: With this release, you can create Programs with the User Type. This brings Programs to closer parity with Outreaches. You can now select User Type in the Program Details section to create programs targeting communications and workflows to internal users, so that the organization can achieve business outcomes. However, if you select User type, only the Email Chain model is available in the Program Model section.
Following are few use cases regarding using user strategies in JO, where you can filter reports to users and send emails:
- As an Admin, you may want to know a report of all your customers who are in the Red Zone. Admins can achieve this by using User Type option in Programs where you can embed reports with the required data and send emails to the CSMs and get the desired report.
- As a Sales Team, you may want to know report on the renewal date of all the customers which is up for due. Admins can achieve this by embedding a report with the required data to an email and send it to the internal users and get the desired report.
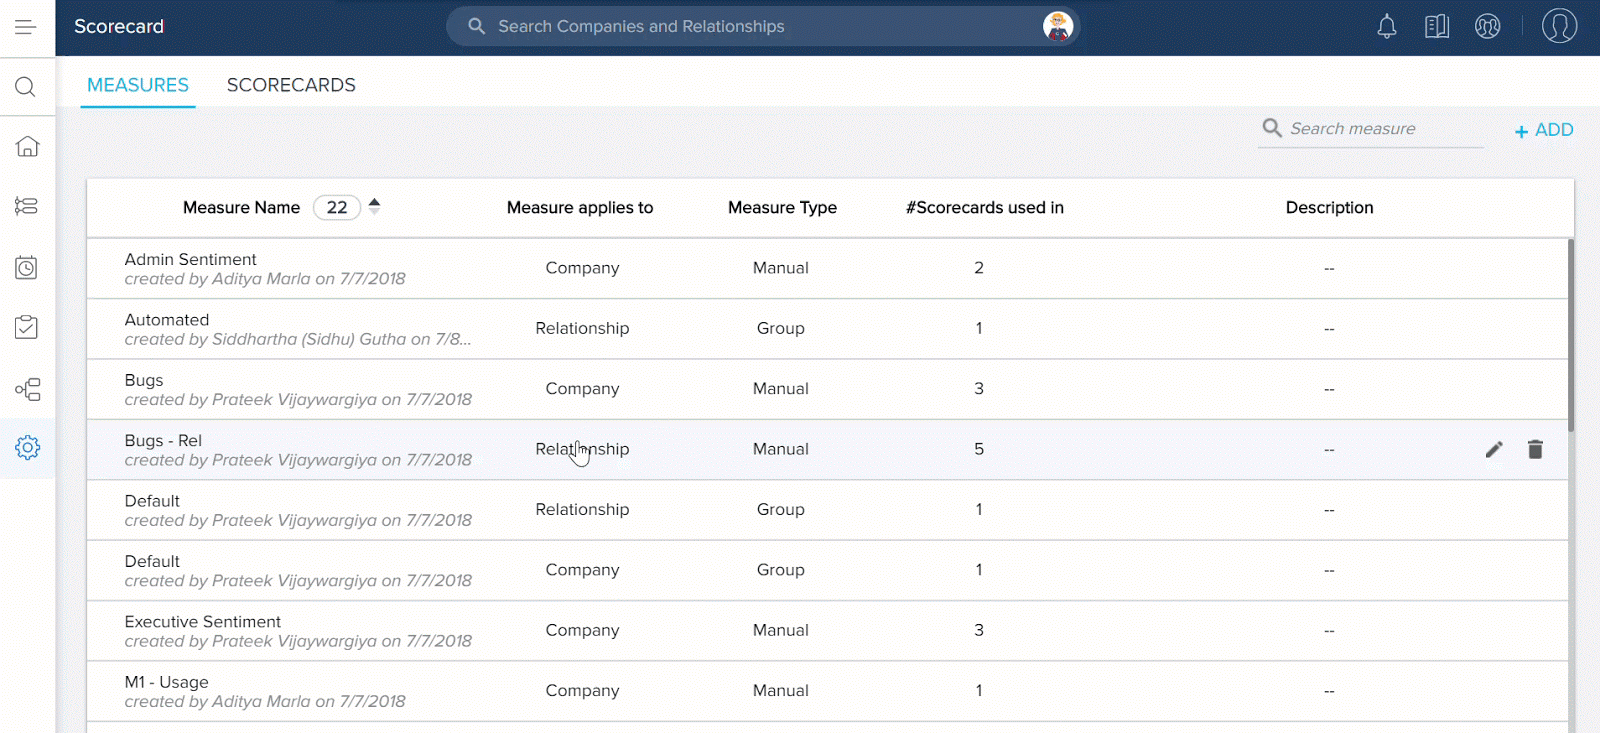
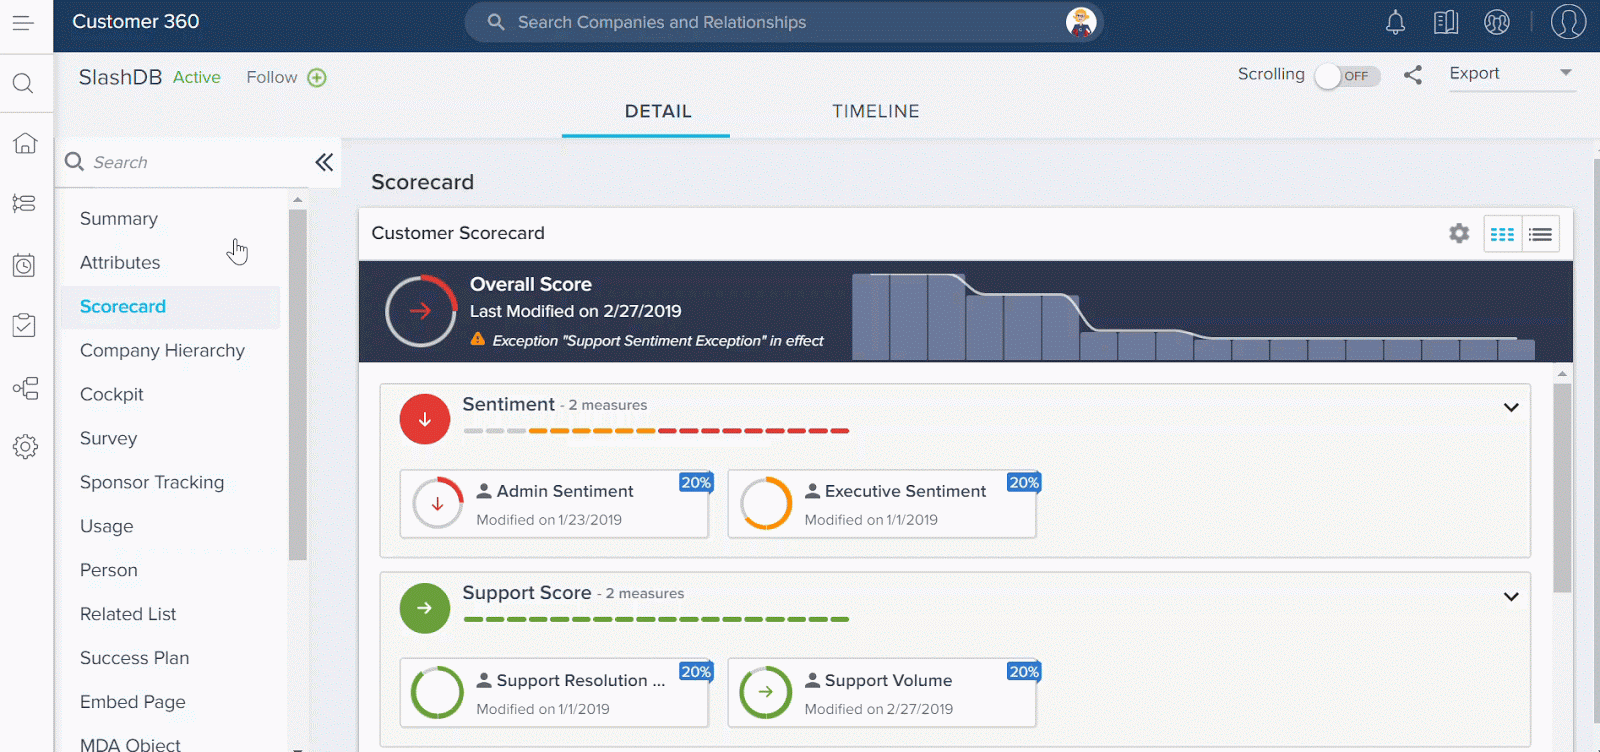
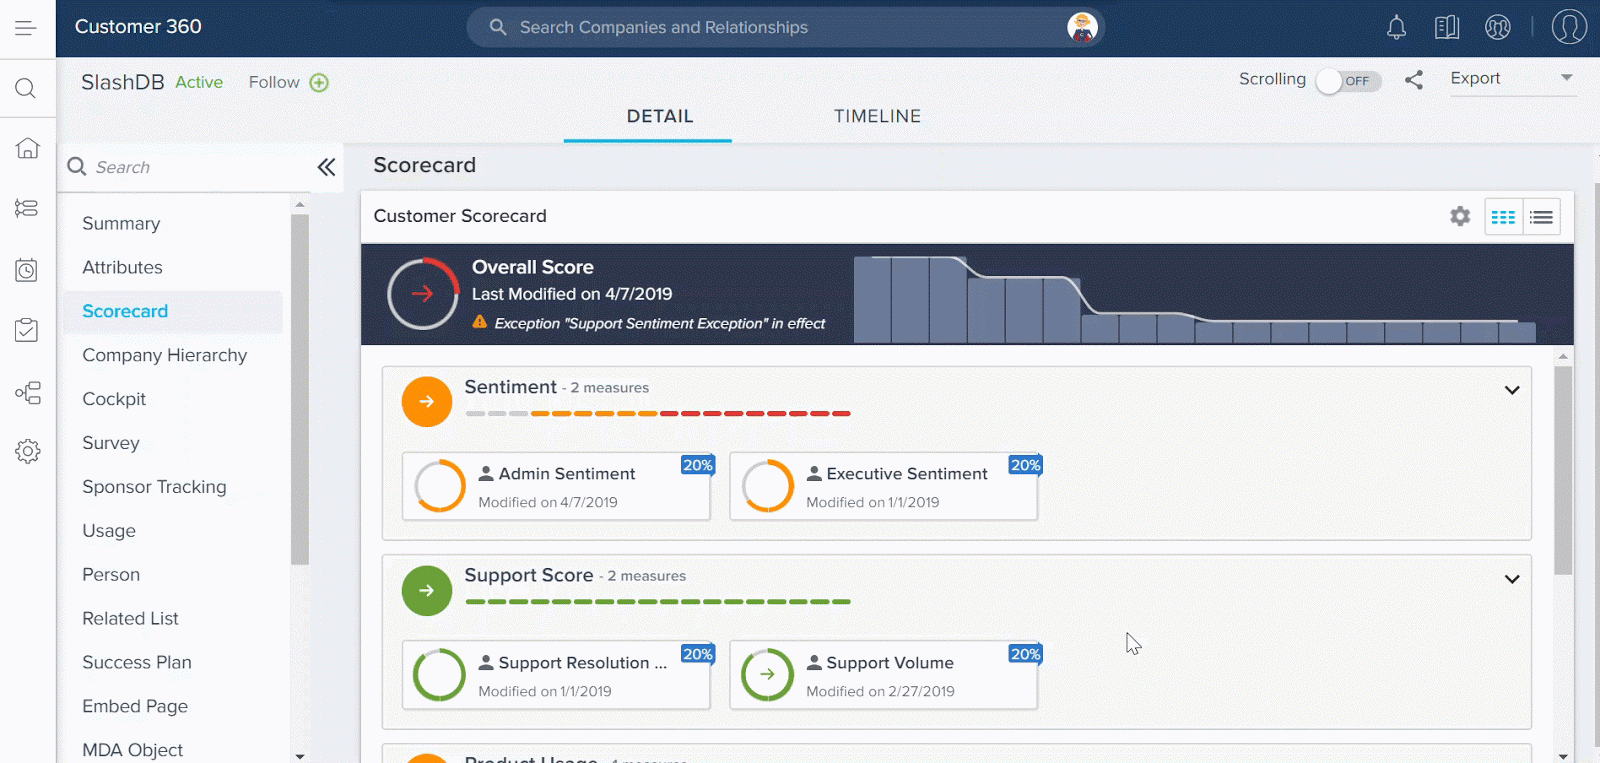
Scorecards
Scorecards are the ultimate barometers of your customers’ health. They transform qualitative and quantitative metrics into customer health scores that can help inform your decision-making. Scorecards provides a single place in Gainsight to configure and manage both Company and Relationship scorecards. Multiple scorecards enable you to have different scorecard configurations in Gainsight which can be applied to different Companies/Relationships automatically, based on criteria like customer stage or lifecycle, etc.
-
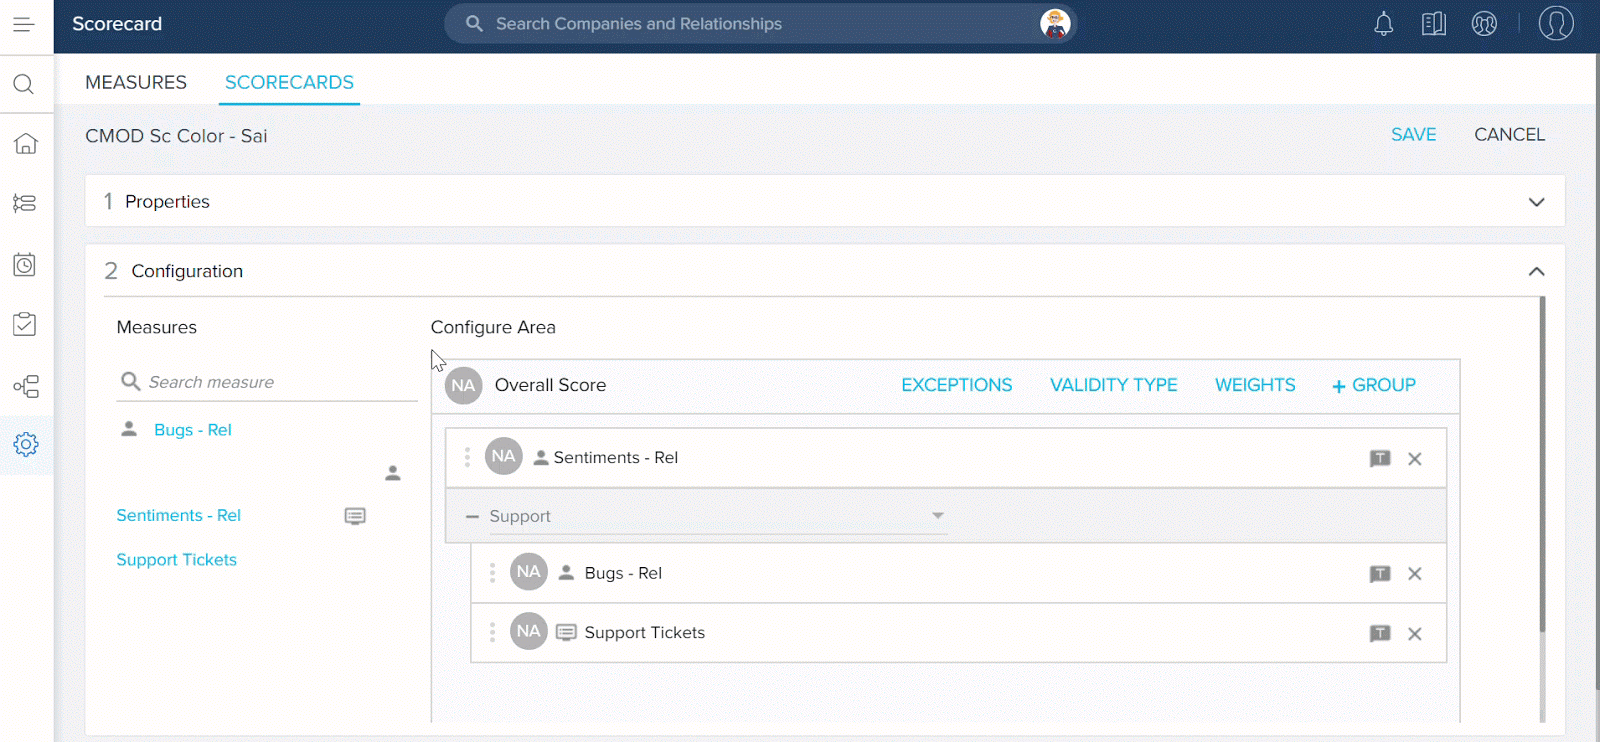
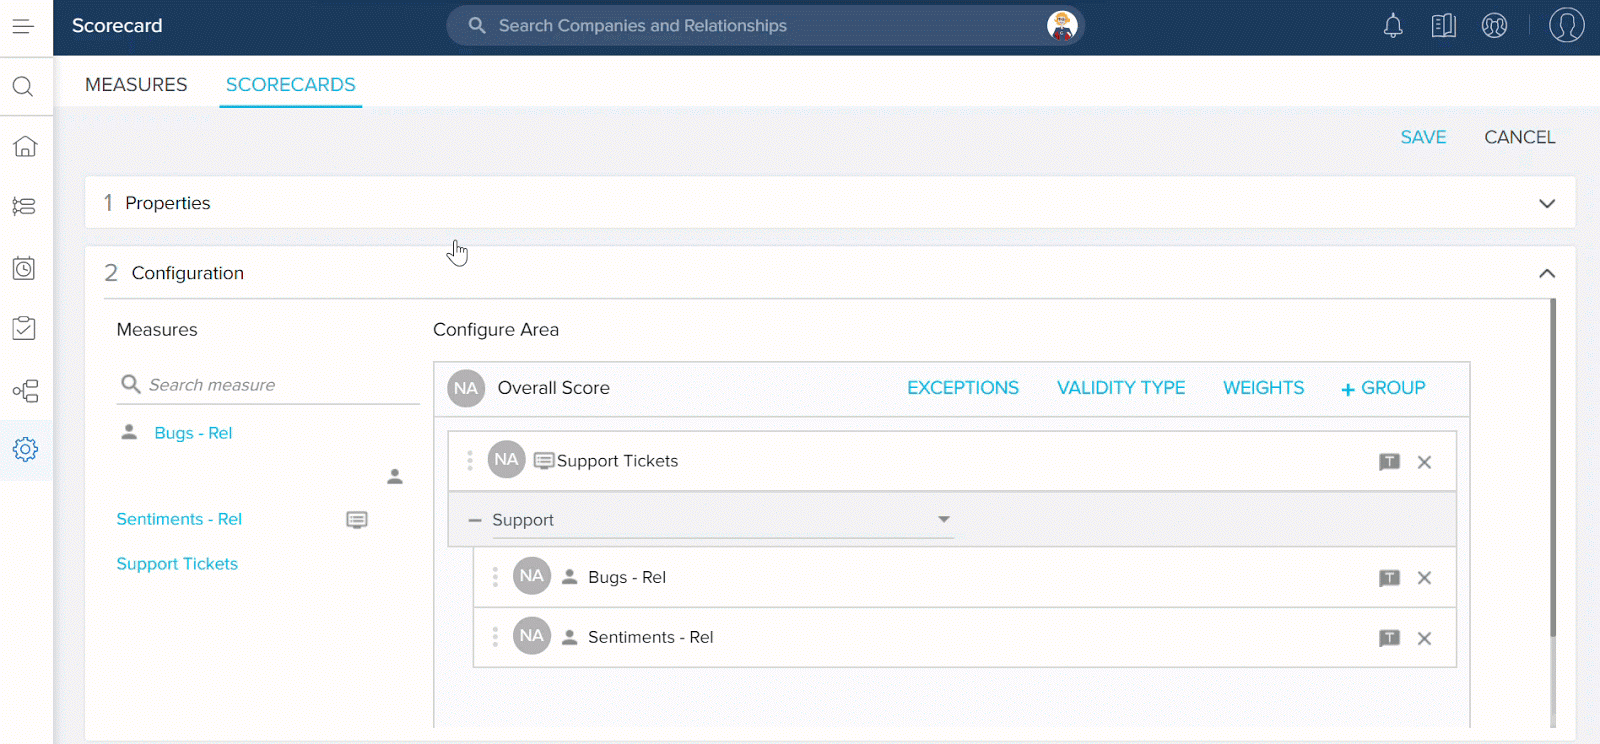
 Ability to move Measures into Measure Groups: Previously, on the Scorecard configuration page, you could only move the Measures from one group to another. However, you could not move an individual Measure which was not part of a group, into another Measure Group. With this release, in the Configure Area section, you can now directly drag and drop individual Measures into the Measure Groups and vice versa.
-
Improved Scorecard Rules Execution Excel: Previously, in the Rules Execution Excel sheet only the GSID’s of the Company, Scorecard, Measure, Current Score, Previous Score are displayed in the sheet. With this release, to avoid confusion about GSID, it is replaced with the name, except for the Company/Relationship ID column. For example; Company Name, Scorecard Name, Current Score, Current Label, Previous Score, etc.
Note: Currently, this improvement is only applicable to the Set Score 2.0 action type, and not yet implemented in the Load to Scorecard History action type.

-
Ability to modify Manual Measure to an Automated Measure and Vice Versa: With this release, you can now modify the Measure Type from Manual to Automated and vice versa, by clicking the Edit icon on the Measures page.
-
Increase of History Bars in Summary View: History Bars have increased from 12 to 18 to view the history of the customers for the last 18 weeks.
-
New Configure Weights Screen: With this release, a new % Contribution (Group) column is added to the Configure Weights screen to determine the contribution of the Measures weight for the respective groups.
Note: This column is only displayed when you add Measure Groups to the Scorecard.
- Filters only Display the Schemes Used in Scorecards while Generating Unified Mass Edit Report: With this release, only the Scheme Types which are used in the Scorecards are displayed while generating the Unified Mass Edit Report. For example, if only Numeric and Color Scheme Types are used in the Scorecards for generating report then only those two Scheme Types are displayed in the Filter, instead of displaying all the Scheme Types.
.gif?revision=1)
-
Ability to Handle the Case of Measure Score N/A when Displaying % Contribution in Summary View: Previously, the percentage contribution of each Measure to an overall score, defined in the Configure weights screen, was directly displayed in the Summary View of the C360 page of that customer. With this release, if the Measure has no score, then that Measure is not considered. However, based on the scores of other Measure weights, the percentage contribution of the overall score is calculated dynamically.
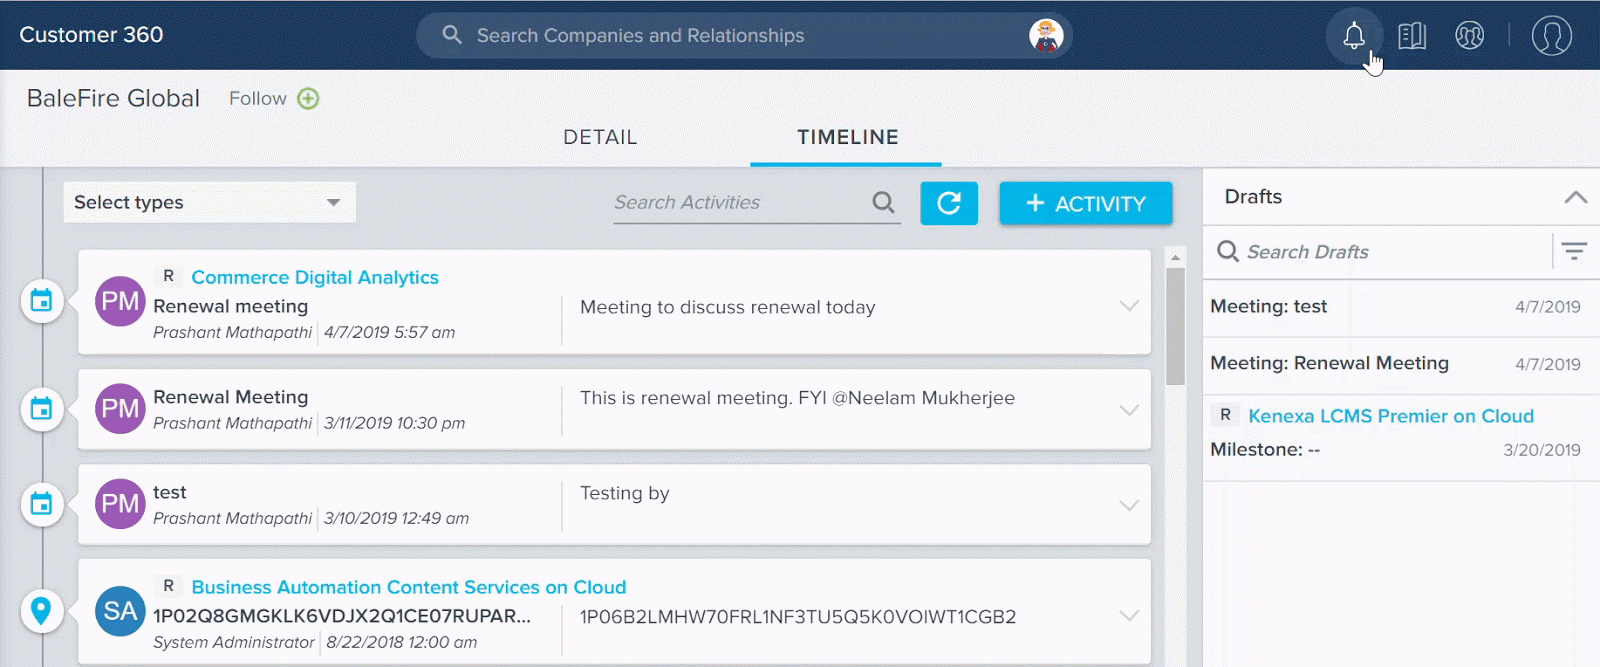
Timeline
Timeline is the official record of your customers. It allows you to log information regarding customer interactions in a way that enables you to quickly gather insights and drive action. The Timeline View in the Customer or Relationship 360 allows you to log and view activities that help you track customer interactions over the course of a customer’s life-cycle. The Timeline tab in the CTA Detail View allows you to log activities for a specific CTA. These activities will also appear in the Timeline View in the Customer 360.
-
Ability to Search Activity Types from C360 and Cockpit pages: With this release, you can now search for Activity types from C360/R360 and Cockpit pages while creating an Activity.
-
Ability to roll up Relationship Activities to C360 page : Previously, it was not possible for you to view or edit Relationship Activities from its corresponding C360 page. However, with this enhancement you can now view the activities of a Company’s Relationships on the C360 page. A toggle switch Show Relationship Activities in Customer Timeline is introduced on the GENERAL SETTINGS tab of the Timeline configuration page to accomplish this task.
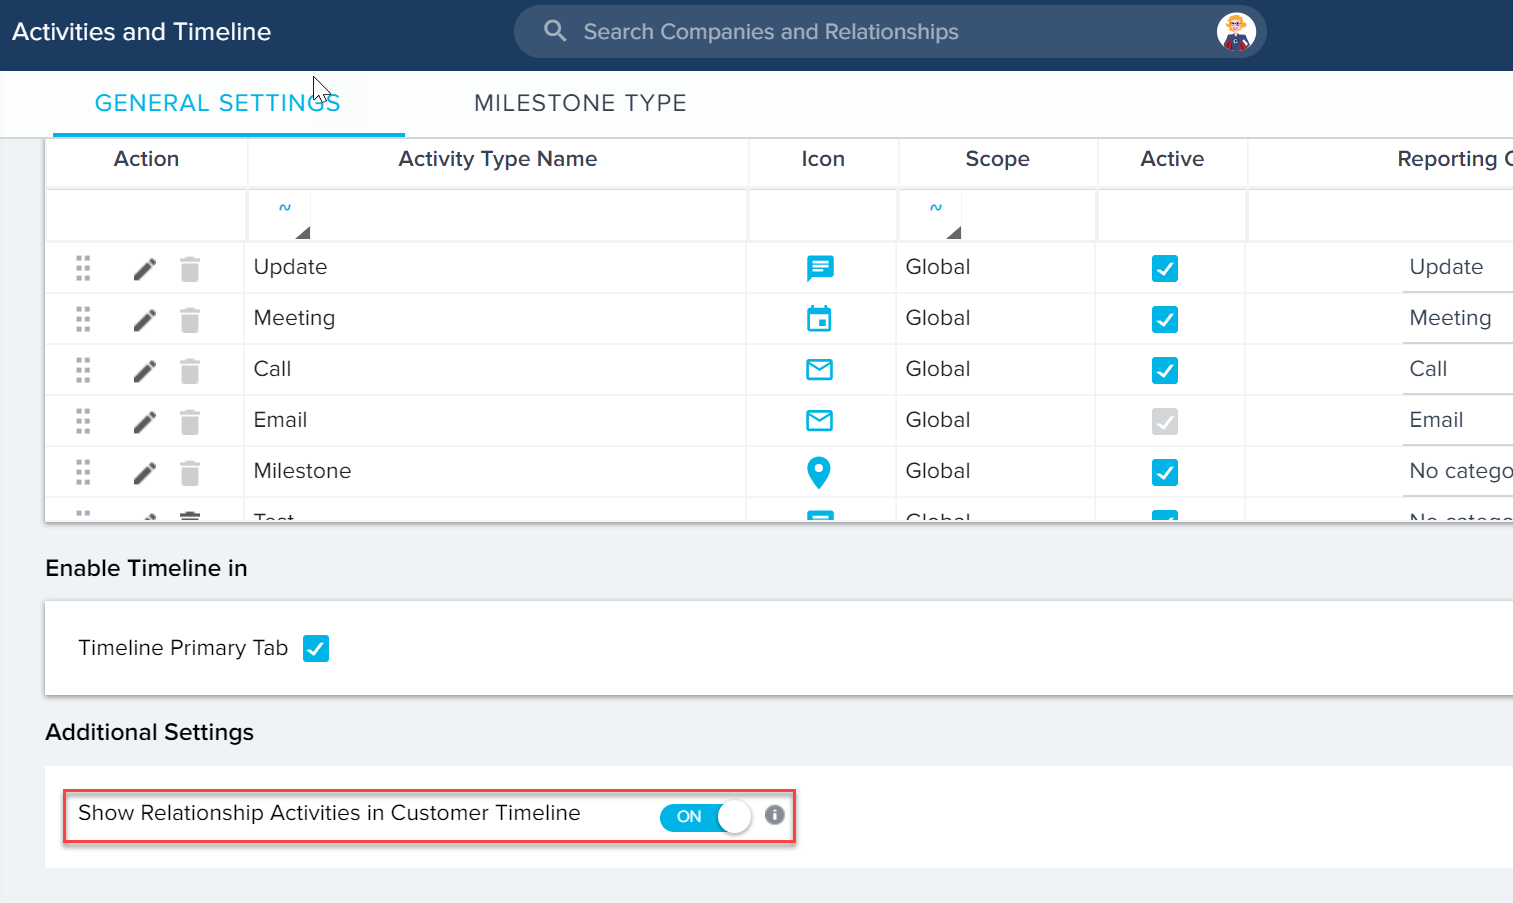
By default, this switch is disabled. When Admins enable this toggle switch, end users can view Relationship Activities from C360 page. Apart from viewing and editing Activities, end users can also view drafts of Relationship Activities. When users apply filters or search for Activities, the results also include Activities created from Relationships.
Business use case: Consider a Company which has ten Relationships. Each of the ten Relationships can have multiple activities logged. If you wished to view all of the Activities for a Company’s Relationships, you had to manually open ten R360 pages and then search look at the activities of each Relationship. However, with this enhancement you can view all the Activities of a Company's Relationships directly on the C360 page itself.
To use this enhancement:
-
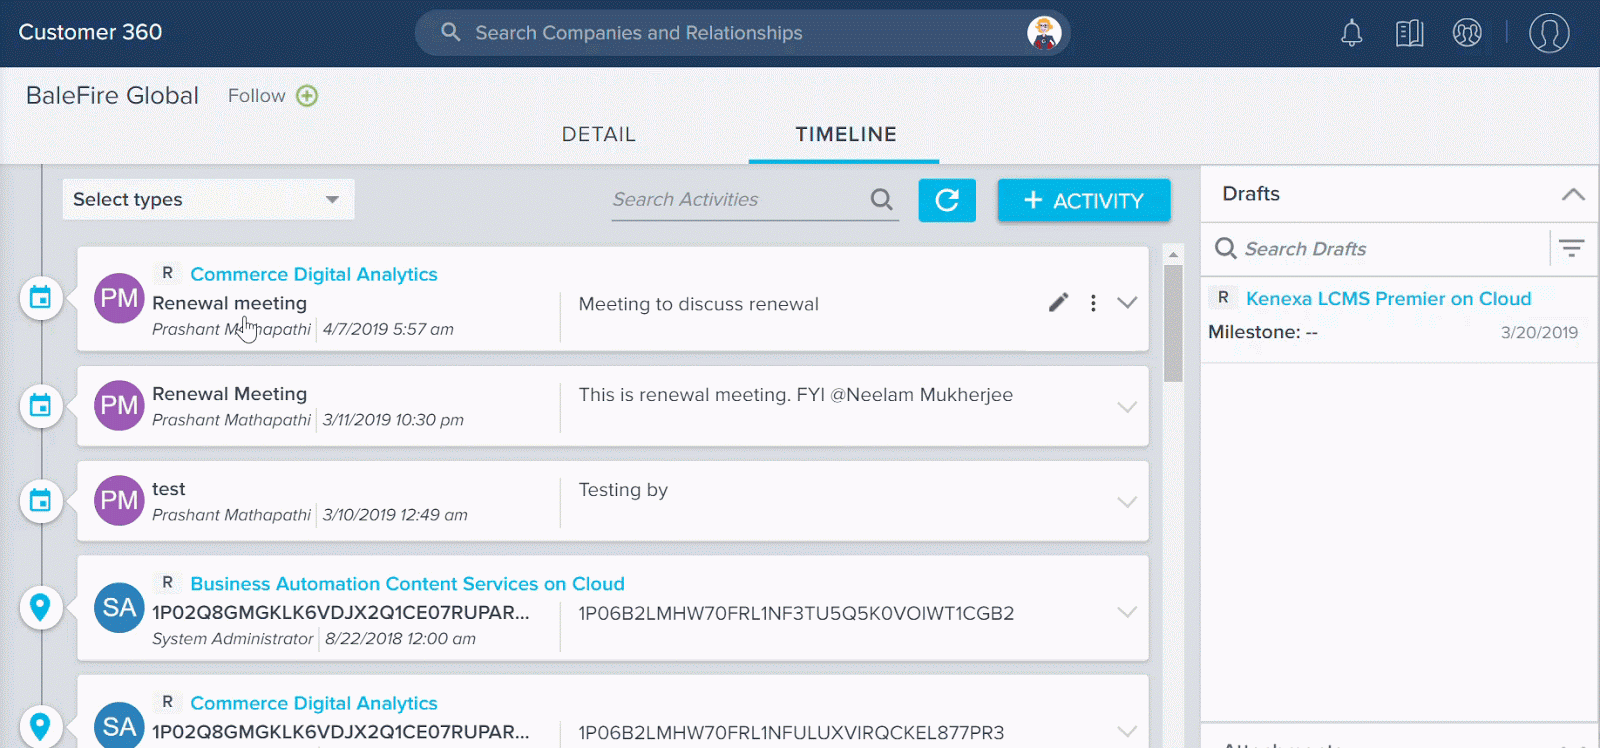
To view Relationship Activities in C360:
-
Navigate to C360 page of the required company.
-
Click the Timeline tab.
-
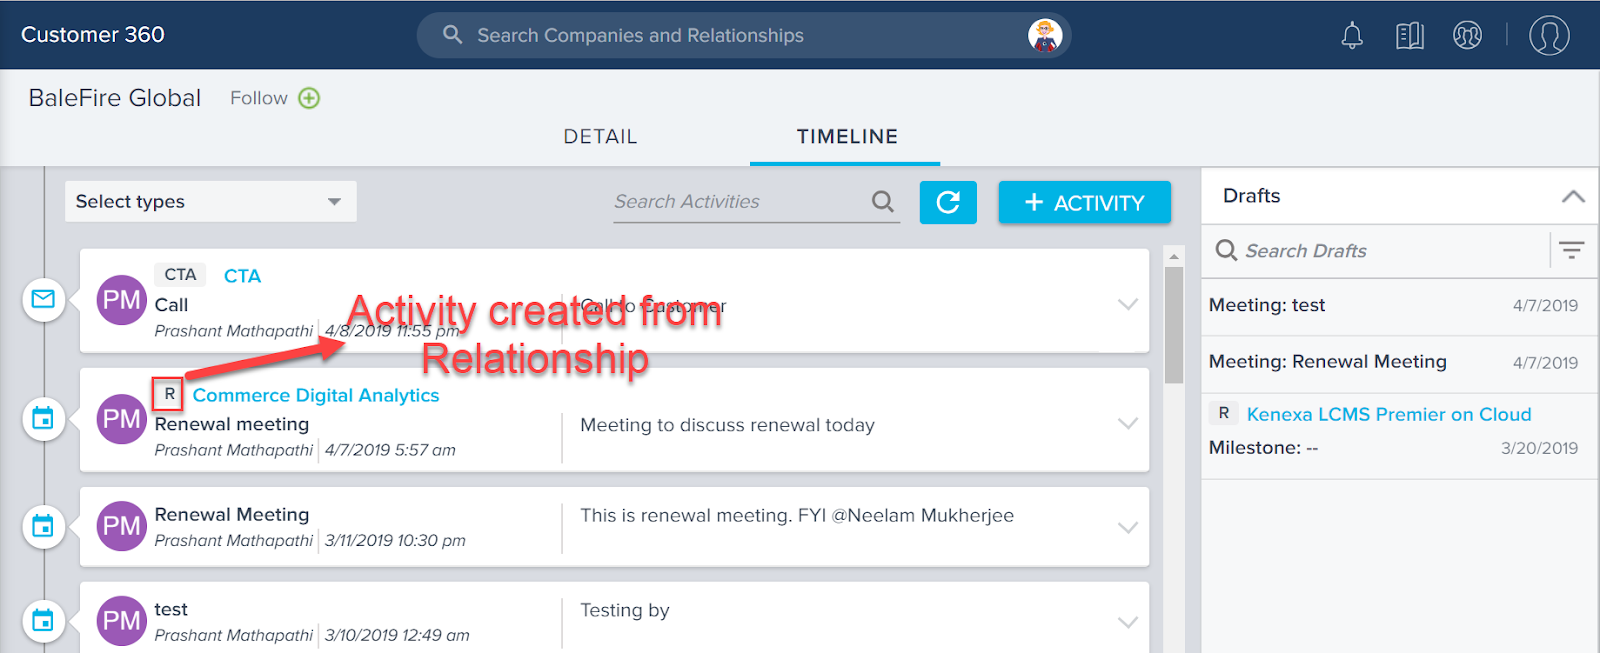
Note: Activities created from R360 page have an R symbol followed by the Relationship Name (the third Activity in the below image).
Activities created from Relationship CTAs are denoted with a CTA symbol, followed by Relationship name and CTA name (the second Activity in the below image).
-
To edit Relationship Activities in C360:
-
Click the edit icon for a Relationship Activity.
-
Make the necessary modifications and click UPDATE.
-
-
When you search or filter Activities from the C360 page, the Relationship Activities matching the filter criteria are also displayed.
-
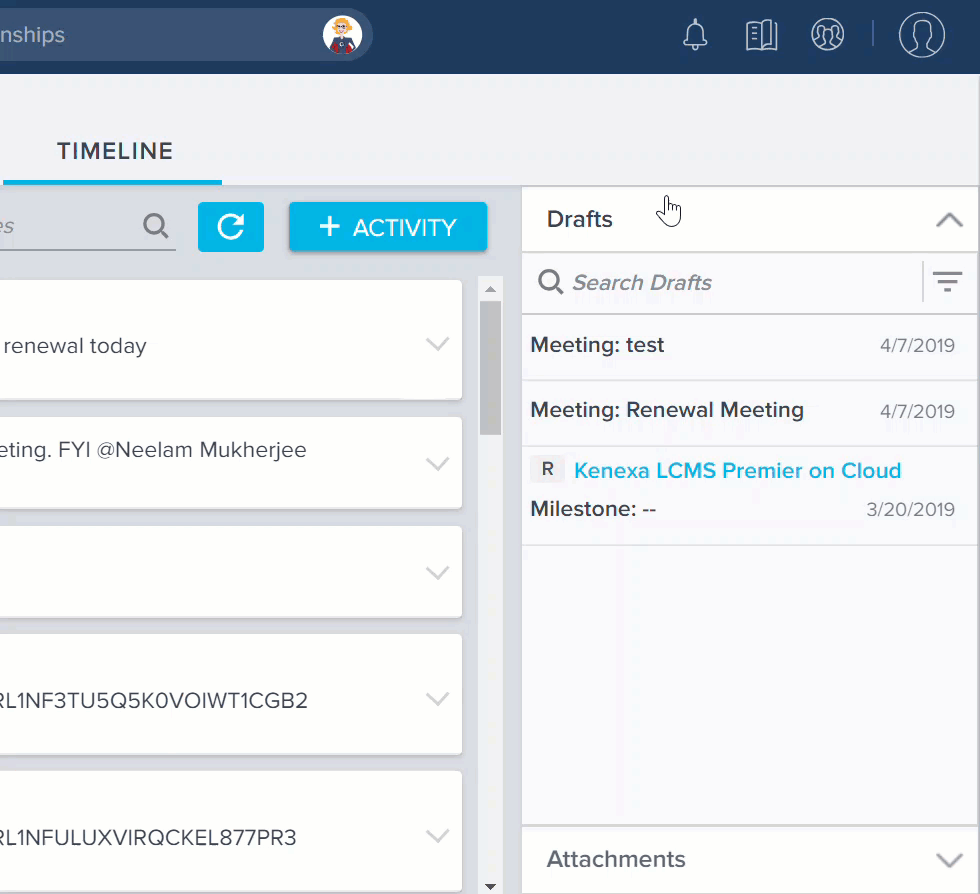
Search for a particular activity draft in the Drafts section. The matching Activity drafts from Relationship are also displayed.
-
Record Delete Implementation in Timeline: Previously, when you deleted an entity (Company or Relationship), the various Timeline records created for that Company like Activities, drafts, attachments, were not deleted automatically.
With this release:
-
If you delete a Company record, all its corresponding Timeline records are deleted. If the Company has Relationships, the Timeline records for the relationships is also deleted.
-
If you delete a Relationship record, its associated Timeline records are automatically deleted. However, the corresponding Timeline records at Company level continue to exist.
To use this enhancement:
-
Navigate to Data Operations page.
-
Delete a Company or Relationship which is not required.
-
Verify from the global Timeline if the corresponding activities are deleted.
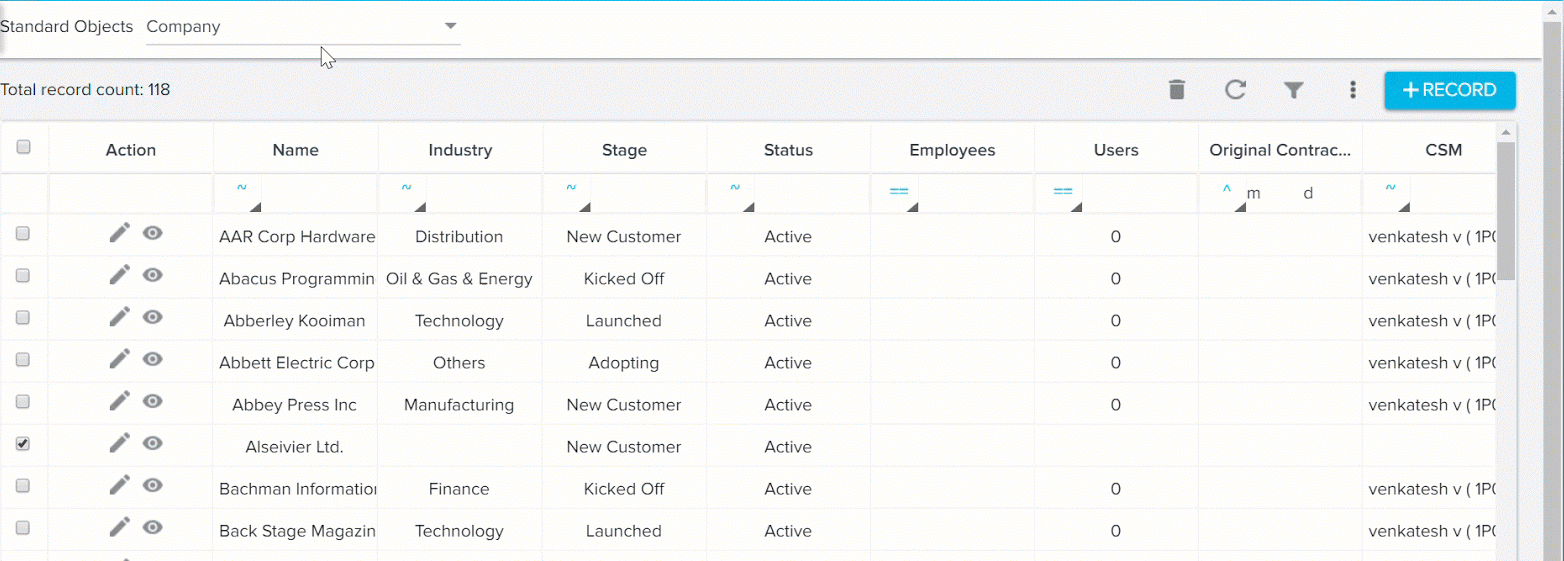
In the below image, the Company Alseivier Ltd. has an Activity “Discussion with Alseivier”, a draft with the same name, and an attachment called “Alseivier Attachment”.
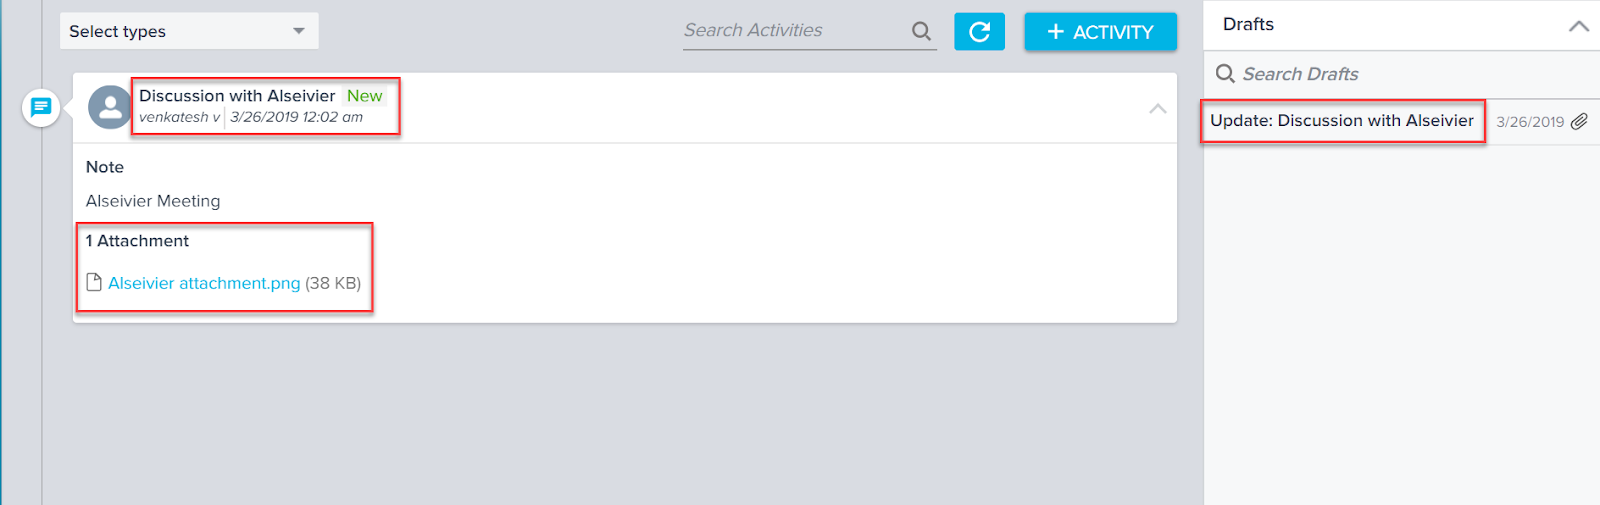
When the Company record for Alseivier Ltd is deleted, all its corresponding activities are deleted automatically.
Sally in Gainsight Application
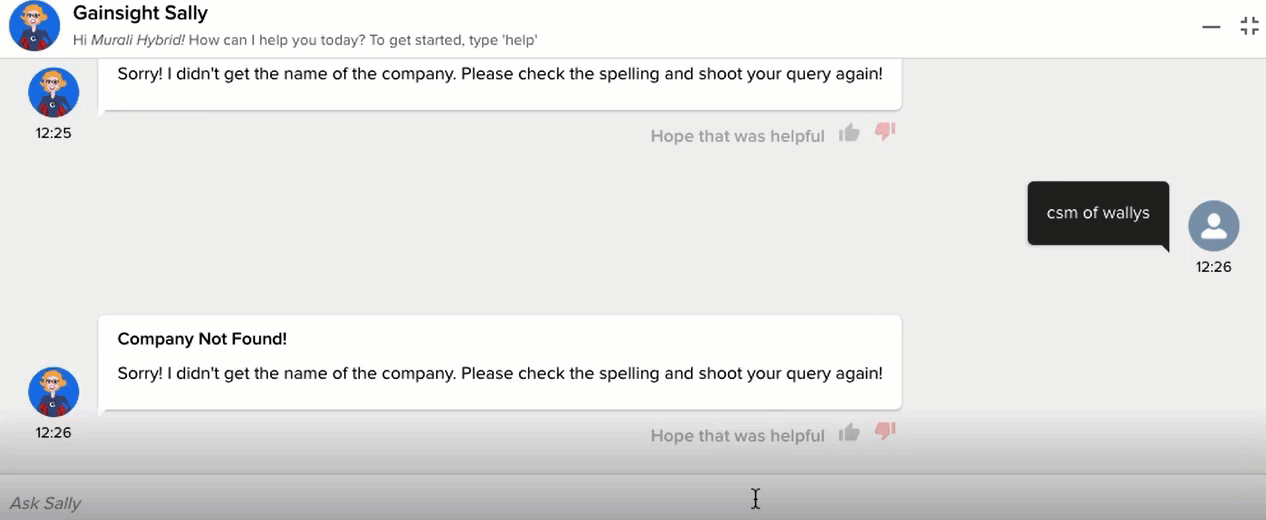
Sally, the AI-powered bot, makes rich Gainsight data easily accessible through simple conversation. Asking Sally questions is just like asking a real person, and machine-learning technology helps Sally get smarter with each interaction. Not only can Sally provide answers to a diverse set of questions about your customers, Sally can also update customer data, provide information on health scoring, current risks, and opportunities. Your company can quickly collaborate on the latest customer intelligence to more rapidly deliver customer outcomes across all parts of your organization.
-
Ability to enable Sally Access automatically for all Slack users: With this release, once a Slack workspace is added in Sally, all Slack users in the workspace who have Gainsight Licenses are automatically given access to Sally.
-
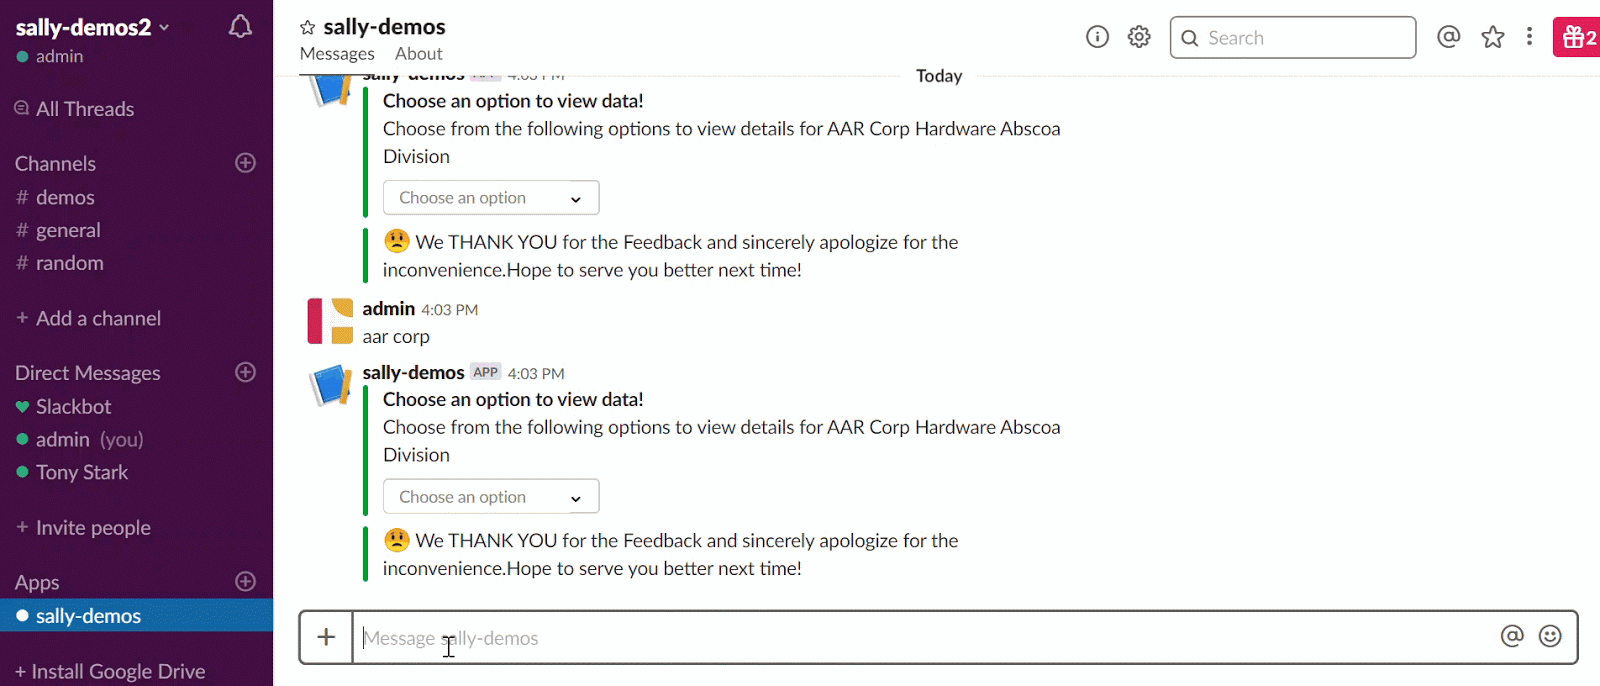
Display Optional Comment Box based on Dislike selection in the ‘Hope that was helpful’ section: Previously, in Slack and In-App Sally, the users could only select Like or Dislike options after Sally responds to the query. With this release, in Slack and In-App Sally, an optional Comment Box with the “Would you like to provide more details” message is displayed when the user selects the Dislike option from the ‘Hope that was helpful’ section to capture additional comments from users. If you select the Like option, ‘Glad you like it’ message appears.
InApp Sally:
Slack:
-
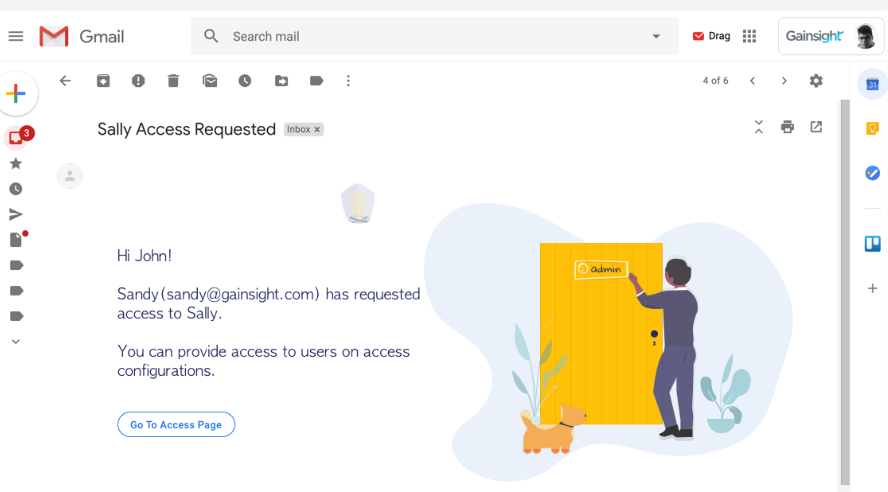
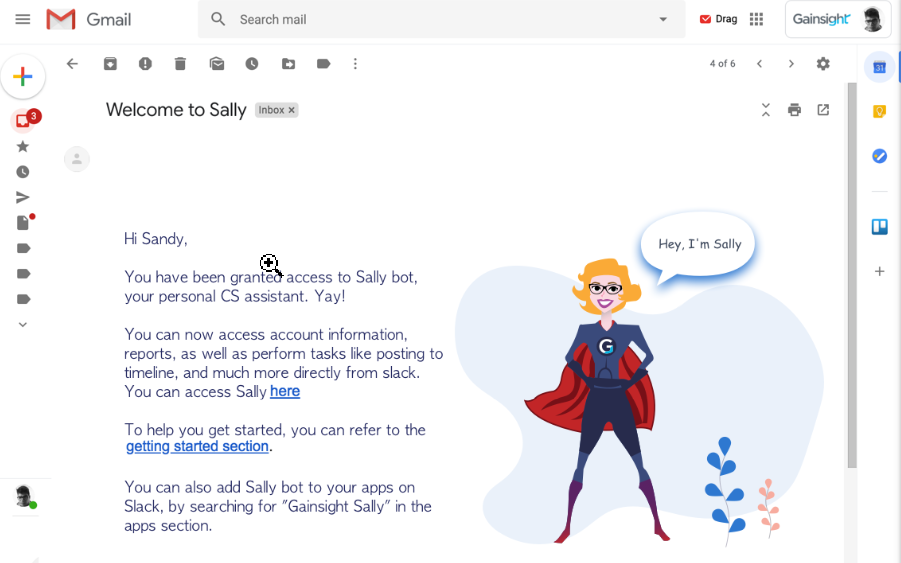
Admin Email Notifications when Slack User Requests Sally Access: With this release, Gainsight Admins will receive an email notification if the Slack users request Sally access, as well as if the Slack user tries to access Sally, and they do not have Sally access. The requested user will receive notifications through Email and Slack channels when Admin provides access to Sally for that user.
Snapshot of a sample email notification received by Gainsight Admin is shown below:
Snapshot of a sample email notification received by the users after providing access to Sally is shown below:
Issues Addressed
C360/R360
- Unable to edit Company/Relationship global stages: Previously, when you tried to edit global stage of a Company or Relationship, the operation failed. This issue is now resolved and you can now edit global stages in a Company and Relationship.
| NPS, Net Promoter, and Net Promoter Score are registered trademarks of Satmetrix Systems, Inc., Bain & Company and Fred Reichheld. |