Journey Orchestrator's New List View
Gainsight NXT
This article explains how you can create the Simple Programs in Journey Orchestrator and how you can manage them in Gainsight.
Simple Program Overview
With Gainsight’s Simple Programs, you can design programs that guide your customers through email and in-app interactions to reach an enhanced outcome.
The Programs page contains following tabs:
- Program Tab: Displays the list of all the programs
- Schedule Tab: Displays the all the scheduled program
Program
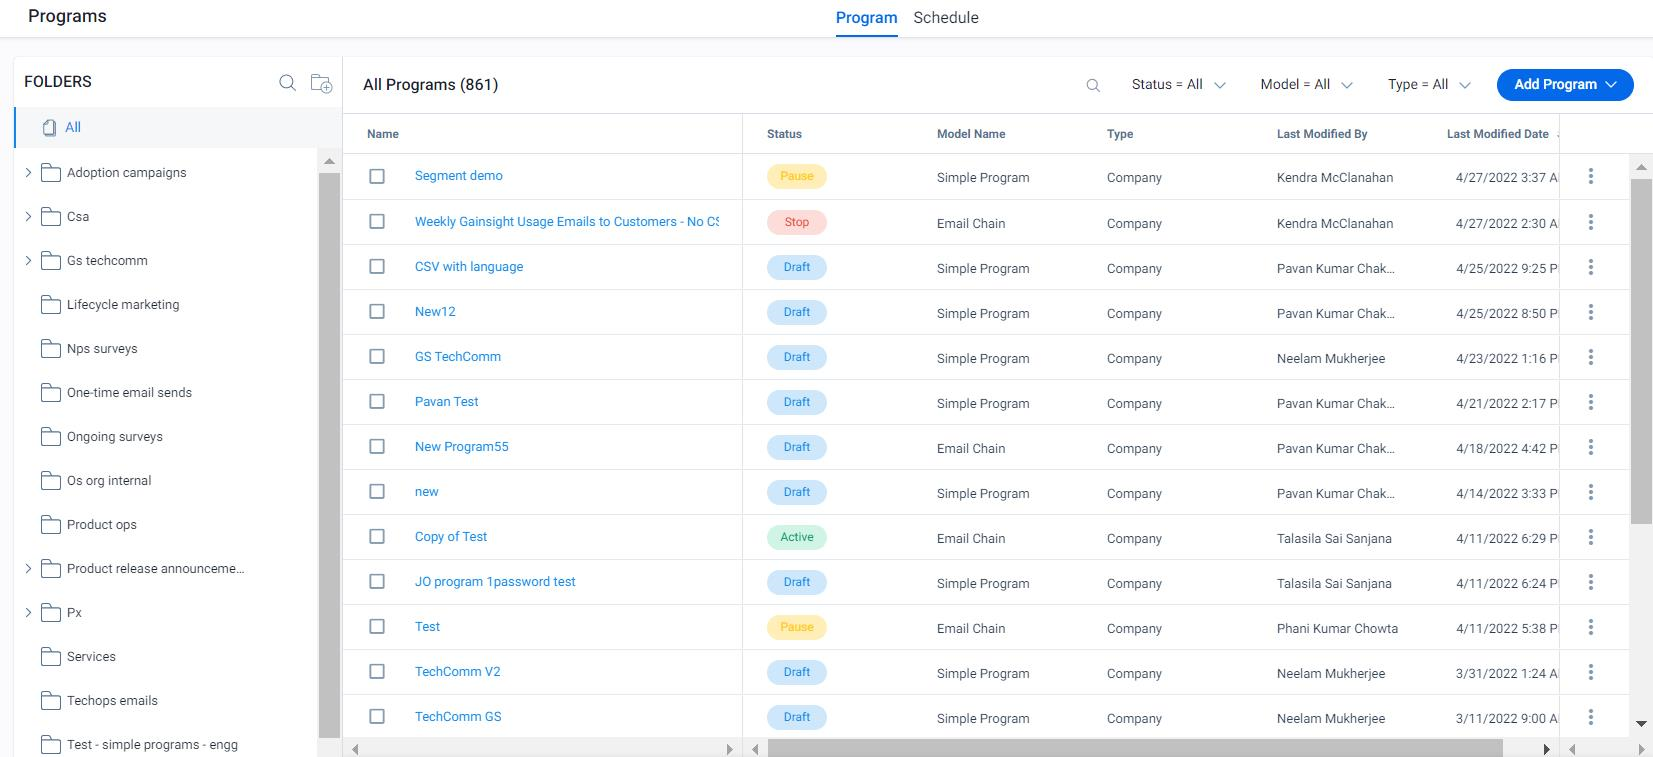
The Programs List view page displays a list of existing programs that include Simple Programs and Advanced Programs. You can see basic information regarding the program from this view, filter the list for specific programs, and create and delete programs.
Programs are displayed on the list view page with the following columns:
- Name: The name of the program. The name is hyperlinked and clicking the name navigates you to the configuration page of a program.
- Status: Indicates the status of a program.
- Model Name: Indicates the type of model used to configure the programs.
- Type: Indicates either Company, Relationship, or User type of programs.
- Last Modified By: The name of the person who modified the program most recently.
- Last Modified Date: The date and time of when the program was last modified.
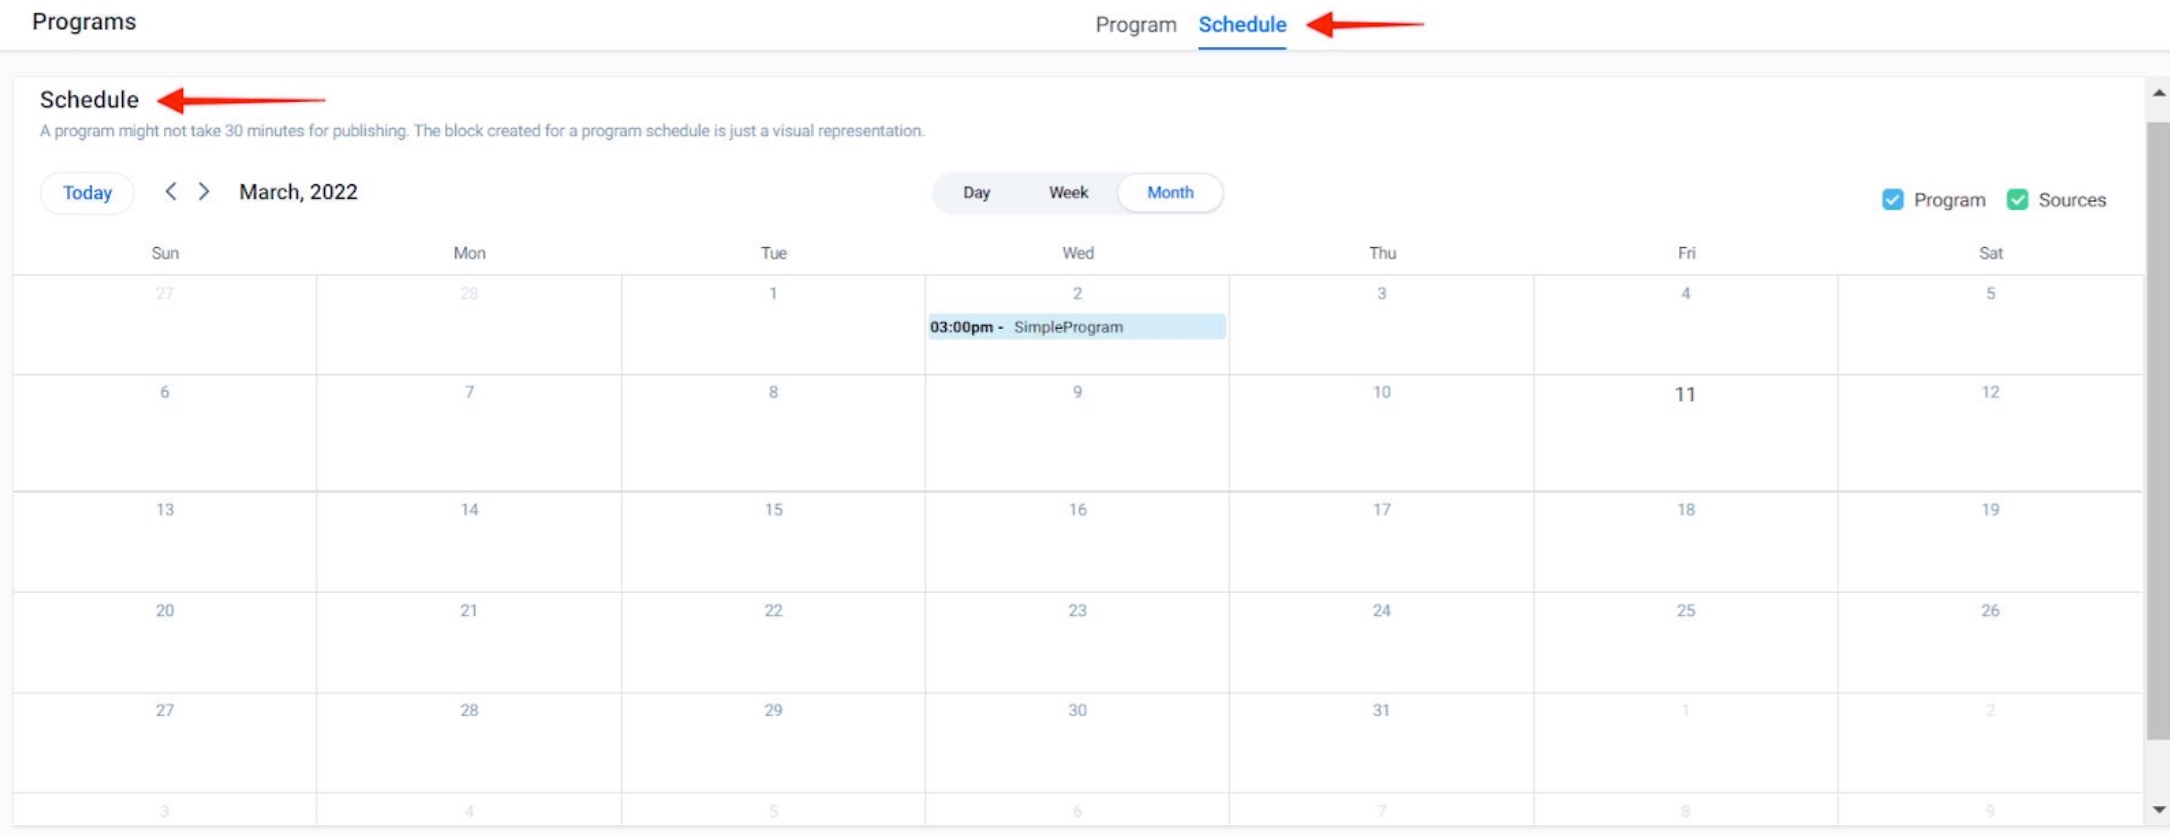
Schedule
The Schedule tab displays a calendar view of the scheduled Programs and Sources. For more information, refer to the Program Schedule View article listed under the Additional Resources section.
Create New Simple Program
To create a Simple Program, you need to perform the following steps:
- Define a New Simple Program
- Add Participants to the Simple Program
- Select Simple Program Action
- Publish the Simple Program

Define a New Simple Program
The first step to create a Simple Program is to define a name and type of Simple Program.
To define a new Simple Program:
- Navigate to Digital Journey > Programs
- Click Add Program > Simple Program. The New Simple Program dialog box appears.
- In the Name field, enter the name of the program.
- In the Type field, select if the Program is configured for Company, Relationship, or User.
- If Relationship is selected in the Type field, select the Relationship Type from the dropdown.
- (Optional) Select a folder for the new program. If no folder is selected, the Program is moved to the Uncategorized folder. For more information about folders in Journey Orchestrator, refer to the Folders section in this article.
- (Optional) Enter a brief description of the program.
- Click Create. The Participants tab appears.
Add Participants to the Simple Program
Once the Simple Program is defined, you can add the target customers as Participants to the program. Participants can be added from the following sources:
- Segment
- CSV
- Data Designer
- Event
For more information on how to add participants in the program, refer to the Add Participants to a Simple Program article from the Additional Resources section.
Select Simple Program Action
After successfully adding the participants to the program, you can select the Action that will be executed by the program.
The Action can be of following two types:
- PX Engagement
In Email action type, you can choose a required template and draft the email. This email is then sent to the participants added in the program.
For more information on the Email action type, refer to the Group Email Support in Simple Program article from Additional Resources section.
PX Engagement
In the PX Engagement action type, you can choose an engagement to be shown to the participants added in the program. This engagement must already be created in Gainsight PX.
For more information on how to create an engagement, refer to the Overview of Engagements article.
Publish Simple Program
You can publish a program once you have added the participants and selected the Action. On publishing, the program becomes active for the added participants.
You can publish a program using the following two methods:
- Publish Immediately: When you need to publish the program instantly.
- Scheduling a Program: When you need to publish a program on a specific date, time, or interval.
For more information on how to publish a program, refer to the Publish a Simple Program article from Additional Resources section.
Manage Simple Programs
Simple Programs can be managed well in multiple folders depending upon the requirement. You can create a folder and move programs to it.
Moreover, after successfully creating a program, You can track and analyze them through the Simple Program Analytics tab.
Analytics
The Simple Program Analytics tab is available only after the program is moved to an Active state.
Analytics tab have following sub-tab:
- Dashboard
- Activity
- Snapshot
To know more about the Analytics tab, refer to the Simple Program Analytics article from Additional Resources section.
Folders
You can create folders on the Programs page to organize your programs accordingly. All the folders are displayed in the left pane of the Program List View. If you click any particular folder name, all the programs included in that folder are displayed in the right pane. Gainsight provides a default folder called Uncategorized, where all of the existing programs are stored. You cannot modify the name of this folder or delete it.
Each folder can have one level of subfolders nested beneath them. The Uncategorized folder cannot have subfolders but any Program in this folder can easily be moved to another folder whenever it is required.
Create Folder
To create a new folder:
- Click the Add new folder icon. The Add Folder dialog box is displayed on the screen.
- In the Folder Name field, enter a name for the folder.
- (Optional) Select a parent folder to nest the folder under.
- Click SAVE.
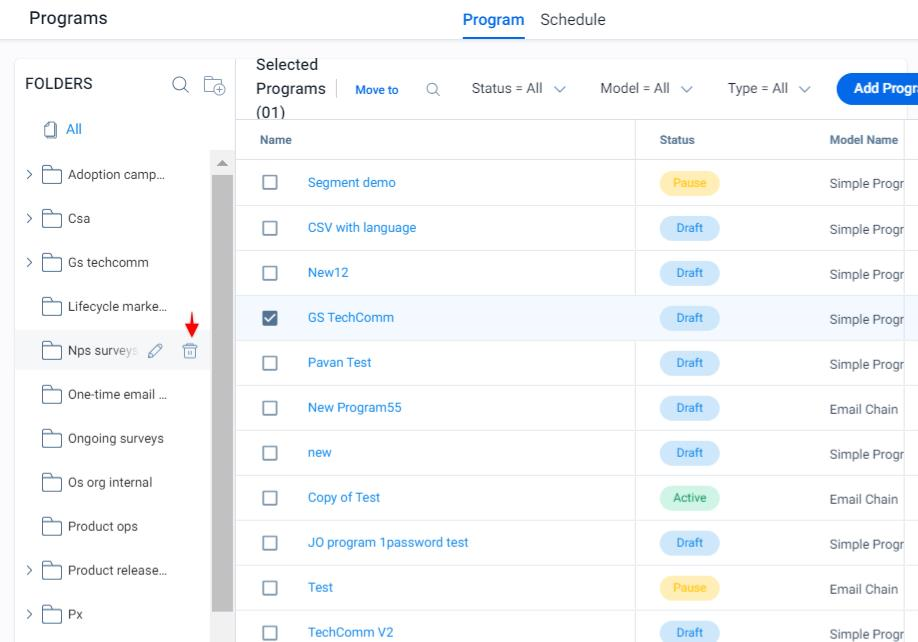
Move Programs to Folders
Once you’ve created a folder, you can move a program into it by taking the following steps:
- Select the Checkbox of the relevant program(s).
- Click Move to to display the Folders dropdown.
- (Optional) Click the search icon to search for folders by name.
- Click the relevant folder to move the program(s).
Note: One Program cannot be in multiple folders.
Rearrange Folders
Click and drag folders to rearrange them. You can drag one folder to another to make it a nested subfolder.
Delete Folders
Users can delete folders that have no other subfolders. Folders containing Programs can be deleted. You cannot delete the Uncategorized folder. To delete a folder, hover over it and click the delete icon.
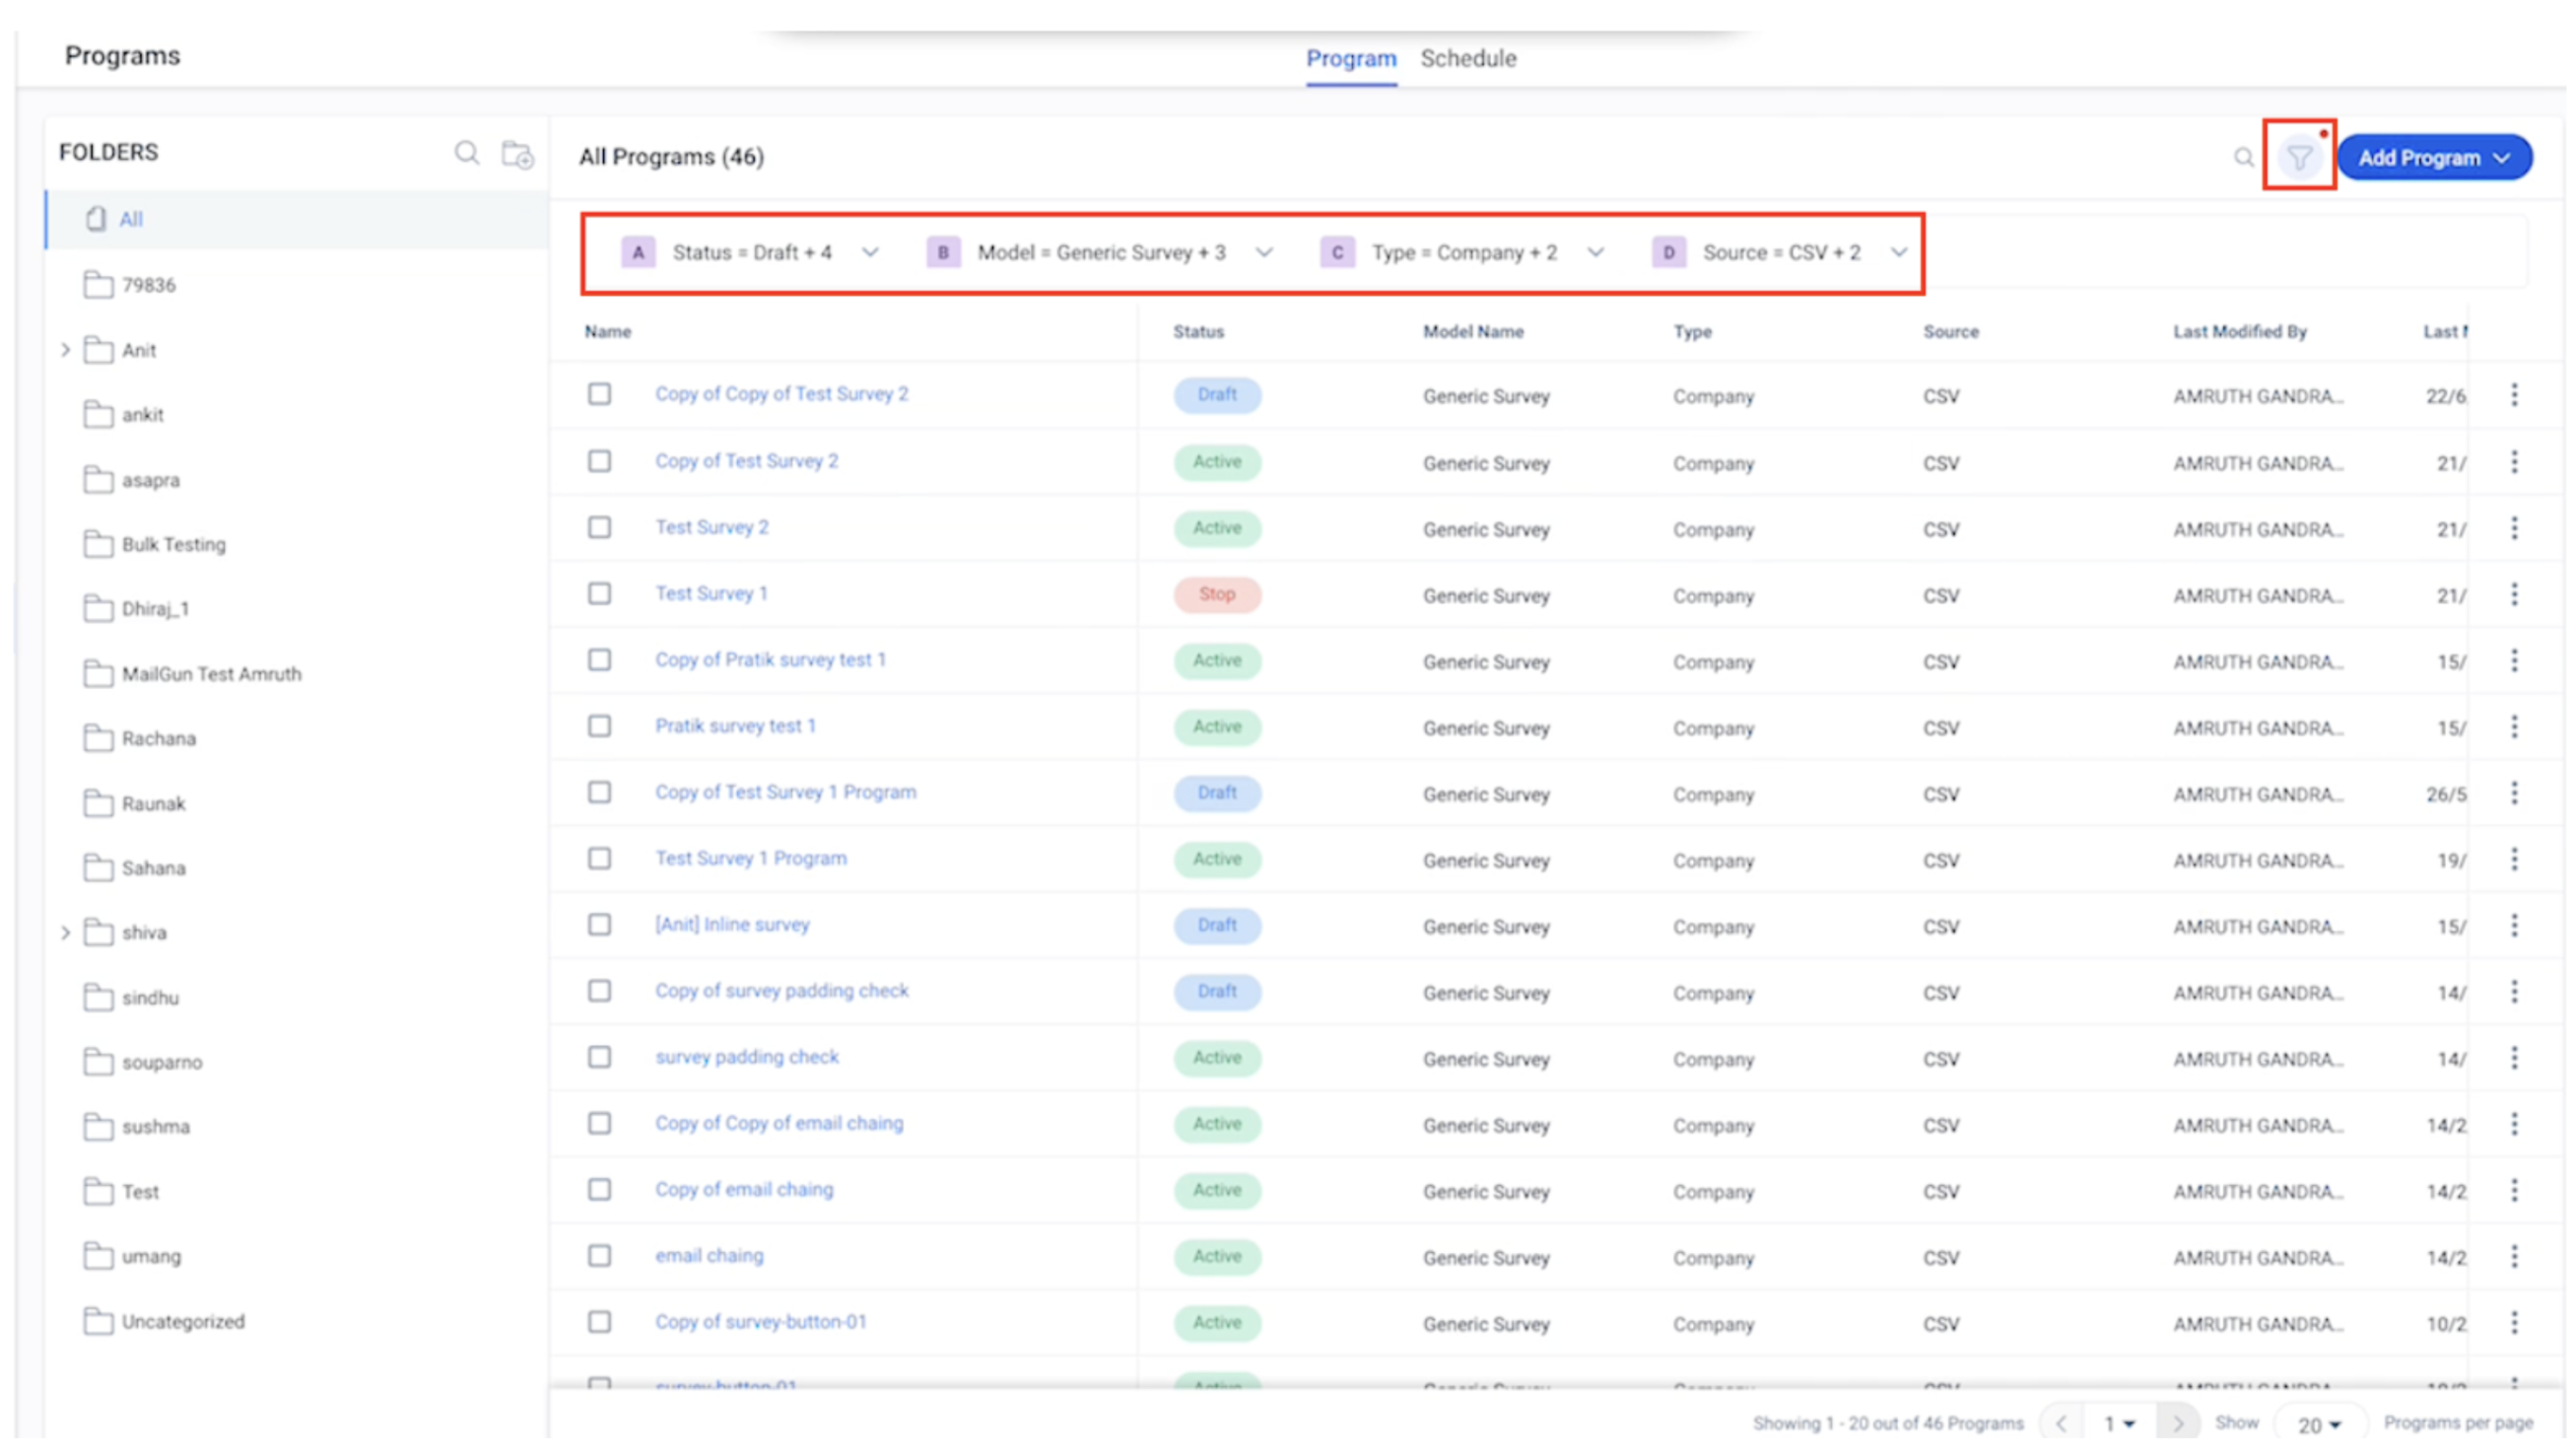
Filters
You can get the list of specific programs in a Program tab by opting this feature.
The following are the four types of filters:
- Status - Filter the list view by Program status, such as: All, Draft, Scheduled, Active, Pause, Stop, Complete, and Publishing.
- Model - Filter the list view for Programs configured with specific model types such as All, NPS® Survey, Generic Survey, CSAT Survey, Email Chain, and Simple Program. For more information on program models, refer to the Available Models for Programs article listed under the Additional Resources section in this article.
- Type - Filter the list view by either Company, Relationship, or User Programs.
- Source - Filter the list view by Participants Source such as: Segment, CSV, Data Designer, Event and Query Builder.
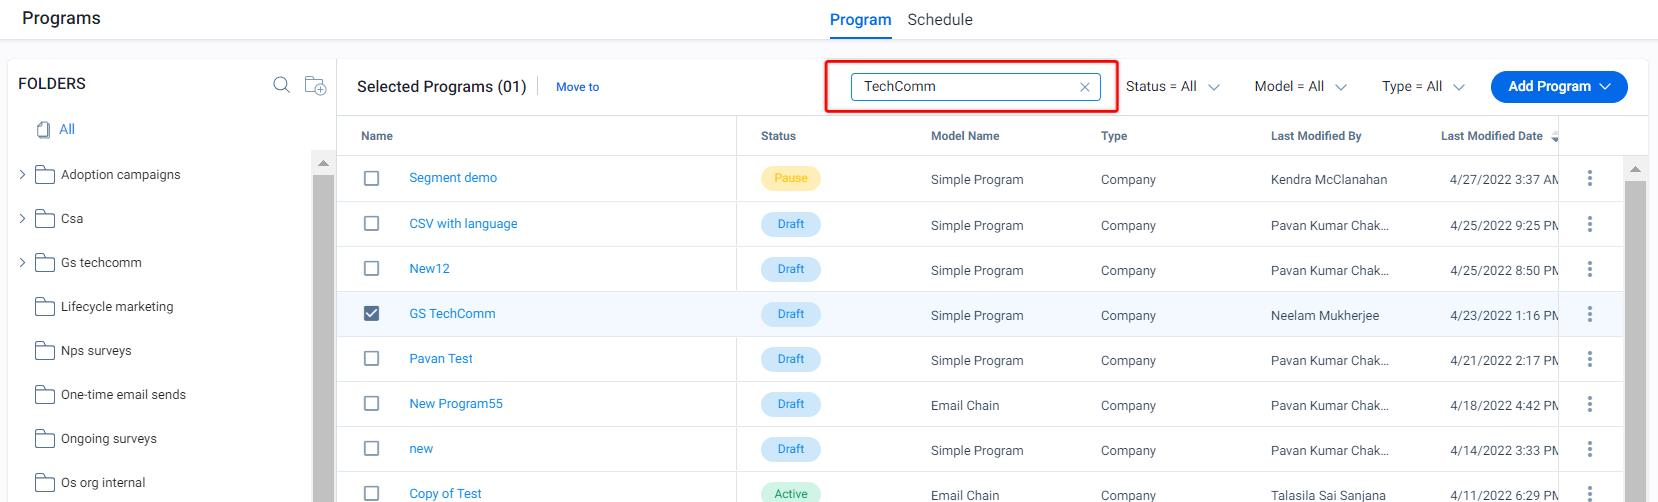
Search
To search for a program in the list view, take the following steps:
- Click the Search icon.
- Enter the name of the program.Enter the program name.
- Hit Enter to filter the list view for Programs with names that contain the text entered in the search bar. Click Enter to view the filtered program’s list.
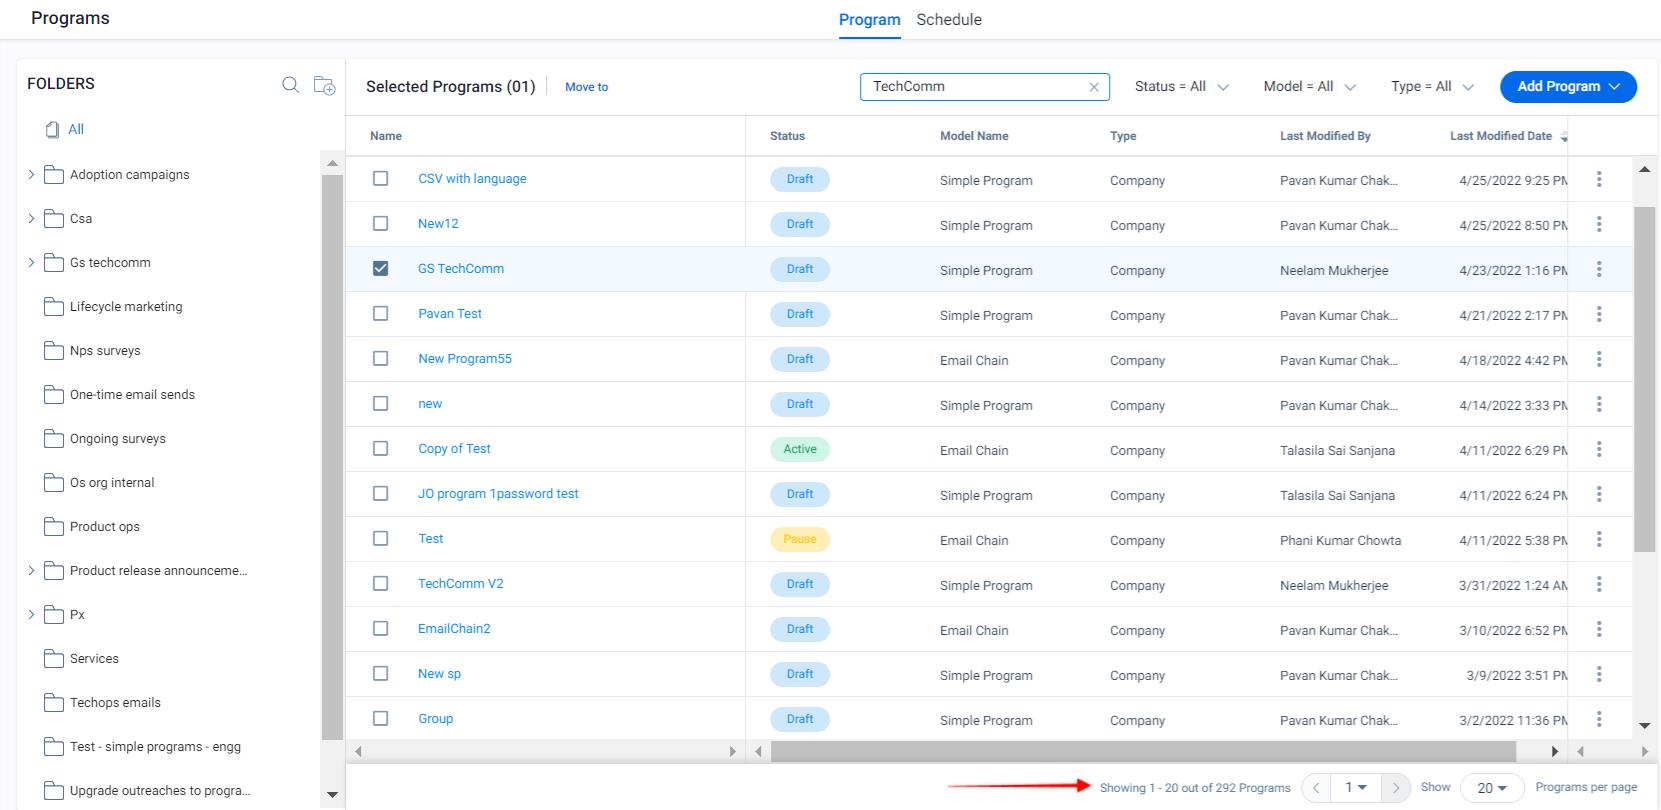
Pagination
Users can control their view and navigation experience of the program list with the following controls at the bottom of the page.
- Page Selection: Click the page number dropdown to select any page to navigate and use the arrows to navigate back and forth between pages.
- Programs per page: Click the Programs per page dropdown to select to display either 20, 40, or 60 programs per page.
Additional Options
You can view the following additional options when you click the three vertical dots icon of any program from different level of folders:
- When you are in ‘All’ Programs, the three vertical dots icon displays the following options in the dropdown:
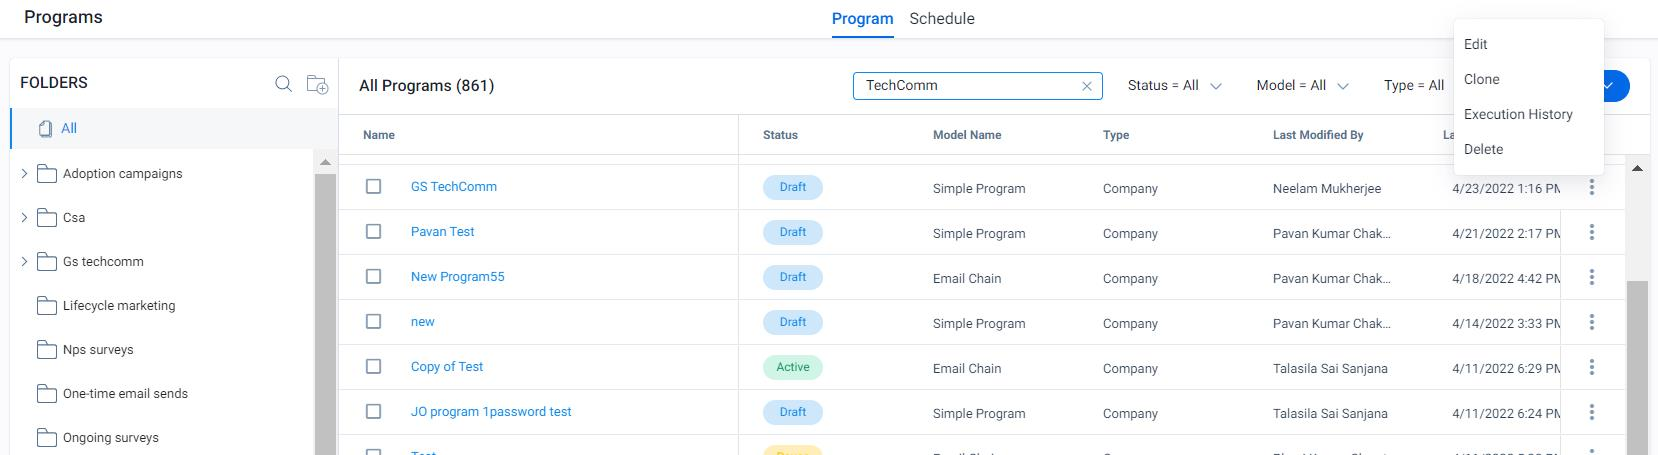
-
When you are in any specific parent or child folder, the three vertical dots icon displays the following options in the dropdown:
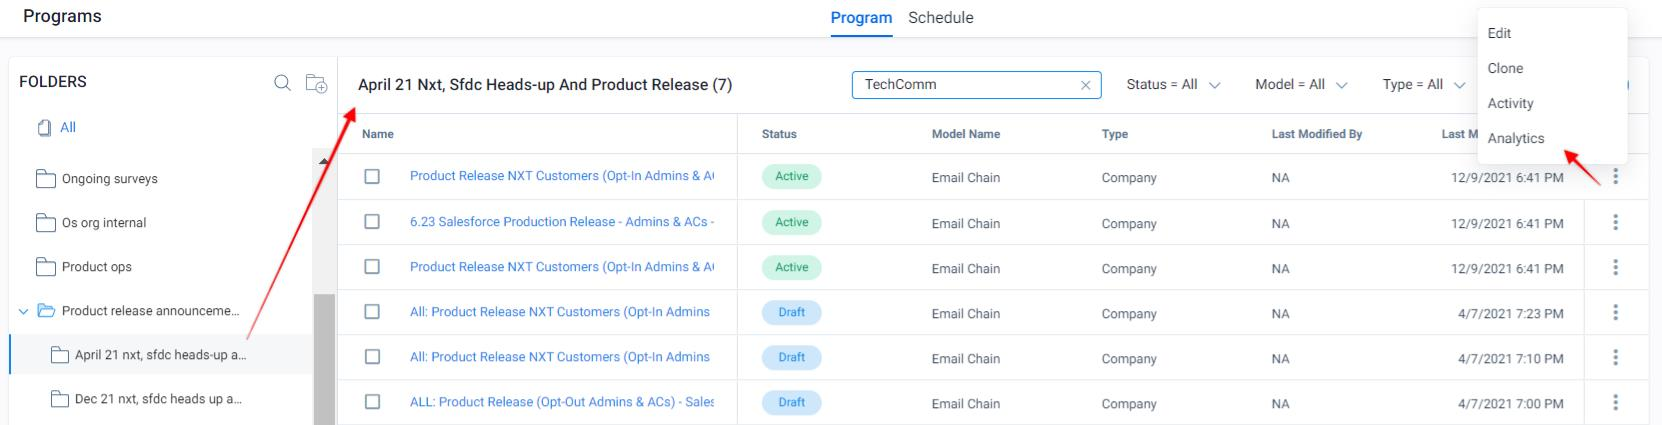
Note: Any program under any parent or child folder doesn’t have the Delete option in the three vertical dots dropdown.
Edit
This option allows you to edit the configuration of the program.
Analytics
This option navigates you to the pre-built analytic reports for that specific Program. For more information on Simple Program Analytics, refer to the Simple Program Analytics article from the Additional Resources section.
Activity
View an activity feed for each participant. The activity feed appears as a flow diagram and displays each step of the participant journey in the Program. This includes when the participant was sent an email, how long the participant waited between each step, their responses to a survey, as well as if/when the participant was dropped from the program journey, and the failure reason.
Clone
This option allows you to create a copy of the program with the same configurations. The clone will have the same sources, but you still need to sync participants and publish the program to make it active. The application does not allow you to edit the cloned program until the cloning has completed.
Delete
This option allows you to delete the programs.
Note: The Program with an Active or Paused statuses cannot be deleted.
Execution History
You can see the execution history of any program listed in the All Programs page . To see the execution history, click on the Execution History option for a specific program from the three vertical dots dropdown menu. The Execution History page appears.
-
Status: Identifies the status of the program. The various status are:
- In progress: The program is currently being executed.
- Successful: This status is displayed when the program is successfully executed.
- Failure: This status is displayed when the program fails to execute.
Additional Resources
For more information on Simple Program and related information, refer to the following articles: