Group Email Support in Simple Program
Gainsight NXT
This article explains how admins configure and send group emails to their customers via Simple program in Journey Orchestrator.
Overview
Admins can send messages to groups of participants who belong to the same company or relationship as part of a scheduled Program. Additionally, the contact limit for both the To and CC fields has been increased. After selecting Email as the Action and Operational Email as Template Type, an optional checkbox called Send as Group Email is displayed.
When participants belonging to a company would receive an email in group, it allows all participants to view the same details mentioned in the template.
Participants who are tagged in CC, would also receive further email responses from the entire group in a single thread.
Limitations
- Group email is supported only in Simple Programs and only on companyID (or) relationshipID
- Non-operational email types are not supported for grouping emails
- Once the program is published, the Action type cannot be changed
Send Group Emails via Simple Programs
To send Group Emails via simple programs, perform the following four steps:
Create Simple Program
- Navigate to Digital Journey > Programs.
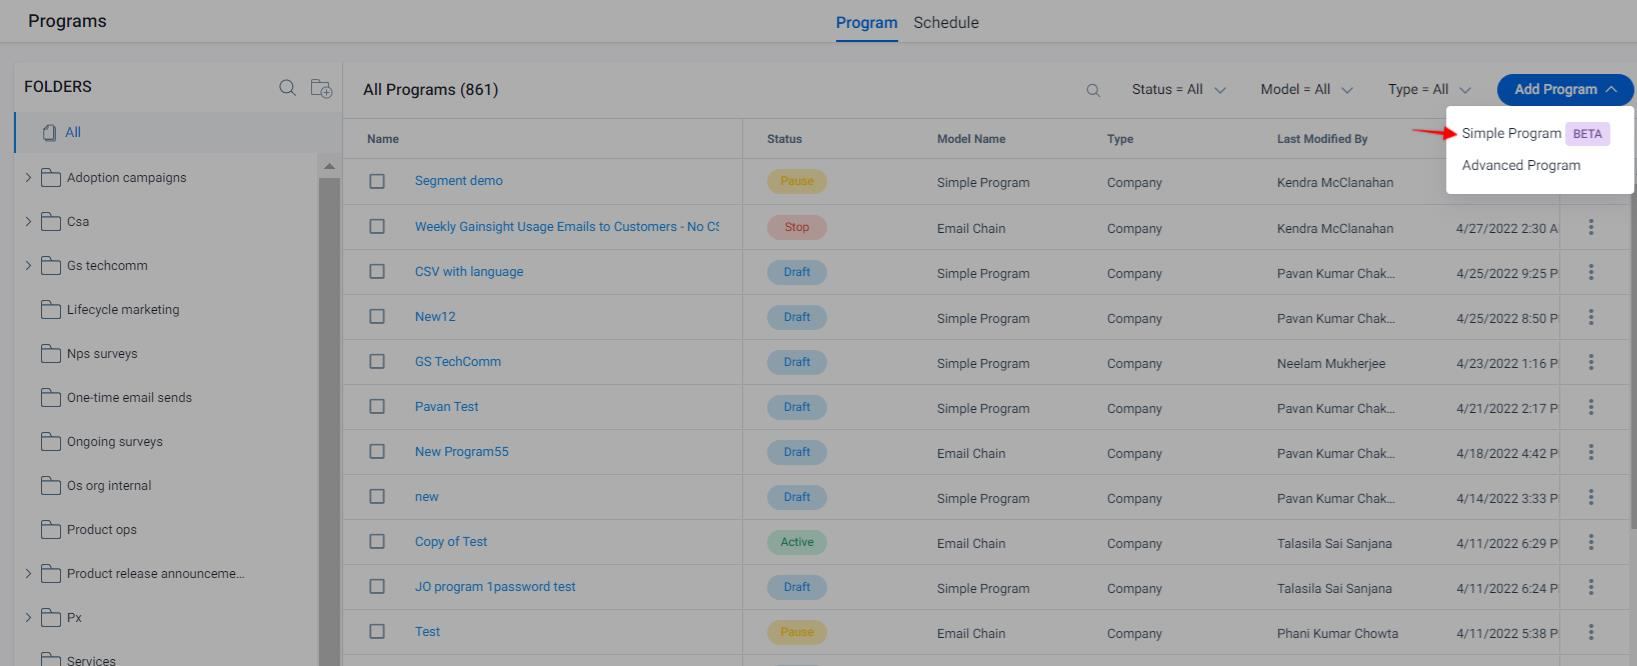
- In the Program tab, click Add Program.
- Select Simple Program from the dropdown menu.
- Provide the details in the New Simple Program dialog box.
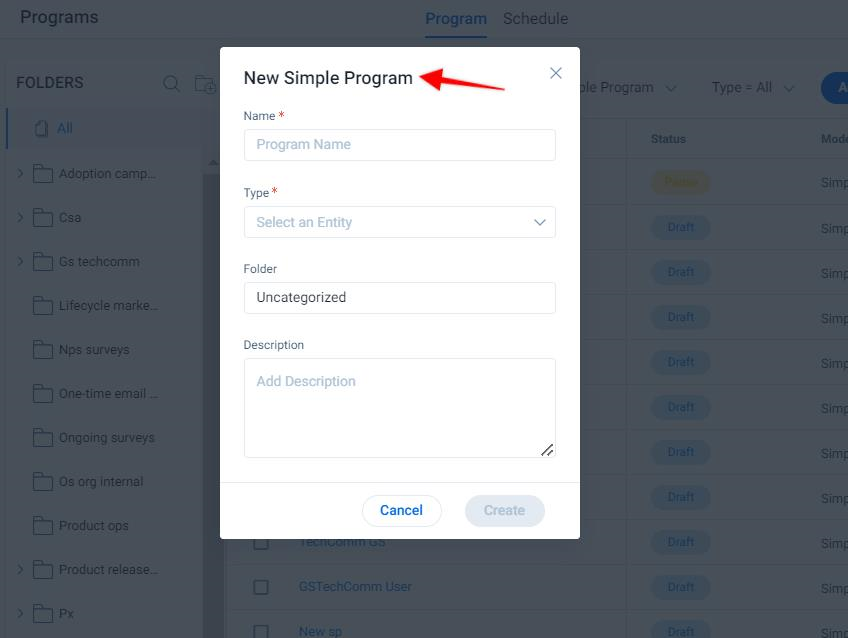
- Click Create. The Participants tab appears.
Add Participants
-
Select the newly created Simple Program (here, it is TechComm) > Participants. The Participants tab appears.
-
From the Source drop-down menu, select the source type (here it is Segment which is used as the participant source, CSV can also be uploaded as the source of participants).
-
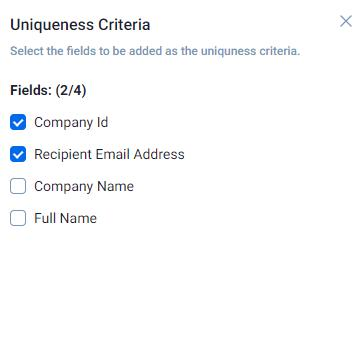
Click Update to set the uniqueness criteria.
-
Select the checkboxes for the Company Id and Recipient Email Address fields.
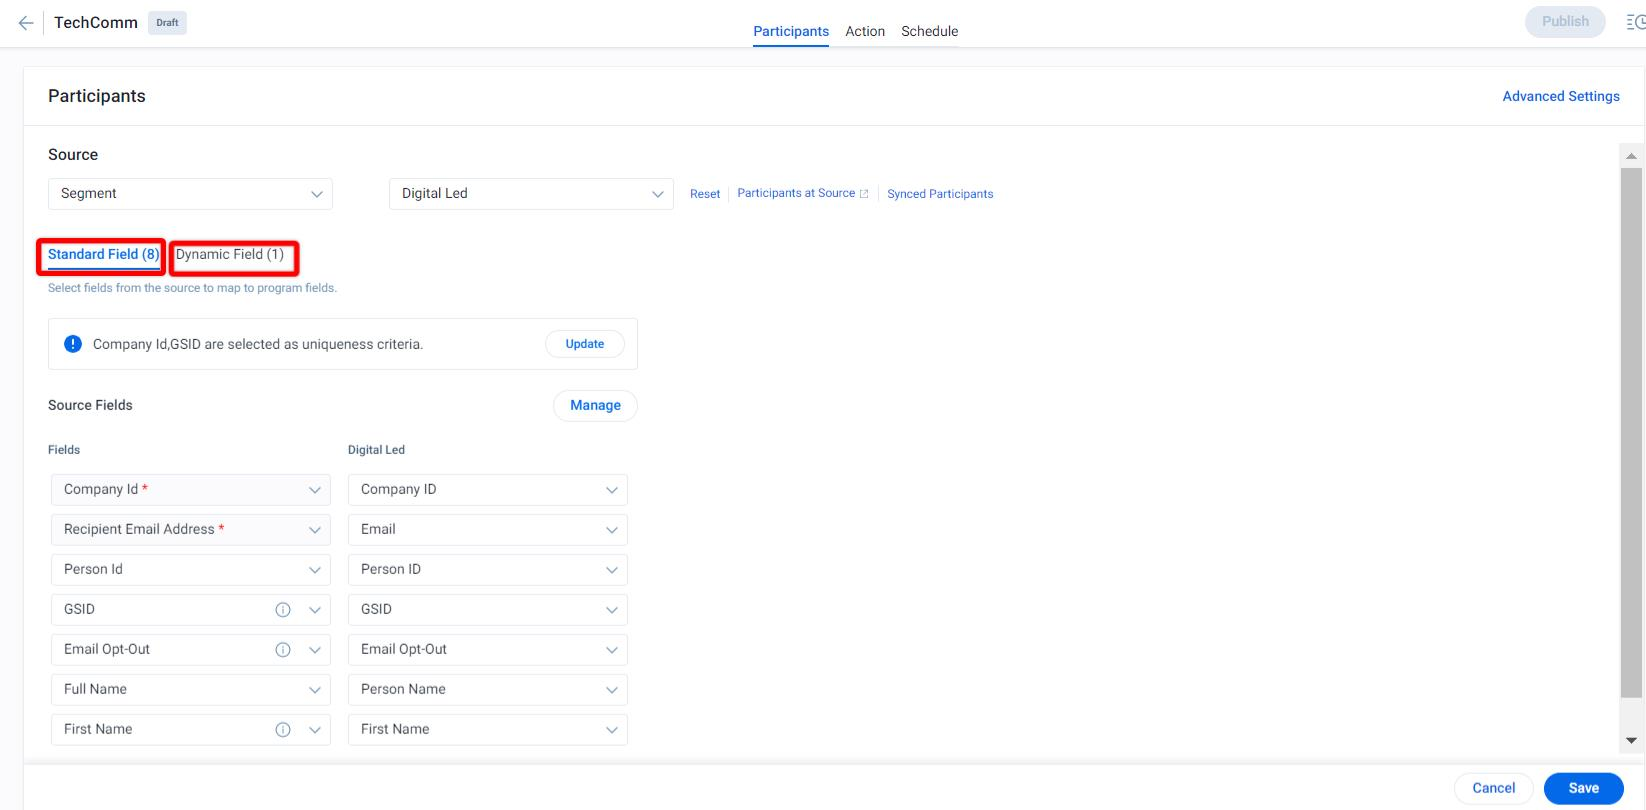
- Select fields from the source to map data from a participant source to any relevant Standard Field and Dynamic Field.
Note: You can select both Standard and Dynamic fields as tokenization options in the email step.
-
Click Advanced Settings to provide several options to define further how Participants are filtered and added to a Simple Program. You can even upload a .csv file containing email addresses which you want to exclude from the program.
-
Click Save.
For more information about Participants Configuration, refer to the Add Participants to a Simple Program article listed under the Additional resources section in this article.
Configure Template
To access the group email option, you need to perform the following steps.
-
Select Email as the action type.
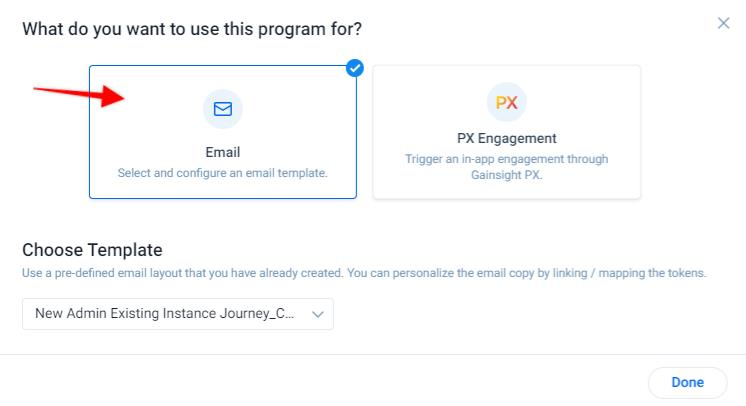
As soon as you click Email, the Choose Template option containing the pre-defined email layout appears.
-
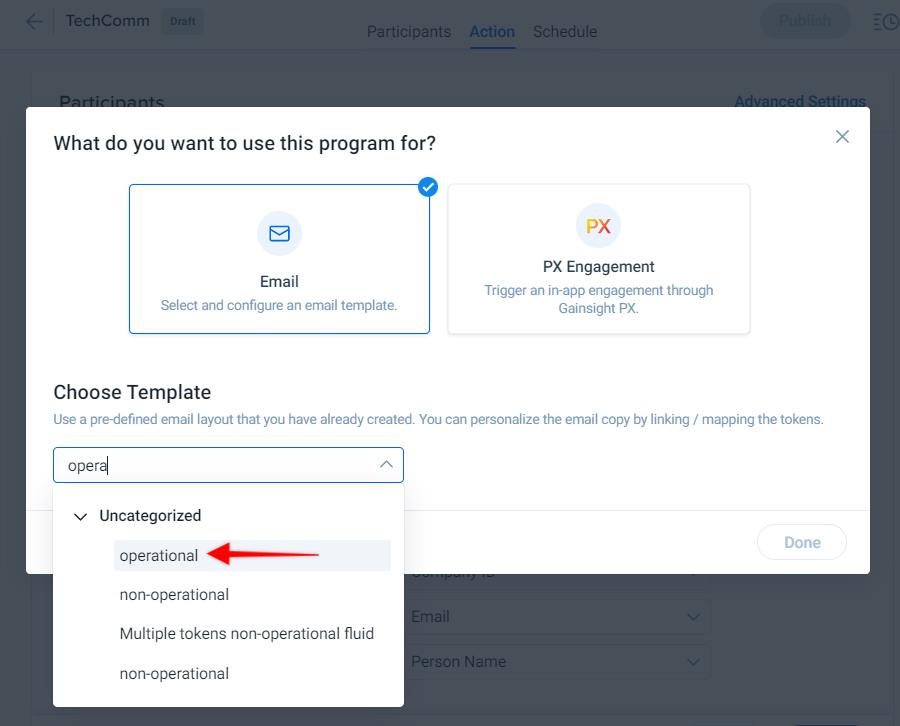
From the dropdown menu, select Operational as email template type. For more information, refer to the Operational Email Guidelines article listed under the Additional Resources section.
-
Select the Send as Group Email checkbox.
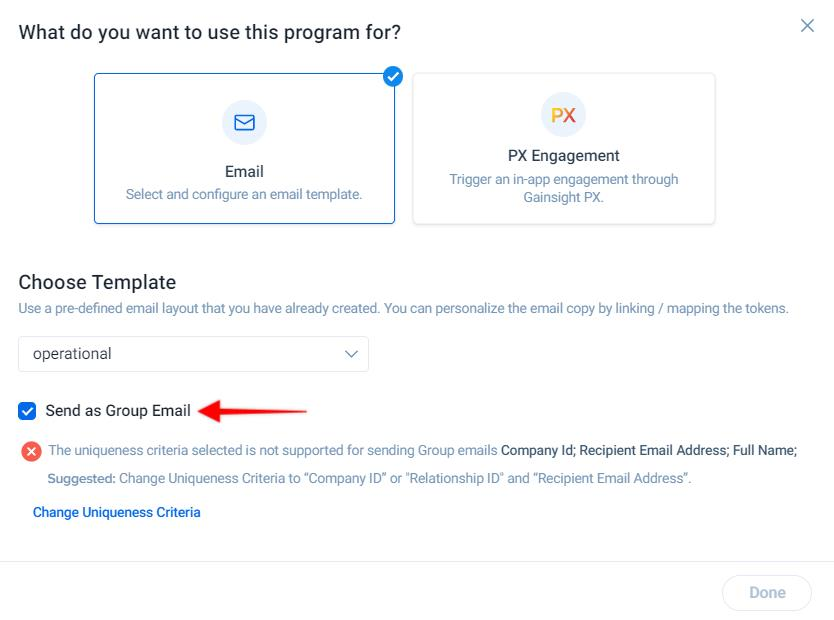
IMPORTANT: While mapping participants, ensure that the uniqueness criteria is ‘companyID’ or ‘relationshipID’ and recipient email address. You might encounter the following error if these fields are not selected as soon as you select the Send Group Email checkbox while setting action.
Notes:
- When bulk emails are sent and if CSMs want to receive email replies as separate threads from recipients, ensure the Send as Group Email is unchecked.
- Separate email threading experience is applicable as follows:
- Applicable only when Send as Group Email is unchecked.
- Supported on Outlook and Gmail.
- Applicable to responses received from the recipient marked in the ‘To’ field. Email replies from different recipients will be no longer threaded together.
- Not Applicable for recipients in the CC and BCC fields.
- Not Applicable for the Out of Office auto-reply emails.
You can update the uniqueness criteria from this location just by clicking Change Uniqueness Criteria.
-
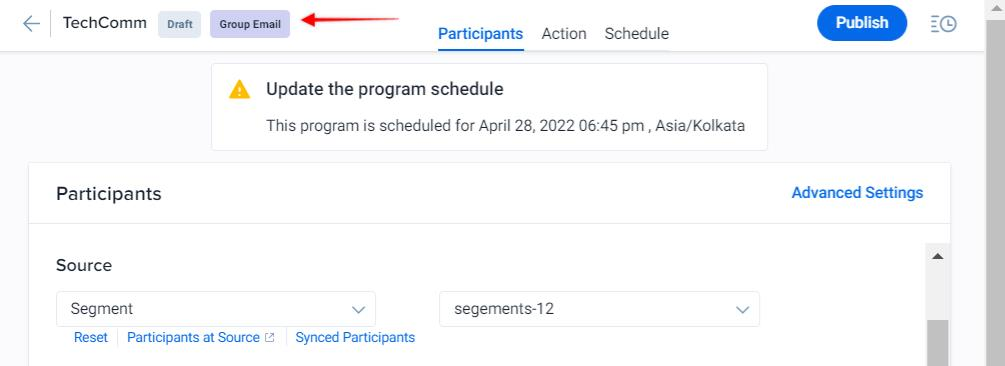
Click Done. The simple program now has the Group Email stamp added beside its name as shown in the following image.
Set Action
In Advance Program, To is editable but in Simple Program > Group Email the To field is not editable. Instead there is an embedded message conveying that the recipients belonging to the same Company / Relationship will receive the same email and will be grouped together.
To set the action,
-
Under Header, the To field is auto populated (Recipients Email Address).
-
In the From field, Select the name and provide the email address for From and Reply To fields.
Note: In the From field, you can see the fields which are mapped in the Participants tab. Whereas for non-operational emails participants ID.

-
Click CC. Maximum of 30 email addresses can be added in CC.

-
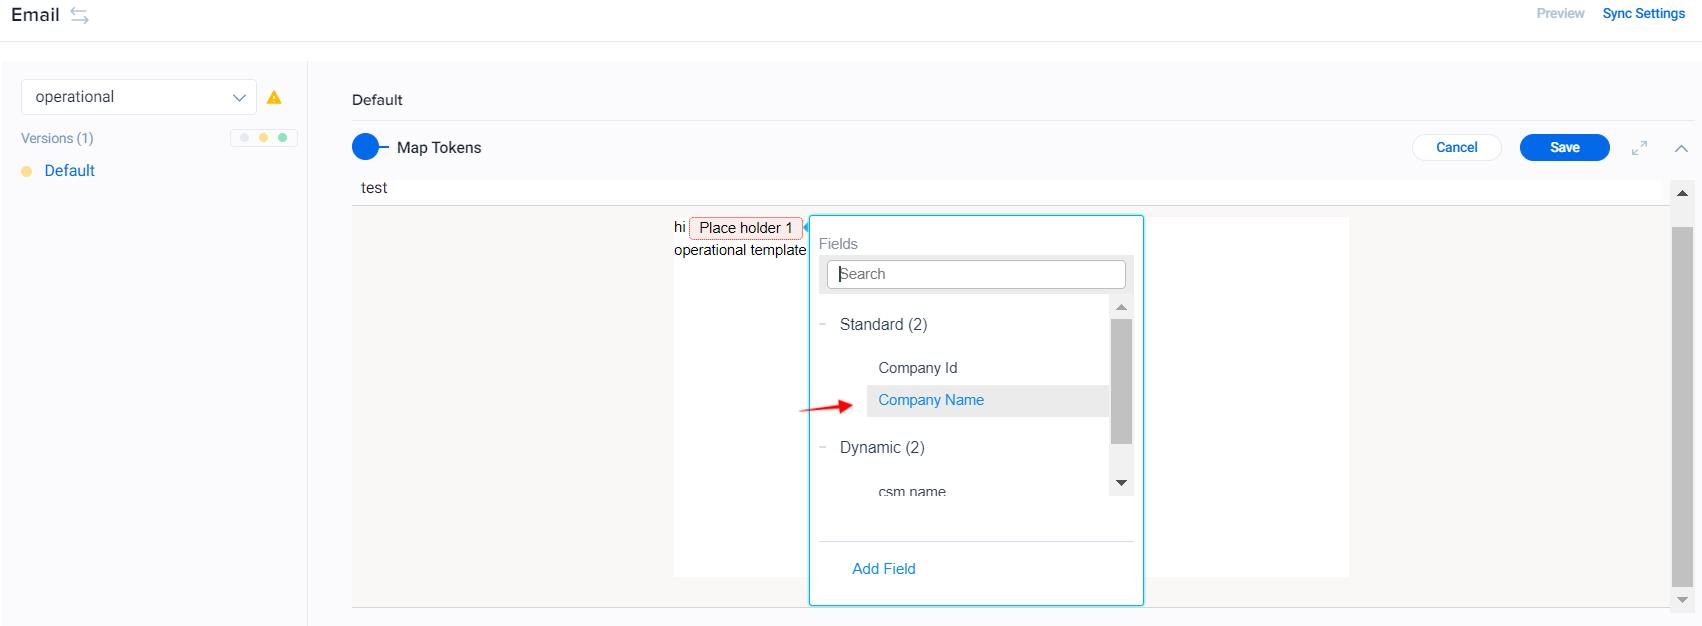
Select Company Name for tokenization.
-
Click Save. The token is mapped.

-
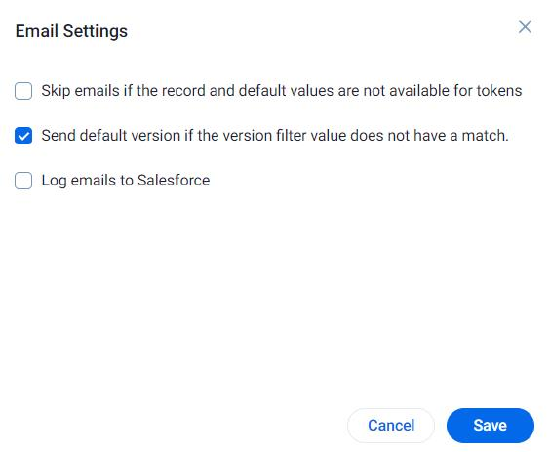
Click Sync Settings to select or deselect the following checkboxes as you require.
Note: “Log Emails to Salesforce” option in the Sync Settings is only available when logged into Gainsight through Salesforce.
-
Click Save.
-
Click Preview.
-
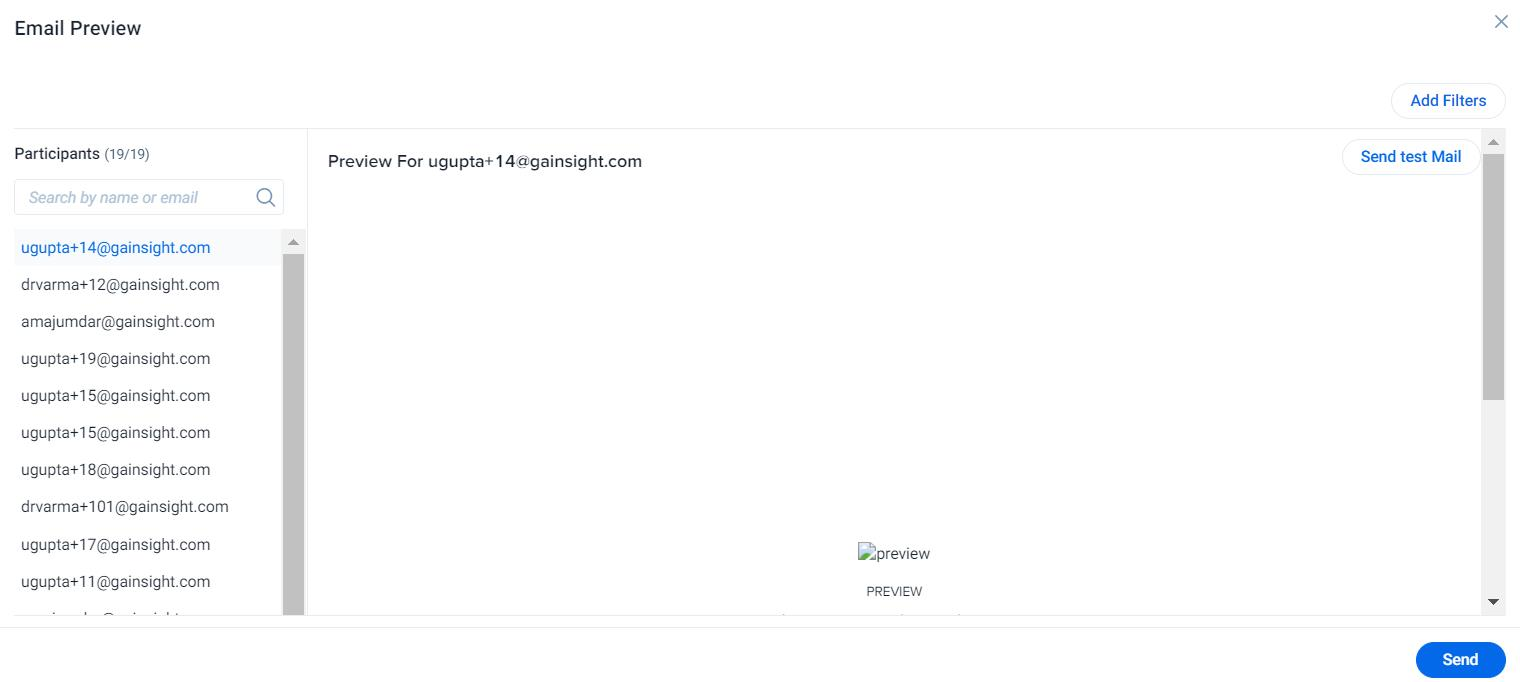
Check the list of participants in the Email Preview window.
Note: You can add filters and send test emails to ensure that the template appears correctly in the recipients’ email.
-
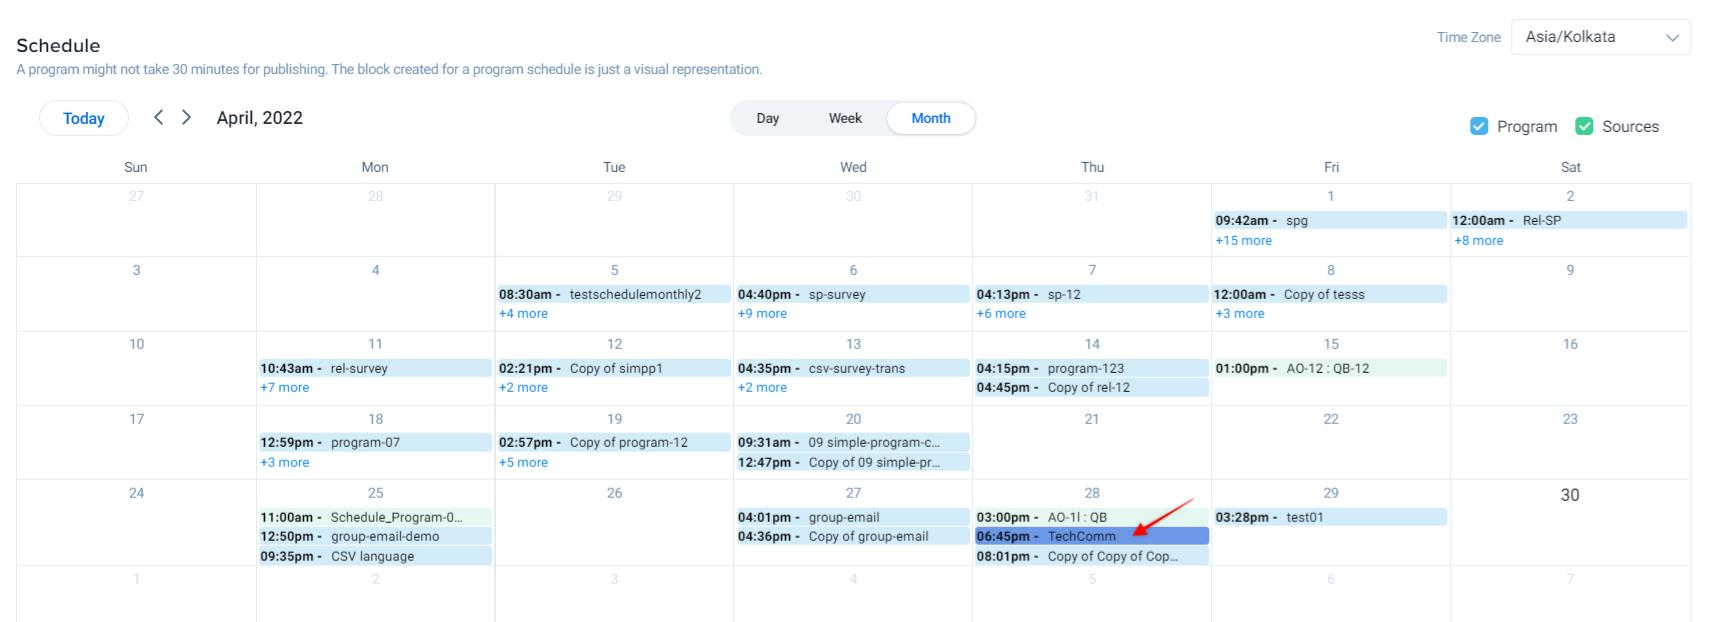
Click Send. You can also schedule this email to be triggered on a given date.
-
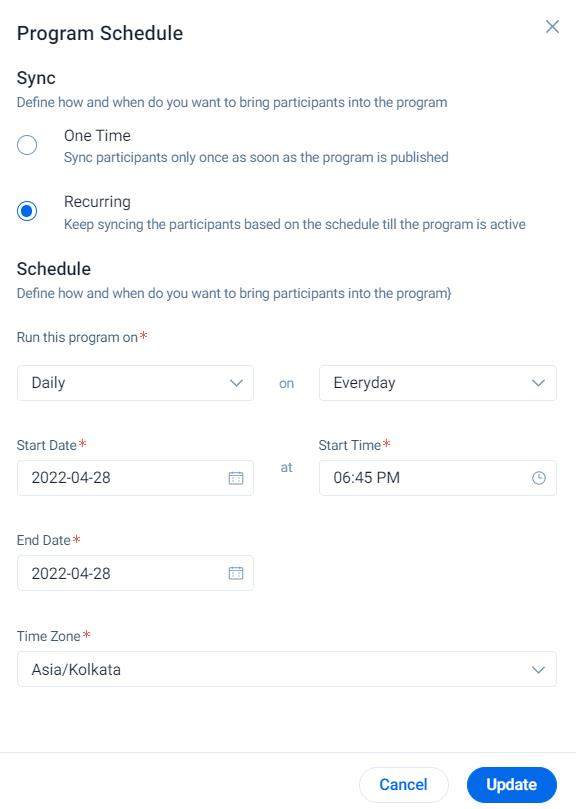
Click on the particular schedule to modify the schedule further.
-
Click Update.
-
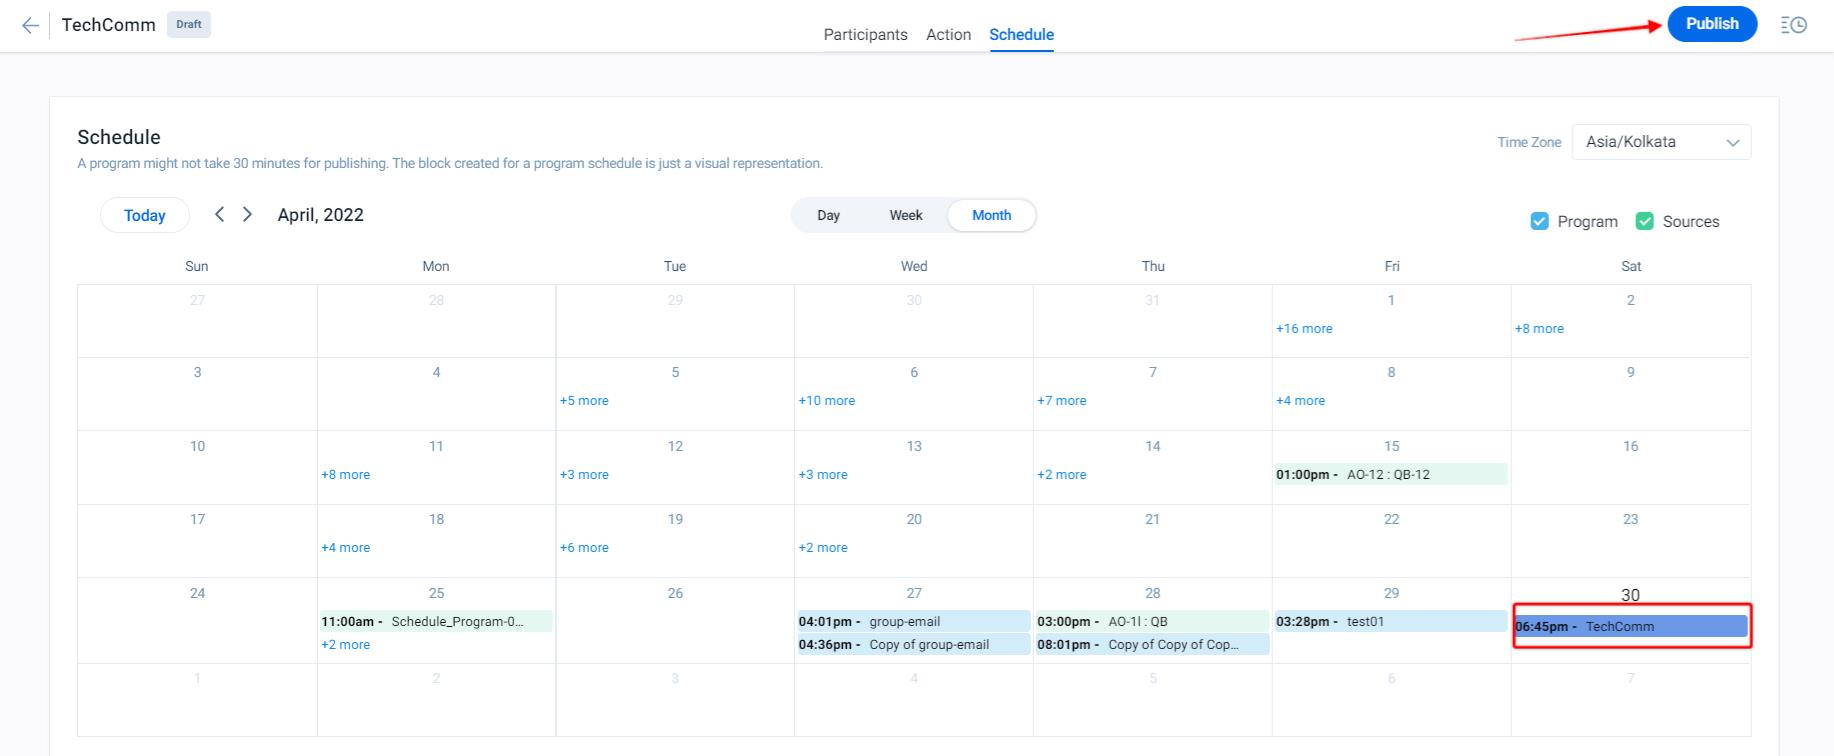
Click Publish.
For more information about Group Email analytics > snapshot, refer to the Simple Program Analytics article listed under the Additional resources in this article.