What's New in Email Assist 2.0
Gainsight NXT
This article provides a quick overview of the new capabilities, design improvements, and changes in the new Email Assist 2.0.
Overview
Email Assist 2.0 is an enhanced version of Email Assist which is powered by Gainsight Horizon Experience. The enhanced version contains new functionalities and improved existing functionalities that provide better user experience. Gainsight ensured to bring all the improvements without major changes in the functionality for a smoother transition to the new user interface.
New Features
Gainsight brings the following new features in Email Assist 2.0.
Organization Wide Email Address
Gainsight users can choose From and Reply-to addresses from a list of email addresses that an admin configures.
Example Business Use Case: When a user needs to send an email on behalf of the team, the admin can grant them permission to use the team's organization-wide email ID. This shared email ID is associated with user groups (pooled workflow) commonly used by digital or scaled customer success teams. It enables users to send emails with the team’s email address in the From/Reply-To fields, instead of using individual personal email addresses.
To activate this feature:
- Navigate to Administration > Email Configuration
- Turn ON the toggle in the Organization-Wide Email IDs section.
Note: The Organization Wide Email Addresses feature is deactivated by default. - Click Add Organization Wide Email ID. The Organization Wide Email ID window is displayed.
- In the Organization-Wide Email ID field, enter the alternate email address.
Note: The Organization Wide Email ID can be selected in From/Reply to Address - In the Allowed Users field, enter the name of the user(s) who are allowed to use the Organization Wide Email ID.
Note: Only users with a Full Gainsight license can be added in this field. - Click Save or Send for Approval.
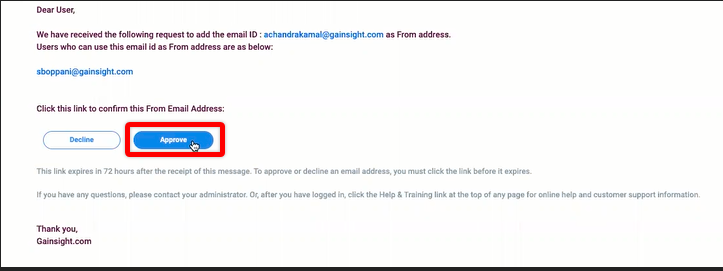
- A confirmation email is sent to the owner of the email id to approve it as Organization Wide Email ID. In the email, the owner can:
- Click Approve to associate the email address with the users.
- Click Decline to cancel the request.
IMPORTANT:
- Once a request is Approved, users can send emails using the Organization Wide Email ID.
- If the request is Declined, the status of the email id is set to Declined. However, a Resend option is enabled to request the owner again.
- If the email owner wants to modify or delete the allowed users, they must contact the admin.
- The approval request link will be active for 72 hours. If it expires, the admin needs to resend the request from the Email Configuration page.
Support of Email Log V2
Email Assist 2.0 also supports Email Log V2. Gainsight users can receive sent email history from both Journey Orchestrator and Email Assist.
Email Log V2 has an Out Of Box (OOB) attribute - Source, which can be used to filter out emails based on the source of the email.
Enhancements
With the new Email Assist 2.0, you can find the following enhancements when sending emails.
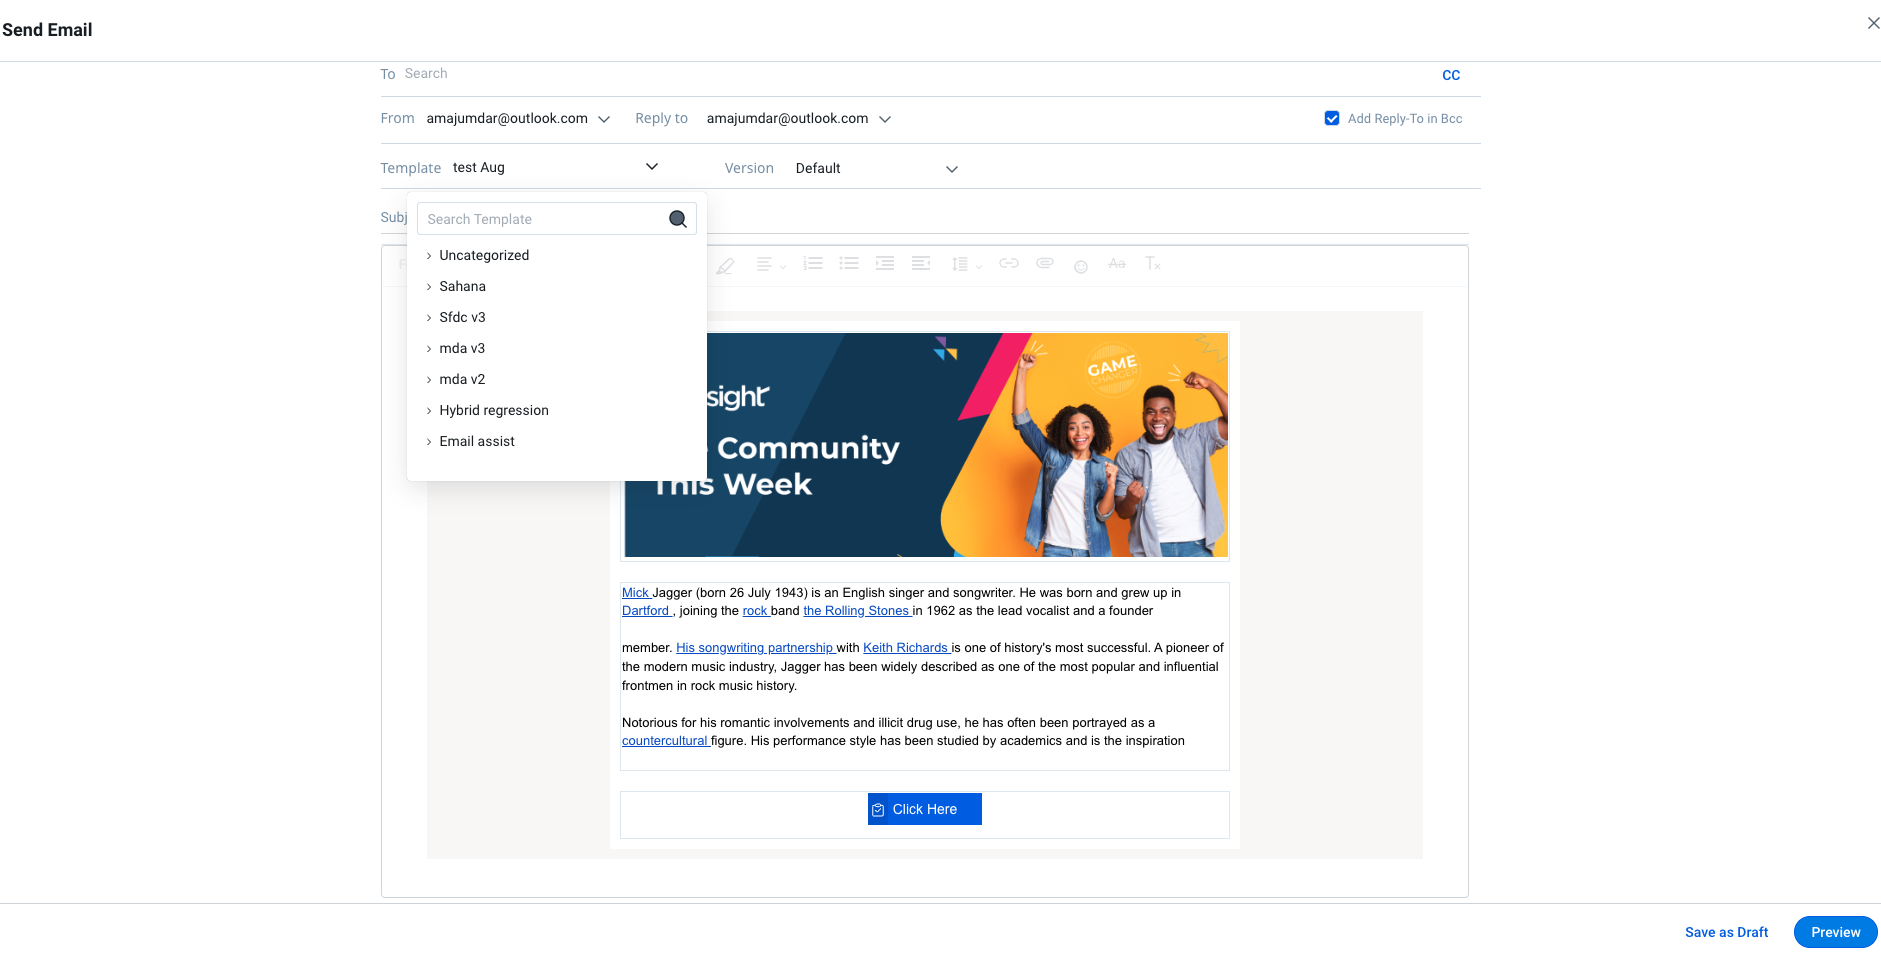
Folder Hierarchy for Templates
The Send Email shows templates in folder categories in the Template dropdown.
Email templates are sorted under the respective folders which makes it easy to identify the required email template.
Edit/Delete Tokens
The Edit and Delete functionality of Tokens is simplified. Earlier, to Edit or Delete a Token, users were required to hover over the Token and select the Edit/ Delete option.
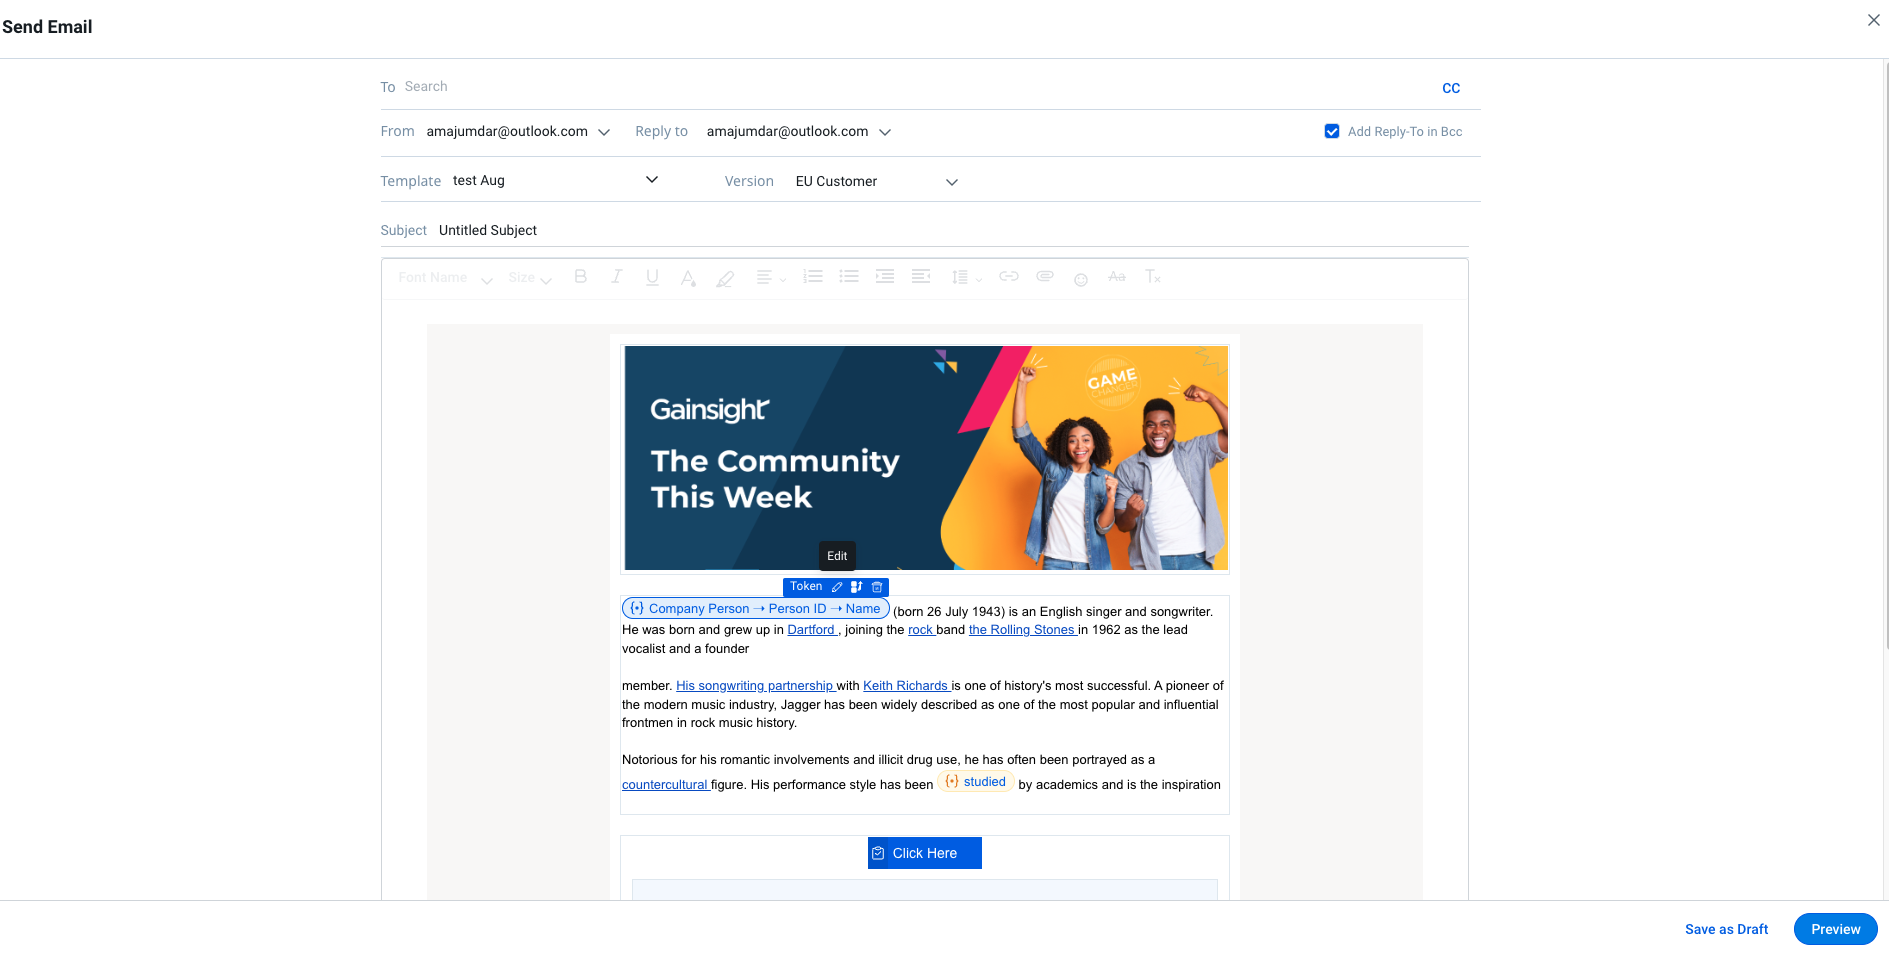
In Email Assist 2.0 To edit a Token:
- Click on the Token. The Edit Token Properties window is displayed.
- From the Select Mapping dropdown, select the required mapping.
- Click Update.
Note: To delete a Token, click x next to Token.
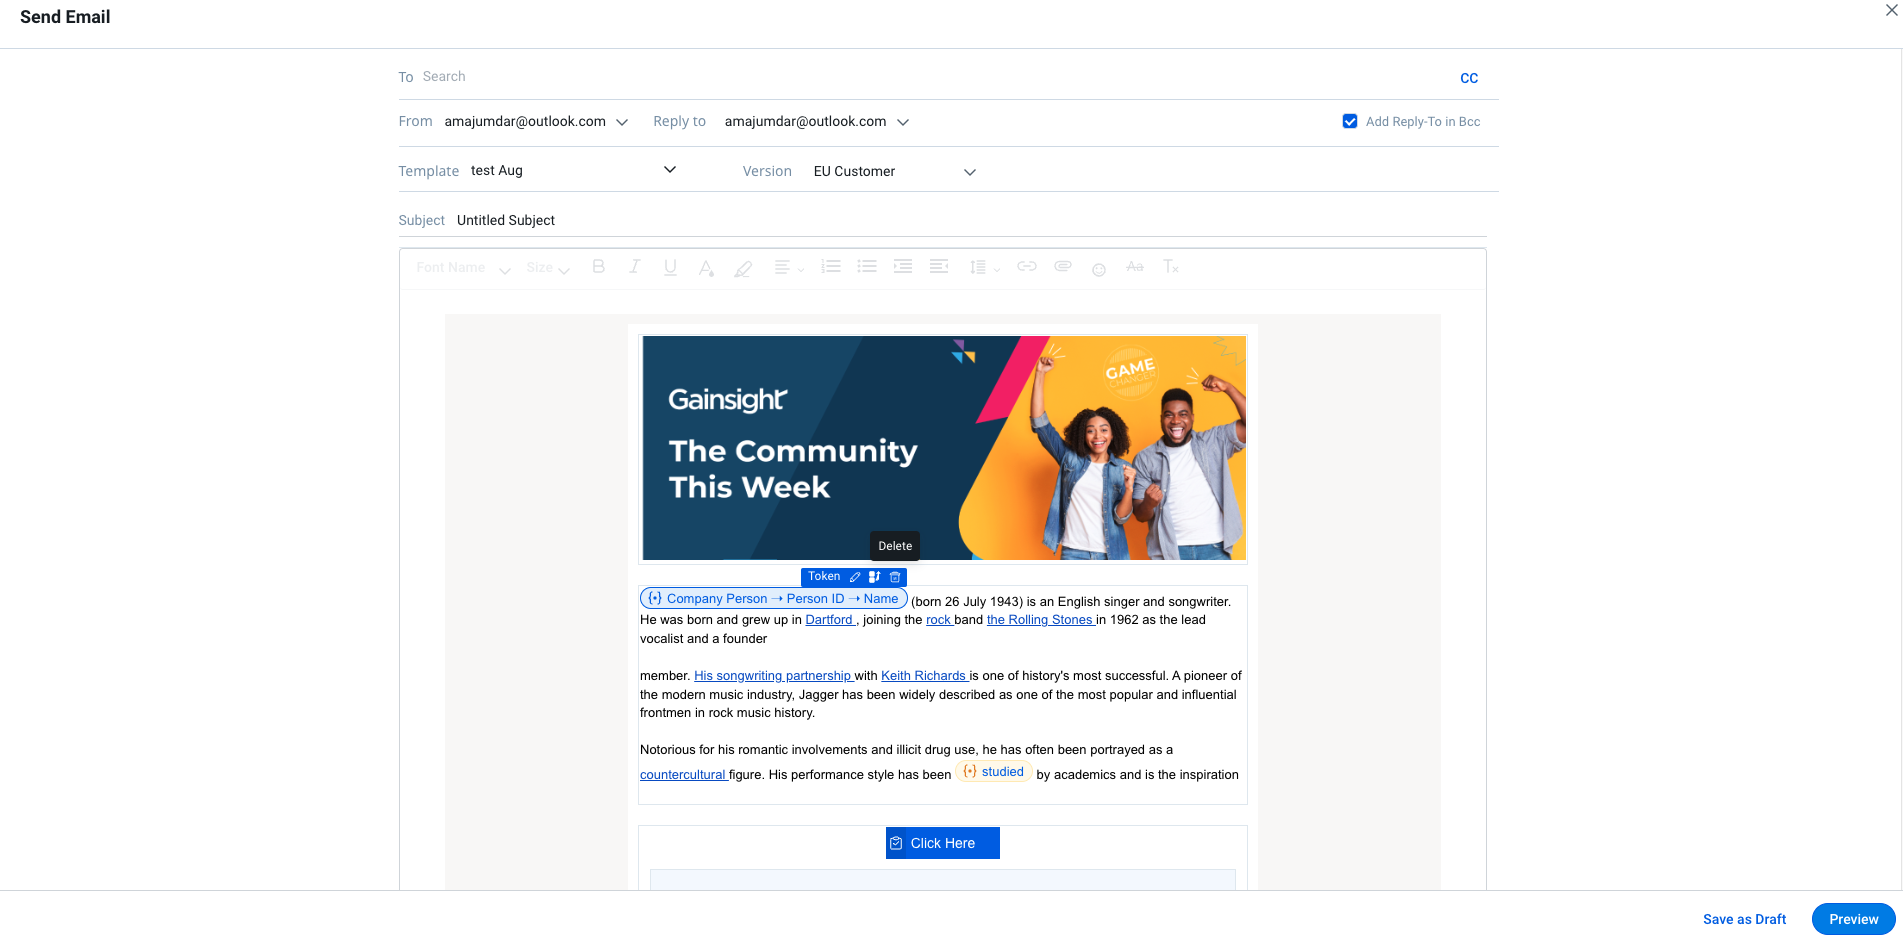
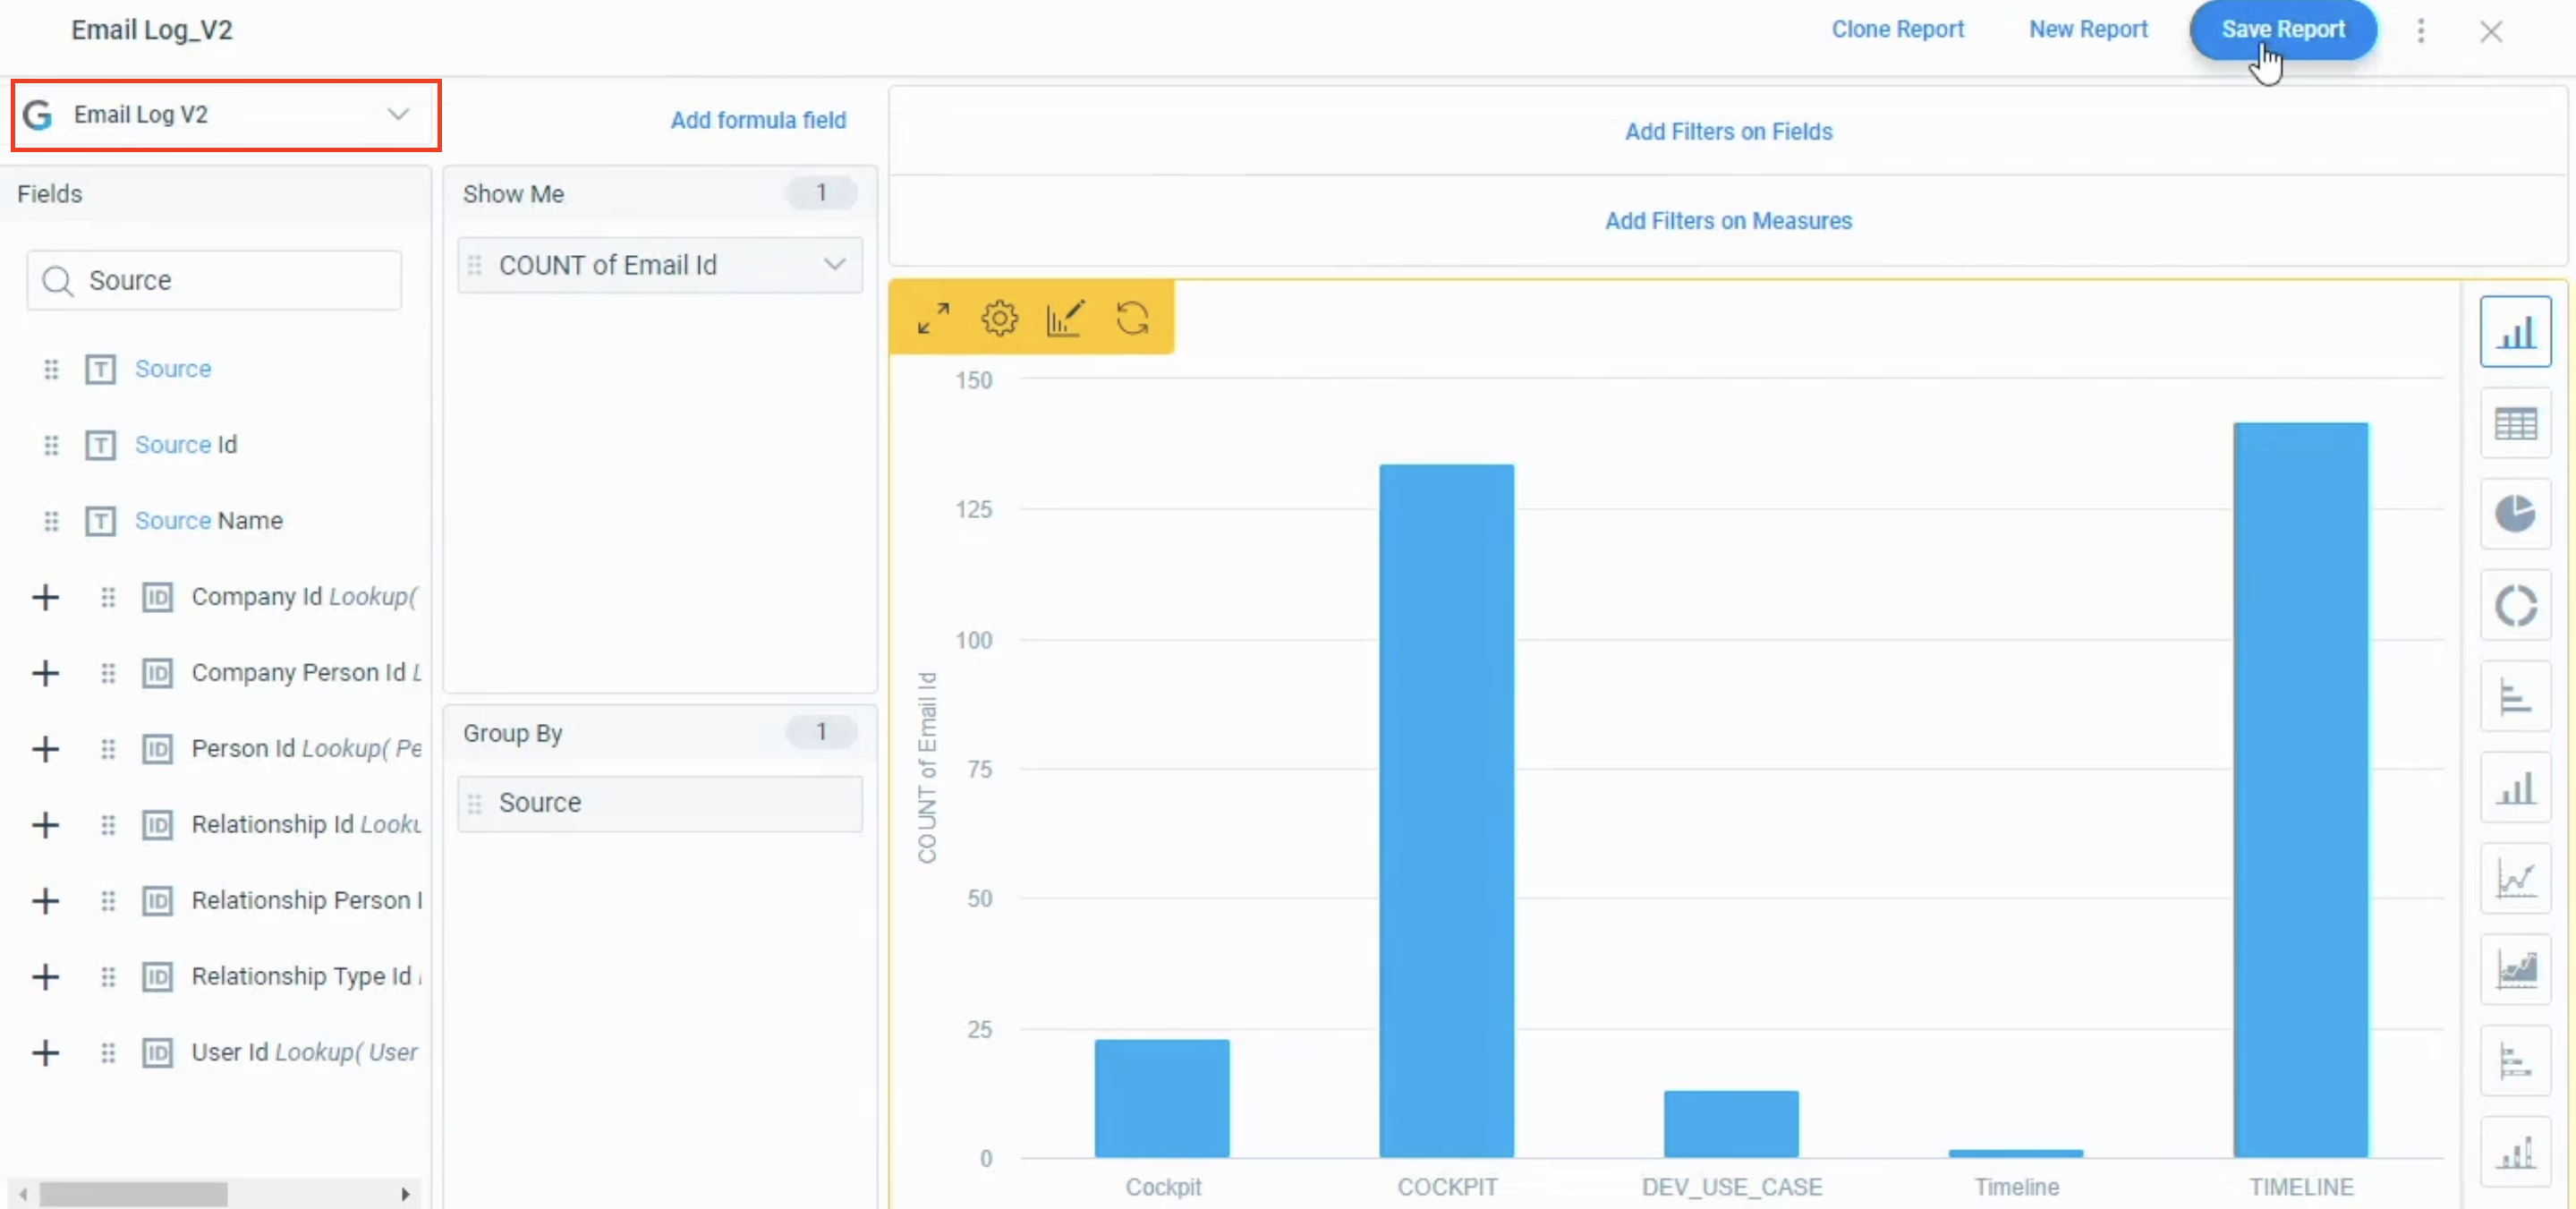
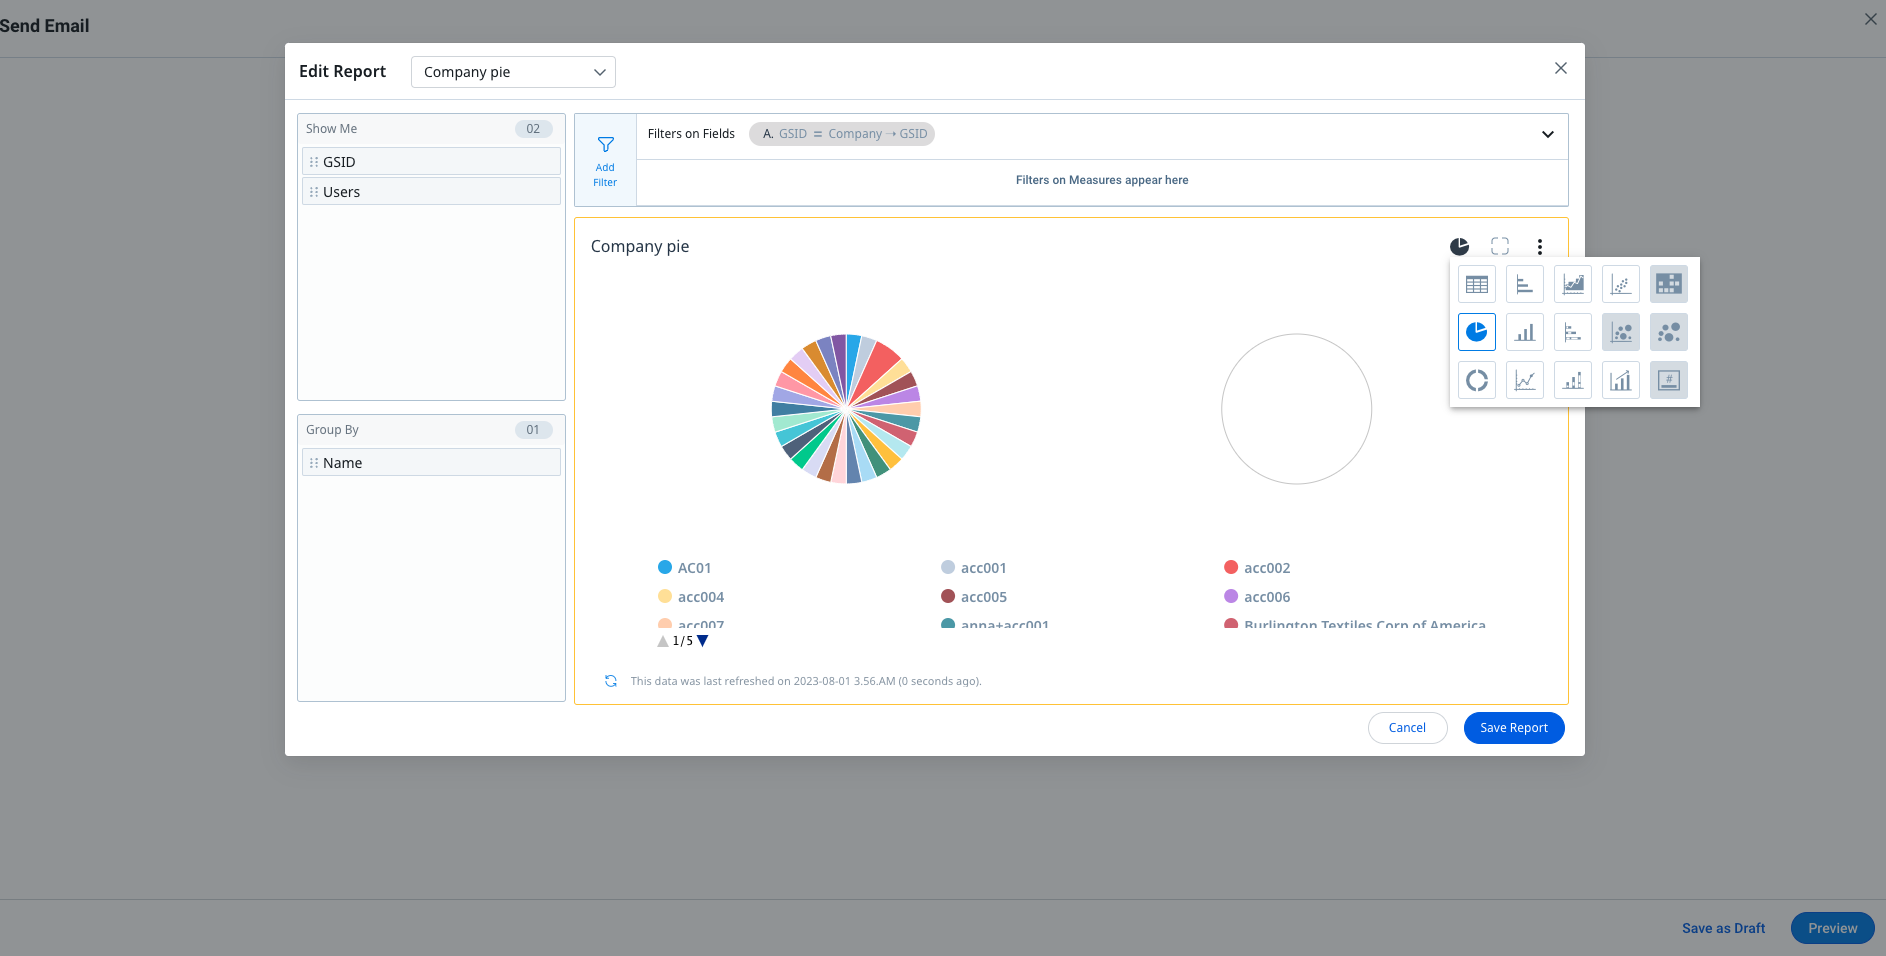
Report Tokens
Report tokens now show the type of chart visualizations used in the report. With this new enhancement, you can edit or delete the report tokens from the Send Email Window.
To Edit the Report token:
- Click Edit on the report token. Edit Report window appears.
- Modify the report. Click Save Report.
For more information on types of visualization used in Reports, refer to How to Build Basic Reports article from Additional Resources.
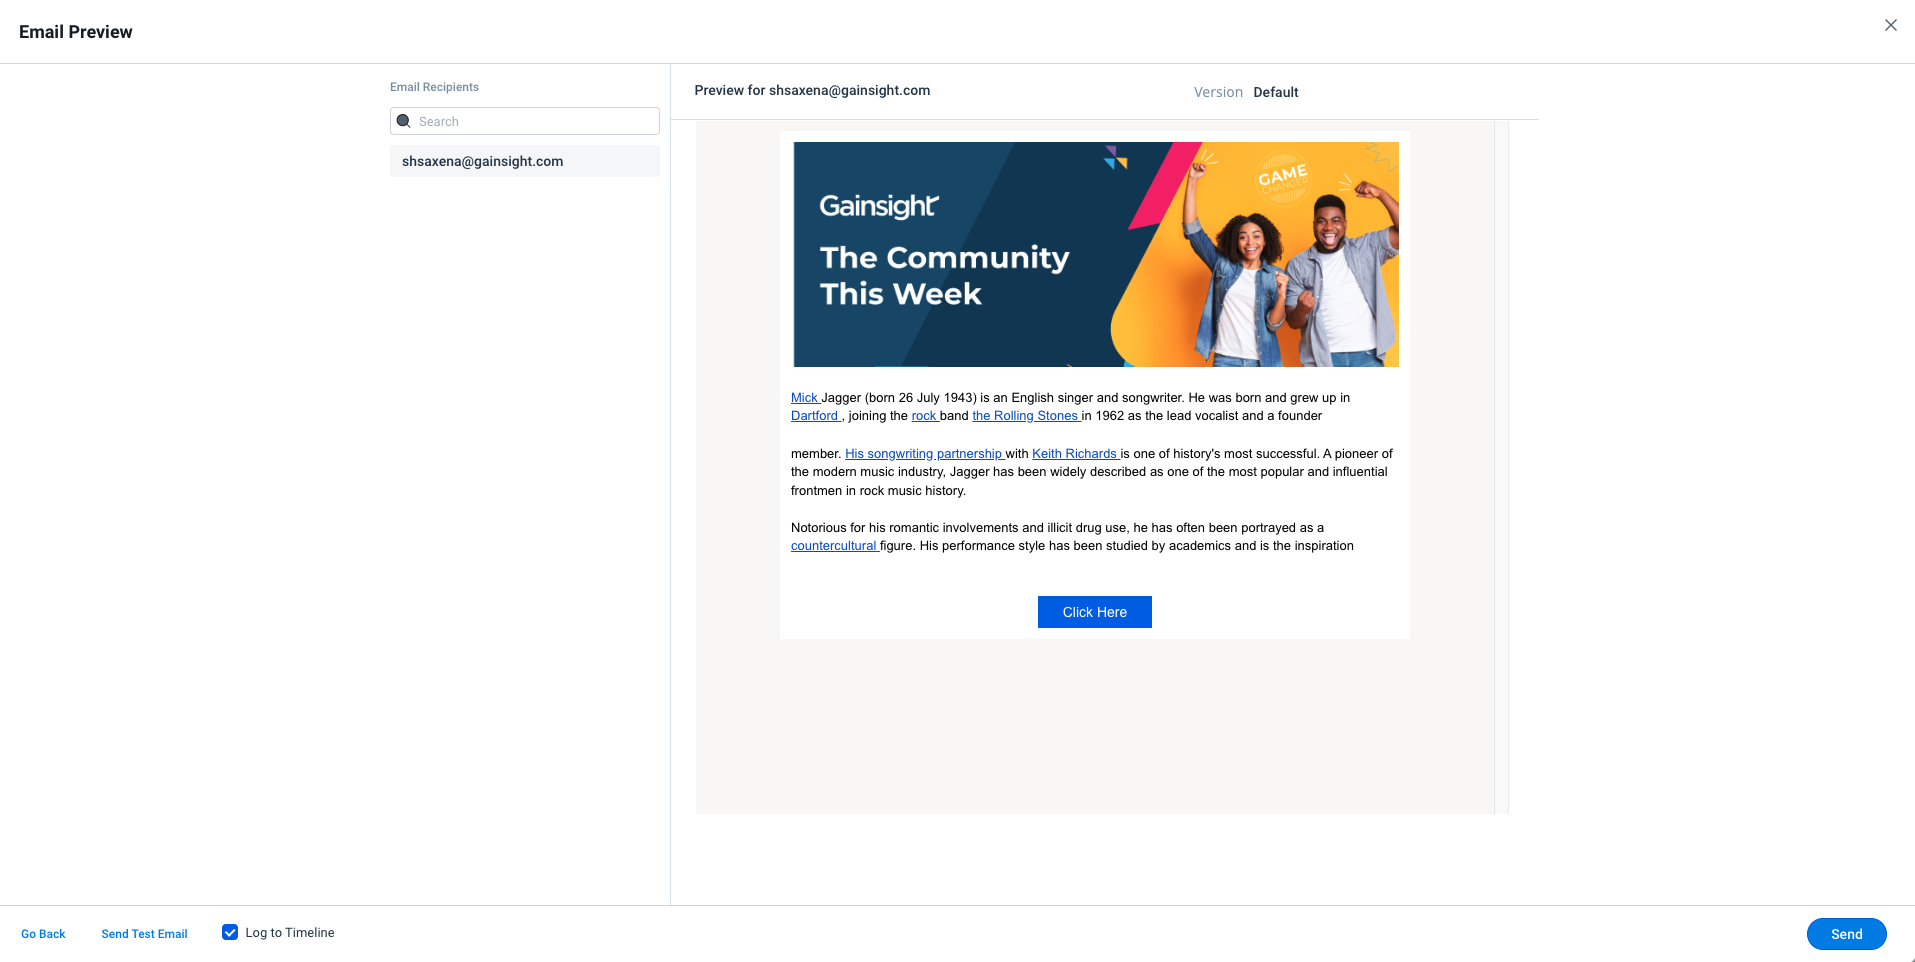
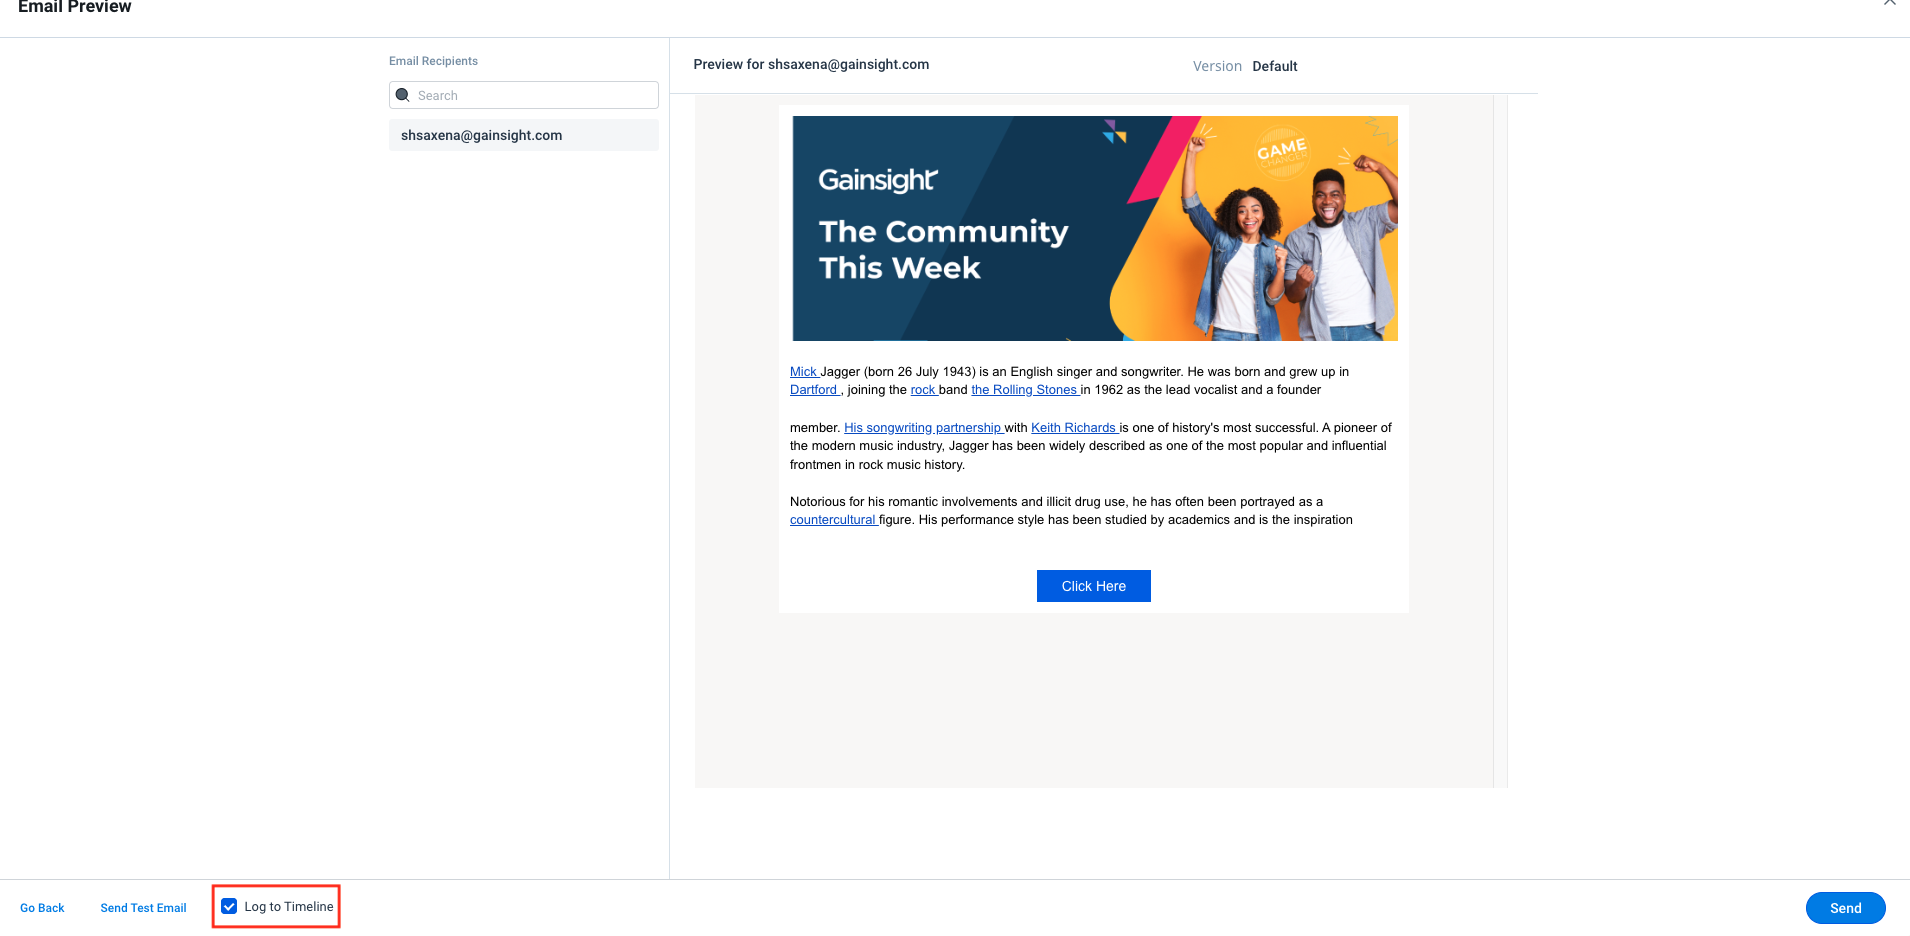
Simpler Way to Preview Emails
Previously, users had to preview all the emails for the number of recipients added in the To Address before enabling Send option. The simplified version of Preview provides an option to send an email by previewing email content for one or all recipients.
To preview an email:
- Click Preview in the Send Email window. The Email Preview window is displayed.
Note:- The left pane in the Email Preview window displays the recipients added in To Address.
- You can review the email for each recipient in the left pane by selecting the recipient.
- In the Search field, enter the email id to preview the email content for a recipient.
- Click Send.
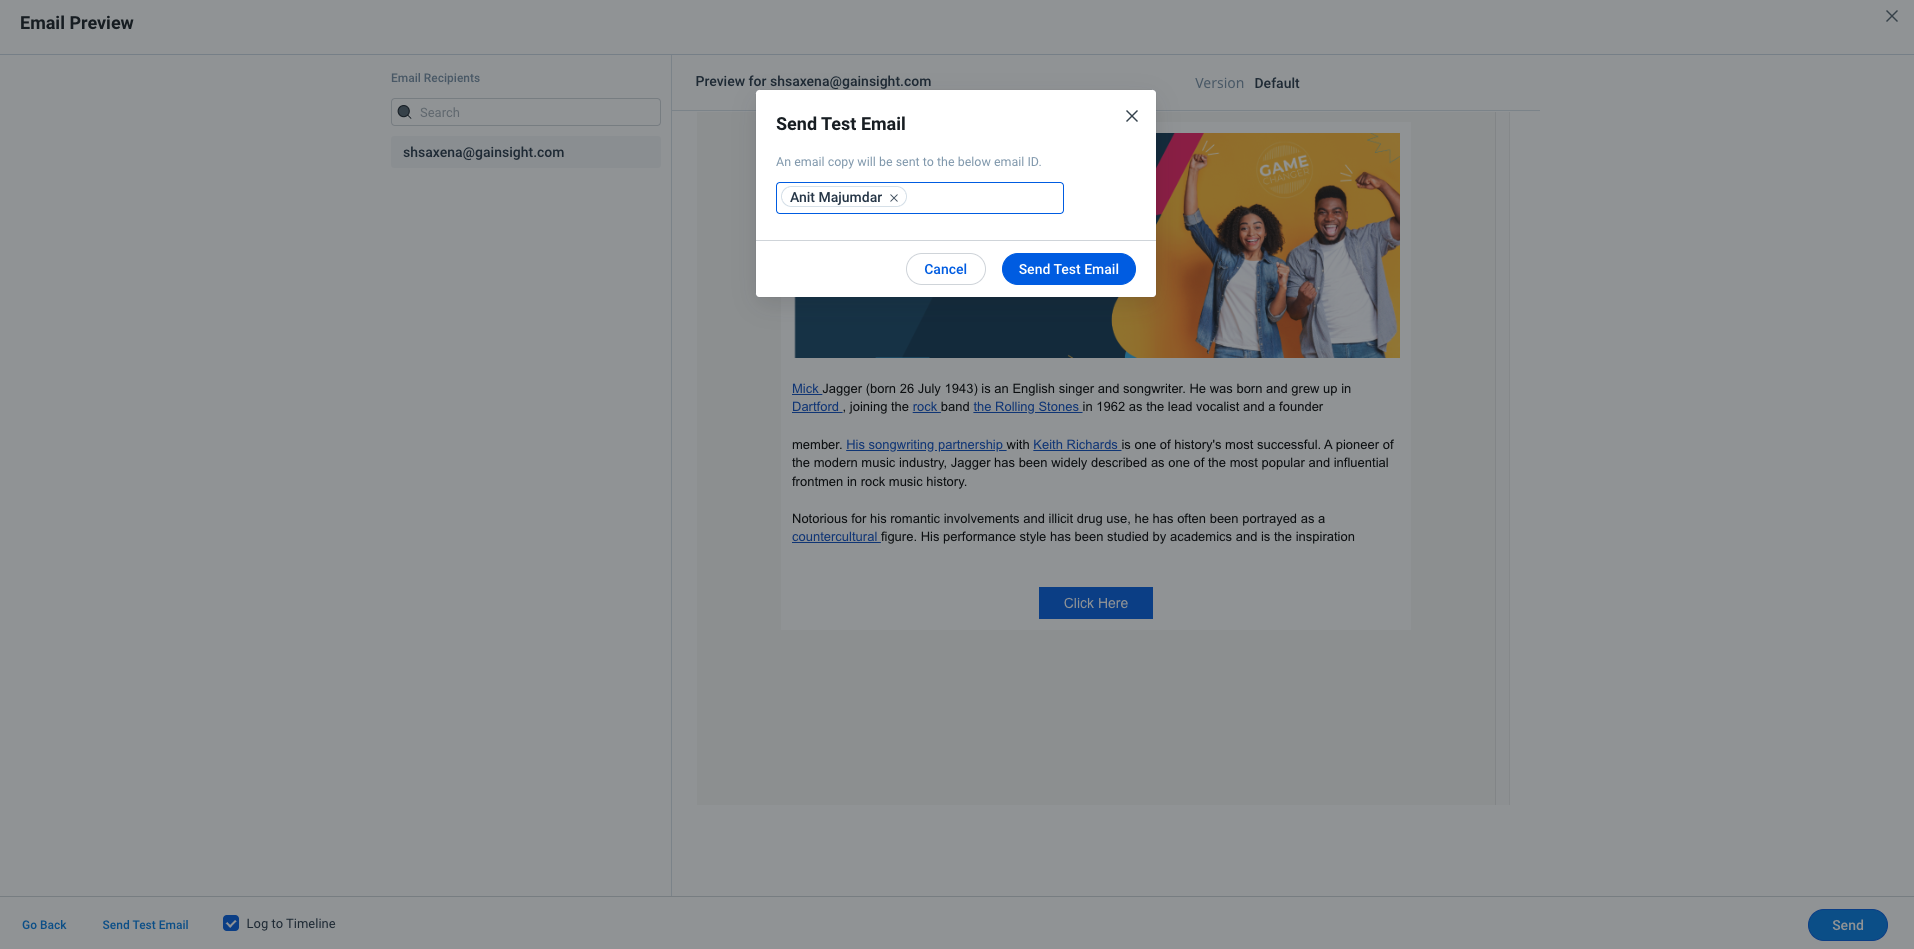
Send Test Email
Gainsight has enhanced this feature to provide an option of changing or adding additional recipients for sending a test email. Earlier, Test emails could only be sent to a default recipient.
To send a test email:
- Click Send Test Email on the Email Preview page. The Send Test Email window is displayed.
- Enter the recipient's email ID.
Note: To remove the email ID, click x next to the email ID. - Click Send Test Email.
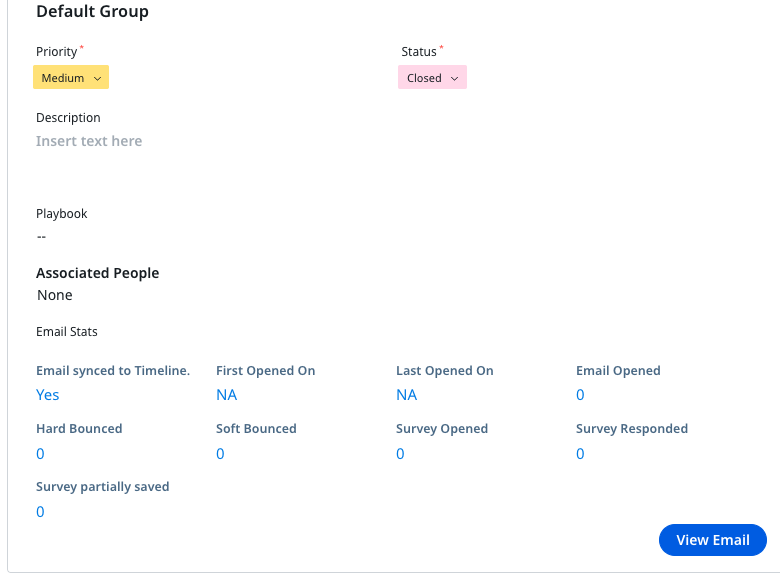
Email Stats
In the Task Detail View, you can view the enhanced Email Stats. The Email stats displays the following information:
- First Opened On: The date on which the email was first opened.
- Last Opened On: The date on which the email was last opened.
- Opens: The total number of times the email has been opened.
- Hard Bounced: The number of times the email was returned to the sender because the recipient’s address is invalid.
- Soft Bounced: The number of times the email was not sent as it was temporarily denied by the recipient’s email servers. Click the number displayed here to see a list of recipients that experienced the soft bounce.
Log To Timeline
You can select if the email needs to be logged to Timeline.
Note:
- The Log To Timeline will be selected by default.
- You cannot modify this option if the admin has selected it in the Cockpit configuration.
Other Enhancements
- The limit on the number of recipients that can be added to To Address is increased to 25.
- The maximum size of each file you can attach is 5 MB, and the cumulative size of your attachments and email body must not exceed 30 MB
- Email Assist 2.0 supports Horizon Analytics.