Create Manual Call to Action (CTAs) and Tasks
Gainsight NXT
This article explains CSMs on how to create Call to Action (CTAs) and Tasks manually to effectively manage their work.
Overview
Cockpit is the Customer Success Manager (CSM) or Account Manager (AM) team’s home base for viewing and managing key customer activities. The backbone of Cockpit is Gainsight system alerts called Call to Action (CTA). A CTA is an alert that can be added manually by a user or automatically using business rules. CTAs are used to manage and track activities such as Low Survey Scores, Upsell Opportunities, Possible Customer Churn, Customer Engagement, and so on.
Following are the five types of CTAs available by default:
- Risk
- Expansion
- Lifecycle
- Objective (for Success Plans)
- Activity (from Timeline)
Example Business Use Case: You want to track an important meeting, a customer event, or a risk that is identified. In such scenarios, you can create manual CTAs and Tasks, not only to track important initiatives but also to provide your team visibility into your workload.
Create CTAs from Cockpit
To create CTAs from Cockpit:
- Navigate to Cockpit from the left menu. The Cockpit List View page appears.
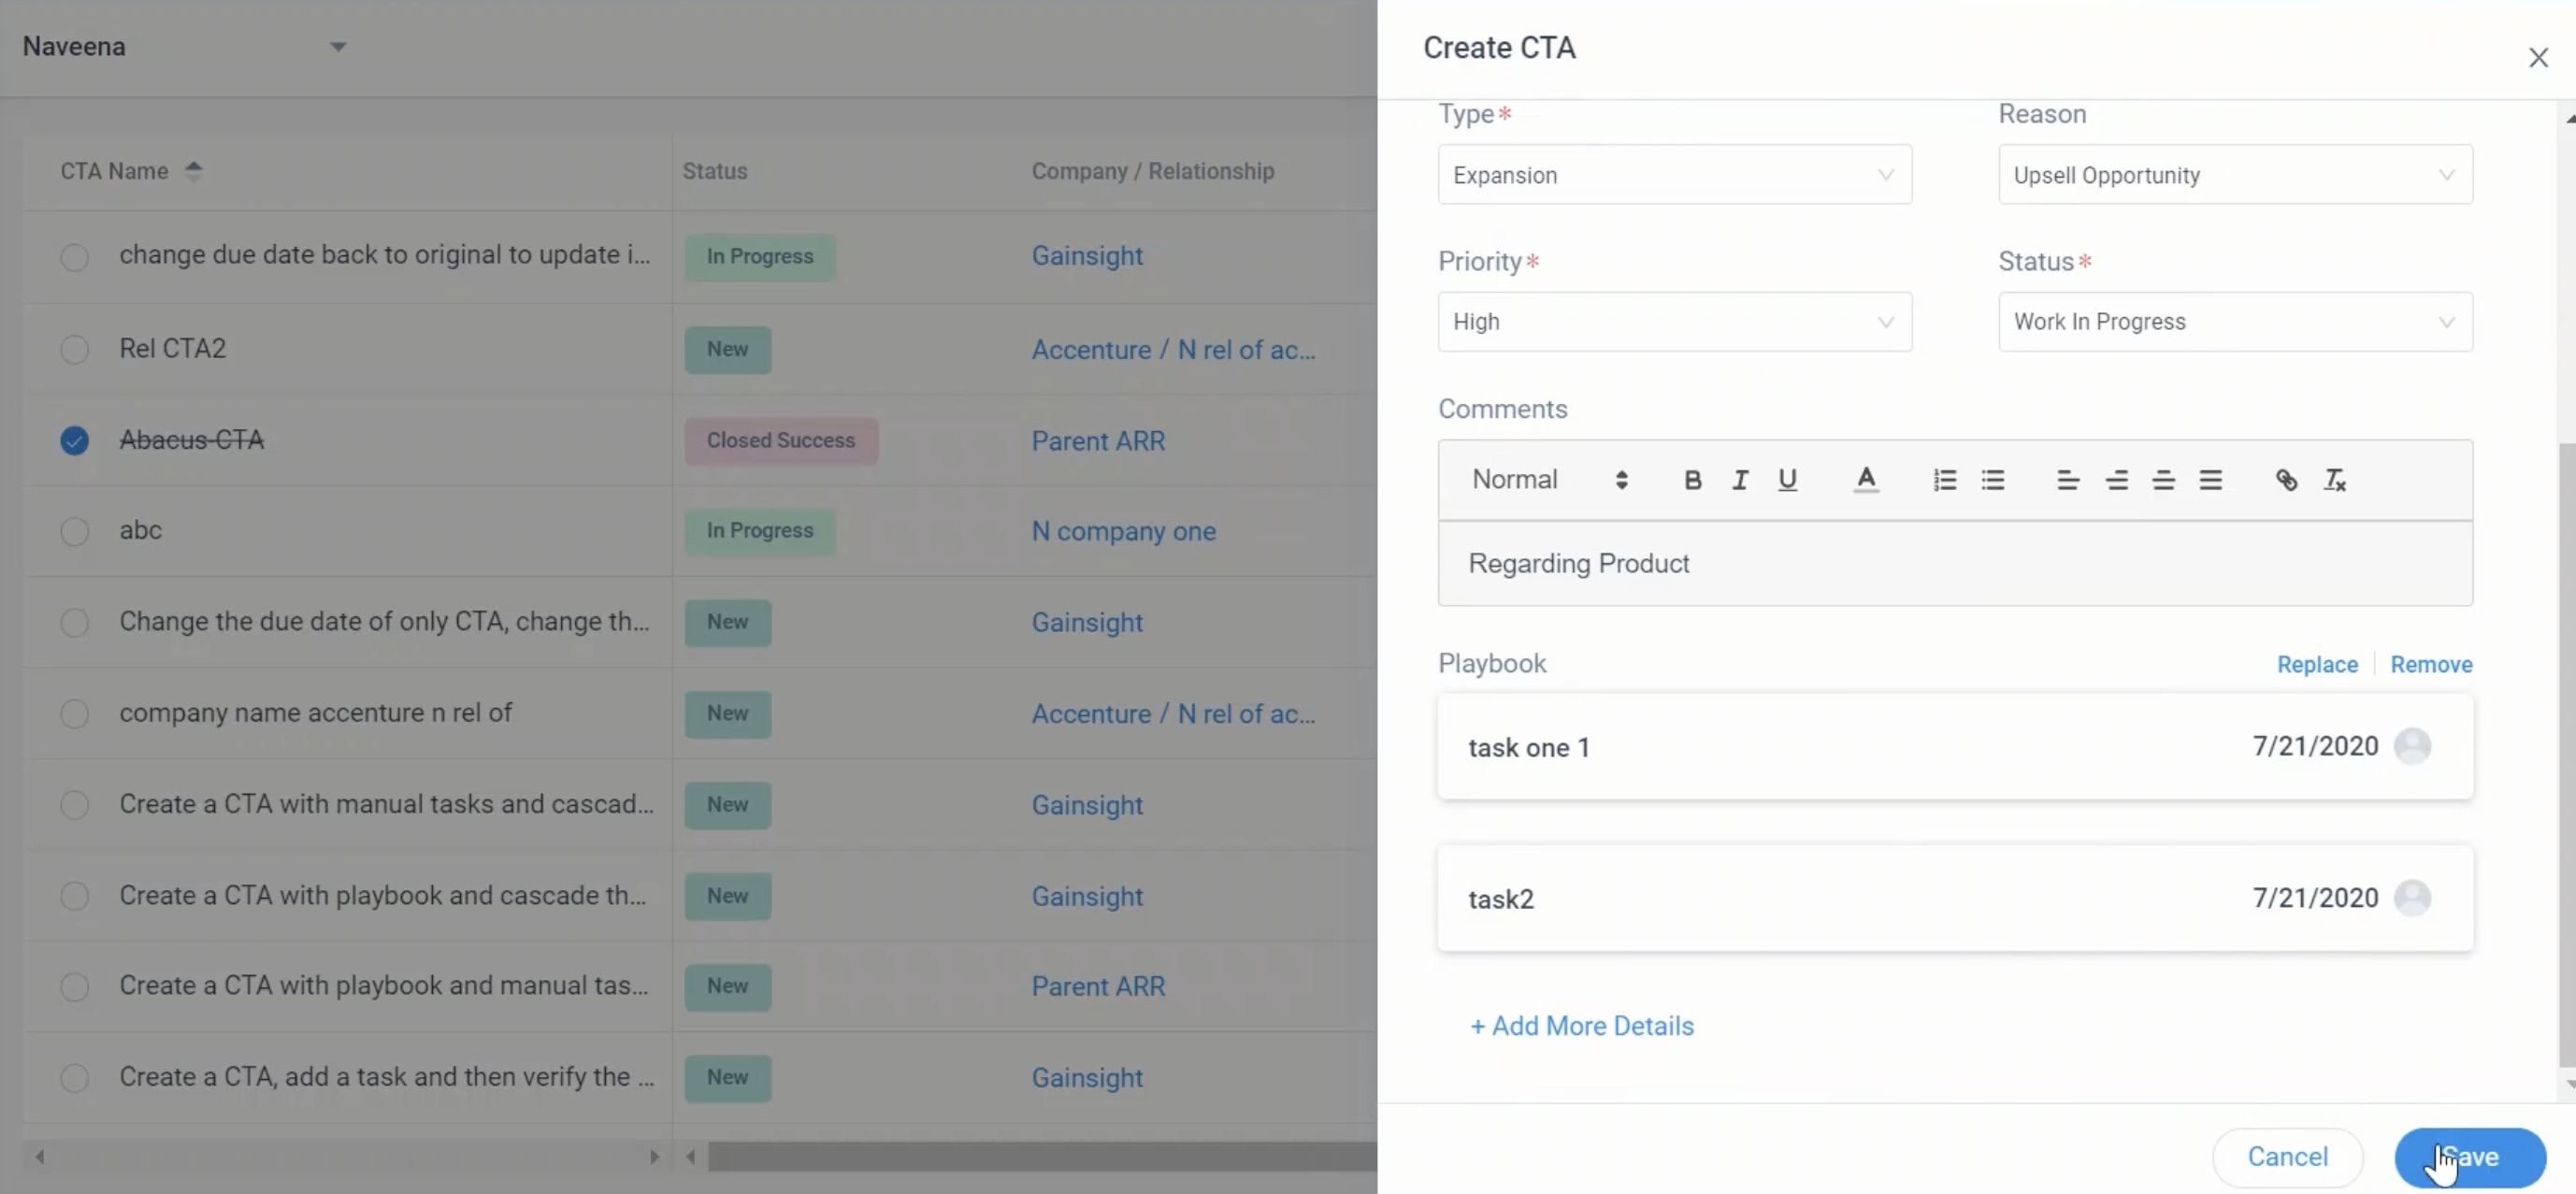
- Click Create CTA. The Create CTA window appears.
- Enter the following details:
- Name: Enter a name for the CTA.
- Company: Search and select the company name.
- Relationship: (Optional) Search and select the required Relationship.
- Due Date: Enter a due date.
- Owner: Enter the name of the CTA Owner.
Note: By default, the logged-in user’s name is displayed in this field. You can modify this and add a new name. - Type: Select the type of CTA.
IMPORTANT: This field cannot be modified later. - Reason: Select the reason to create the CTA.
- Priority: Select CTA priority.
- Status: Select the status of the CTA.
- Comments: (Optional) Any extra information in the form of notes or comments can be added in this section.
- Playbook: (Optional) Click Click here to select Playbook to search and select an applicable playbook from the list. Once you select a playbook, all of its associated tasks are displayed. You can also modify the owner of each task.
Notes:-
The person records you find here depend on the Associate Person Configurations in the Admin area. For more information about how to configure search fields, refer to the Configure Cockpit List View, General Settings, and Reporting Categories article.
-
Additional fields set up by the admins (if any), will appear in the create CTA window. Such fields depend on the CTA Type selection.
-
Filters added by the admins on any of the Lookup fields are not applied while creating CTAs and Tasks. Company ID filter is an exception in this case and is applicable while creating CTAs and Tasks, if added by the admins.
-
-
Click Save.
Notes:
- Playbook/Playbook Tasks cannot be modified while creating a CTA.
- If you do not select a playbook here, you can still use the Apply Playbook button from the CTA Detail View. You can also use the Replace Playbook to replace an existing playbook.
Apply Playbook
To add a playbook and its associated tasks to your CTA, follow one of the three methods as explained below:
From CTA Detail View
To add playbook and its associated tasks to your CTA:
- In the CTA Detail View, click three-dots at the top right corner.
- Select Apply Playbook.
- Search and select an applicable playbook from the list and all its associated tasks are displayed.
- Modify the owner of each playbook task, if required.
- Click Apply.

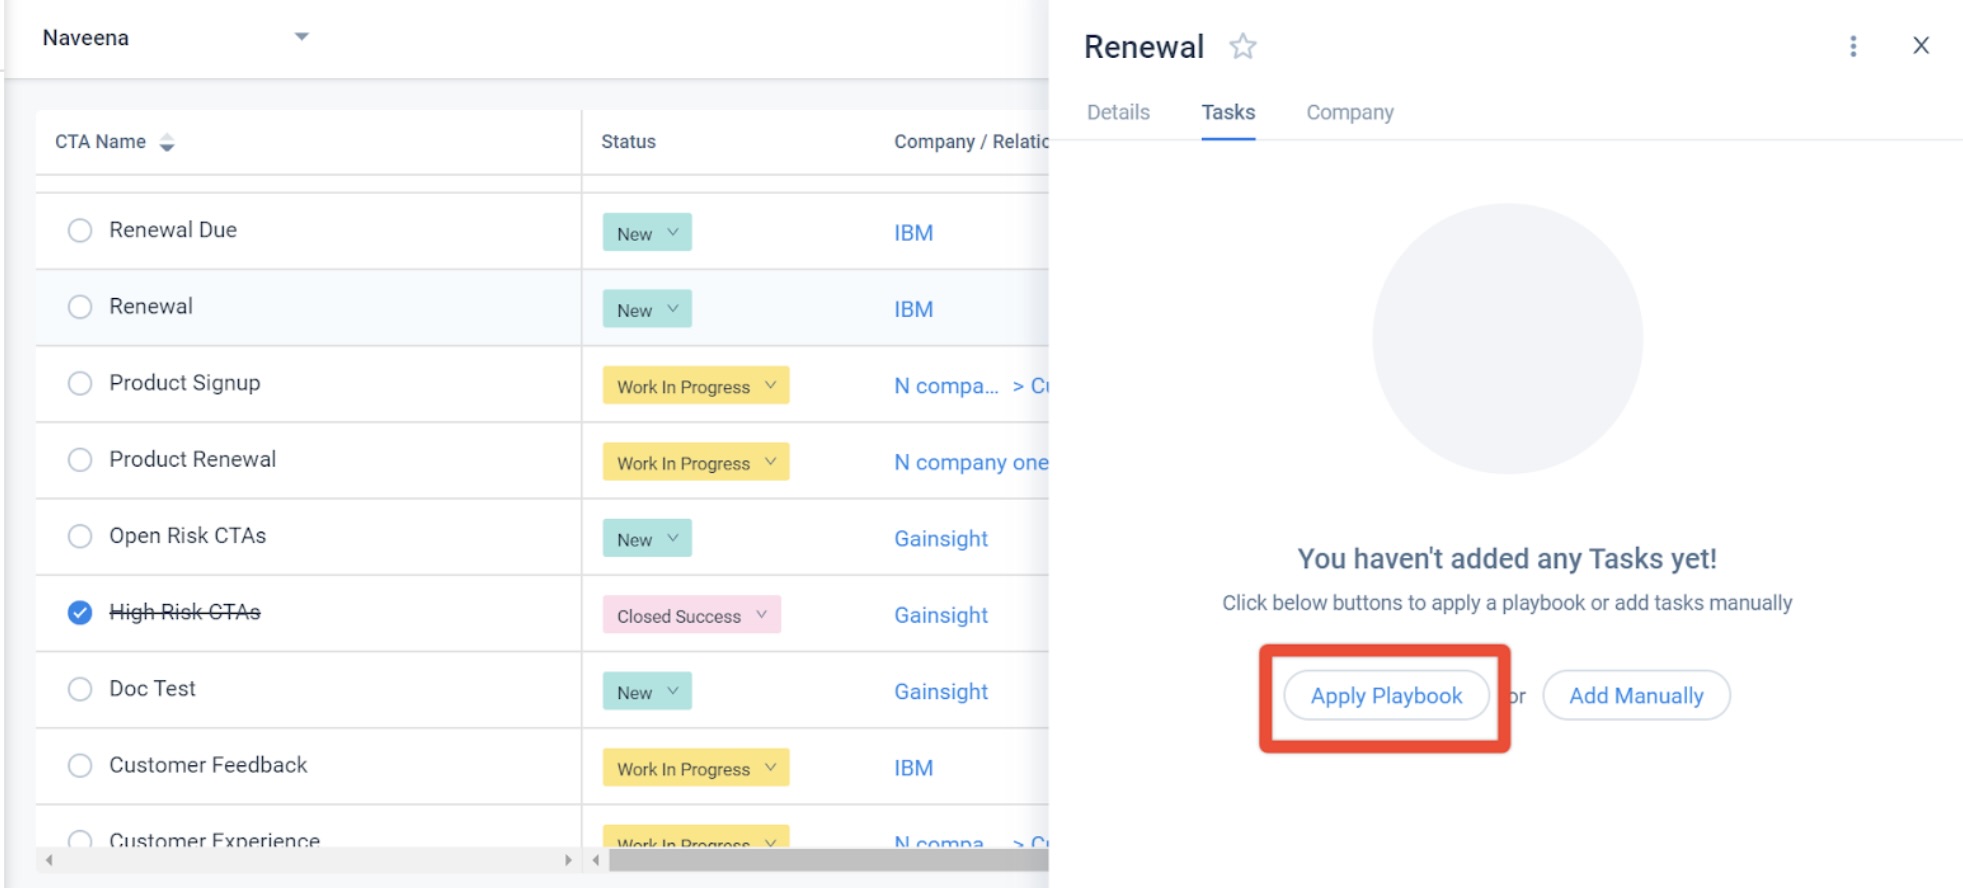
From Tasks Tab
Method 1
To add playbook and its associated tasks to your CTA:
- In the CTA Detail View, navigate to the Tasks Tab.
- Click Apply Playbook.
- Search and select an applicable playbook from the list and all its associated tasks are displayed.
- Modify the owner of each playbook task, if required.
- Click Apply.
After you apply a Playbook, you can always replace an existing playbook by clicking Replace Playbook from the CTA detail view as shown below.
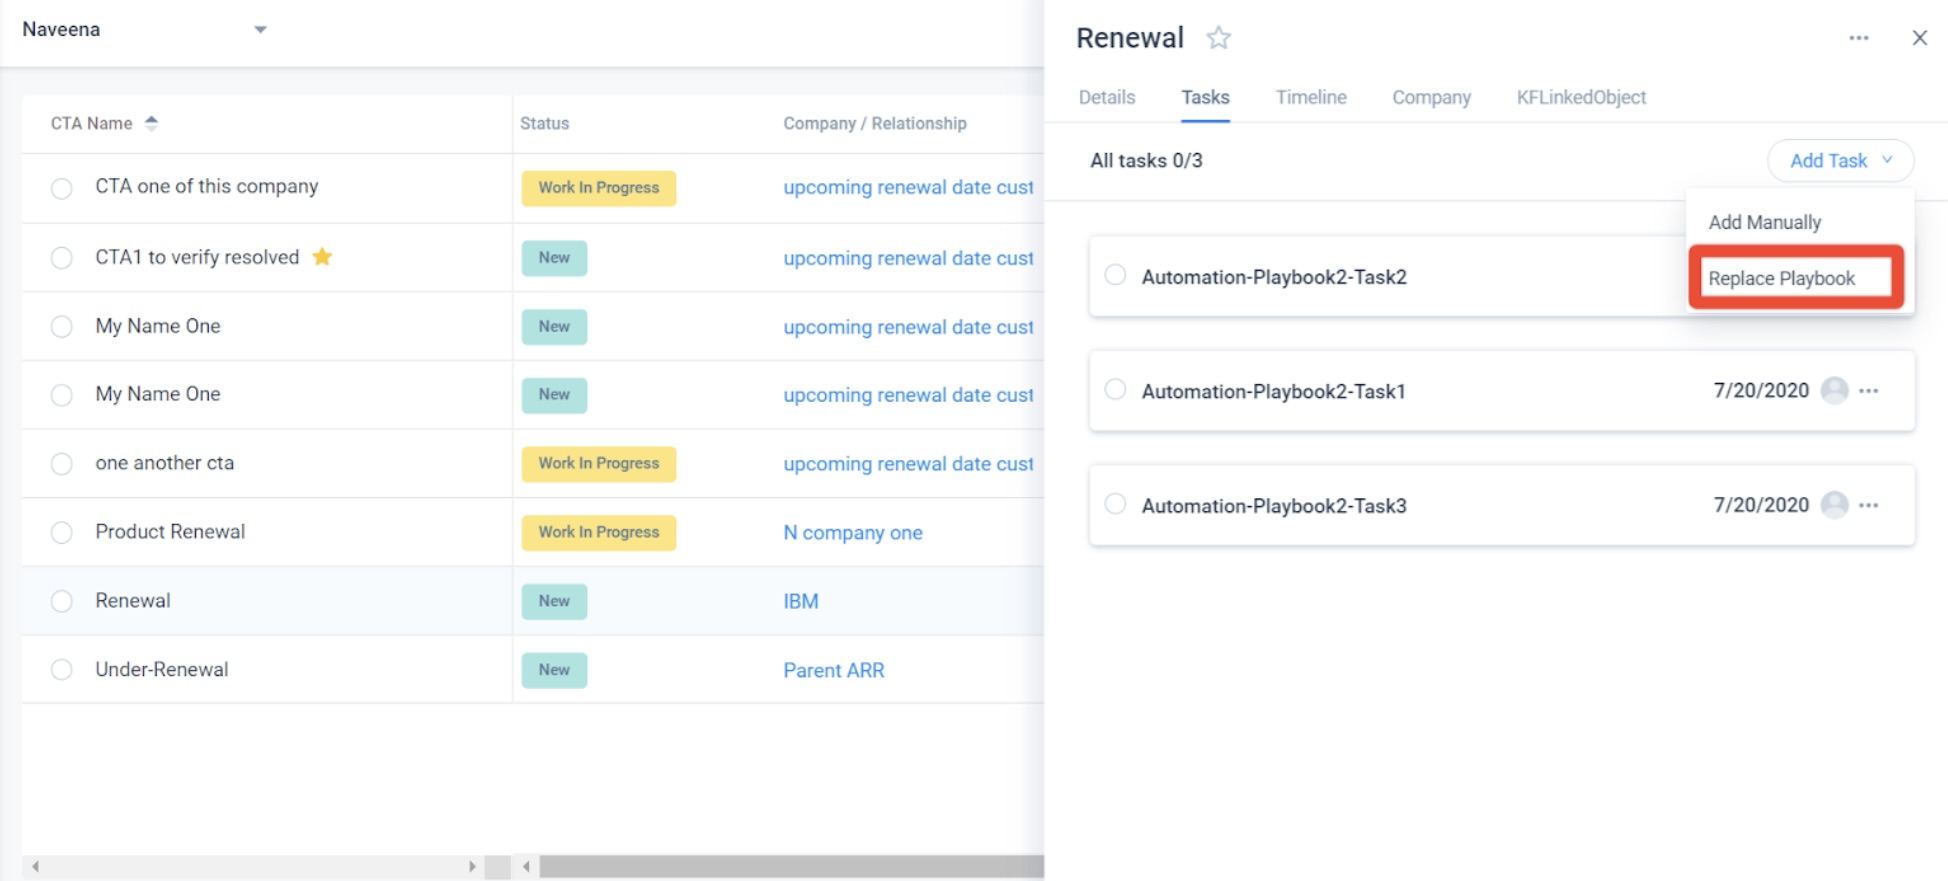
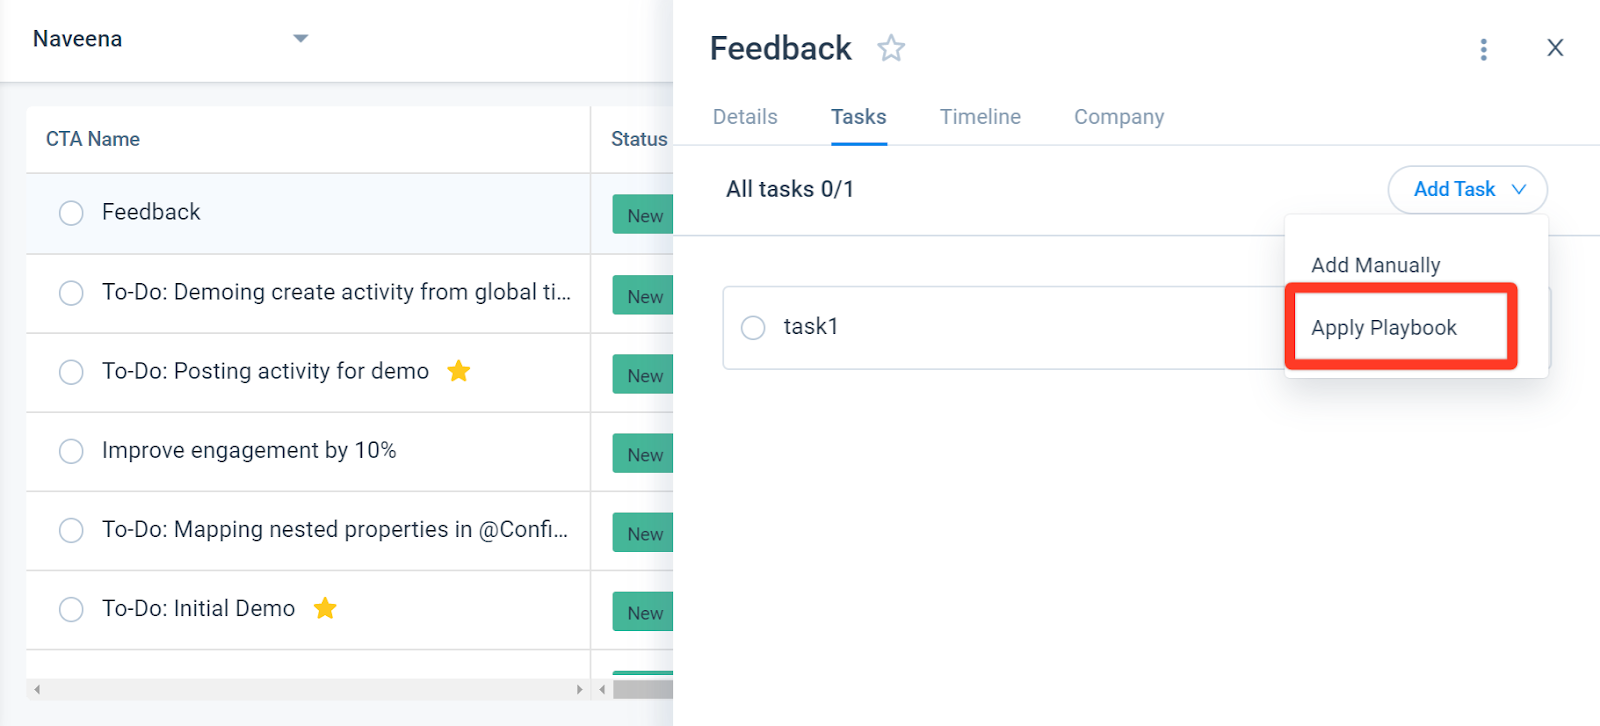
Method 2
To add playbook and its associated tasks to your CTA:
- In the CTA Detail View, navigate to the Tasks Tab.
- Click Add Task.
- Select Apply Playbook.
- Search and select an applicable playbook from the list and all its associated tasks are displayed.
- Modify the owner of each playbook task, if required.
- Click Apply.
Create Tasks
To create tasks manually either before or after adding a playbook, follow the methods as explained below:
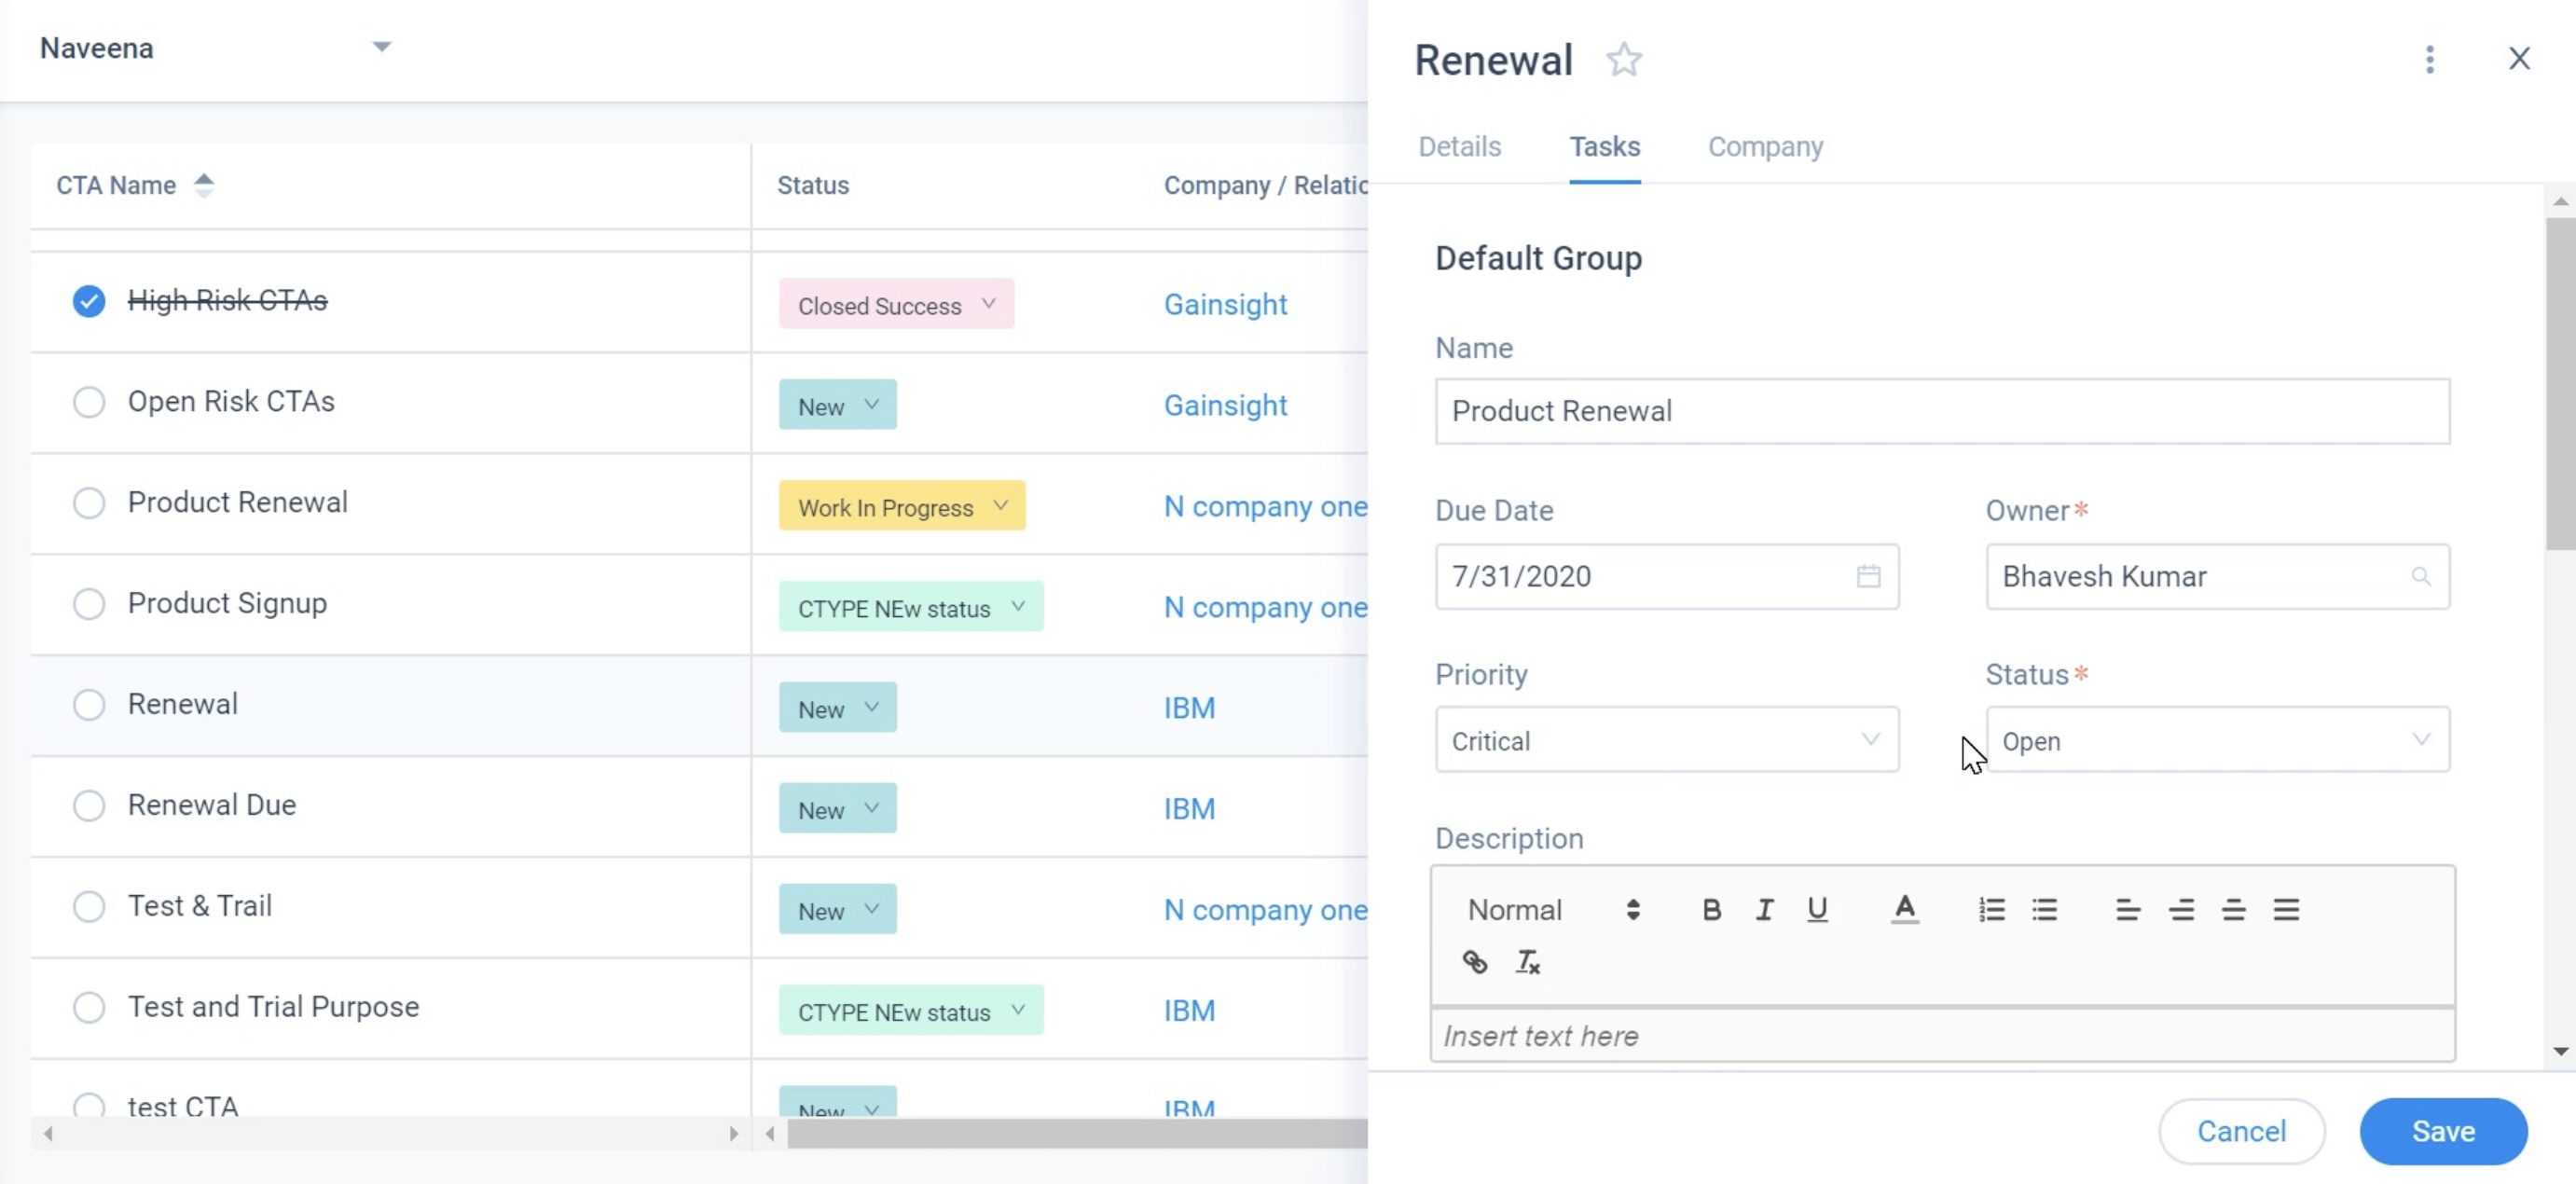
To add tasks:
- In the CTA Detail View, navigate to the Tasks Tab.
- Click Add Manually, if no playbook is applied (or) click Add Tasks and select Add Manually, if a playbook is already applied.
- Enter the following details:
- Name: Enter a name for the task.
- Due Date: Enter a due date.
- Owner: Enter the name of the CTA Owner.
Note: By default, the logged-in user’s name is displayed in this field. You can modify this and add a new name. - Priority: From the Priority dropdown list, select the task priority.
- Status: Select the status of the task.
- Description: (Optional) Any extra notes or information regarding the task can be added in this section.
- Associated Persons: (Optional) Search and add the person whom you want to associate with this Task.
-
Click Save.
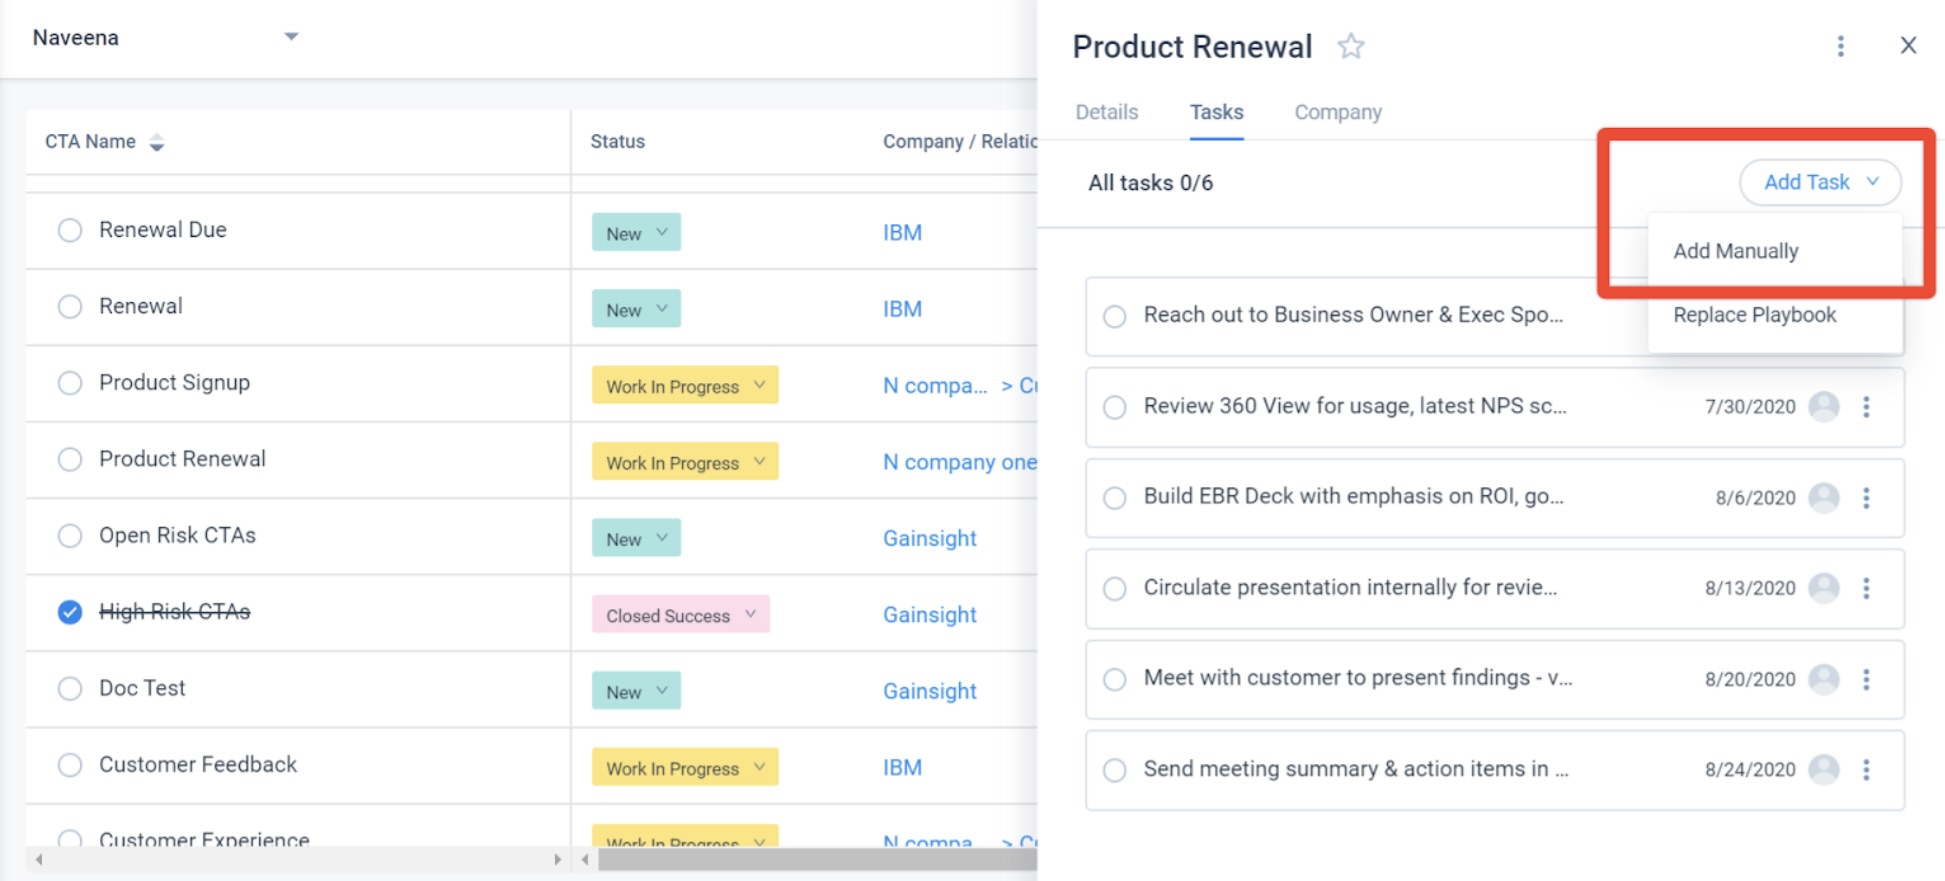
The following image shows how Tasks are added in a CTA when a playbook is already applied.
Delete Tasks
In the Tasks tab, click the ellipsis on an existing task and select Delete, if you wish to delete the task.

Update CTA Status
To update the CTA Status, you can follow any one the methods explained below:
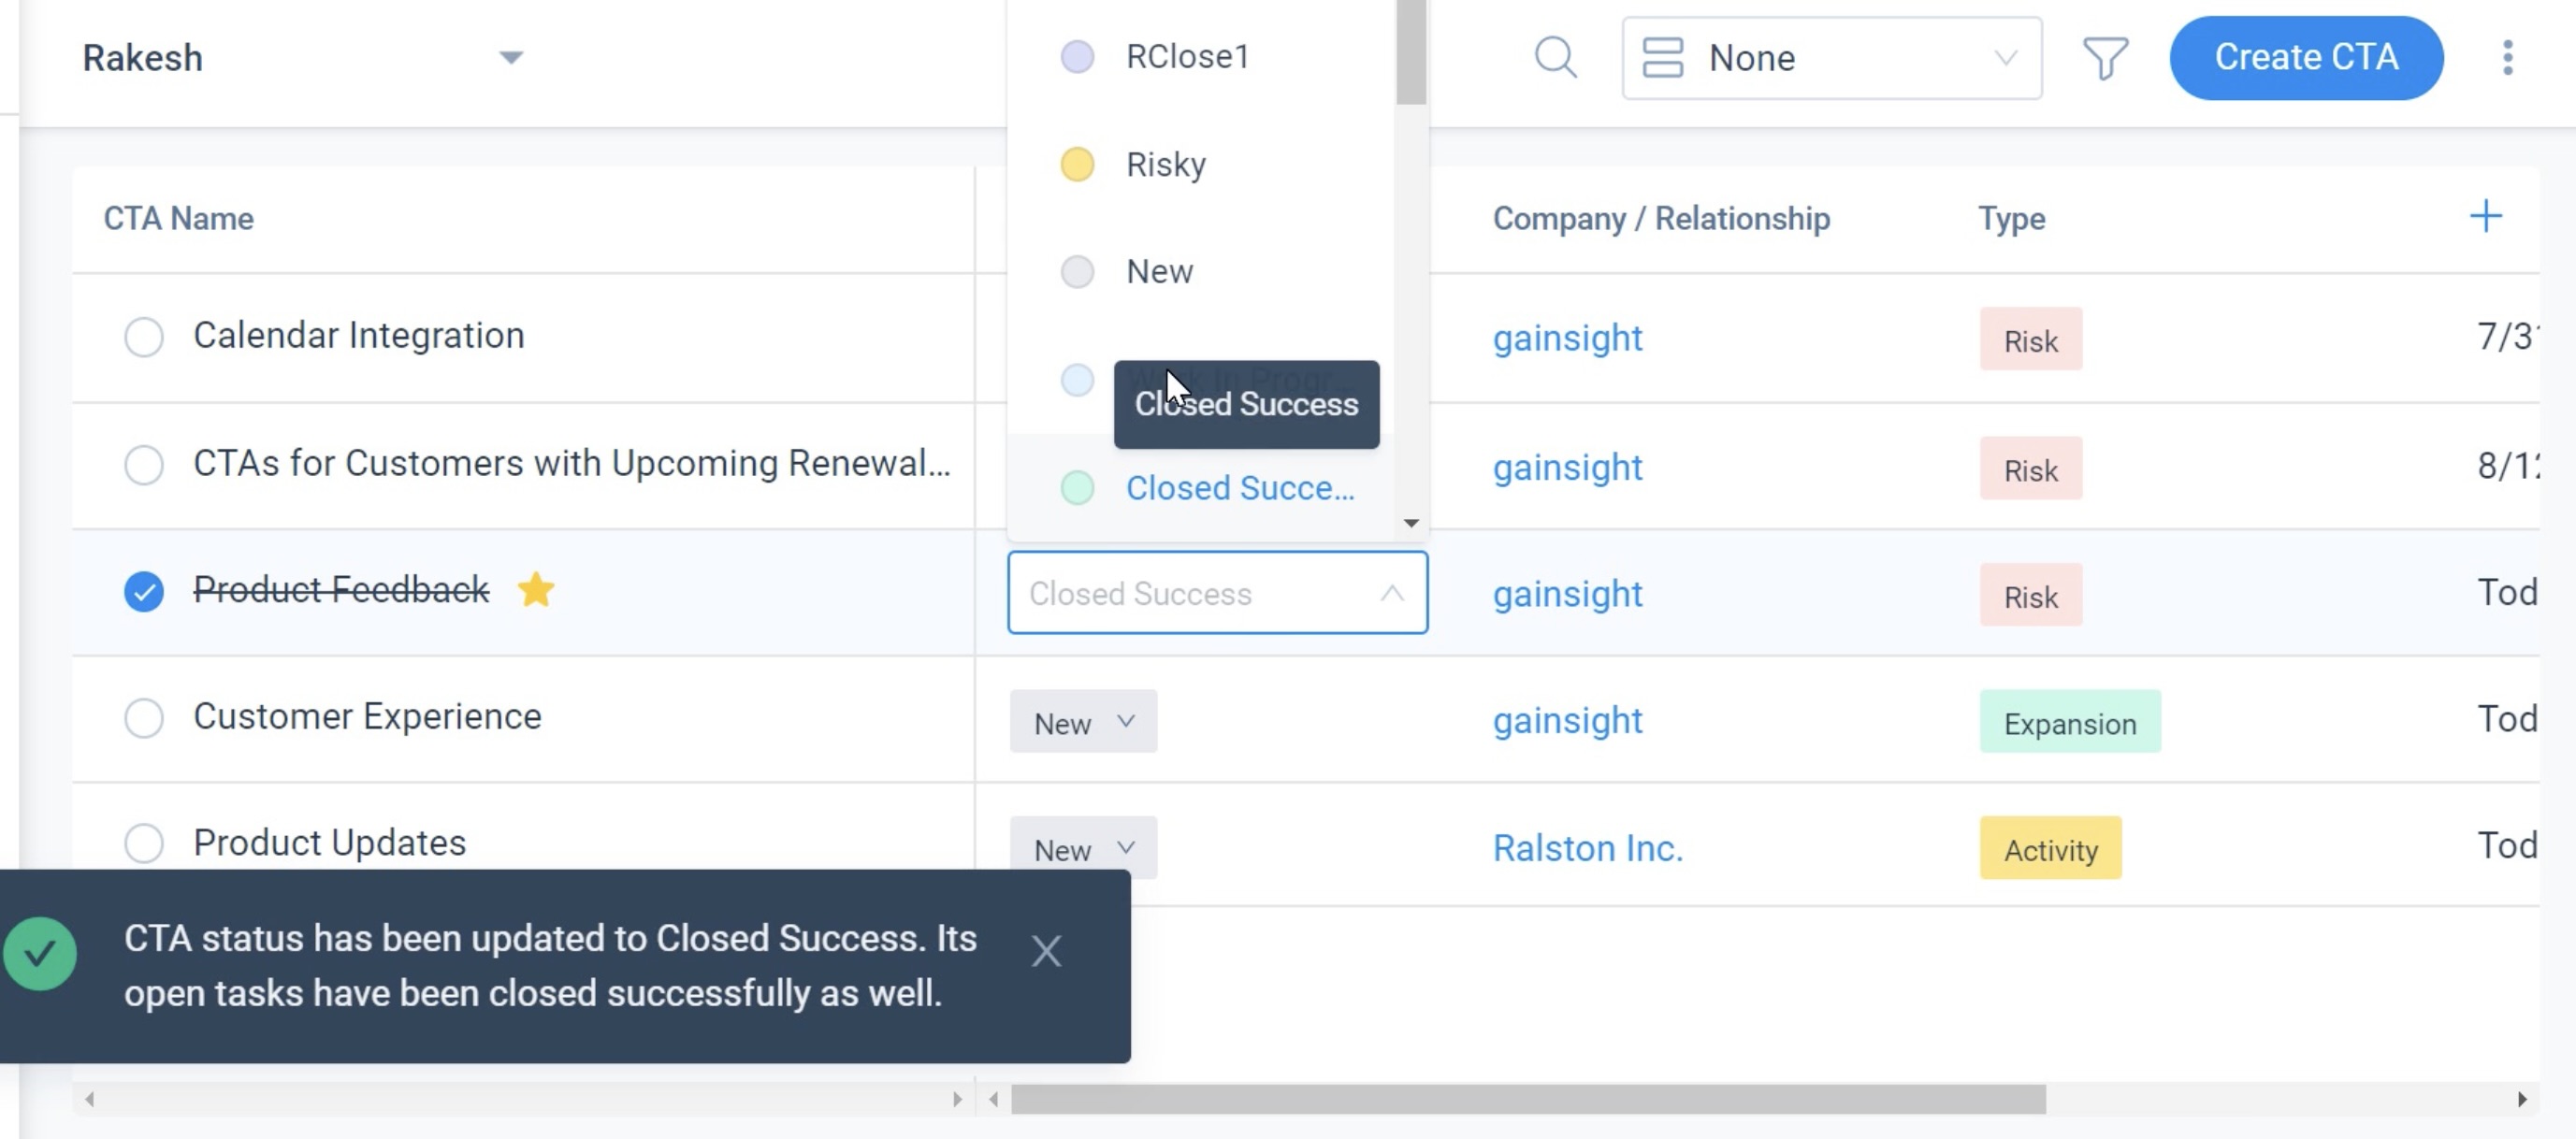
Method 1
In the Cockpit List View, click the CTA Name to mark the CTA as Closed Success. You can again click the same CTA Name to mark the CTA Status as New.
Note: In the Administration > CTA, the Default Open Status and Default Closed Status are set to New and Closed Success respectively, and these are not the fixed values. CSMs can change the status as per their choice, by clicking the Status dropdown list.
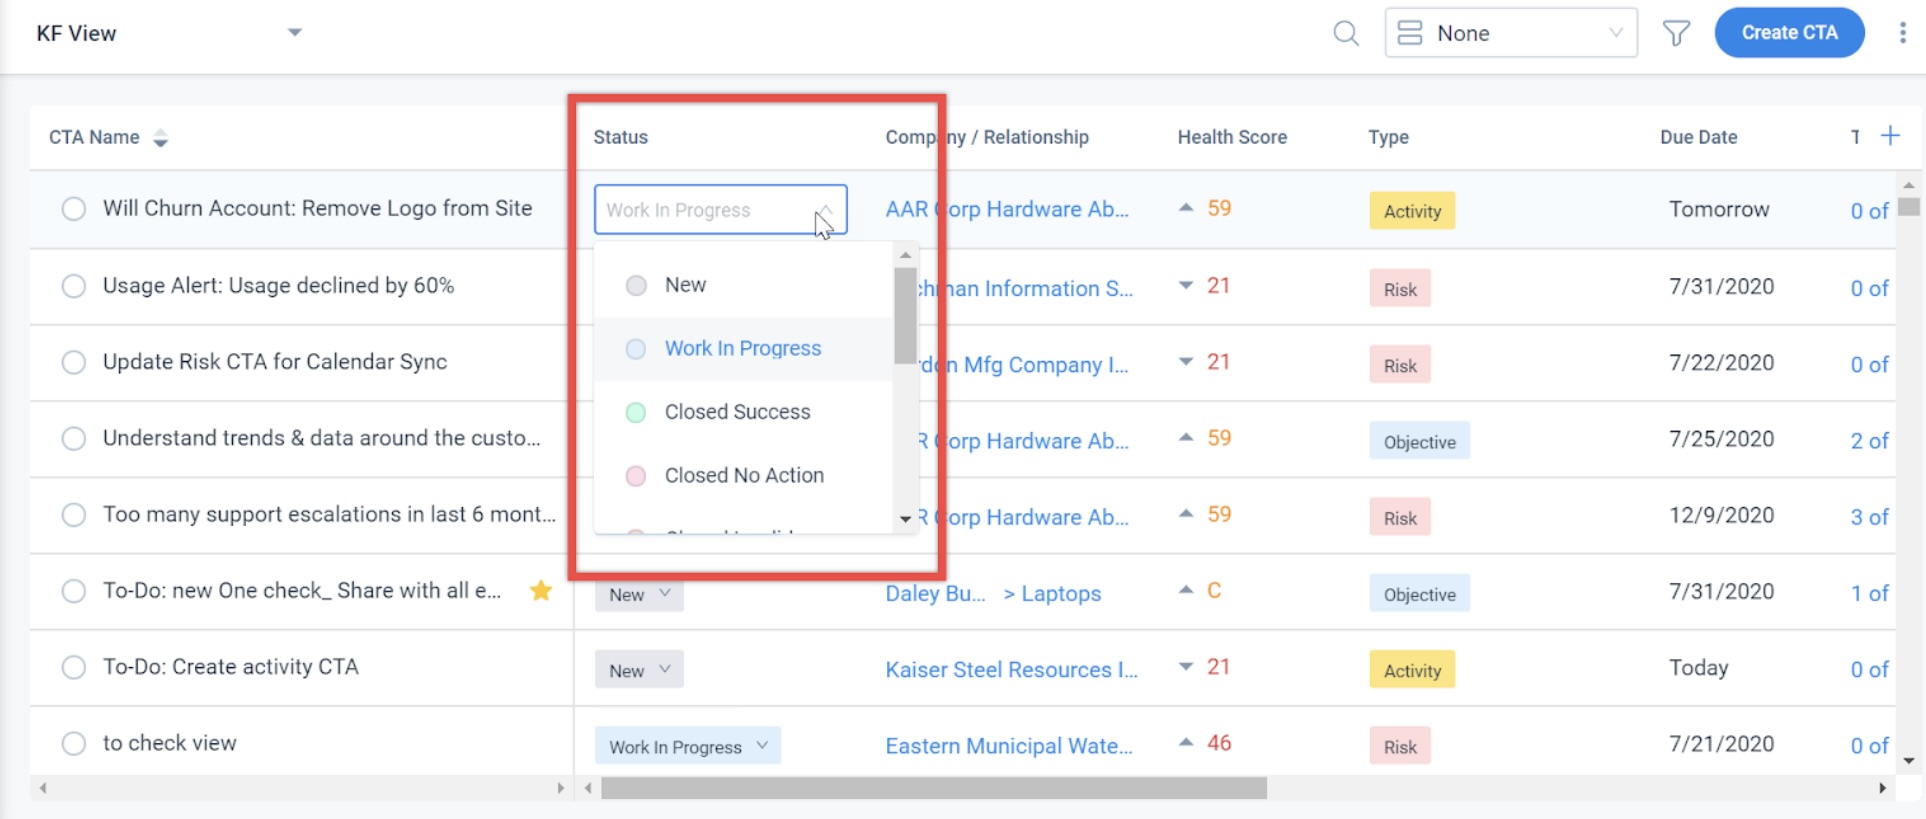
Method 2
In the Cockpit List View > Status Column, select the required status from the Status dropdown list.
Method 3
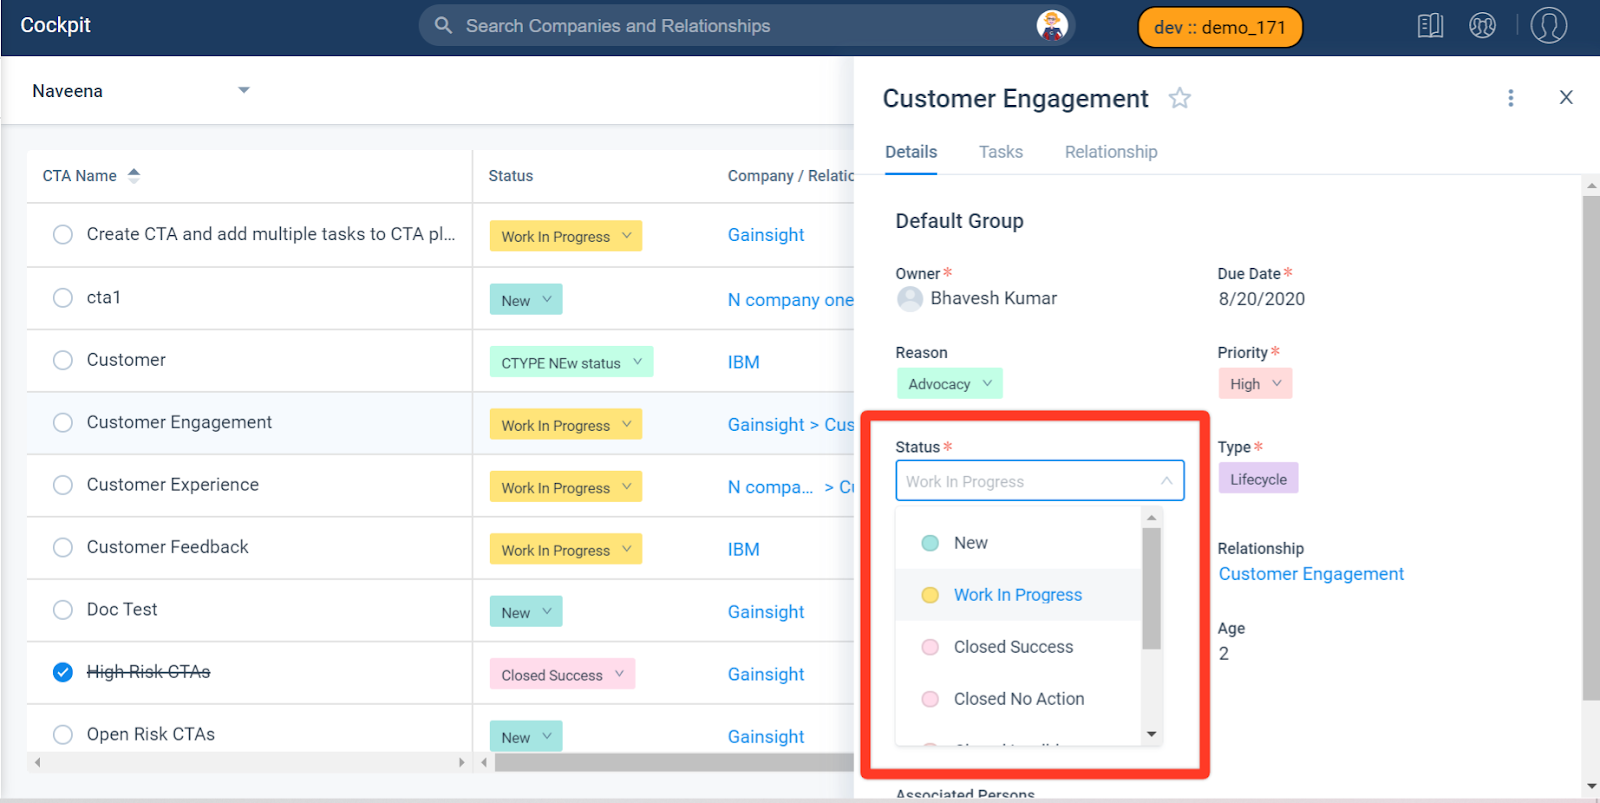
To update the CTA Status:
- From the Cockpit List View, click the required CTA Name. The CTA Detail View appears.
- Select the required status from the Status dropdown list.
Note: Click the Star icon beside the CTA Name to mark it as important.
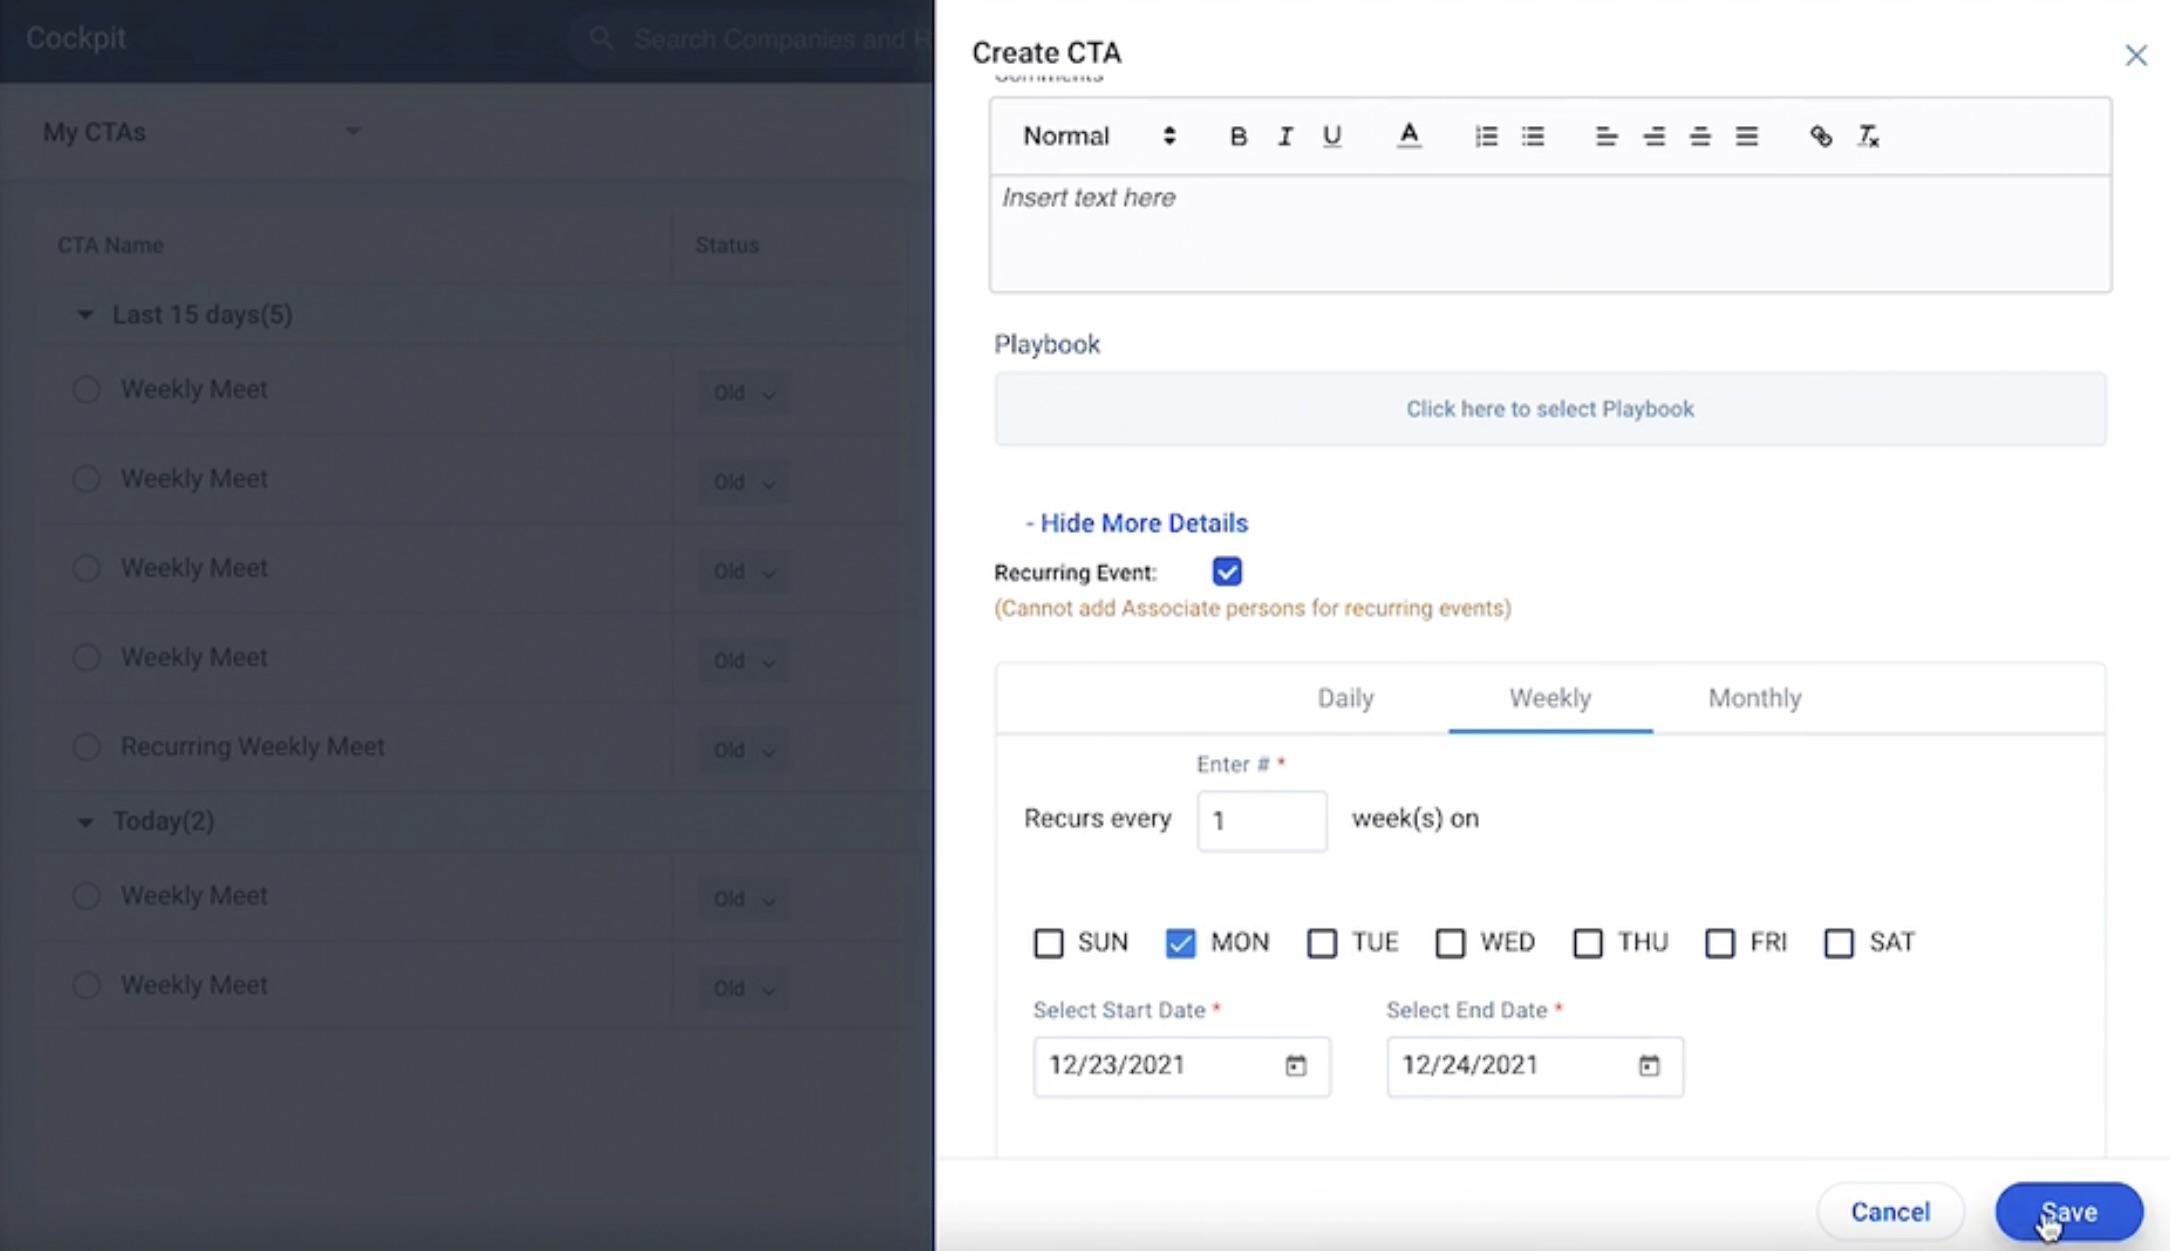
Create Recurring CTAs
Recurring CTAs occur repeatedly over regular intervals of time. Administrators can mark CTA Type(s) as recurring. End Users can then create Recurring CTAs by selecting CTA Type(s) that have already been marked as recurring by the Administrator. The occurrence pattern can be set to Daily, Weekly or Monthly.
For example, if you have weekly or monthly check-ins with a customer, and you want a CTA to automatically remind you to prepare for the check-in, you can create a Recurring CTA for the same.
Note: You cannot associate persons for recurring events.
To create a Recurring CTA:
- Navigate to Cockpit.
-
Click on Create CTA.The Create CTA window appears.
-
Enter CTA details. For more information on the CTA fields, refer to the Create CTA section of this article.
-
Click on Add More Details.
-
Select the Recurring Event checkbox.
-
Select whether the CTA repeats:
-
Daily: You can either set the event to occur on every day of the week(Mon-Fri) or you may define an alternative pattern for their recurrence. For example, you can schedule a Meeting that occurs:
-
Every Weekday from Monday to Friday
-
Every ‘2’ days from the Start Date till the End Date
-
-
Weekly: You can define the occurrence pattern for your weekly CTAs. For example, the event may occur every ‘2’ weeks from the Start Date till the End Date.
-
Monthly: You can define the recurrence pattern for the CTAs occurring on a monthly basis using one of the two available options. For Example, the events may occur:
-
On the ‘1st’ of every ‘2’ month(s)
-
On the ‘2nd’ ‘Tuesday’ of every ‘2’ month(s)
-
-
-
Enter the Start and End Date for your selected Daily/Weekly/Monthly CTA.
-
Click on Save.