Install and Configure Gainsight Customer Success in Salesforce
This article explains to admins how to install the Gainsight CS app from the Salesforce AppExchange, assign Gainsight Customer Success licenses, and grant the Gainsight Customer Success permission set to the required users.
Overview
Gainsight is an application designed for Customer Success professionals to drive revenue, increase retention, and scale operations. Gainsight Customer Success app is the next evolution of the Gainsight platform that allows you to use Gainsight Customer Success from the Salesforce UI. For more information about Gainsight Customer Success, refer to the Gainsight NXT Overview article. To start using Gainsight Customer Success in Salesforce UI, you must first download and install the Gainsight Customer Success application from the Salesforce AppExchange.
Prerequisites
Before you install the Gainsight Customer Success package, ensure the following requirements are met:
- You have an active Gainsight NXT tenant.
- The Salesforce Connector is configured and linked in Gainsight NXT.
- Salesforce users are synced to Gainsight.
- Your Salesforce edition is Developer, Enterprise, or higher.
- You have the Download AppExchange Packages permission in Salesforce.

- You are installing the latest version of the Gainsight Customer Success package.
IMPORTANT
Install the latest version of the package using the official Install Gainsight Customer Success Package. The latest version does not require a password. A password is required only for the older version (1.4). Contact your Gainsight project manager or CSM to obtain the package password.
For more information about Gainsight Customer Success, refer to the Gainsight NXT Overview article.
Why the New Gainsight Customer Success Package
If you are using the legacy Gainsight CSM package, Gainsight recommends upgrading to the new Gainsight Customer Success package. This new managed package is lightweight and designed to minimize impact on your Salesforce org.
Key benefits include:
-
Contains only one custom object, a small number of Visualforce pages, and minimal Apex classes
-
Does not add triggers to standard Salesforce objects, unlike the legacy package
After migrating to the new package, you can safely uninstall the legacy package to:
-
Free up Salesforce limits by removing over 70 unused custom objects
-
Remove the trigger on the Task object
-
Clean up obsolete Apex classes, Visualforce pages, and components
Understand Gainsight Packages on AppExchange
When you search for Gainsight on Salesforce AppExchange, multiple Gainsight packages appear, each designed for a specific use case. Use the following table to determine which package best meets your requirements:
| Package | Purpose | Who Needs It |
|
|
Main application for accessing Gainsight NXT from the Salesforce UI. Includes 360 widgets, Gainsight tab, and core functionality. | All customers who want to use Gainsight within Salesforce |
| Gainsight CS Data Connector US | Connected App that enables secure integration between Salesforce and Gainsight. Required for the Salesforce Connector to sync data. | All US-region customers using the Salesforce Connector |
| Gainsight CS Data Connector EU | Connected App for EU-region customers. Same functionality as the US version. | All EU-region customers using the Salesforce Connector |
| Gainsight CS SSO | External Client App (ECA) that enables Salesforce-based SSO login for Gainsight browser extensions and mobile apps. | Customers using Gainsight plugins or mobile apps who want to authenticate via Salesforce |
Most customers need to install both the Gainsight Customer Success package and the appropriate Data Connector package (US or EU) for their region. These packages are available at no additional cost.
How to Identify Your Region
Your region is determined by your Gainsight NXT tenant URL:
- US1 (Default): <subdomain>.gainsightcloud.com → Install Gainsight CS Data Connector US
- US2: <subdomain>.us2.gainsightcloud.com → Install Gainsight CS Data Connector US
- EU: <subdomain>.eu.gainsightcloud.com → Install Gainsight CS Data Connector EU
Installation and Configuration Workflow
To enable users to access Gainsight Customer Success from within the Salesforce UI, you must perform the following tasks:
- From the Salesforce AppExchange, install the Gainsight Customer Success application.
- Link the Salesforce org from Gainsight NXT.
- Assign Gainsight Customer Success licenses to the required Salesforce users.
- New package licenses can be automatically assigned for users having existing package licenses. For more information, refer to the section Migrate License from Gainsight CSM Package in this article.
- Assign Gainsight Customer Success permission set to the users who should have access to Gainsight NXT from the Salesforce UI
- New package permissions sets can be automatically assigned for users having existing package permission sets. For more information, refer to the section Migrate Permissions from Gainsight CSM Package in this article.
- Configure the Account, Opportunity, and Case layouts to add Gainsight 360 widget or Lightning Web Component in the new package.
- Configure the custom object widget that is integrated using GS NXT 360 Smart Widget (applicable if customer already uses the GS NXT 360 Smart Widget).
Install Gainsight Customer Success
This section explains the process of installing the Gainsight Customer Success application from Salesforce AppExchange.
To install the Gainsight Customer Success application:
- Log into Salesforce Org with your credentials.
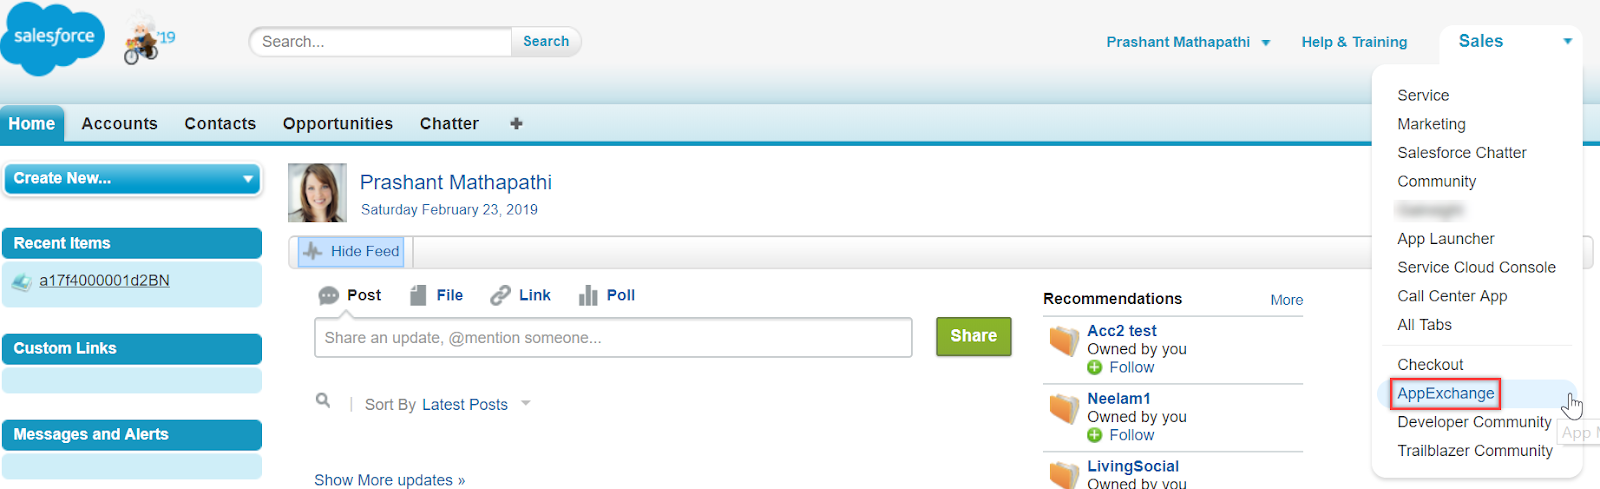
- From the Salesforce app menu, click AppExchange. Salesforce AppExchange opens in a new tab.
- In the global search bar, type Gainsight and press Enter. All available Gainsight packages are displayed.
- Select Gainsight Customer Success.

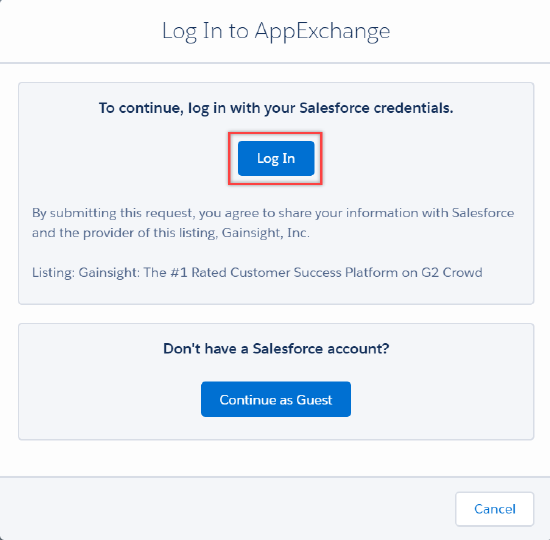
- Click Get It Now. The AppExchange Log In dialog appears.

- Click Log In. You are automatically logged in to Salesforce AppExchange.
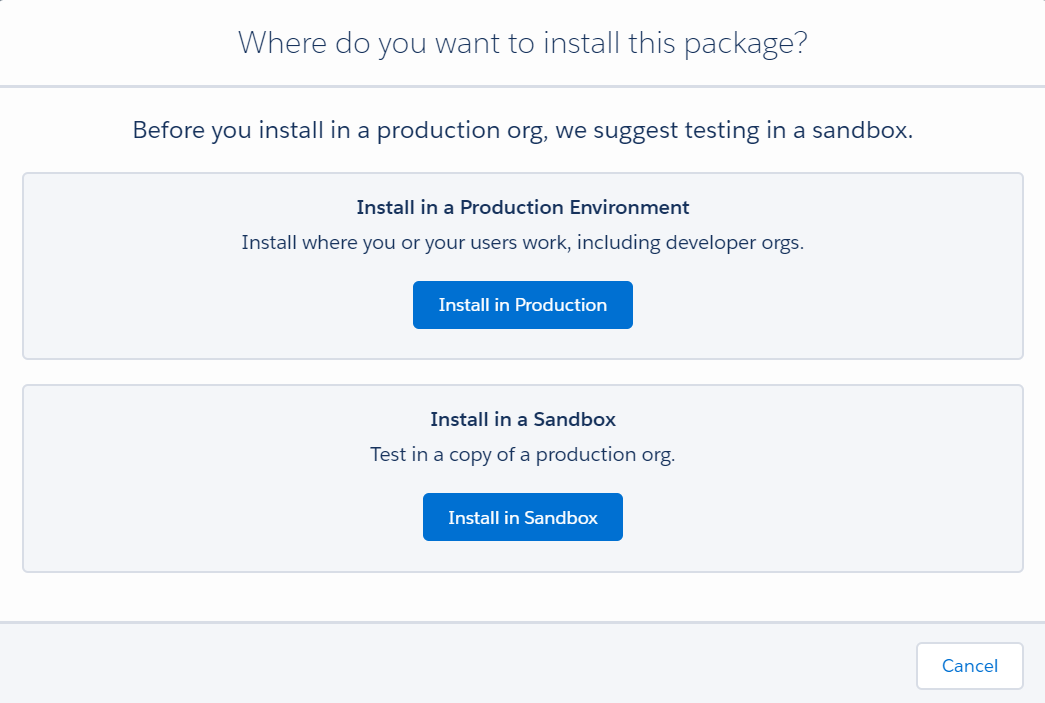
- Click Install in Production or Install in Sandbox to start the installation.
Note: To access Gainsight NXT for Salesforce Sandbox environments, users must have the necessary permission sets and licenses inherited from the parent Production SFDC instance.
- Verify the installation details and your personal details.
- (Optional) Click Edit Profile to update your personal details.
- Select the I have read and agree to terms and conditions option to indicate your acceptance of the policies.
- Click Confirm and Install.

Note: Enter your login credentials, if you are redirected to the login screen.
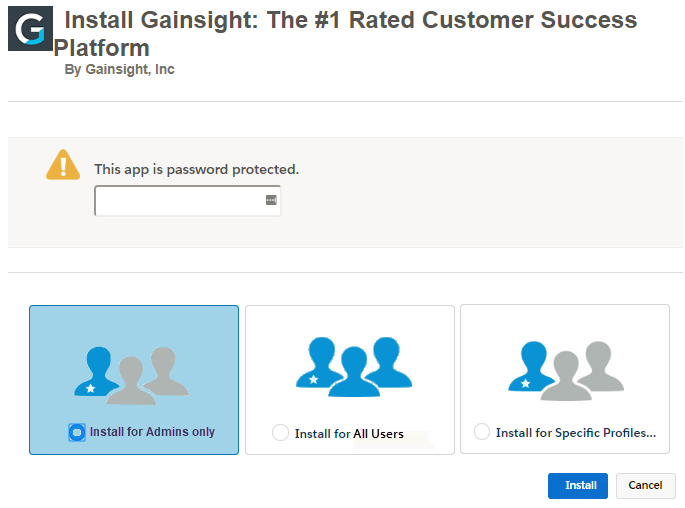
- If prompted, enter the package password.
Note: The latest version of the Gainsight Customer Success package does not require a password. If you are prompted for a password, you may be installing an older version. Contact your Gainsight project manager or CSM for assistance. - Select an appropriate security level option. The following are three security levels available that will be used during installation and upgrading to new versions of Gainsight:
- Install for Admins Only - Users with your profile get full access: This is the Gainsight recommended option. Use this option to manage access and permissions of individual users. Using this option, no user other than your Salesforce Admins get access to Gainsight.
- Install for All Users - All internal custom profiles get full access: This is not recommended by Gainsight. Use this option if you want all users who are assigned to a custom profile to have full access to Gainsight.
- Install for Specific Profiles: Not recommended for most packages. Discuss with your Gainsight representative before selecting this.
- Click Install.
After the installation is completed, an email confirmation is received. You can verify the version, organization’s name, and username from the email.

Assign Gainsight Licenses
This section explains the process of assigning Gainsight Customer Success licenses to users. By default, five licenses are granted when you install Gainsight Customer Success. One of the five licenses is assigned to the Administrator who installed Gainsight. This admin can further assign the remaining four licenses to the required users. If you want more licenses, contact Gainsight.
To assign licenses:
- Click Setup.
- From the Quick search option, navigate to Installed packages.
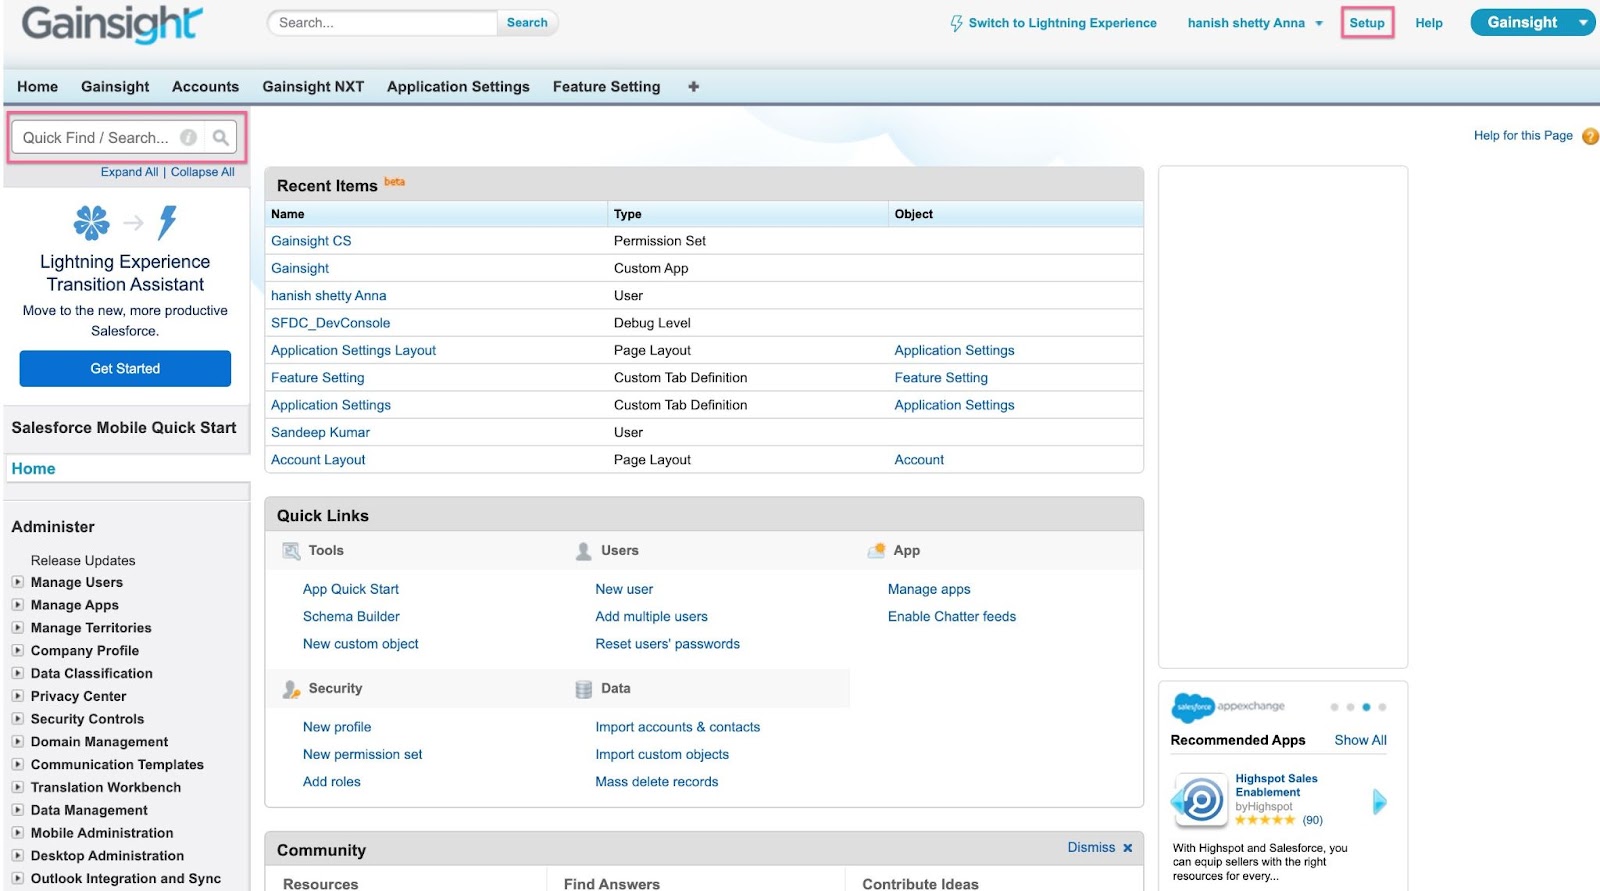
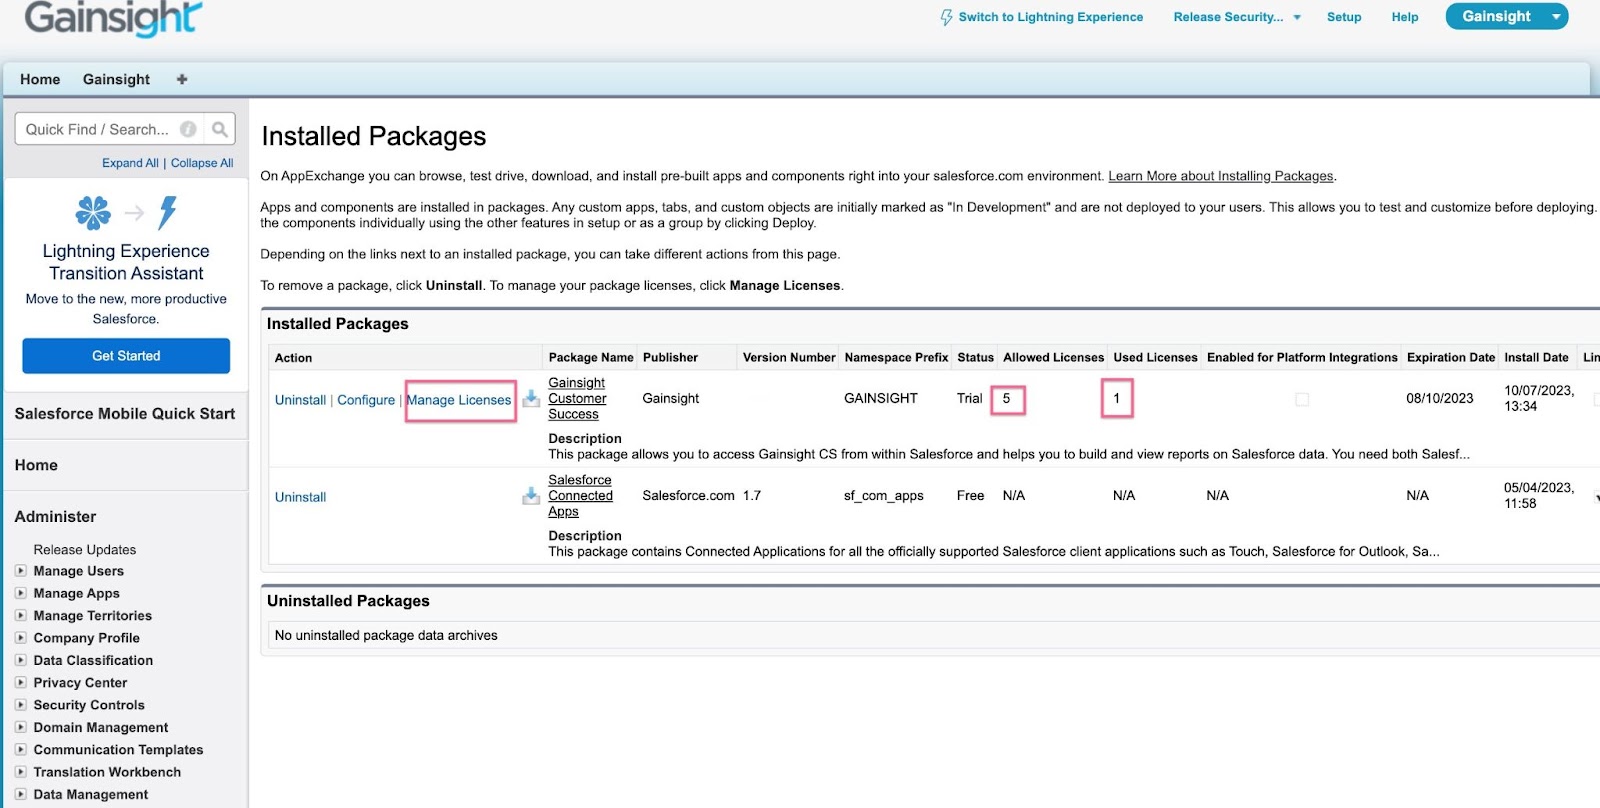
- Click Manage Licenses. The Installed Packages page displays the assigned and utilized licenses. For example, in the following screenshot, one license is assigned and four more can be assigned to other users.
Note
- License counts may take a few hours to update. If they don’t update as expected, contact support@gainsight.com.
- Salesforce does not support managed package licenses in Sandbox environments. When a Sandbox is created, active managed package licenses from Production are automatically assigned to all users.
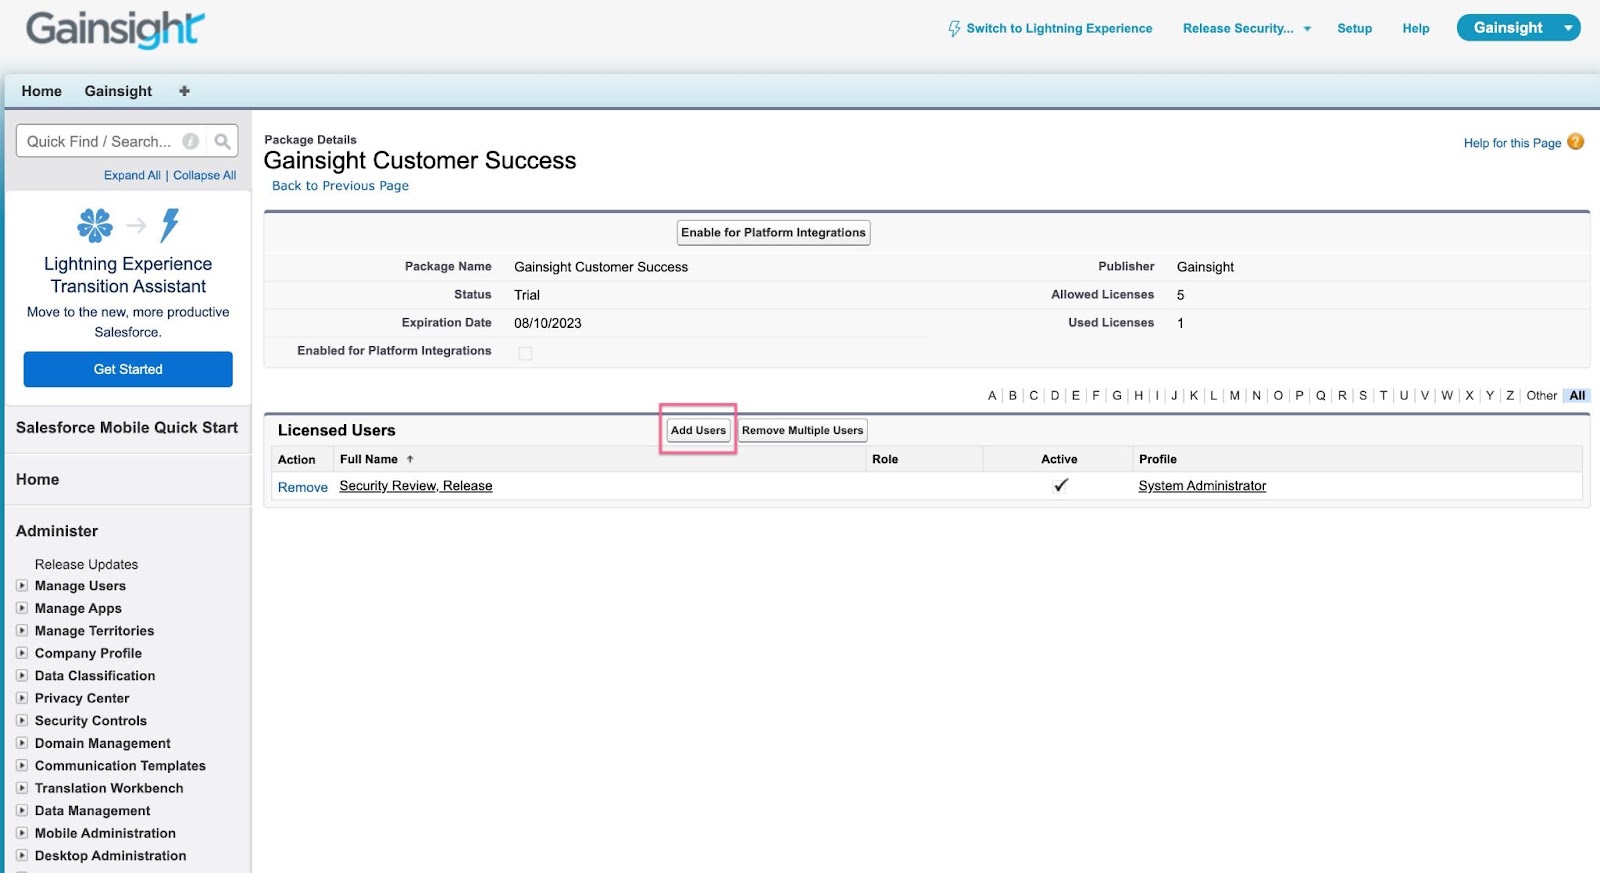
- Click Add Users.
- Select the check box for the required user(s) and click Add.
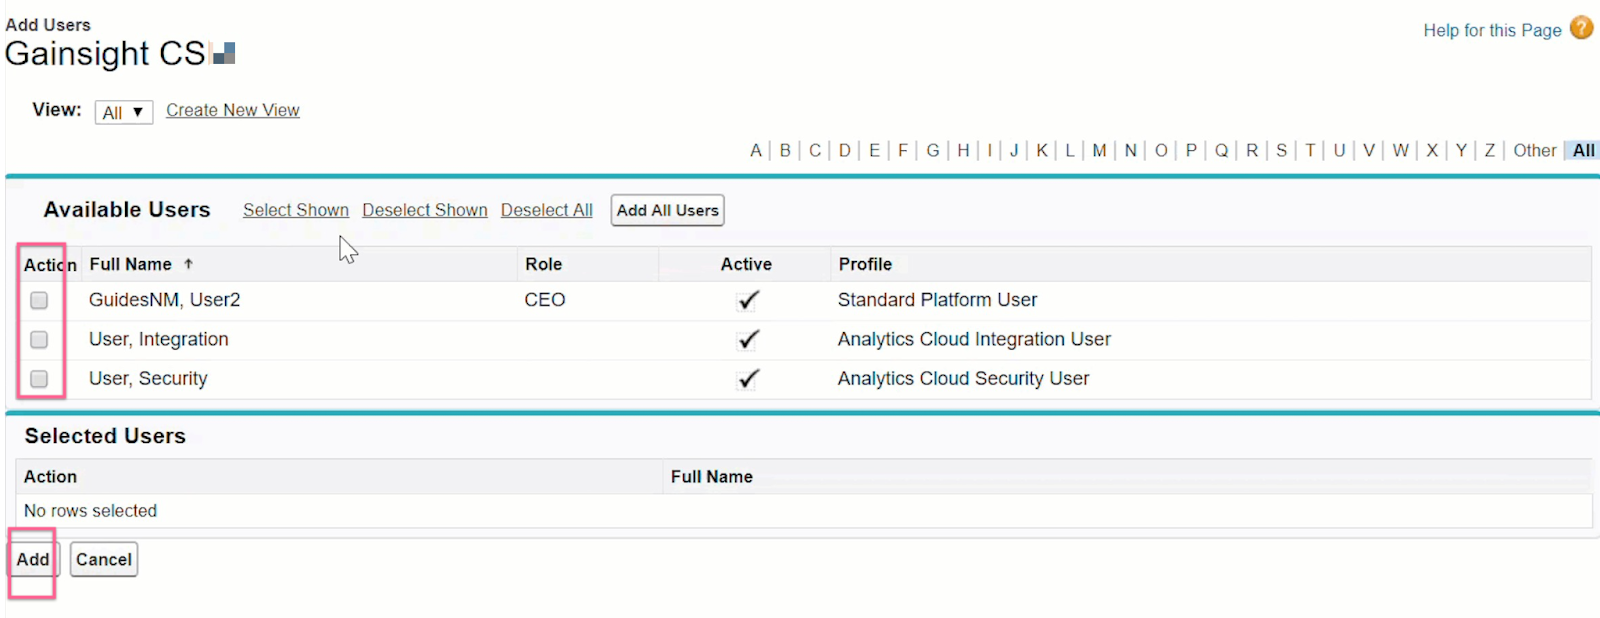
The selected users are assigned licenses based on availability. The count allowed and utilized license is updated, as in the following example:

For reports created using Salesforce objects in Gainsight, the user lookup search retrieves users based on the LicenseDefinitionKey field (SFDC or AUL). This field is part of the following lookup hierarchy:
User → Profile → UserLicense → LicenseDefinitionKey
To retrieve users by license type, the OAUTH user must have the View Setup and Configuration permission in Salesforce. If this permission is not granted, the user lookup search fails.
Assign Gainsight NXT Permission Set
Once you have assigned Gainsight Customer Success Licenses, you can assign the Gainsight Customer Success permission set to the users. Users with the Gainsight Customer Success permission set can view Gainsight as a new tab in the Salesforce org.
If you do not want to grant users a Gainsight CS permission set that includes access to Visualforce, use the Gainsight CS API permission set instead.
To assign the Gainsight CS permission set:
- Navigate to Setup > Manage Users > Permission Sets
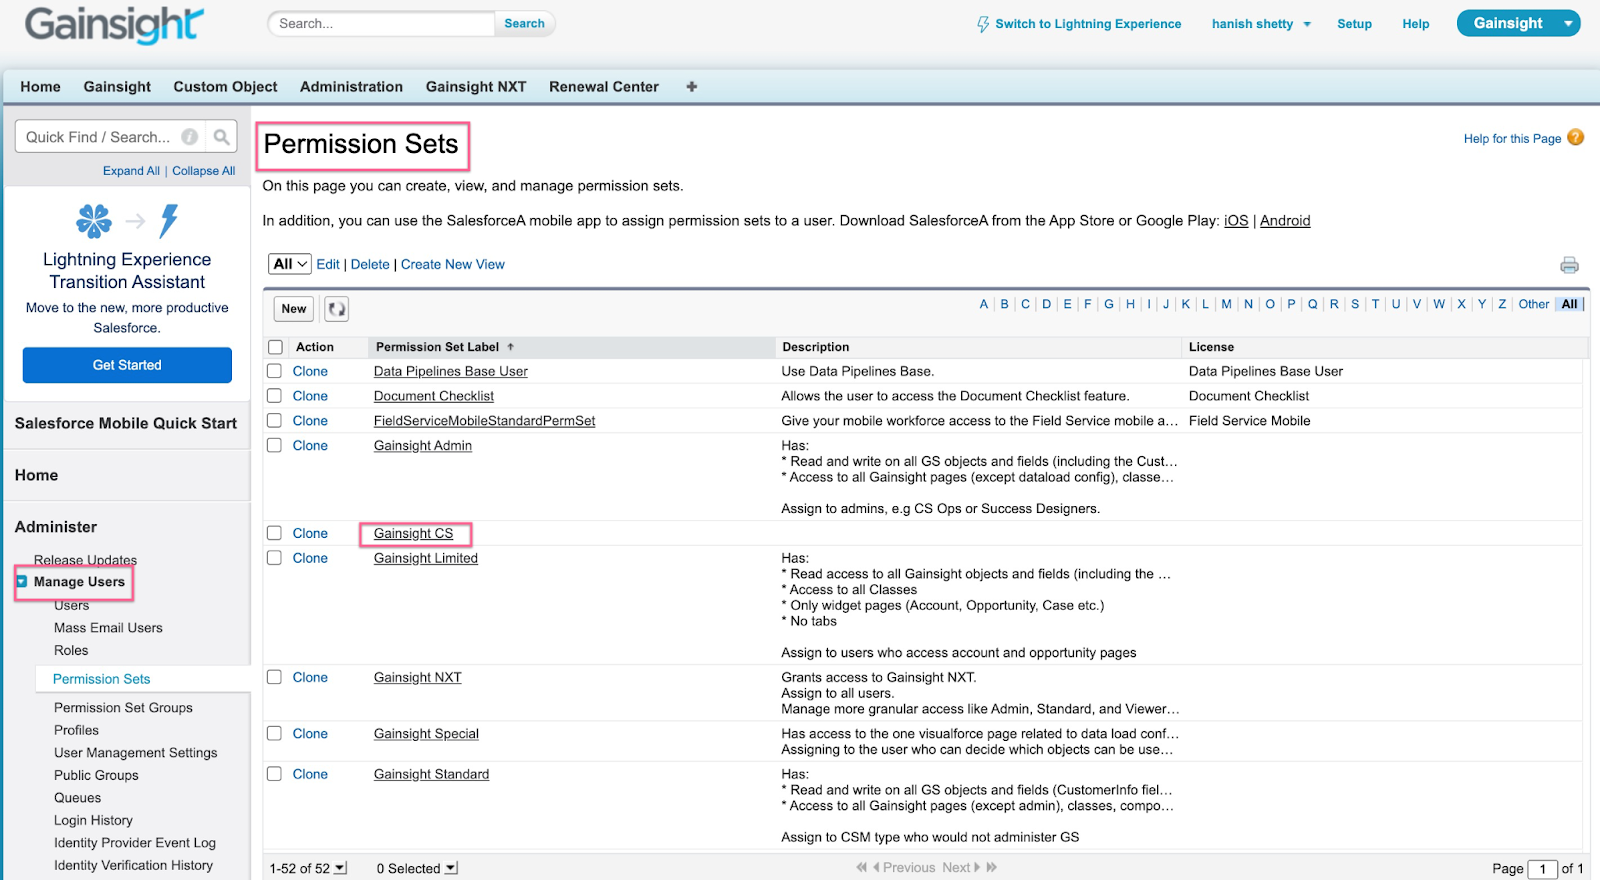
- Click the Gainsight Customer Success permission set.
- Click Manage Assignments.
- Click Add Assignments.

- Select the checkbox for the required user(s) and click Assign.
- Click Done.
Configure Gainsight NXT Domain Settings in Salesforce
Configure the domain settings to ensure the system operates within the correct data region.
Here’s how you can set up the domain settings:
- Log into your Salesforce account.
- Navigate to Setup.
- Use the Quick Find Search box to find and select Installed Packages.
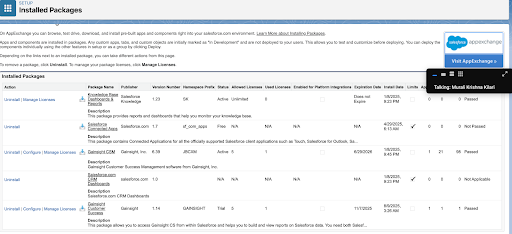.png?revision=1)
- In the list of installed packages, find and click the Gainsight Customer Success package.

- Click Configure. A new window appears to choose your Data Center.

This configuration window has the following sections:
- Tenants
- Licenses
- Permissions
- Mapping
- Widget Config
Select Tenants
In the tenets section, you need to select the appropriate data centers based on your Gainsight NXT tenant URL.
- US2 →
<Tenant Subdomain>.us2.gainsightcloud.com - US →
<Tenant Subdomain>.gainsightcloud.com - EU →
<Tenant Subdomain>.eu.gainsightcloud.com.
Note: US1 is the default region for all new installations.

Migrate from Old to New Managed Package
If you are using the old Gainsight CSM package (Namespace: JCXM) Admins can migrate existing licenses and permissions for users from the Gainsight CSM package to the new Gainsight Customer Success lightweight package. Migration to the new package is required only if you’re on the JBCXM package. If you’re on any version higher than 2.1, migration is not required.
When configuring Gainsight CS in Salesforce, migrate the components in the following order:
- Tenants
- Licenses
- Permissions
- Mapping
- Widget Config
Migrate Licenses From Gainsight CSM Package
Admins can migrate existing licenses for users from the Gainsight CSM package to the new Gainsight Customer Success package.
Note: Migration to the new package is required only if you are on the JBCXM package. If you are on the new Gainsight Customer Success package (any version higher than 2.1), migration is not required.
Prerequisite: Make sure the new package has the same number of licenses, or more, than the old package. This is required to ensure successful assignment of licenses from the new package to users who currently hold licenses from the old package. For validating or adjusting license counts, contact Gainsight Support for assistance.
To migrate the licenses:
- Navigate to Installed Packages.
- Click Configure. You are redirected to Gainsight App Configuration.
- Click Licenses.
- Select the Migrate License checkbox.
- Click Save.

Migrate Permission Sets From Gainsight CSM Package
Although the UI may display Permissions before Licenses, you must migrate Licenses first, and then proceed with Permissions. Migrating in a different order can result in configuration issues.
Admins can migrate existing permission sets for all users from the Gainsight CSM package to the new Gainsight Customer Success package.
To migrate the permissions:
- Navigate to Installed Packages.
- Click Configure. You are redirected to Gainsight App Configuration.
- Click Permissions.
- Select the Migrate Permission checkbox.
- Click Save.

Log in to the Gainsight NXT org and authorize the connection to this Salesforce org. You should also sync users from this org to the Gainsight NXT org using the Salesforce Connector to grant Gainsight NXT access to the users. For more information on this configuration in a sequence, refer to Onboarding for Gainsight NXT in Salesforce.
This configuration is mandatory and the absence of which results in the following error:
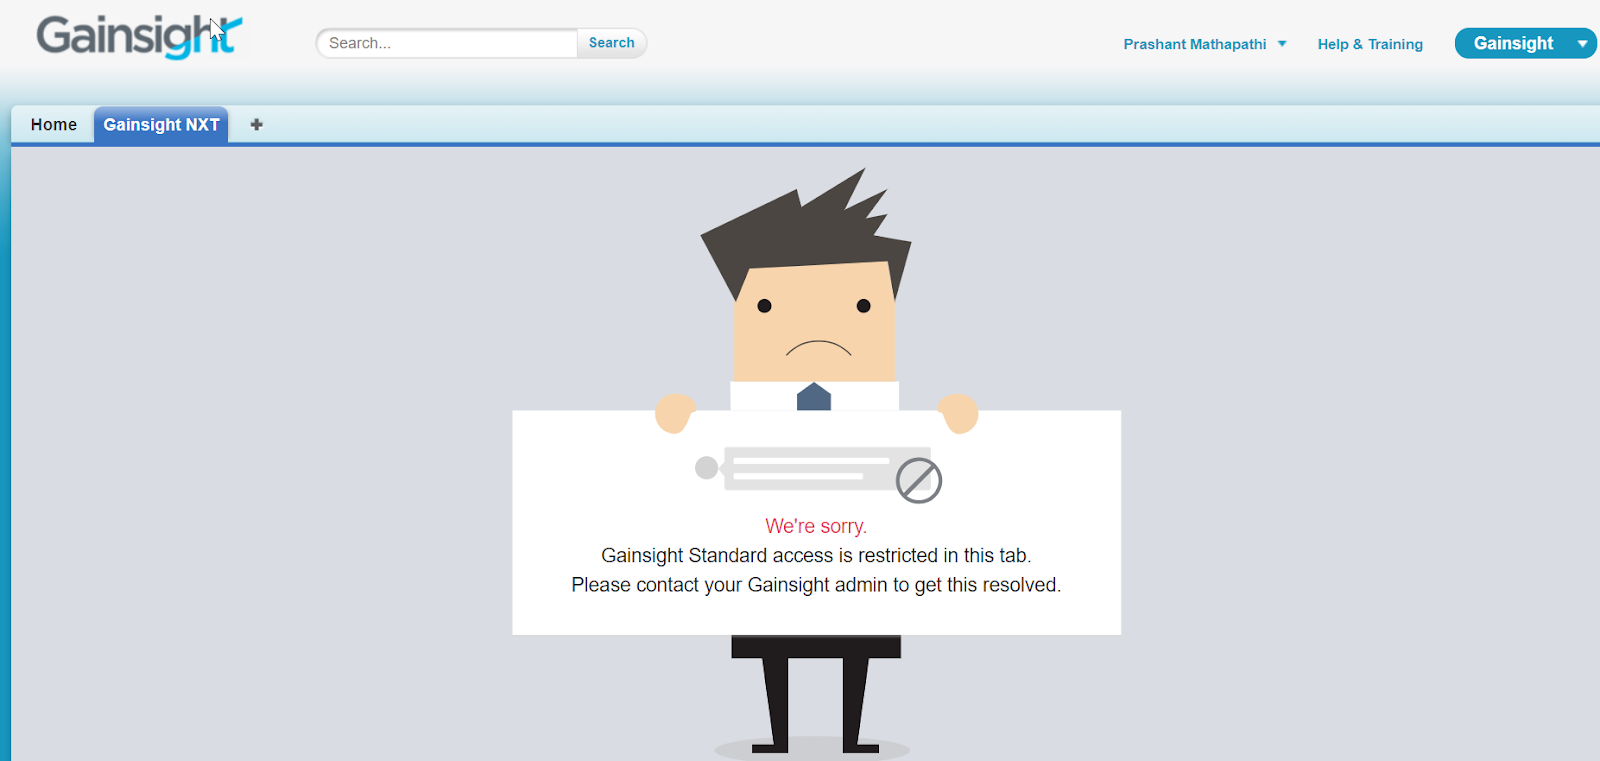
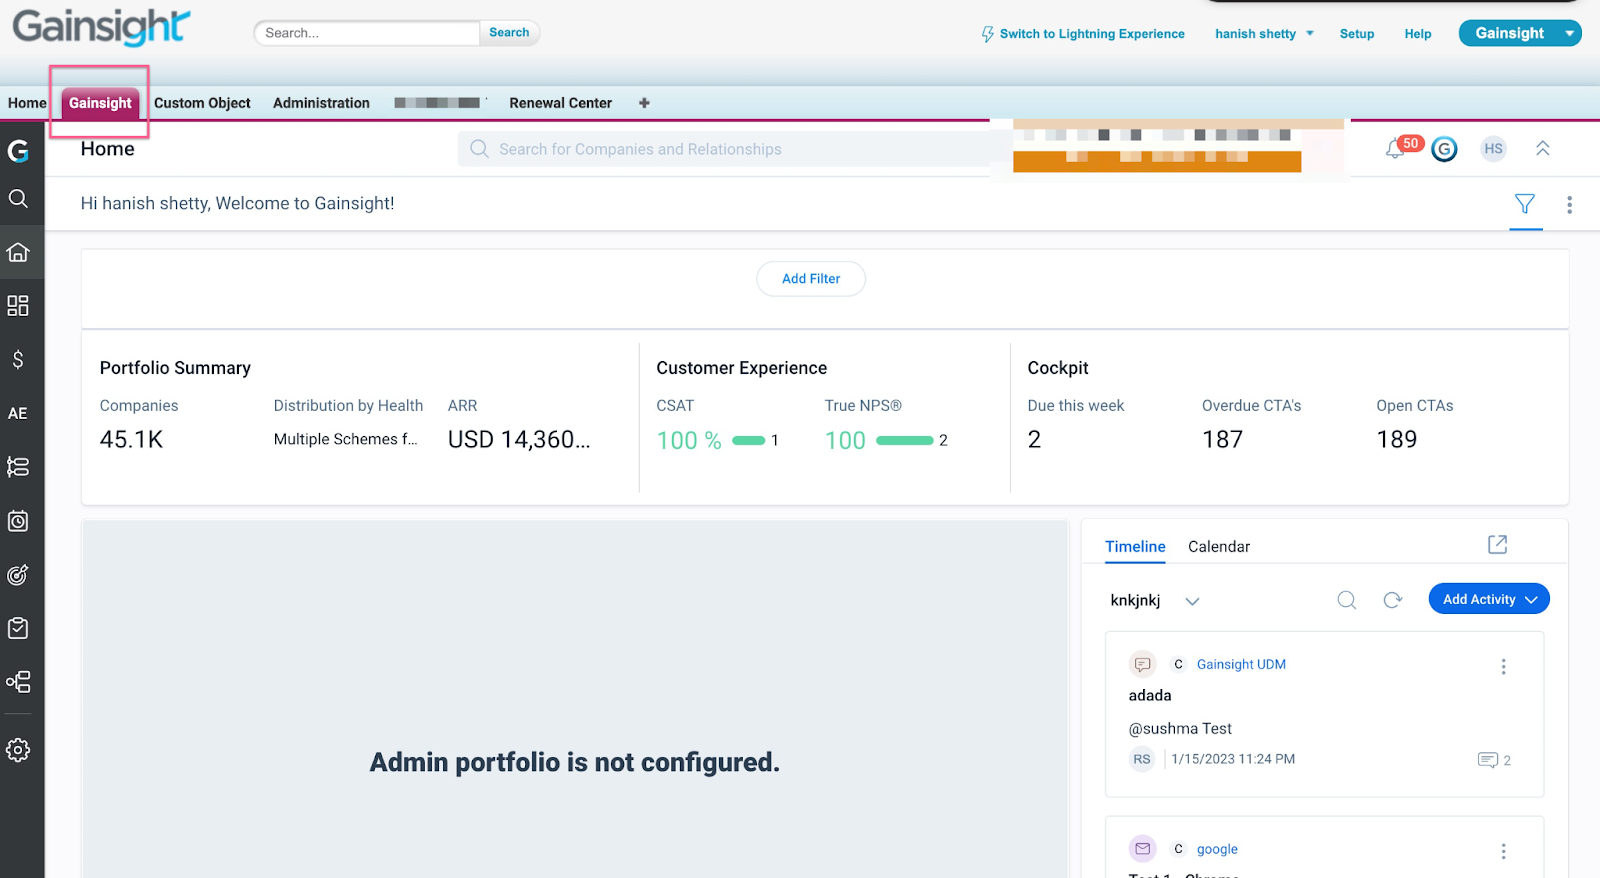
Users who have the Gainsight Customer Success permission set can now view Gainsight as a new tab in the Salesforce org:
Account and Relationship Column Mapping
Account and Relationship mapping offers you the flexibility to display Gainsight 360 widgets across different Salesforce record layouts to fit your workflow. When configuring the Gainsight 360 Widget, the system must identify the correct field that maps to the Gainsight Account ID (for C360) or Relationship ID (for R360).
- Account Mapping: Account mapping enables you to display the Gainsight C360 widget on layouts apart from Account. To display the widget:
- In the Object Name text box, enter the layout you want the widget to appear in.
- In the Field Name, select the Account ID for that object.
The widget will display the C360 for the company whose Account ID matches the field value.

- Relationship Mapping: Relationship mapping enables you to display the Gainsight R360 widget on any layout. To display the layout:
- In the Object Name text box, enter the layout you want the widget to appear in.
- In the Field Name, select the Gainsight Relationship GSID for that object.

The Gainsight Relationship GSID must be written back to the object whose layout you want to display the R360 widget on. If the GSID field does not exist on the target object, the LWC will not work.
To add Account or Relationship mapping:
- Navigate to Installed Packages.
- Click Configure. You are redirected to the Gainsight App Configuration.
- Click Mapping.
- Select the Account or Relationship tab.
- Click Add to add mapping fields.

- In the Object Name, enter the object name from the source.
- In the Field Name, enter the field name from the destination to be mapped.
- Click Save Mappings.
Migrate Widgets From Gainsight CSM Package
After mapping the correct field to the Gainsight Account ID (for C360) or Relationship ID (for R360), you can now configure the widget for each object, including section names, and how the widget gets displayed, either in the sidebar or in a new tab.
To configure the widget:
- Navigate to Installed Packages.
- Click Configure. You are redirected to the Gainsight App Configuration.
- Click Widget Config.

- Click Add.
- In the Object Name, enter the object name to be displayed in the widget.
- From the Section Name dropdown, select the section name
- Select Show R360 in Sidebar checkbox to display the widget as slide-out panel.
- Select Open R360 in New Tab checkbox to open the widget in a new tab.
- Click Save Widget Config.

Update SFDC_PACKAGE_NAMESPACE Feature Toggle against Gainsight Tenant
After successfully installing the new Gainsight Customer Success package, raise a support ticket and work with the Gainsight Support team to enable the GAINSIGHT variant of the SFDC_PACKAGE_NAMESPACE feature toggle for your tenant.
Note: This configuration is required only for customers migrating from the old package to the new package.