Edit an Advanced Program
This article explains how admins can edit and manage an advanced program in Journey Orchestrator.
Overview
You can easily correct errors or make updates to active or paused programs without stopping them, creating clones, or managing complex exclusions and reporting challenges. When you enter edit mode, the application creates a draft copy of the live program. This allows you to make the necessary changes while the original version continues to run without interruption.
All modifications are tracked in the Execution History, including details about who made the edits and when the draft was republished. This option gives you complete visibility and control over program updates.
- The active program is read-only. All editable actions must take place in edit mode.
- The Edit option is available for both active and paused programs.
- For scheduled programs, participant sync is paused until the draft is republished.
- Discarding changes deletes the draft copy and reverts all modifications.
Edit a Program
To edit an active or paused program using edit mode, perform the following steps:
- Navigate to Digital Journey > Programs.
- On the Programs page, select the active or paused program that you want to edit. The program editor page opens.
- Click Edit. The Edit Your Program confirmation window appears.

Note- Editing creates a draft version, while the active program remains unchanged, and participant sync is paused until the draft is republished.
- On the Programs listing page, if a draft exists for a given program, the program’s status is shown as both Active and Draft.
- Click Proceed. A message indicates that draft creation is in progress, after which an editable draft copy of the program is generated.
Note: You can choose to either wait or go back and continue working in parallel. - (Optional) Use the program status dropdown list to switch between the Active version and the editable Draft.

- Click any editable tokens within the program editor to modify them.
Note- Any steps in the program that were previously editable can also be edited in this copy. For example, updating token mappings in emails or modifying conditions in Evaluate steps.
- The program schedule can also be modified in edit mode. If the program is scheduled to run only once, it can be updated to run multiple times. For programs scheduled to run multiple times, the timings can be adjusted to modify the schedule displayed on the Public screen.
Edit a Filter
To edit a filter in a program. Perform the following:
- Open the program in Draft mode.
- Select an editable Step. The Source slide-out panel appears.
- In the Sources tab > Query card, click the three dots vertical menu to choose Reconfigure Sources. The query opens in edit mode.

-
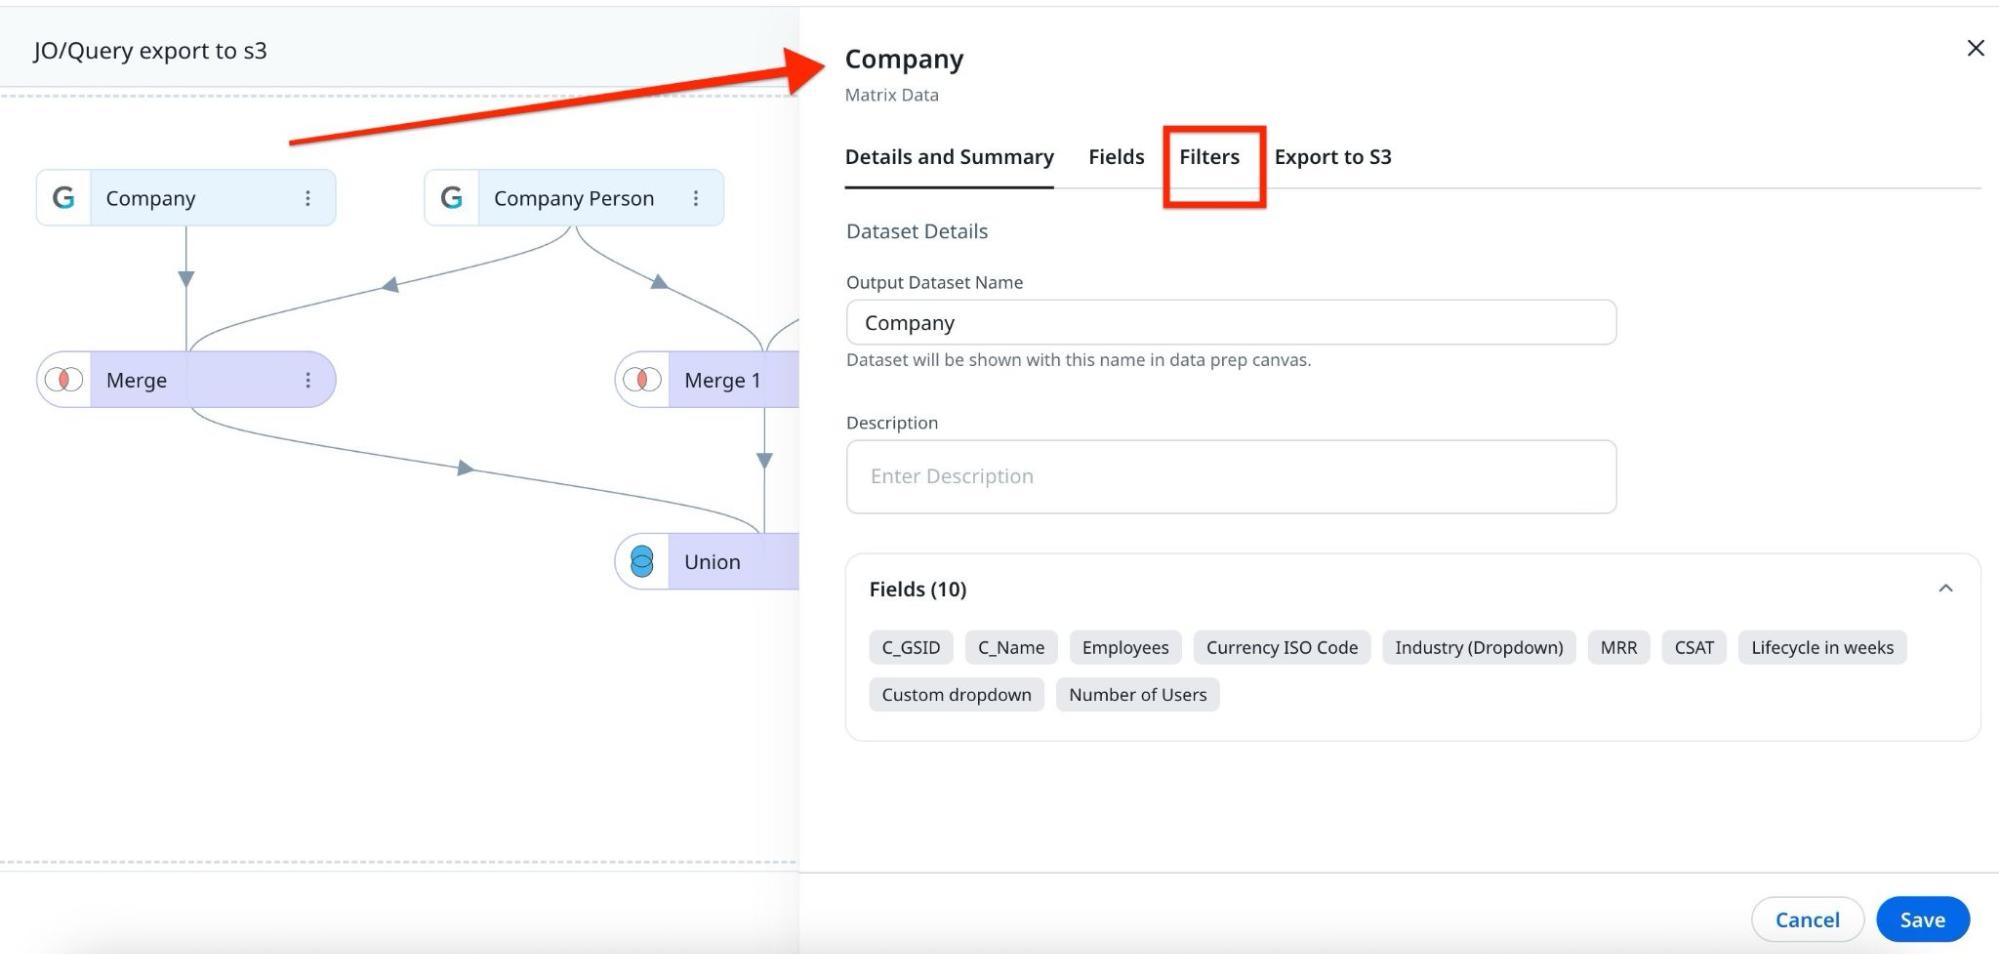
Hover over the Company task and click the edit icon. The Company slide-out panel opens.
Note: Similarly, hover over any task and click the edit icon to open its slide-out panel.
-
Click the Filters tab to open and edit query filters.

-
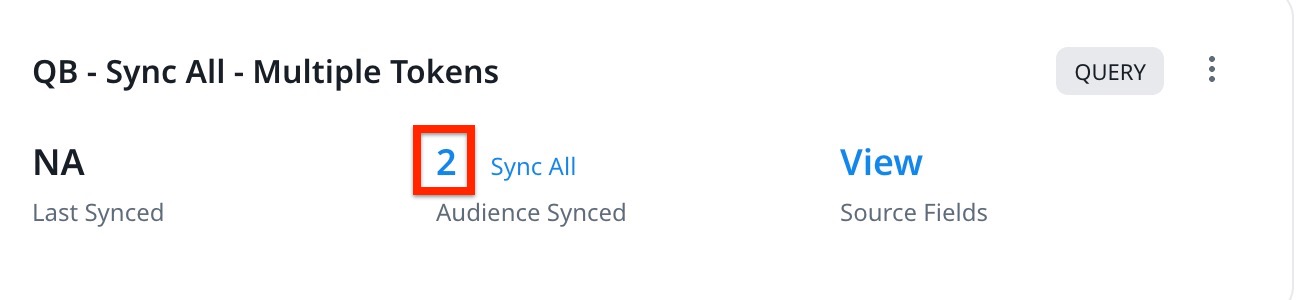
In the Audience slide-out panel, review the synced and failed participant counts.

- To refresh the participant list with updated data, click Sync All. The updated participants are synced.
- To review synced participants, click the participant count on the query card. The Synced Participants window appears with the participants grid.
- (Optional) In the Synced Participants window, review these two tabs in the participants grid:
- Active: Displays participants currently in the live program. You can remove participants here.
- Draft: Displays participants synced after updates made in edit mode.

- (Optional) Before publishing, you can:
- Update the existing schedule.
- Add a new schedule if one was not previously set.
Note: You cannot delete existing schedules.
- To apply all updates to the active program, click Publish. The Publish Edited Program confirmation window appears.
Note: In the draft version of the program edit page, two additional options, Discard and Save are available. Click Discard to remove all changes made during the current session, or click Save to retain your updates in the draft.

-
In the Re-Publish the program confirmation window, review how changes apply to manually synced participants, active participants, and tokens.

-
Click Publish. The updated program is published.
Add New Fields
You can add new fields to an active program for a segment or data designer source, instead of cloning the program.
The fields included at the time of publication cannot be deleted.
To add and edit fields to a token in an active program, follow these steps:
-
Open the required Program in Edit mode.
-
On the program editor page, click an editable token to modify. A slide-out panel appears for the selected token.
-
Under the Sources tab, click the three dots vertical menu in the program card and Reconfigure Sources. The source page appears.
-
Click the three dots vertical menu on the token you want to edit and click Edit. Alternatively, hover over the token and then click on the Edit icon.
-
Click the Fields tab.

-
Click Add Fields. The Select Fields slide-out panel appears.
Note: Avoid making changes to the properties or values of fields that have already been synced.

-
Select the fields to add to the token source, then click Select. The selected fields now appear in the Fields tab.
Note: You can update the field details for the newly added fields.

-
Click Save to update the Dataset.

Add New Steps
To add steps to an active program using the draft mode, perform the following:
- Open the required Program in Draft mode. (Refer to the Edit a Program section till step 4).
- Hover over the connection line. A Plus icon appears.
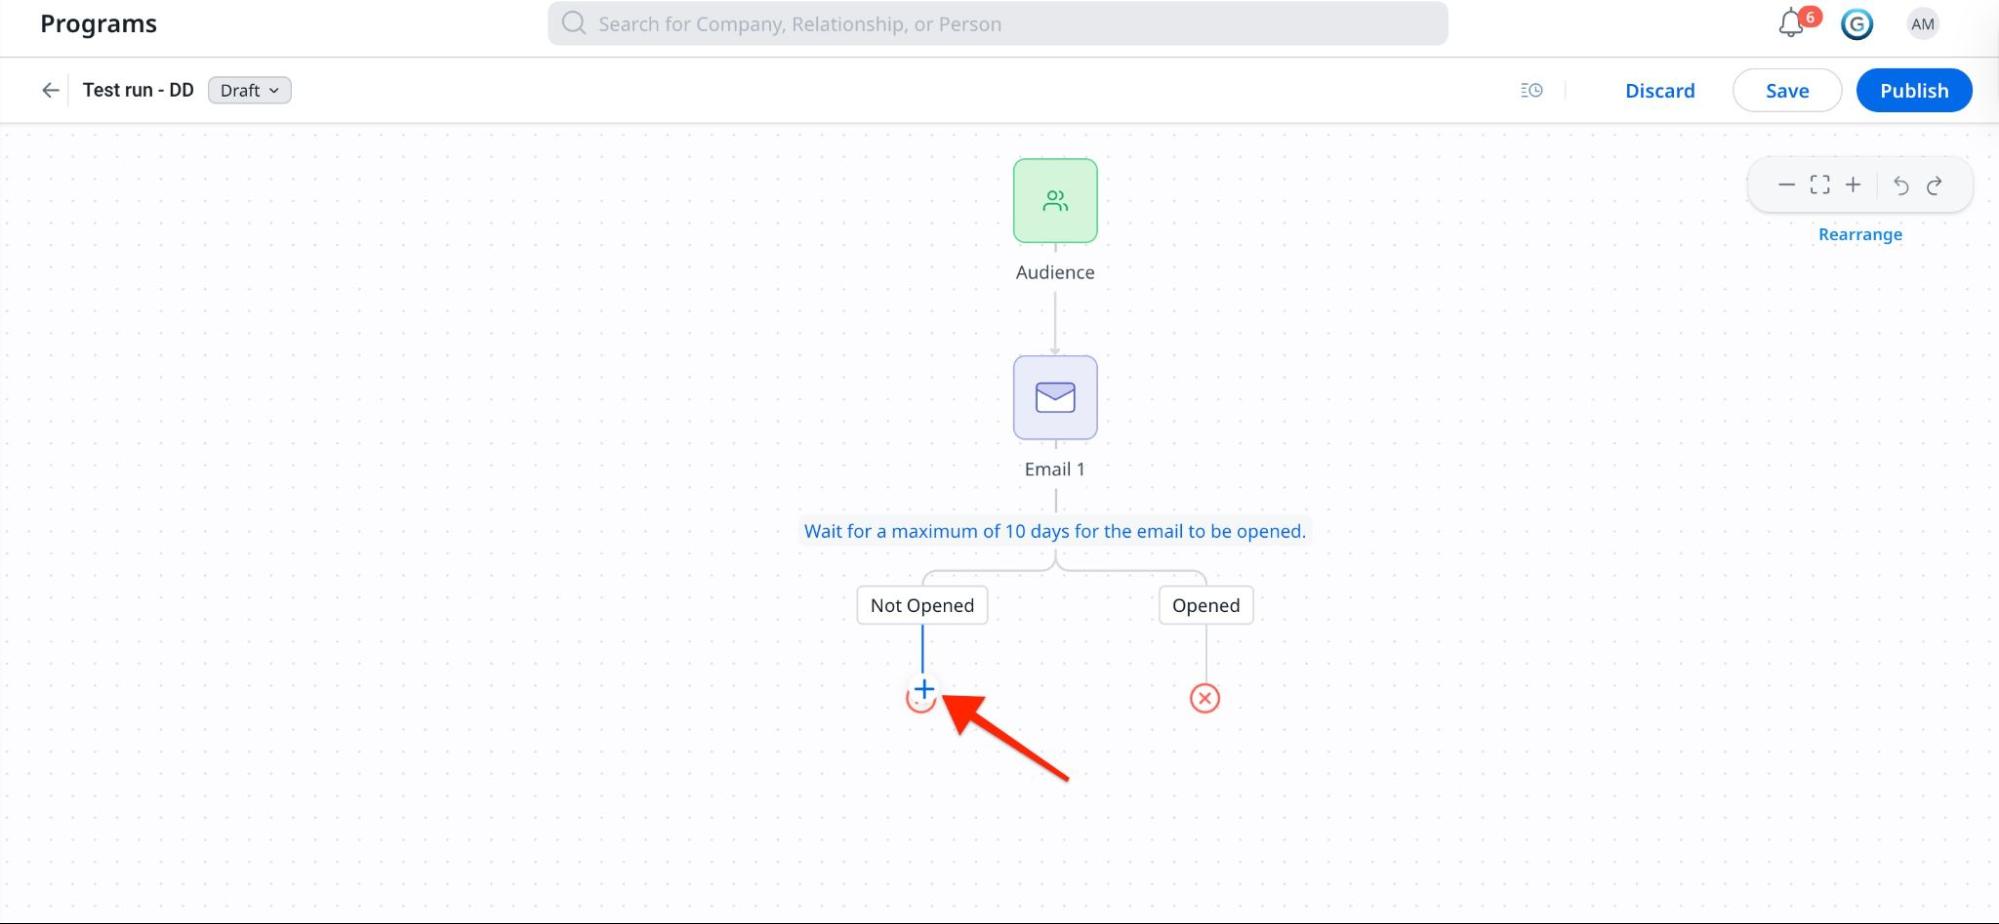
-
Click the Plus icon, and select one of the following:
-
Email
- Survey
- CTA
- API
- Eduction
- Slack
- Community
- Engagement
- Evaluate
- Delay

-
-
Select a Step. The selected Step appears in the program flow.
Note: To remove a newly added step in Draft mode, click the Undo icon immediately after adding it or Discard the program.

-
Click the Step to open the Step Configuration page/pane.
-
Provide the required details and click Save or Save & Exit.
If the newly added step must follow a specific outcome, first add the step and then click Show Outcomes for the Step above it. A choose path pop-up appears, select the outcome under which the new step should be added.
Skip a Step
You can not remove an existing Step from a published program; instead, you can Skip the Step. This helps to maintain the program’s logic.
Skipping a Step does not affect participants who have already moved through that Step. The program directs participants who have not yet reached the Step, or are waiting at the skipped step, will be move to the updated path.
- A Skipped Step cannot be unskipped in the draft.
To skip a Step in an Active program, perform the following:
- Open the required program in Draft mode.
- Hover over the Step you want to skip. The Skip icon appears.
Note: The Skip icon is available only for Steps which are already published.
- Click the Skip icon. The Skip Step dialog box appears.

- Click Skip Step. The Skip dialog box appears.
- On the Skip dialog box, select the next Step for the participant to follow.
Note: If the step contains no sub-steps, the Skip Element dialog box does not appear.
- Click Skip. The skipped Step is greyed out, and the skipped path is represented with a dotted line.

The skipped Step remains visible in the flow but is not executed for applicable participants. The selected path is highlighted with a continuous grey line, indicating the path that participants follow. The dotted line represents the skipped path that participants do not follow.
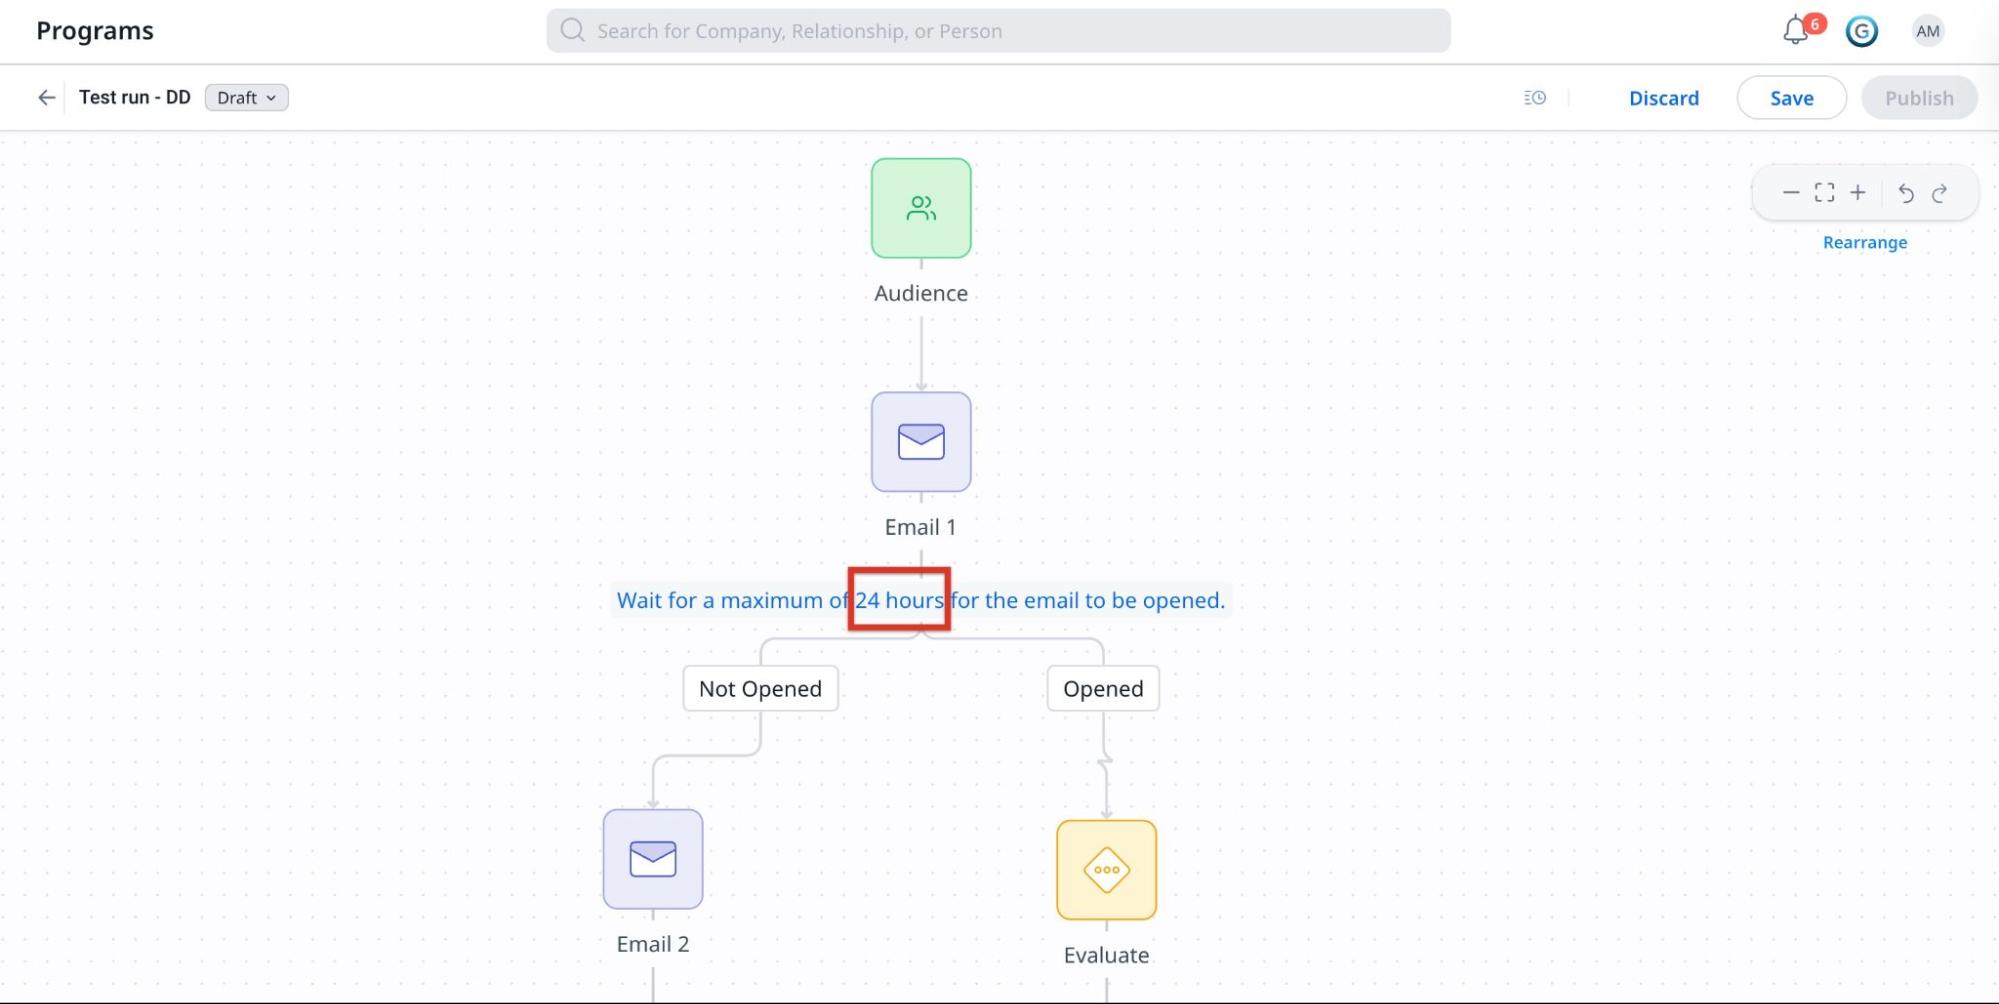
Update Delay Step Duration
You can change the delay duration of Steps in an Active Program through Draft mode.
To update the delay duration, perform the following:
-
Open the required Program in Draft mode.
-
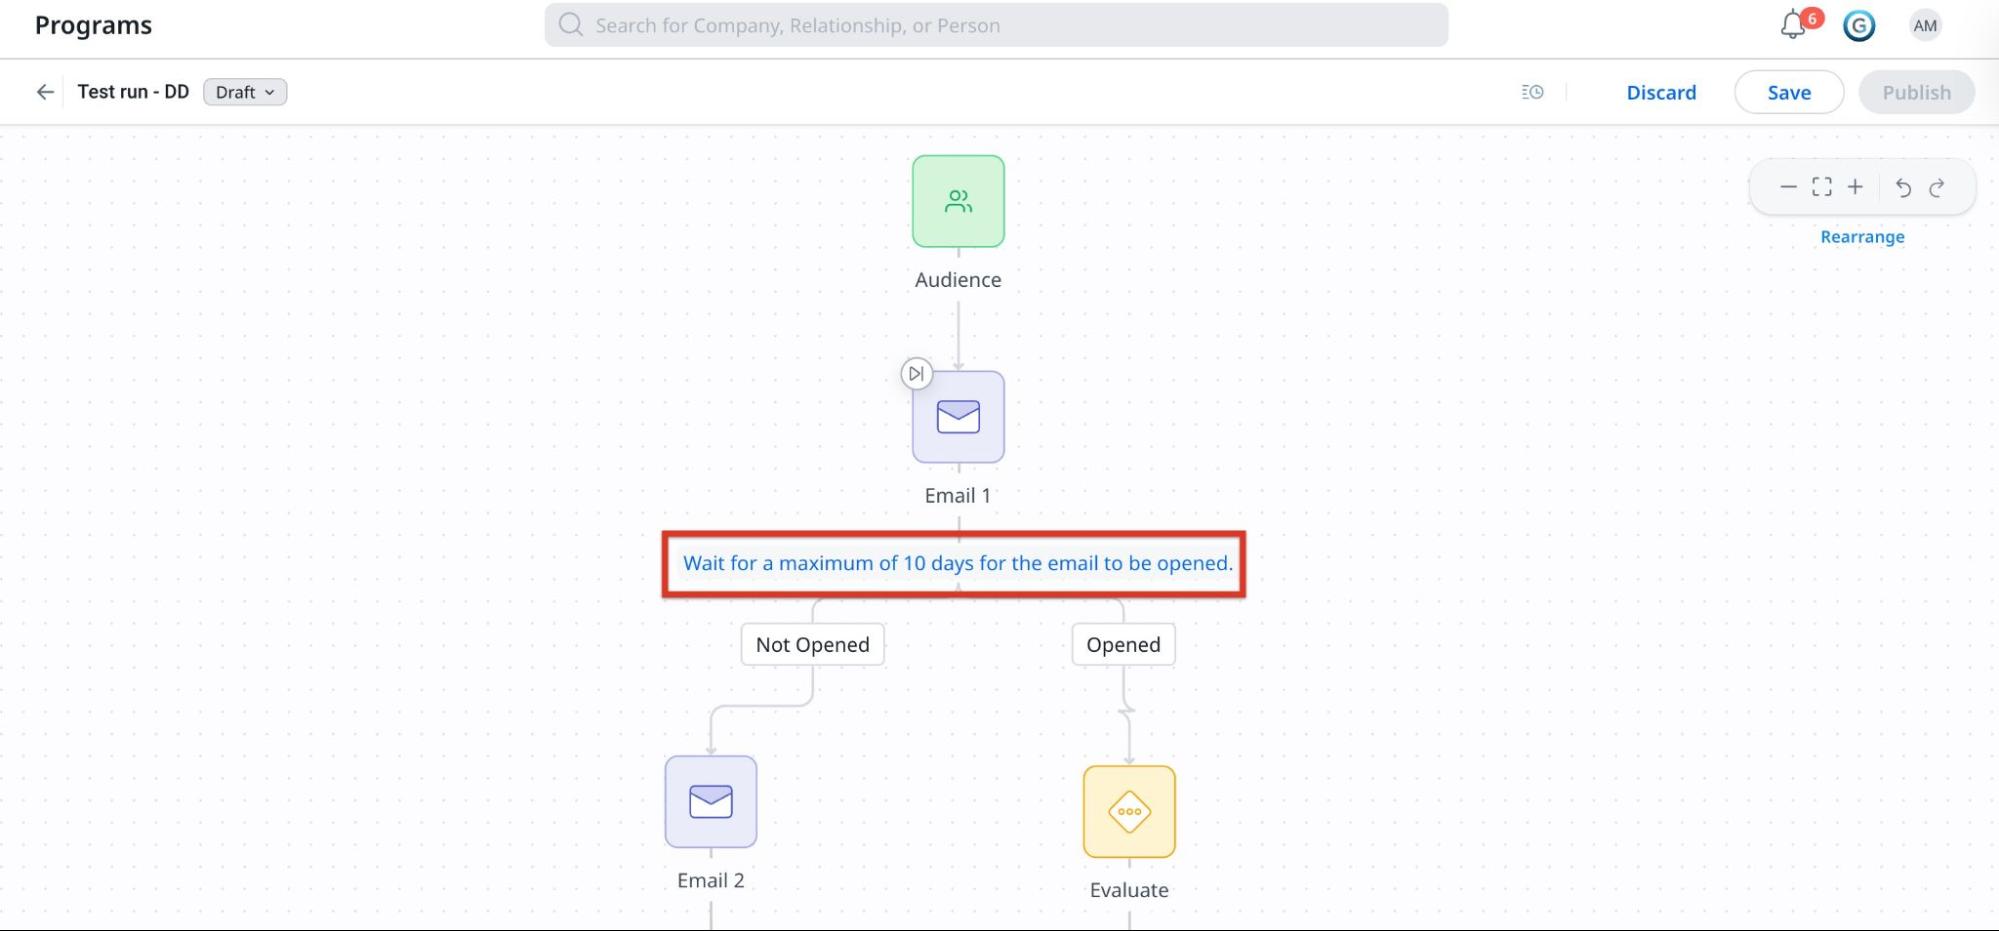
Click on the Step Delay Message. A dialog box appears.
-
Provide the duration for the step delay.

-
Click the Tick icon to save. The Step Delay message reflects the updated duration.
Note: To update the delay duration for a Delay Step, select the Delay Step and update its configuration.
After Publishing the Program
- The draft is merged with the active program.
- The skipped steps cannot be added back.
- The changes are applied only to participants synced after the update or when the program is republished.
- In Participant Activities analytics, a line indicates when a Step is skipped by a participant.
- All changes, including the creation of the draft and the time of republishing, can be accessed using the Execution History option.

Limitations
- Newly added calculated fields in the draft cannot be deleted.
- Any additional CSV sources added in the draft cannot be deleted.
- Add and Skip Steps can be used only when the program has fewer than 50,000 active participants.
- Add and Skip steps are intended for minor updates, such as adding or skipping a few steps. They are not recommended for making major changes to the program flow.
- New branches can be added only to newly created Evaluate nodes. Branches cannot be added to existing Evaluate nodes.
- Override Action Execution Schedule can be enabled for Email and Survey steps, but it cannot be disabled after it is enabled.
- Once a Step Outcome is enabled, it cannot be disabled.
- The link tracking URL can now be modified in the Link Clicked pop-up for existing steps.
- Participants who execute a Skipped node continue to generate events for that node, and the analytics are updated accordingly (for example, link click count or survey responses).
- Provides an overview of the waiting logic when the timer value of Delay, Evaluate, or Outcome steps is increased or decreased.
- The evaluation type (one-time or recurring) of an existing Evaluate step can now be edited.
- Execution History can only be viewed; it cannot be downloaded.